
GraniteStaters
-
Posts
295 -
Joined
-
Last visited
-
Days Won
1
GraniteStaters's Achievements
")


-
We will go for months without using our television but it is nice to be able to watch a DVD if we get a several rainy days in a row. We always bring a few favorites along just in case. Paula
-
When we replaced our window shades the company sent us the wrong size for the back window. (Yes, we finally got the right size.) I am hoping that the left-over shade might fit one of the new rear windows and someone can use it. The measurements from the back of the frame, where it is not curved, are 21 3/4 x 38. Paula
-
- 1
-

-
Not trying to add fuel to the Truma fire, but we had problems with our Truma last spring after 4 1/2 years and the symptom, delayed ignition and the smell outside adjacent to the Truma. I was directed by Oliver to reach out to Truma, as I recollect and that wasn't unexpected. When I open the case with Truma support, an Elkhart based engineer reached out to me and said they didn't want me to use the Truma anymore. They made me promise as they felt it was a health and safety risk. I naturally agreed, particularly when they said they would have a certified technician of my choice replace the unit for free and document the installation of the Truma with pictures. We went with out hot water in the Oliver for a week at the Maine Rally. I reached out to Tim's RV in Erving, MA and explained to Tim and Brandon that Truma would be shipping a unit to them and compensating them for doing the pictures and installation. We arranged for a late June for the 1/2 day installation. Truma requires certified and trained technicians and extended a courtesy approval after discussing Brandon's experience and in light of our needs. Truma sent the brand new unit to Tim's. We were notified when they received it. Brandon confirmed the delivery too before I made the trip from Concord, NH to Erving. Tim and Brandon were very gracious and Brandon did an outstanding job on the install.
- 132 replies
-
- 10
-
-

-

Truma Aqua Go randomly comes on with CP off
GraniteStaters replied to Steve Morris's topic in General Discussion
Was it colder than 40 degrees overnight, because a Truma will come on automatically to prevent freezing in the closed loop portion of the water heater. -
We have EZ-Pass and we don't have the trailer plates registered, but the transponder covers us and we have never had a problem with being billed for the travel trailer when we have it attached. We have used it in the Northeast for years.
-
We had a 2019 Ram 1500 Longhorn Laramie with 5.7 Gas E-torque engine. It had air suspension too. It had all the bells and whistles although we didn't use them all. The issue we had was payload with the 1/2 ton. We knew that we wanted to make longer trips and wanted to have our Weber Grill, then a Q1200, and stand, plus a small griddle someone gave us, plus generator, Clam quickset, and assorted other gear, plus my golf clubs. We wanted to have extra clothing for longer trips to be able to do seasonal changes. We only had 400lbs of payload after, my wife, myself, a forty pound dog, and a couple of back packs after connecting the Oliver LEII which had a tongue weight of about 700lbs. It really meant we had to keep too many items in the aisle that we had to transfer in and out of the Oliver before and after we traveled to the next campground. The E-torque was sweet and allowed us to have increased low end torque for pull outs onto the highway and starts from red lights and stop signs. We did love the Ram, so we eventually traded it for a 2021 Ram 2500 with 6.4L Gas engine. We have air suspension on this truck too. We have over 1300lbs of additional payload over and above what we had on the fully loaded Ram 1500. We love our current truck, but the 1500 with E-torque got better mileage and the engine would completely cycle off at long stops if we weren't towing and just traveling in and about town.
-
Update on Alcan springs and Monroe shocks...
GraniteStaters replied to johnwen's topic in Mechanical & Technical Tips
Bulldog HD Shock Absorber Replaces 555001 For Trailer Leaf Spring Retro Kit 19-050000007 These are the shocks that I ordered based on other folks recommendations. They are pretty substantial shocks and I haven't installed yet as they didn't come until November, 2024. The guidance I received from this forum suggested that the top rubber cushions might need to be compressed a bit more than you would be inclined to do because of they are a bit larger than the originals. I paid $128.00 for 4 for our LEII. -
AGM deep discharge question
GraniteStaters replied to Sandman's topic in Mechanical & Technical Tips
We try to never have our AGM batteries discharged beyond 12.6V. This can be very challenging in cold weather as our Dometic Furnace squirrel cage can use a lot of Ah overnight. If you can keep your SOC over 80 percent at all times, we never go below 90 percent, you will double the life of your batteries otherwise you can expect only so many cycles. The advantage of Lithium is that they can be discharged more deeply and cycled many more times. The usual expectation for LiFePO batteries is about 3000 cycles. The best you can hope for AGMs are 750 cycles if you keep SOC above 90 percent. -
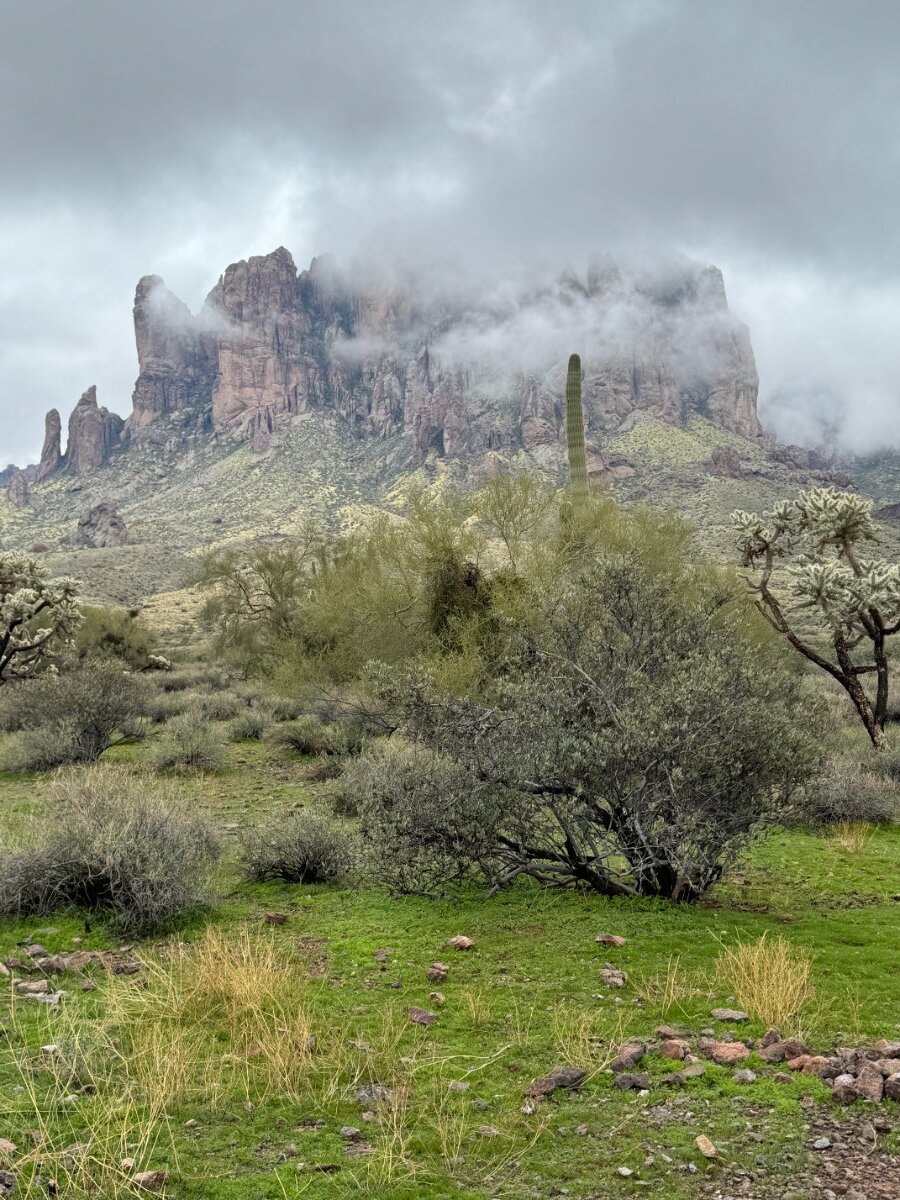
We love Lost Dutchman. Took this last winter. Paula

-
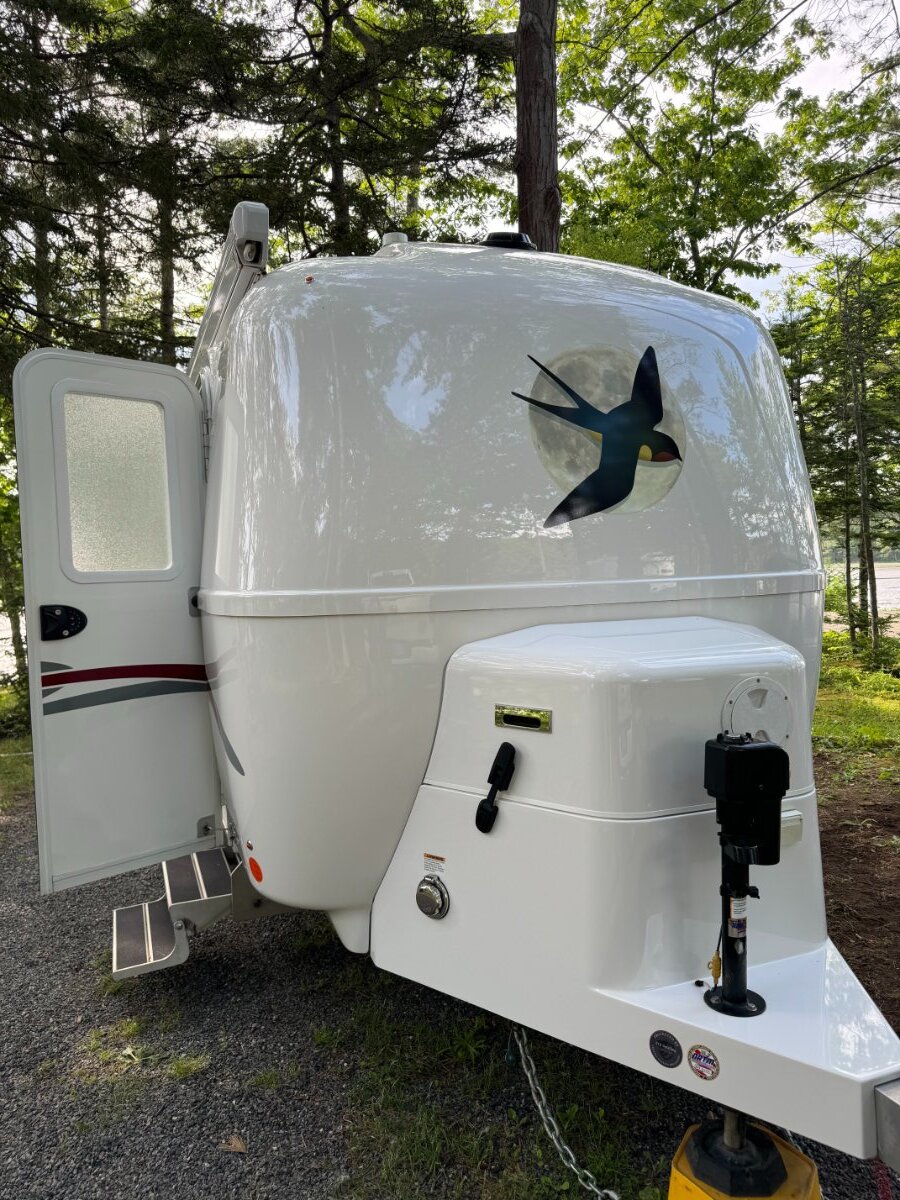
We had The Swallow, #509, done in June at the Maine rally. I was a bit appalled at the price but we could see some oxydation beginning on the top and the nose even though we waxed twice a year. Our Ollie does sit uncovered in our driveway in NH so it takes a hit from the weather. I didn't mine the washing, but the waxing was hard on the arms! Anyway, after watching the CGI guys work for an entire day and a half it was clear that they earned their money. What a nice and hard-working crew! The shine is amazing but the ease of washing off the bugs and road grime, then giving it a quick "spritz" and wipe with the the ceramic spray is worth every penny. Paula
-
Victron Smart Shunt - alternative to the BMV-712
GraniteStaters replied to Overland's topic in Ollie Modifications
Chris, On our LEII, 2019, there was a yellow ground wire from the negative post on one of the 6V batteries that ran back to a bus bar that was grounded to the frame. I discontinued this yellow wire in favor of an additional bus bar that I connected to the Oliver ground bus bar to allow grounding of the inverter and the shunt. This means that our batteries are grounded by the 4/0 inverter negative wire that runs from the new bus bar to the battery negative post on the first 6V battery. -
Day/Night Window Shade Questions
GraniteStaters replied to rideandfly's topic in Mechanical & Technical Tips
Mine is sitting in the dining room while I try to work up the mental energy to tackle it. I am getting confused just reading this thread! Things that look like mazes baffle me. 🙂. Paula -
The step for winterizing the fresh water inlet is really to prevent damage at the check valve where some water may accumulate and not drain due to the design of the check valve. I have never added any significant winter antifreeze in the freshwater tank because if it drained, there is very, very little chance that any freezing would damage the tank. Imagine an ice cube tray with a bit of water in the bottom of the tray. Any freezing water would just fill the void and not press any significant issue to the sides of the water tank.
-
Lippert Cam Lock Sewer Hose
GraniteStaters replied to GraniteStaters's topic in Mechanical & Technical Tips
Not sure what you mean, but here is what I have seen on the Lippert and my original hose. If there is any water in it and I stretch out the hose I create negative pressure. On the Lippert, when I stretch the hose to its entire length, the vacuum was so pronounced to cause the beginning of the hose to collapse. It was the downward leg of the connection and was laying against the bumper which probably contributed to the collapse. -
The Saga of corroded brake wires on older trailers
GraniteStaters replied to Wayfinder's topic in Mechanical & Technical Tips
There is a DIY video on Dexter YouTube channel that showed checking the magnets as a part of the bearing repack and shows how to check the face of the magnet where it activates on the wheel. If there is uneven wear the magnet won’t be as effective. I don’t believe they explained why the wear would be uneven.