johnwen
-
Posts
642 -
Joined
-
Last visited
-
Days Won
3
2 Followers

Recent Profile Visitors
9,352 profile views


johnwen's Achievements
")


-
It's plastic, not pvc...by water pump, accumulator and shower. You should have it also since you have a 2022 model :) John
-
Congrats!
-
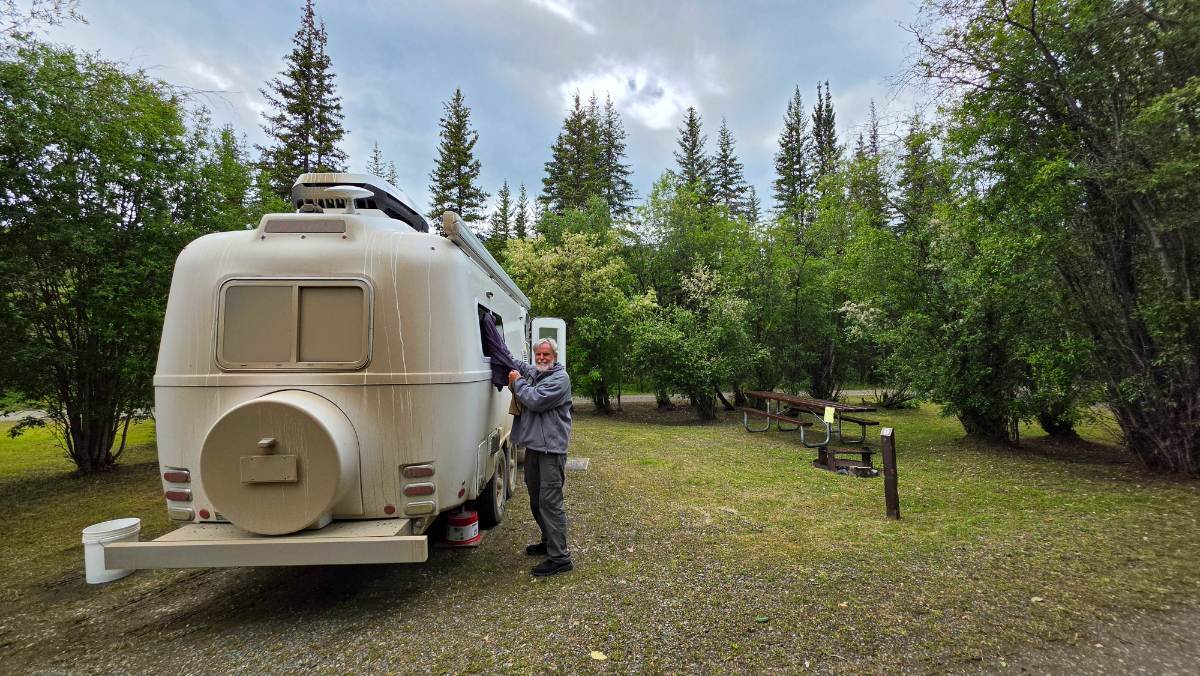
Has anyone replaced their white plastic pipe with pex? These washboard roads on our Alaska trip are causing the retaining clamps that go around the female connector to come loose. The rubber/plastic clamps holding them to the pvc mounting boards are coming loose as the result of the the intense shaking....the screws are stripping out and allowing the connections to loosen. I'm surprised they didn't loosen enough to create a leak. I just think permanent pex connectors would be a better fix. Any reason to not replace. with pex? I haven't studied the layout to see where all that pipe is used...water heater, pump, etc, so I expect difficulties along the way. Just looking for a little advice now and I won't think about starting this project until stationary for a couple of weeks this winter. Might be a good time then to do my furnace ductwork replacement/reconfiguration project :) Thanks for all help, John
-
Walker Fork Campground (BLM) approx 15 miles north of Chicken, AK. 33 degrees this morning but warmed up nicely while we panned for gold...not much luck...this time. Dirt courtesy of Top of the World Highway coming from Dawson City, Yukon Territory.

-
JD, On a side note...I thought I was wasting my time and money with our dc to dc install last year at the Q, as I have barely used it the past year and a half but I sure am happy I did as we've had so many cloudy days since getting into Canada on our way to Alaska. Each day we travel we get them charged back up in a respectable amount of time. Of course we mostly boondock as you know. I only used 6ga so don't get things through as fast as you but I still have plenty to satisfy me. John
-
It was.
-
My experience....with our 2022 LE2 Norcold I left my setting on auto while boondocking and my LP ran out. The result was an automatic switch to DC while we were away for 2 days. On a good note, with help from Steve L. and JD I got to throw away my 4 6v agms and switch to 600 ahs worth of Epoch Lithuims. Albeit an expensive lesson I couldn't be happier that it happened :)
-

True Induction Stove Top will not turn on
johnwen replied to Lamar's topic in Mechanical & Technical Tips
JD, I need to talk to Wen about this :) Thanks for all your testing and research! John -
Love you both...Wen and John :)
-
I wonder if the 2022 models can be fitted with the 2027 windows...
-
Yes...those flex lanes are great. Went that route about a month ago :)
-
I'm sure glad things went well, JD. Blessings from us :)
-
Sorry, JD.....I need my anchor 🙂
-
Having been up on the roof a few times I will say I only walk on the side with the awning 🙂
-
We also have just 1 awning. True we don't use it very often but are happy we have it. We probably would use it a little more if the fabric was not black. BTW...I recently (2 weeks ago) got a quote from Mike at Oliver and at $4600 for adding another, we will be happy with just the 1 we have. Congrats on your future new Oliver John