
Wayfinder
-
Posts
364 -
Joined
-
Last visited
-
Days Won
1
Posts posted by Wayfinder
-
-
I also posted on FB, but I like the forums best. I did search the forums, but didn't see the exact configuration complaint.
Who has this AC outlets setup in their Oliver and what year is your TT?
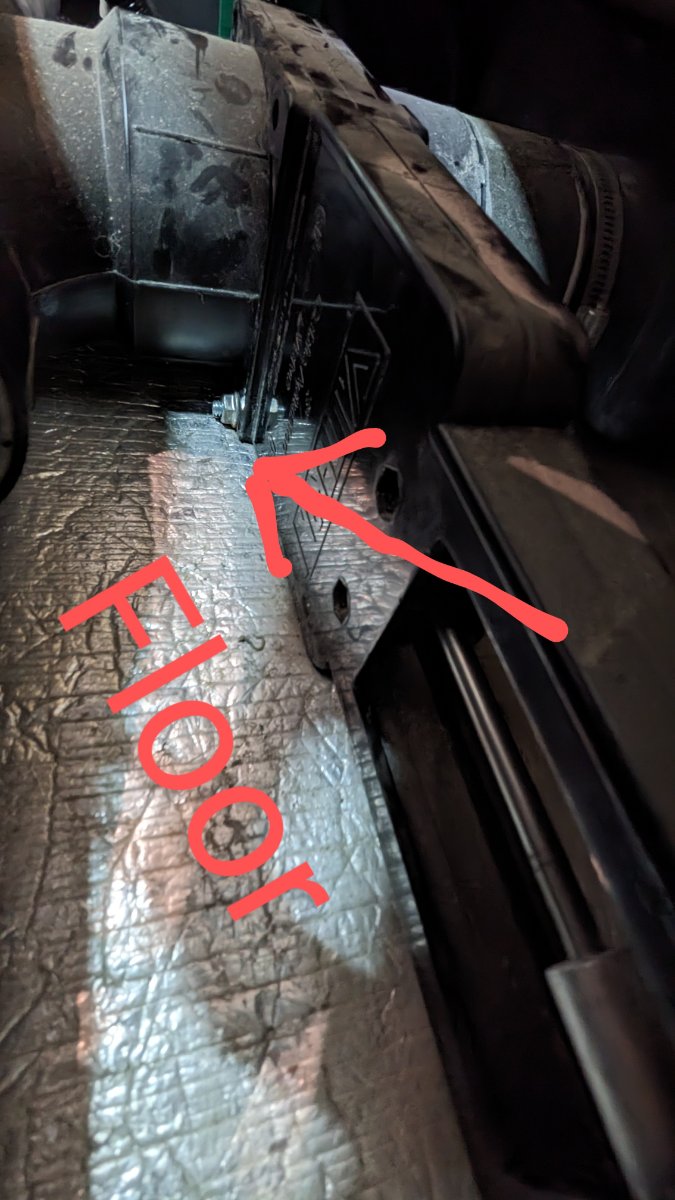
I have a 2016 Elite II and I just discovered that in the breaker panel there is no dedicated breaker for the 15 amp outlets around the trailer. I discovered this while replacing the outlet by the drivers side twin bed, inside the rear drawer cabinet. This new outlet has built-in USB-A & USB-C receptacles as well, for AC plugs.
I have two GFCIs which protect all the 15 amp outlets in the trailer, including the microwave. The GFCI on the Xantrex inverter itself AND a GFCI under the dinette, across from the breaker box. This is fine, but I first searched the breaker panel like any sane person might do.#5 "110 outlets - 15A" SHOULD be the breaker, but it does not seem to do anything.
"Now I know."

-
Thanks for you site-to-name list you maintained for this year's rally. It was very helpful to have it bookmarked on my phone to cross reference who I was face-to-face with. Hopefully someone will take up the torch for next year's rally.
I know many of us have already reserved out site for next year.
-
 2
2
-
 4
4
-
-
I'm using that Tuxtop that @Ollie-Haus posted a pic of. I think it's much better than the cheaper version with the edge around it. The fan noice is better and I like the controls.
-
2
-
-
13 hours ago, rich.dev said:
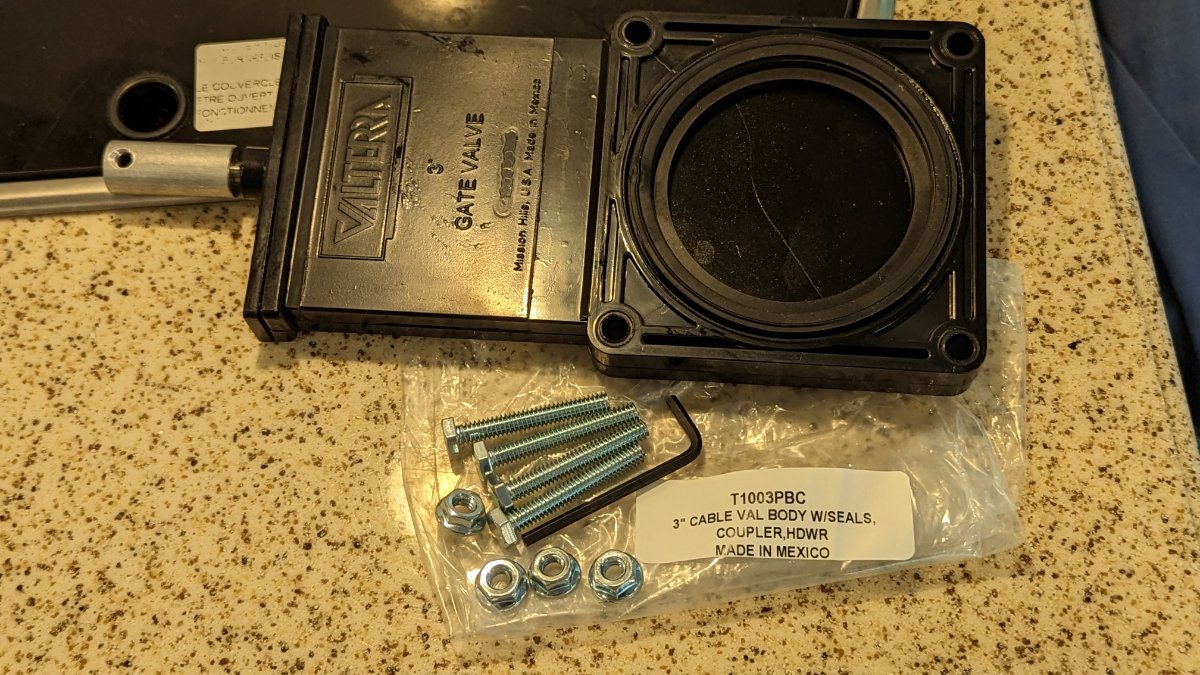
Was it easy to replace that grey tank seal/gate valve?
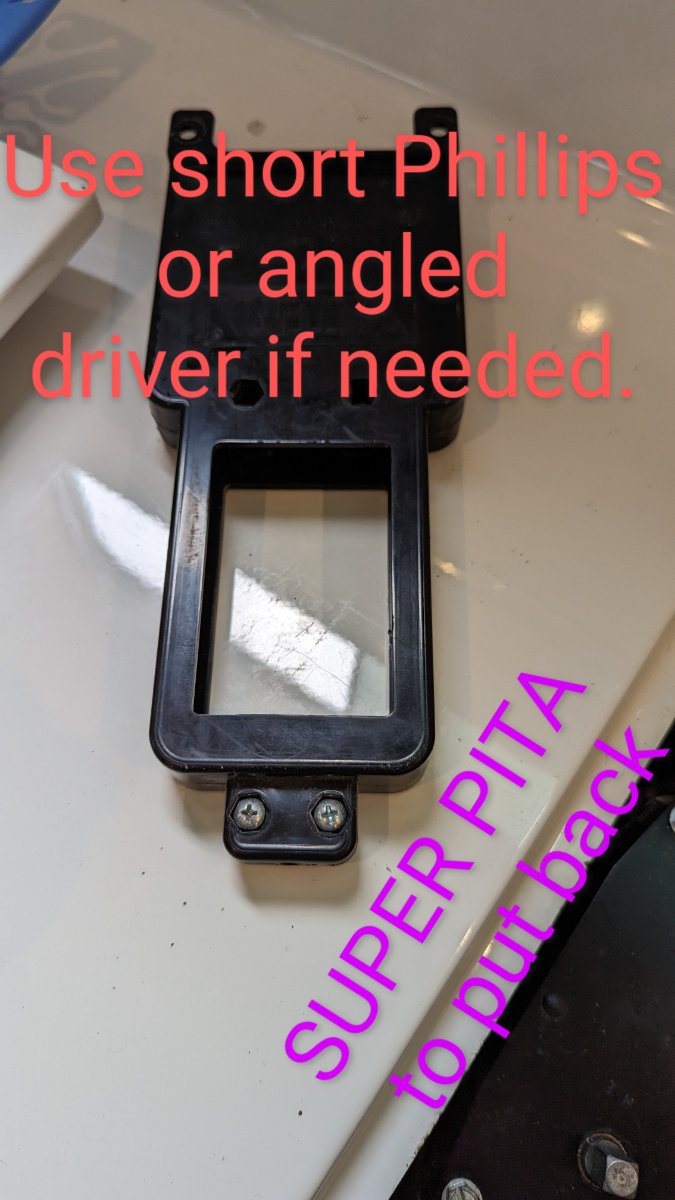
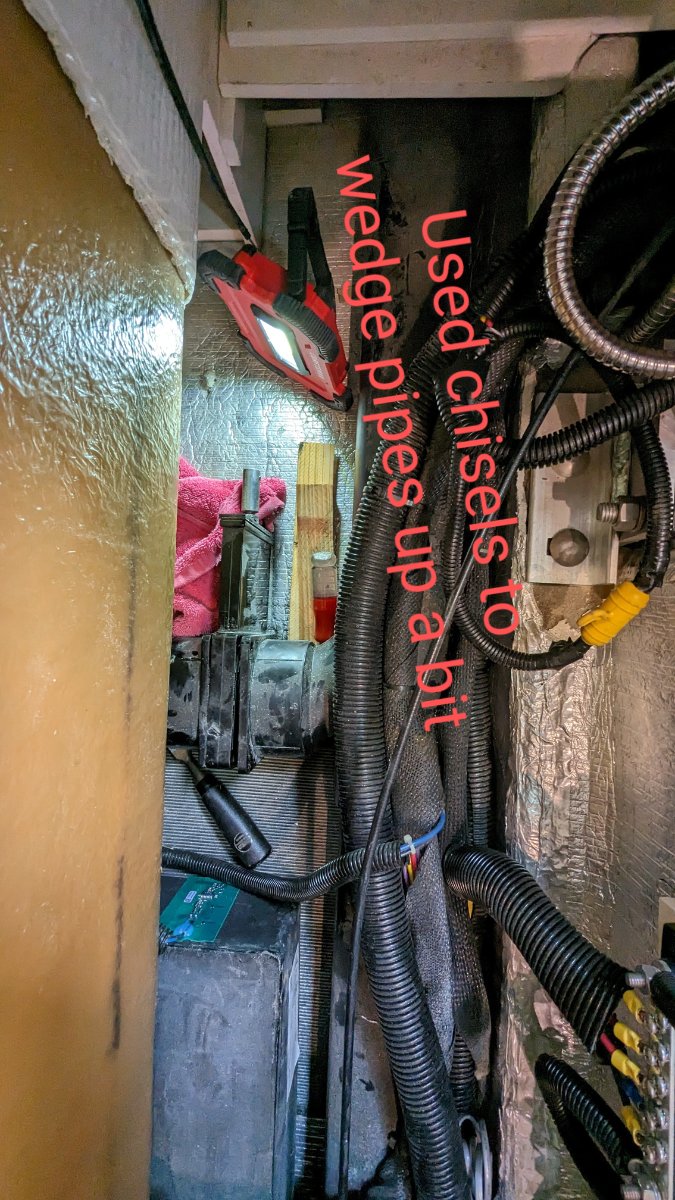
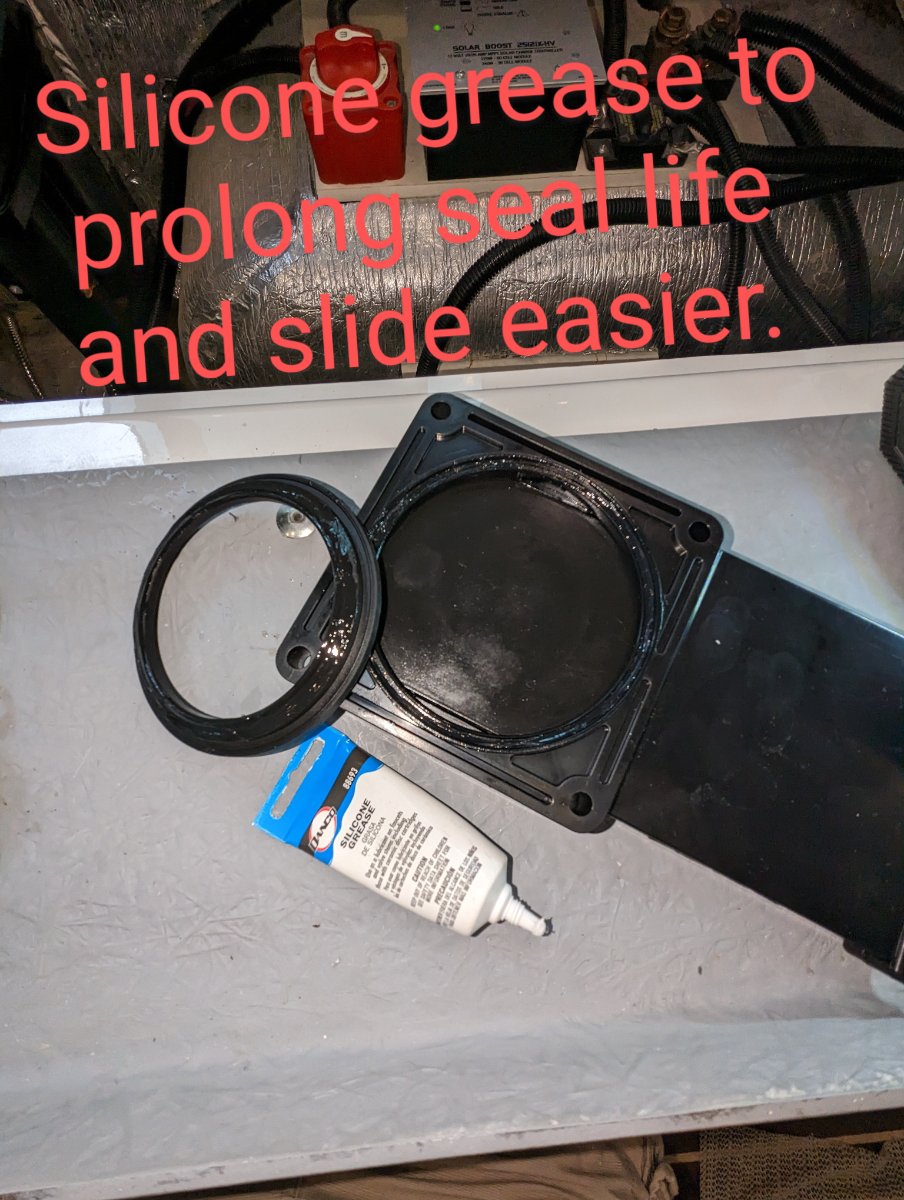
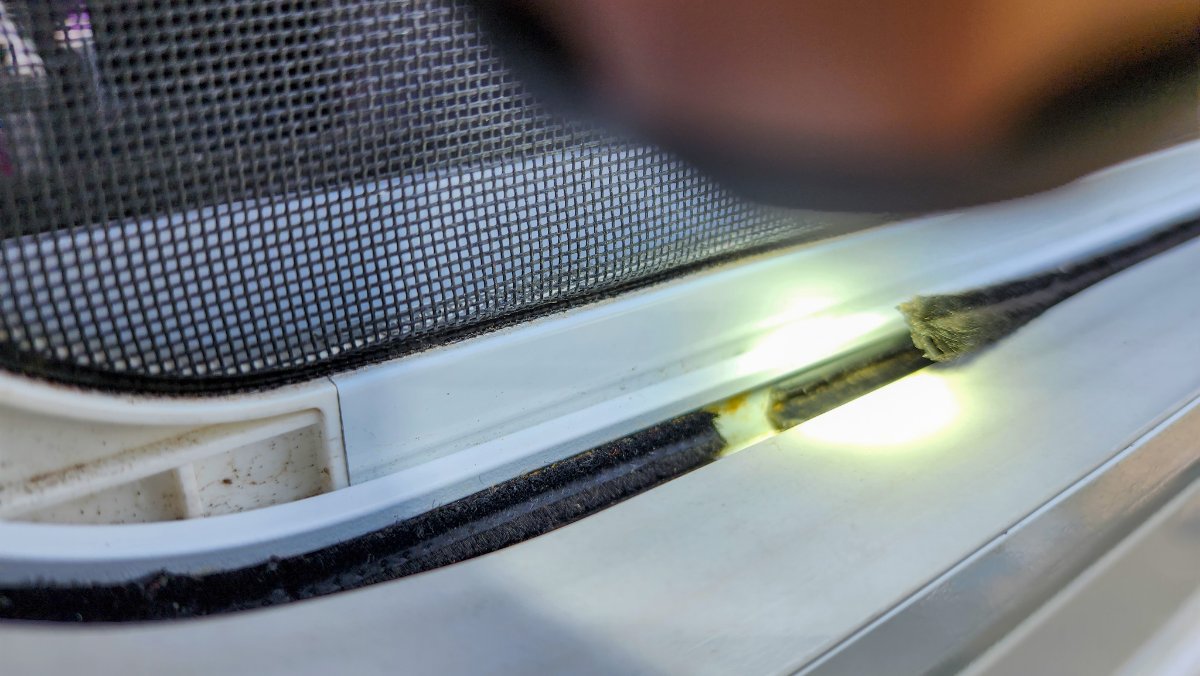
NOOOOOOOO, no it was not easy. LoL
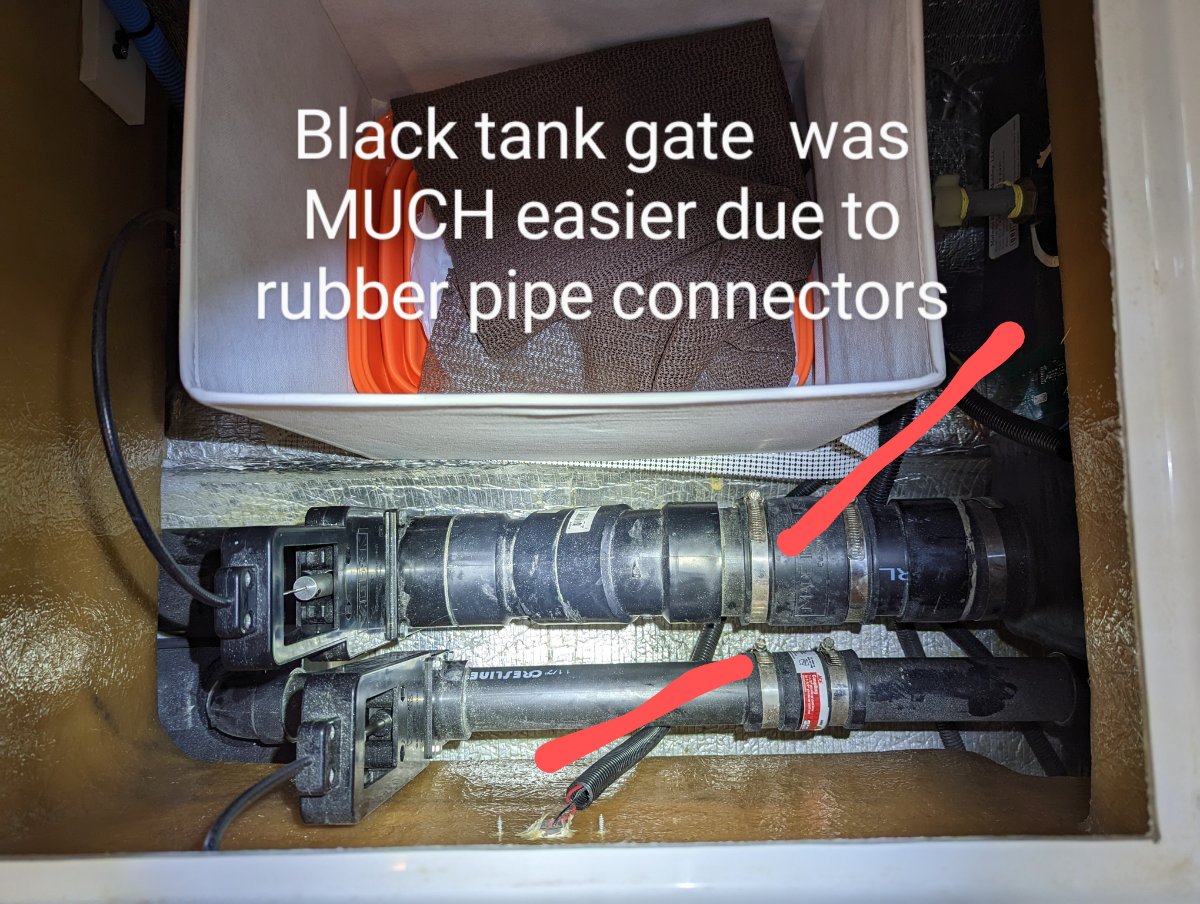
OMG that was two hours I'll never get back. It's done and with no leaks. I filled up the grey tank to 100%, and then some. I let it sit for over an hour, checking for leaks very carefully and with a very bright light and white glove test. I also opened and closed the gate valve a few times and checked for leaks.
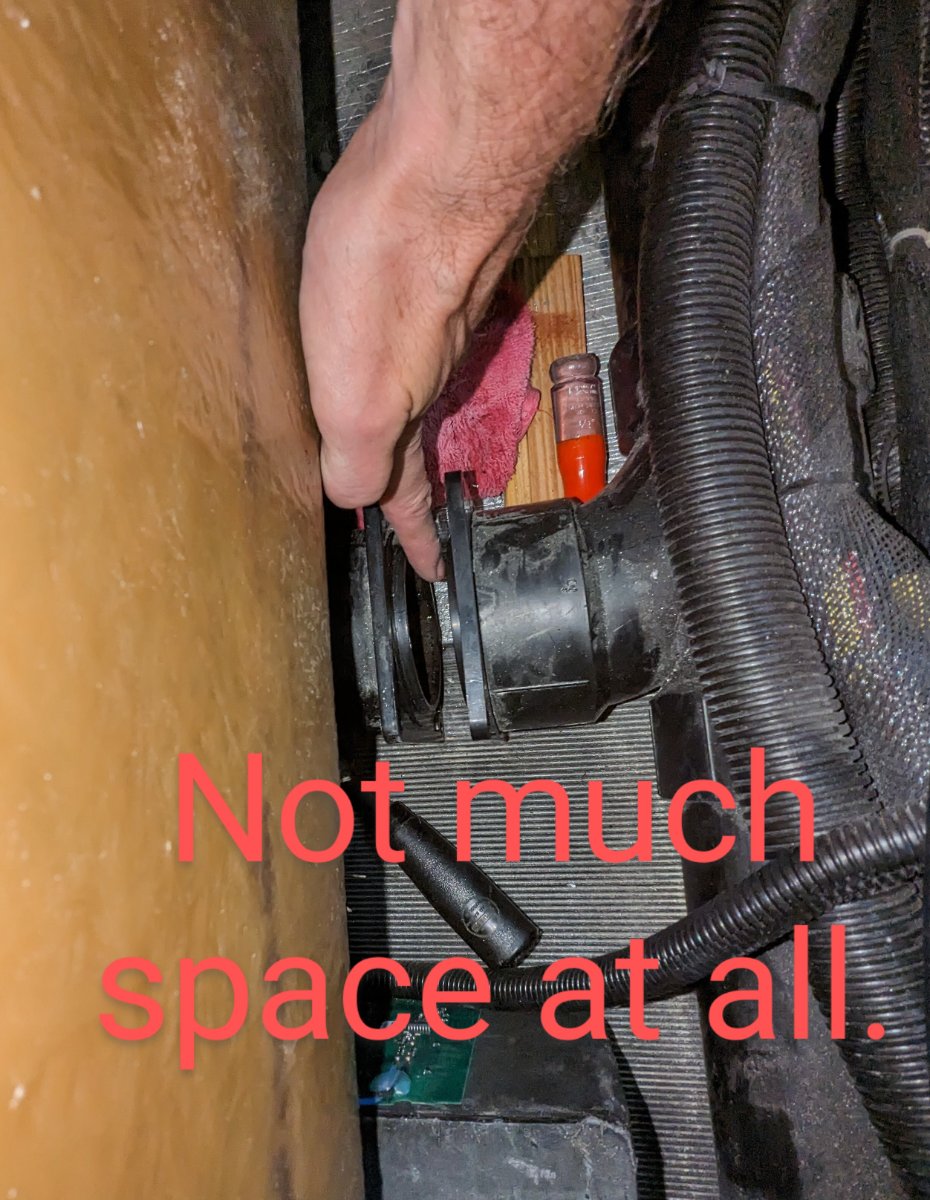
The grey tank valve in this 2016 model is extremely difficult to do. Unlike the black tank valve that has rubber pipe connectors to loosen up for wiggle room.
Next time, I drive to Tennessee and let Oliver curse through that grey tank valve. Errrgggggg.
If you have a bad back, are over weight, or have arthritis in the hands I would think twice before attempting this. I hope the newer models have improved this part replacement. I had to rest my head on the jack motor several times. Oh, long arms are required.
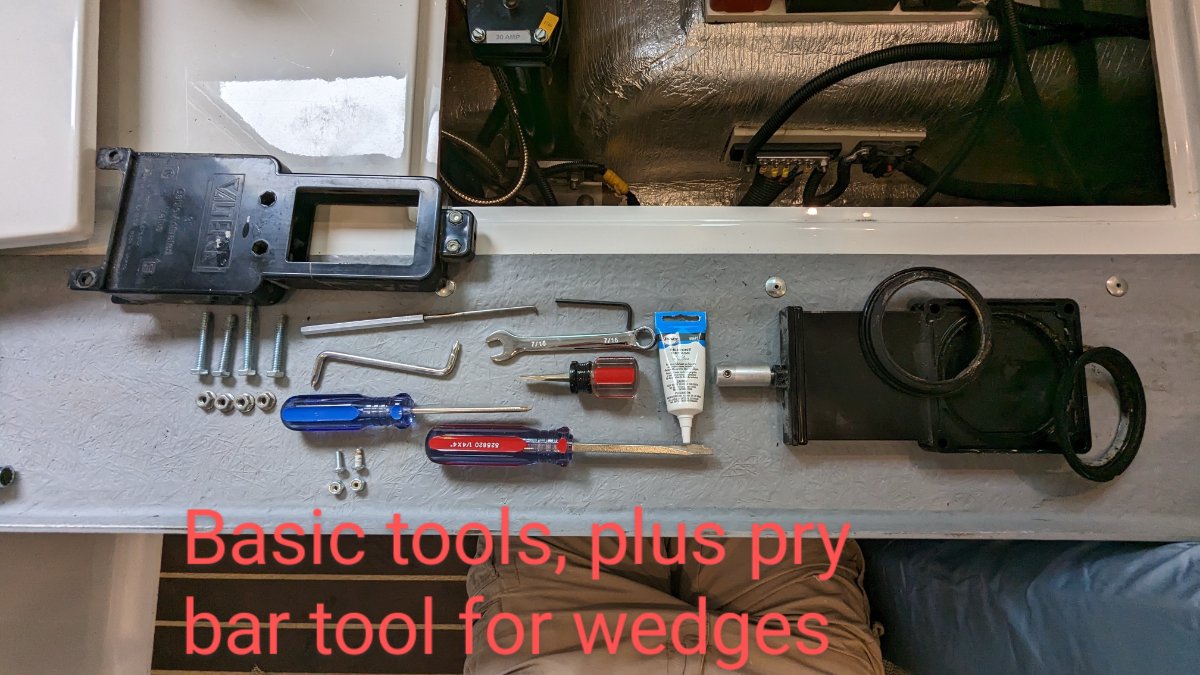
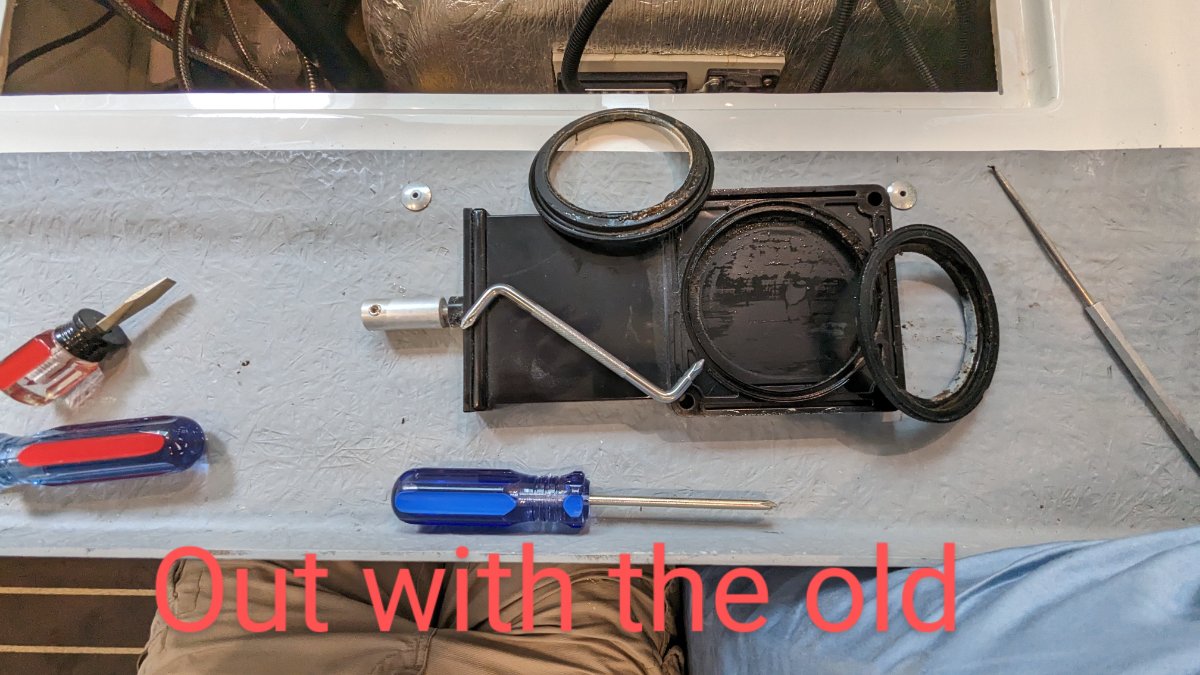
I've annotated some pictures. No certain order. Hopefully the plumbers grease will add an extra two years of life.
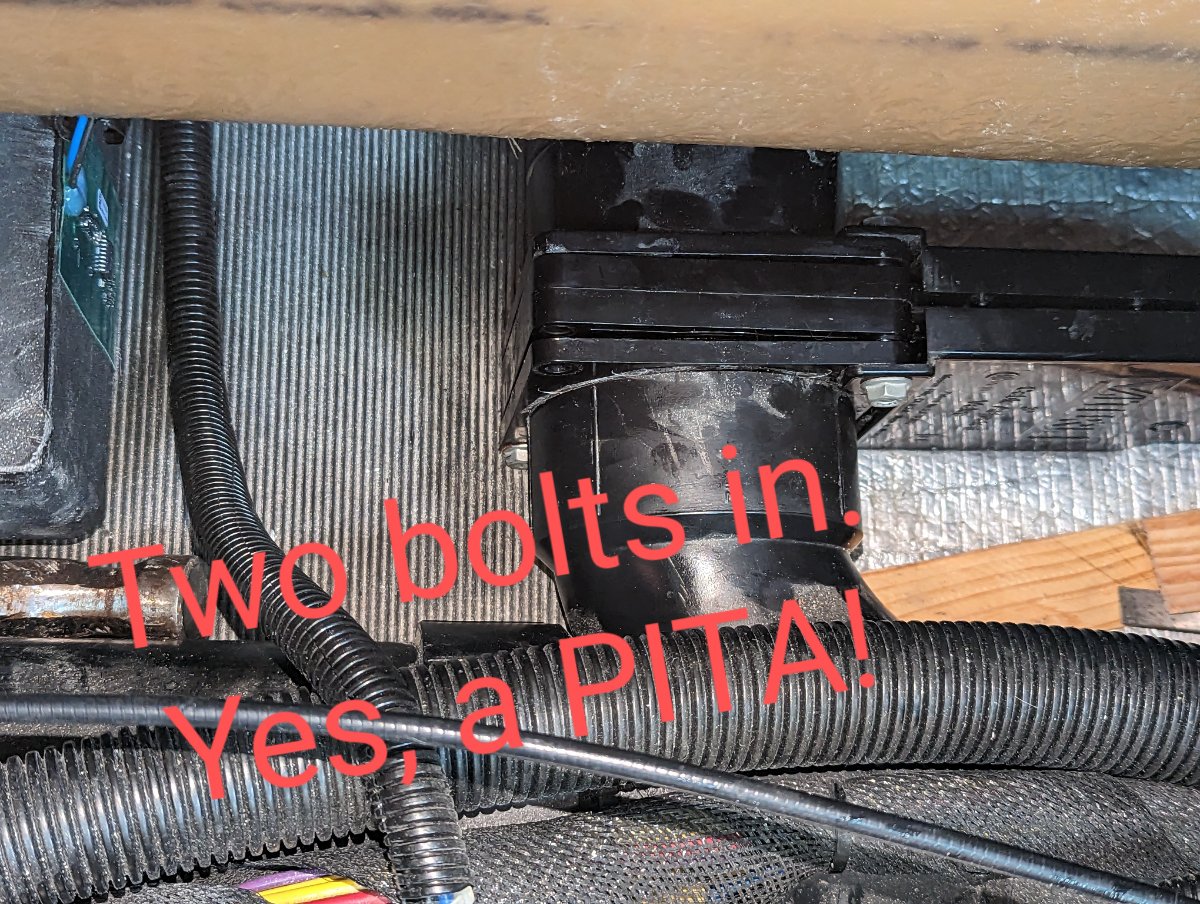
I think the job could have been substantially easier if the gate valve could have been 1/8 to 1/4 inches off the basement floor. It would have at least saved time getting the two lower nuts off and on again. It's tricky for sure.
I'm considering doing a short video with the pics and doing a voice-over to describe the challenges.
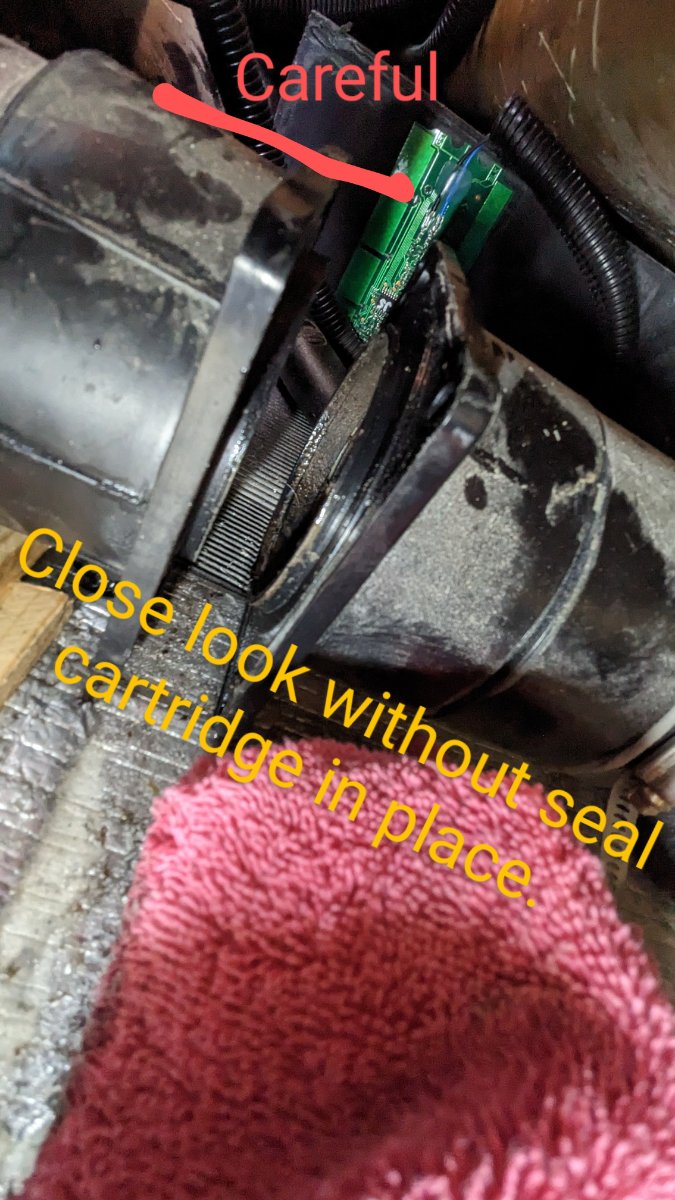
In some of the pictures you can see what I believe is the grey tank sensor board in the background. Be careful with tools around the sensor, it could be damaged and work even less affective than it already does.
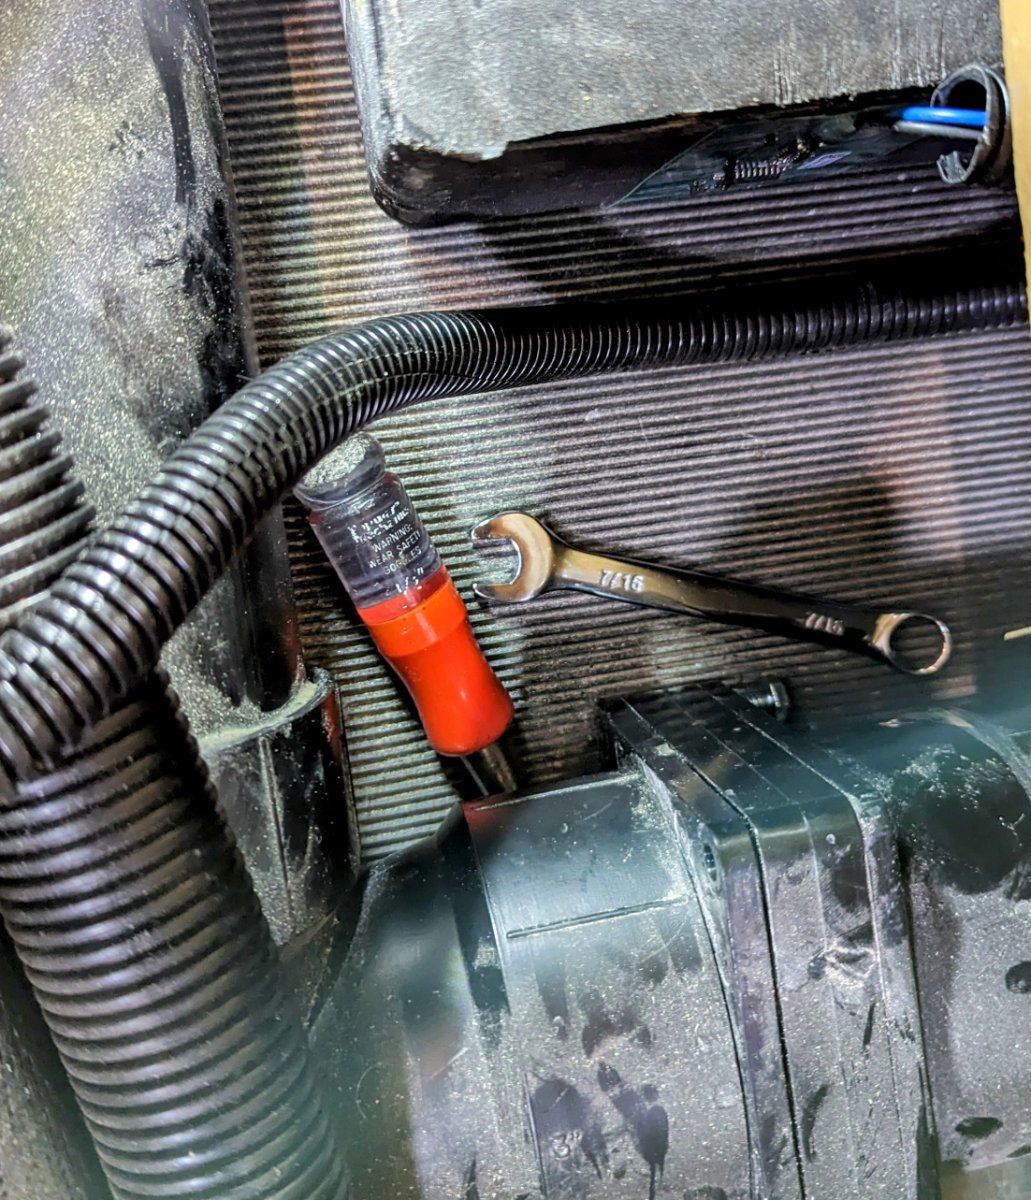
I used a hammer as leverage to separate the grey tank side of the valve with the main black tank pipe. On my TT many of the electrical wire bundles were between the hull and the main drain pipe, preventing movement. I was however able to lift the bundles up to relieve some of the pressure on the drain pipe.
-
2
-
8
-
-
A small chisel helped to wedge it up a tad bit.

-
3
-
-
I hope Oliver lifts this up off the floor even 1/4". He'll, I'd be happy with 1/8".
-
10 minutes ago, rich.dev said:
Was it easy to replace that grey tank seal/gate valve?
Funny you should ask. Still trying. The bottom bolts are right on the basement floor. TIGHT, very!
No curse words yet, but no promises. I tried to shim under the pipe, but man it would budge. So, slow going with big man fingers.
-
2
-
 1
1
-
-
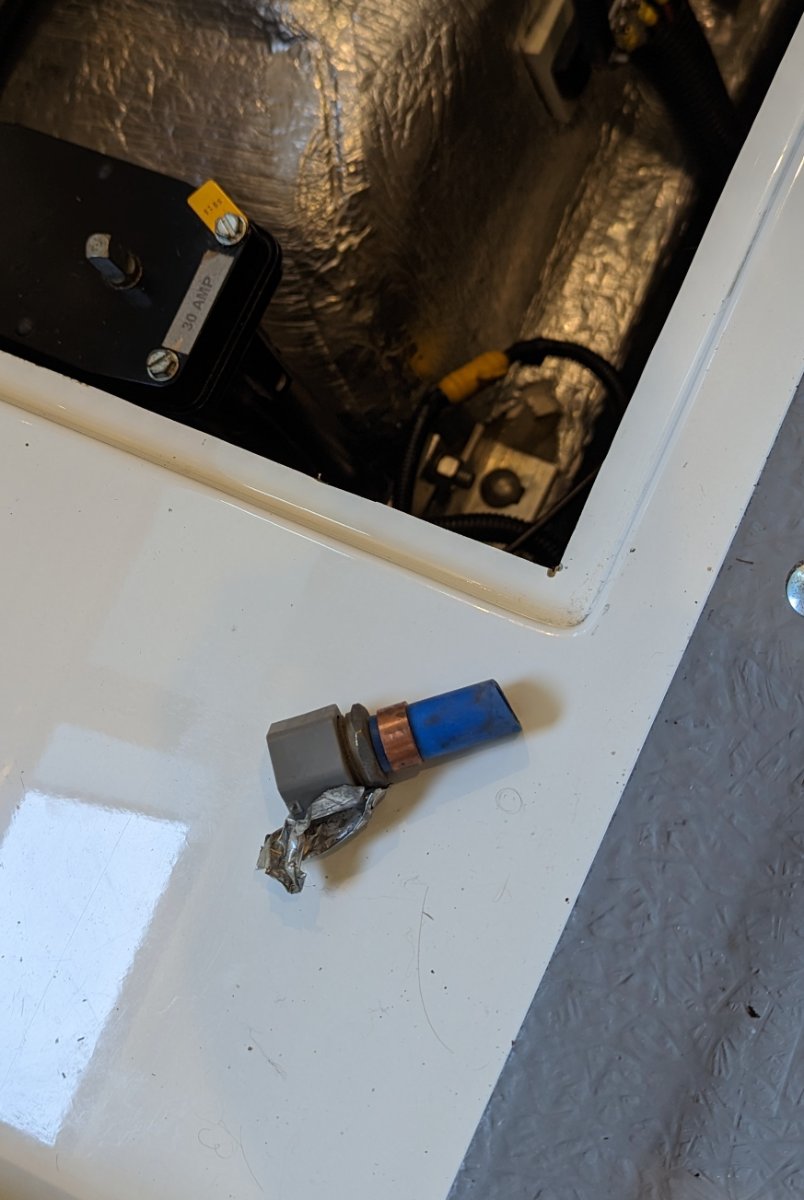
While considering to replace my grey tank seal, I found a lose spare part, a pex fitting end/stop. LOL. Been there's likely since 2016. Not something I want rolling around with electrical connections. Does have a brass crimper and the brass connector.
Also finger-checked all my electrical connections under the driver's side bed to ensure everything is still snug.
-
2
-
 1
1
-
-
So, without a bike, and it in section G (G28), how much of a walk is it to the main hall daily? Also, it looks like good chance of rain at least one day. Thoughts? This will be my first time.
I've been fighting plantar fasciitis since last summer. I'm sure I will aggravating the foot without a bike. But, I am considering bringing it. I'll need to get old-school peddles as I only have my clip-in peddles.
Thanks,
-
Folks, it looks like a chance of rain for much of my 5 hour trip and throughout the week of the rally. Don't forget to clean and apply Rain-X to at least your front windshield. Be safe out there.
-
1 hour ago, johnwen said:
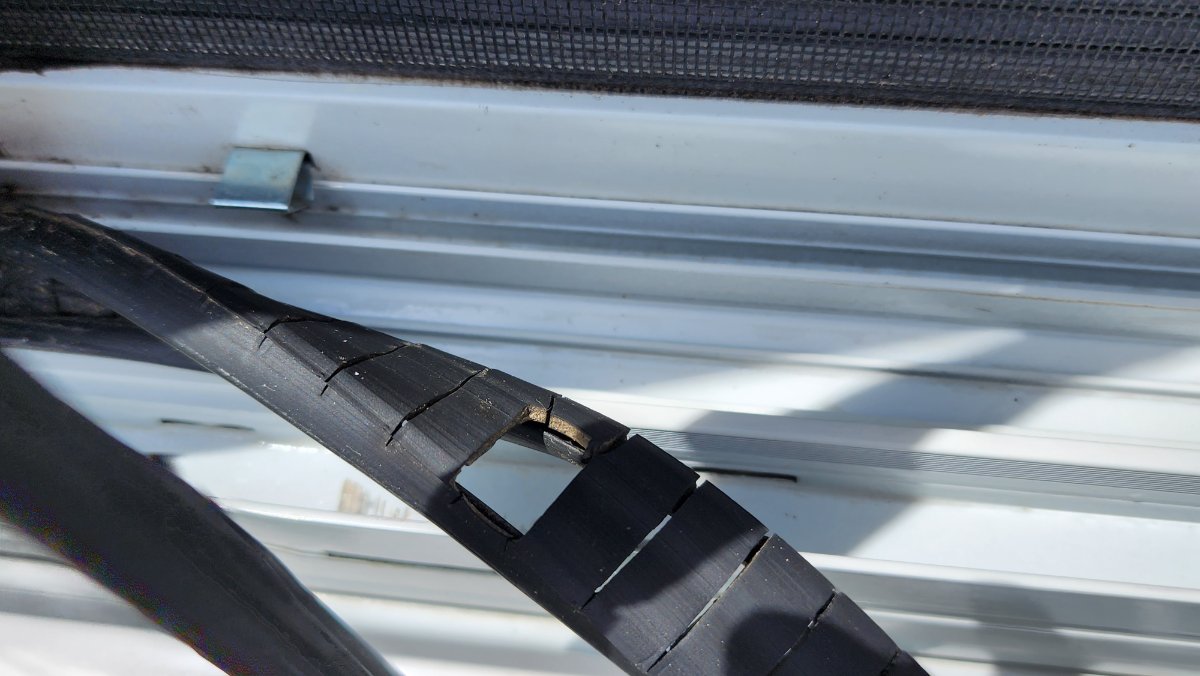
My rear window is as described by Chris and was pretty straight forward as he shows in the video. My side windows are not. The slotted rubber piece on each side have a felt rubbing strip on either side of the channel and prevent the rubber piece from being extracted, unless you use quite a bit of force. The felt strips are an H shape and fit over the edge of the rubber strip. I'm not sure if the pictures are of any help. I quit as RoadKingsofGa did and am unable to fit the H shape of the felt strip back over it edges. So I quit at that point and finished cleaning as best I could. I don't think it matters much if I don't get the felt strip back perfectly as the window still slides smoothly and none of the weep holes are blocked. I'll search out the window experts at the rally.
BTW, there are 2 of those felt strips, 1either side of the rubber strip. I did not attempt removal of the outboard strip.
John
Do you think the newer windows are a better design than the old? I know you may not have touched the old ones before, as I have not seen the new. But I will need new windows eventually and I'm sure they'll be a different design.
-
2 hours ago, routlaw said:
Watching this video reminds me of how much I detest these windows, my biggest Oliver complaint by far.
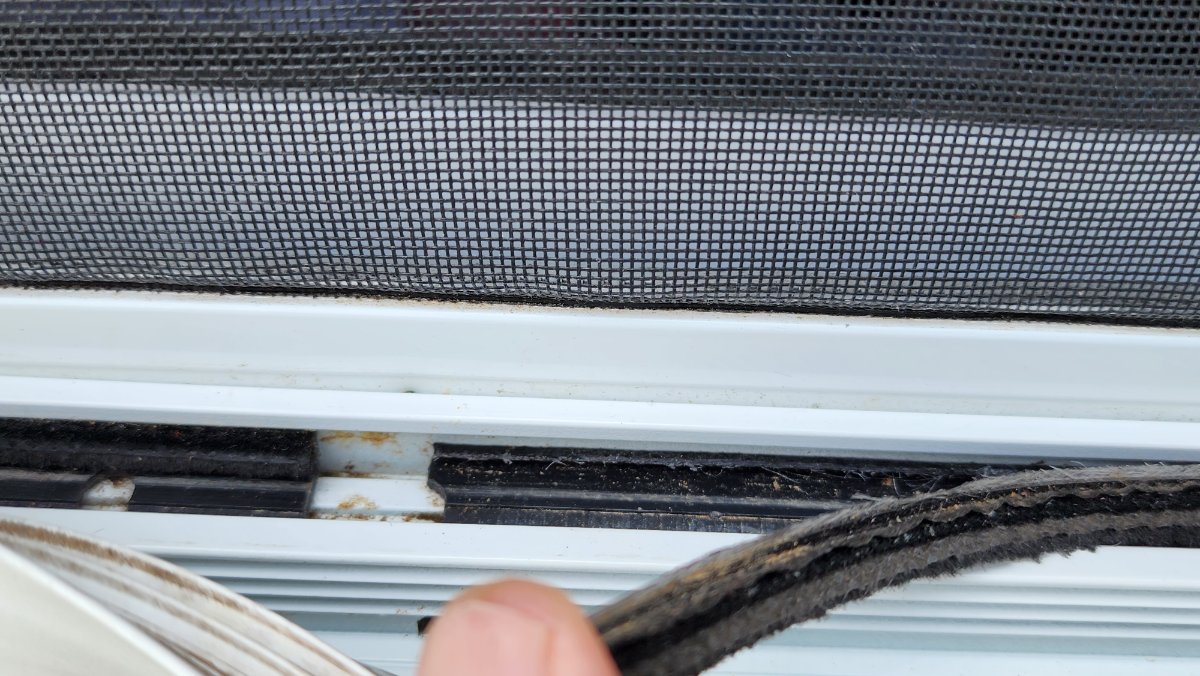
Just went through this on my own windows yesterday but rain kept me from doing the last one. Maybe later today. I do want to reiterate what Steve stated above, it is very easy to remove those rubble glides from the tracks. What I have always done is to pull the window while pulling the rubber glide simultaneously which only takes a couple of strokes to remover it completely. I also take the top part out in order to thoroughly wash and clean the rubber glide. Normally the sliding window should remove easily after that though it may take a bit of maneuvering up and down to release from the tracks. The screen also needs to come out as well, just push down against the springs (bottom of screen) then the top should release from the upper track. This allows for a much easier and thorough cleaning of all parts, rubber glides, track and windows. Figure about an hour for each window doing it this way.
In conclusion I also spray each of those rubber tracks with silicone lubricant both sides and doing this allows for very easy installation using the same method as removal. Just get the rubber glide started a few inches then push both window and glide together, pull the window back while keeping the glide in place. Repeat as often as needed until the glide clearly is past the window on opposite side from the feed at which point you can grab the rubber glide and pull it to its destination.
Great idea using the wand for flushing!
Great tips, thanks. I also have used the silicone spray before just to allow windows to slide nicely.
-
7 minutes ago, routlaw said:
You will be ok without the metal valve stems unless you want to inflate to max PSI of 80, for pressures in the 40's-50's those rubber should be fine. Agreed though with longer rubber ones they tend to flex too much.
My tire shop did say these stems are rated for the 90 PSI Michelins. But I'm not an expert in stems... and will never be close to 90 PSI on an Oliver.
-
1 hour ago, Galway Girl said:
Here's the link to the load PSE/Load tire inflation chart for those Michelin Agilis Cross Climates
https://tirepressure.com/lt225-75r16-tire-pressure
Agilis Loading Table:
The Agilis has a bit higher payloads in the table than the original Michelin LTX M/S that came on my 2019...so they could be a good replacement.
Thanks for your posts.
Craig
Thanks. I also posted the entire lineup of these tires a few posts back in this thread. I had the tires inflated to 50 lbs. But even that seems high for these tires and my Oliver.
-
2
-
-
Well, here are the Michelin Agilis CrossClimate tires. They look like tires. 😂
No shine on them yet. And I lost my metal stems. Darn it. They were out. These are longer too. I don't like it.
-
1
-
-
I feel like the forums have been a tad quiet for the past week. Everyone must be out spiffing up their trailers. I know I have.
😉
-
2
-
-
Although my quickie front jack stand box looks like crap (version 1.0), I'm going to do something to it that I have not seen any of you mention in the forums. So, you'll have to stop by camp site G28 to see it. I did sand it down some and stained.
Oh, the suspense of it all.
-
44 minutes ago, Geronimo John said:
Wayfinder: I like your chock set between the wheels. I typically put them outside of the axle sets. Yea, a tomato/tomatto discussion.
Your way though would require me to bend over just once to place both of them. YEA
With a "tag line" between them, it would allow me to easily allow carry two sets of two in one hand. That saves travel time box to wheels and back for a second run to the other side. YEA X2
Thanks for the picture!
GJ
Too bad they're upside down in the pic!
-
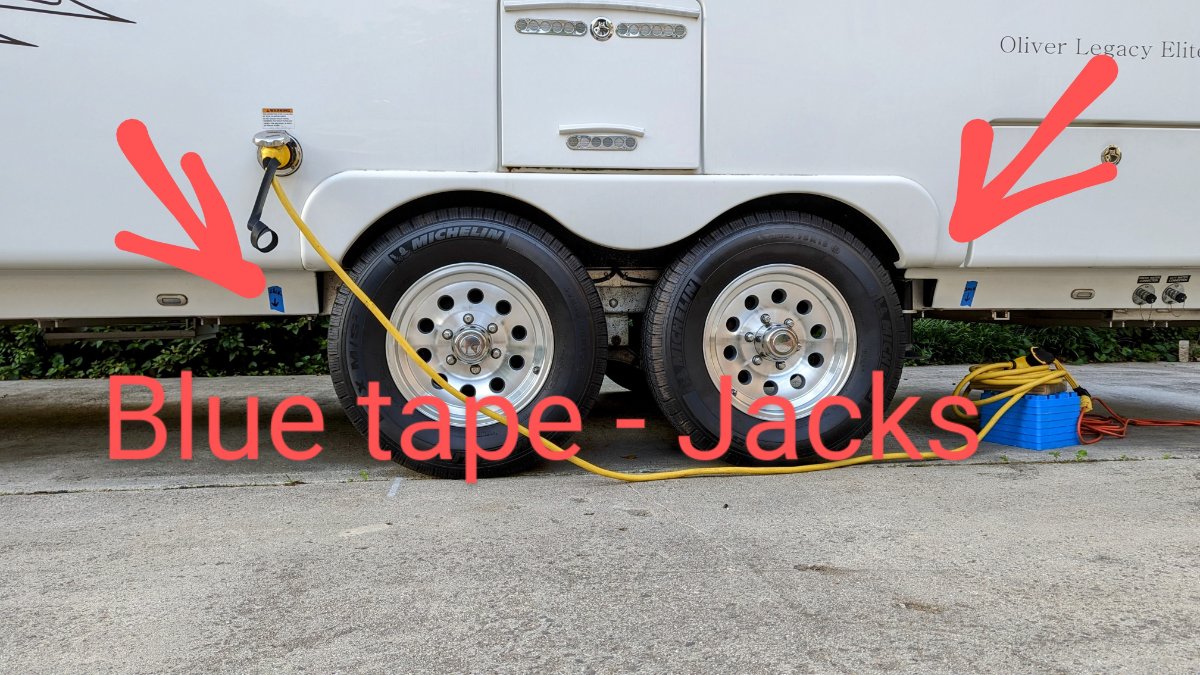
2 hours ago, John E Davies said:
Use your onboard stabilizers AKA jacks to lift all the tires clear of the ground, have the store tech place his hydraulic ones under each axle.
This isn’t exactly rocket science. Lots of us do this, but never ever crawl underneath without additional supports.
But it is easier to just take the wheels down there.
John Davies
Spokane WA
Unfortunately we were not on level ground, otherwise I would have done at least one side at a time. But, it worked out. New shoes are on Wayfinder.
-
1
-
-
Next time I just take the tires off and drop them off. Oy. Like some here have mentioned they really don't have all the necessary good equipment to reach that high into the frame. I marked and told they guy where to jack, but he ended up jacking right in the spring connection point. And he even said he didn't want to do that.
Shaking head.
So, if this can be a somewhat common issue at certain tire shop locations, the height problem that is, I wonder if Oliver could weld on specific jack plates that drop down from the primary frame, about two inches. That way there is never a question from where to jack.
Thoughts?
-
In 1 hour I go to the tire shop to get a new tires have marked what I think is the best place for jack points. Based off of your pictures. My 2016 doesn't appear to have extra metal under the frame, but these points match your descriptions. I've also noted potential damage to propane lines on the passenger side.
-
1
-
-
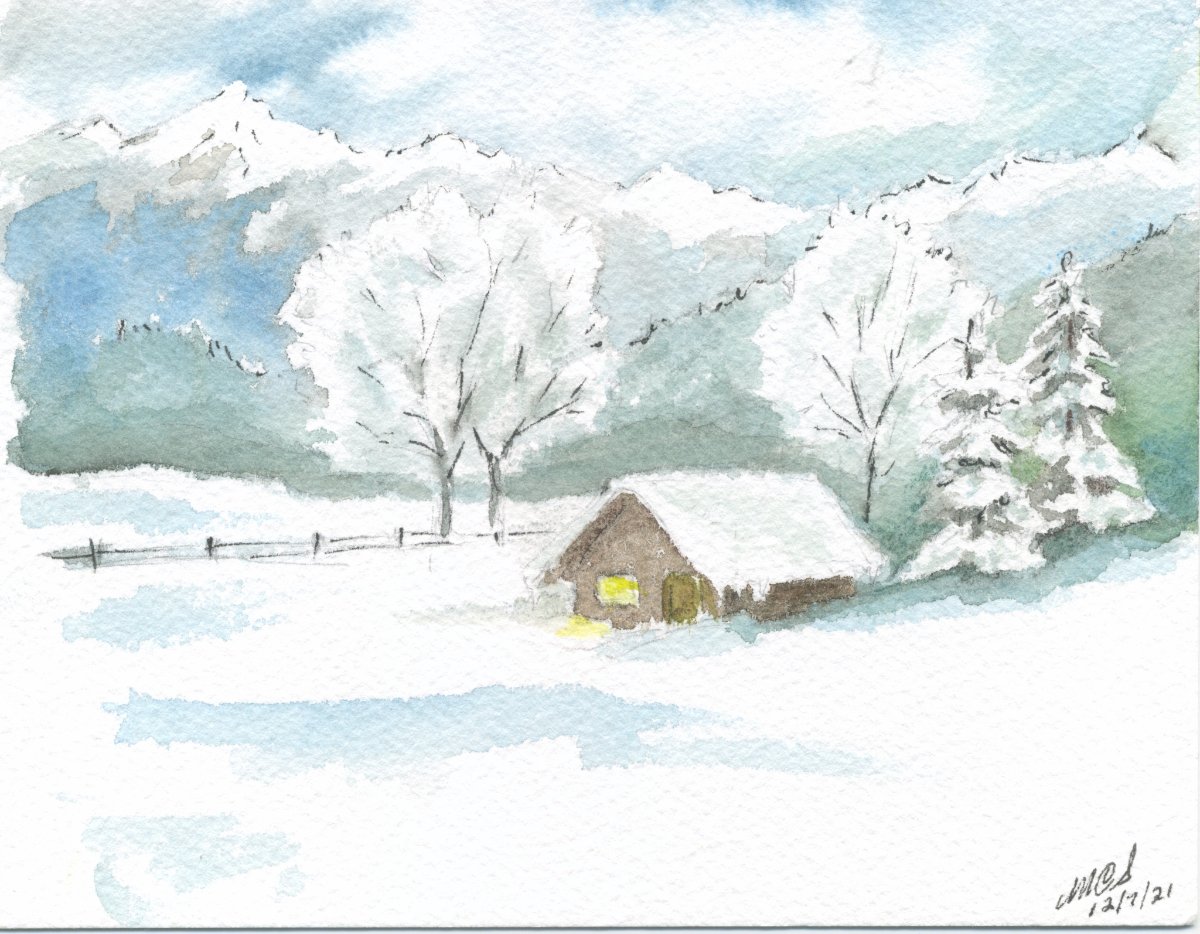
3 hours ago, Nancy K. said:
Nice artwork! Two teens designed the cover of my book and I had specified that I wanted the trailer to look like an Ollie. (without the name showing in the back). I think they did a great job.
Thank you Nancy for sharing. I'll check out the book.
-
1
-
2
-
-
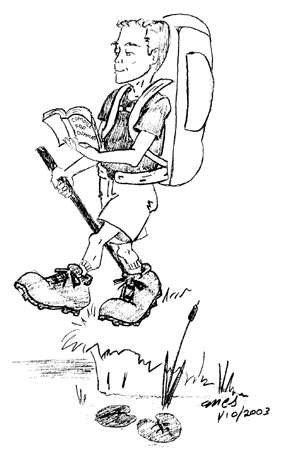
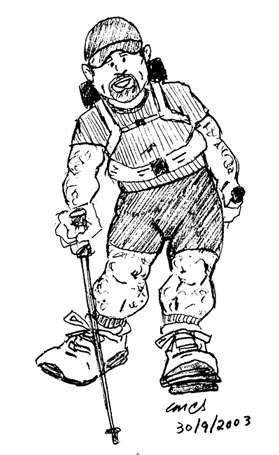
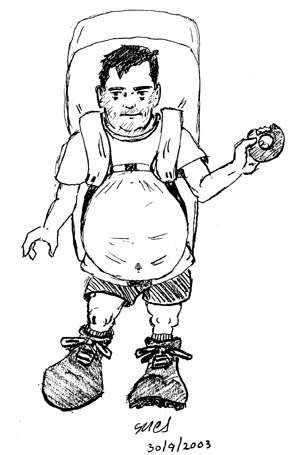
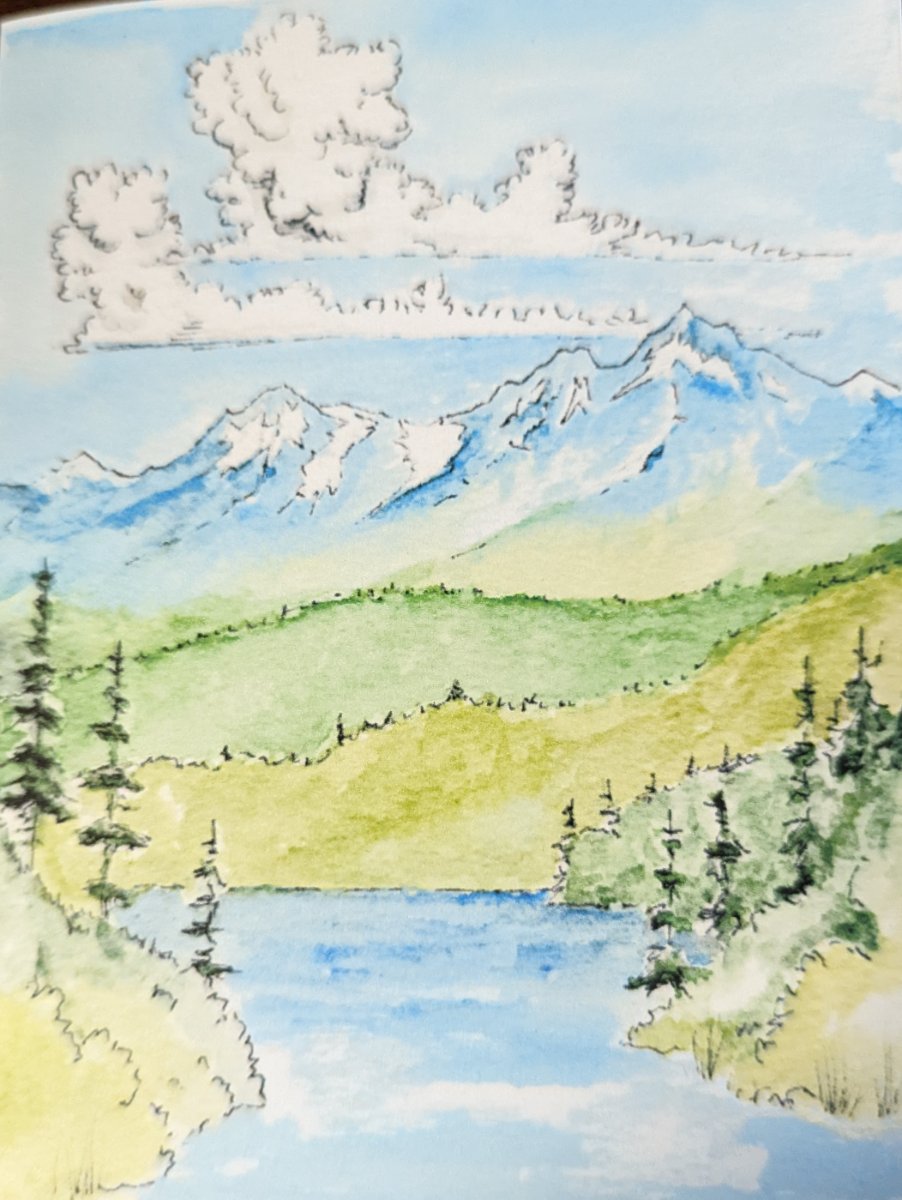
Thanks, I will let him know. And he has considered Etsy, but it's very competitive. He's done some great pencil sketches for our office over the years. I'm hoping he comes up with a comic-like sketch. Much like these. Also some of his beautiful cards. Again, he's considering doing something with this after retirement. I think he needs a "push". But that's me.
I'm not sorry to overload you with his work. I think he needs encouragement. This is all I could find my my photo album. I know I have more. He's been getting really good with the water colors works. I think he started doing water colors about a year ago, maybe a bit longer.
We'll be going camping again in the Oliver soon. He's gone once with me, but I got sick and we cut the trip short. Maybe we'll do a mountains trip to NC or something.
This sketch of the skinny guy with prices tags on all his hiking gear is me back in 2003. LOL
He did the cardinal from a photo I took last year.
-
5
-
 1
1
-
-
I'm really surprised at how stable the front jack is now, even with the rear jacks up. With a 9 inch box, the front jacks is not extended that much and does not wobble much at all.
-
1
-


Facebook accounts hacked or duplicated - Steven Cobb
in General Discussion
Posted
I'm not sure how to get hold of Steve, but some jerk is portraying him on Facebook. I've posted a message on the Oliver Owners group, but that all I can do. That account only has 4 friends and just a few pictures. Be careful.
I tried to confirm it was him by immediately asking what we did last week and where we met. The jerk on the other end kept repeating BS about some great site or organization. Big clue!
Facebook is getting crappier everyday.