

Wayfinder
-
Posts
364 -
Joined
-
Last visited
-
Days Won
1
Posts posted by Wayfinder
-
-
27 minutes ago, SeaDawg said:
@Wayfinder, I have a duxtop (slightly cheaper version than yours) and an IKEA induction burner. Love them both. Both have a clean glass/ceramic edge, no plastic guard, so easy cleanup.
My house is half-powered by two tesla powerwall batteries during power outages. My Bosch induction cooktop is not on the panel powered by the batteries. The two little induction burners work just fine as replacements, on separate circuits. Also great as "keep warm" burners for parties. I love the timer function on the cheap duxtop.
My college roommate and her daughter were here for a week visiting this spring. Both are gourmet cooks, and gas stove aficionados. Though skeptical at first, they were both amazed at the quick response of my induction cooktop, and the super easy cleanup. I do use ceramabryte cooktop cleaner on all my induction cooking devices, to protect and keep like new.
I like smooth bottom, lighter weight conductive steel or stainless pans. My favorites are enameled steel, IKEA 365, and a smalk nordicware spun steel wok skillet.
I think you'll really enjoy the duxtop. Read the manual a few times, carefully, and youll find it's really fun, easy, and controlled, using all the features.
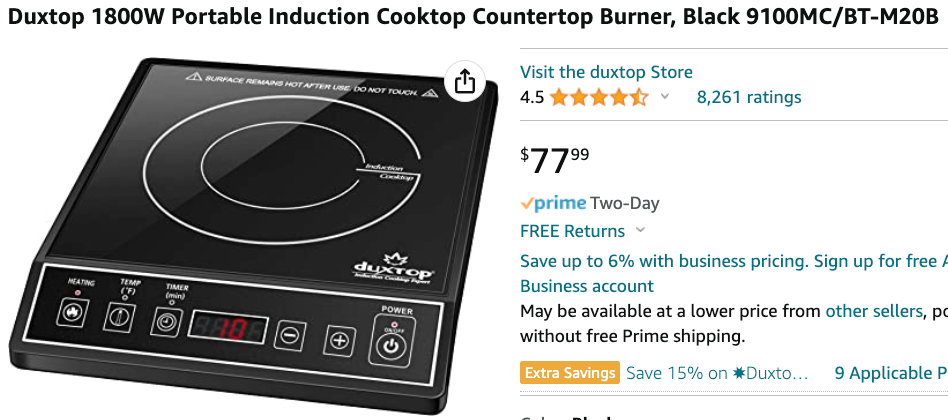
This is the cheap one I bought:
Duxtop 1800W Portable Induction Cooktop Countertop Burner, Silver 8120MC/BT-180G3 https://a.co/d/h5eo8vi
I bought a used/Like new version (probably a return) for around $40.
I may have gone overboard purchasing the one over $100, but I'll now have the cheap one and better one from which to compare. I'll update here if I even remember this thread in a couple weeks. LOL
I've been eye-balling that large Bosch unit for some time, but other expenses keep coming up, like stupid medical bill. Errgggg.
-
 2
2
-
-
BLUF: I LOVE Induction cooktops.
I'm camping solo often right now and I really don't want to fuss with my Black Stone griddle, if it's only me. Too much to clean up if it's only me. So I'm going to take a Duxtop induction cooktop with me to the rally. I have a single burner in the house right now that gets used a great deal. It's great for the price of $77. It's the lower version of this one, which I just ordered maybe for Wayfinder TT.
https://www.amazon.com/dp/B01FLR0ET8?smid=A2EPN08Z0FPLG4&ref_=chk_typ_imgToDp&th=1There are 10 settings, 1 to 10. I used my "Kill-a-Watt" meter to measure electrical useage. When the cooktop is on setting 5, where the unit starts at when turned on, it boils water slower, but only uses appox. 900 Watts. Slower meaning as fast as a normal electric stovetop.
On setting 10 it only uses 1400 watts ('ish). I rarely go about setting 8 from which to boil quickly. Bacon and eggs are normally on 1.5 to 3 for short periods.
I think I'll like this much better outdoors in nice weather. I have 4 x lead acid batteries equaling 324 AHs, so 160 Amp Hrs useable. I should be fine. I will test out in the drive way this evening to be sure. I need to "exercise" my batteries anyway. You know, out with the old, stale electrons and in with the new. 😉
This one pictured is not good for LARGE pots. The plastic edge tends to melt a bit, but only for very large pots. The cooktop linked above has no plastic edge, but is nearly twice the cost. I'll see what's best for the baby Ollie.

-
3
-
-
42 minutes ago, topgun2 said:
I'd bet that your front jack is a replacement for the original jack that was in this location.
When the front storage basket was introduced it was necessary to rotate the front jack in order to make rom for the basket while at the same time allow for the top of the "dog house" to be removed. In turn - this caused the light on the front of the jack to now be shining to the side versus the front. One way to tell if any Oliver is of the "older variety" is to look for this turned front jack.
Bill
@topgun2 do you think my jack came from Oliver or was replaced by the first owner?
Thanks!
-
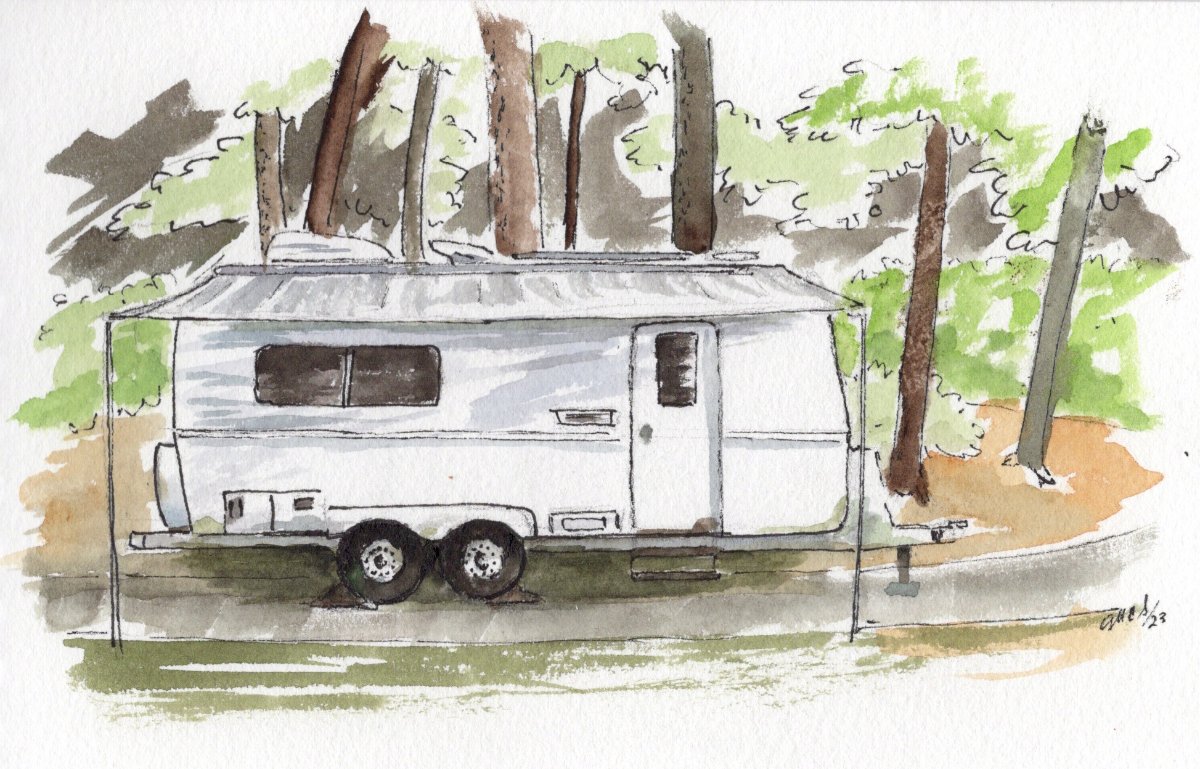
My friend is a pretty good artist, he does greeting cards for holidays and such. He's working on some ideas for me. I was thinking of making a custom T-shirt with my hull number. This is his first attempt and is done with water colors. Maybe too much for a shirt.
-
11
-
 1
1
-
-
I see his thread move from books to music, but I usually listen to audible and science fiction books, usually long series. I would recommend Expeditionary Force Columbus Day, which is the first book of a 14 or 15 book series. Once you make it halfway through the first book, it gets pretty funny when you meet an ancient AI who gets nicknamed Skippy. The whole series is about Joe and Skippy and fighting aliens. There are a lot of funny moments throughout the series. Not always suitable for young children. I think a movie deal is in the works as well, but let's face it. The books will always be better.
-
Well, I'm not sure who posted their video link to a heavy duty jack stand made from wood, but I made my own as soon as I got back from camping today. This looks rough, and it is, but I'm letting the Gorilla Glue setup with the weight of the trailer on it as it will normally sit.
This is made from old reclaimed pressure-treated 2x6s, long deck screws, wood and Gorilla glue. Once the glue is completely dry, I'll finish sanding it down to get ride of any splinters or chips and then give it a quick stain. Why not, right?
My neighbor does have some extra spray paint he can give me. I'm thinking of painting it safety ORANGE. So from a distance it might look like a cheap piece of plastic. But I don't think so really. Would be too much of an attention getter.
This is approximately 9 inches high and around 8.5" x 11" (ish) wide/long.
I think it will last as long as me. Well, longer!
I made it so it's easy to pick up with two hands, grips/handles on both sides. With the height, it should give more stability to the front jack as it will not need to be extended nearly as much.
I usually just used a small set of blocks as a front jack stand. Not nearly as stable (also Pictured next to rear tire).

-
1
-
-
Well, I'm glad I checked my spare tire. I now know that it is smaller than the other four primary tires. It's P215/70R16 from BF Goodrich only good for 1708 lbs @ 44 PSI. There's really no way for any of the primary tires to fit inside the spare tire cover. If one did, it would be VERY tight indeed. But, added 8 lbs of air to the spare and it looks good, new even.
I even cleaned inside, under, and around the spare cover. Just in case the Oliver Police come knocking for a white glove inspection. 😝
-
1
-
-
I'm not sure why the TT has that front jack, but I like it and it has essentially no maintenance. Maybe the previous owner put it on.
-
1
-
-
4 hours ago, MAX Burner said:
@Wayfinder: Does your mobile's hot spot work effectively when in close proximity of the antenna for a good internet connection? Just curious...
If I understand you correctly, yes. Both my cell phone AND a dedicated cellular hot spot, both from Verizon, see improvements, albeit not drastic or magically drastic. Again, if there's already a signal worth boosting. Now I cannot speak for the improvement for all carriers, mileage may vary. My WeBoost might only help LTE & 3G. Newer WeBoost models, like the Drive+X "says" that all WeBoost products support 5G, but I'm not sure. 5G technology has a relatively short distance and is only line-of-site as I understand it. Also, 5G, if very close to a large antenna is quite dangerous. That's why it's so important for these companies to position the transmitters correctly, where humans are in the way of the signals. So not sure if we'll see an internal antenna boost a 5G signal. 🤷♂️
This weekend, here at Petersburg Campground in Appling, Georgia, I would have nearly zero Internet activity if not for the WeBoost. I would have had to read a real book or something. "I shutter the thought". The only book I have with me is my Security+ certification book, which I need to study for once again. I swear I retire before I another Security+ certification... after this one. LOL
-
 1
1
-
1
-
-
On 5/3/2023 at 3:10 PM, topgun2 said:
"Maybe"
?????????
There's also van life that has my eye too.
-
Yeah, from my experience, I get one, maybe two bars of improvement, BUT, ONLY if there is a decent enough signal to start with, say a half to one bar. Can't boost zero signal. Zero * anything is still zero. LOL
I pretty much have to put the phone on top of touch the internal antenna.
I like the idea of Star Link, but I don't camp enough for that yet.
-
4
-
-
I likely miscounted, but so far it looks like 73'ish Olivers are coming to the rally. Not sure if any of them are from the Oliver team itself, but very impressive.
What's the largest Rally ever, does anyone know?
BTW: I will be there a day early if the team needs more help setting up. Pulling in on the 16th.
-
6 hours ago, VBistro said:
Love that pic. Says a lot.
-
1
-
2
-
1
-
-
One of the first things I had to replace when getting Hull 110 was the cell booster. I picked up a WeeBoost and left the interior antenna cable extended over the dinette table. I've not yet made it super "pretty", but the long cable allows me to sit outside with my phone right next to the antenna. Basically, if you've used a booster before, the phone pretty much needs to literally be on top of the antenna to get any significant boost. At least with this POS WeeBoost.
I want to shop for another extended cable to make it even longer. As it is now I can barely get then antenna outside the door. It's a stretch.
-
3
-
-
25 minutes ago, routlaw said:
From my experience I have never had any issues 8 years running with the factory tires set between 45-50 so you should be just fine. At this point I am definitely going to invest in a TMPS system though. Had I lived in the SW where road and air temps can really soar I would have done it long ago. Still experimenting with the truck however. Honestly I think I could easily get by with 45 front and 40 rear driving without load or towing. I plan to do the chalk test over the weekend to see what that determines. Good luck.
Yup, a TMPS is great.
-
1
-
1
-
-
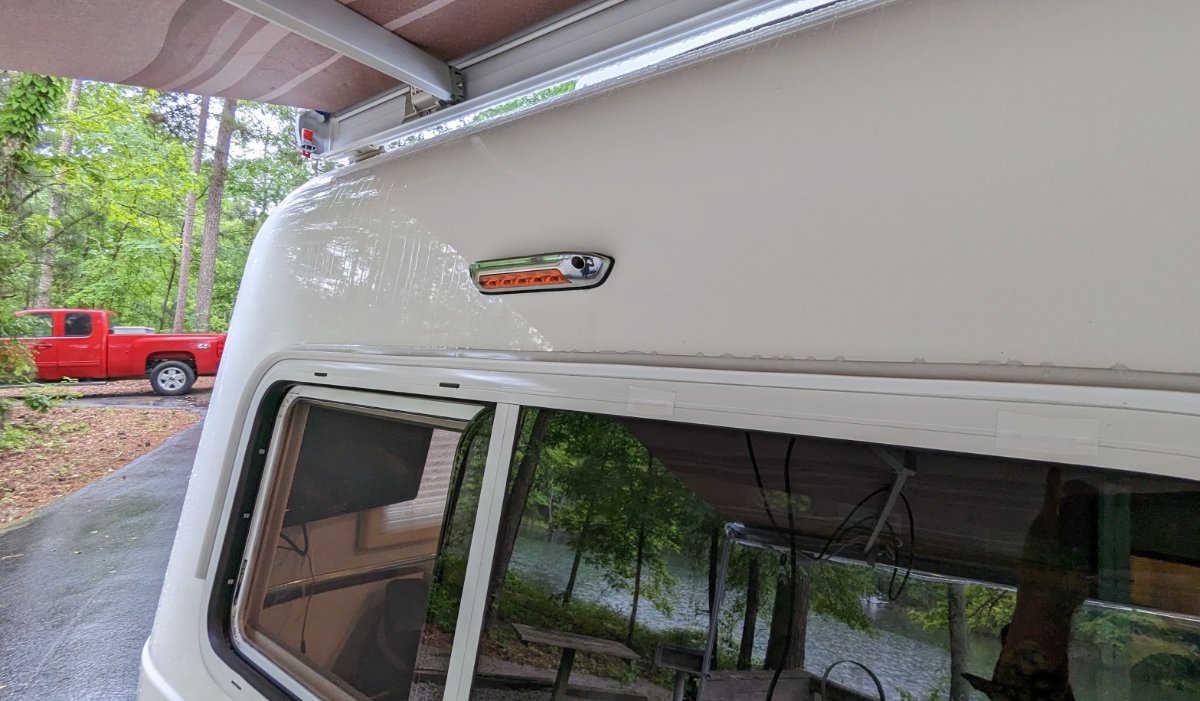
Well, I am currently camping for the 3rd time in two years, (and twice in two weeks) and now testing weather or not I will like NOT having a bulb seal on the trailer. So far with a light drizzle it's no issue. But I also have gutter guards all around.
I am wondering if I'd like gutter guard under the awning mount, leaving a sizable opening between the gutter and the bottom of the awning mount. It might be a nice compromise. But, no rush. Critical thinking and testing to do in the mean time.
Still adding pics to Album, but again, it's raining. Doesn't look like any astrophotography practice tonight. LOL
Album so far: https://photos.app.goo.gl/nkozxUcsgrfPp9YeA
The attach pic is showing the rain tripping down over window gutter and showing there's no bulb seal over head.
-
2
-
-
HA, didn't see the reply until now. Winning!
-
3
-
-
Are you pulling our leg? Are those stickers?
-
 1
1
-
-
Wow, I was thinking an Oliver would be very resistant to mice infiltrations. Maybe by leaving the basement door open one night?
-
I'm no tire expert, but I think you're right in setting the truck and TT to what you did. I'm running 60 PSI on this short camping trip, and I will be airing down to 45 to 50 PSI to see if I can tell a difference on ride home. Watching in the mirror closely for rocking of trailer. But next week the new ones go on. I'm thinking upper 40s so when they heat up they'll go to around 53-55 PSI. Thoughts? Likely the pressure I'll use for the trip out to the rally from Georgia.
-
 2
2
-
-
@LindaShields Mine is black, but my TT is a 2016. It's under my dinette seat next to the pantry. Please be careful around this gear. It's can be dangerous.
I just happen to have my EMS code display on top of the box because it was never mounted outside of that area. matter of fact, whoever had it before me crushed the grey "telephone-like" cable with the bottom of the hatch. I have no ideas why it was never mount for easy viewing.
-
2
-
-
HA, I found my picture of when I had to charge my house batteries with a Jackery 1000 until the sun came up. LOL. Worked great.
Talk about a convenient location for a plug.
-
3
-
-
Well wouldn't you know! I get my new tires put on next Wednesday, but my local tire shop initially quoted me $261 for each Michelin Agilis, but nearly everyone online was charging $245 to $255. My local Discount Tire wanted $245.
I went up to my local family shop and asked if they would at least meet me half way on the difference. Well, dang, the not only meet it, they beat it. Now only $240 per tire. Woohoo! It's good to be nice and just ask.
"Winning!"
-
2
-
1
-
1
-
-
1 hour ago, routlaw said:
Took my Oliver in this morning for new tires after 8 years +, just didn’t want the worry of something going wrong. The only place in my area that supplied the tires I wanted was Les Schwab which tends to be more expensive for what ever reason. They told me 15 & 16 inch tires will always be around for a long time to come. Abundant choices however might be a different issue.
Also after 8 years, Wayfinder gets new shoes next Wednesday. Shiny new Michelins. Party to follow. My current tires would be good for a farm truck or something. They still took new, all surfaces.
-
3
-


Oliver Artwork
in General Discussion
Posted
My buddy did this from memory, so don't judge too harshly. LoL
He's working towards something, of what I'm unsure.