
Wayfinder
-
Posts
364 -
Joined
-
Last visited
-
Days Won
1
Posts posted by Wayfinder
-
-
Well, taking some advice from @Geronimo John and/or @SeaDawg and making some extra leveling & clocking pieces along with non-slip material as a ground base.
Now that I'm more prepared with 2x6s and X-chocks, I'll never be on a sloping campsite again. 😂
They might be able to help someone else out, someday.
Heading out to Petersburg Campground this weekend. What an awesome campground. I'm lucky I got in on a weekend.
This is another reason to keep a small 24" camper. Americans are going crazy with all the big rigs so they can't get in the all the sites.

-
 1
1
-
-
Ten years for PERFECT looking tires seem very reasonable, but, like so many have said here and else where, we just can't see what's going on under the tread. Dang it!

I better not hit something on the road to the OTT rally with my new tires. I could have done that with my old ones and felt okay about it. LOL
In regards to rim sizes going away, nothing will happen over night, and I suspect we'll be able to get 15" and 16" in decades to come. I have NO doubt.

-
4
-
-
Welcome @Nightfog. True about YouTube watching. It took me 8 to 10 years to pull the trigger. LOTs of "research" for sure. This group is fantastic and TONS of experience. I learn from them every time I log in.
CORRECTION: Oliver is my first camper, and maybe my last. LOL
Cheers,
-
 1
1
-
-
Welcome back to the road. Have fun and share cool pictures.
-
1
-
-
Well, I'm a bit ashamed to admit that I did not know, or at least remember, any of this, in regards to the multiple Oliver companies. I'm just now getting back into all of this great Oliver life style, so I guess I'm pulling my head out of my.... um, out from under a rock. 😉
Thanks for sharing this info!
-
1
-
-
Once again I would like to thank @Hokieman for putting me onto this thread and everyone who participated on this thread. I had missed it when you guys are actively creating it.
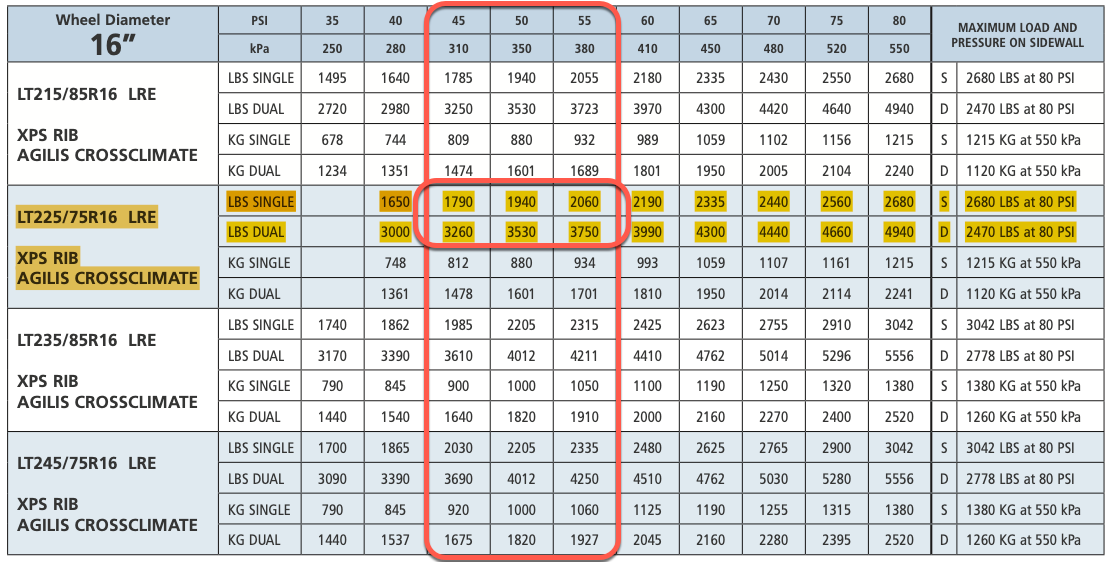
With my new Michelin Agilis Crossclimates going on the trailer next week, they will still be brand spanking new by the time I make it to the rally, let the inspection begin. 😉 I have doubts that I will be able to tell any difference from my original 2015 Michelin LTs, while driving. It sounds like I will be just fine staying within 45 to 55 PSI, no matter how heavy I load the trailer and maintaining 7000 lbs, unless I load up with too much good Lagar. 🙂
Many of us continue to learn from these forums. Thank you all! It's really appreciated by me.
-
6
-
-
Thanks @Hokieman. I knew that info was around here somewhere. I just couldn't find it.
-
So I've ordered my Michelin Agilis CrossClimate #72022 (225/75R16) If I estimate my OE-II is approximately 6000 with a light load for camping, is this chart saying that 40 PSI per tire can handle the trailer load, at 1650 lbs x 4 wheels = 6600 lbs total? Am I reading that right?
40 PSI seems low to me. My current original Michelin LTs I typically run around 55-60 with a light load.
What would you experts do here?
Michelin-Agilis-Climate-Control-Inflation-Chart-for-RV-Usage.pdf
-
That surprises me since my windows are from 2015 or 16 and the rubber is in perfect shape. I wonder if the window manufacturer changed materials.
-
I should do a charity fund and have bidding wars. Great promo for Oliver. LOL
-
1
-
 1
1
-
-
3 minutes ago, Patriot said:
If you have it, bring it to the rally, I will take it off your hands if you decide not to install it.
Patriot🇺🇸
Will do.
It will make me feel good after ordering new tires for Wayfinder. 😞
-
1
-
1
-
-
If I decide not to use the new Bulb Seal, I'll just send it to whoever needs a new one. Just pay shipping, seal will be free. Save someone $66 bucks.
-
Appreciate your time @Patriot
-
2
-
-
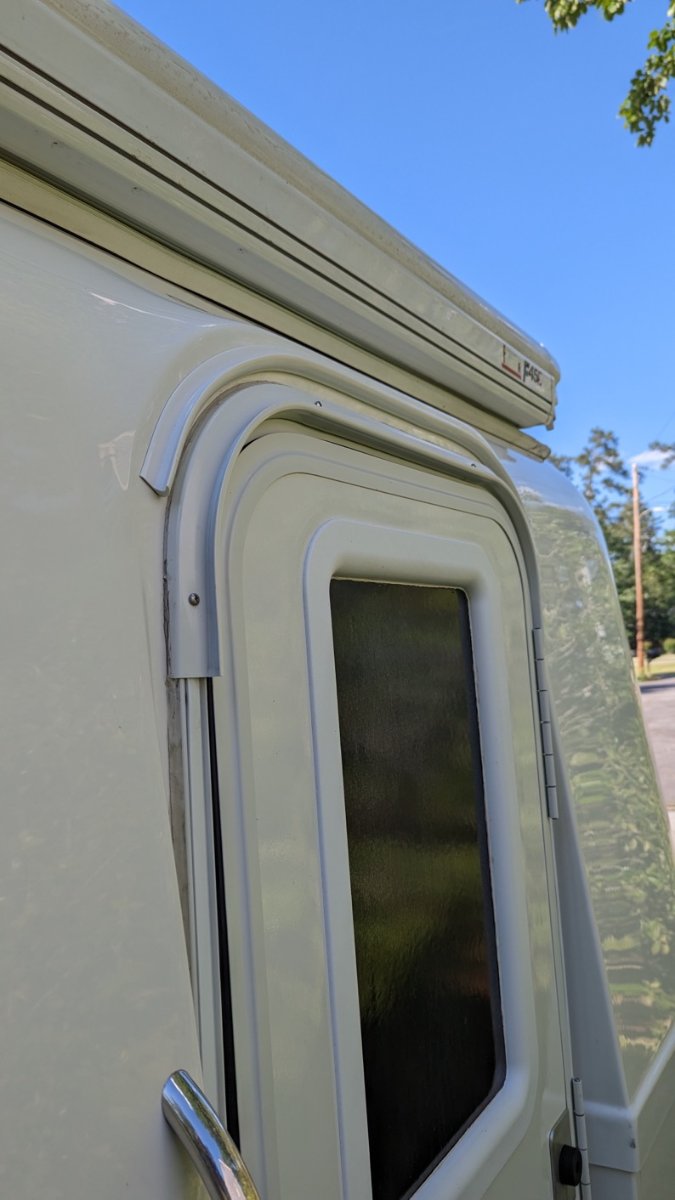
I'm still thinking about this. I really don't like the Bulb seal solution at all. I'm thinking tree junk and heavy winds.
Maybe nothing will meet everyone's needs, because we're not "Borg", but I'm going to see what seems to work best for me. Right now, I'll try without the Bulb seal or anything else. Than see how it is to sit under the canopy in a good rain storm. I would suspect my sitting area would get wetter faster, on the ground and under a mat, if I have one laid out.
-
@Patriot Can you tell how big those holes are in the awning mounts? Maybe take a drill bit to them to see?! We don't want people making to large of a hole and compromising the integrity of the mounts.
Would a quick picture help see what it looks like?
Do you know if Oliver has made that their new standard, or did you ask for them to drill the weep holes in the mounting brackets?
Pulling off and cleaning that Bulb seal was a PAIN.
-
I was even considering my left-over gutter guard in lieu of the bulb seal. That way heavy water, and wind, could still pass thru under the awning mount, yet light to moderate rain could be channeled via the gutter guard? I'll do some critical thinking on that one.
-
1
-
-
It will be nice to put faces to names. Now the task will be to remember real names to Forum (and/or FB) handles. I'll need a database I'm sure. LOL
I just now thought of it, and it's likely too late, but I'm having an artist friend of mine create a graphic of the Oliver to put on a T-Shirt. Maybe with the trailer name on it. We'll see.
-
1
-
-
1 minute ago, Mike and Carol said:
I did mine on a hot day. I left the EZ Gutter on my black tonneau cover for a half hour or so, very pliable after that. Mike
HA, I tried the same exact thing, then the sun got blocked by clouds. Dryer it was. Hehe.
-
4
-
-
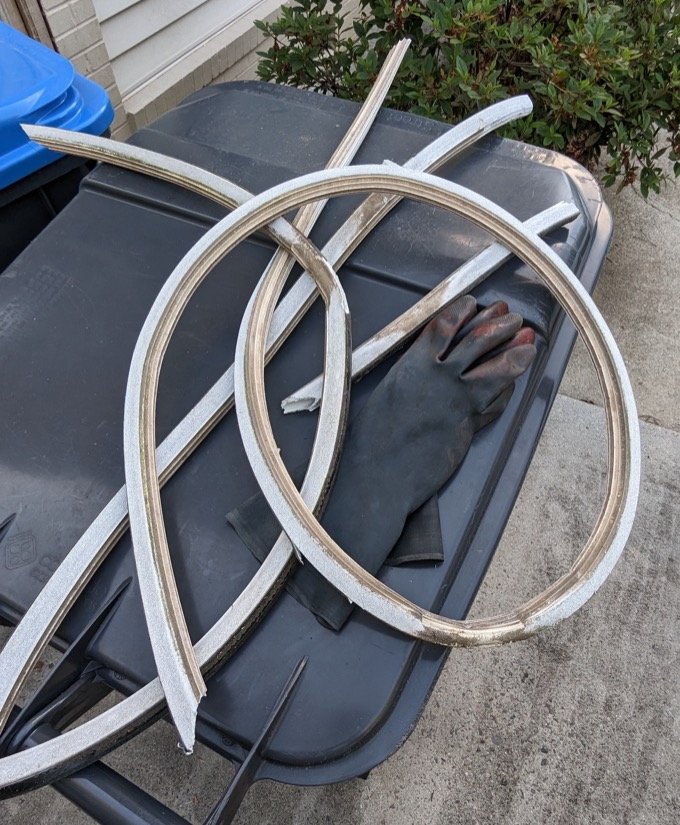
Wow, I'm pooped. Even with 3M General Purpose Adhesive Cleaner (08984), a 3M Scratch Brite sponge, and flat razor, it was a "BLEEP" to get the sticky residue off the hull. Thankfully the Bulb seal was only sticking well to half the trailer. Still took me over an hour to scrub-down and get clean. There's still grime to pressure wash off, but I think I will like it better than having the seal on the trailer. Time will tell. I have the new seal on the way, if I change my mind. I have already installed a EZE Gutter Guard over the door, just to keep the door seal, what's left of it, drier. I'm not sure if I will have time to pull off the door and reseal before the rally. Who wants to help? LOL 😜
I'm mean, it's not like raising a barn! 🙂
Pro tip: Putting the Gutter guard in the dryer for 15 minutes with some rags quickly softens up the rubber to make it go around curves easier. I had no sun that day.
-
5
-
-
I called Matt and he confirm I was good-to-go. He also forwarded the confirmation. I still could not find the original after knowing what to search for. No biggy. They won't throw me out of the park, that's all I care about. LOL
-
1
-
1
-
-
1 minute ago, ScubaRx said:
If those Michelins were on your truck would you be getting rid of them?
Ordering them in the morning. Errrrggggg.
-
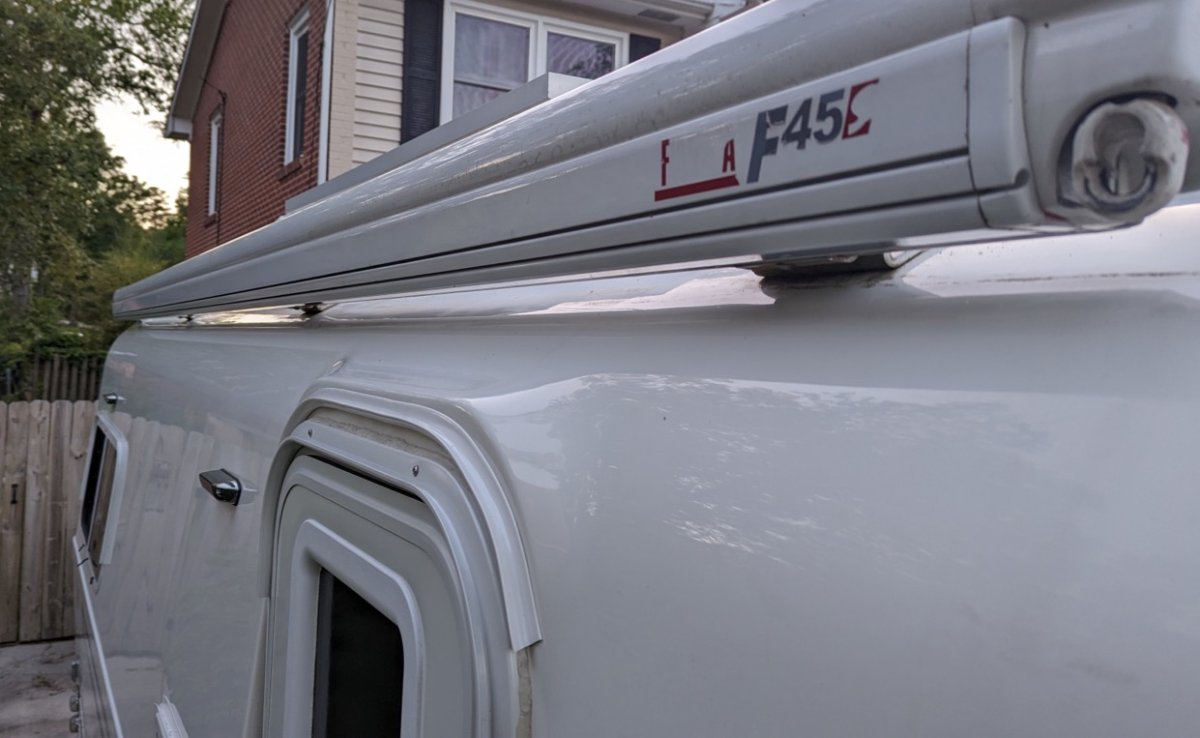
I just ordered from Oliver, what they call the Bulb seal (18 ft ~ $66). That large rubber-like material that goes directly under the awning mount/housing.
My bulb seal has been leaking in some areas, especially over the entry door; and since the door needs resealing to the hull it's time to replace. However.....
I'm still not convinced I want the bulb seal there at all. Someone on the forums mentioned they removed it due to the gathering of tree junk. I'm considering taking my old one off and seeing what I think of it. Yesterday I did place a small EZE Gutter Guard strip over my door frame, to divert heavy rain water from hitting the top of the door frame. Not sure I'll get to resealing the door frame before the rally. I'm not retired, dang it.

-
2
-
-
Well, my tire shop also just recommended the Michelin Agilis Cross Climate LT (225/75R/16) quoted at $261 each.
Man, I HATE to get rid of what I have (Michelin LT), they look BRAND NEW! But they do have a year date of 15 on them. What a shame, and waste.
I just don't want to take a chance though.
I'm going to have to put way more mileage on them then the previous owner. I promise myself! LOL
-
Now I need to dig deeper for dirt. I just need to get a "Go" and not a "No-Go" at this station. LOL


What does happen when pulling brake cable
in Mechanical & Technical Tips
Posted
Thanks @John E Davies , without ever touching them before, I love the Battleborn solution. I almost missed your suggestion, but just now saw it as I updated this thread. I've been trying to be more active here as I'm finally able to get out and camp this year. Hope to meet many of you at the rally.