

John E Davies
-
Posts
5,759 -
Joined
-
Last visited
-
Days Won
243
Posts posted by John E Davies
-
-
I have a Chevy diesel with a 200amp alternator, which can run all day and is quieter than the generator. Battery’s will charge quickly.
With a modern diesel with emissions equipment this is not a very prudent practice, for several reasons. No worries with the generator.
John Davies
Spokane WA
-
 1
1
-
-
If you want the microwave and plan to boondock, you absolutely need solar panels, the inverter and the four batteries. My microwave pulls 75 amps from the batteries for many long minutes....The alternative is to run your big generator a lot, which is irritating to everyone. Solar is dead silent and most always chugs away without any of your attention. If you will stay plugged in most of the time, you do not need it. The people who don’t buy panels tend to be those living in the east, where there are limited places to boondock.
If you want to have your Ollie available for a long term emergency like hurricane Francis, get solar and the composting toilet!
If you want to visit the desert West and stay at other than RV parks, solar and the composting toilet are must-have options. IMHO....
BTW with solar, you never need to plug in at a full hookup site, unless you want to run the AC.
The trailer looks a lot better without them on the roof, and it will affect the resale value a little, but they can always be added later, since the wiring inside the ceiling is in place already.
You will need a 2000 watt or bigger generator anyway, if you want to run the AC while off grid. If it is 90 degrees and 100% humidity, or 115 degrees in the desert, it is essential. You can’t always seek a higher cooler location.
Finally, I have never heard of anyone who switched to solar power in an RV that wanted to go back to the old way. It’s time for you to come over from the corrupting power of The Dark Side. May the Solar Force be with you.... ;)
Much good info here .... https://www.rvwithtito.com/articles/solar-for-your-rv
Can you post a pic of your sailboat?
John Davies
Spokane WA
-
1
-
-
Thanks for all the advice and good information. I appreciate the response. Off today to replace the plug.
Remember that you can have the exact same problems with the other connector, the one on your truck. Clean it occasionally. If it is a factory one and made of plastic it should be reliable for many years, if an aftermarket one, who knows? An old add-on socket with a silver steel housing is a time bomb. The corrosion will short out the hot wire(s) to the housing and blow a fuse. I have seen old steel ones that were a rusty nightmare inside.
Good luck.
John Davies
Spokane WA
-
That is pretty gross, but I guess you found your problem. That blue-green glop is corrosion and it is conductive, so current is flowing where it should not. You can clean it up with isopropyl alcohol or electric contact cleaner (not a harsh one like brake cleaner) and an old toothbrush. That will probably keep you on the road for a few months.
As bad as that looks, I would consider putting a complete new harness on the trailer. The inside of the wires, the copper conductors, are also corroded and you can't clean that.... There is really no way to stop moisture from entering, but it is OK to seal the back where the cable enters to keep out water, using silicone sealer, and always leave the plug hanging downward when not hooked to your truck. That way any moisture will hopefully drain out.
You should spray some cleaner inside annually at least, to just flush out the crud. If you have compressed air, blast it afterwards, watch your eyes!
This might help.... http://olivertraveltrailers.com/topic/how-to-junction-box-for-trailer-harness-repair-or-extend-the-harness/
Good luck,
John Davies
Spokane WA
-
You need to take the center part out of the housing to check for corrosion where the wires hook up inside. Usually there is a clamp where the cable enters in back, and also a small set screw that goes in from the side to anchor the inside part. I don’t have any pics, but I am pretty sure the Ollie one is built that way.
Those little lights are called running lights, the ones up top are clearance lights.
John Davies
Spokane WA
-
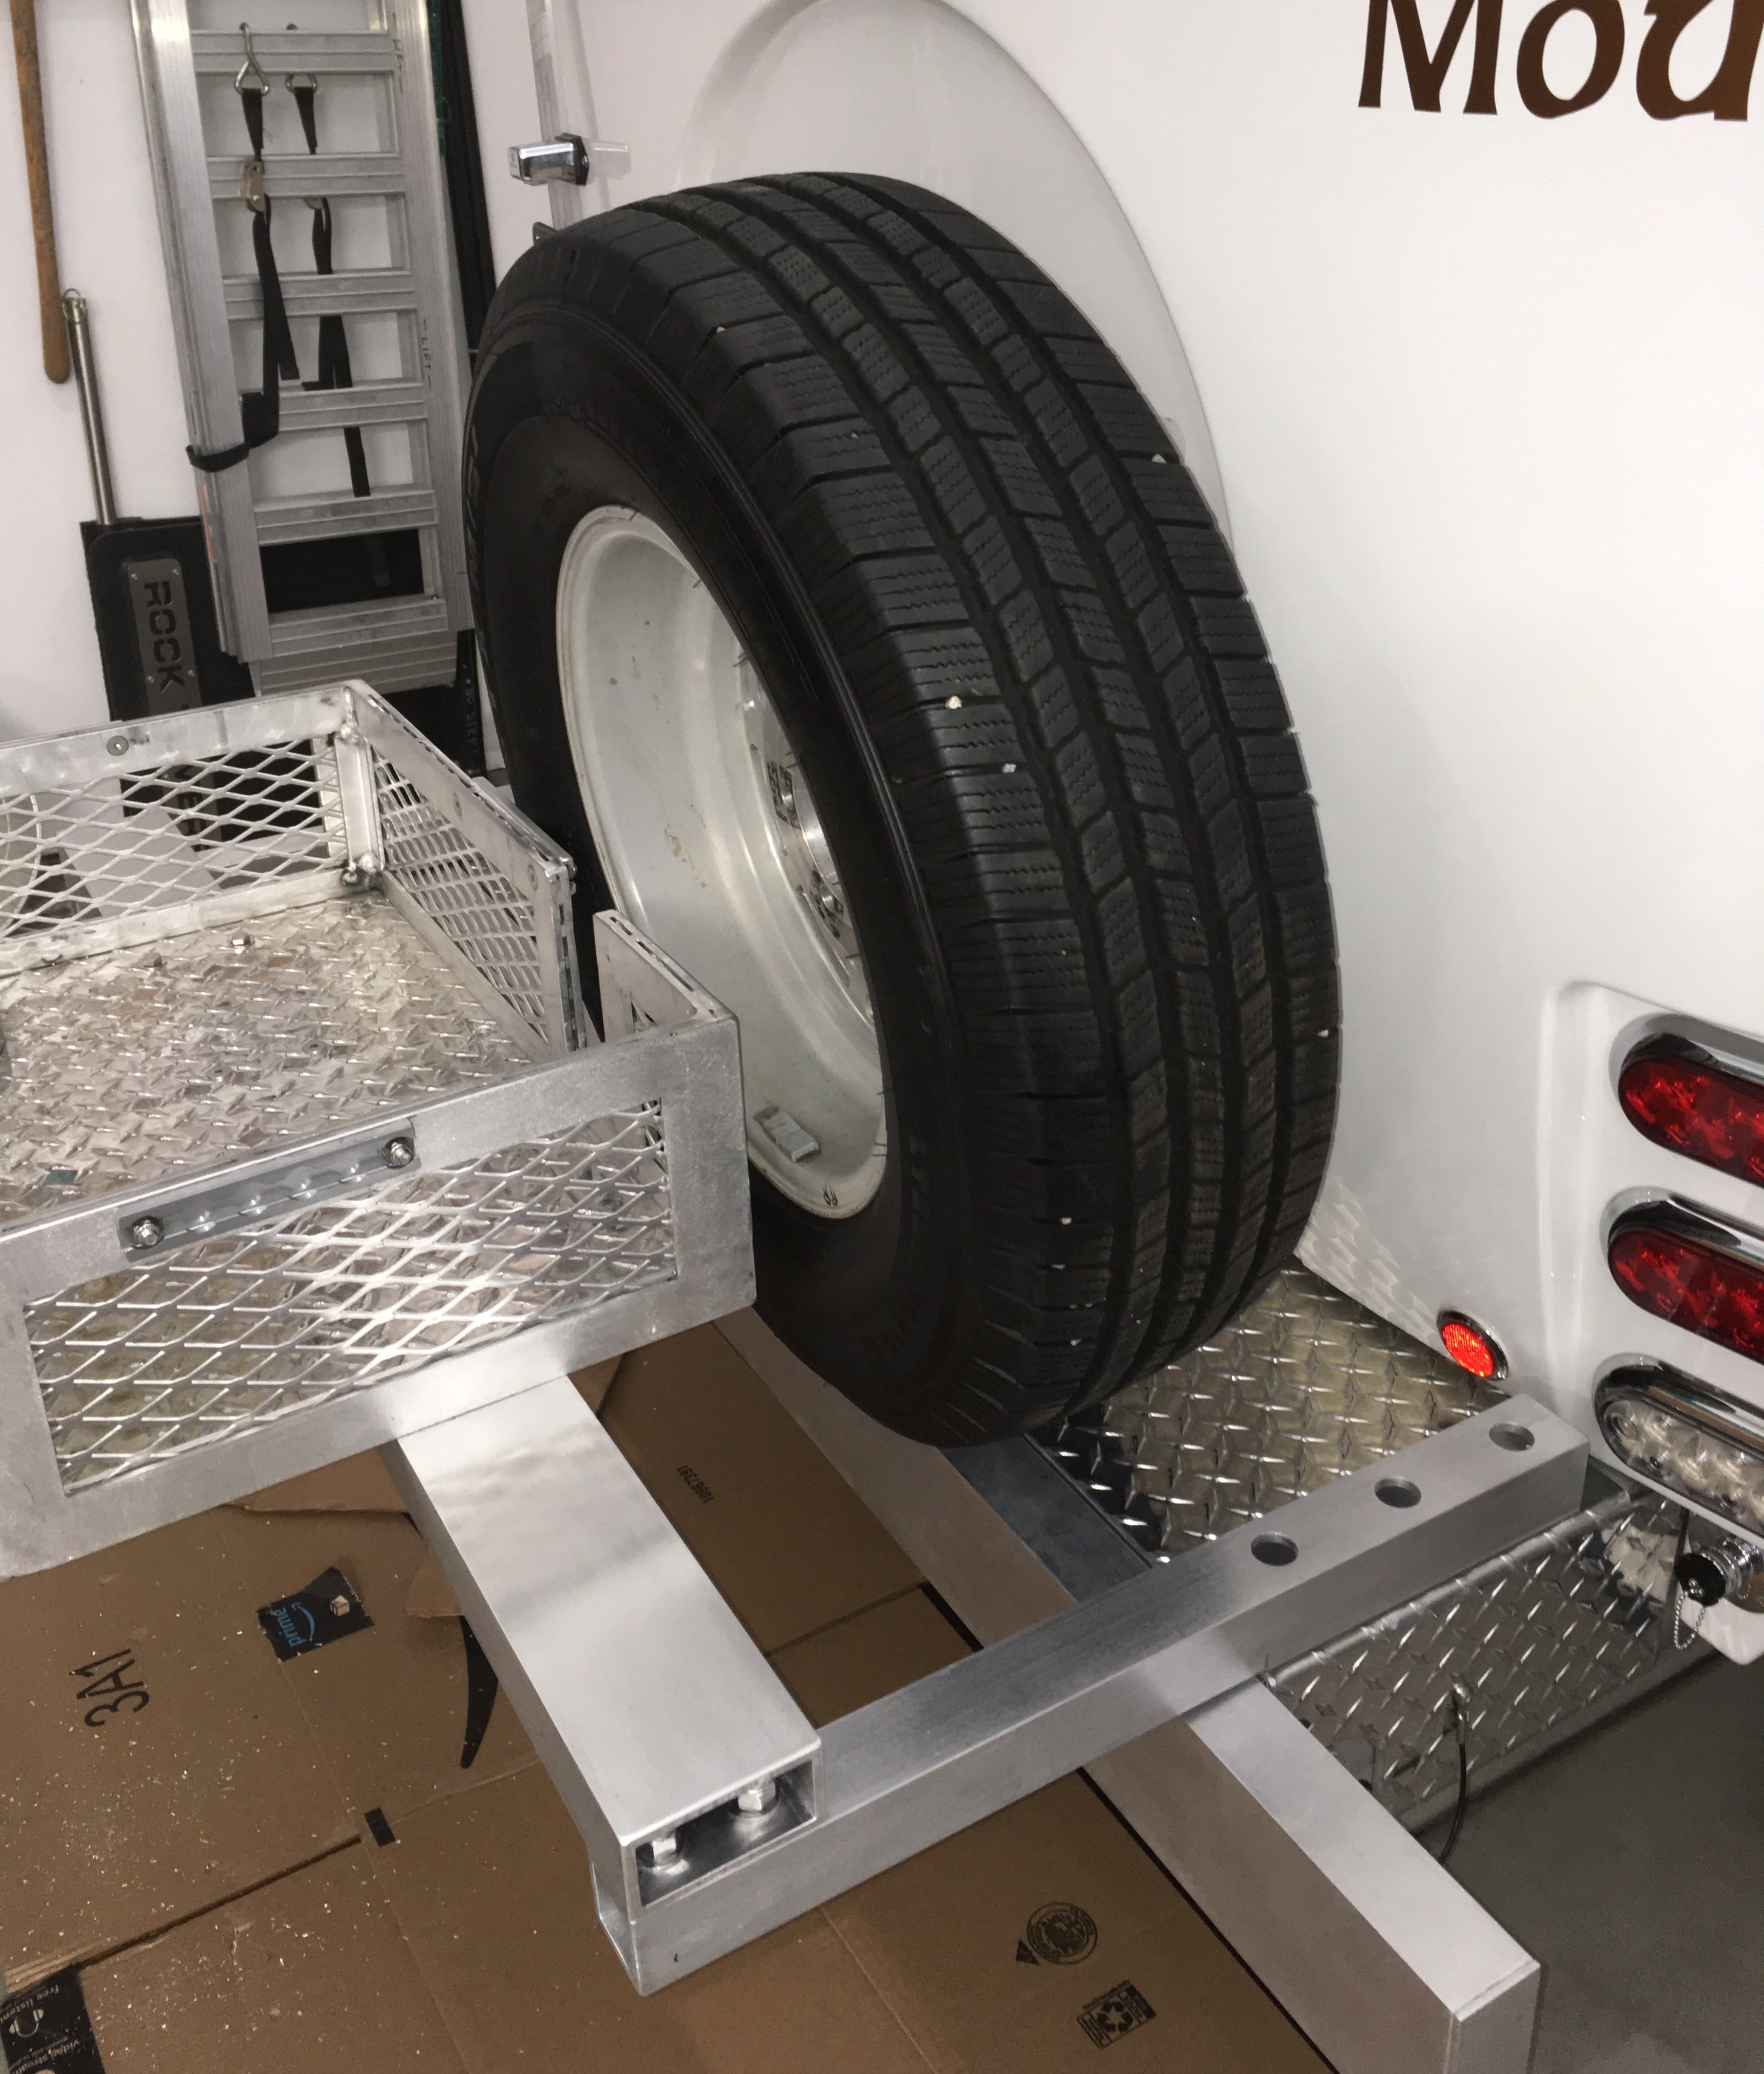
The spare tire will simply roll out to either side after you remove the big threaded rod in the center of the mount. You do not have to disturb the rack or any cargo. This will NOT work with a tire cover installed, for obvious reasons.

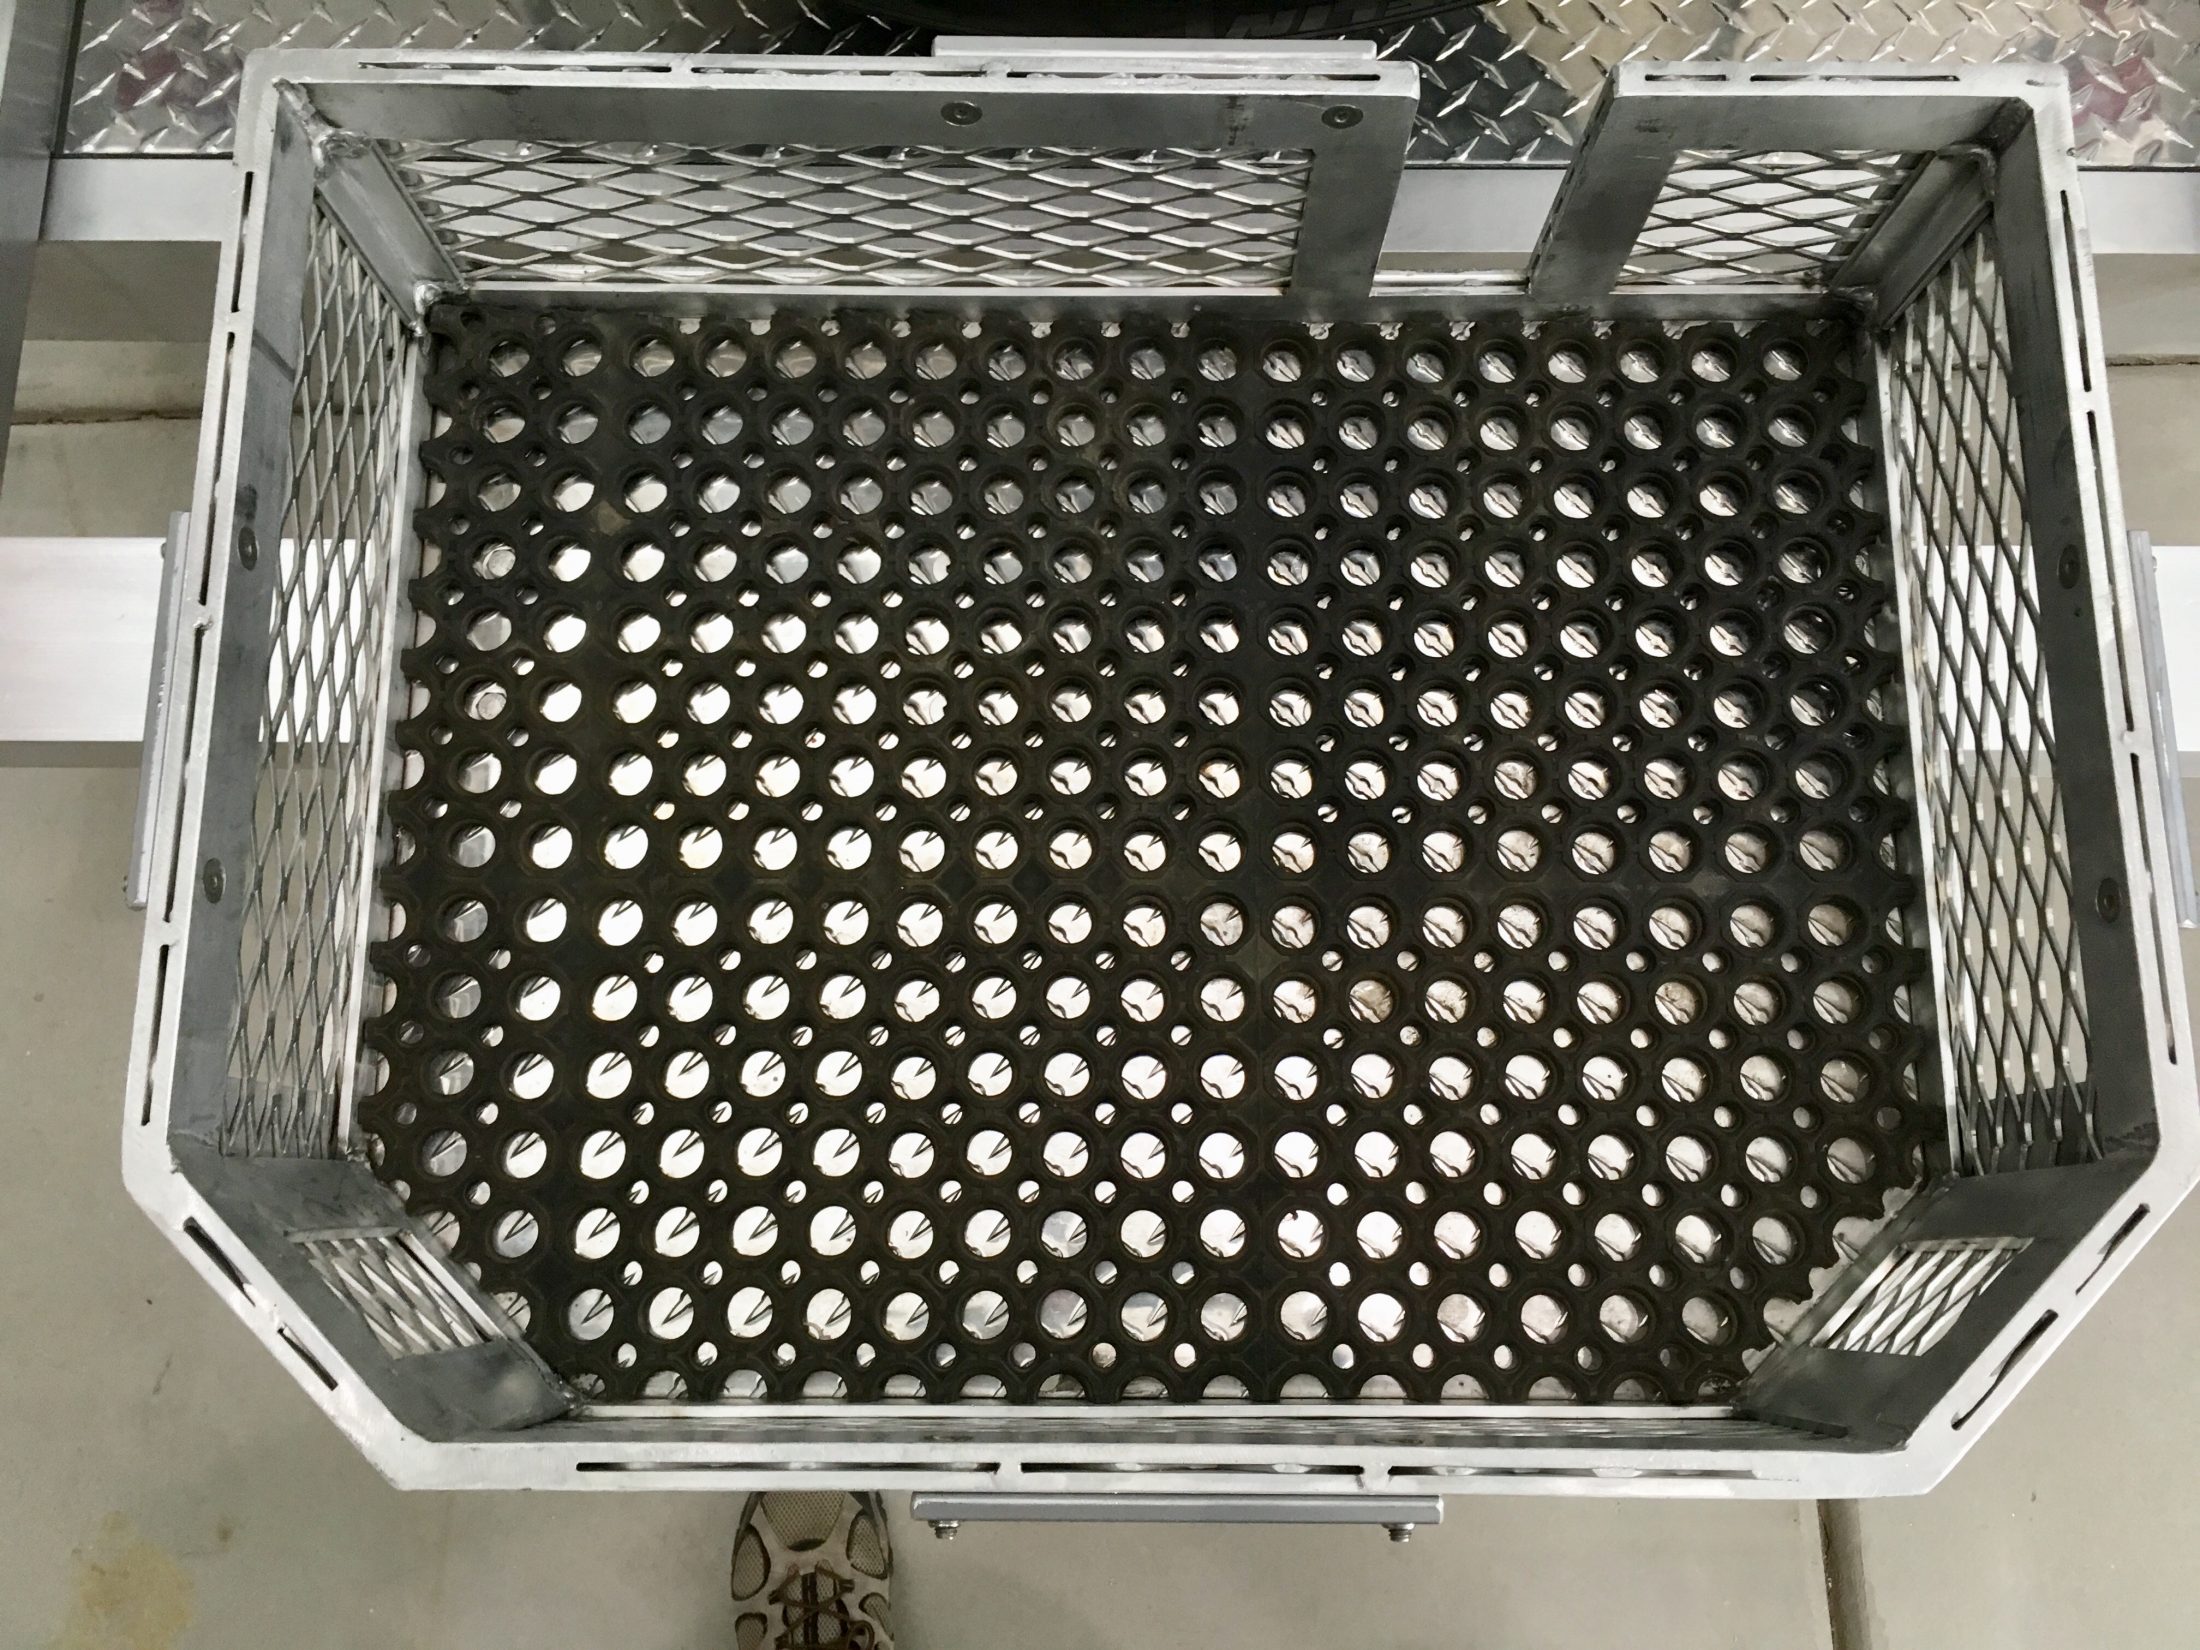
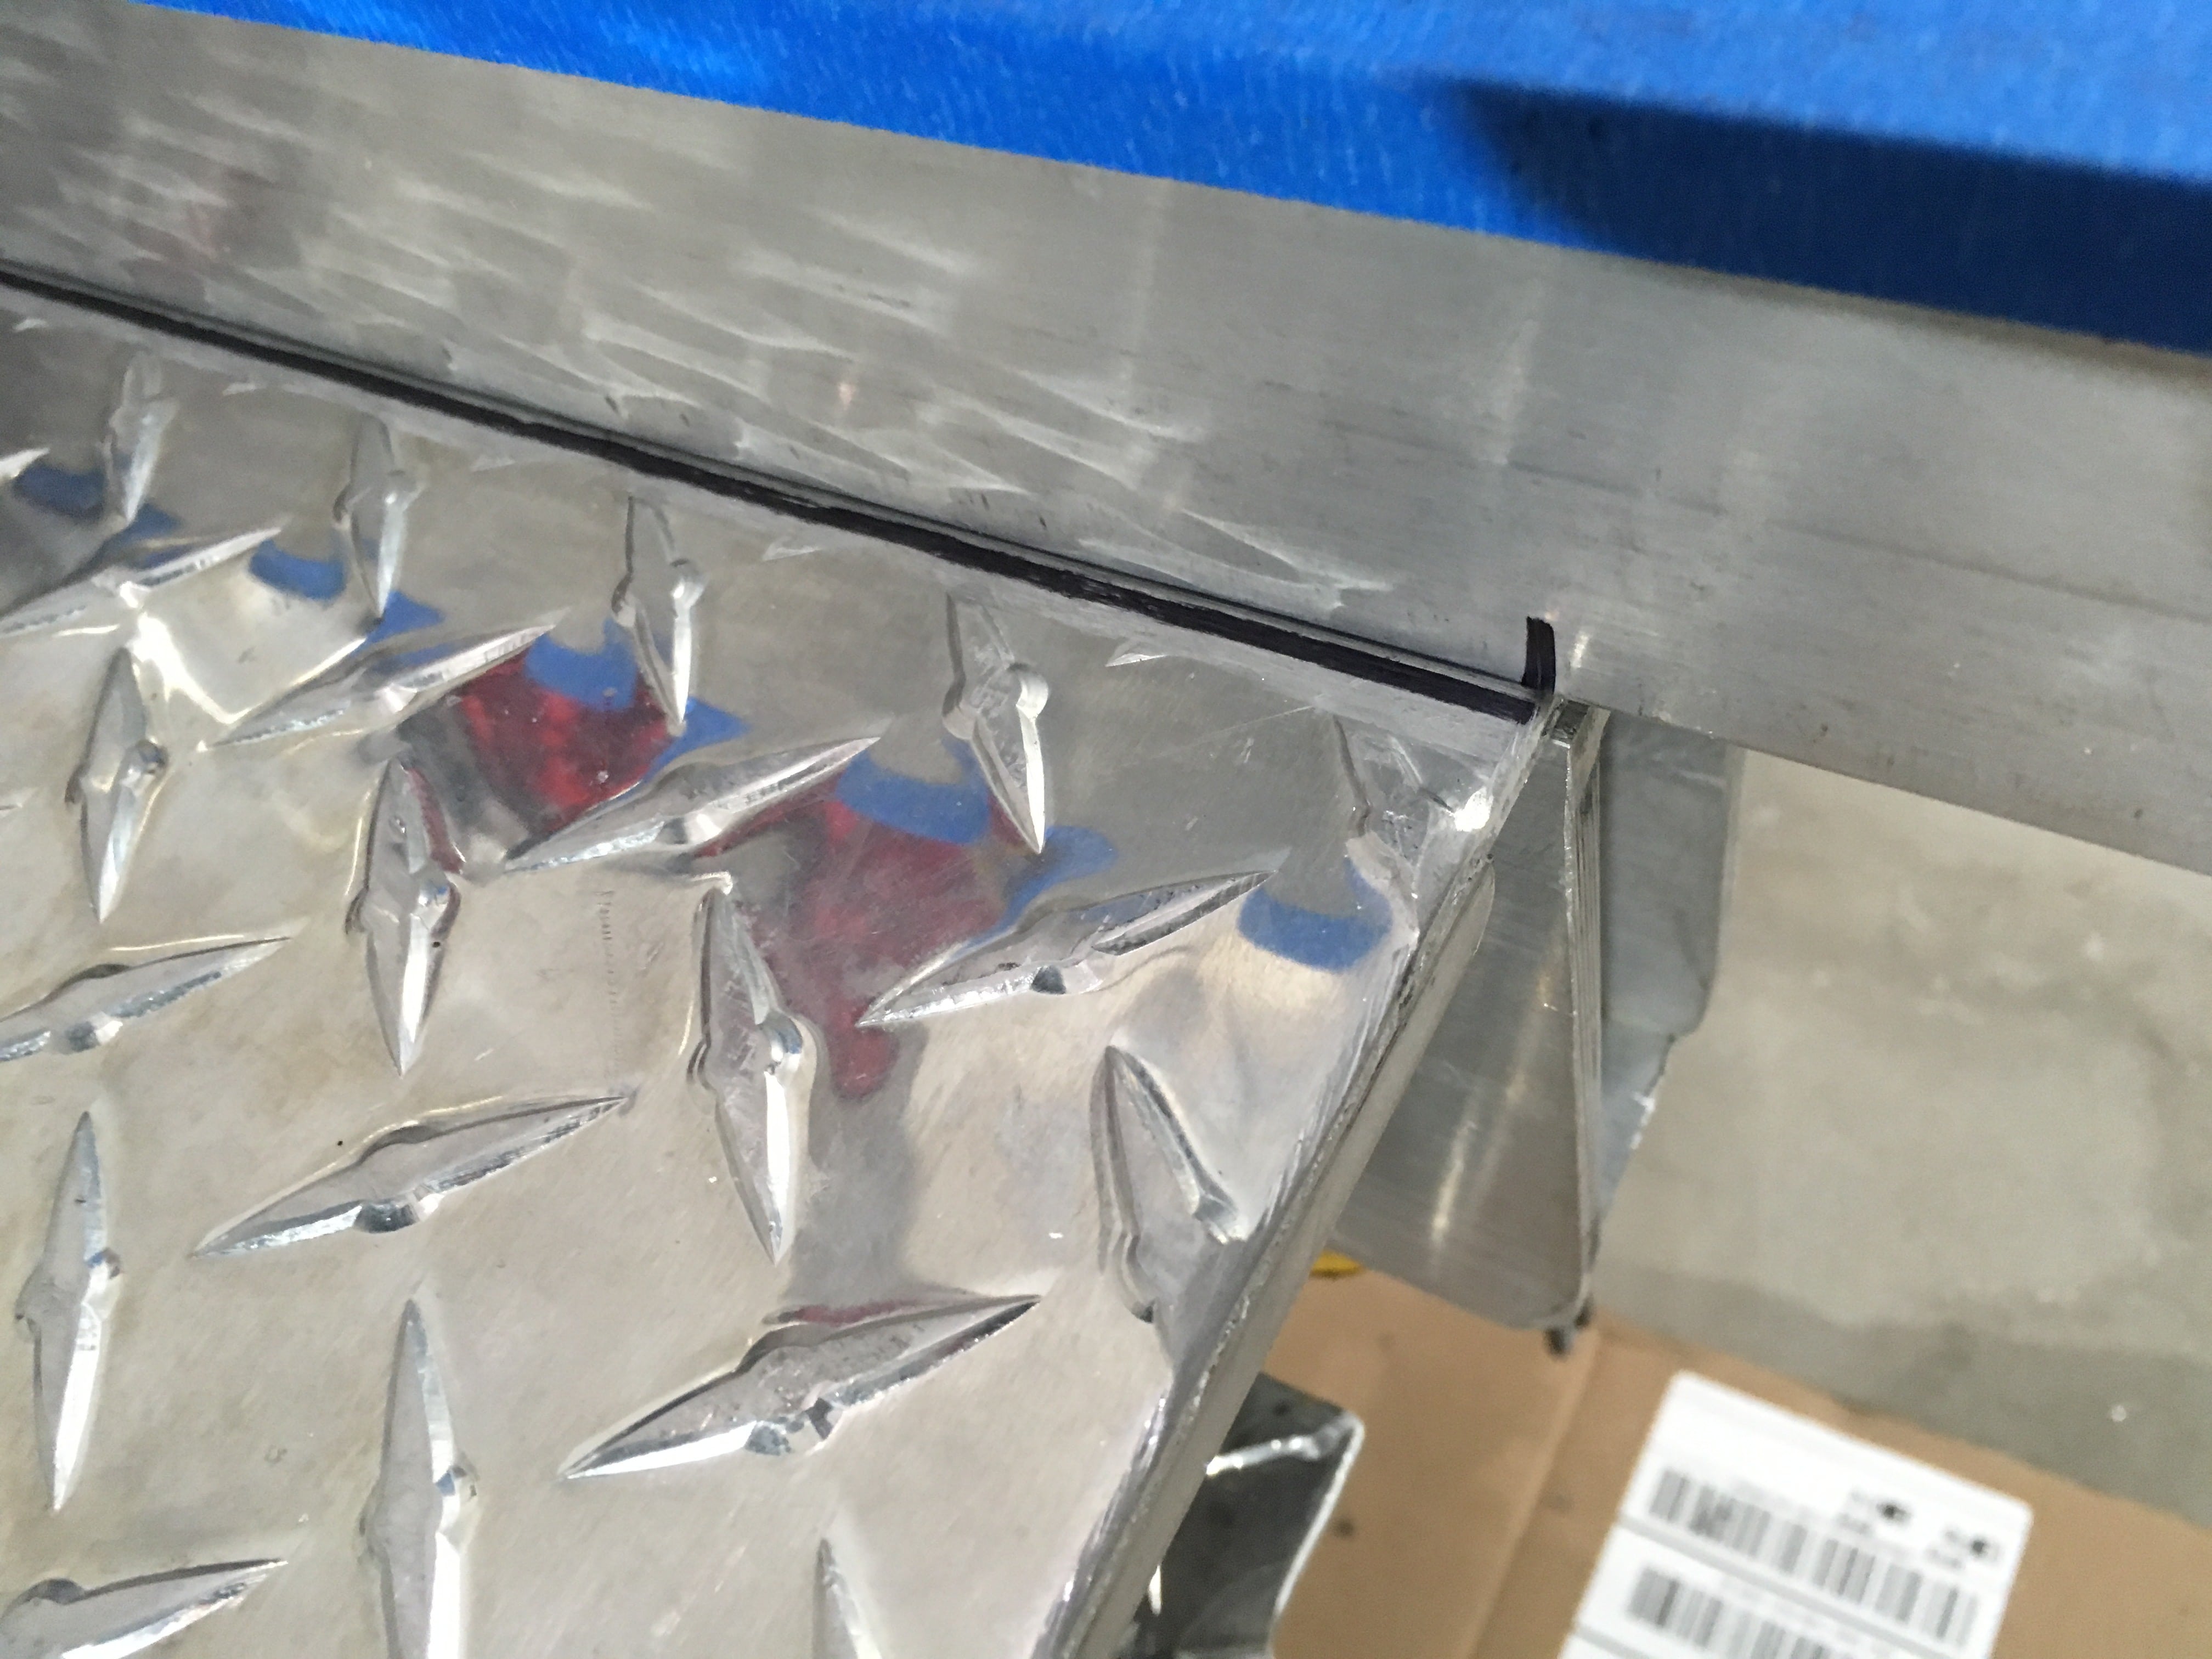
It is hard to see here, I was able to position the eight tray 3/8” holes so that the washers fit neatly between the raised diamonds, not straddling them, which is not so good:
[attachment file=IMG_8171 copy.jpg]
John Davies
Spokane WA
-
 1
1
-
-
-
-
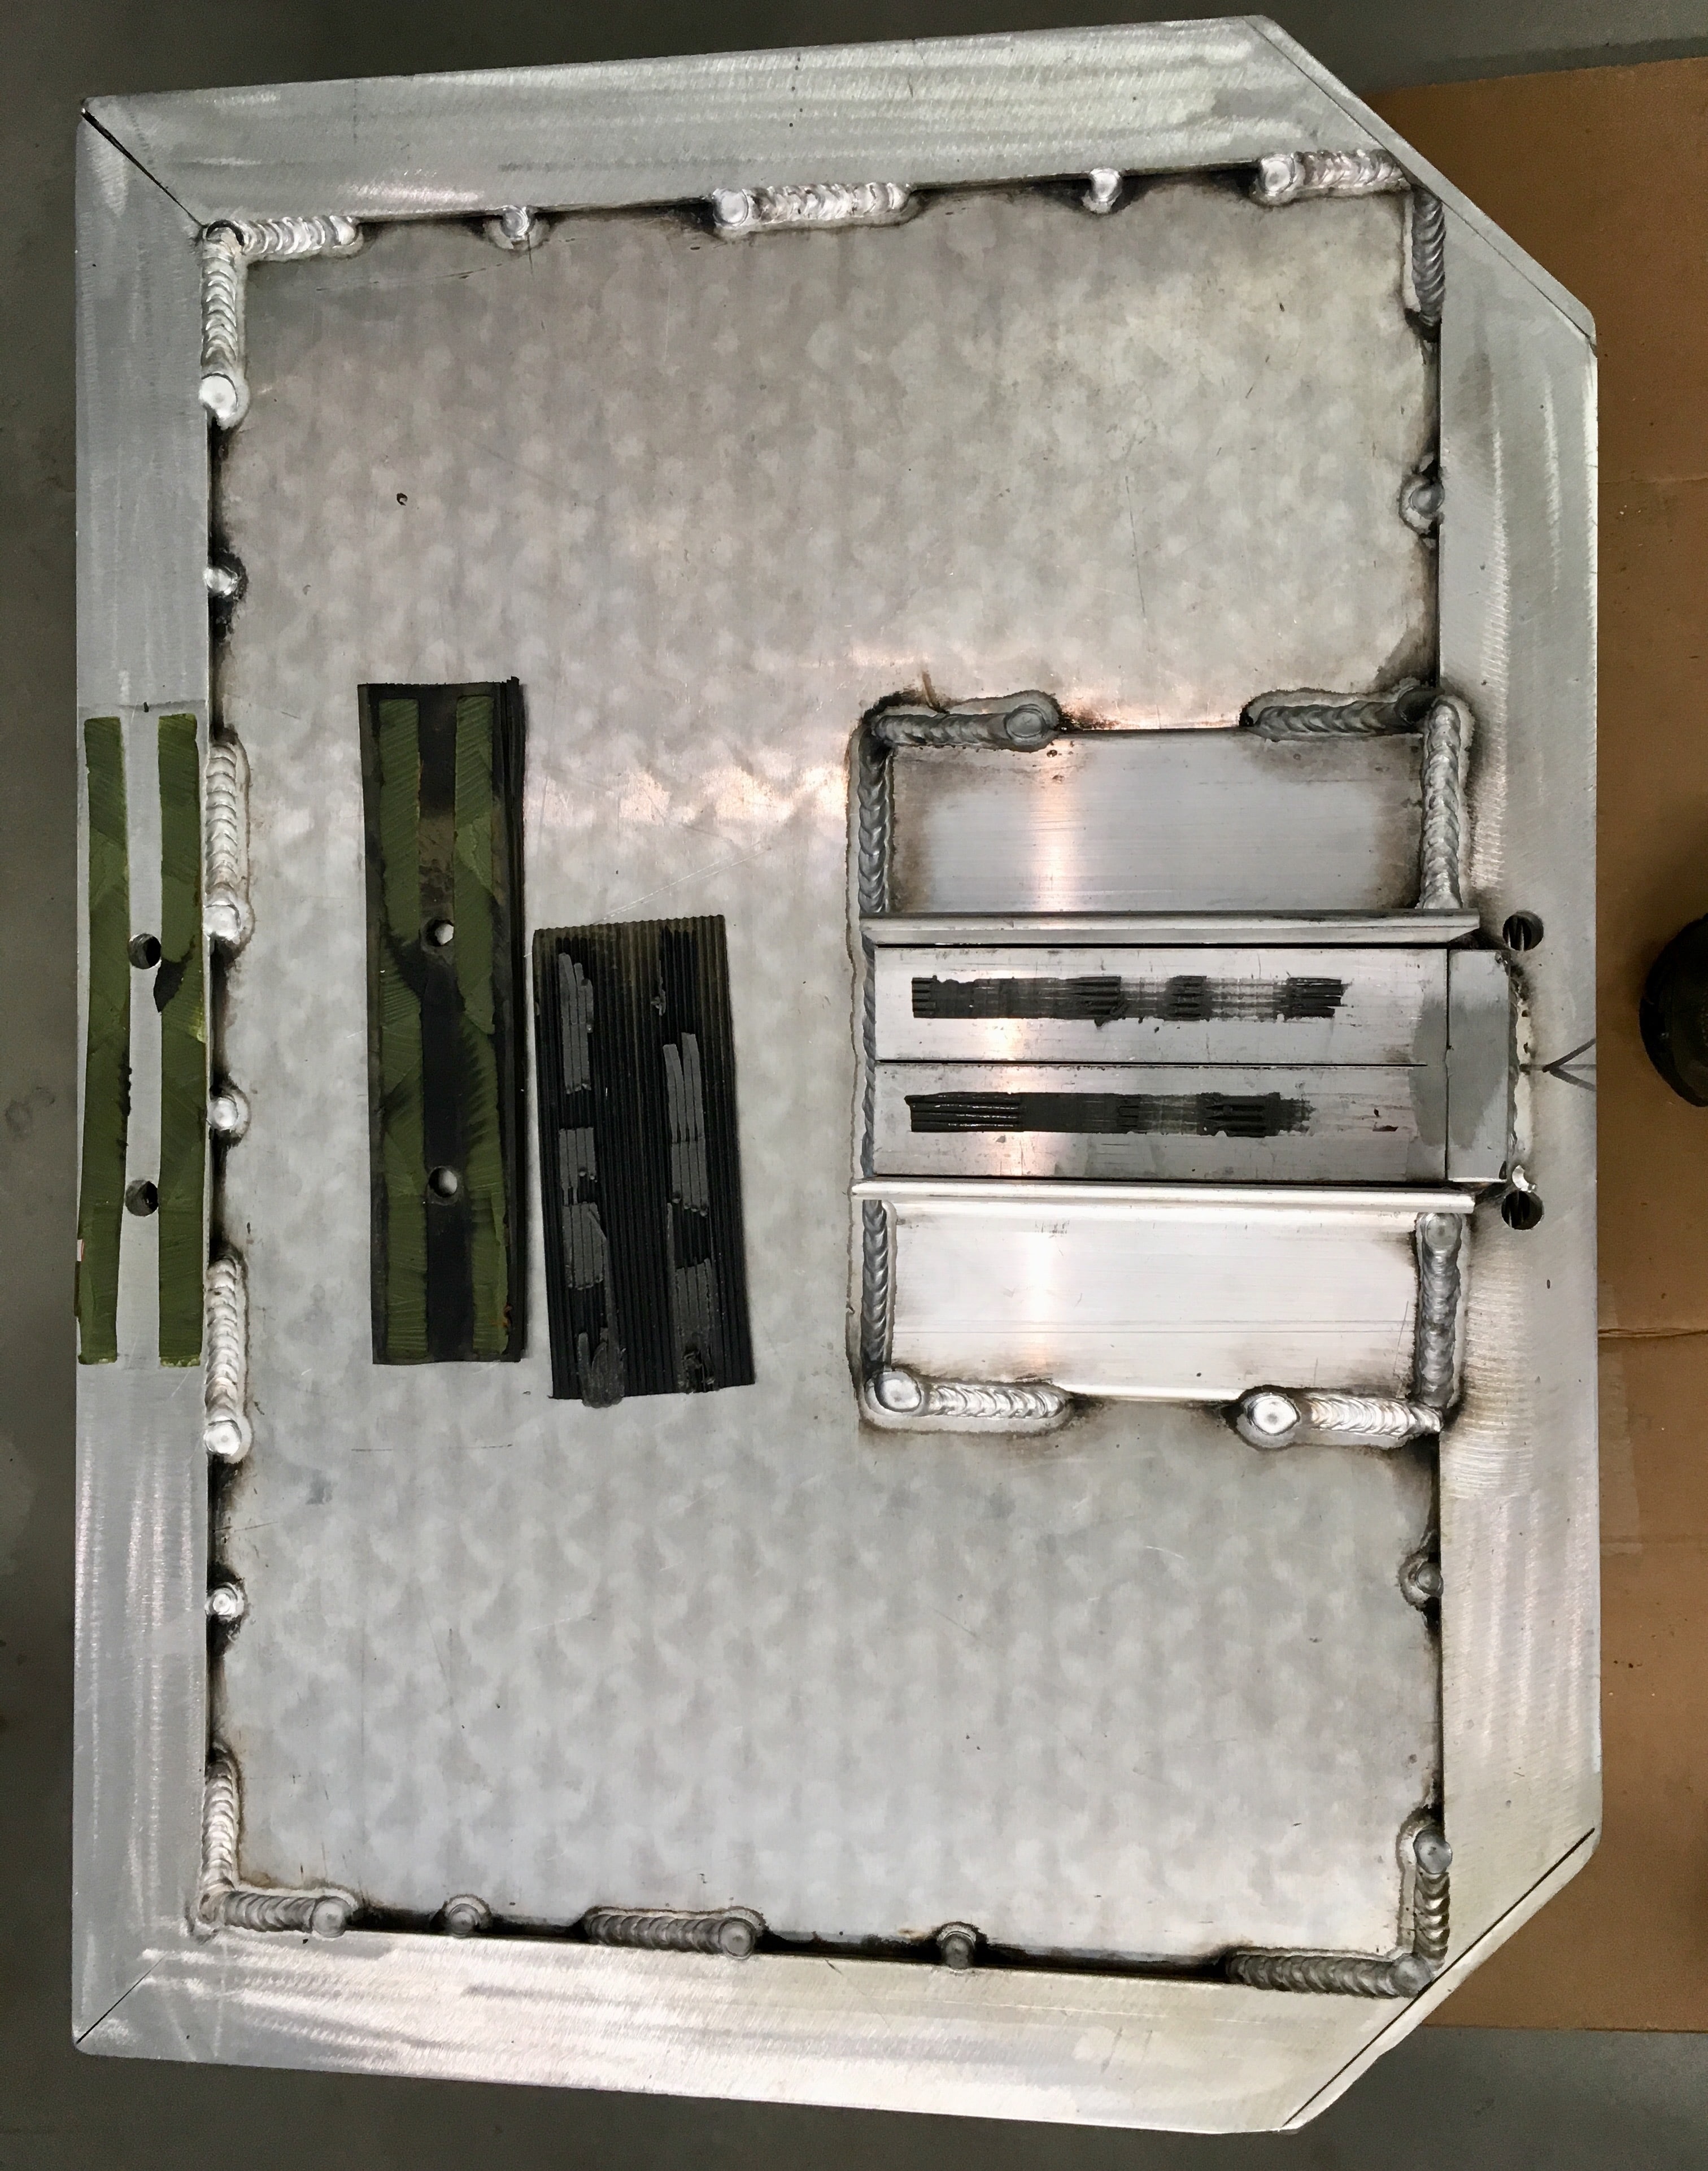
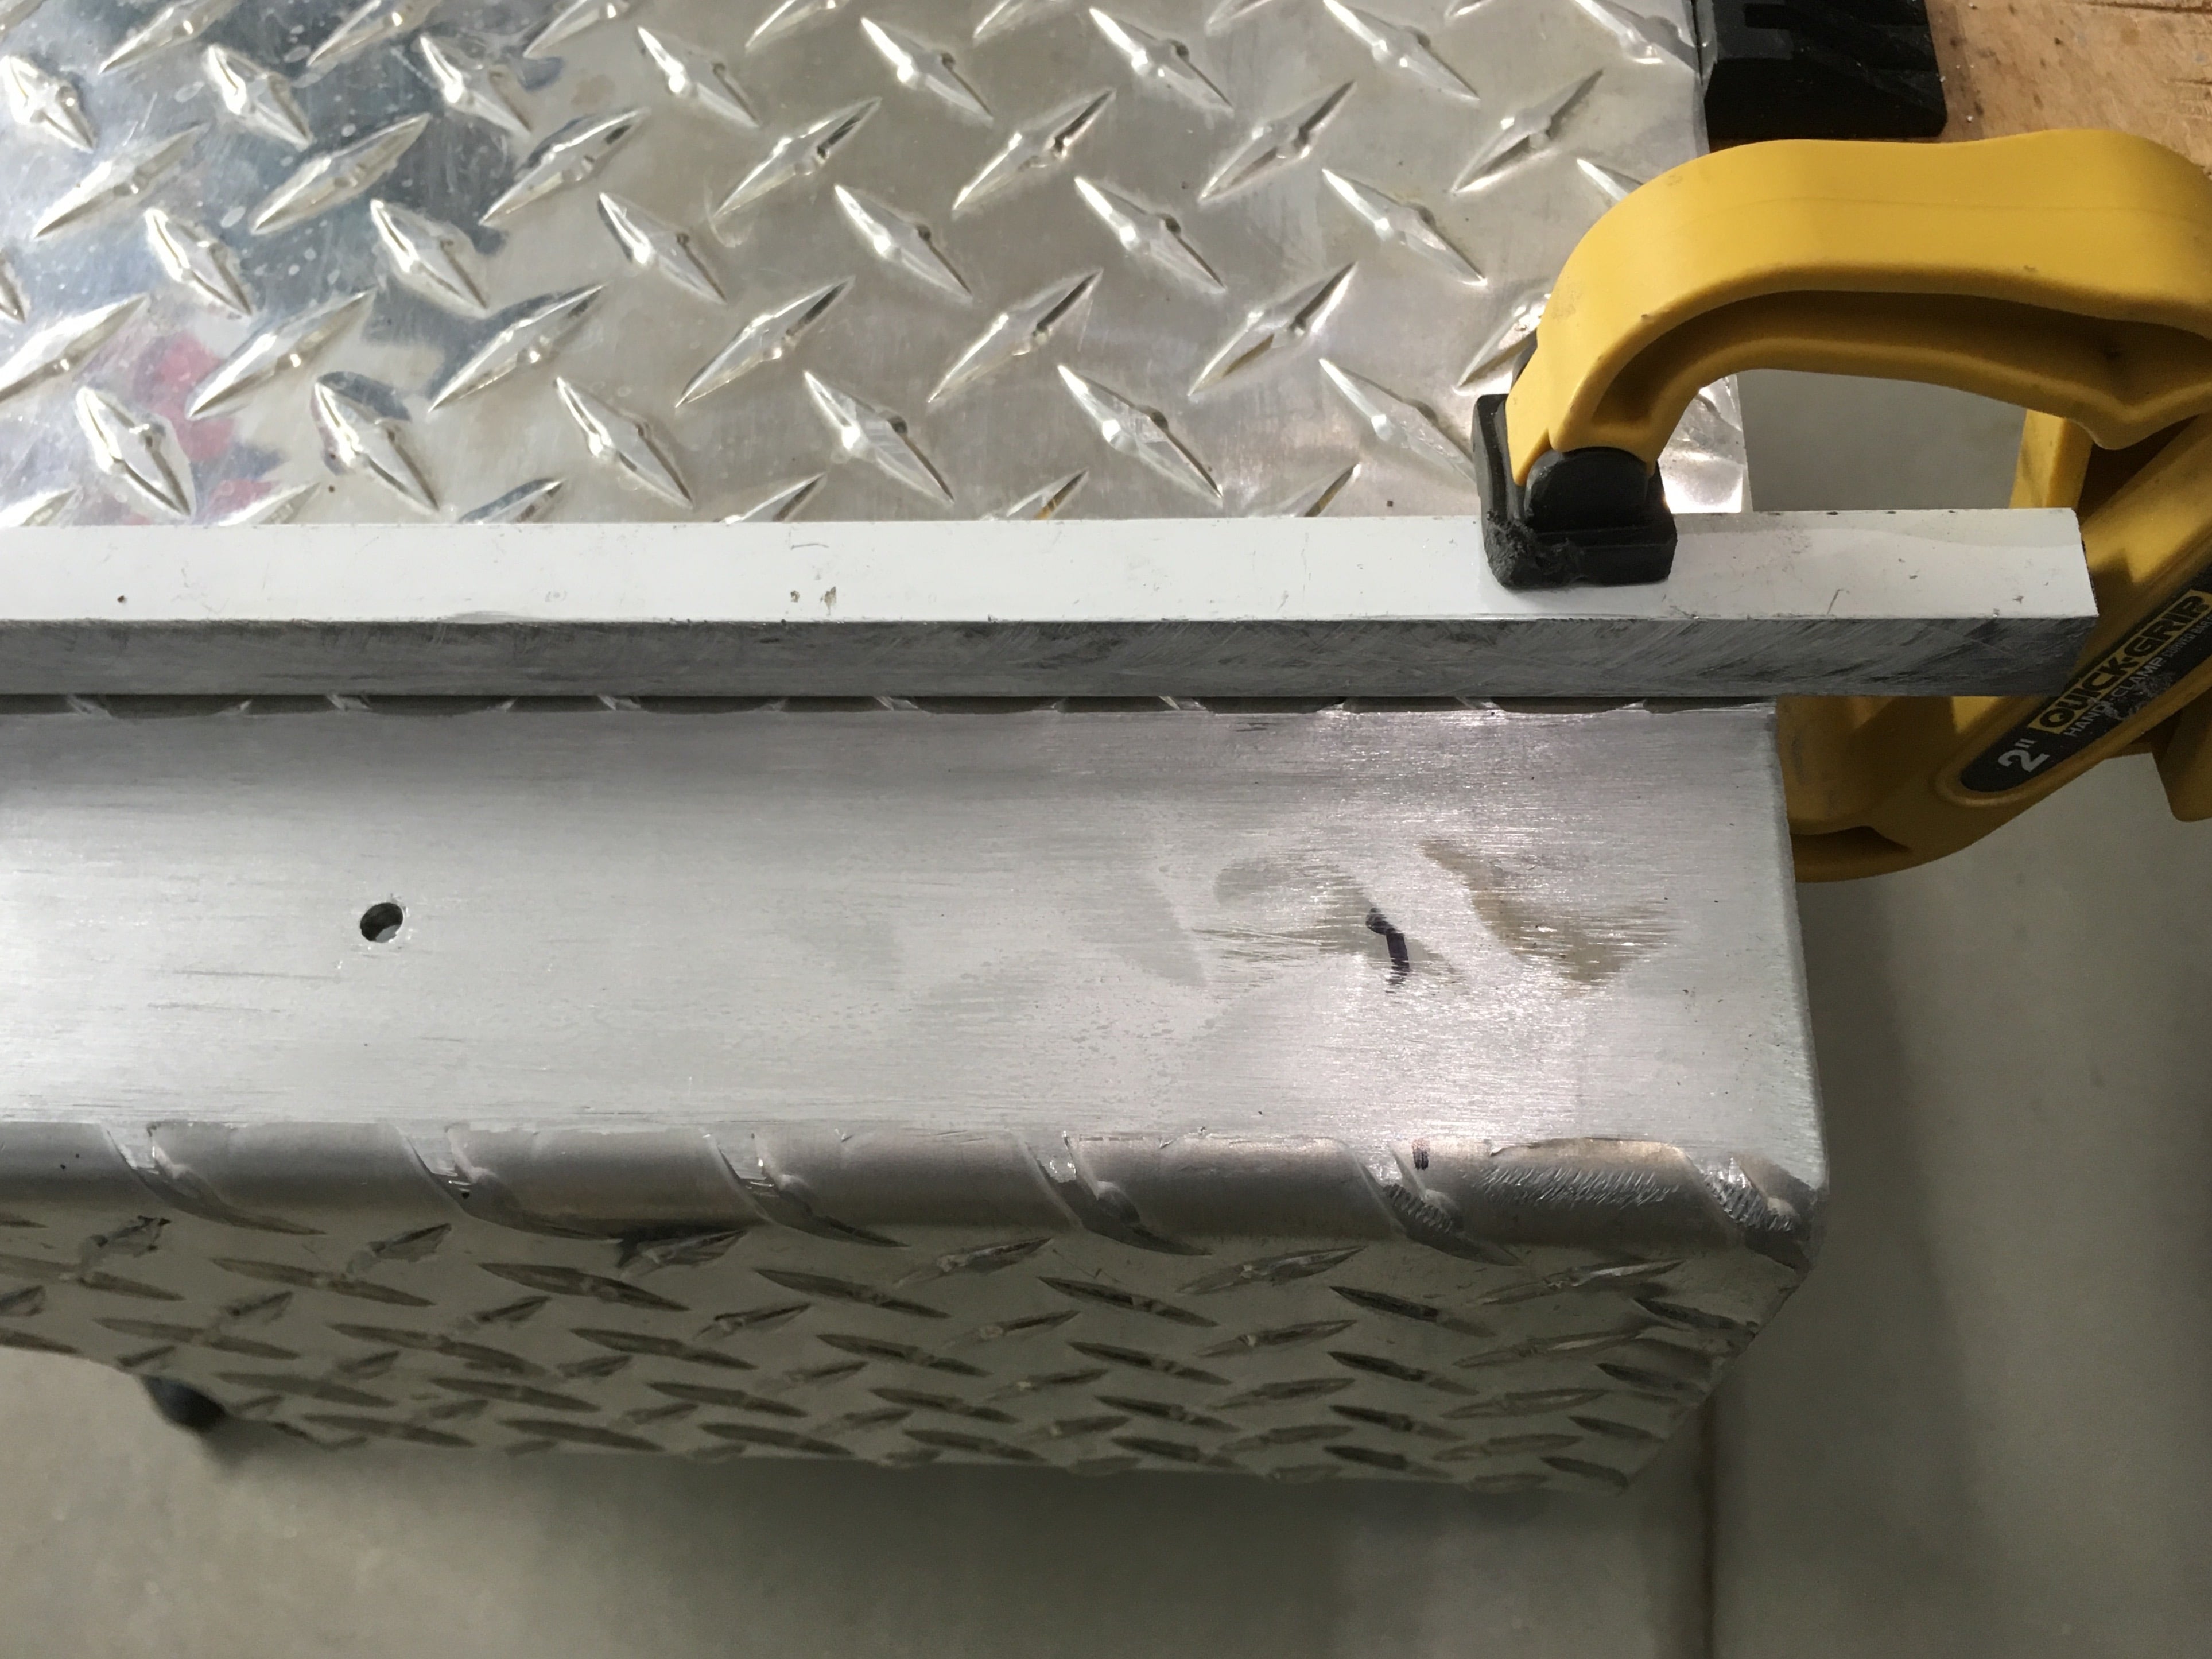
I used this scrap to make a guide bar to sand down the diamonds on the waste cover, using a handheld 3" belt sander:
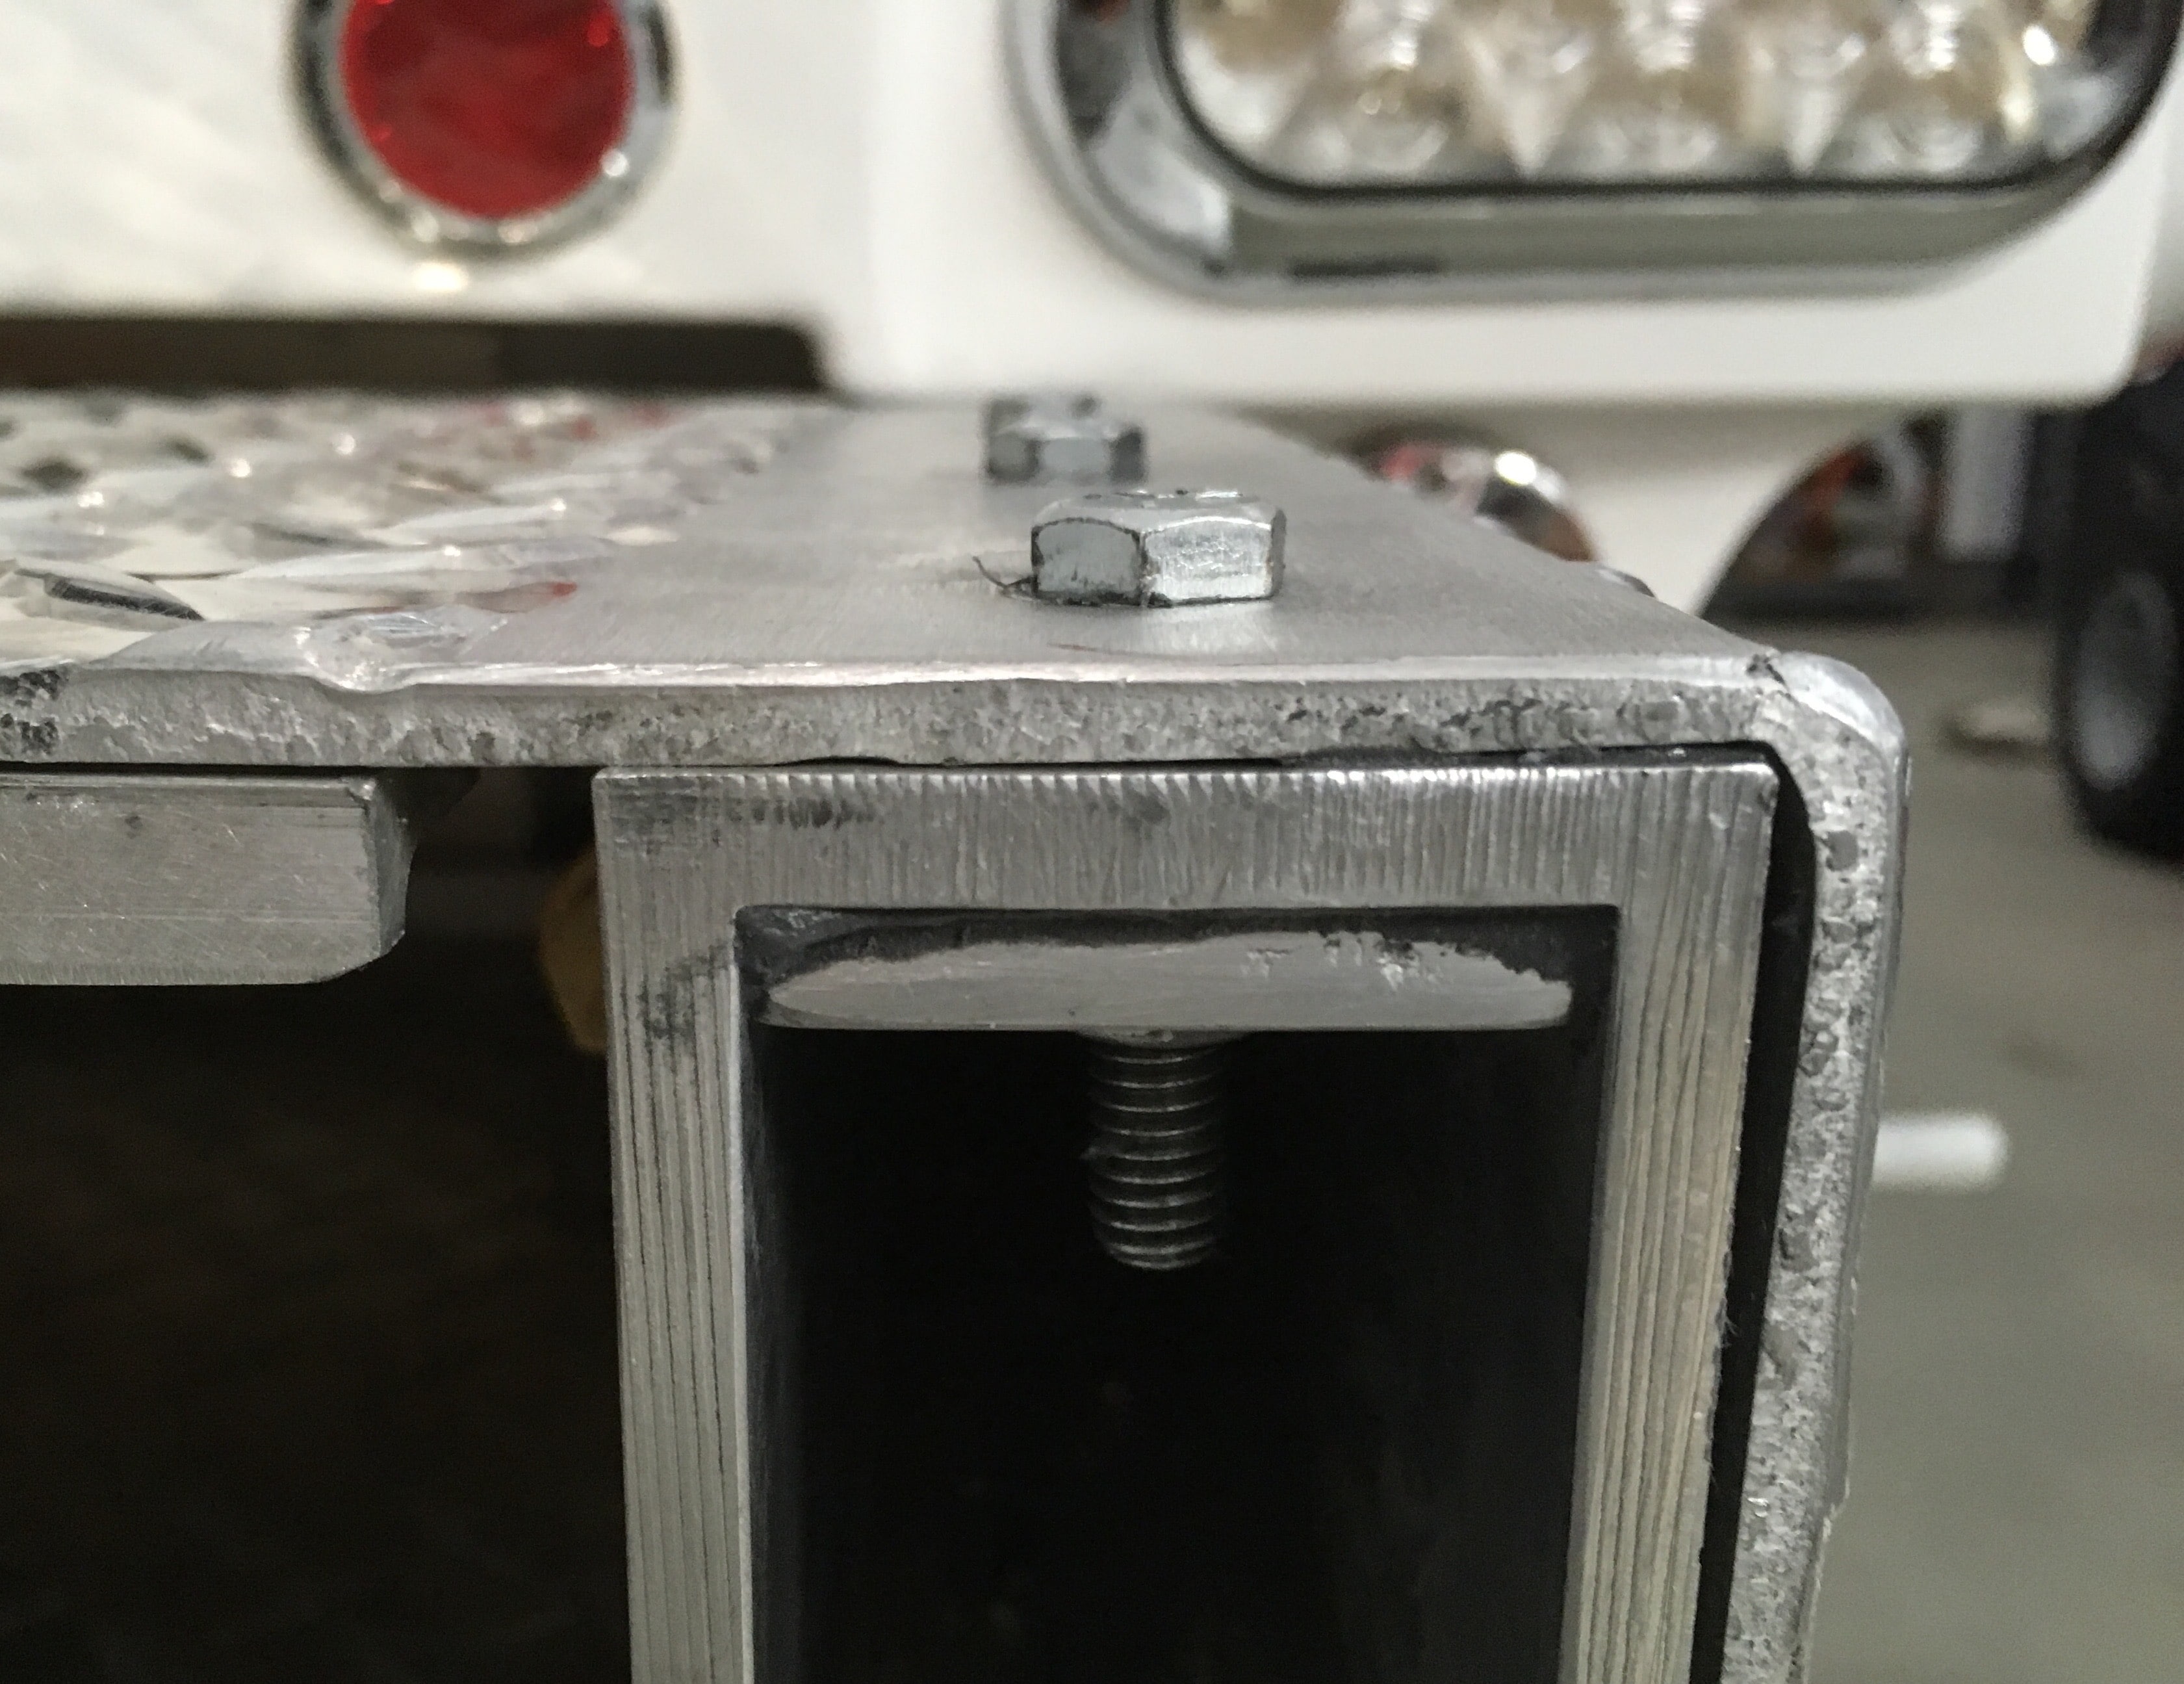
I bonded the plate under each frame rail with small bolts coated in vaseline, until cured.
More pics.
-
1
-
-
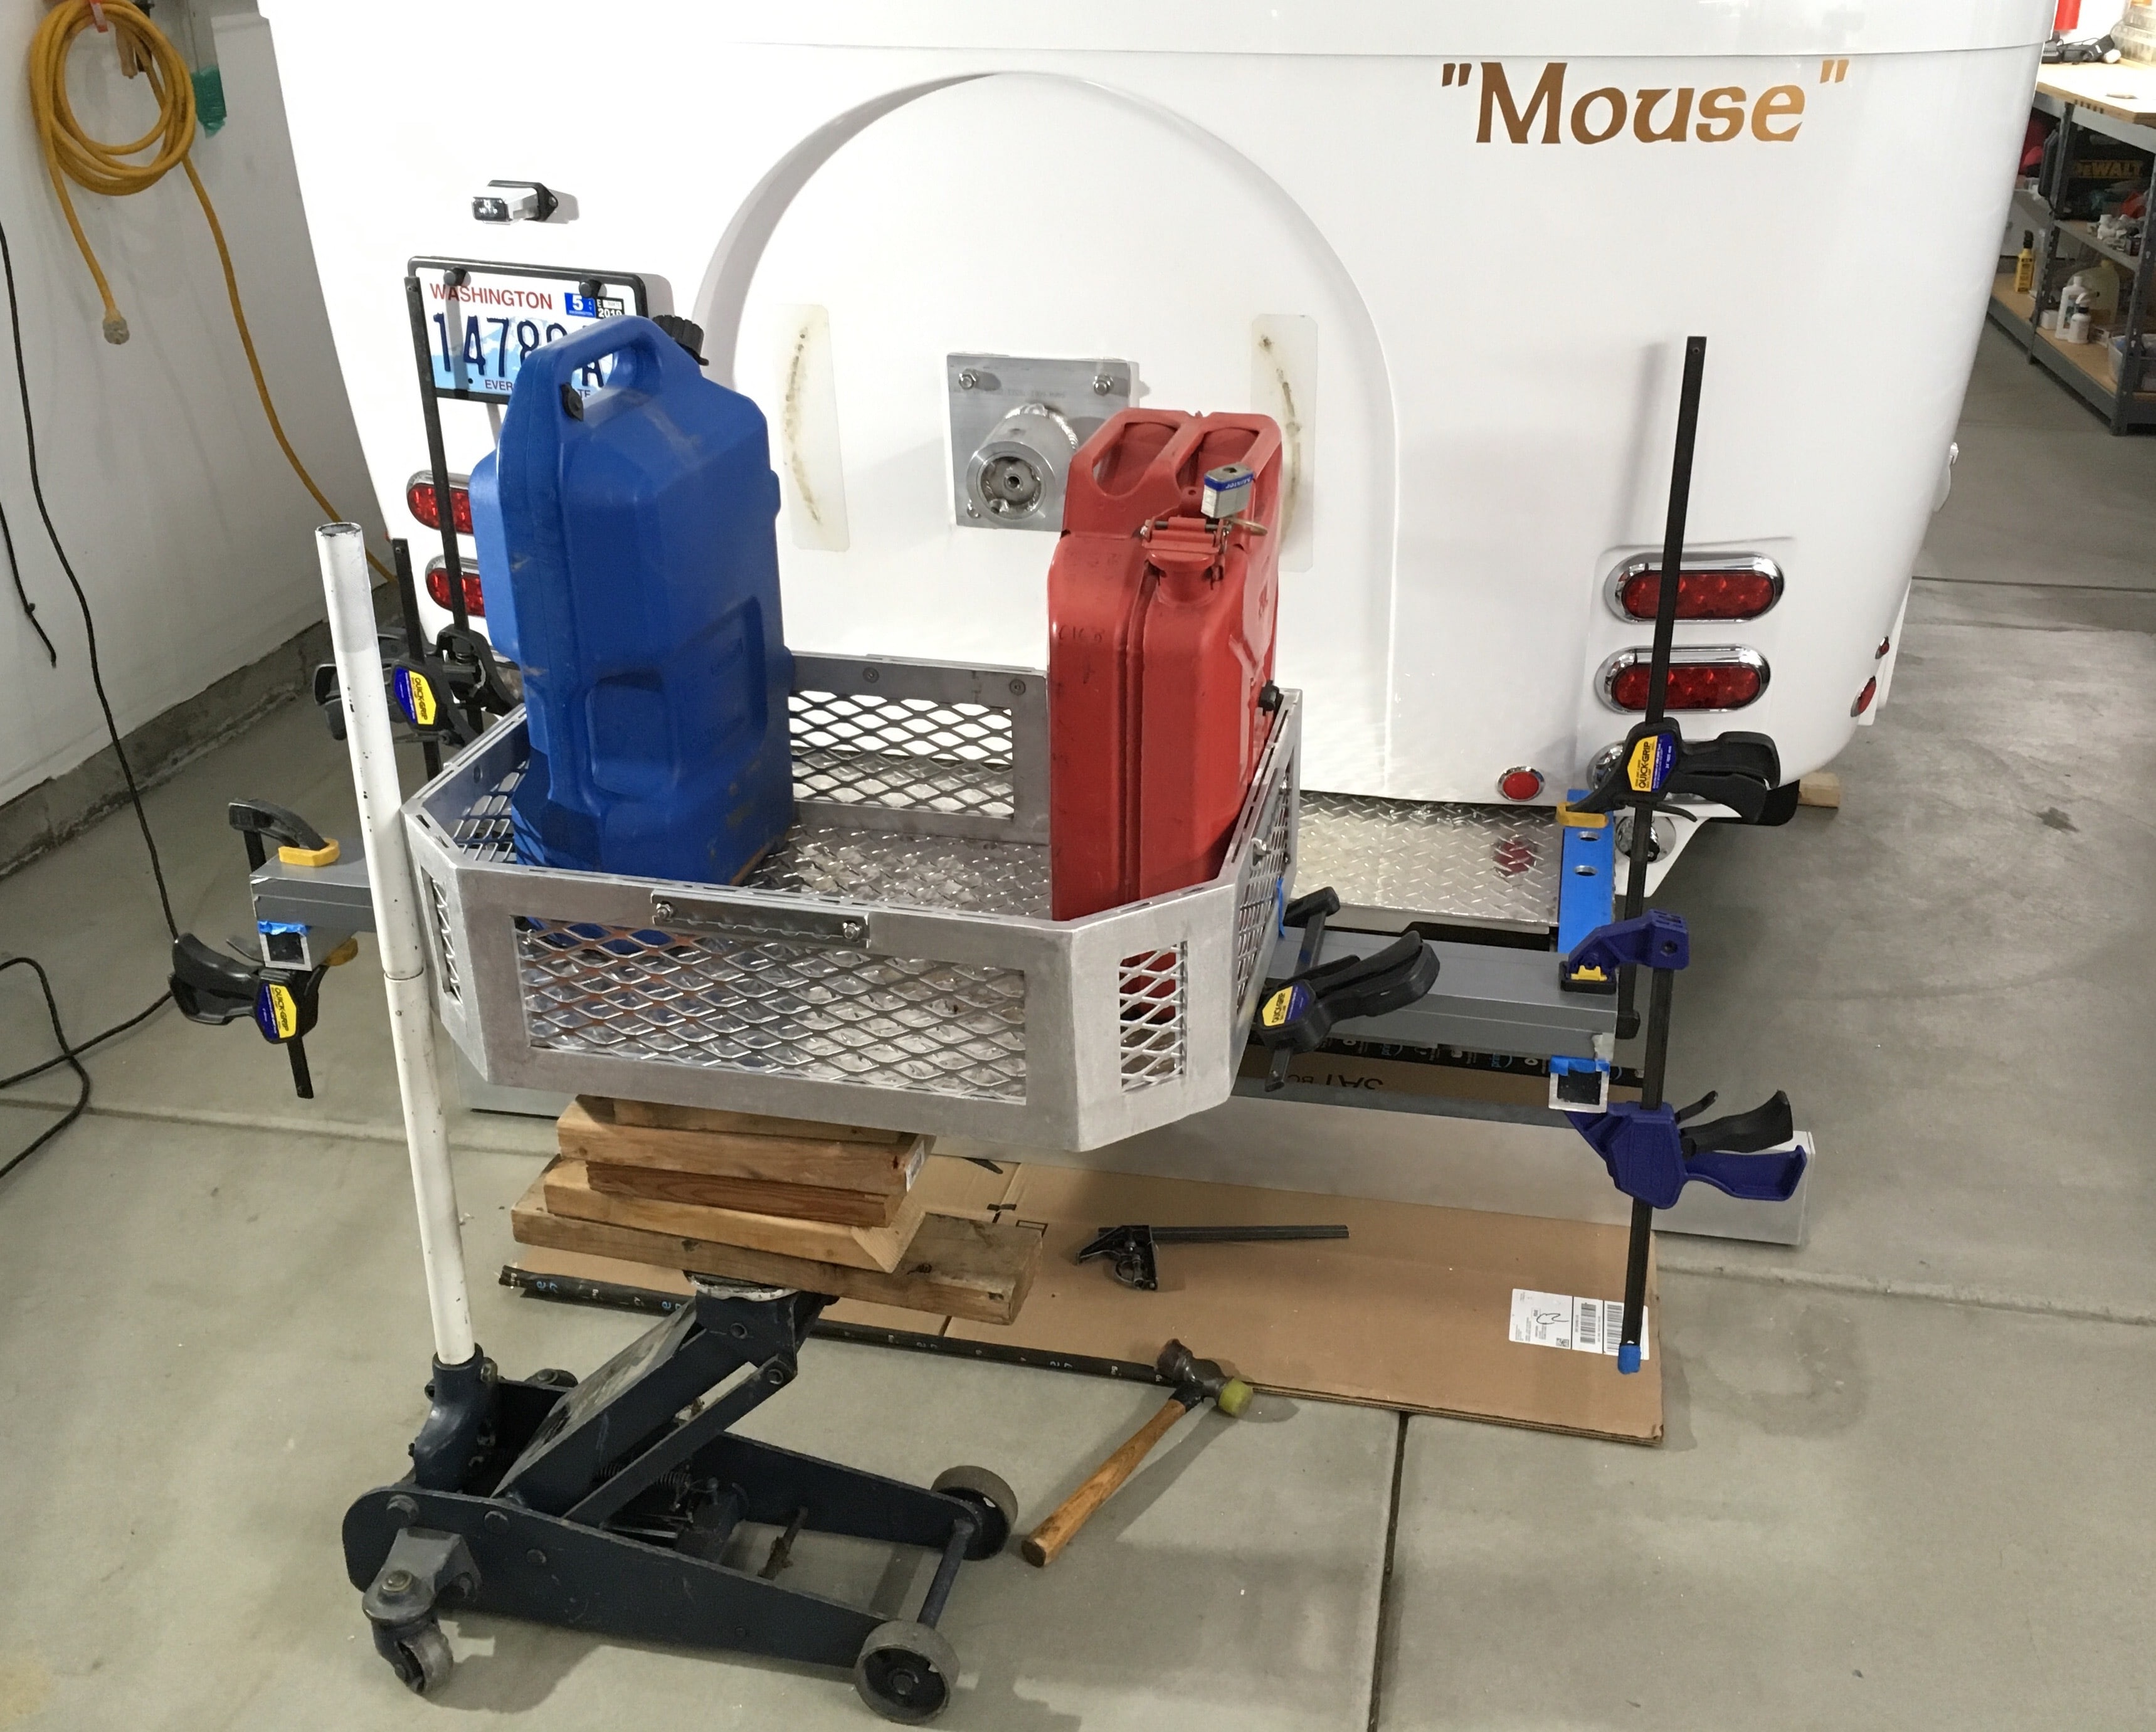
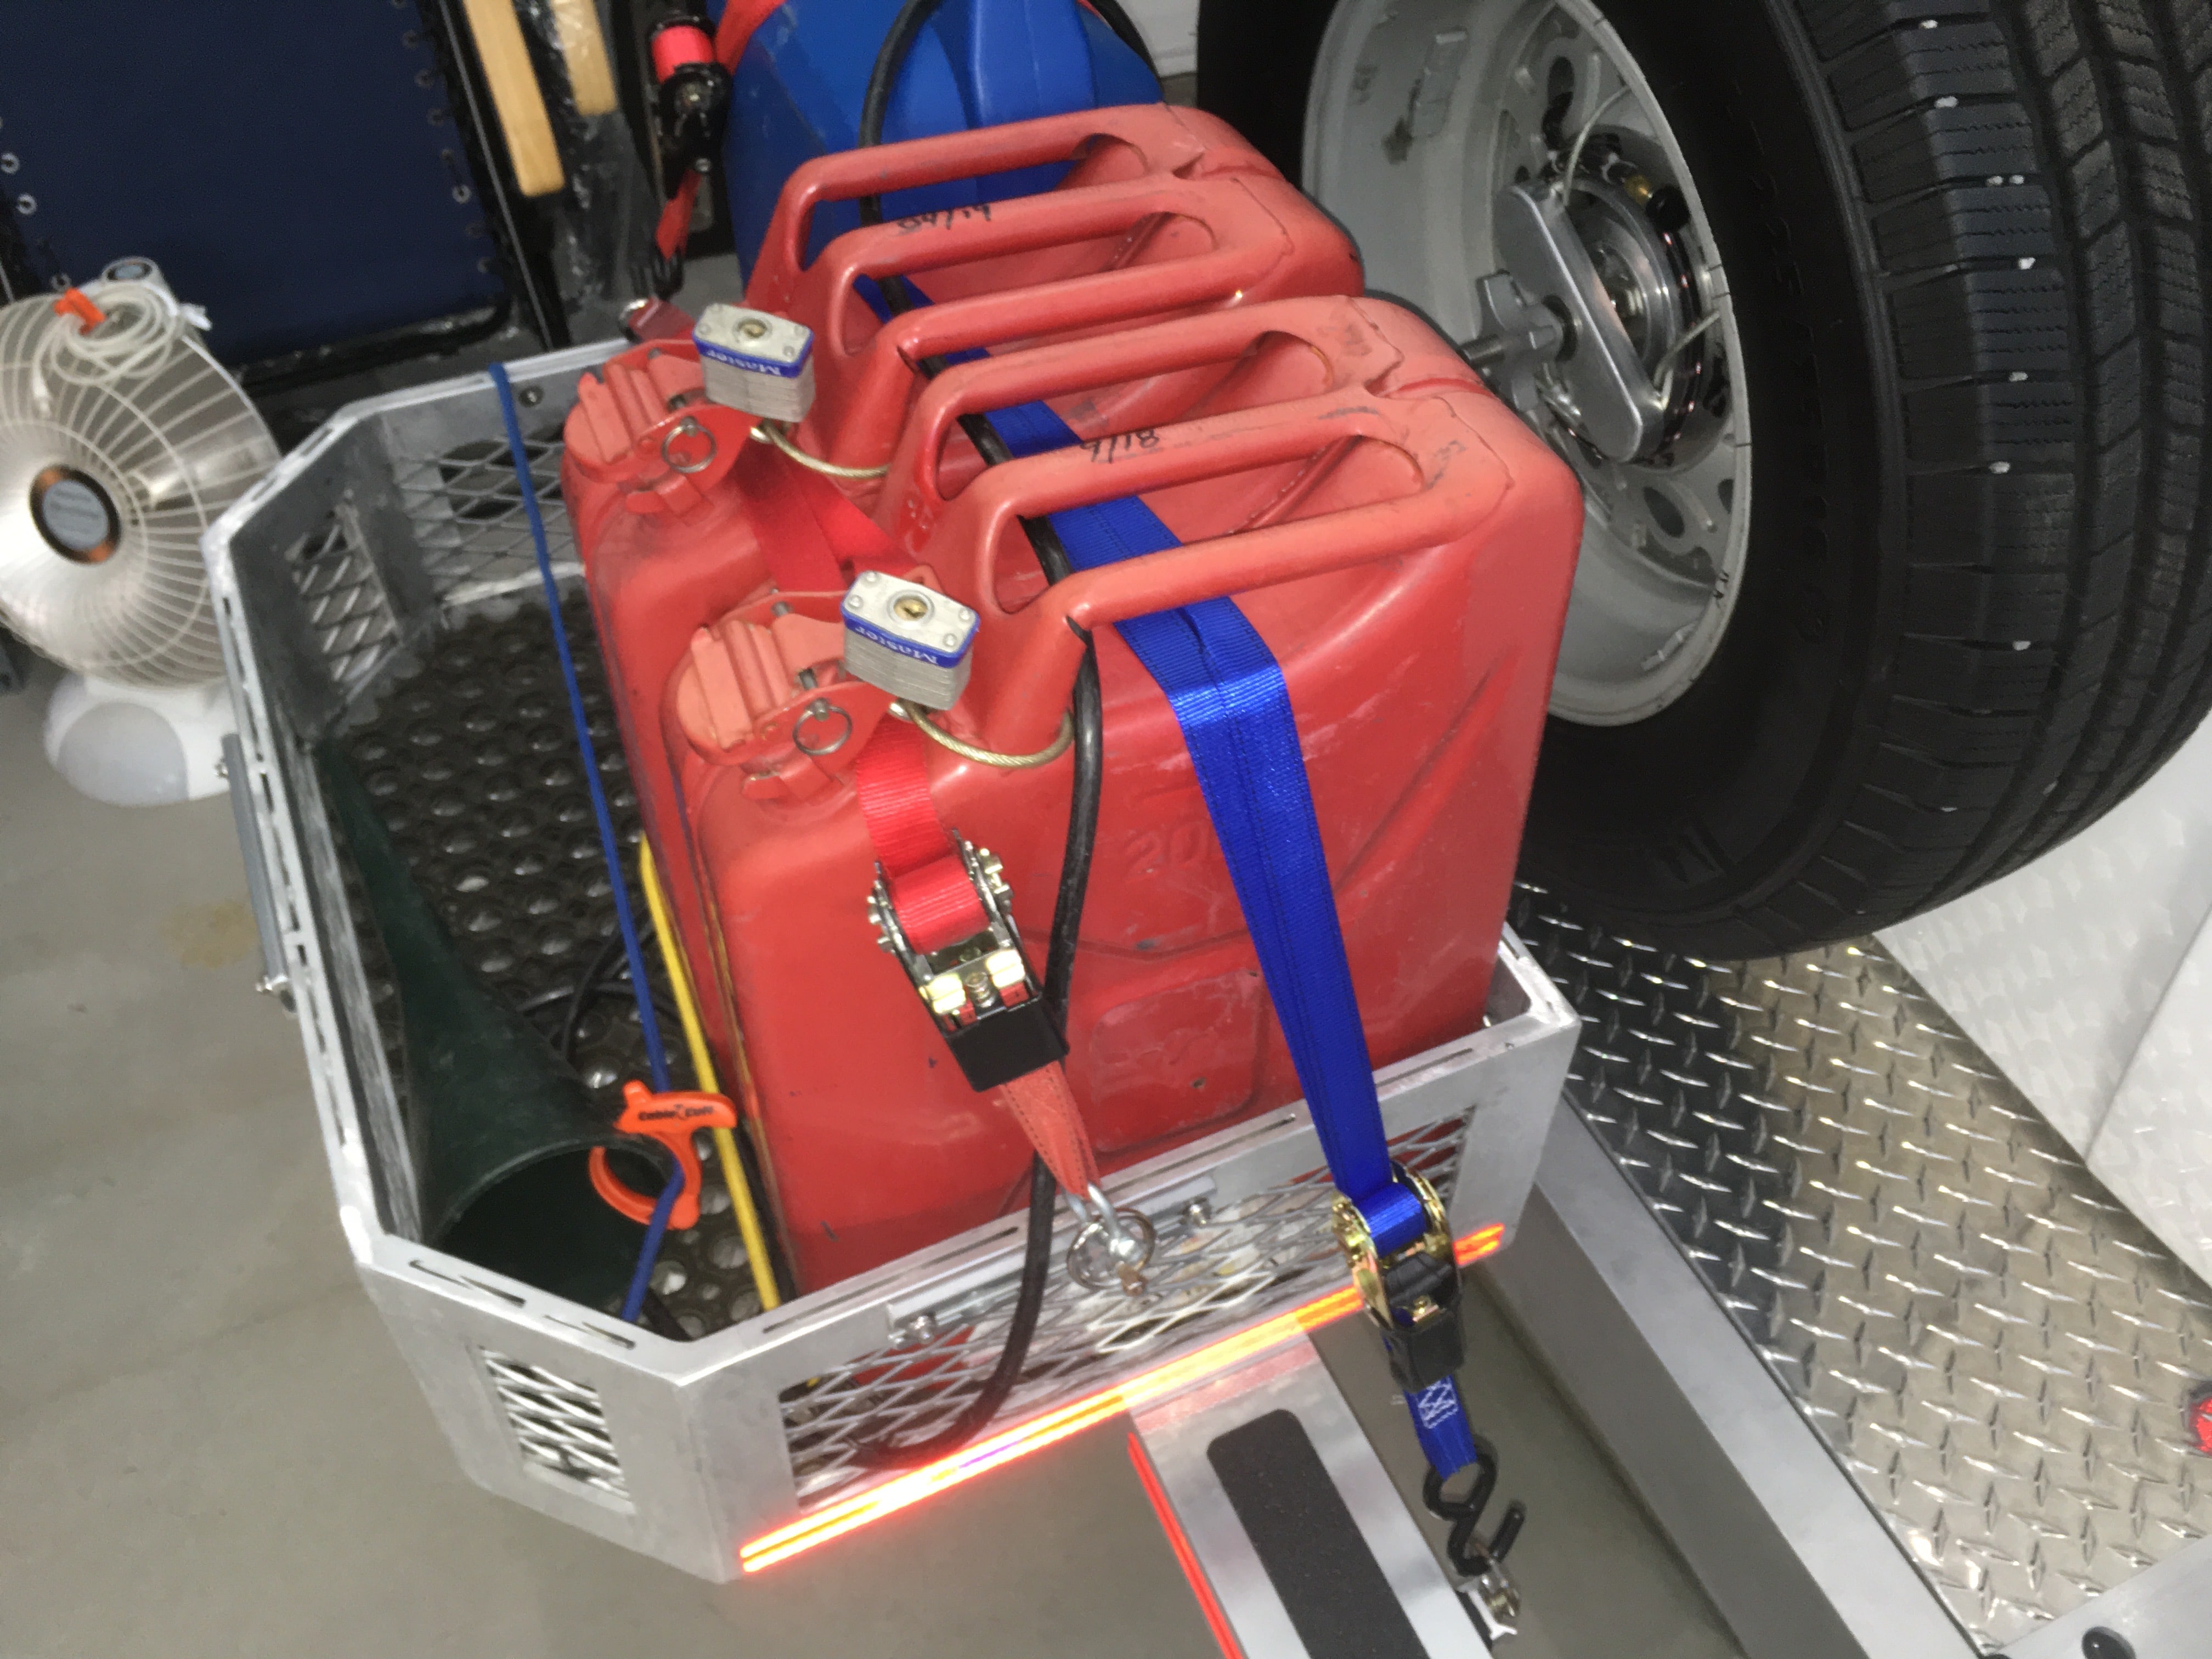
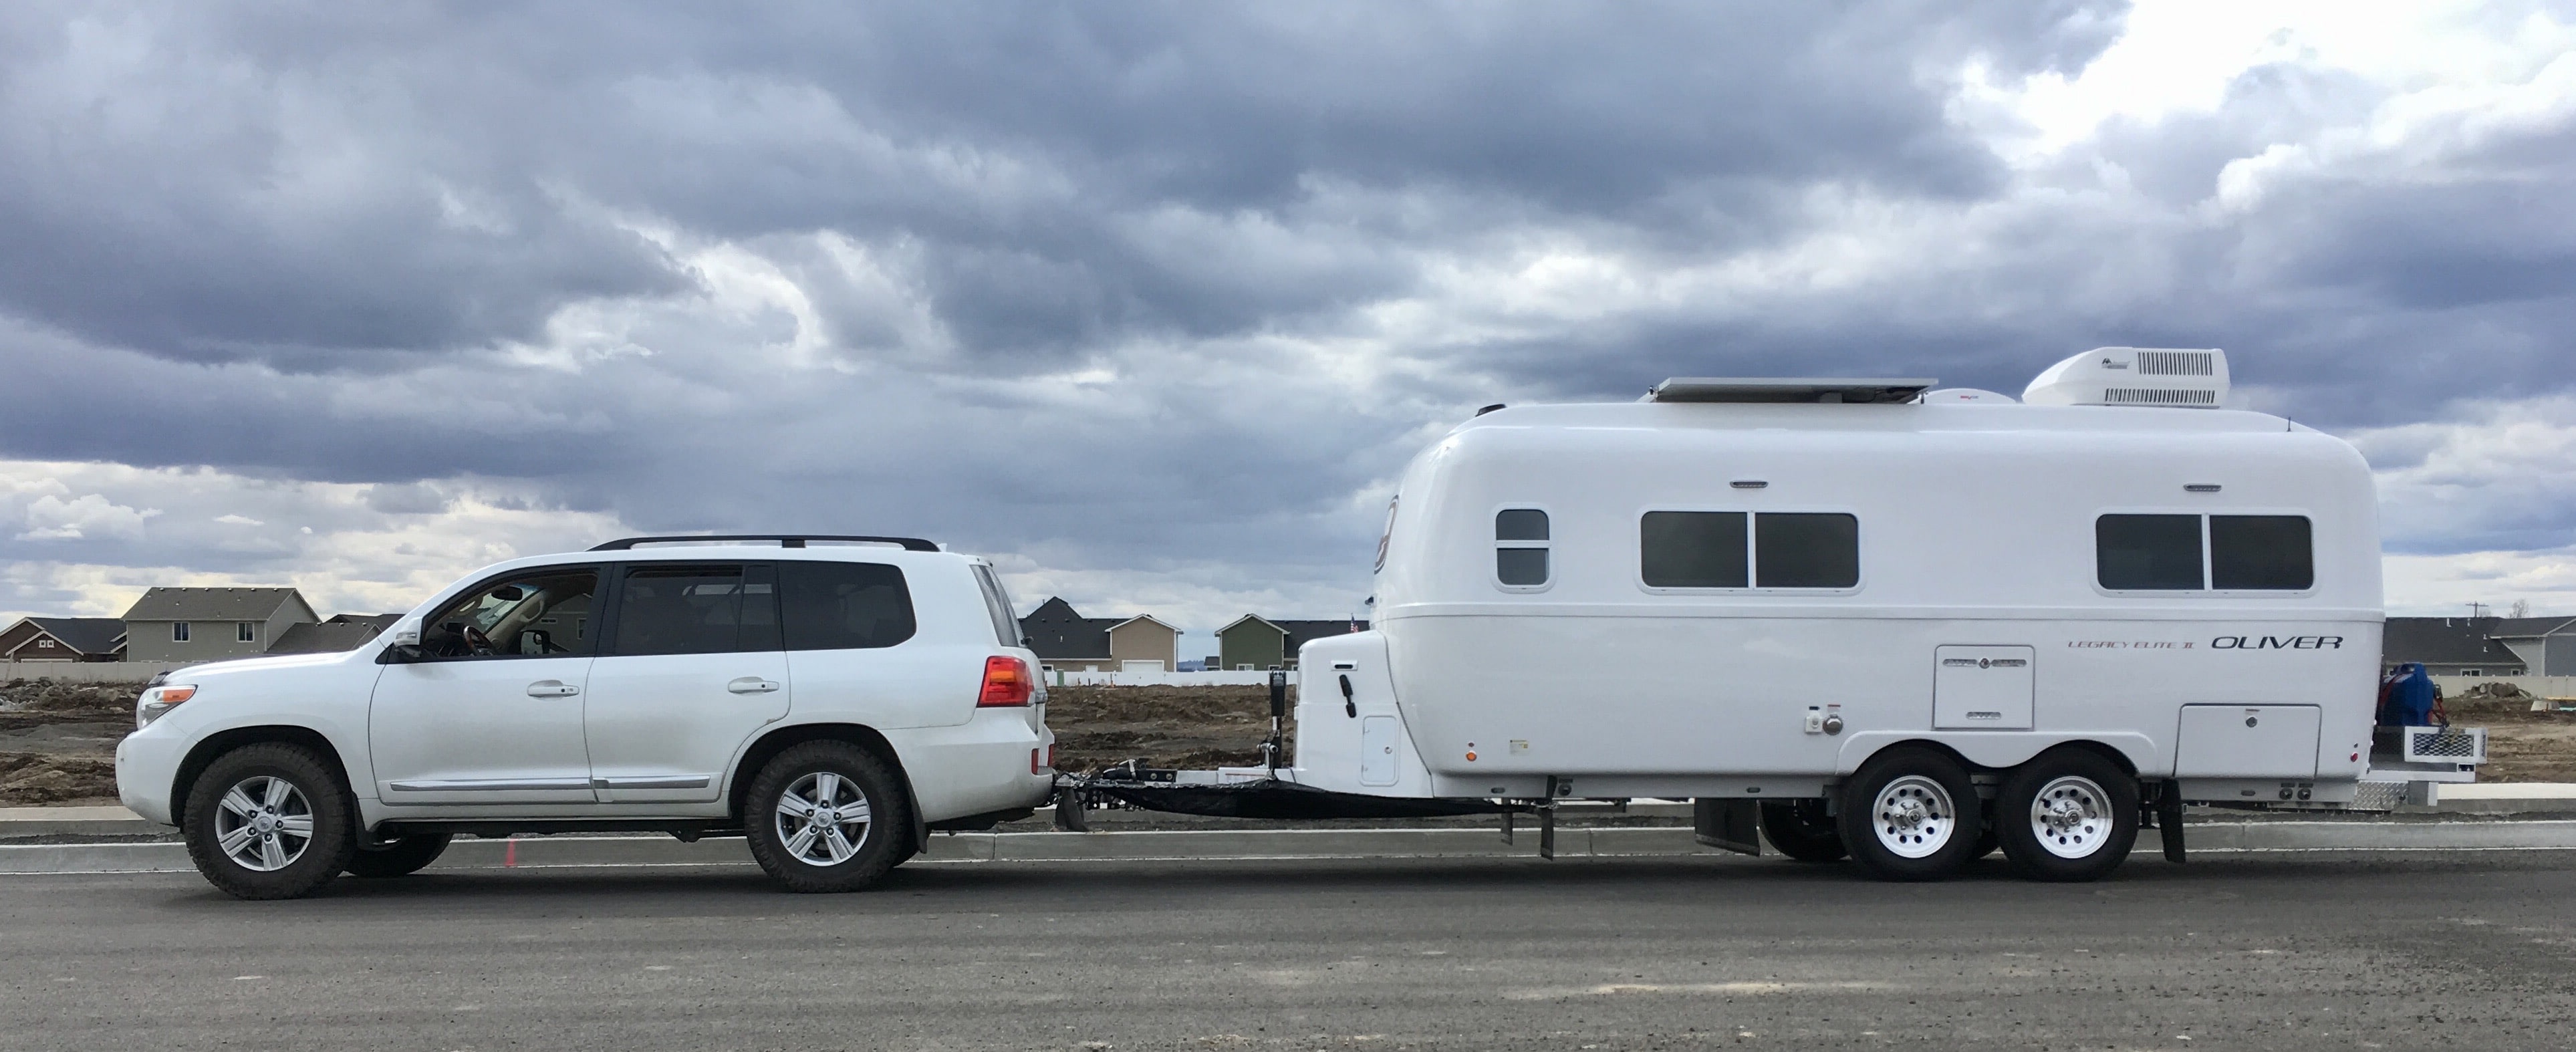
I wanted to move my Oliver front cargo tray to the rear of the trailer to lighten the tongue. For a light duty truck like my Land Cruiser 200, the weight reduction is very significant. I normally carry two full 5 gallon gas jerry cans, an empty 6 gallon water can and my heavy rubber chocks. The tongue weight was 720 pounds with full tanks and full propane. After the mod it is around 480 pounds. I will probably continue to use the Andersen hitch for its excellent jounce control, but I have the adjuster nuts backed way off so that there is zero tension on the chains at rest. My airbags, at 10 psi, level things out and support the reduced tongue weight very well.
I won’t describe every step in detail. I will provide a basic materials list and some measurements. This is in NO WAY an easy mod, I rate it 7 out of 10, and this is for an ex-A&P mechanic who is comfortable working, shaping and drilling aluminum. The tray brackets on the bottom had to come off, and I left it to a local welding shop to mill them with their big milling machine, and to also weld some support spacers. Everything else I did in my shop with common hand tools, power tools, a handheld sander and a bench top sander, and a floor drill press.
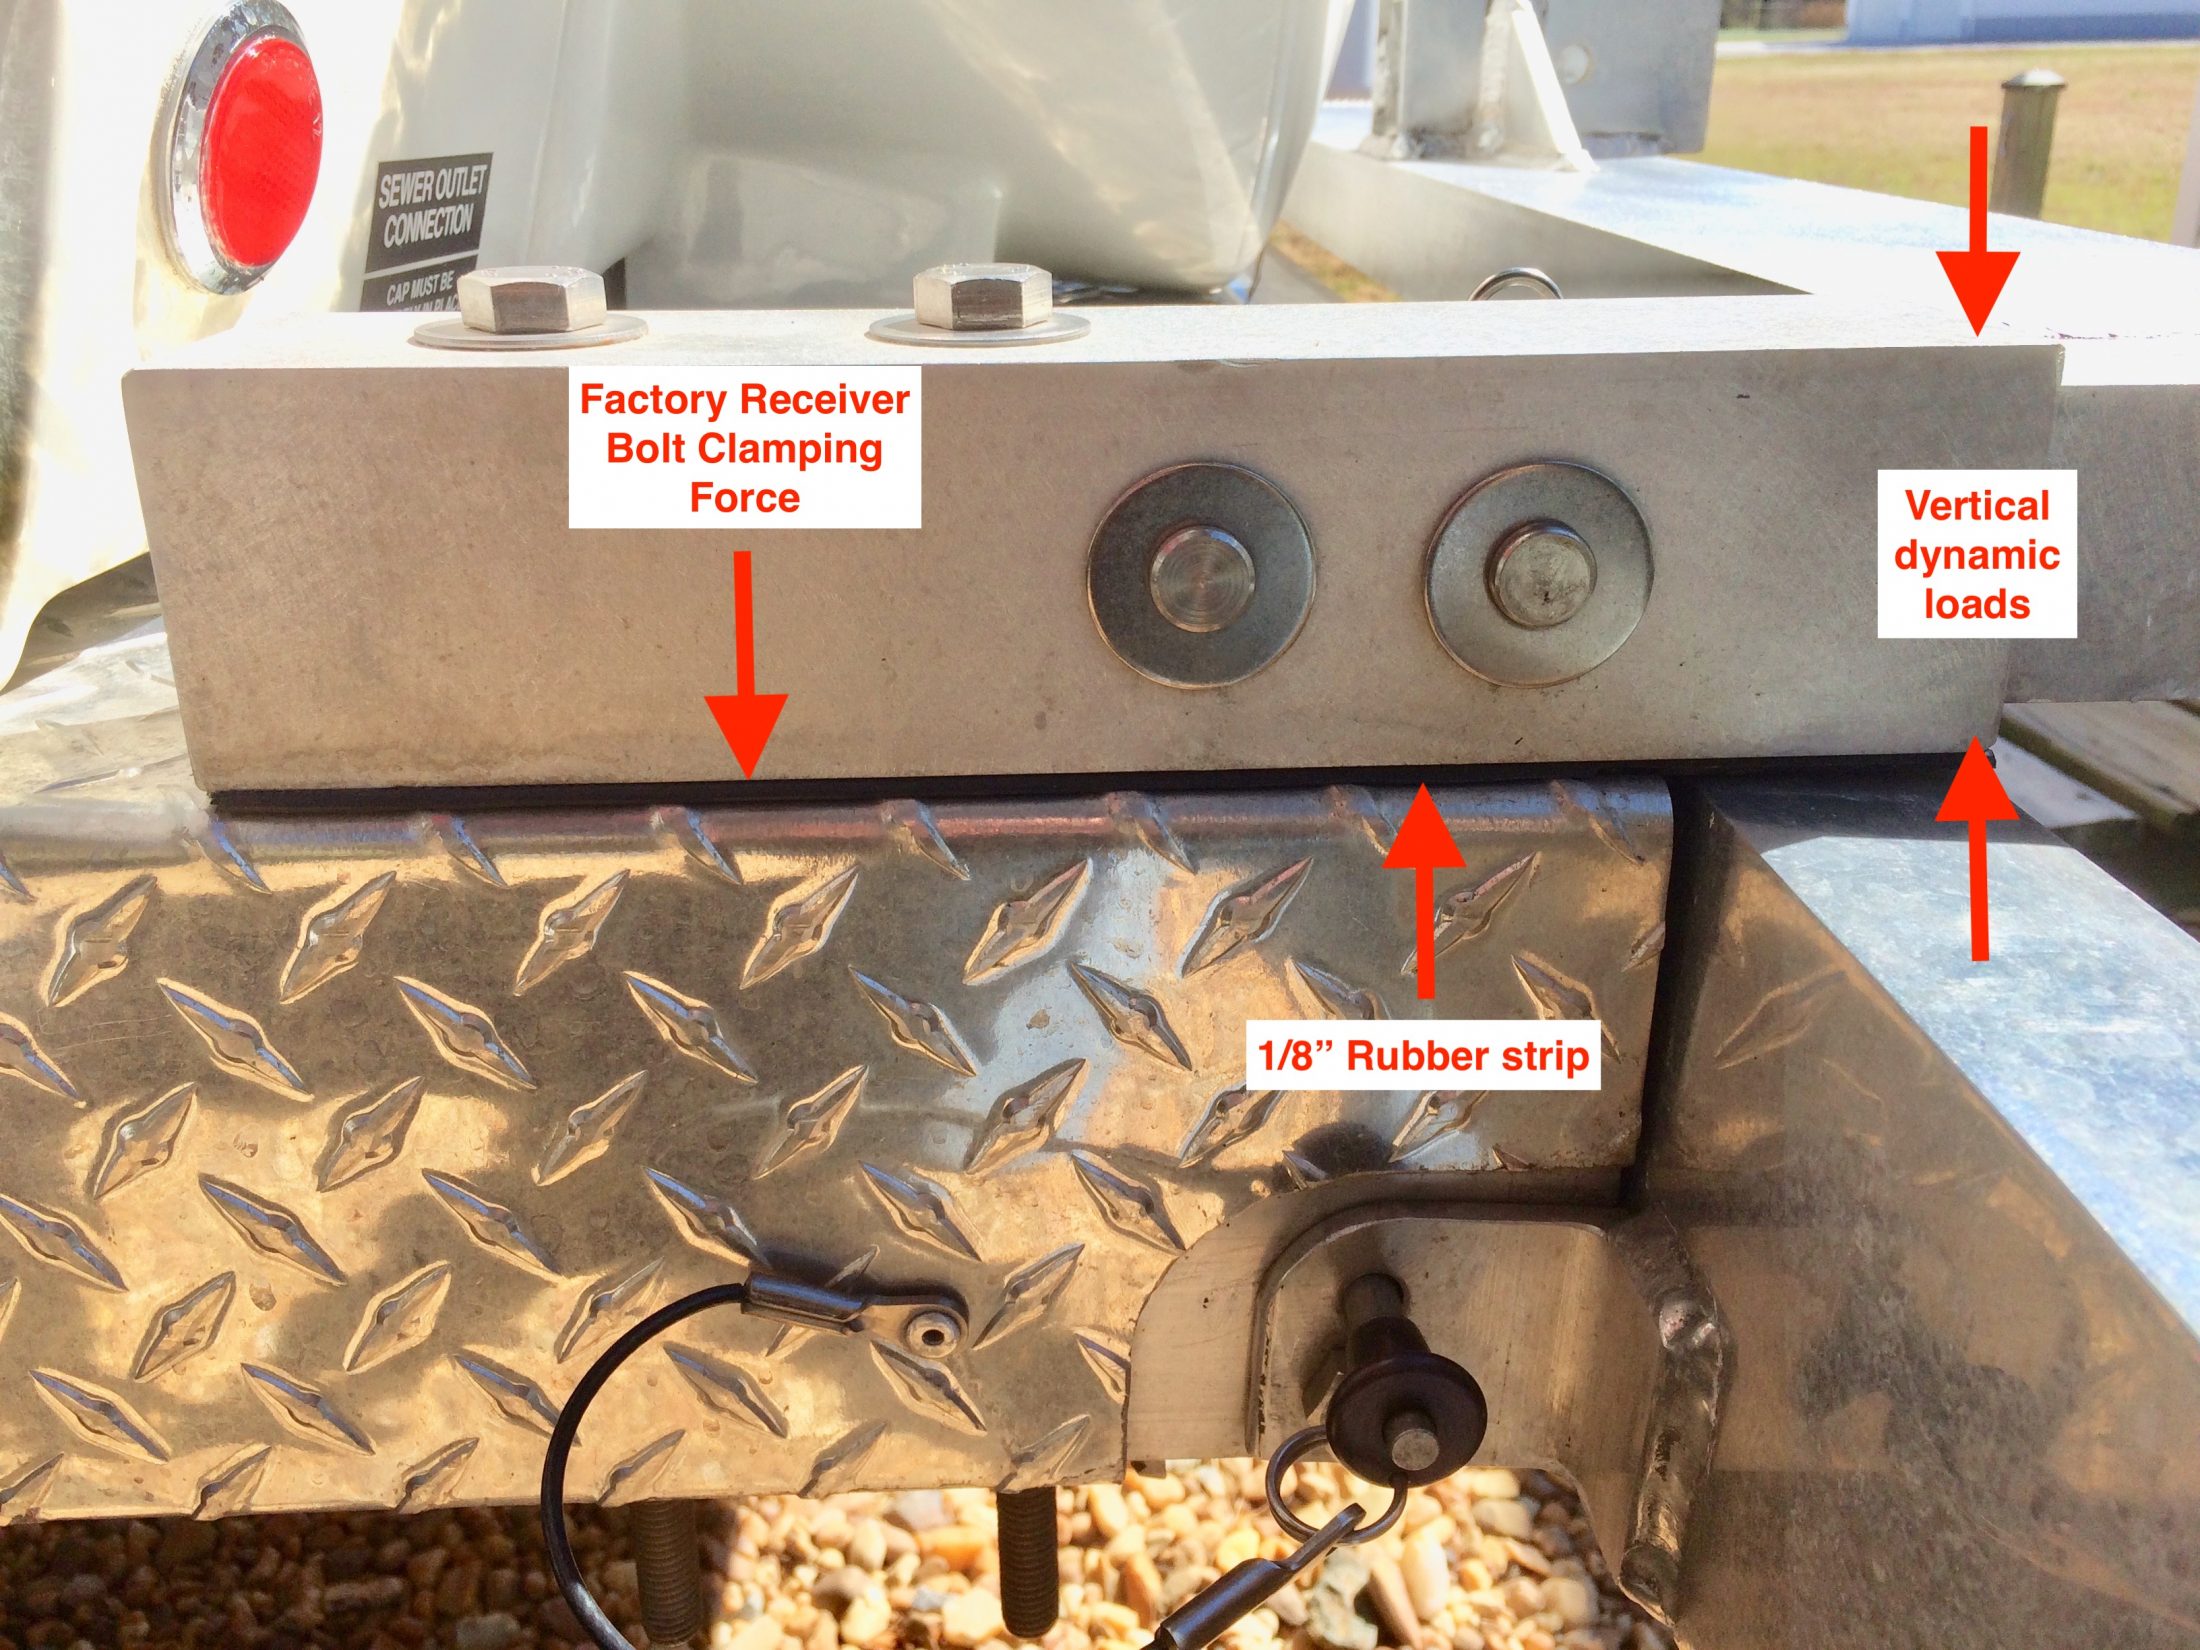
The current factory bike rack (and previous versions) have double receivers that are bolted down to the frame. Because they attach to diamond plate, Oliver uses a hard rubber strip under each one to keep them from getting destroyed by the very sharp teeth. The two big attach bolts are located in the center and front of the receivers. There is nothing securing the back, which in my view is a problem, since that is where the most of the vertical force is applied from the cargo.
I did contact Jason in Service and asked how the latest factory bike racks were doings and if loosening was a problem. He told me that there were no issues. ….. Still, I decided to bolt my support arms directly to the frame - no receivers - and to remove all the sharp diamonds from the waste cover. This would allow me to eliminate the rubber strips, which I think are not a wise choice. I wanted my arms to have an intimate and solid connection to the frame. I did add 1/8” strips of aluminum bar to replace the rubber strips, to provide bumper clearance.
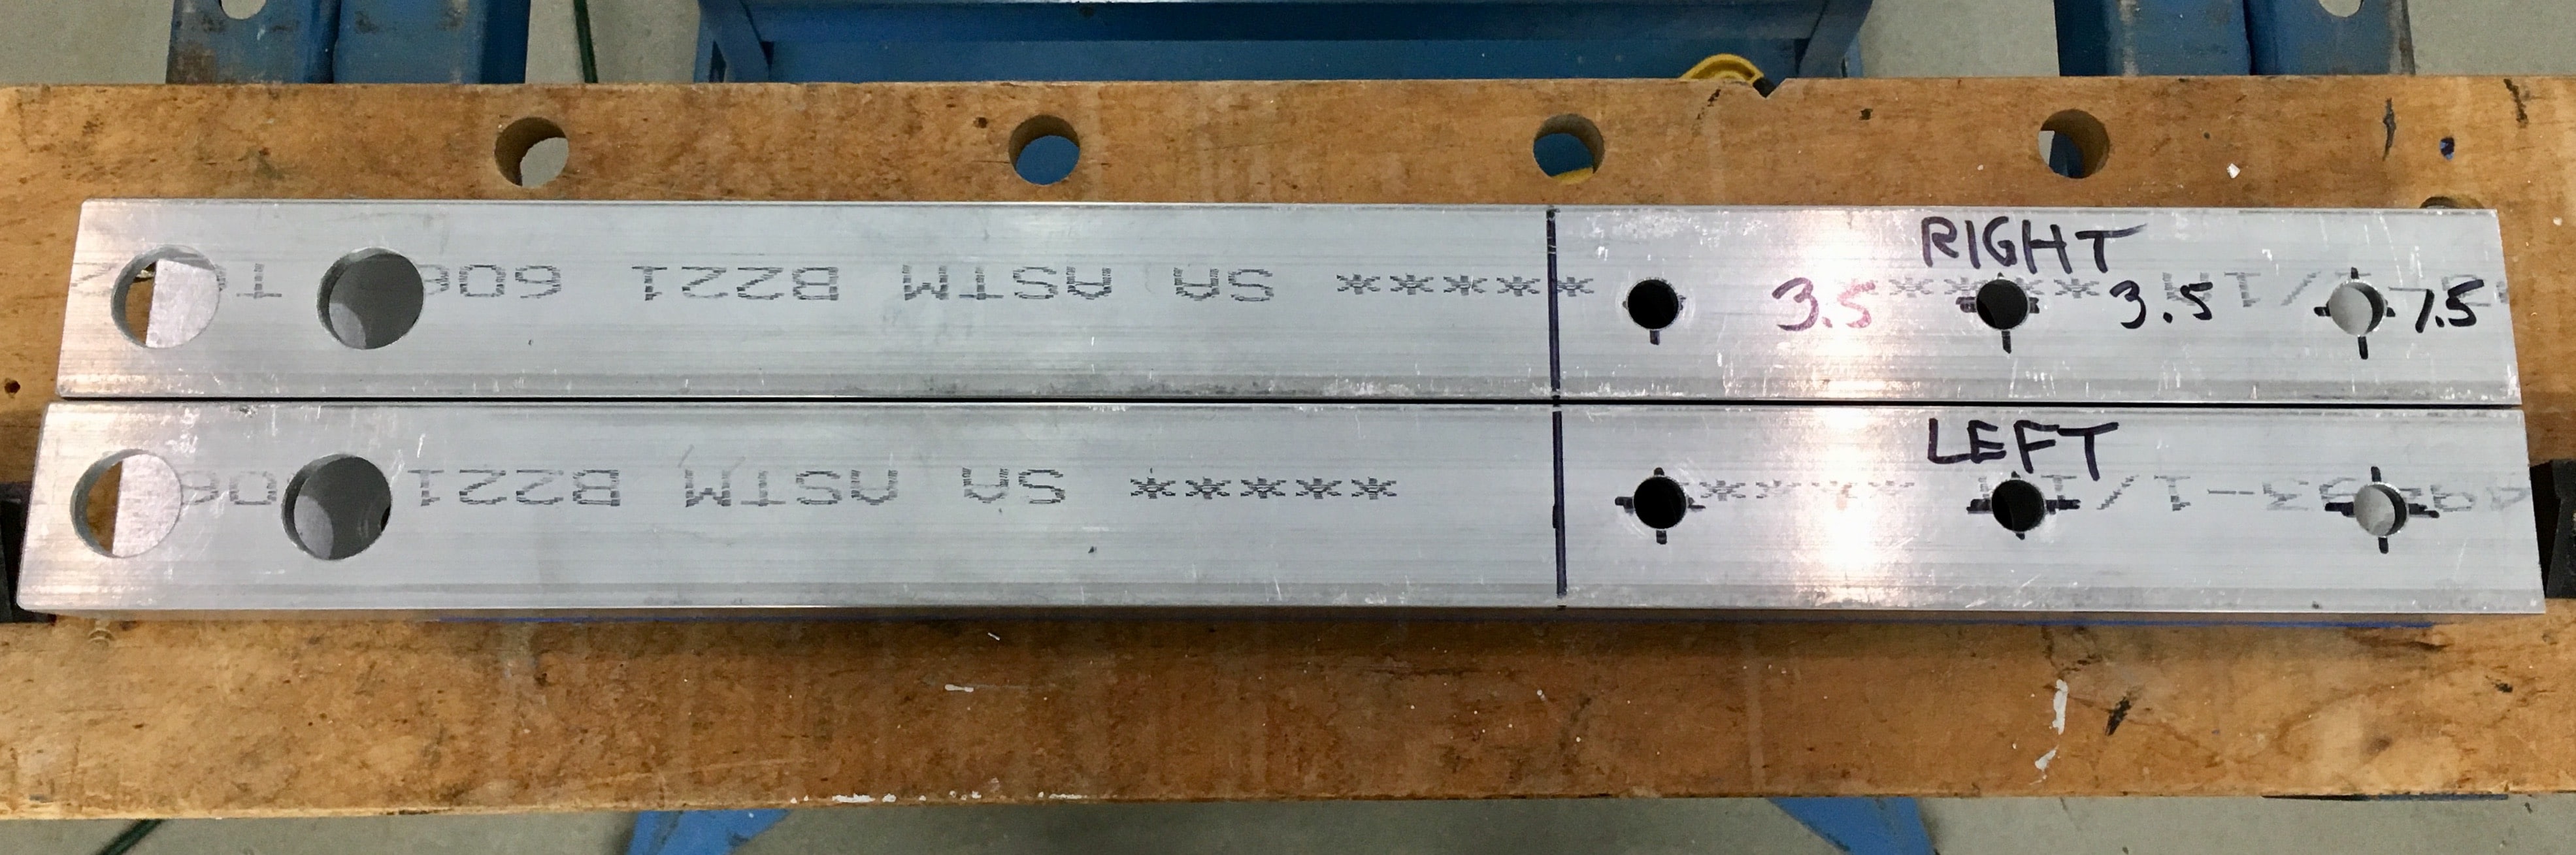
Materials are aircraft grade 6061-T6, 1/4” wall, with square corners. This is close to the same stuff the factory uses for their racks and the trailer frames. All hardware is stainless, and I strongly recommend using silver anti-seize on all of them!
Bumper removal is required. One of my nuts seized and I was able to snap the bolt using a big breaker bar.
Waste area diamond plate cover removal is required. This was a *****, I will make a new thread for that and provide a link.
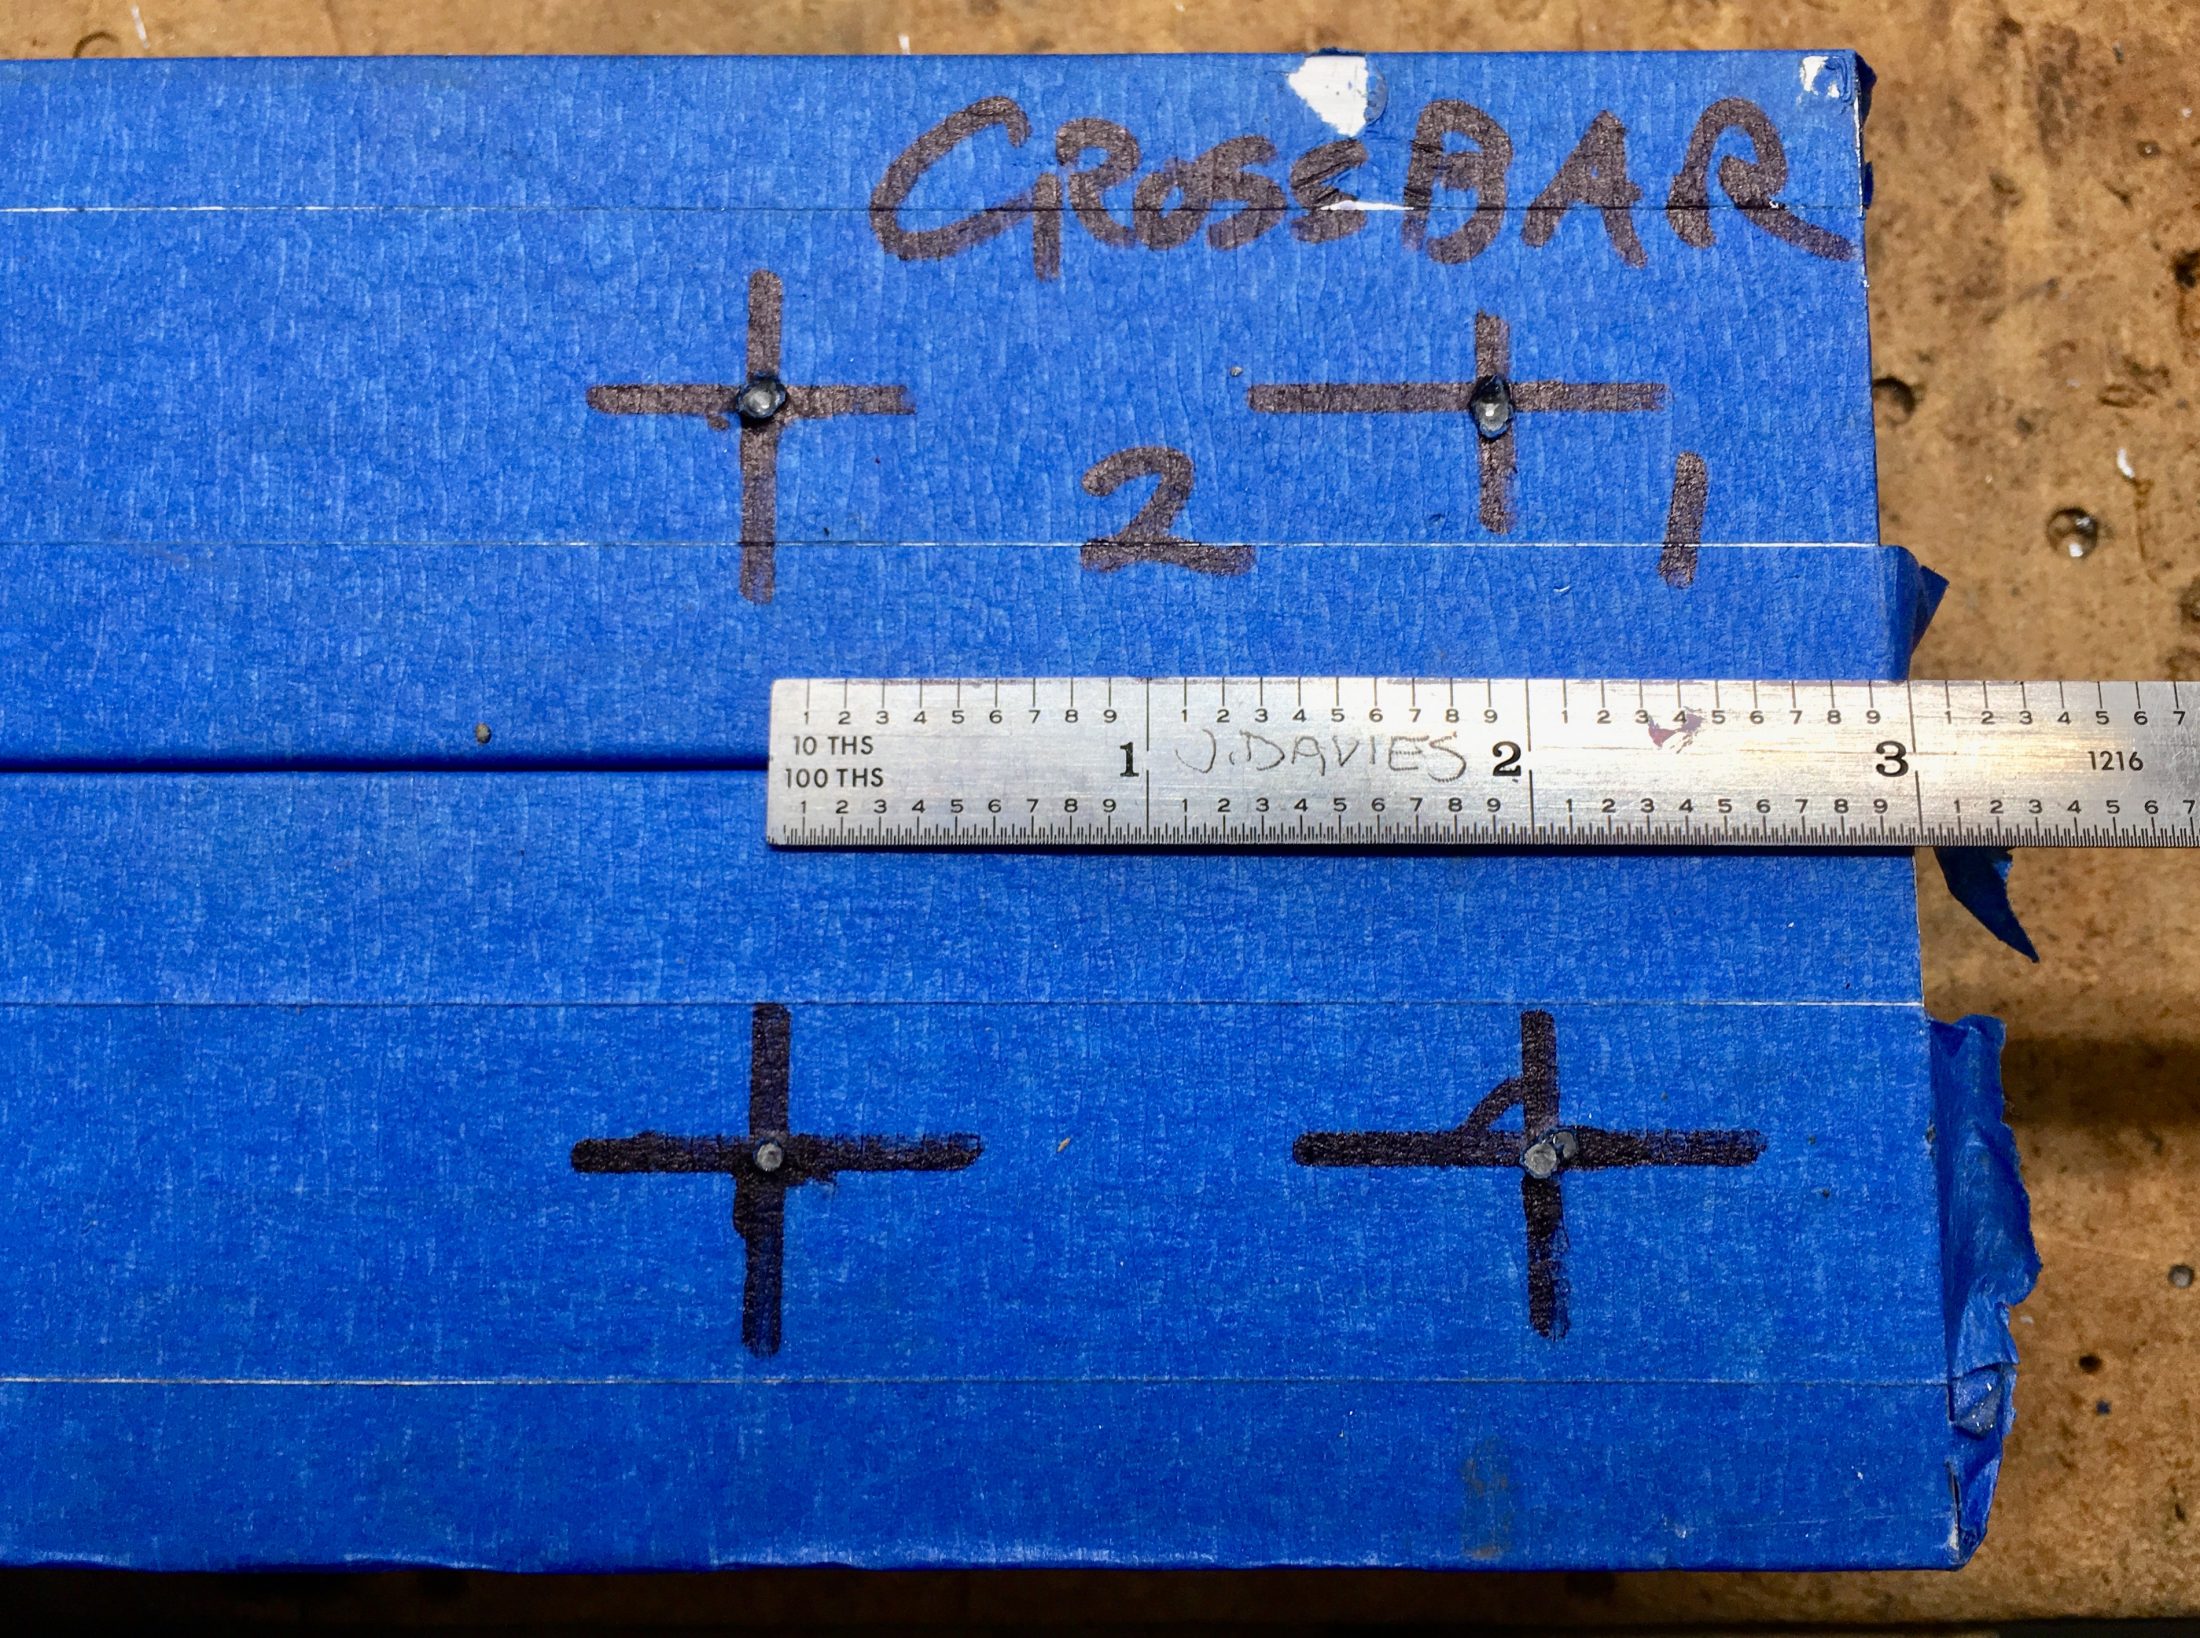
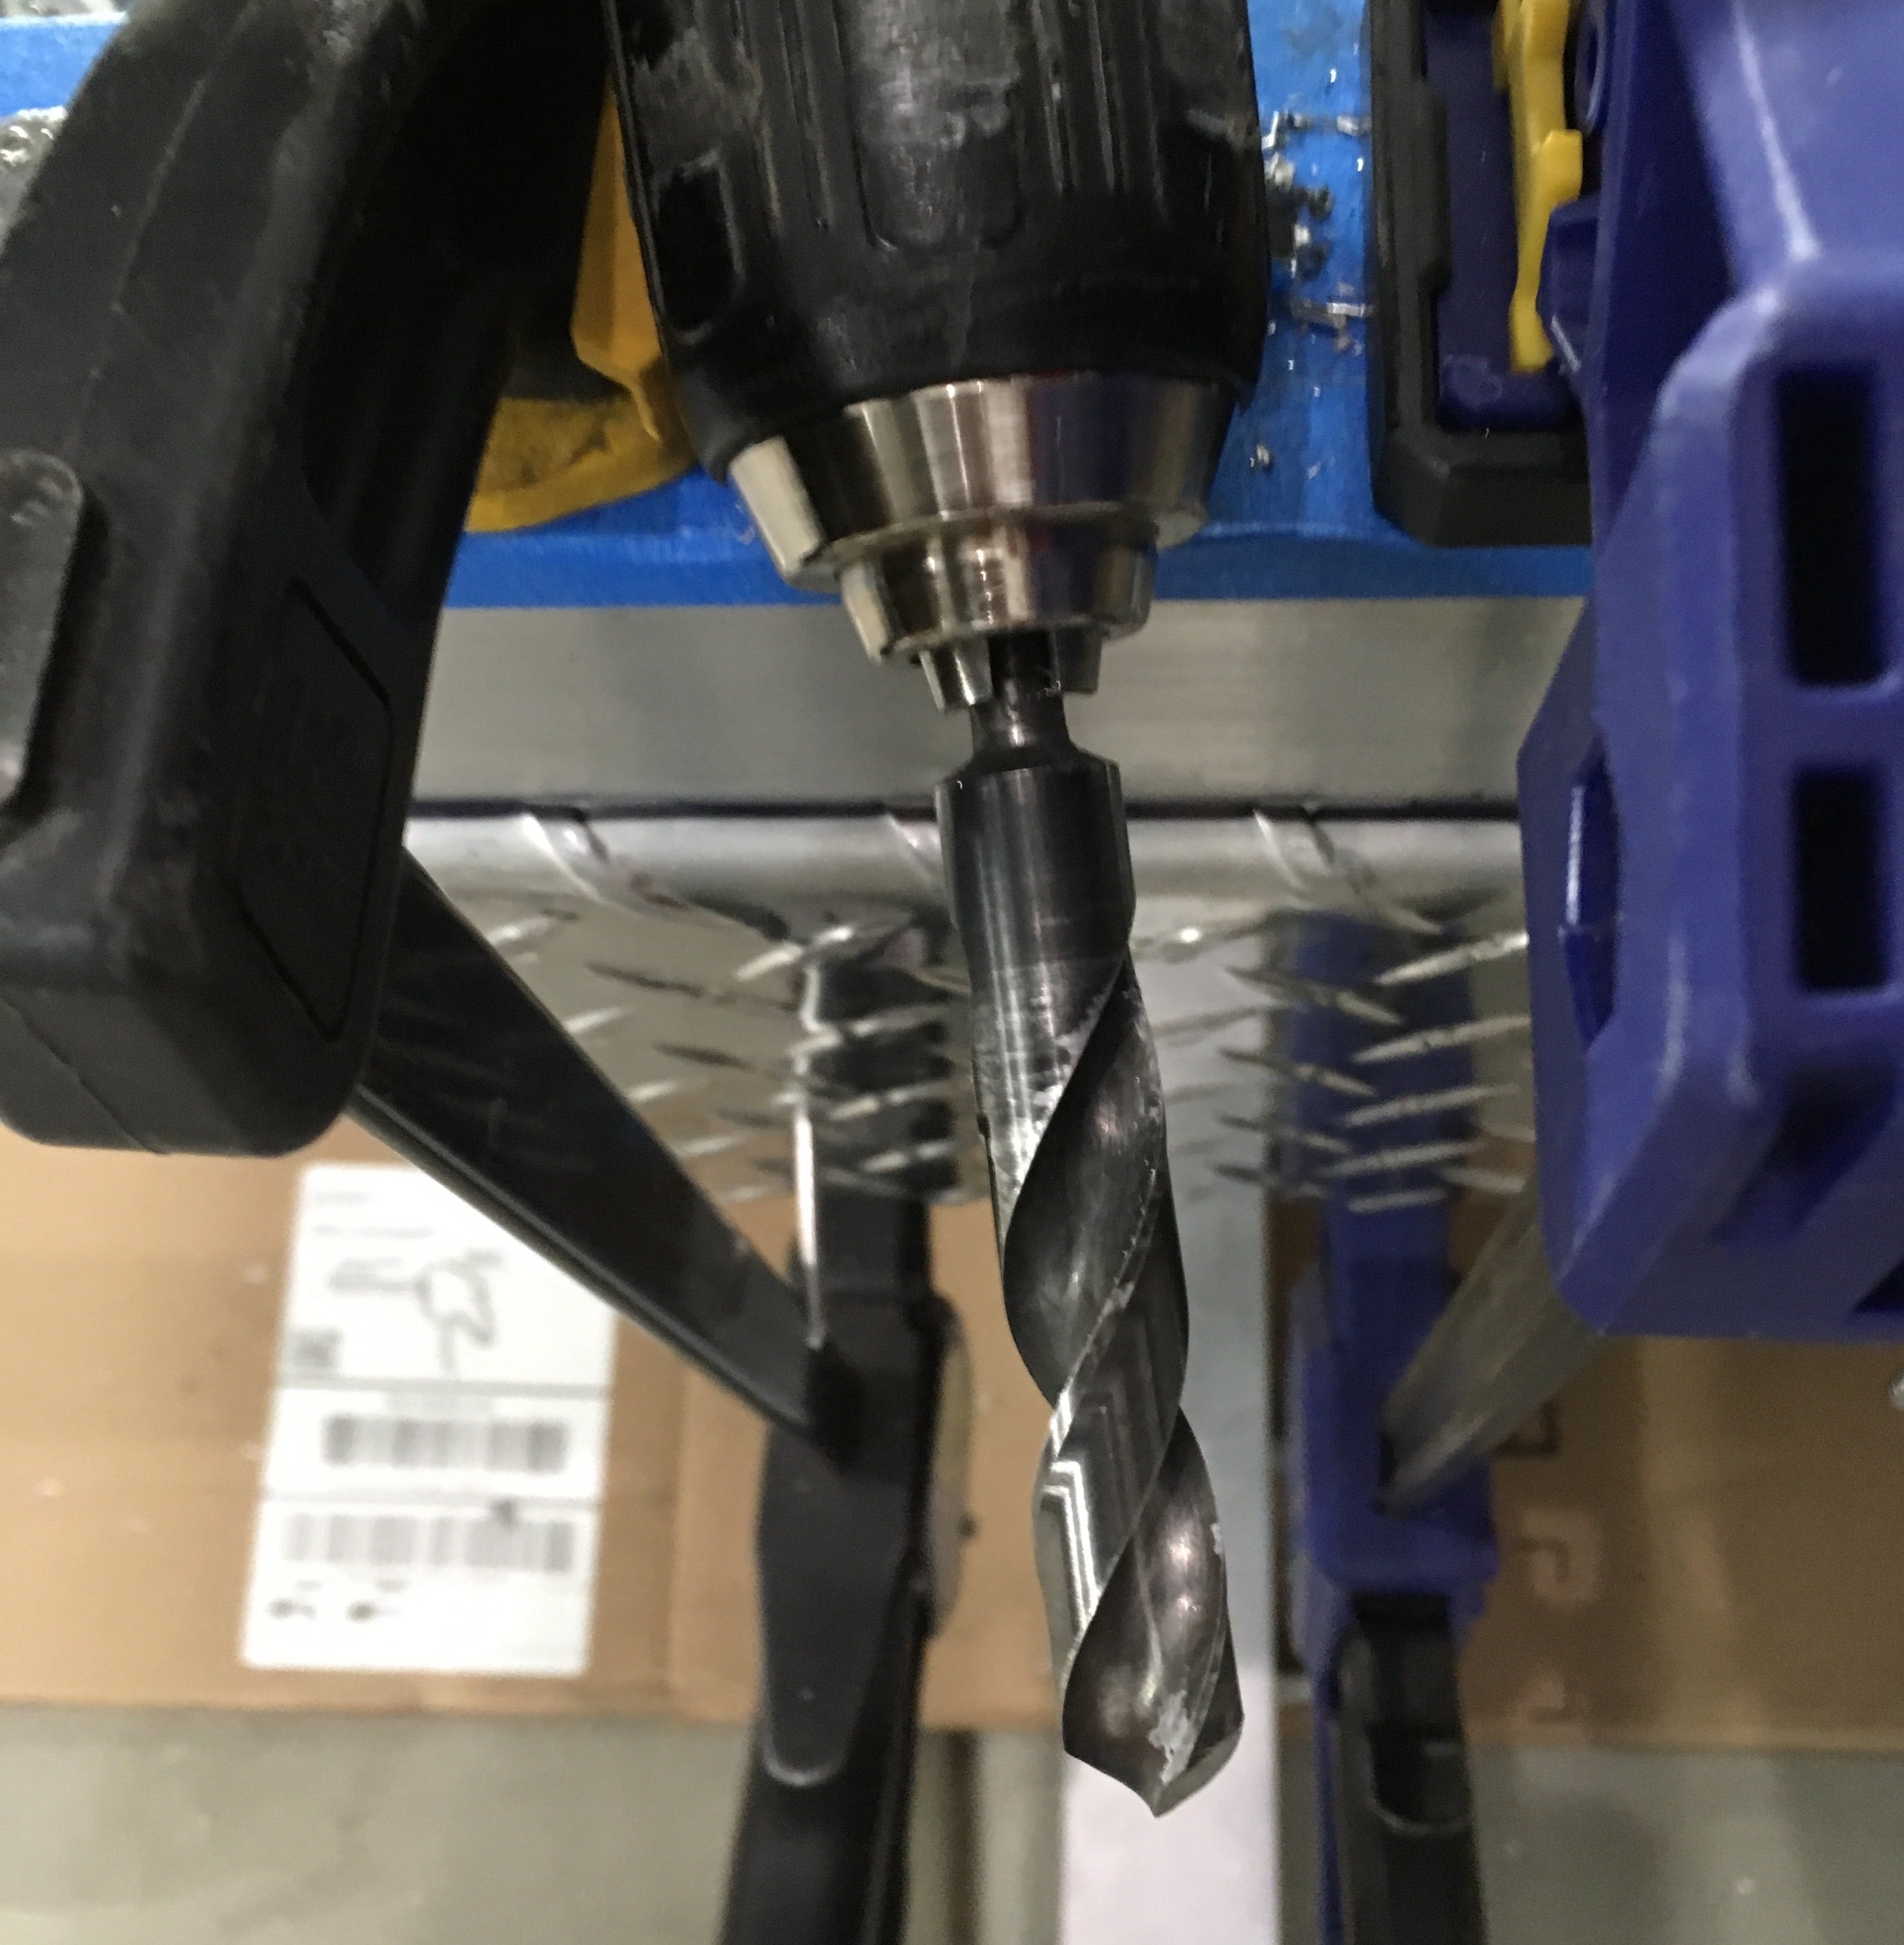
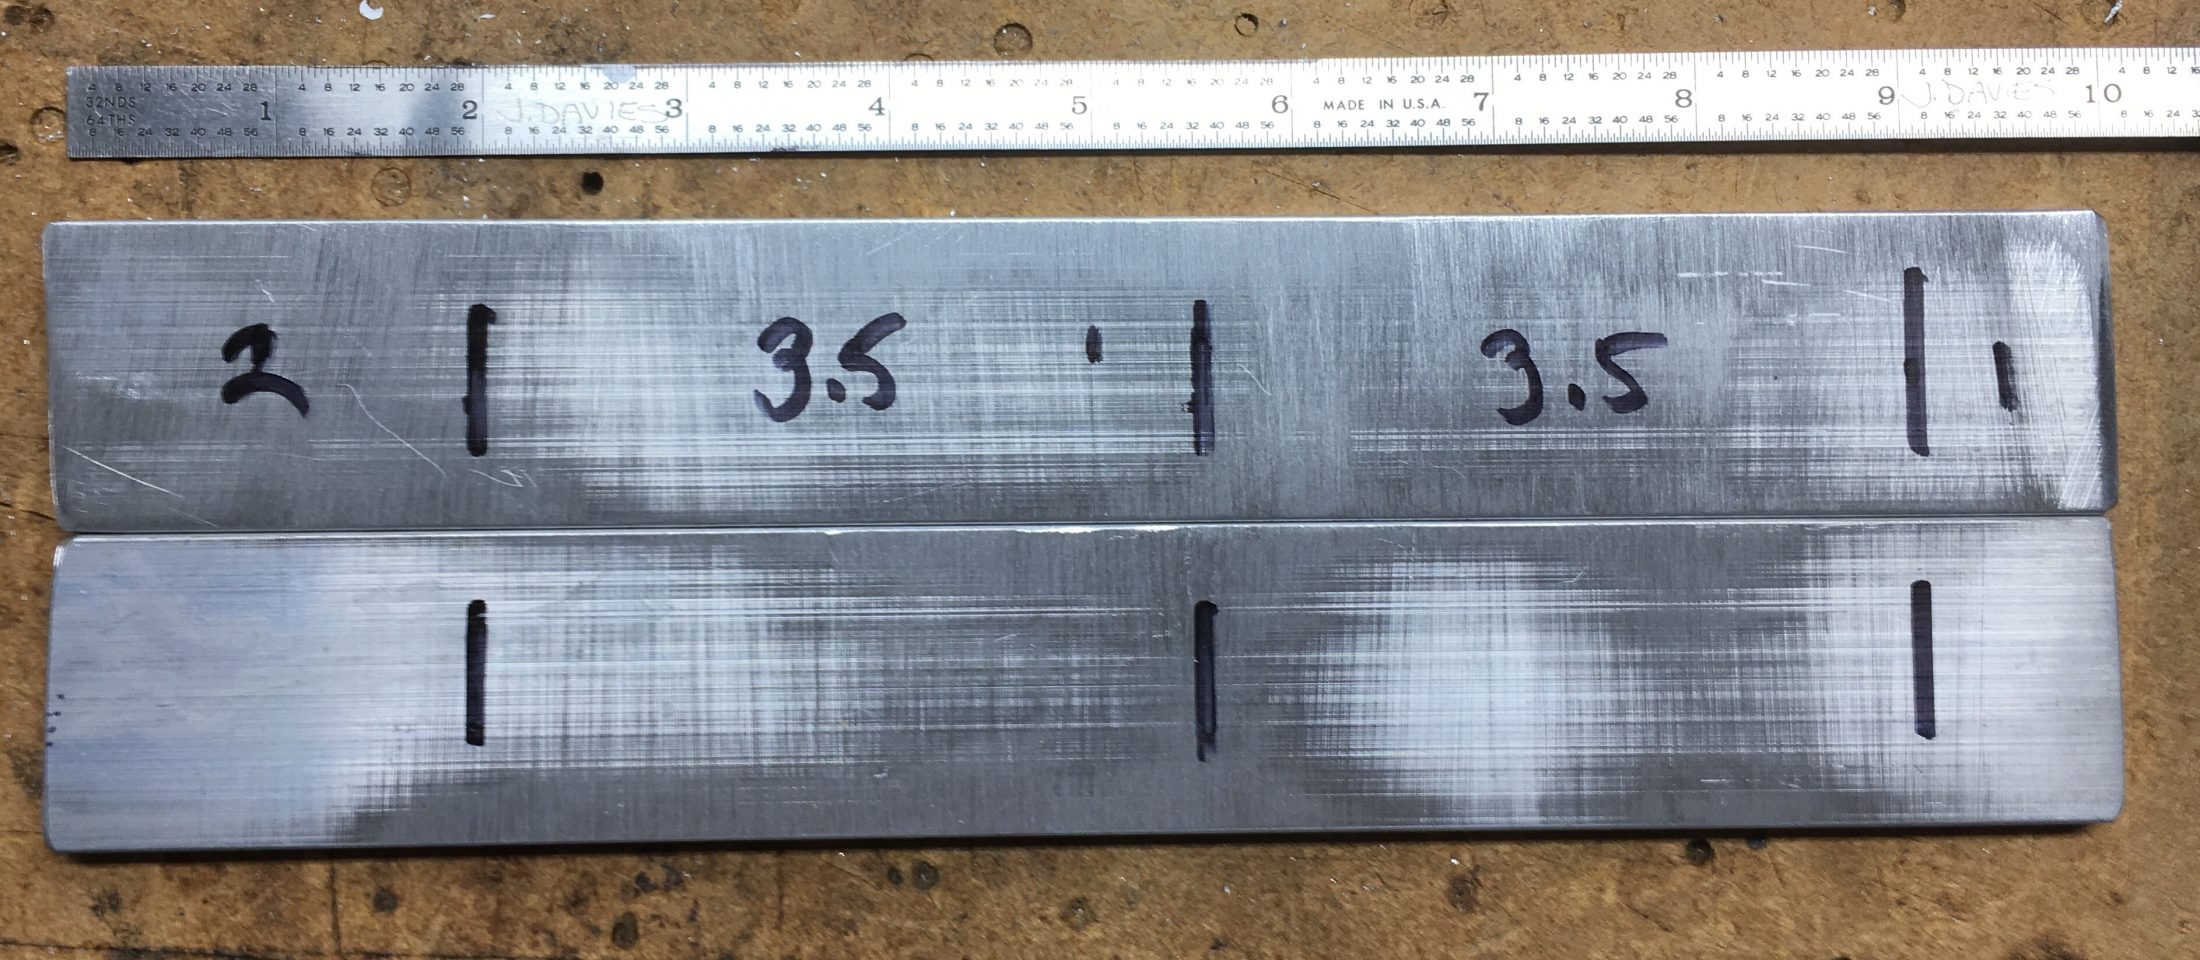
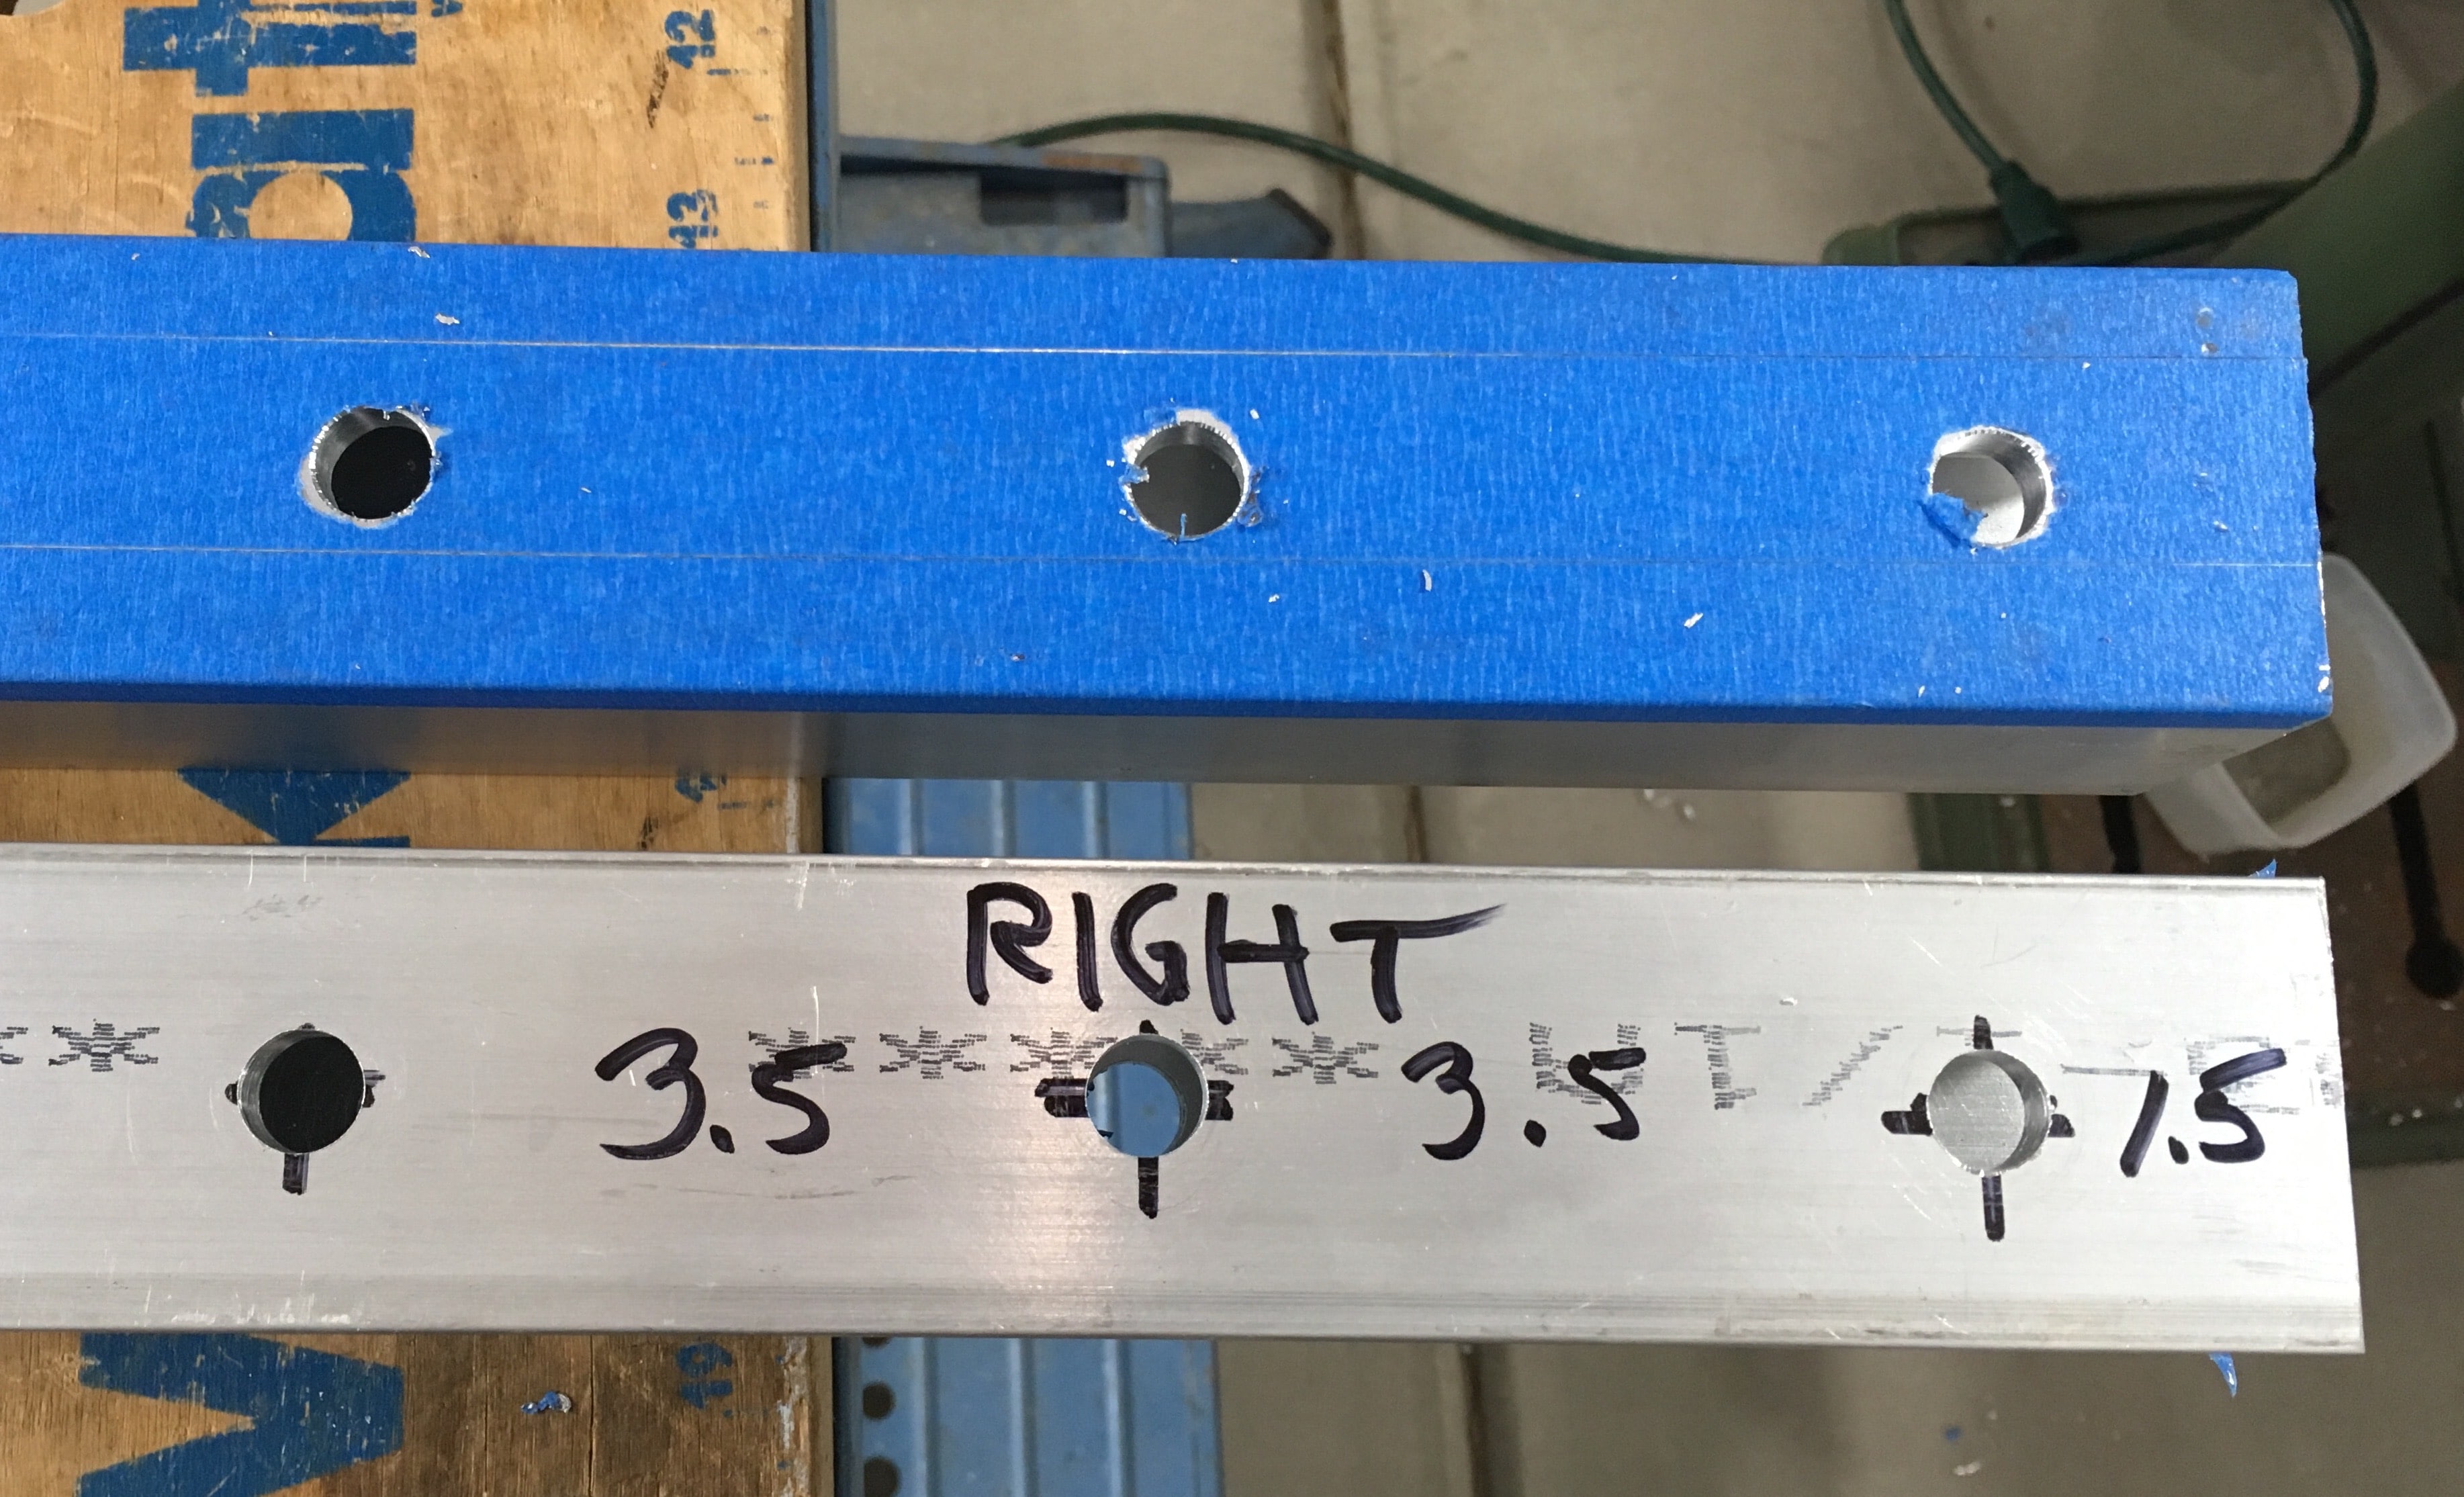
Arm hole spacing: The critical factor is the forward hole, if it is too close to the hull, you won’t have room to get your drill in there because the hull swells out and interferes. I was JUST able to get my compact Dewalt drill in without any worries. If you have an angle drill, you could use it and a short 1/2” bit to get into this location. Beware!
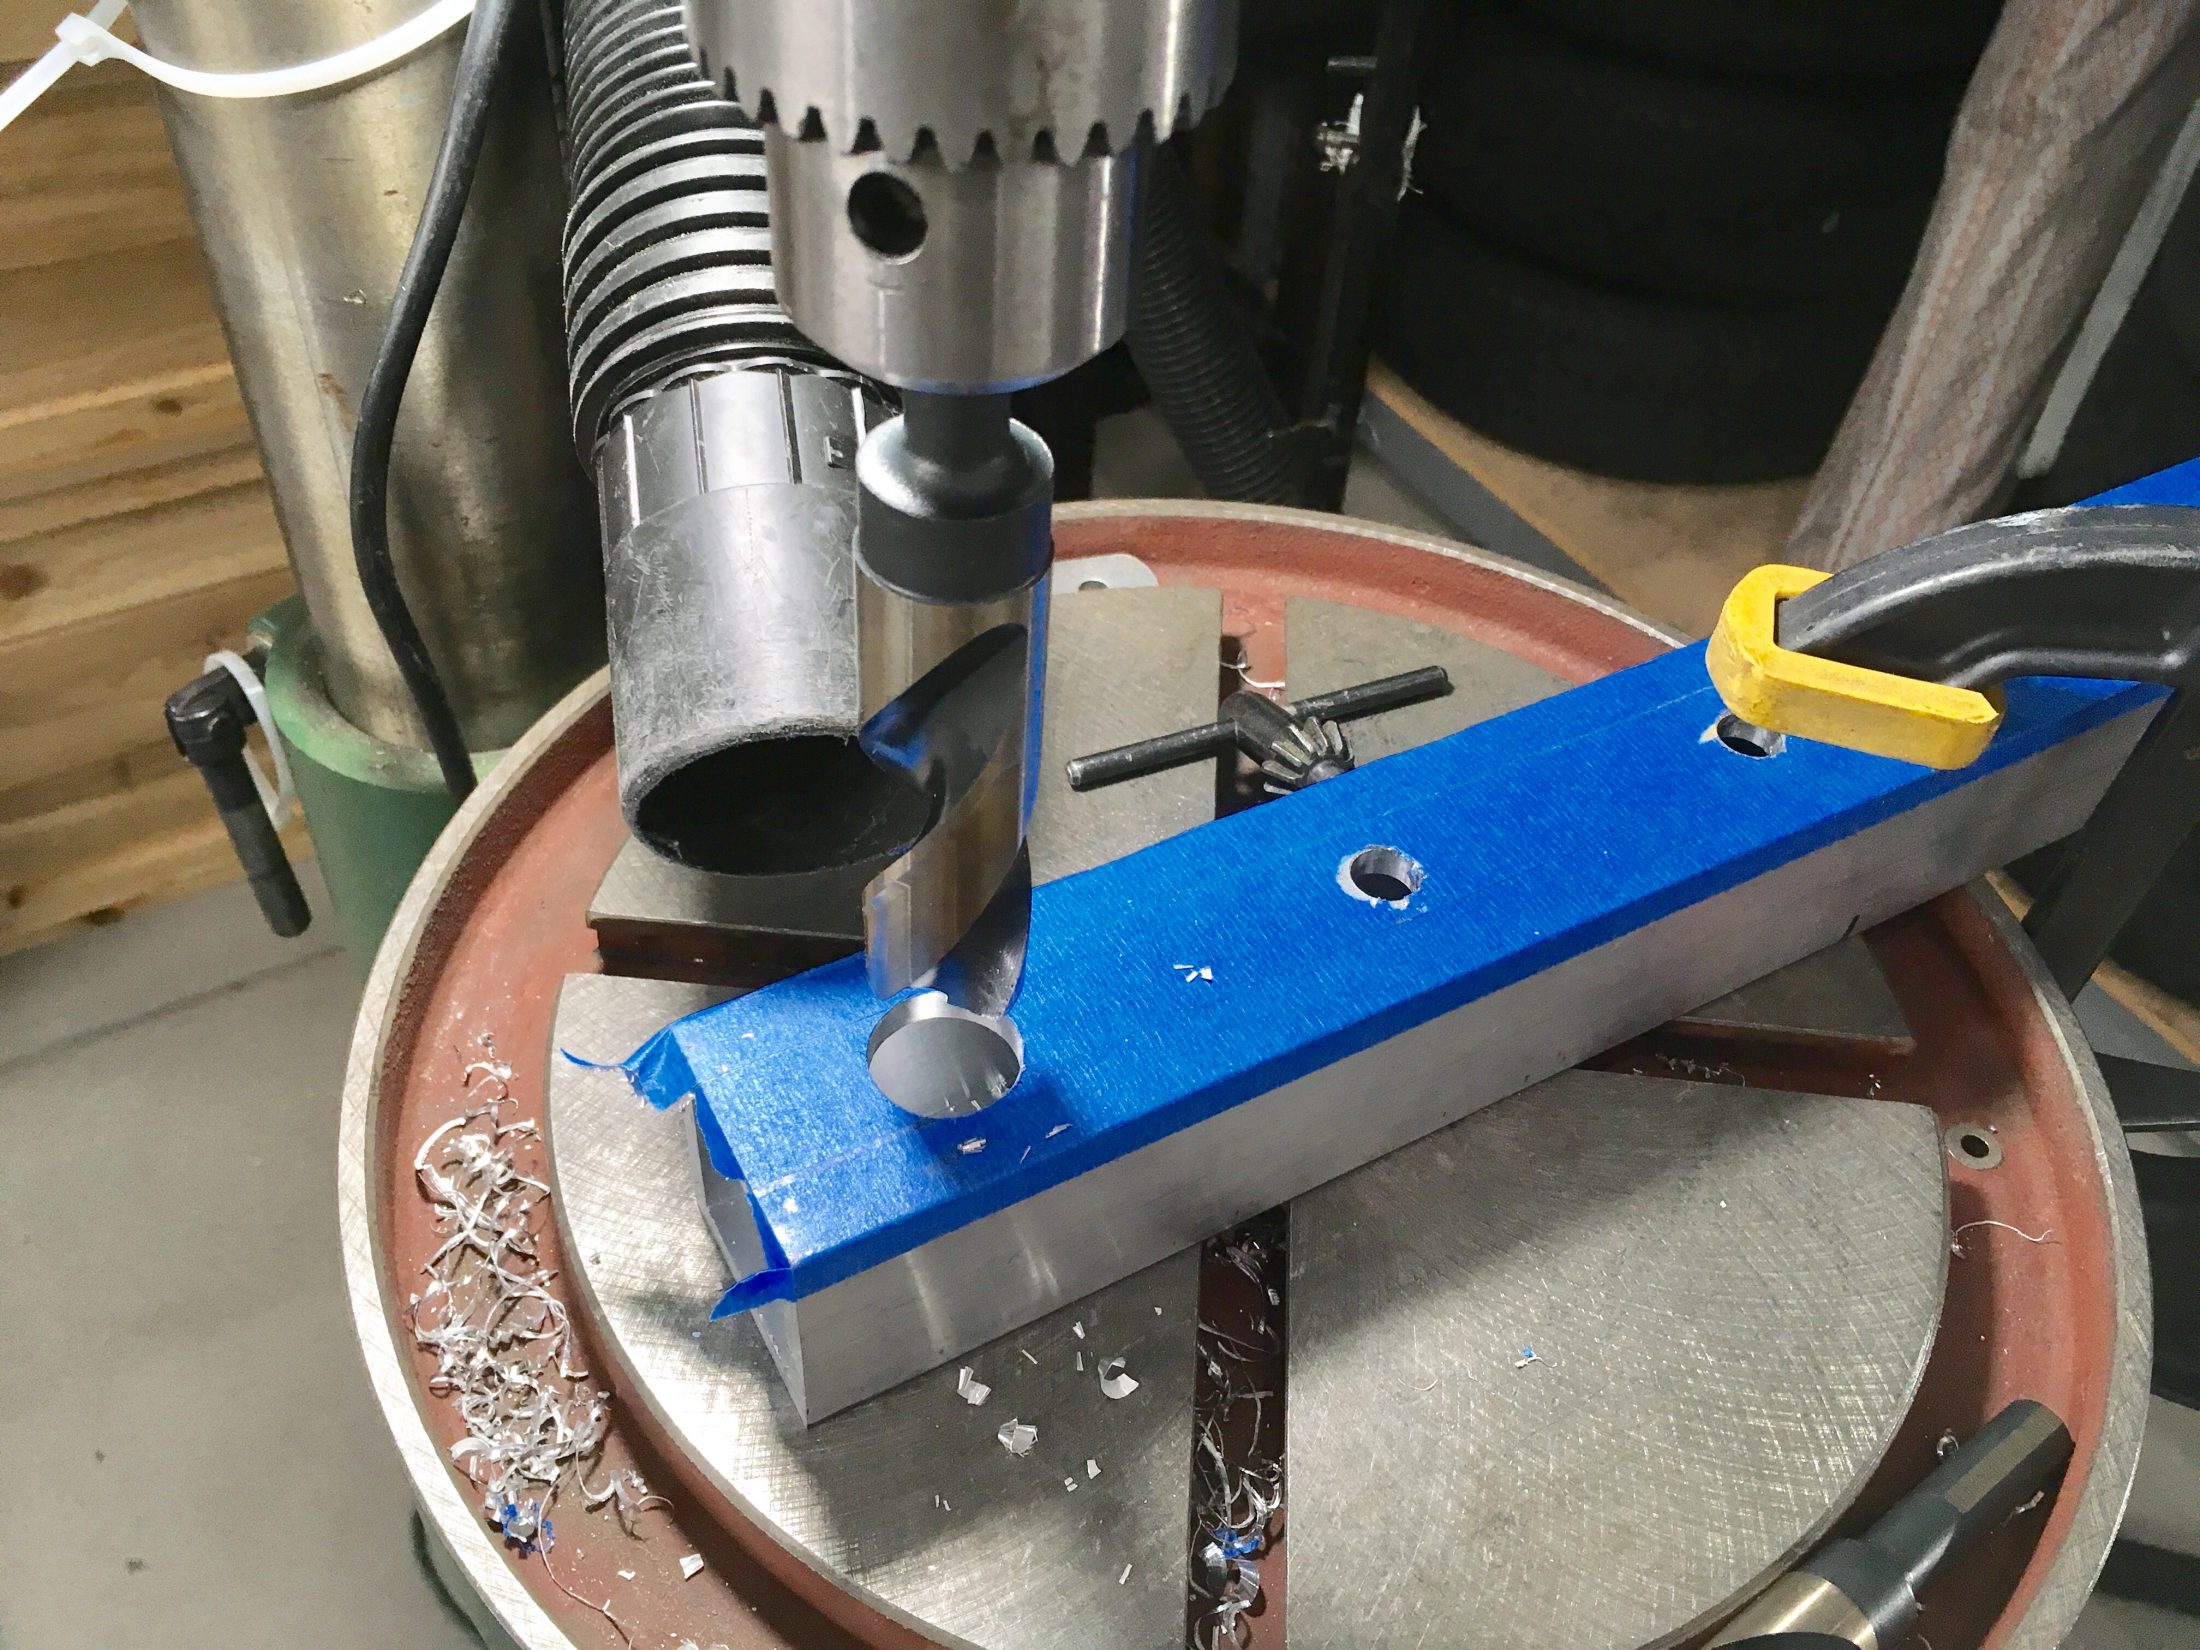
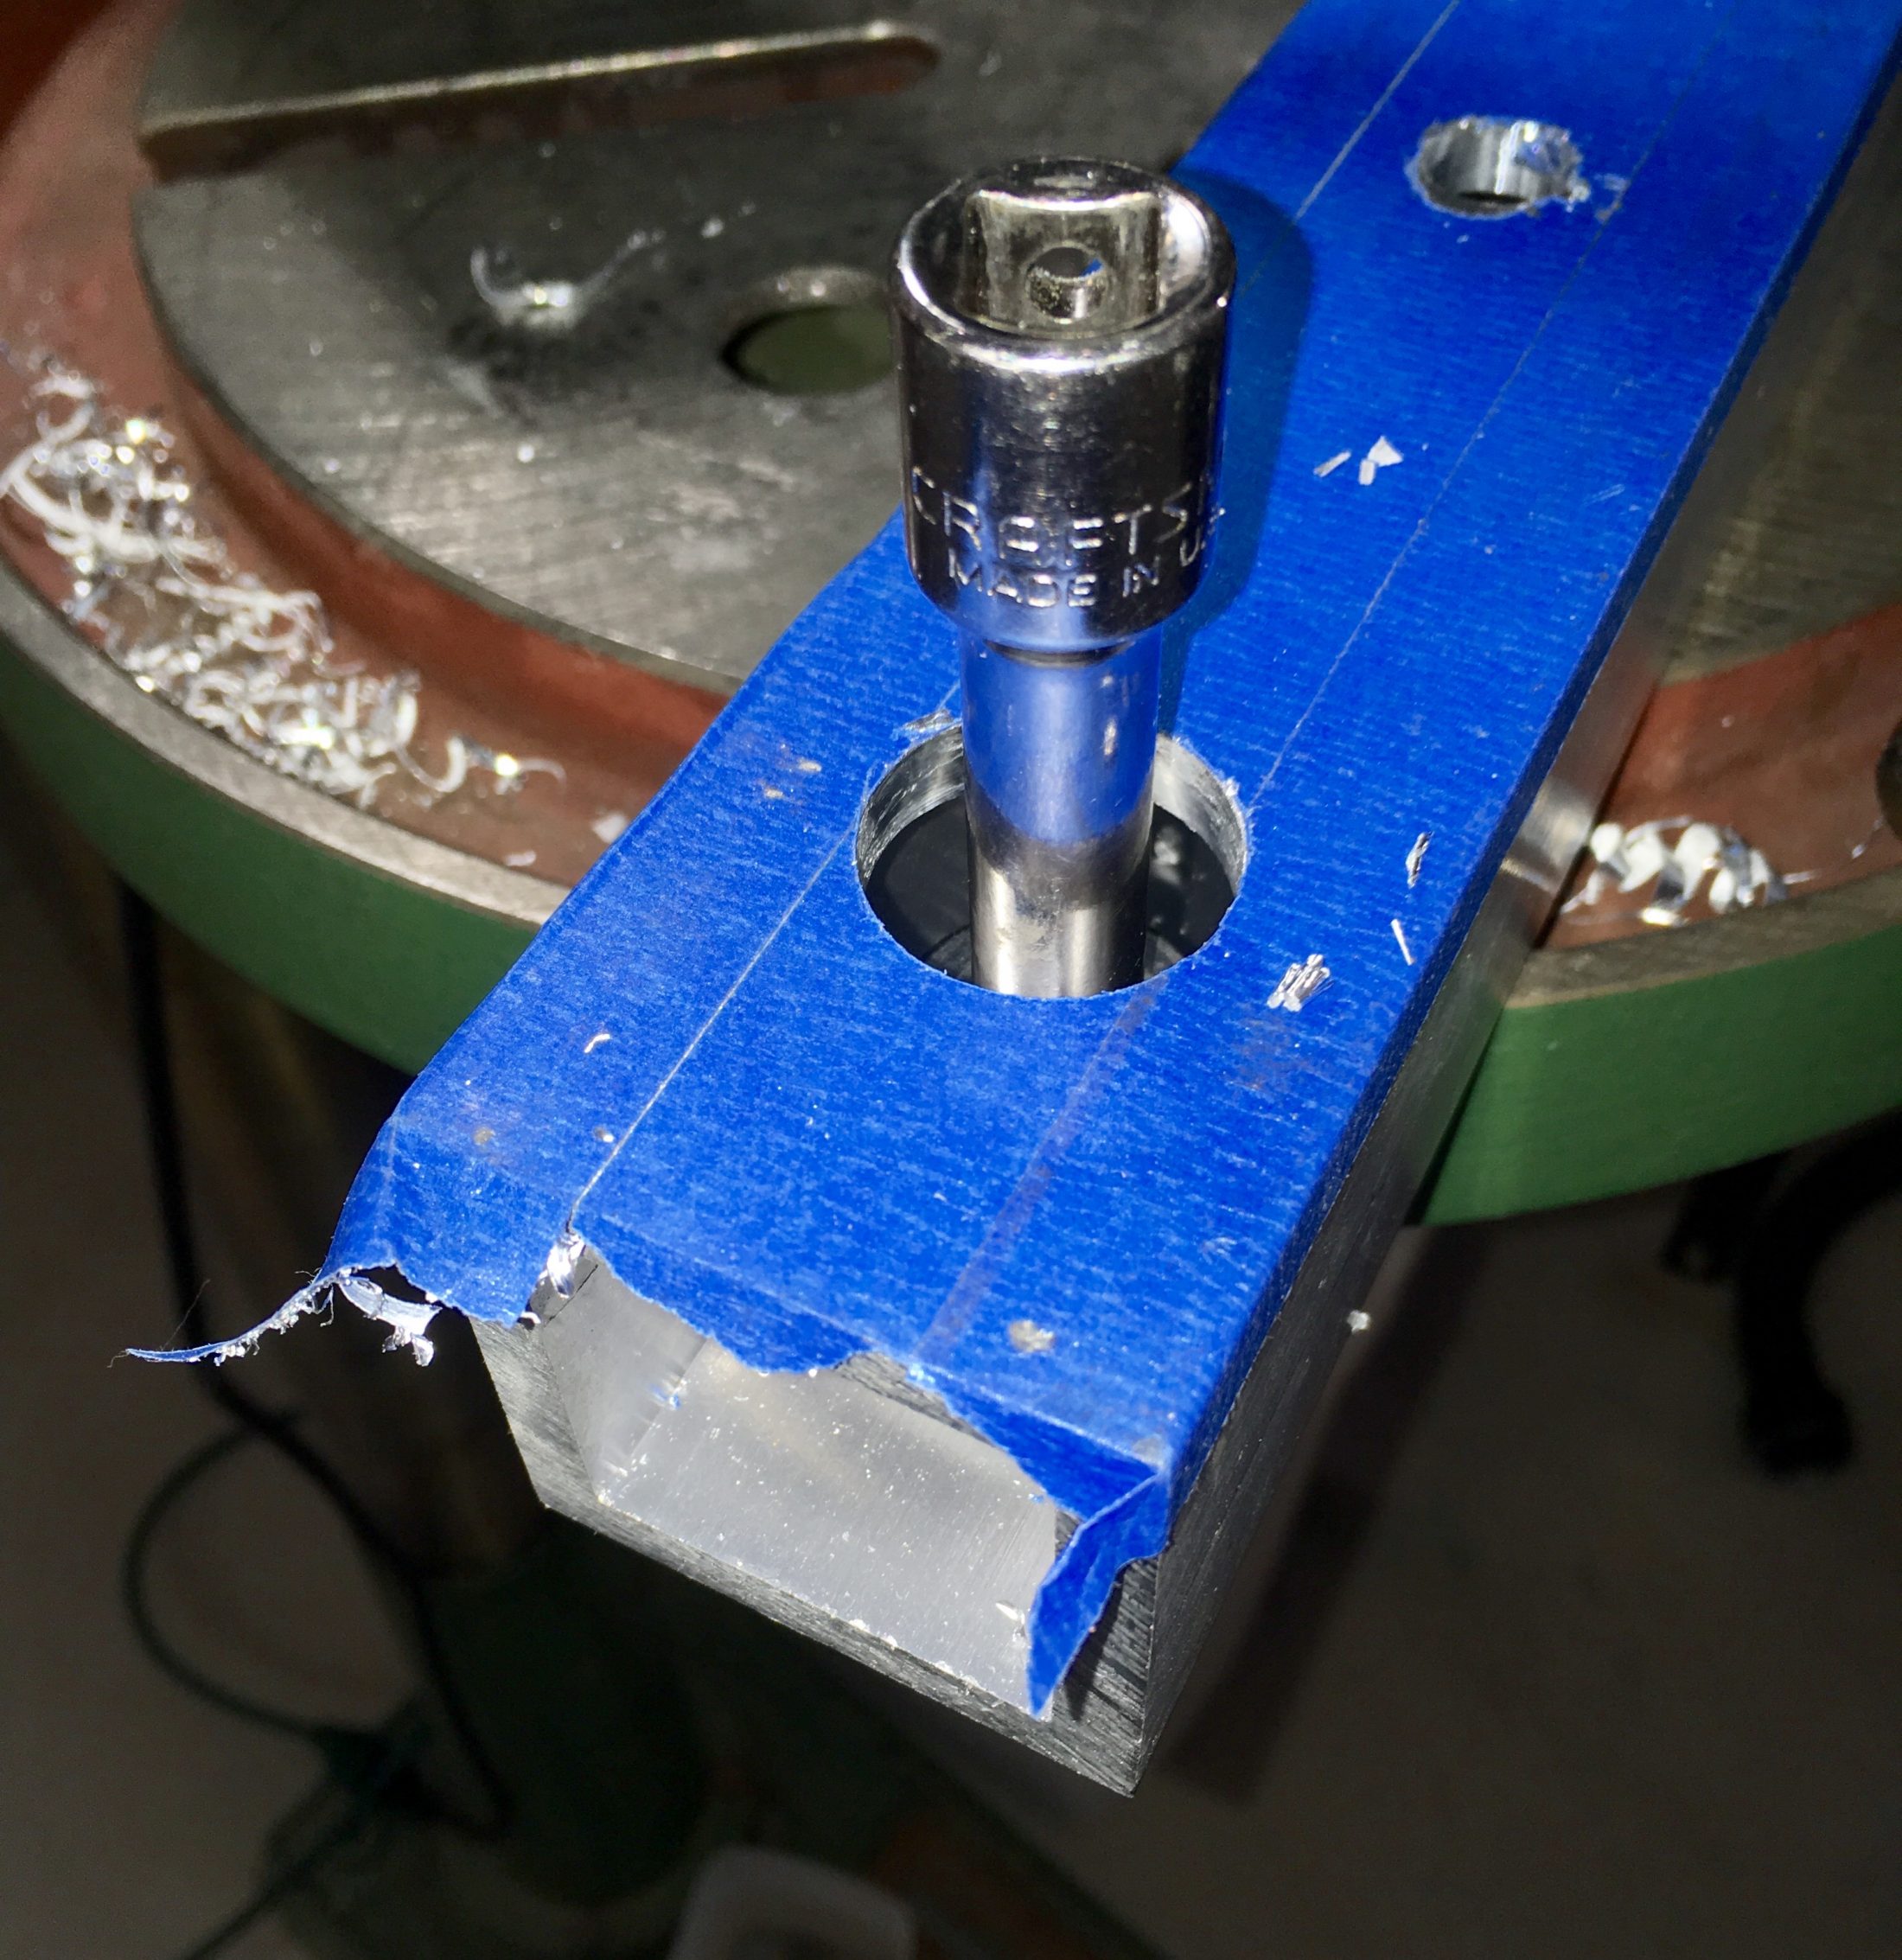
Drilling: I drilled as many 1/2” holes as I could using the drill press, so they were dead straight. I used the drilled arms as jigs, to drill the frame holes straight, and afterwards I opened up the arm upper holes so I could get the hardware and a socket inside. See pictures.
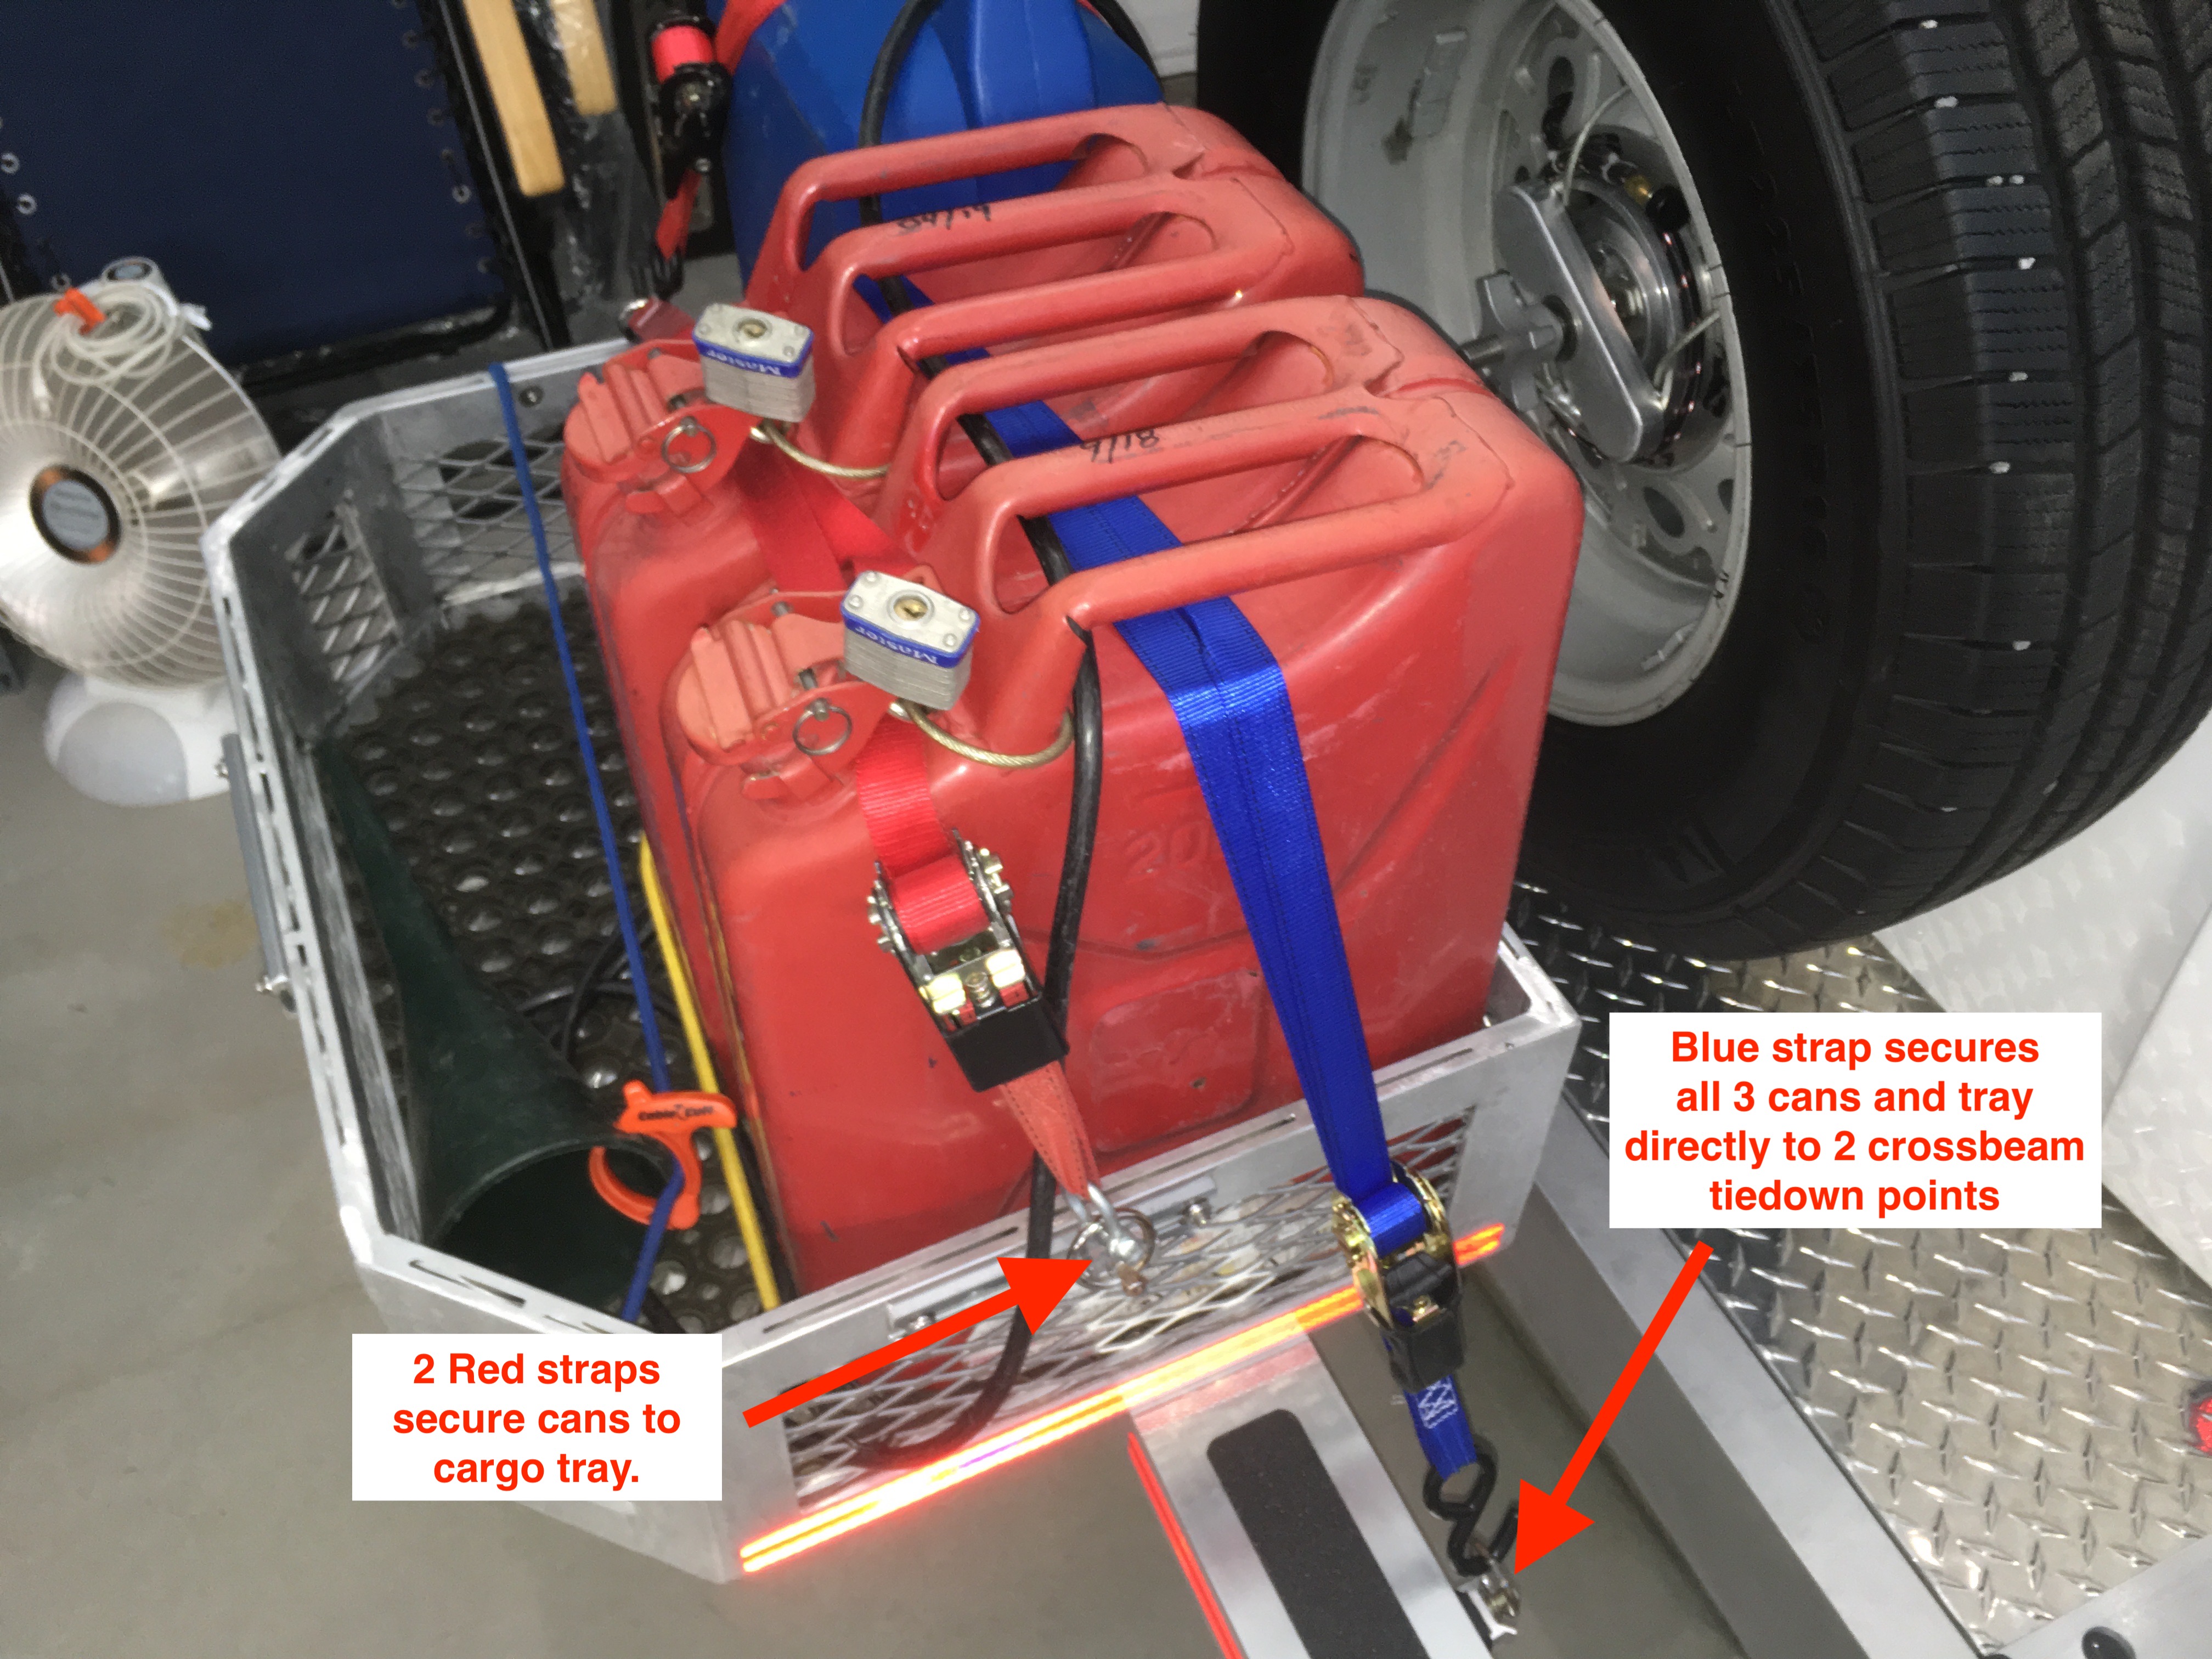
When building something like this it is important to consider what happens if something goes seriously wrong, such as a major rear end collision. There needs to be a “fuse” - a designed-in weak point - where the rack can fail and hopefully minimize structural damage to the hull and frame. My rack is intended to fail where the cross beam meets the arms, not where the arms meet the frame (the underside of the frame rails is reinforced with an extra 1/4” bonded layer). Hopefully the rack will collapse upward and forward. The cans will meet the exposed rear tire and that will help to cushion the blow to the hull. These are real NATO style jerry cans and they are extremely tough. I would not feel happy about transporting plastic gas cans here. OTH if there is going to be a big fire, better here than right behind the truck....
RACK:
EDIT 01/21/22. Added wall thickness for crossbeams and arms. JD
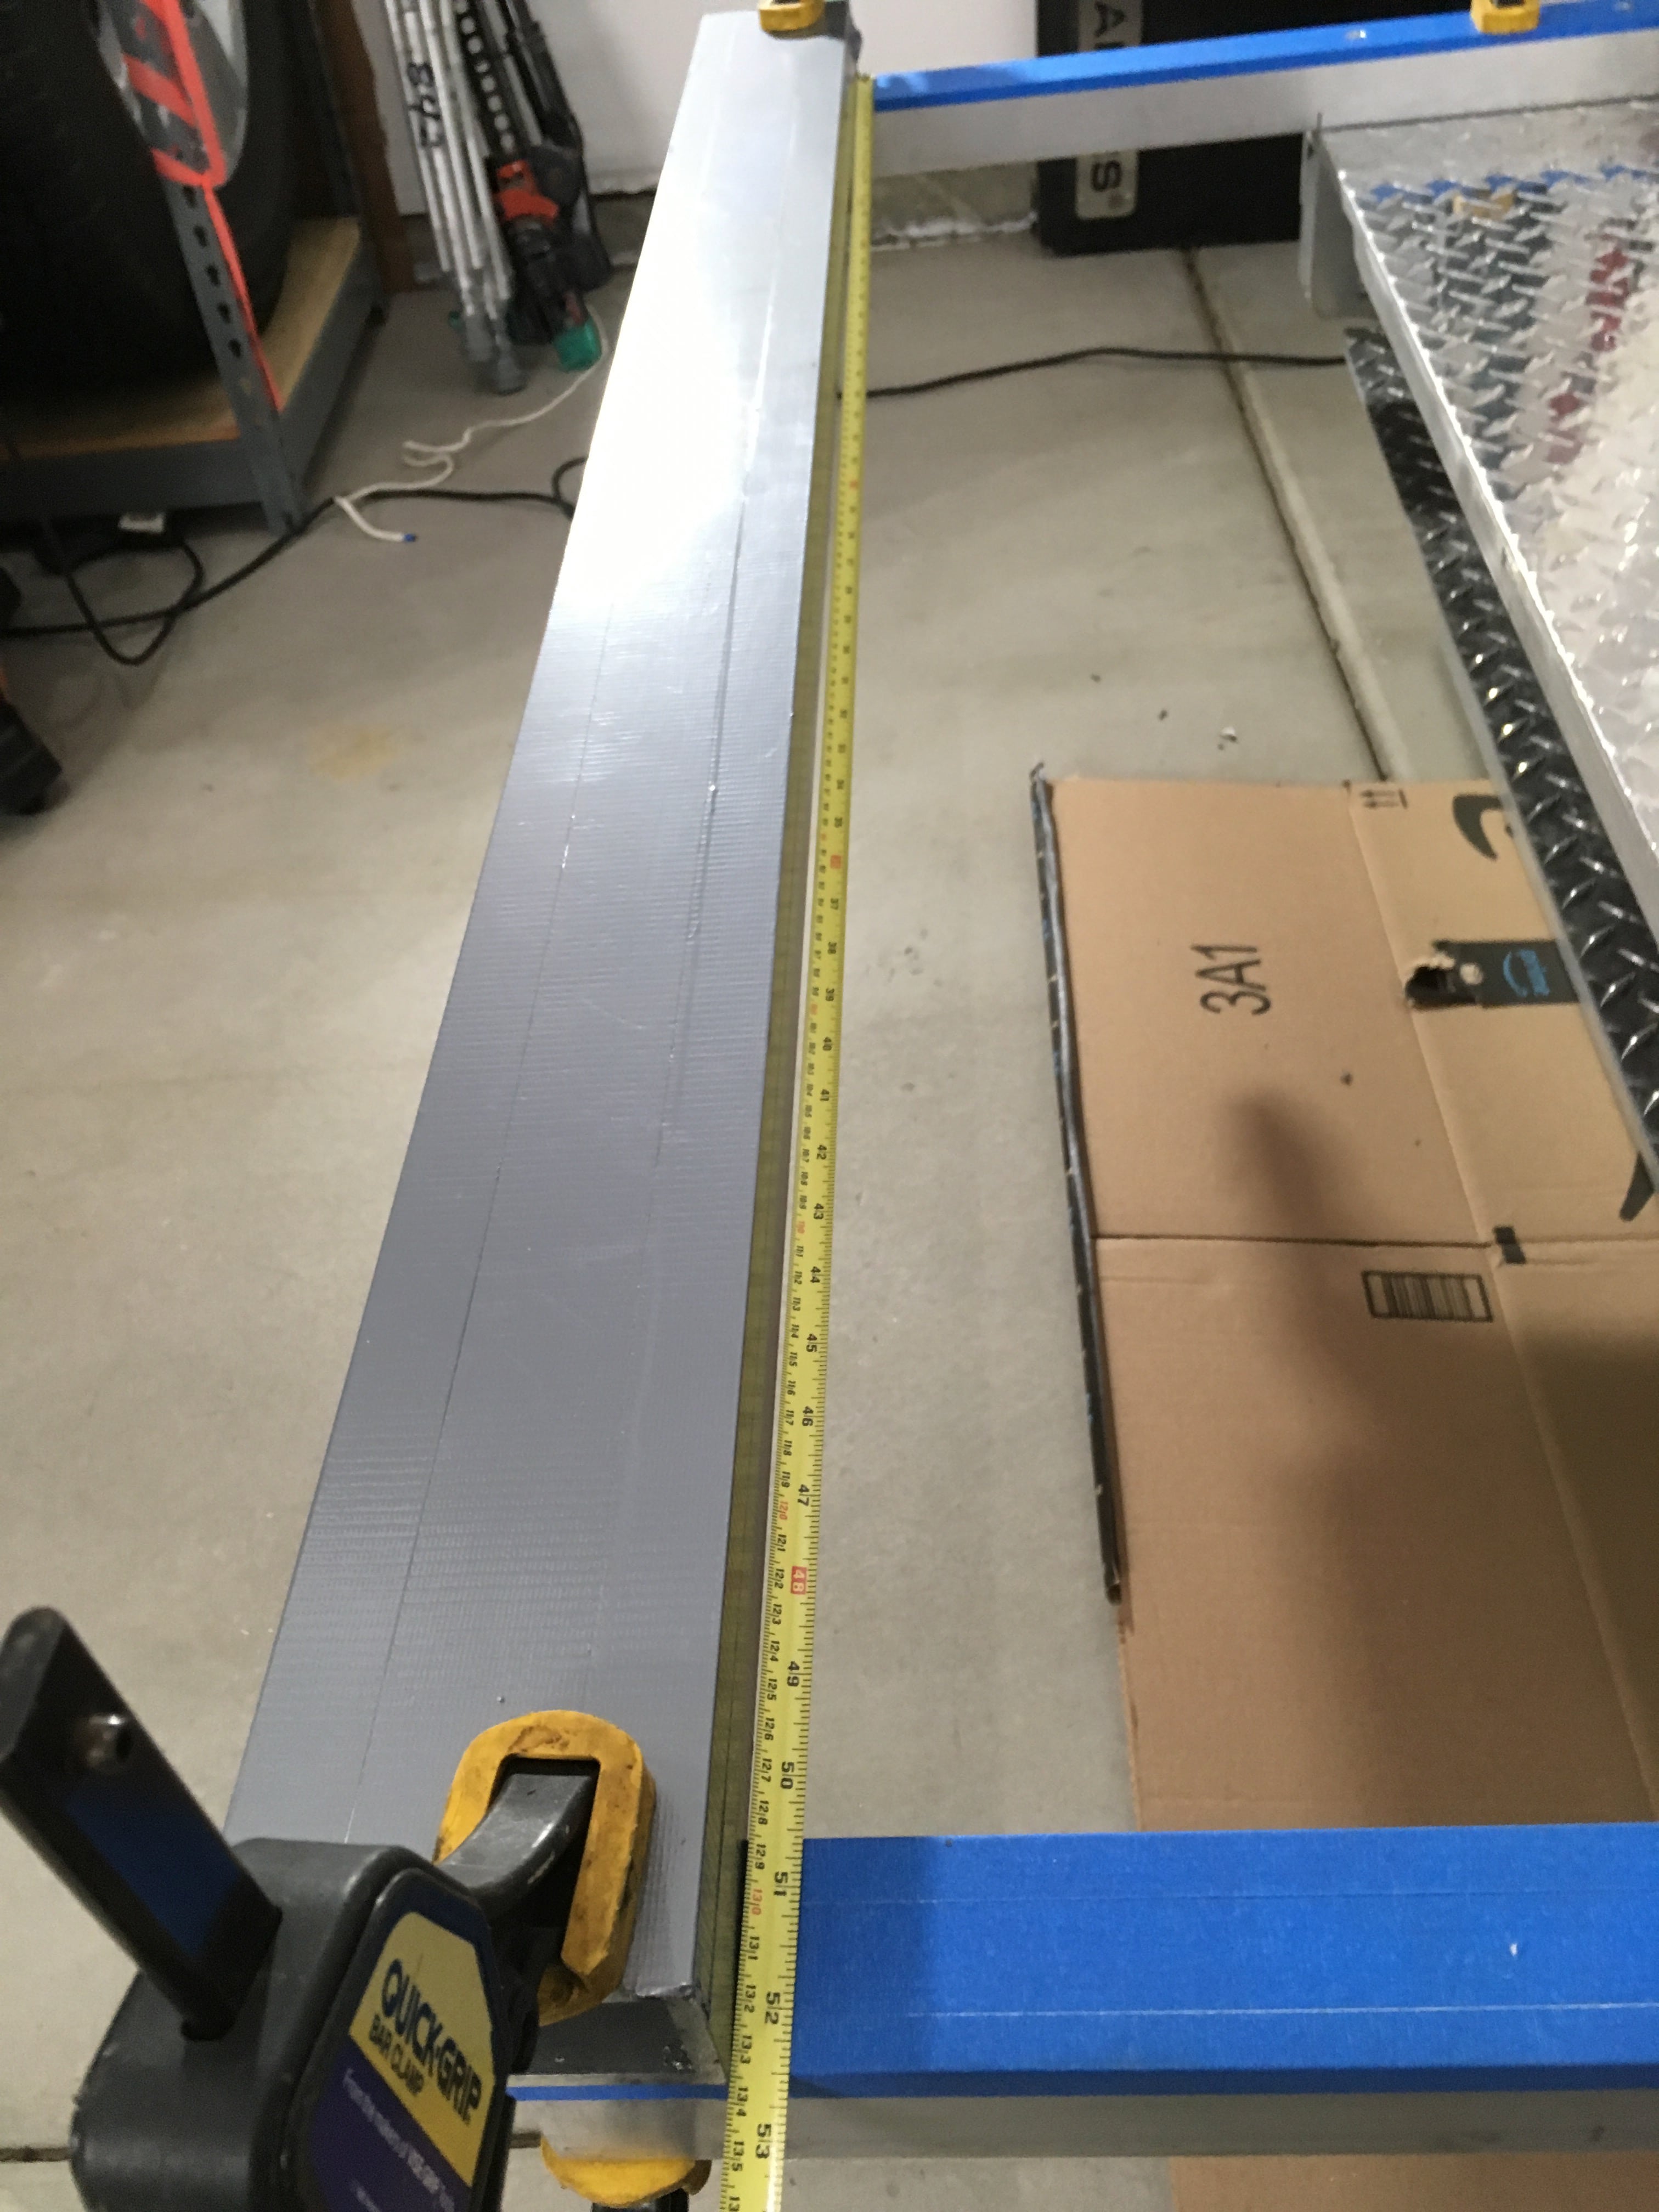
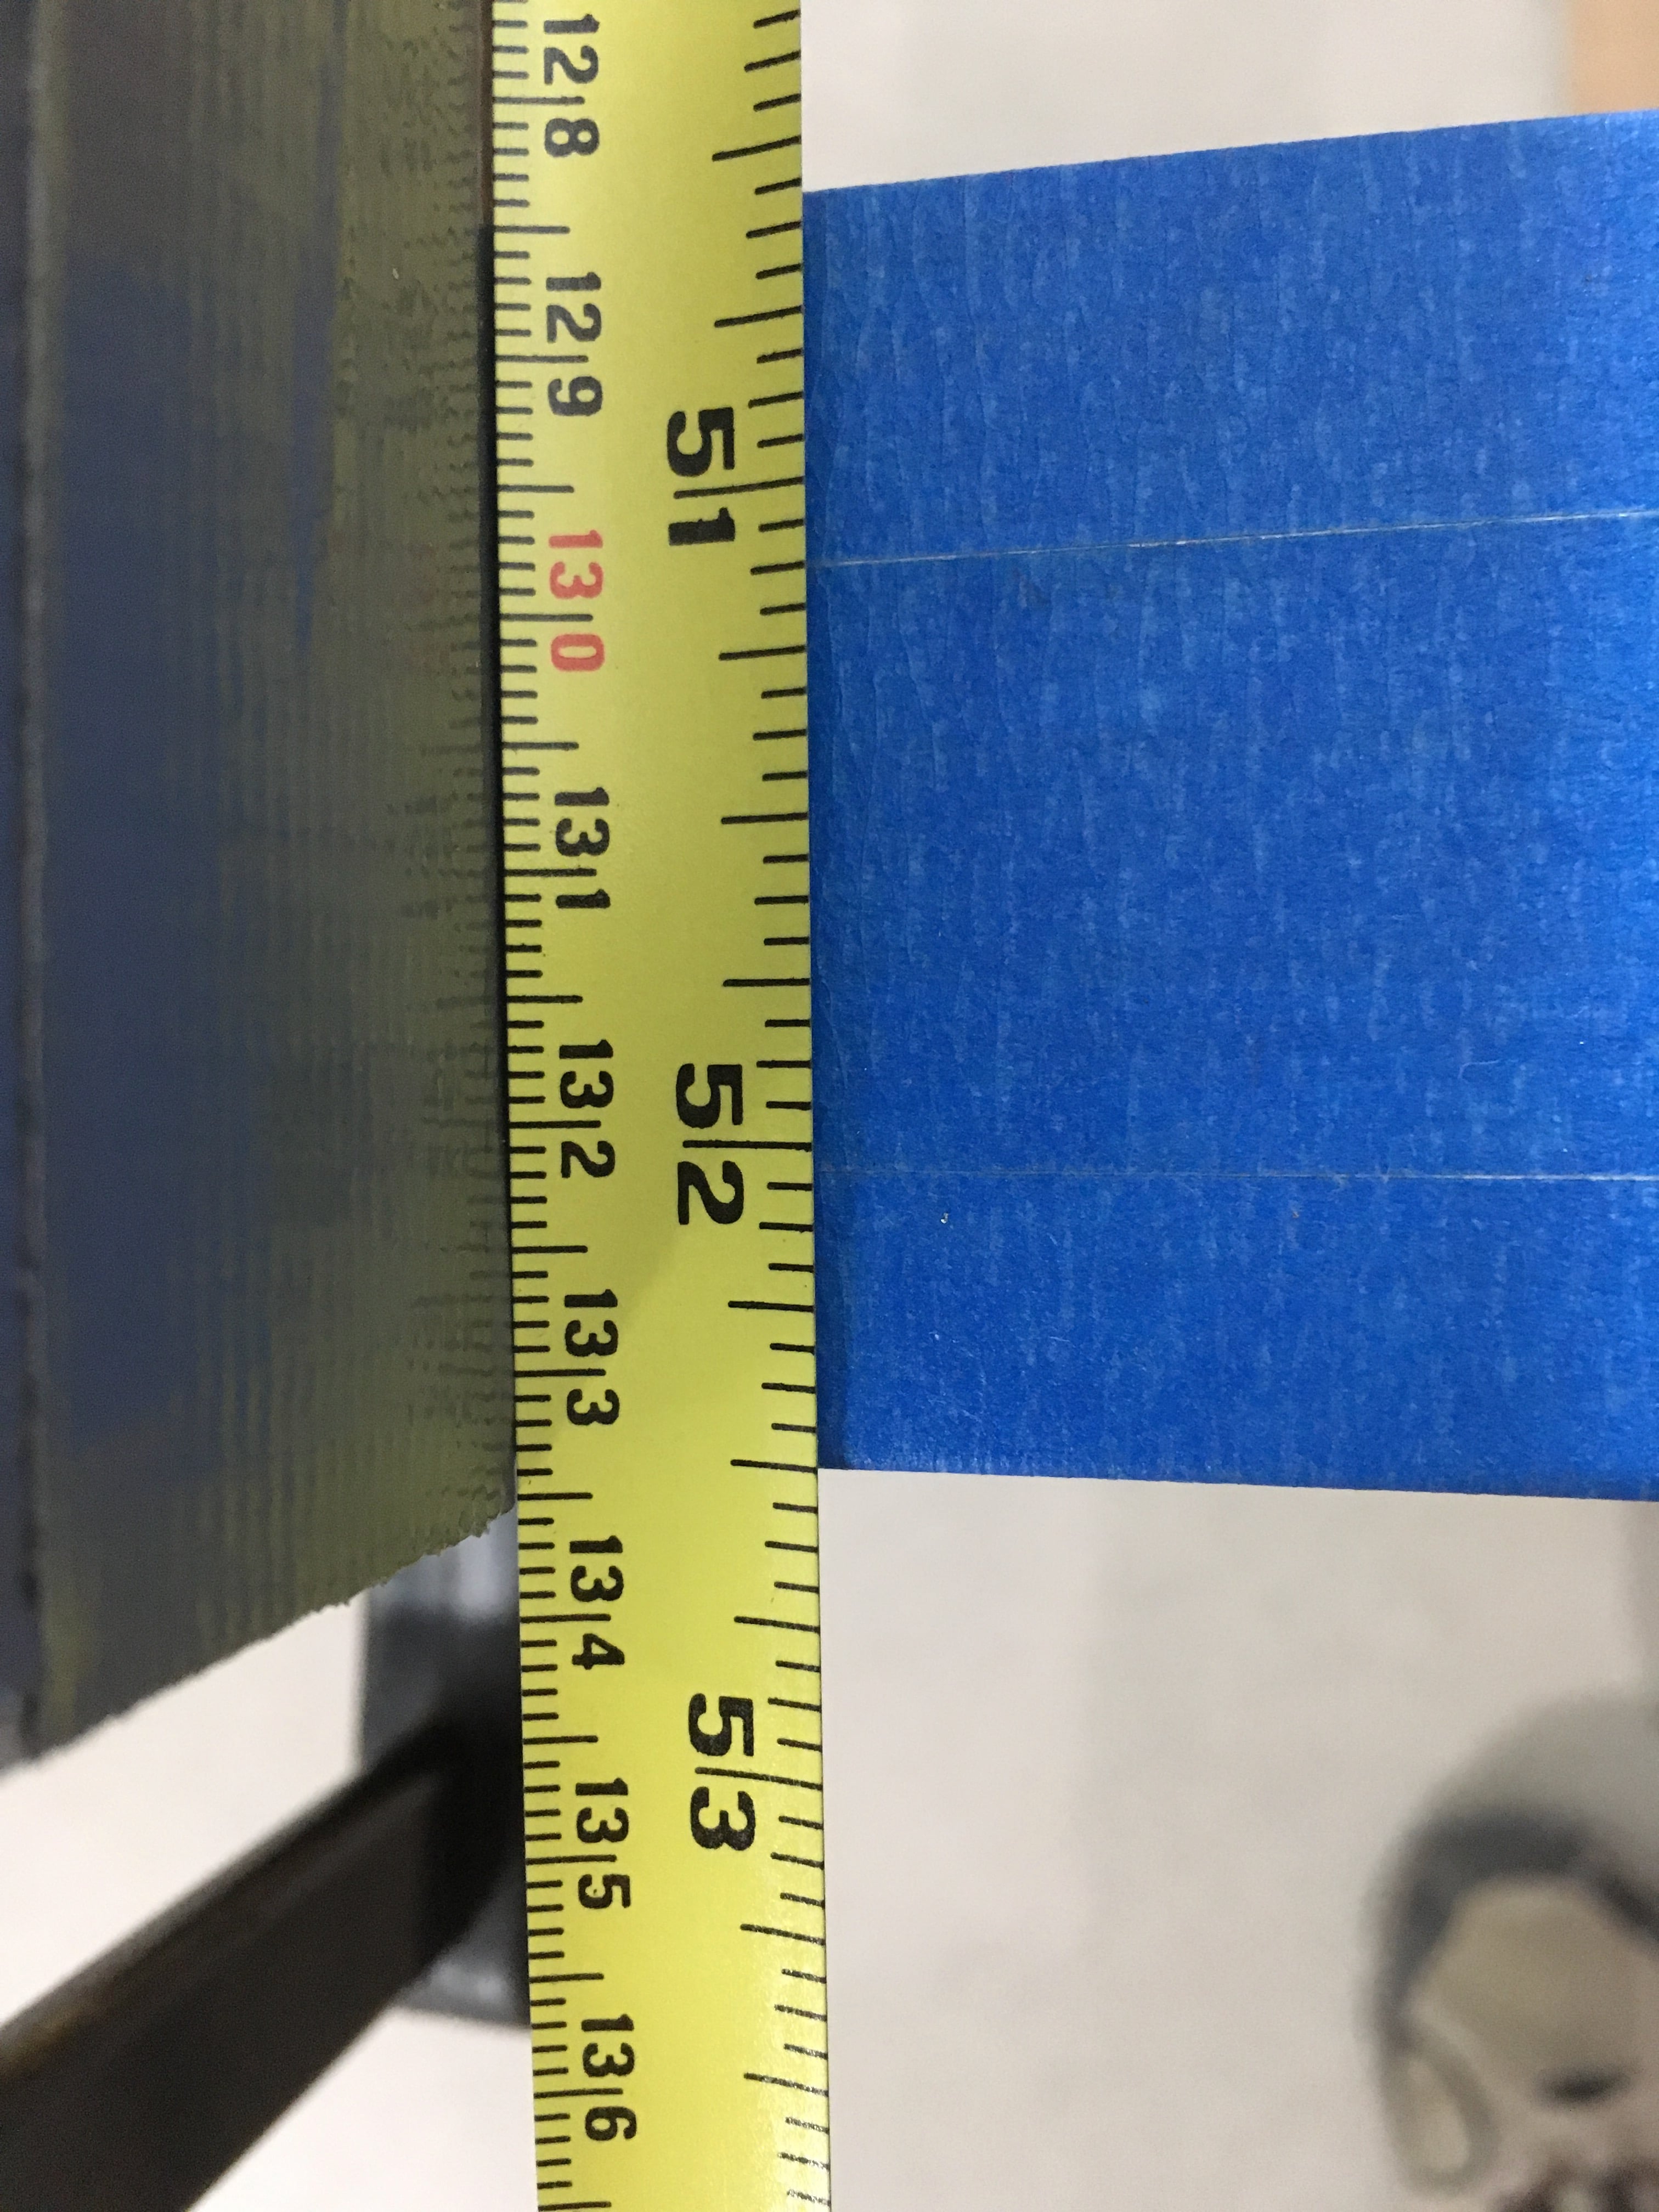
1 - Crossbeam 2” x 4” x 1/4” x 52.5” long. $68.00 … I could have gone a little wider on the beam (Oliver uses 7”, the same as the bumper), but my supplier had run out of the larger sizes and I think this is plenty adequate for the load (which is centered directly on top of the crossbeam).
2 - Support arms 2” x 2” x 1/4” x 24” long. $45.00
1 - Bar 1/4” x 1 1/2 x 24” long. $5. For reinforcing inside of trailer frame rails (epoxy bonded).
1 - Bar 1/8” x 2” x 24” long. $6. For spacers between arms and diamond plate cover.
4 - Bolt 1/2”-13 x 2”. Arms to frame.
4 - Bolt 1/2”-13 x 1 3/4”. Crossbeam to arms
8 - Nylock nut 1/2”-16
16 - Washer 1/2” x 1.062” OD (SAE specs, thicker and a better fit than a common washer)
CARGO TRAY:
Labor: mill off lower brackets, weld on two 1/8” thick support pieces: $80
1 - Bar 1/4” x 3” x 24” long. $10. For the tray reinforcing supports.
4 - Bolt 3/8”-16 x 3” trim excess length if needed. Use in the ends of the tray.
4 - Bolt Countersunk Allen head 3/8”-16 x 3” trim excess length if needed. Use in the center of tray to minimize interference with cargo.
8 - Nylock nut 3/8”-16
12 - Washer 3/8” x 7/8” OD
MISCELLANEOUS:
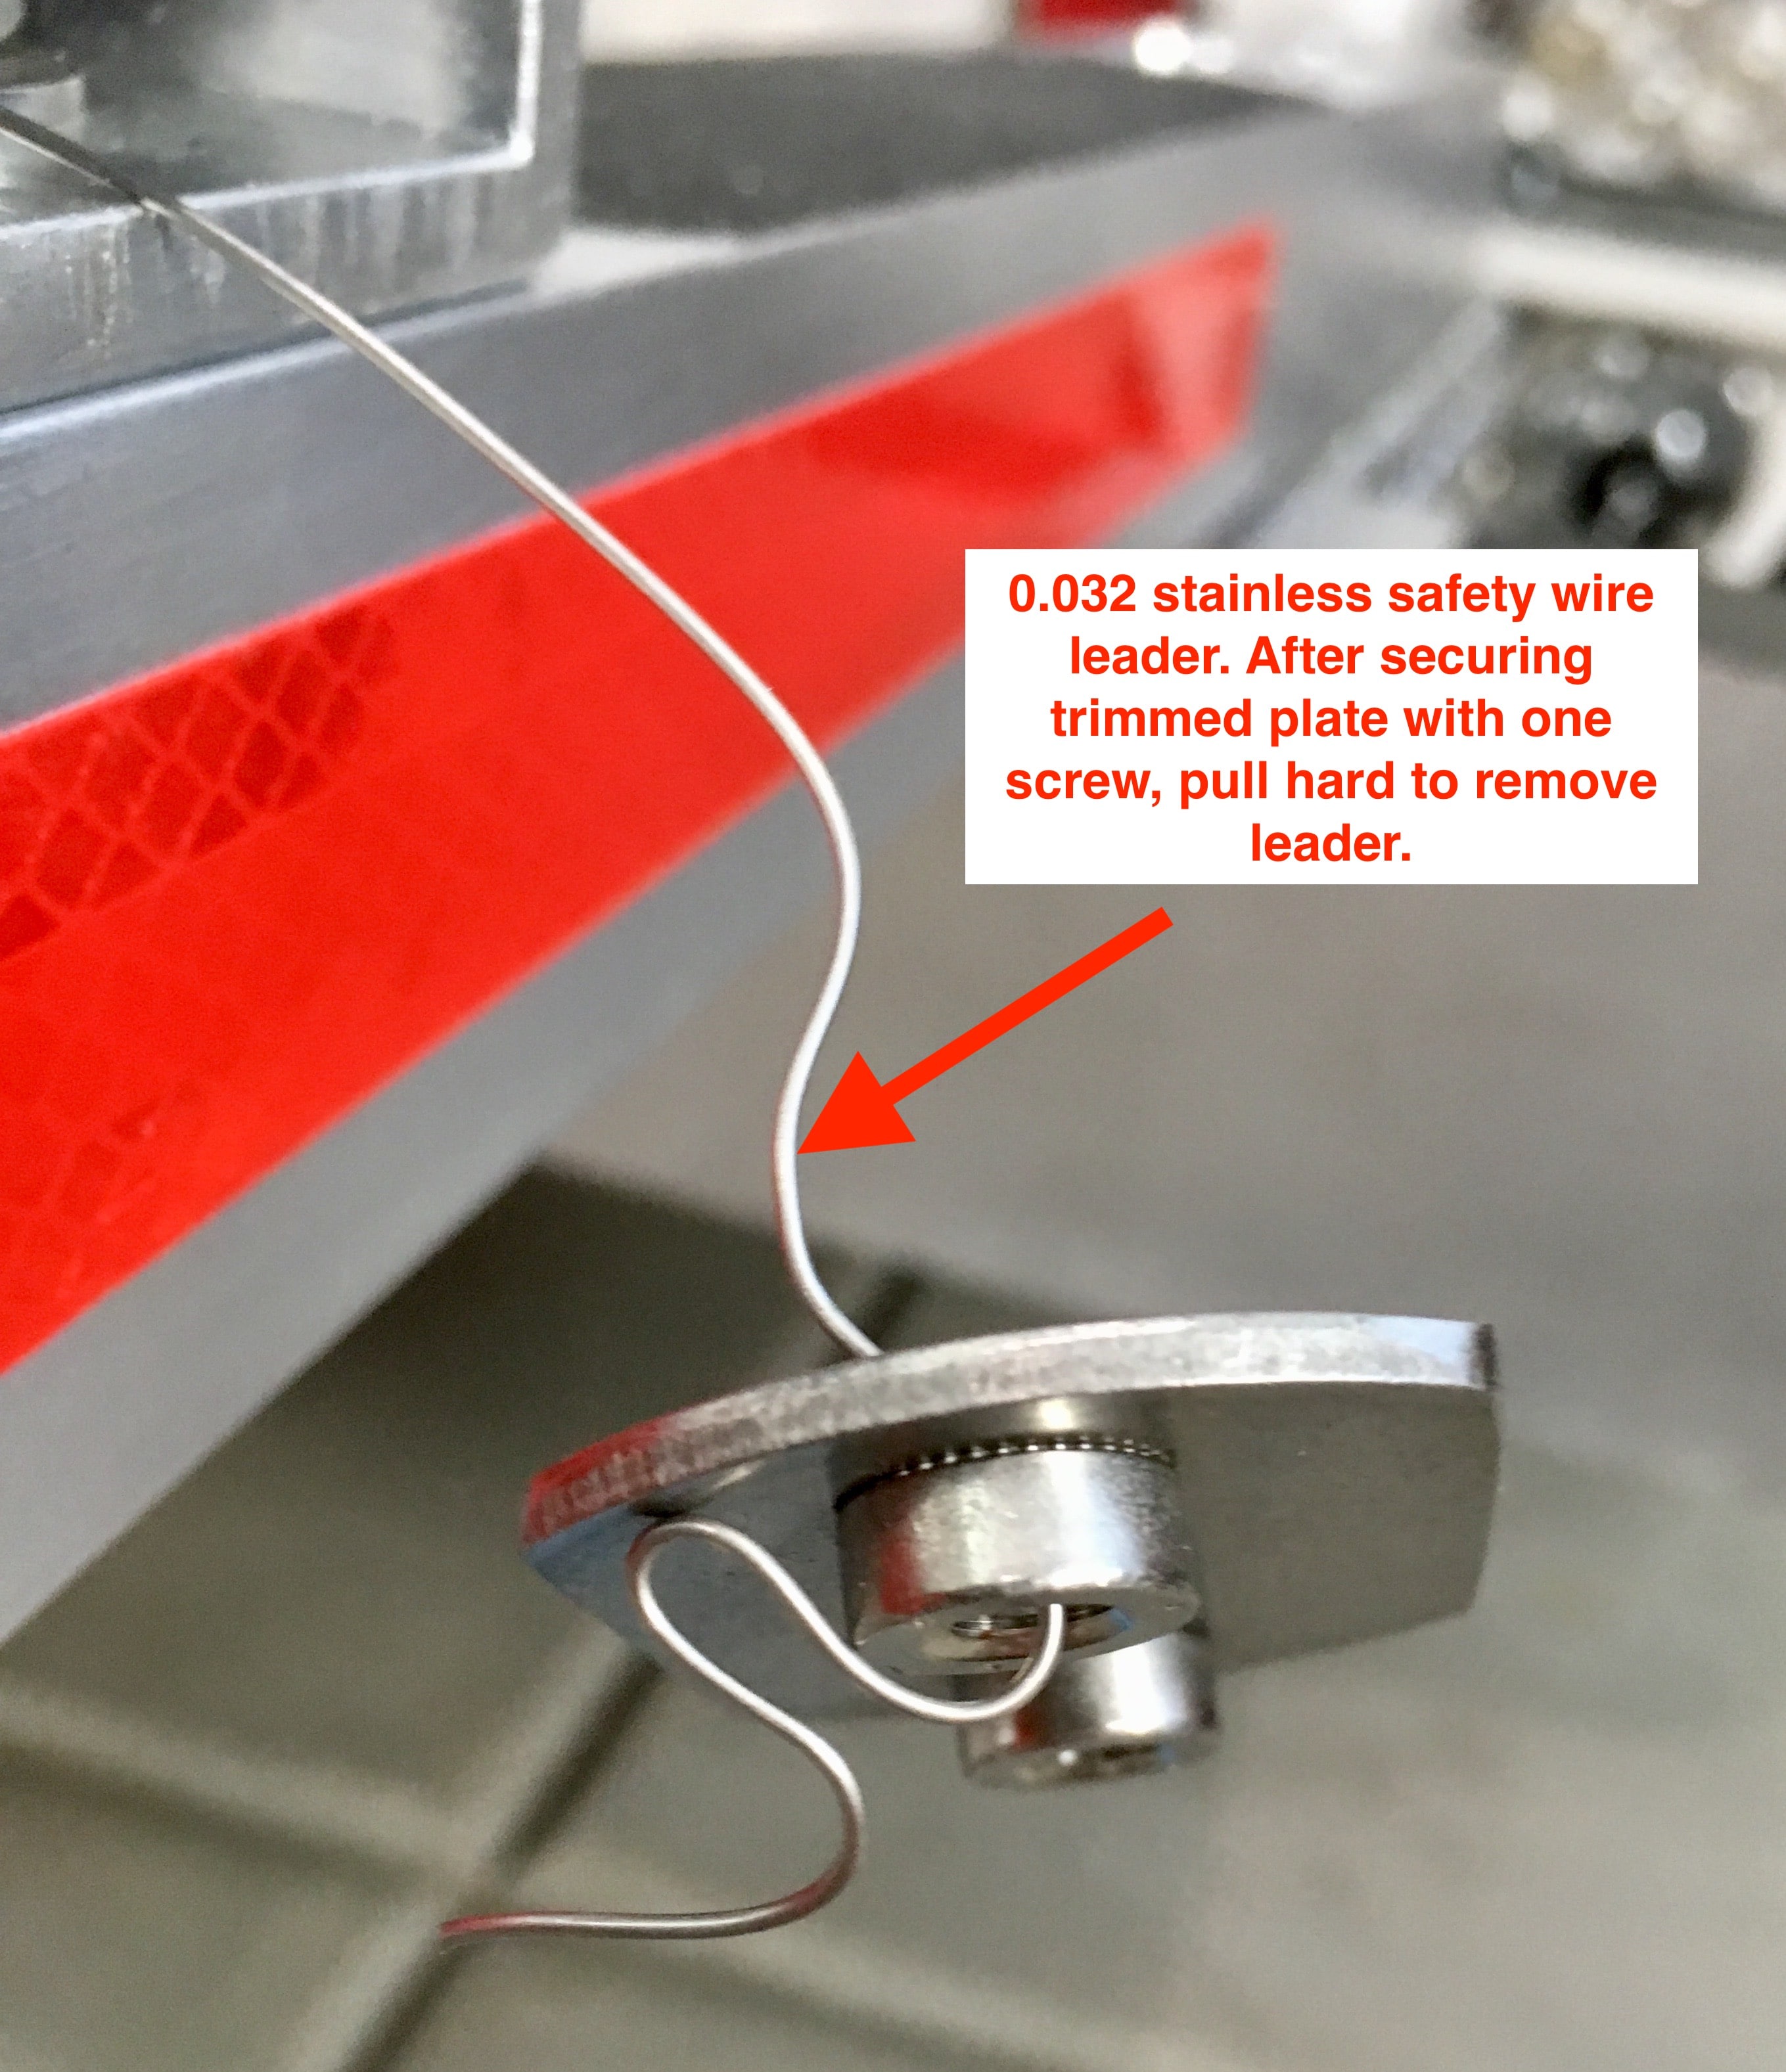
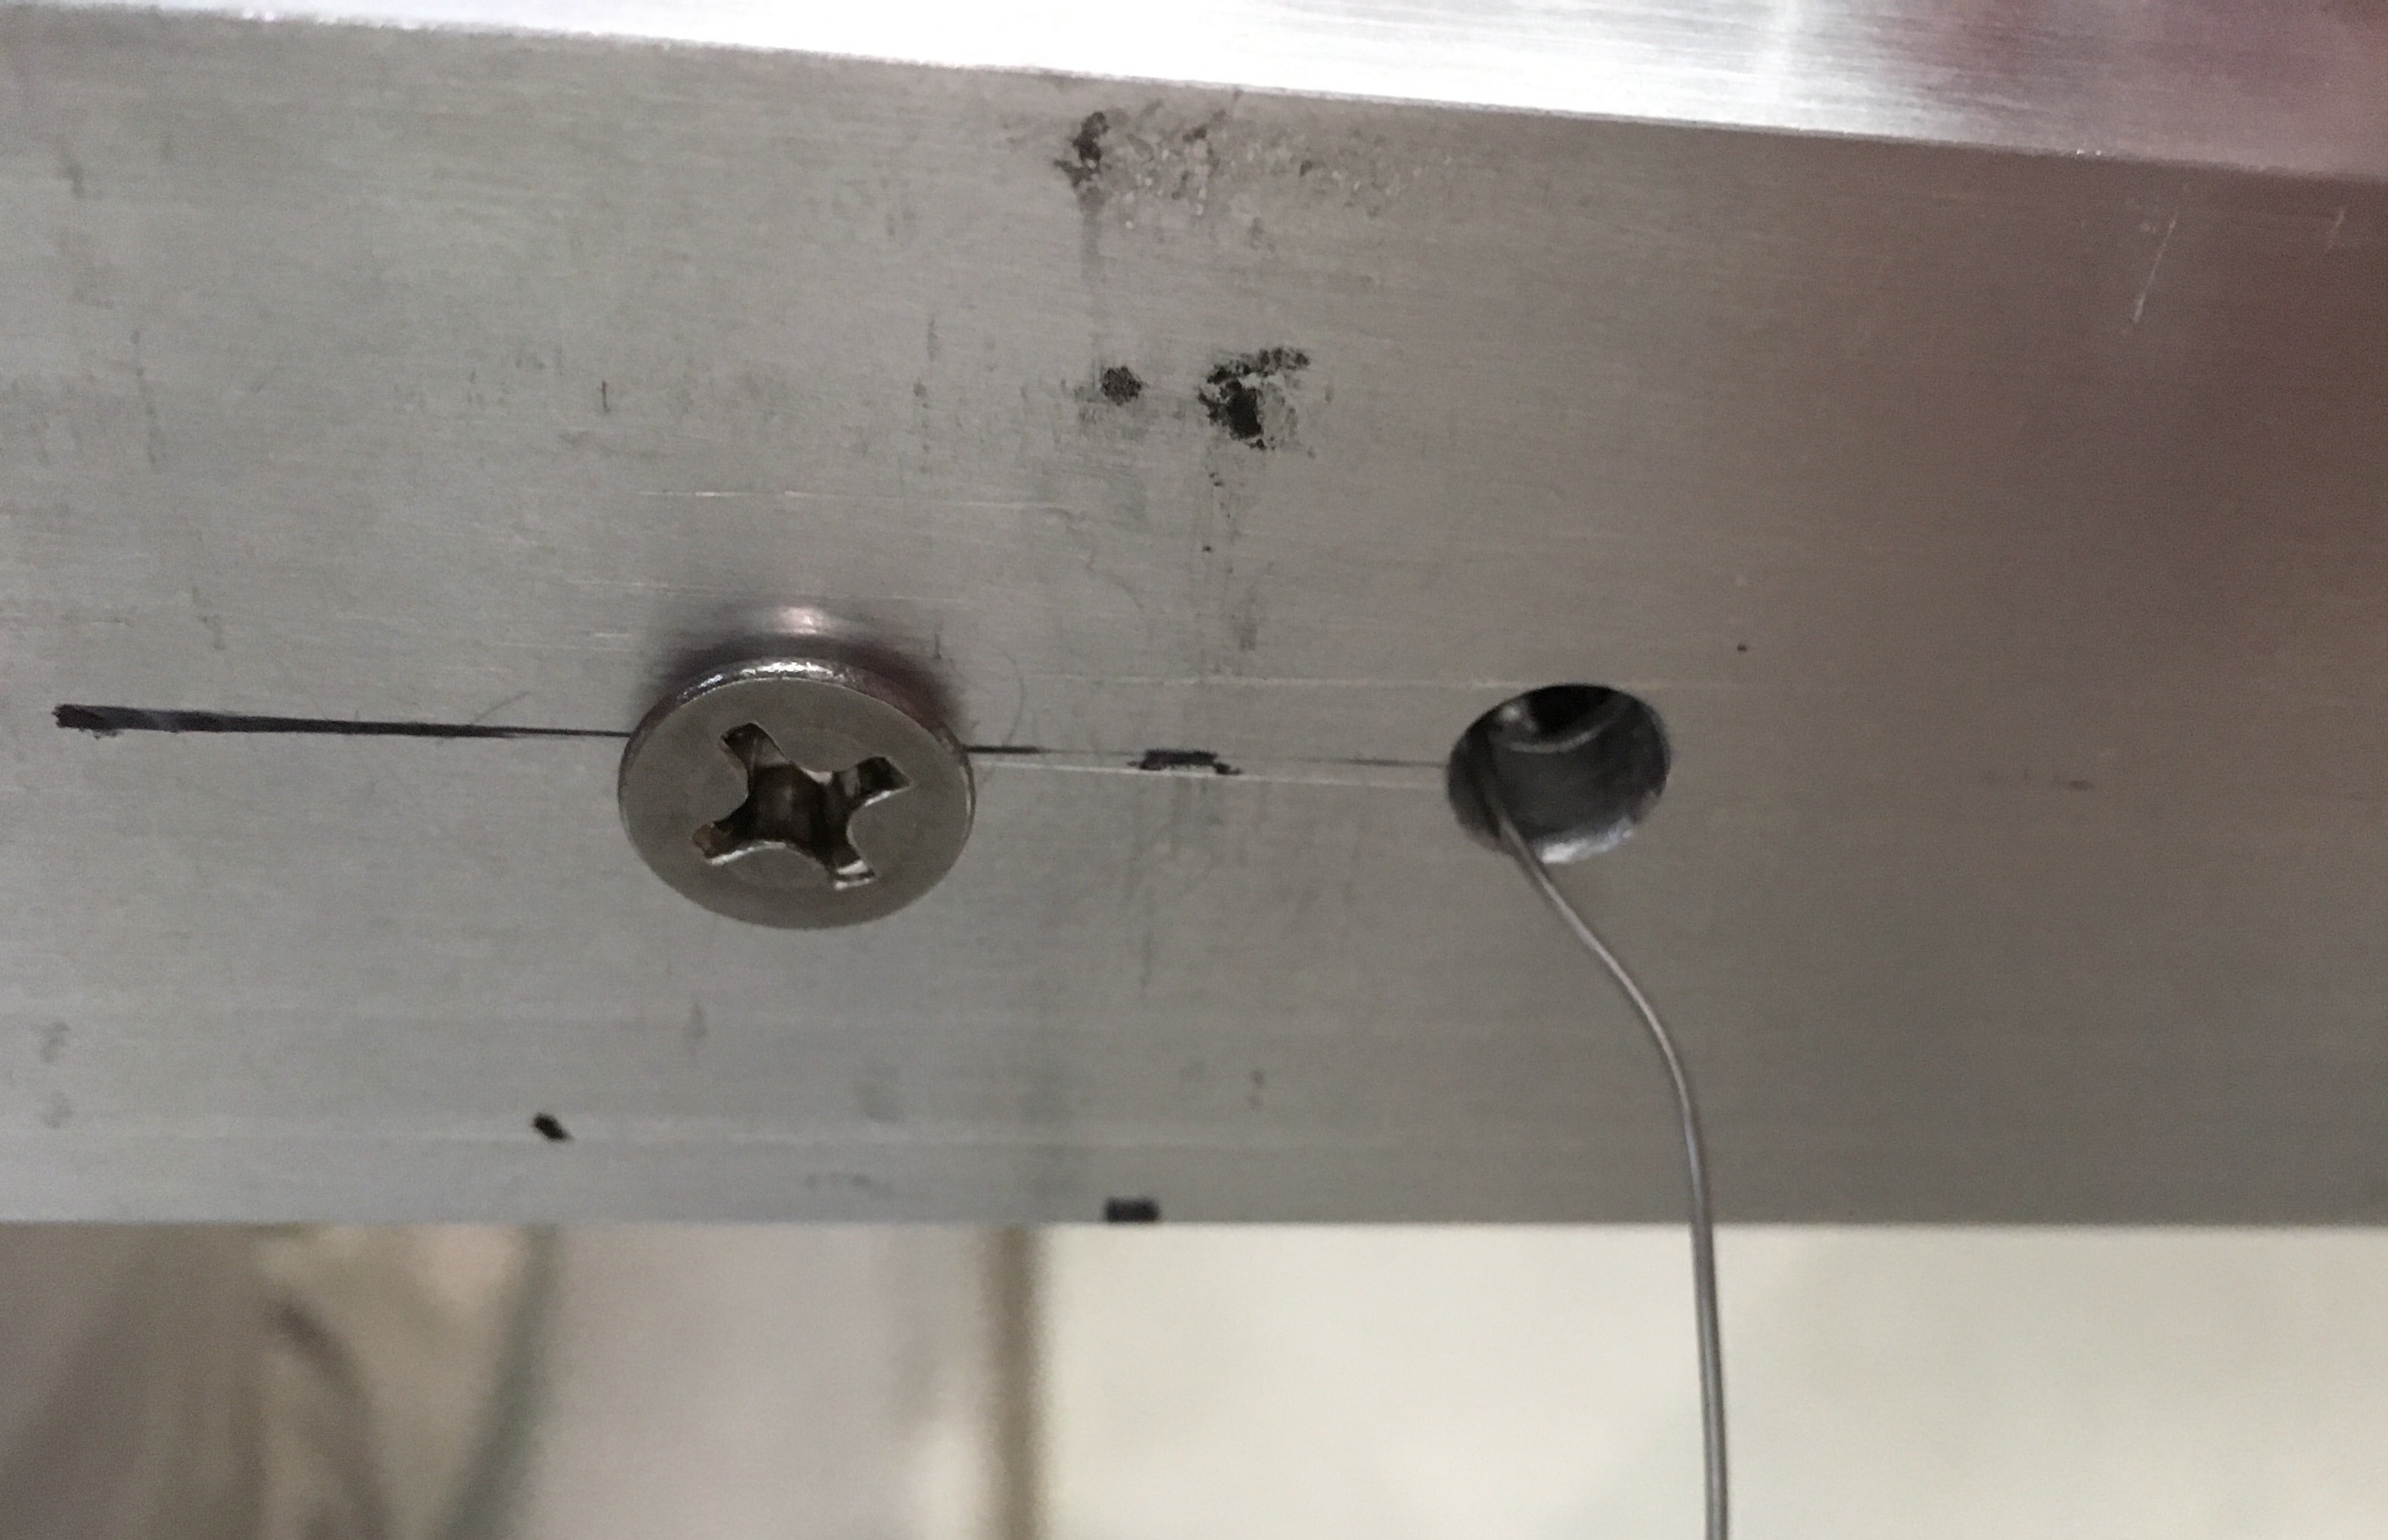
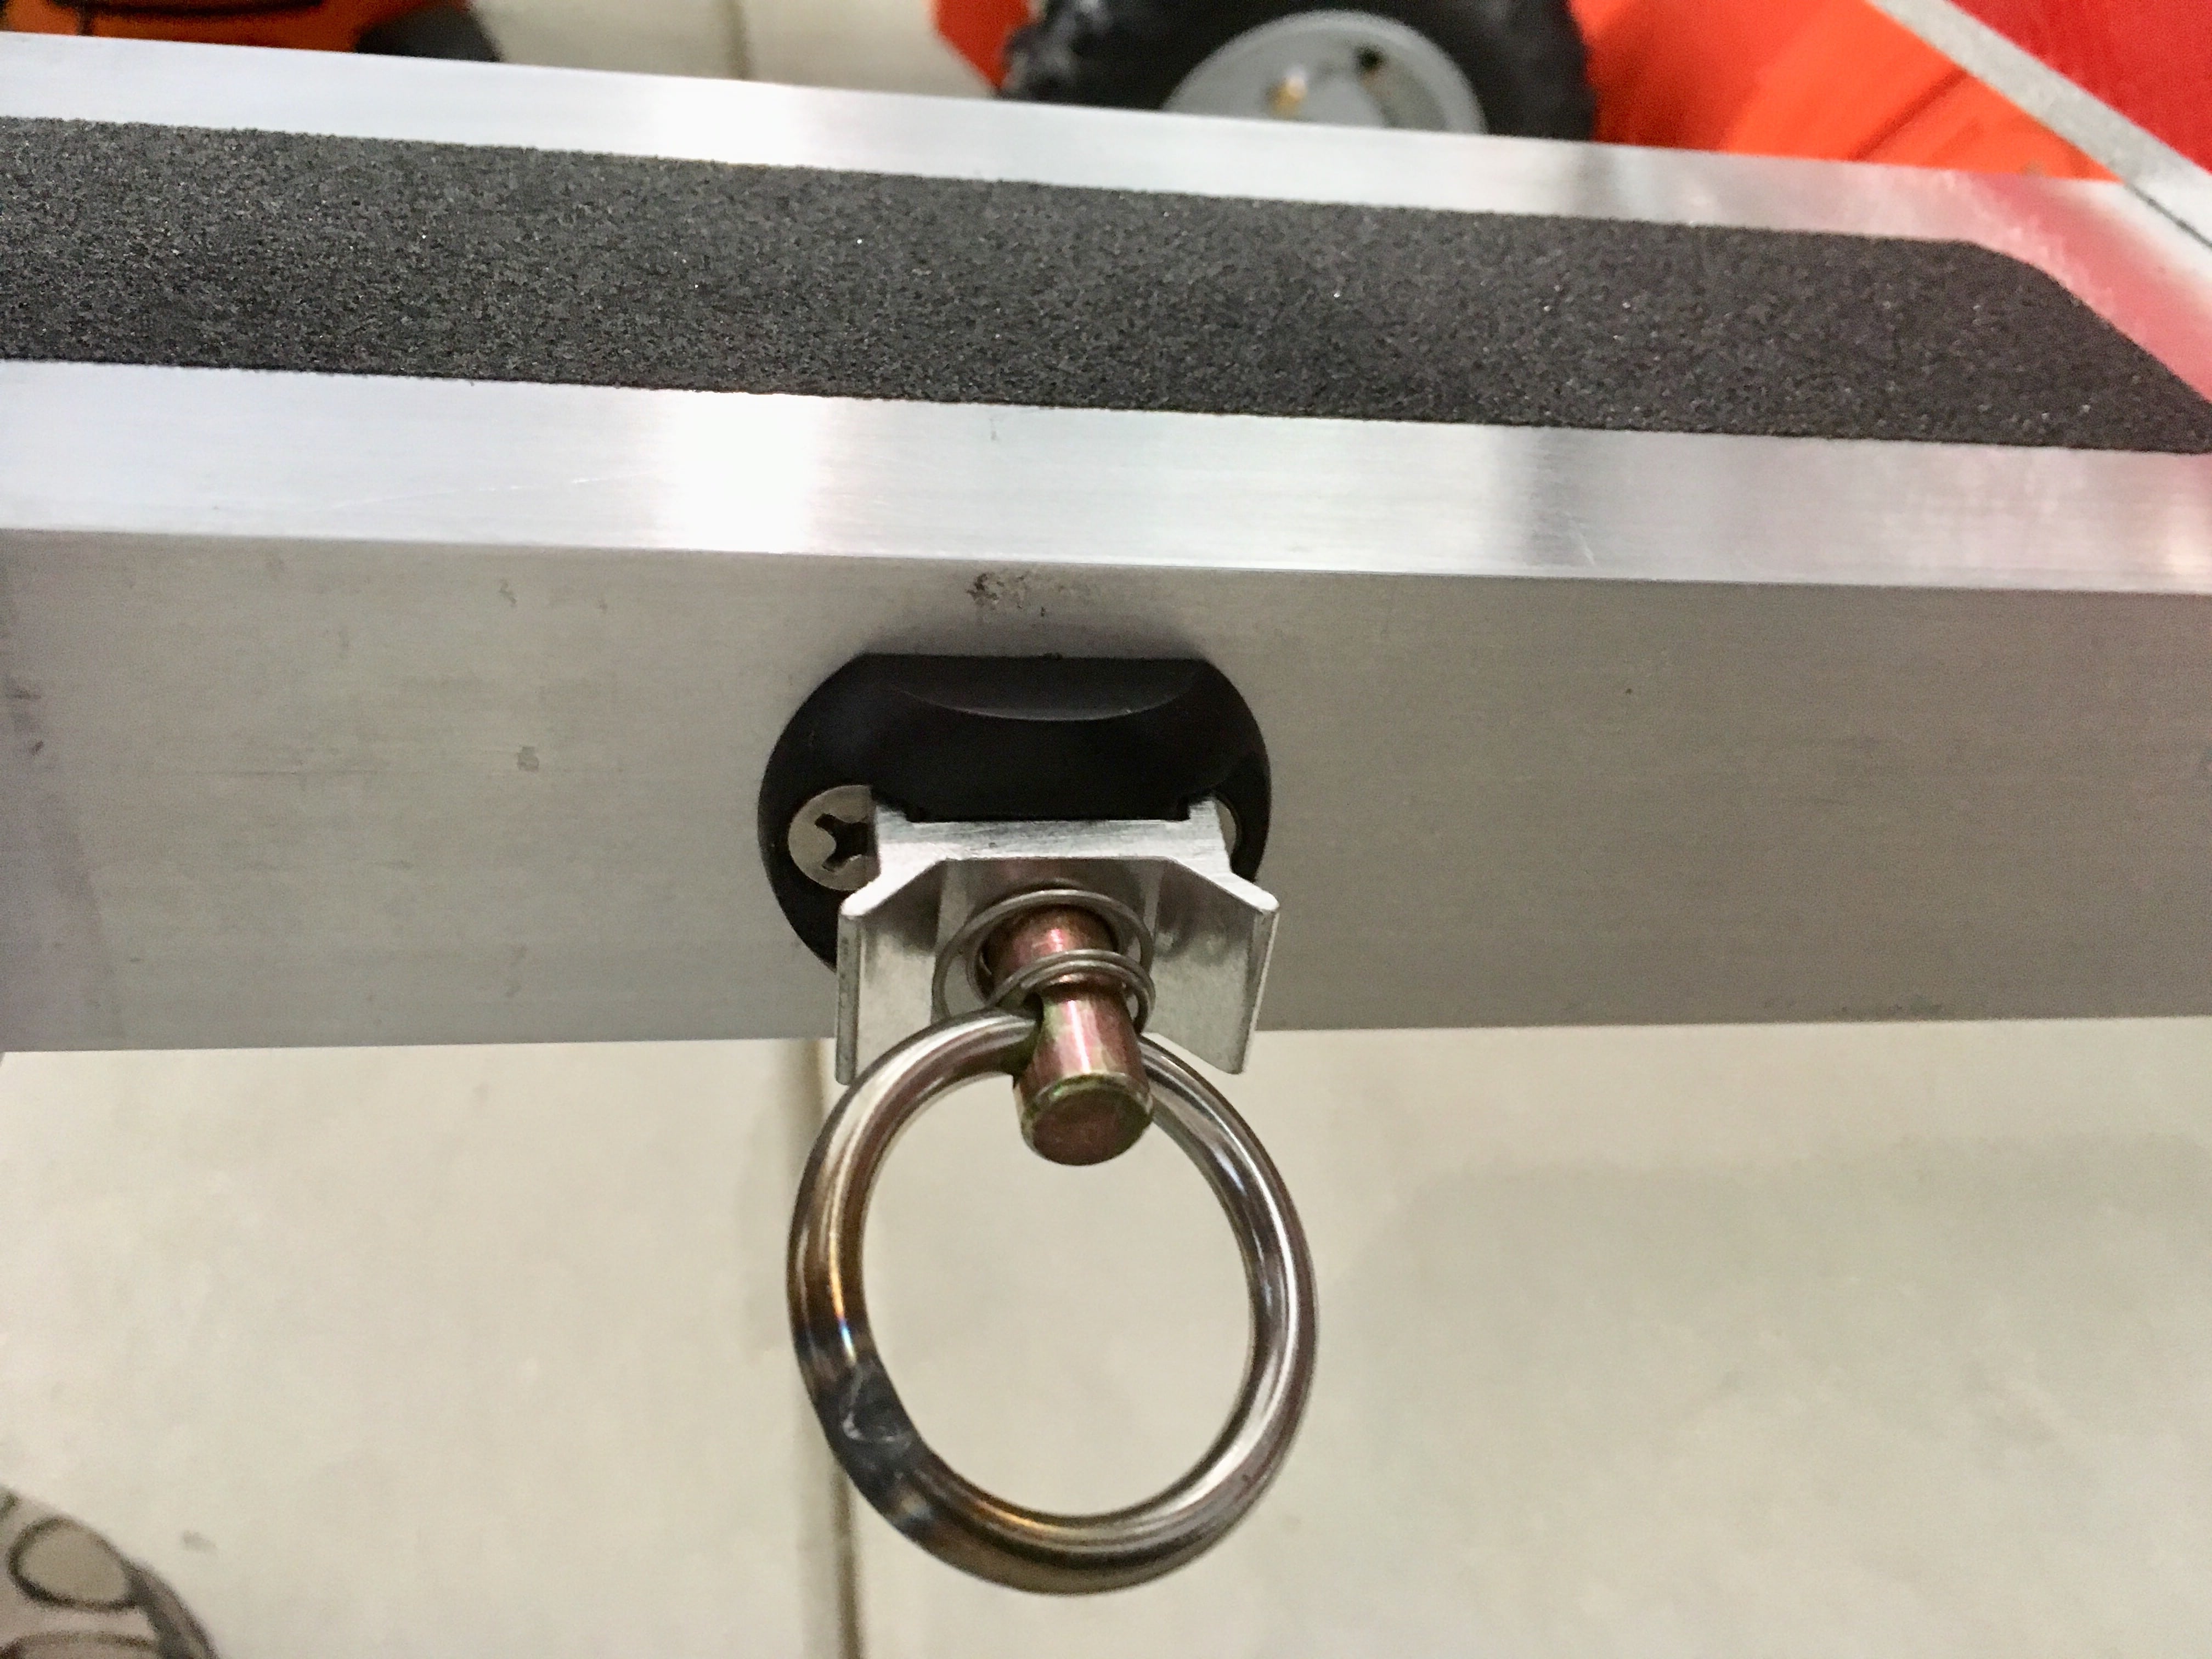
2 - Tie-downs, Mac's: http://www.macscustomtiedowns.com/product/versatie-slimline-anchor-plate-assembly/Anchor-Plates
When doing a major job like this, fresh drill bits are important, or if you know how, sharpen yours. I bought new 3/8” and 1/2” bits. It makes the job go easier.
Large bits: I bought a set of 9/16” to 1” bits for $100. It is very rare that one would need them this big. The 9/16” fits the tongue bolts and hitch bolts. The 1” one I used to make access holes in the top of the support arms so the attach bolts would be recessed. Consider this optional, but if you follow my instructions you will need a 1” hole saw instead. OR use really long bolts and figure out a way to reinforce the arms internally with solid spacers.
Tape: You must protect the aluminum while working with it, otherwise it will get scarred and scratched. I used 1” blue masking tape an duct tape. Use something that will be easy to remove a week later if need be... not regular tan masking tape.
Files and sandpaper. I cleaned up cuts on the belt sander and finish polished parts with 360 grit wet-or-dry paper to make them look like the Oliver parts (which I believer are wire brushed).
Work stand. I used an old B&D Workmate. it makes drilling and sanding big parts easier.
Epoxy: JB Weld regular grade, to bond reinforcing plates under the top of the frame rails.
Primer: Duplicolor Self Etching for aluminum. For priming the top of the waste cover after sanding it down.
Lots of large clamps for holding everything together.
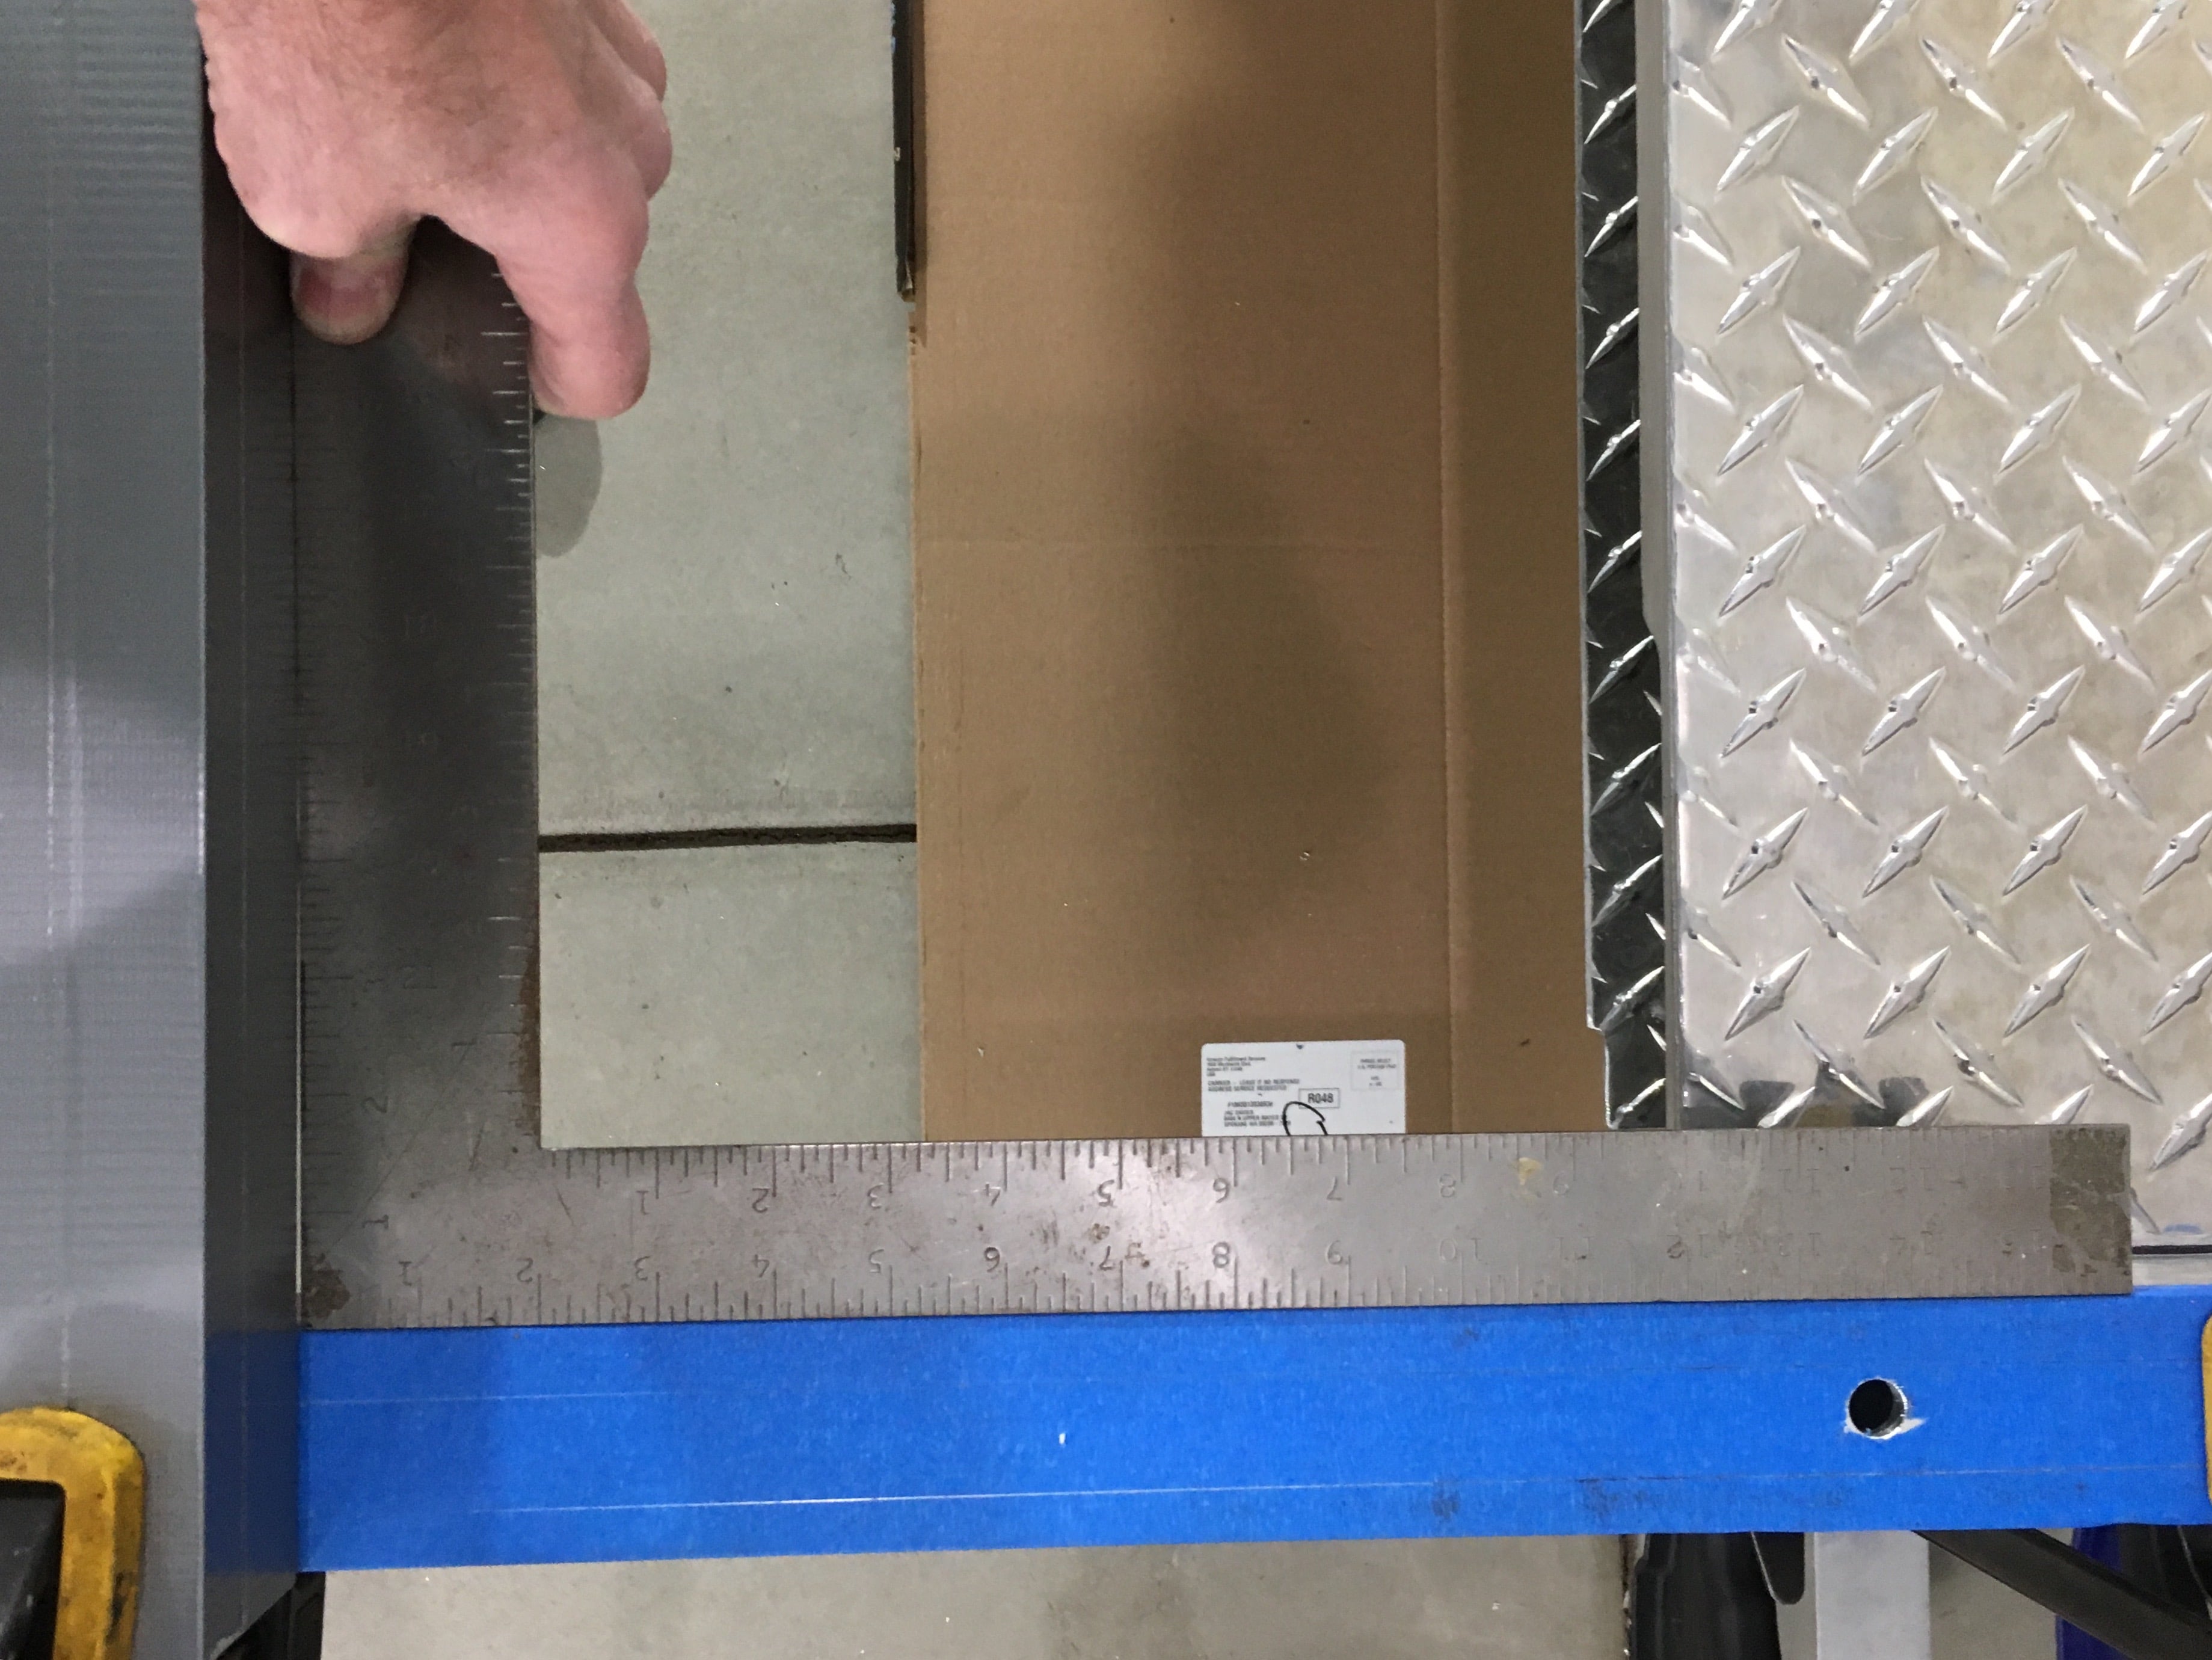
Carpenters angle, tape measure, machinist square: for ensuring everything is straight and true. Measure THREE times, cut once!
Patience, take your time, don’t make too many mistakes! If you want attempt this, good luck and feel free to ask questions.
Pics to follow.
John Davies'
Spokane WA
-
1
-
-
But not too early in the fall. Many of the western states are shrouded in wildfire smoke from July through September. It is sad but it seems to be the new normal.
John Davies
Spokane WA
-
I haven't actually seen these with my eyes, but Hull 218 has check valves in both street side fresh water inlets in back. You can tell they are there because when you remove a hose you only get a small dribble of water out, and this design is intended to drain the outer section so it won’t freeze. You don’t see any appreciable back flow. I don’t believe there is one in the boondocking port which is suction only.
I like your first diagram, thanks. I actually labeled the mounting board that my valves are attached to, using a black Sharpie, with arrows showing which way the water goes “ To Tank”, From Rear Port”, “To Pump”, etc.... It is hard to work the system without some references.
You can also directly mark water lines with arrows showing flow direction, with a double-headed arrow if it is bidirectional. Like a well run ship, we are are striving for this:
Not this:
John Davies
Spokane WA
-
1
-
-
You can always pump the water out with the water pump. It is faster that way and won’t hurt anything. If you don’t want to fill your gray tank you can lock the outside shower handle on and let it water the roses....
The belly drain is not the fastest setup, for sure, even with the tongue raised a little.
John Davies
Spokane WA
-
1
-
-
My car insurance company doesn’t offer any discount, I asked ;( maybe my RV insurance will (Progressive). I know they advertise big discounts for the car insurance. Does anybody know if they will for Rv insurance?
EDIT: never mind, they have lots but not for a safe driver class. .... https://www.progressive.com/rv-trailer/discounts/
John Davies
Spokane WA
-
Welcome. I am sure you will enjoy your Ollie, but I will go ahead and speak for those too polite to ask..... “where is everybody sleeping?”
It’s refreshing to see a young family group.
John Davies
Spokane WA
-
2
-
-
Do you have the standard 6 gal unit or the Truma? If the former....
Do you mean your heater had the drain/ anode plug removed and the cavity was empty? If so Oliver needs to send you one. In your shoes I would just order these ASAP and wait for the replacement from Howenwald. It might take a while to arrive. That way you will have spares.
https://smile.amazon.com/gp/product/B07CHNPZ79/ref=ppx_yo_dt_b_search_asin_title?ie=UTF8&psc=1
Be sure to use teflon tape on the threads and screw it in tight, but not stupid tight. It will be harder to get out by winter..
John Davies
Spokane WA
-
1
-
-
Neat, I am a big fan of cargo barriers. I am very uncomfortable hauling stuff in the back of any vehicle if it can fly forward in a crash or rollover and decapitate you. I use to have a Series 80 Land Cruiser and I mounted a steel Milford barrier from Oz behind the second row, very nifty. I am using nets in my 200 and they are functional but they don’t give you warm fuzzy feelings like a steel cage does. I would like to see a pic of the inside of your van please.
Happy trails.
John Davies
Spokane WA
-
Nope! Never pushed that button.
Mike, go ahead and push it, I know you want to...
John Davies
Spokan eWA
-
Actually you can't do a whole lot without taking it completely out. You can look inside the two outside holes to make sure they are not blocked, and to look for soot, which is a sign of distress (or high altitude use). You can however get to the ignitor, and view the burner flame from inside the trailer.
The manual recommends an annual check of the flame to make sure it is OK. Here is how you can do that. It will take about 30 minutes.
Remove the rear top access panel under the mattress, on the curb side, and also remove the air return grill, (two screws). If you have a work light, drop it down in the hole so you can see.
CAUTION: the screws to be removed are stainless steel and non-magnetic. If you drop one it may disappear forever under a pipe or duct.Be prepared to find a replacement. I did not drop any...but it was a close call a couple of times.
Remove the front screw of the furnace cover, easy:
The second screw is hard to reach, it is on the other side inline with the first one. I used a stubby to get it out:
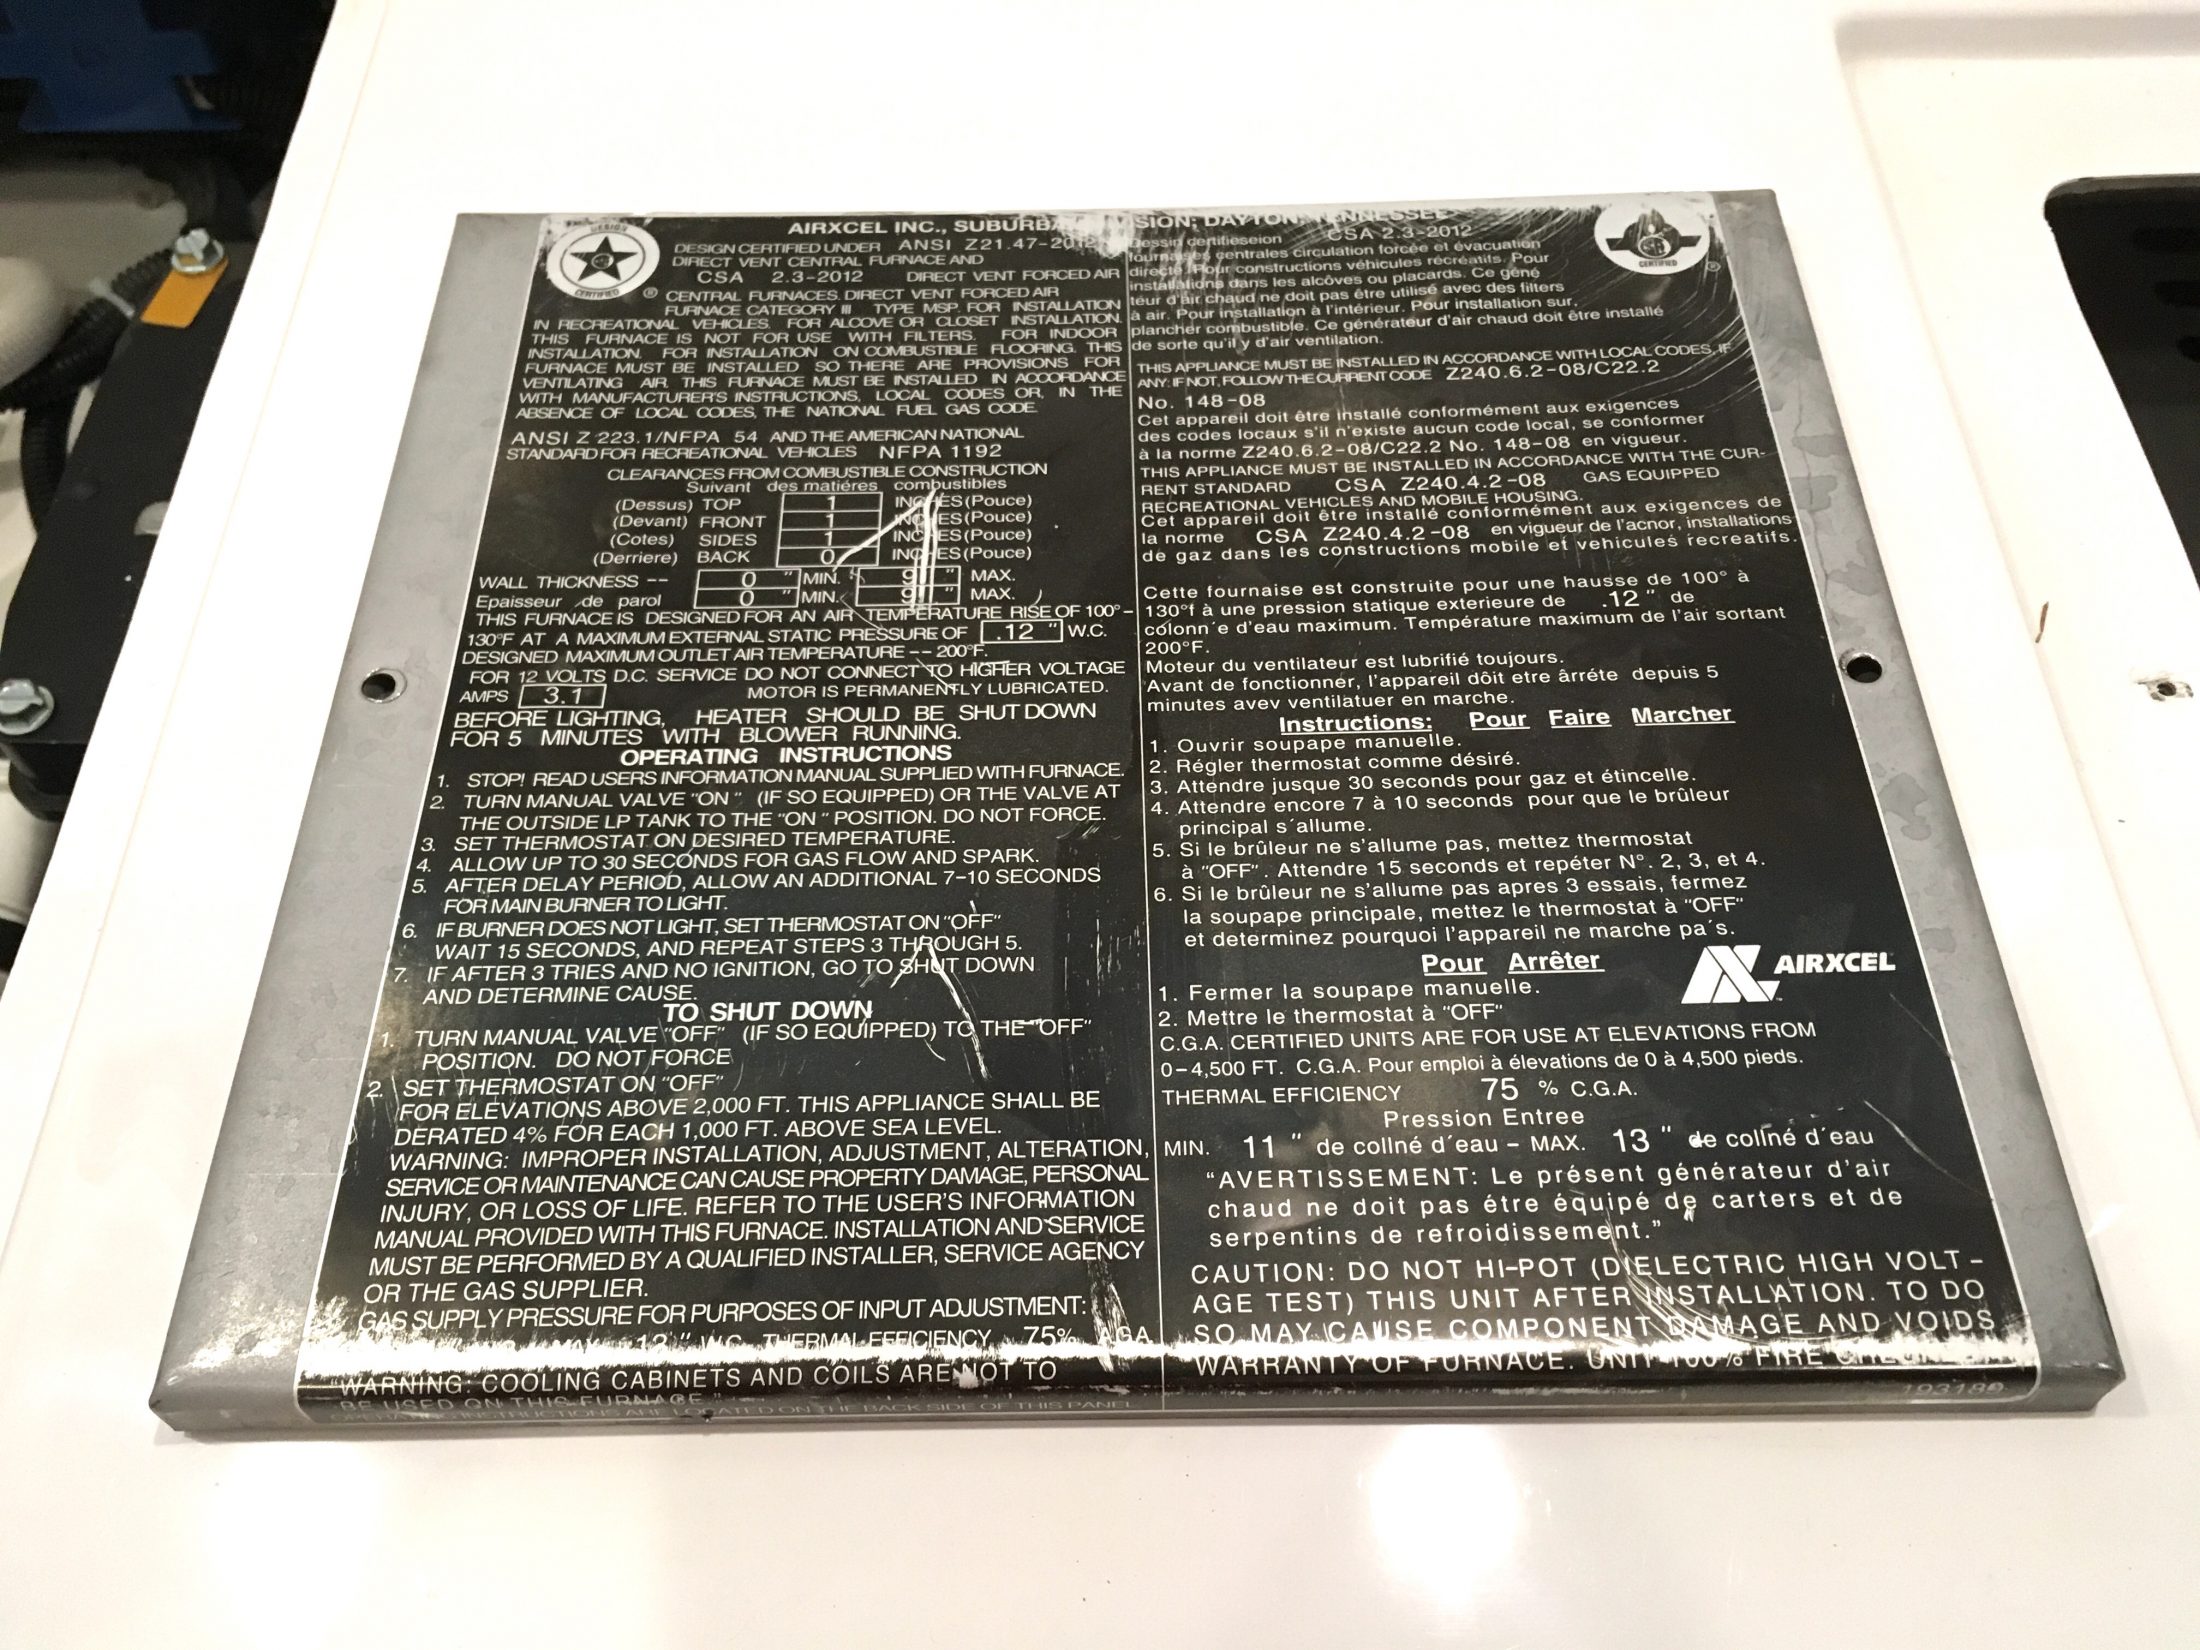
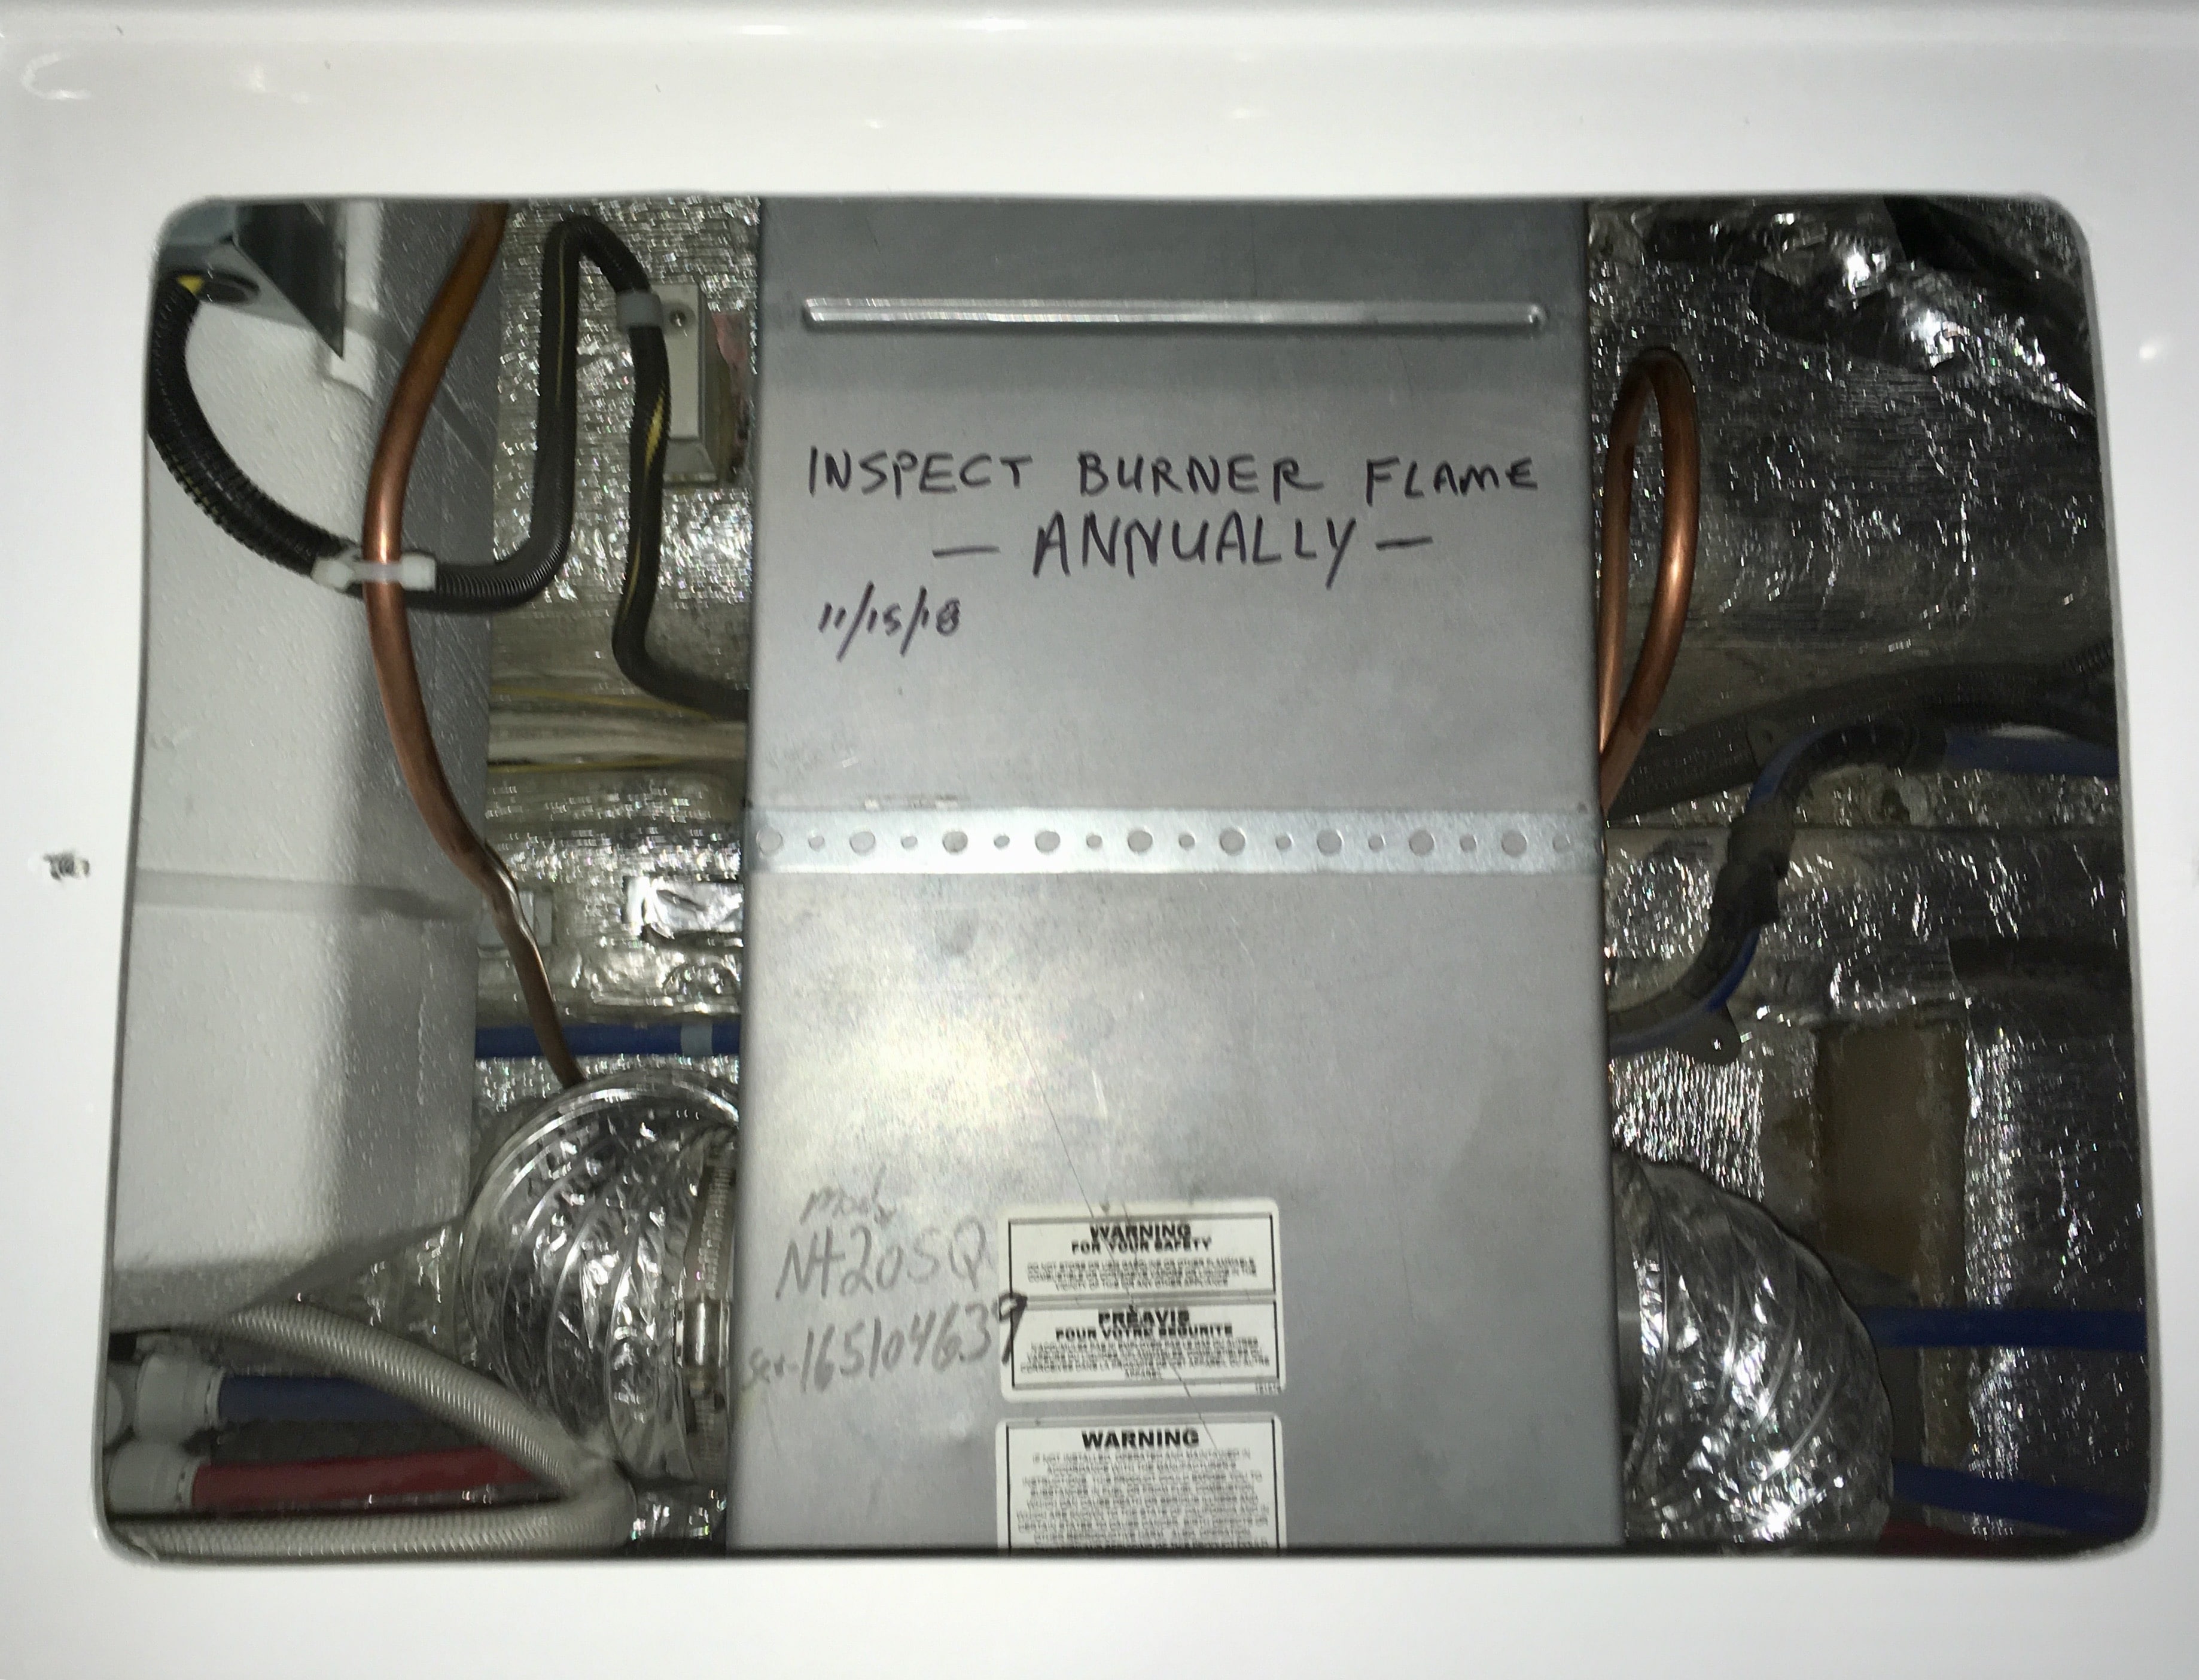
Remove the sheet metal cover. Here it is with a bunch of instructions, on BOTH sides:
I don't know the purpose of putting the operating instructions INSIDE the furnace. The bottom of the fiberglass cover would be a more logical location....!
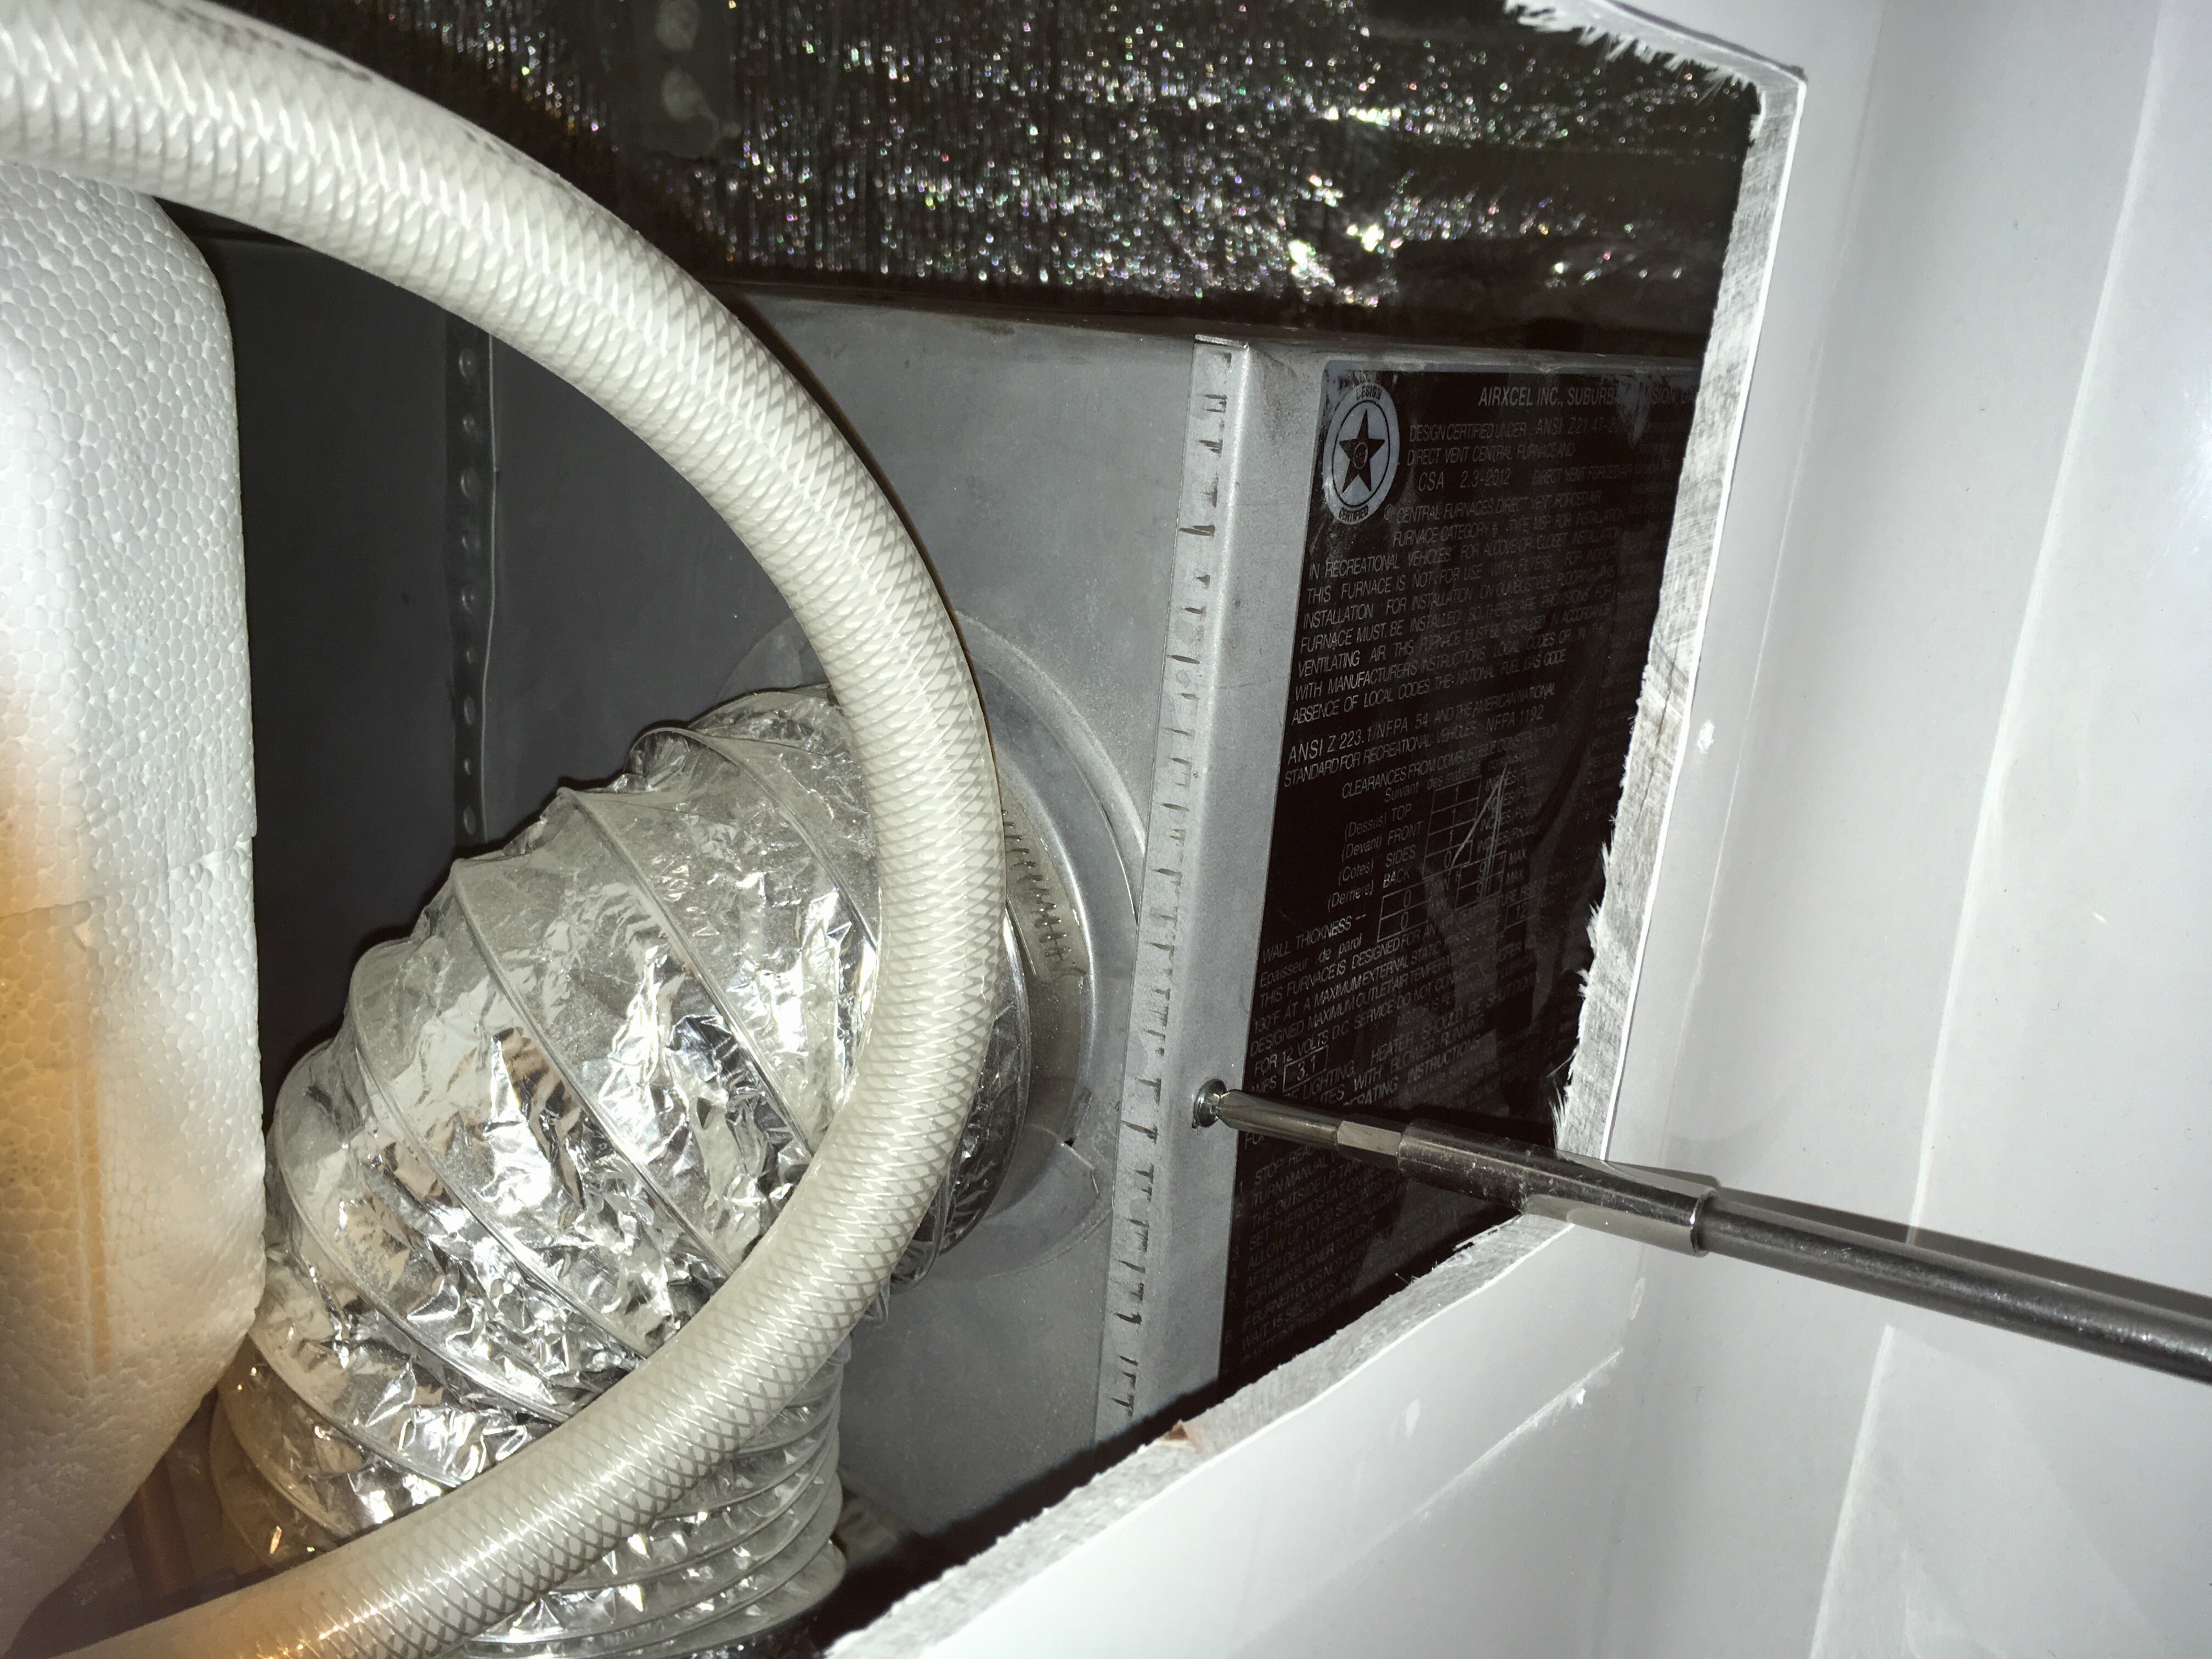
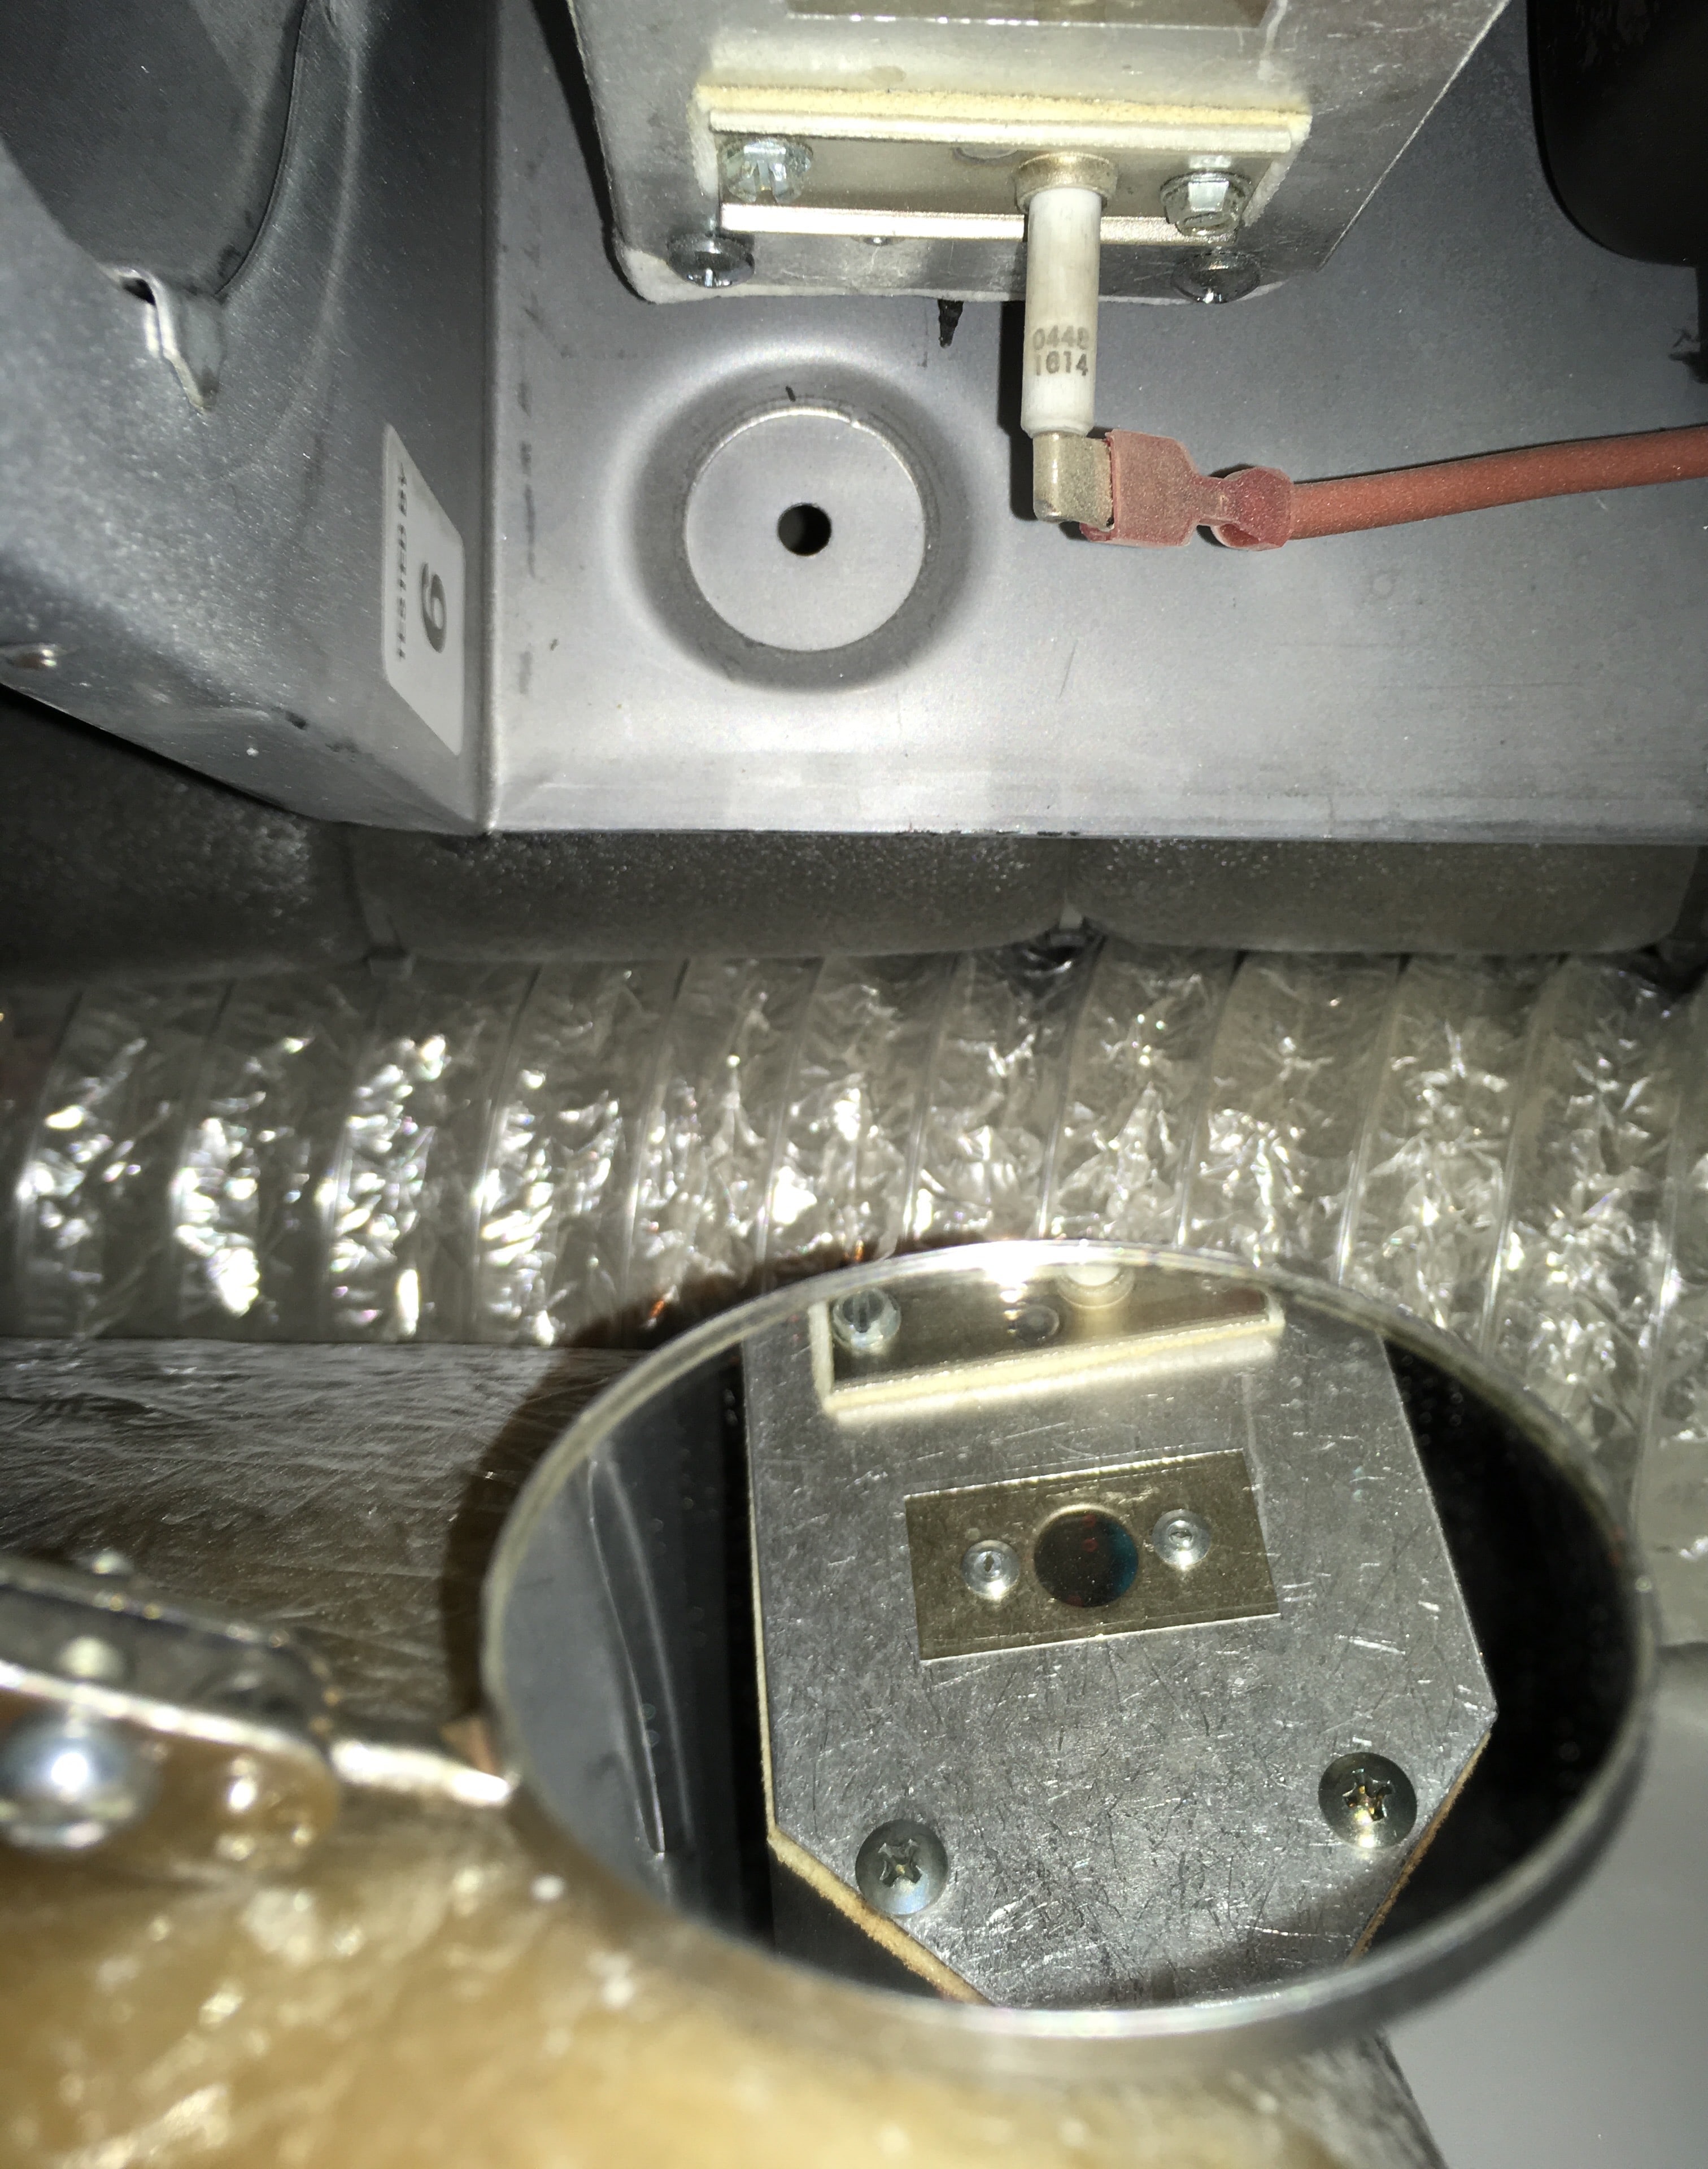
This is what is inside the opening, it's an air plenum of sorts to distribute air from the fan, which you cannot see. The silver plate holds the ignitor, which you could easily change in a few minutes, and it has a small clear window for viewing the hot stuff inside the burner can. I don't know exactly what would be accessible if you removed that plate.
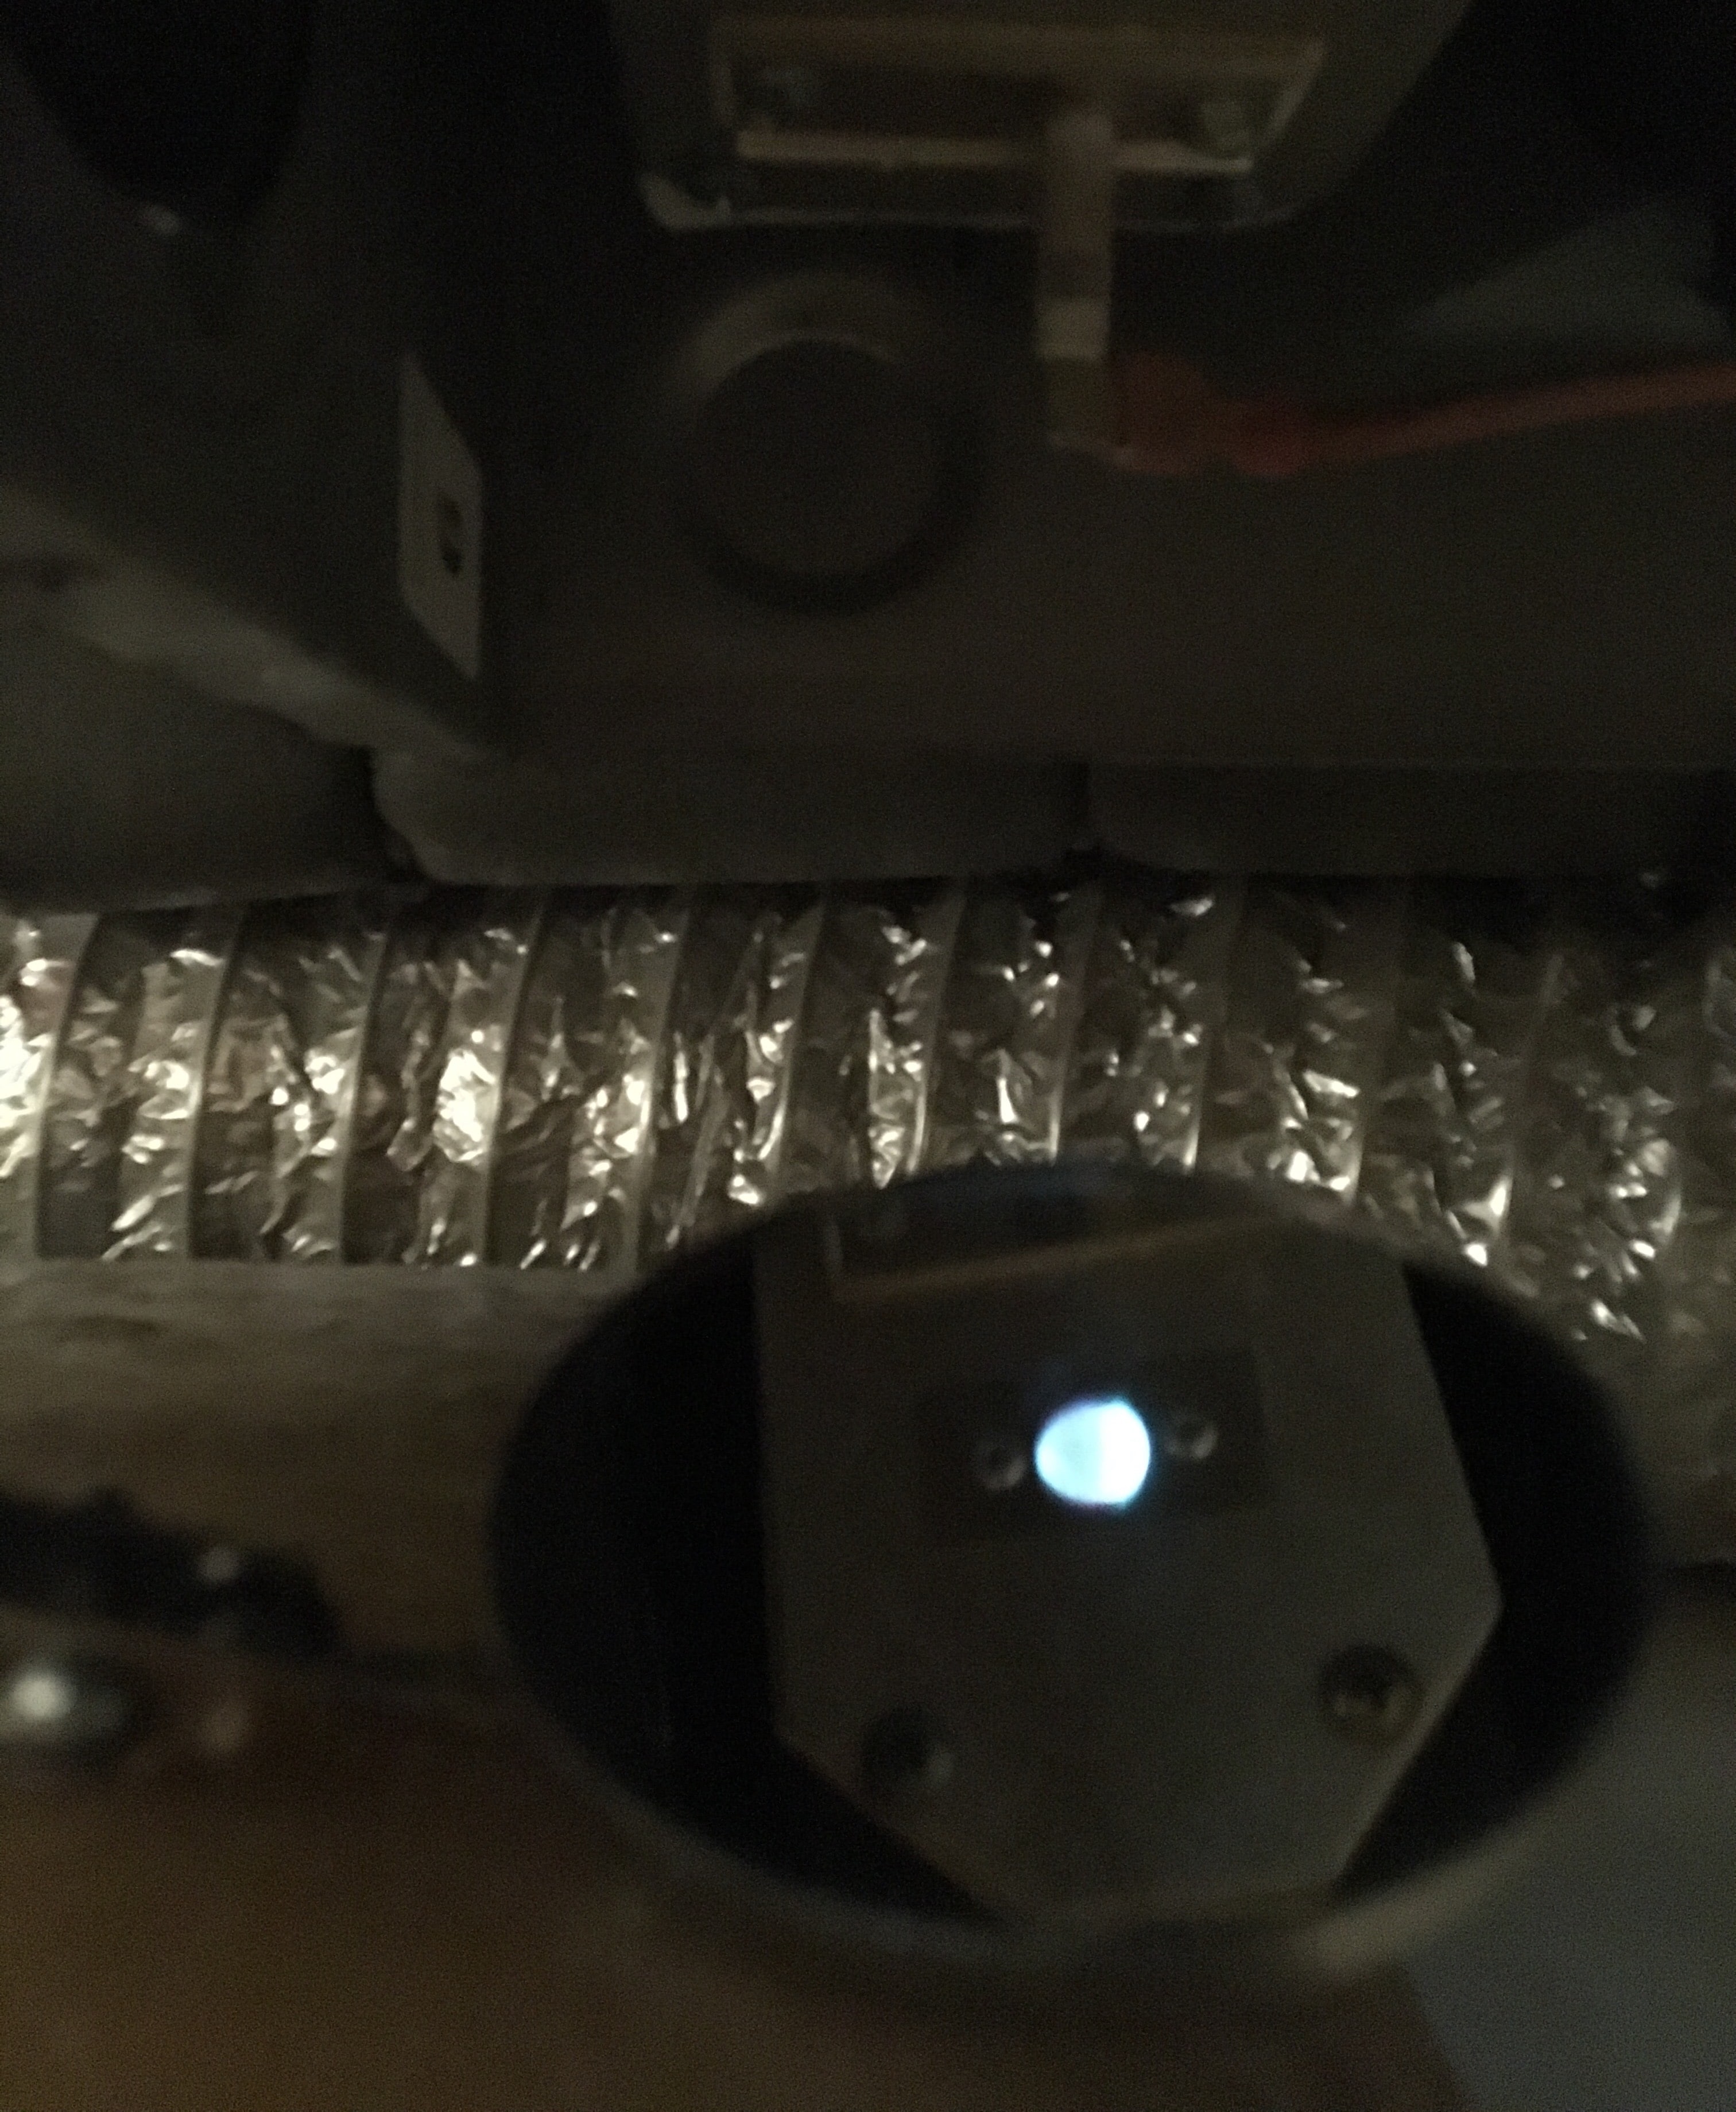
Notice that Oliver puts foam insulation on the water pipes below the sharp edges of the furnace housing. Bravo... The area is very hard to see directly!!! I used my phone to take pictures so I could see what was there, and I used a 2 inch round mechanic's mirror to watch the flame. Here it is with the furnace running, with a camera flash:
And this is sort-of what it looks like, no flash. With your bare eyes it is easy enough to see the flame.
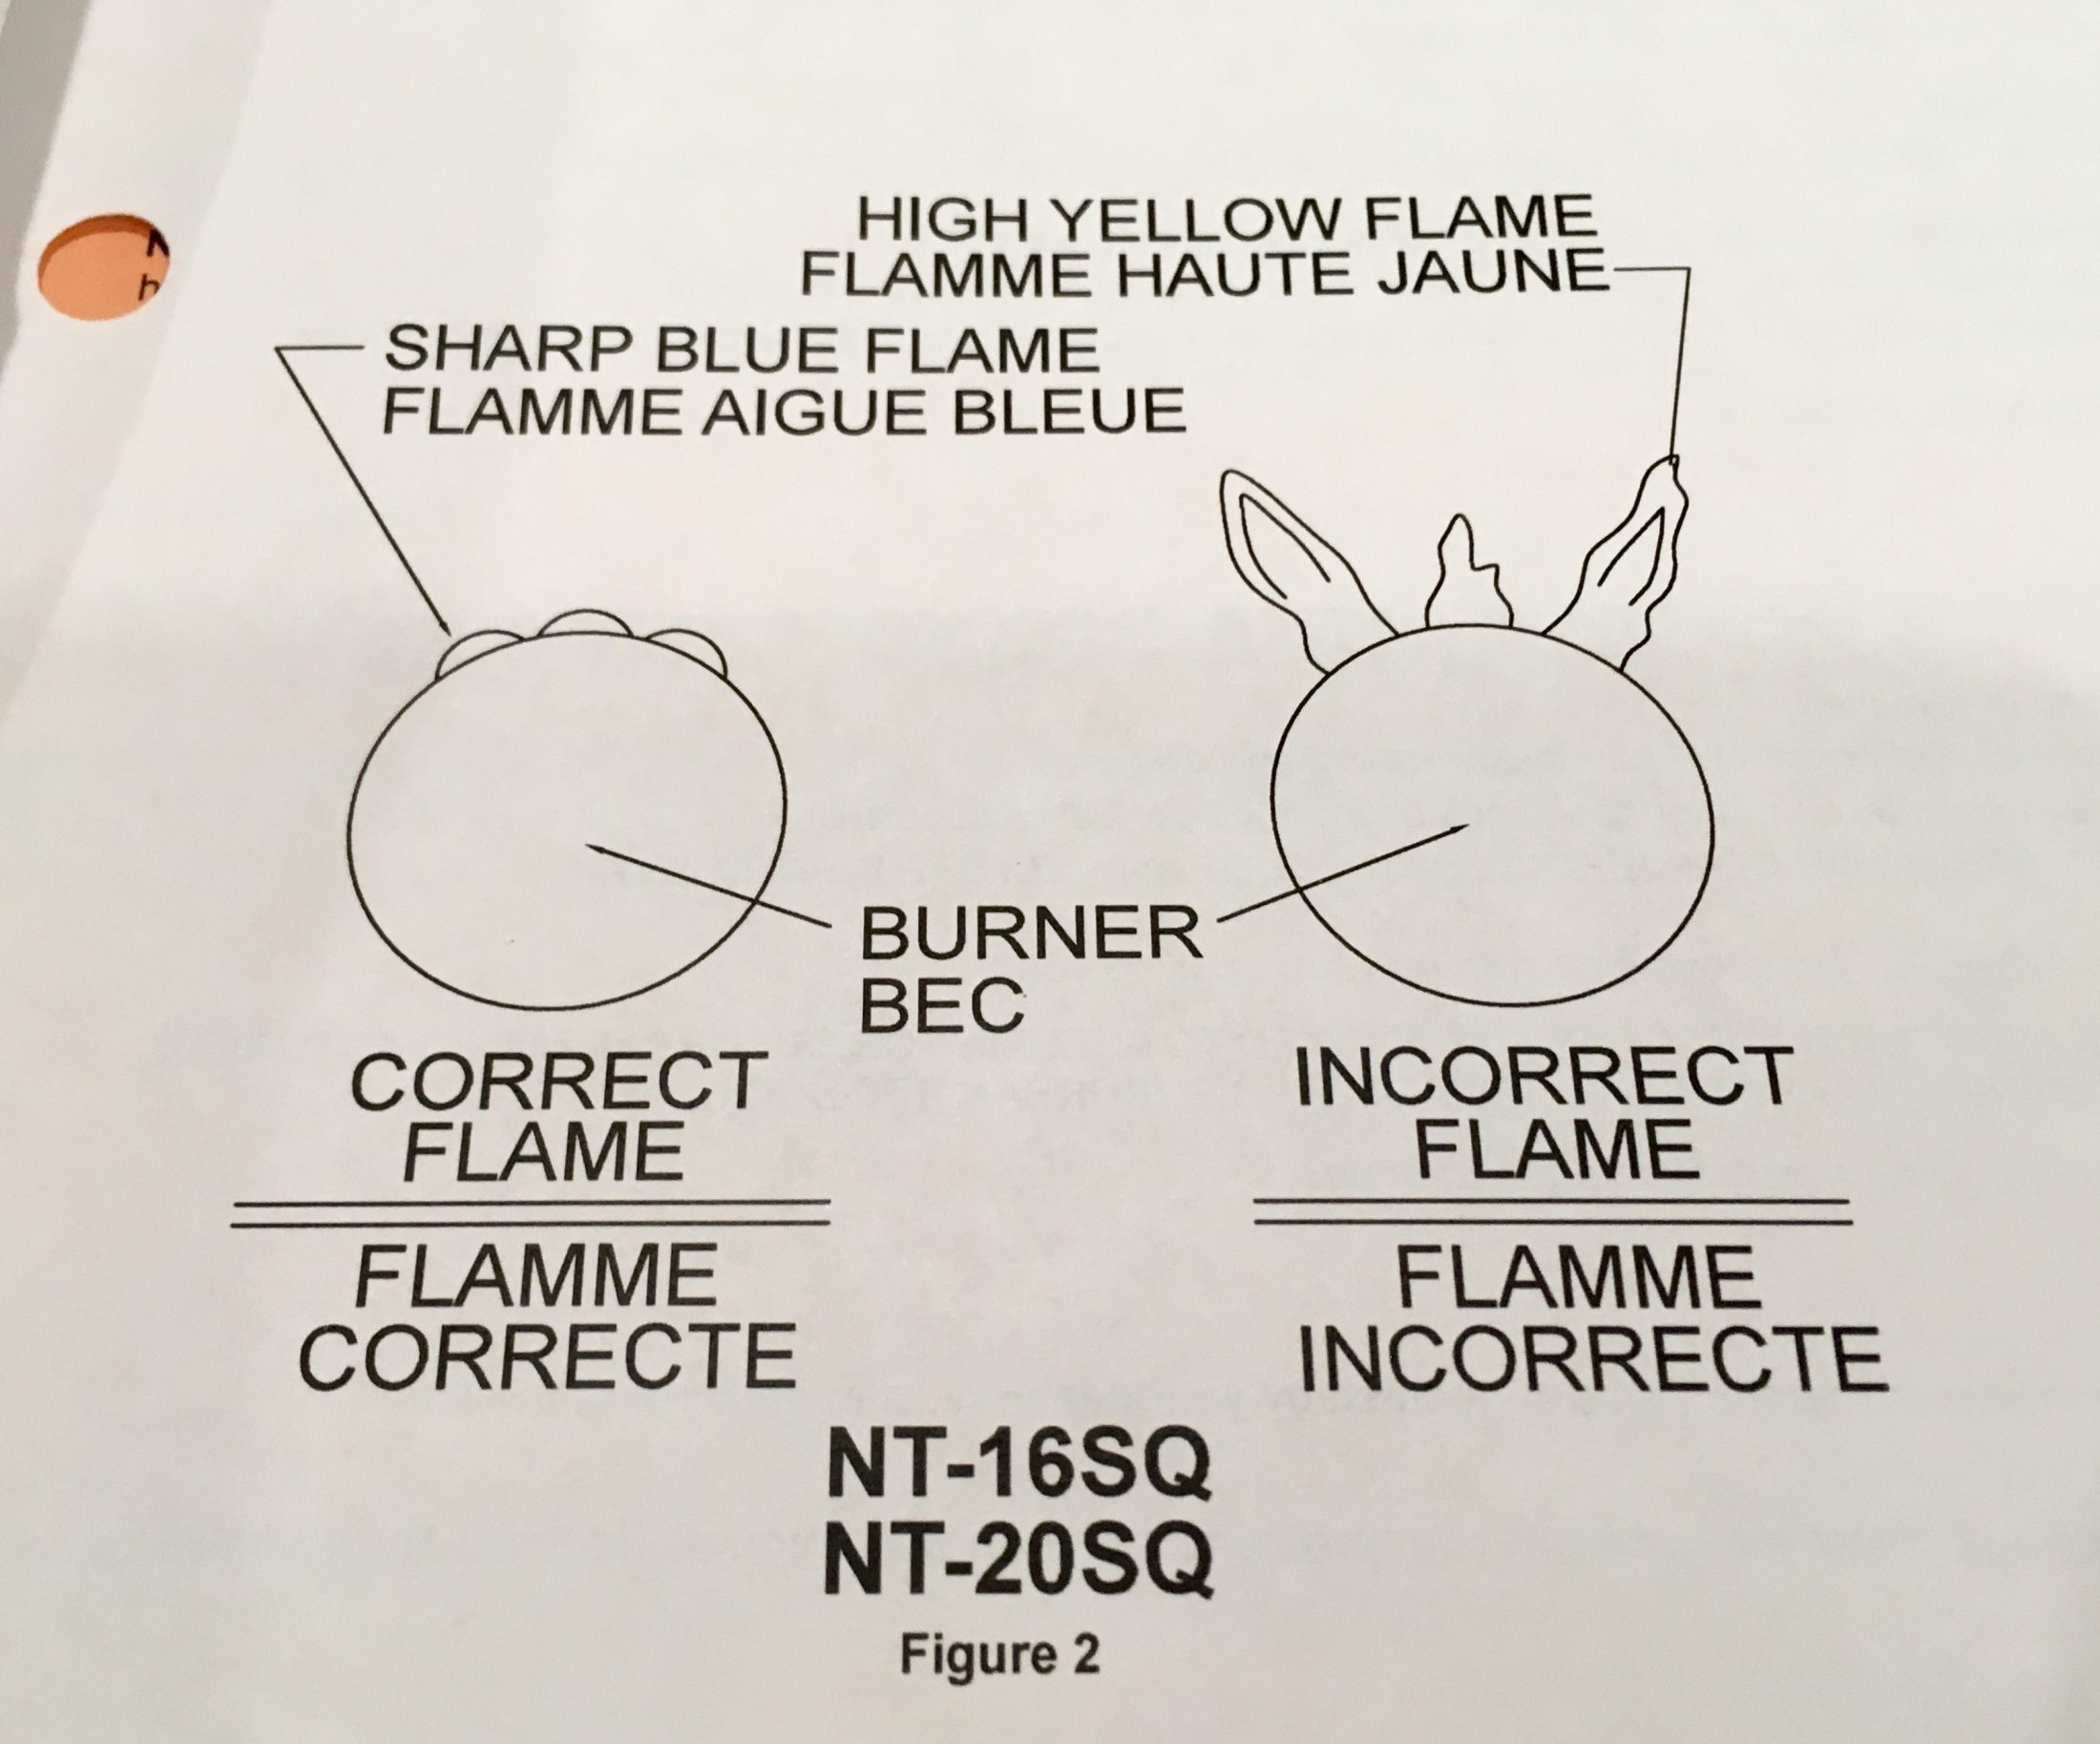
The flame should be blue and stable, no yellow or flickering:
If the flame looks good, put the cover back on and write down the info for future reference:
If the flame doesn't look as it is supposed to, there is a problem and the furnace will have to be removed and checked by a professional. While you are at it, visually inspect around the furnace to make sure the ducts and the gas connection and wires look OK.
John Davies
Spokane WA
-
3
-
1
-
-
EDIT 05/10/21. Made an alteration to the cable, added a Y connection to connect to a portable solar panel ... https://olivertraveltrailers.com/forums/topic/5478-how-to-remote-mount-the-controller-of-a-suitcase-solar-panel-not-inside-the-trailer/
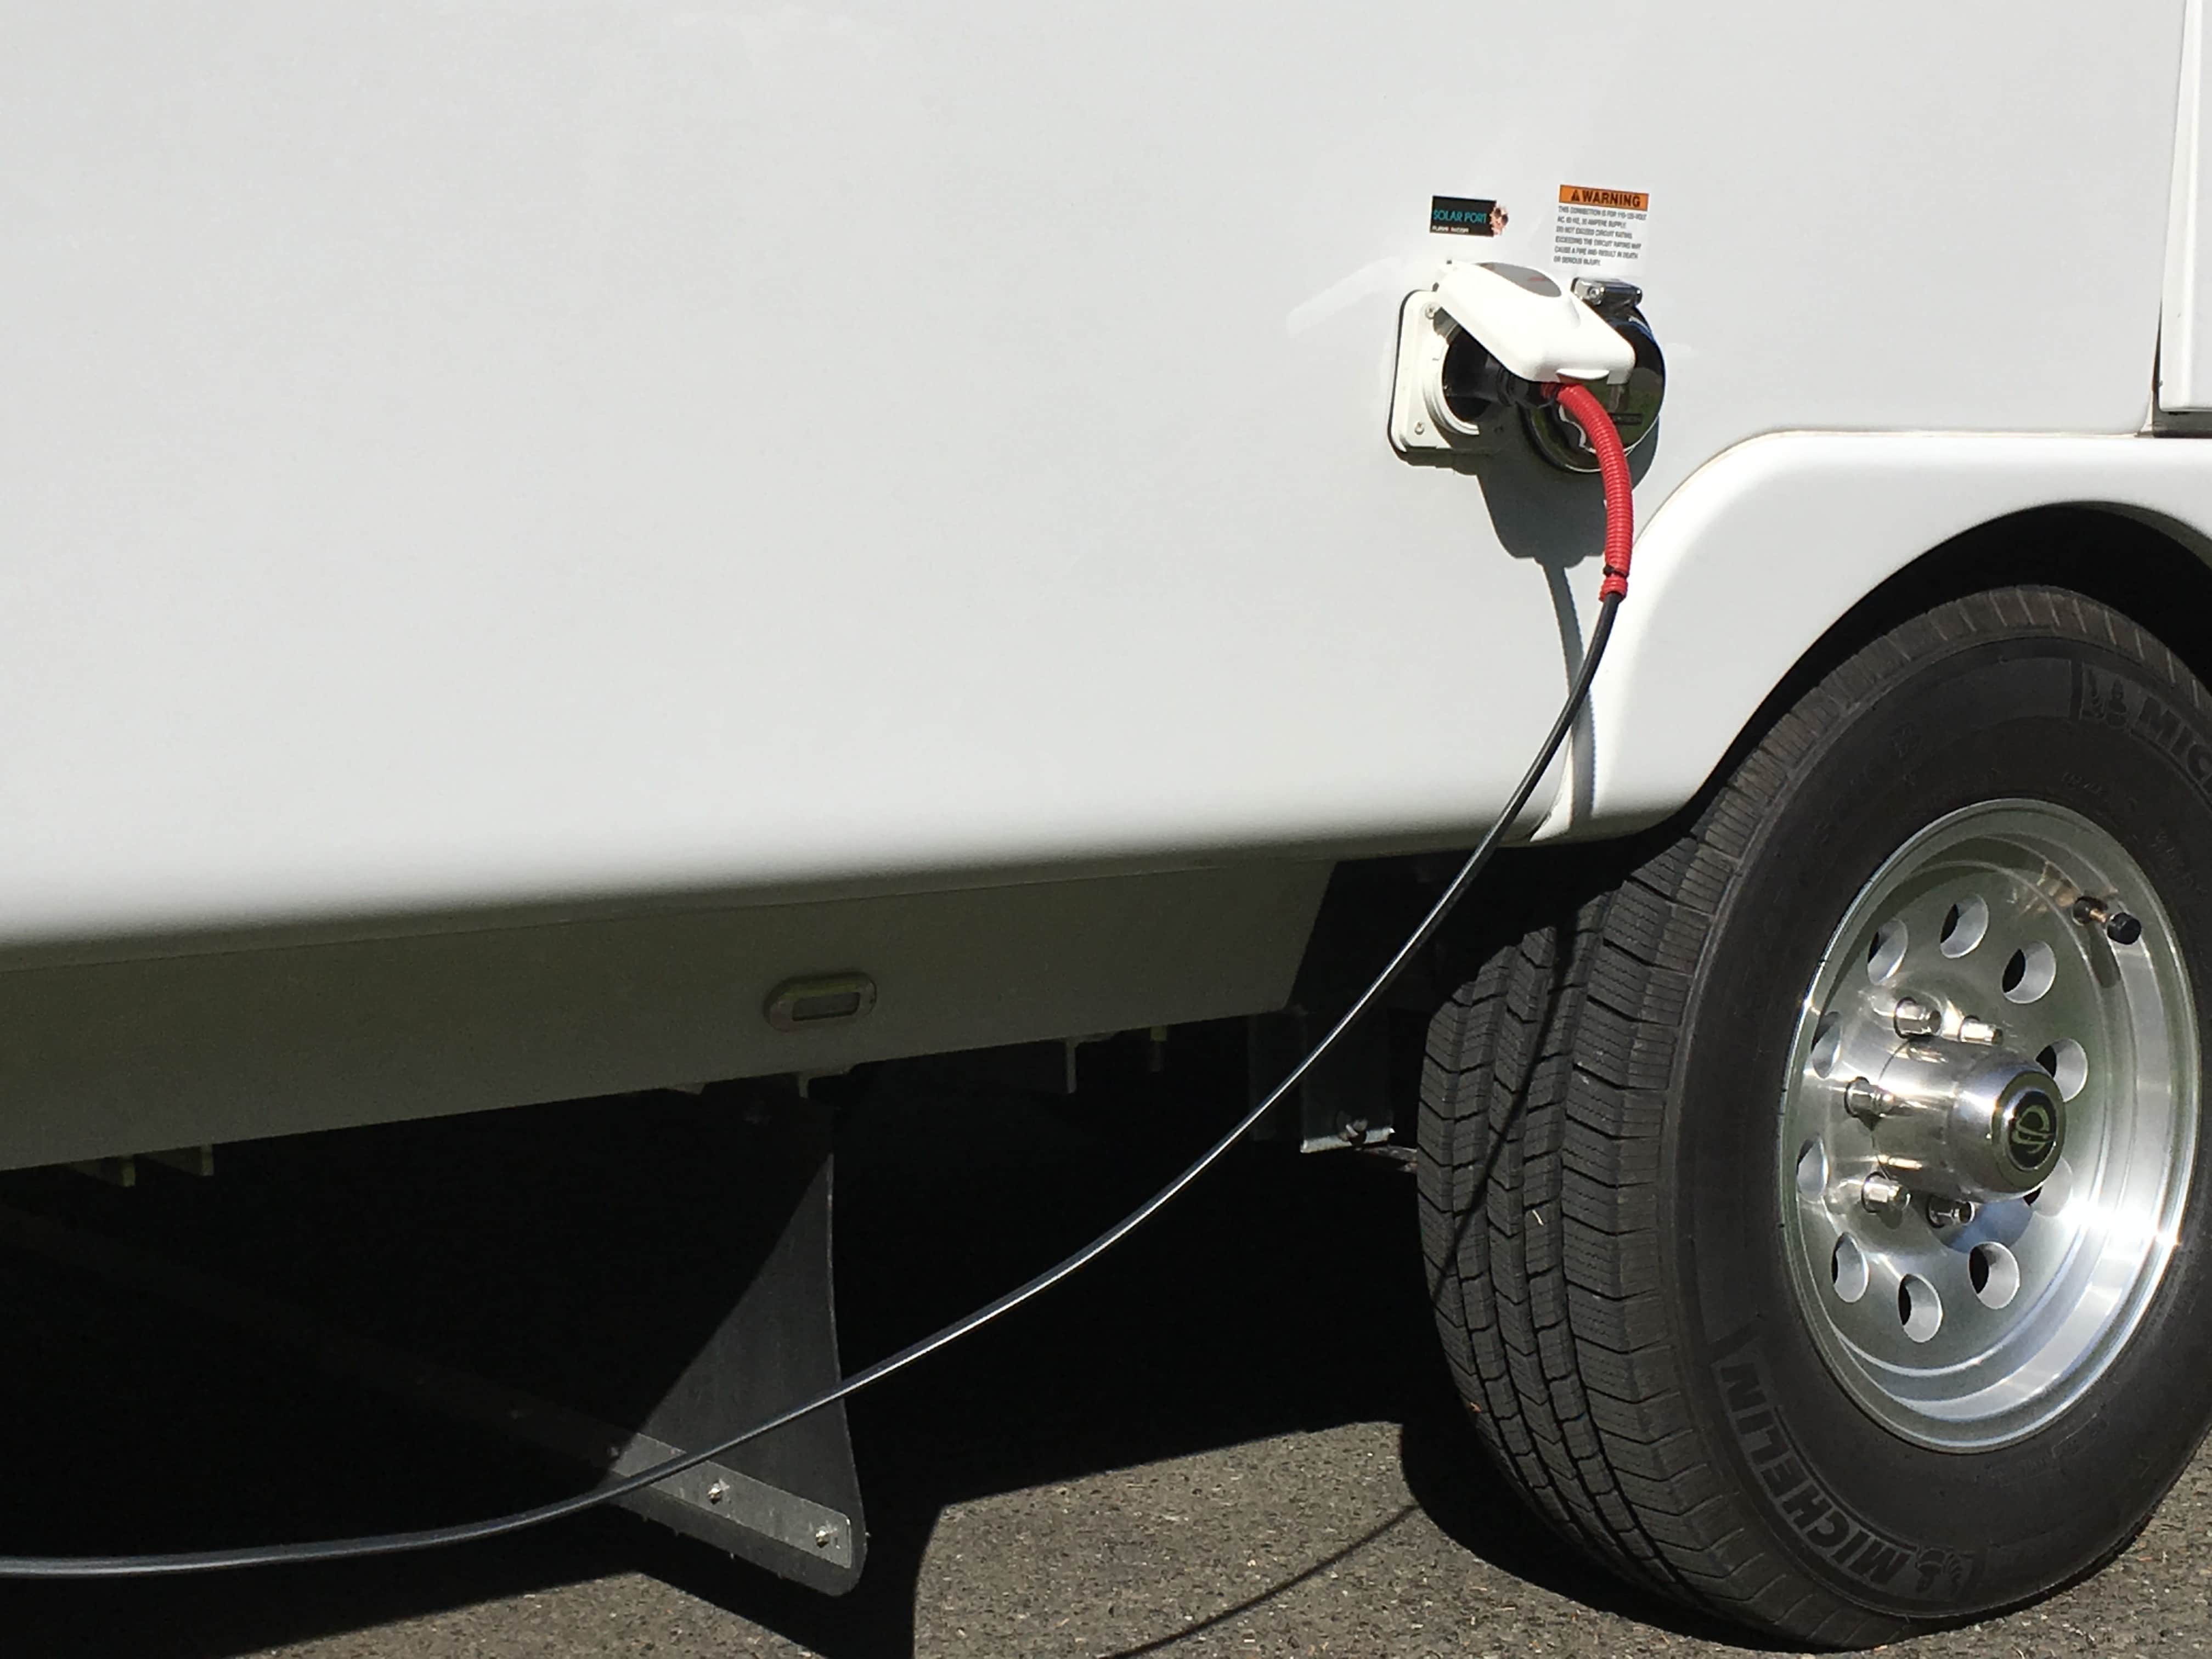
I wanted a large gauge cord that would provide 12v power from the trailer to my ARB compressor fridge (while inside the parked truck), and also as an extension cord in the future for use with an external solar panel. I had been using a regular 120 volt AC extension cord, but that required me to run the inverter all the time and I did not like the idea of a live high-voltage cord lying outside in wet conditions. The 12 V cord is safer and uses way less power than the inverter.
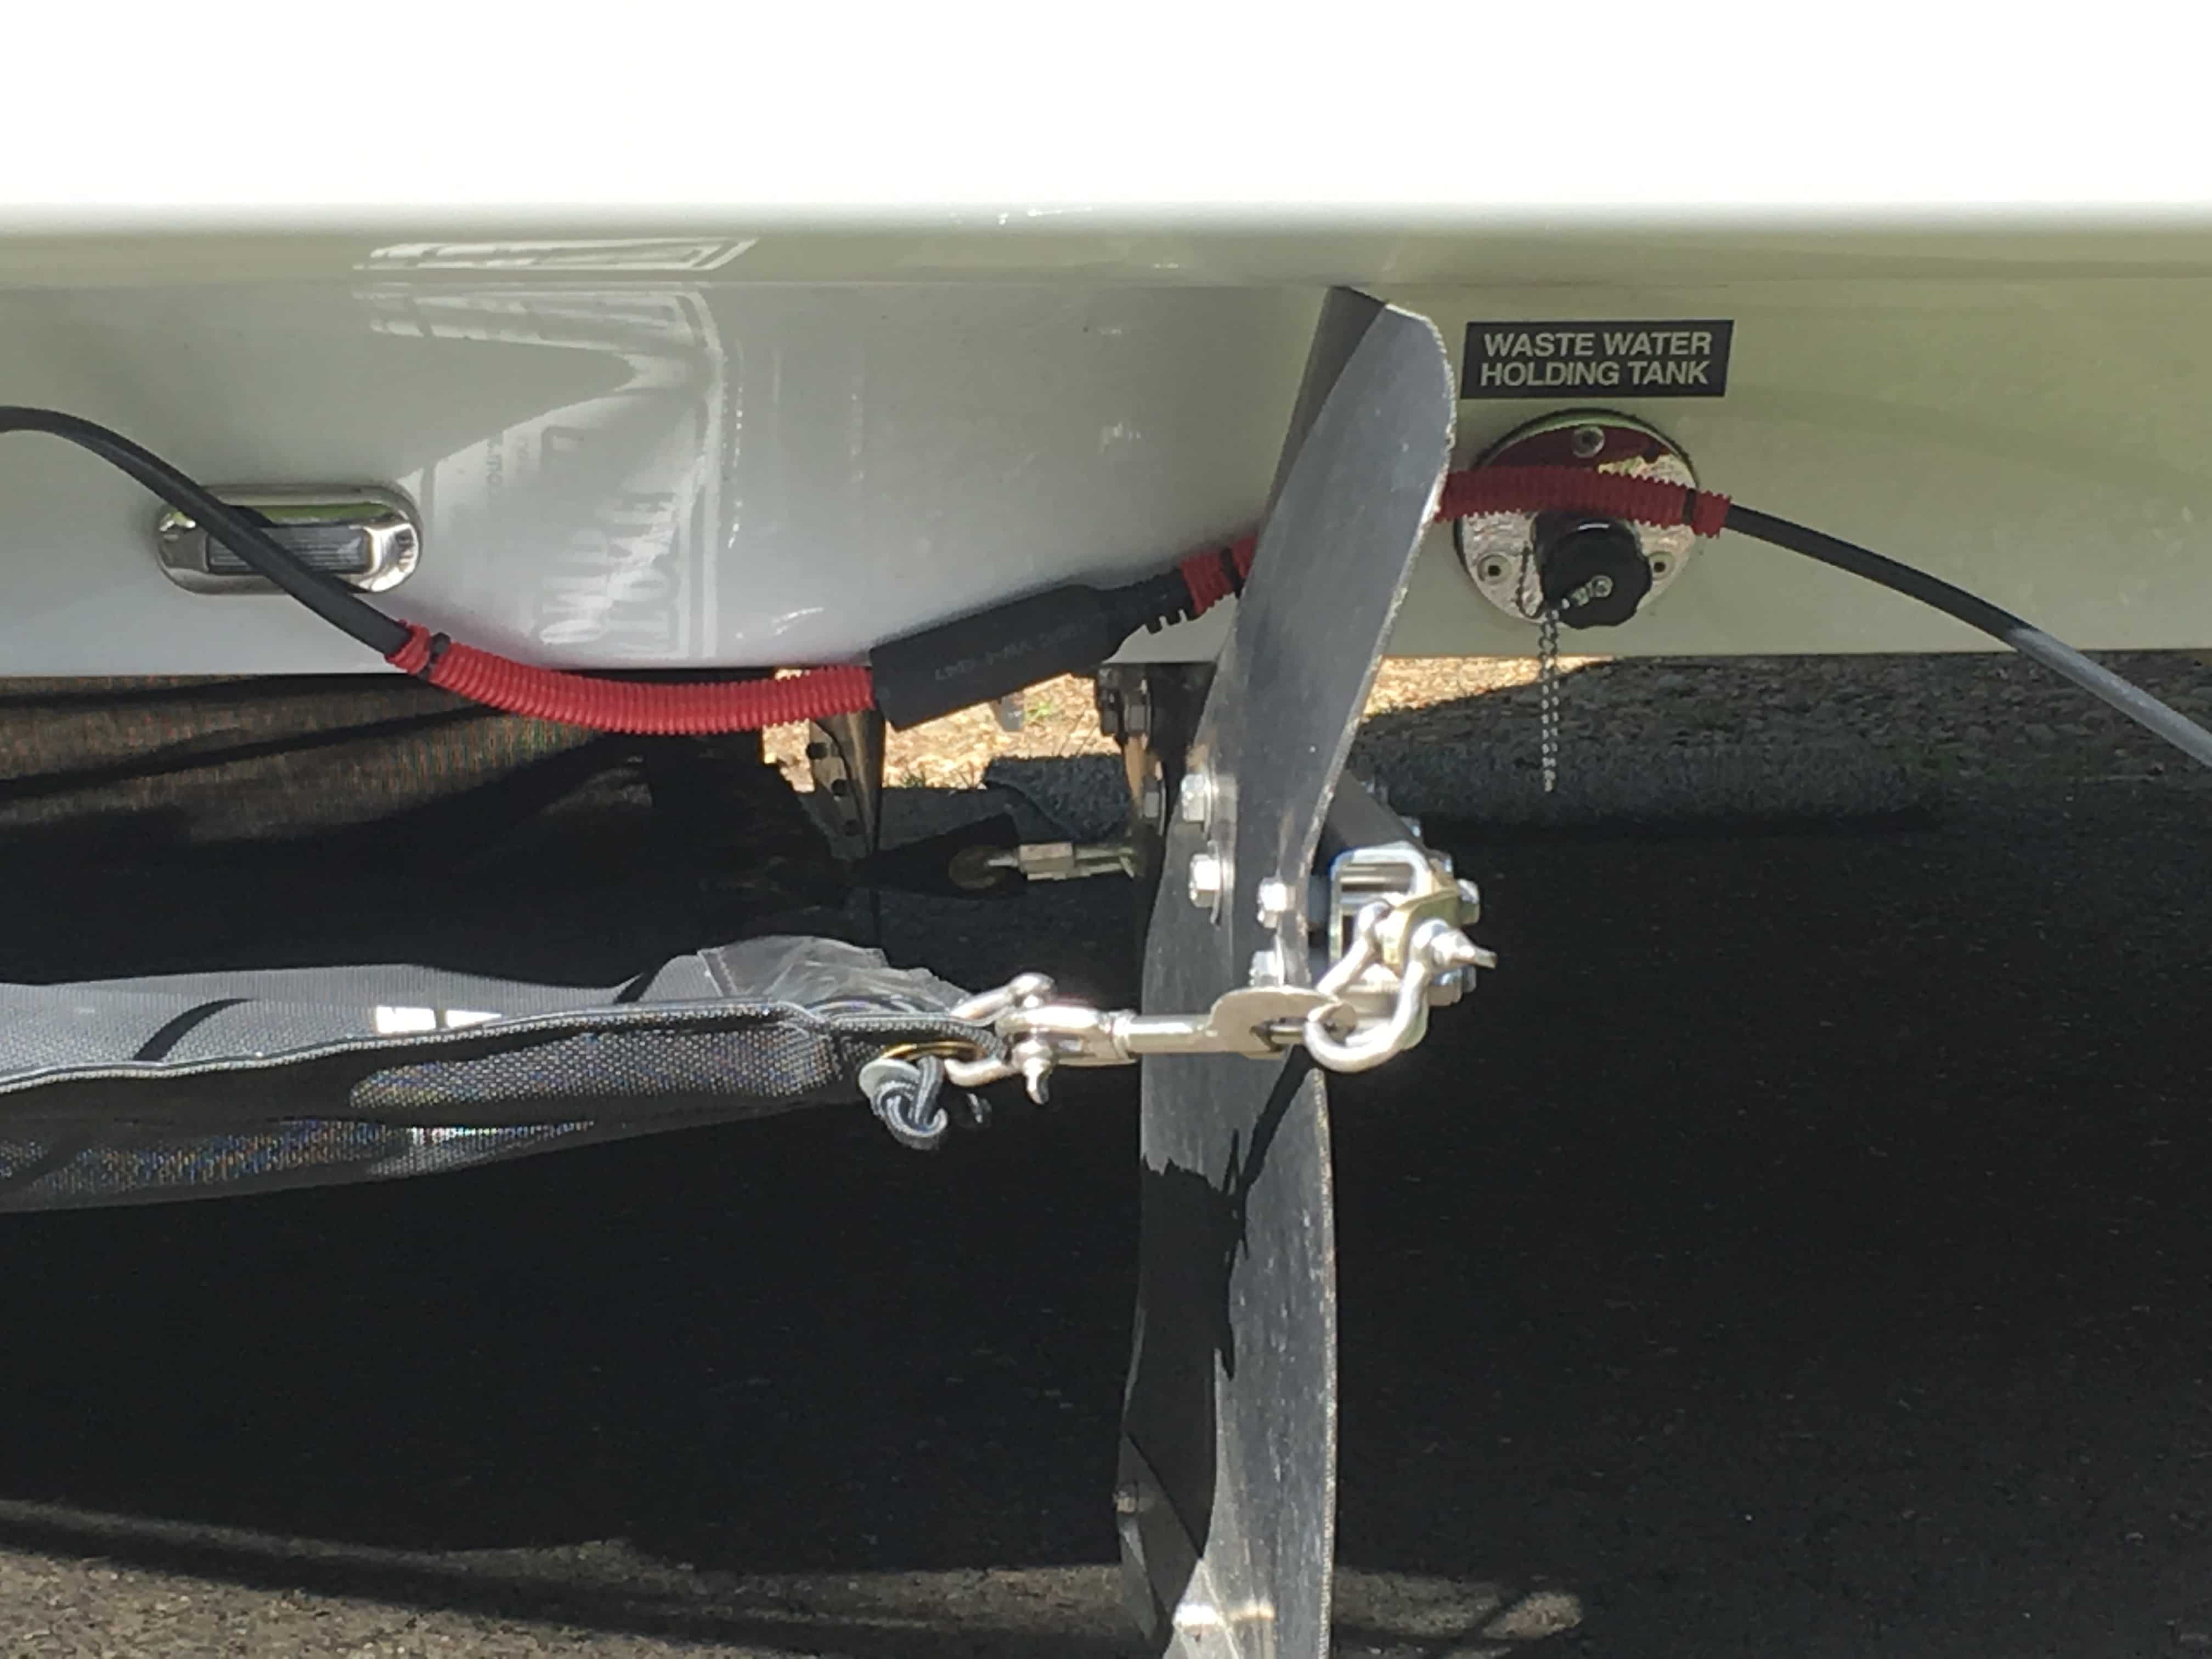
The short rear section will unplug itself, hopefully, from the front section if I drive away without disconnecting first. I do hang a red flag on the gearshift every time I connect this cable to the trailer, as a reminder!
Parts used:
Unlimited Solar 50 FT - 12 AWG Solar PV Multi-Conductor Tray Cable. Rugged and heavy gauge. Actually a little too stiff, it doesn't like going past the rear hatch seal when I run it into the truck.
https://smile.amazon.com/gp/product/B01KWGEODU/ref=ppx_yo_dt_b_asin_title_o04_s00?ie=UTF8&psc=1
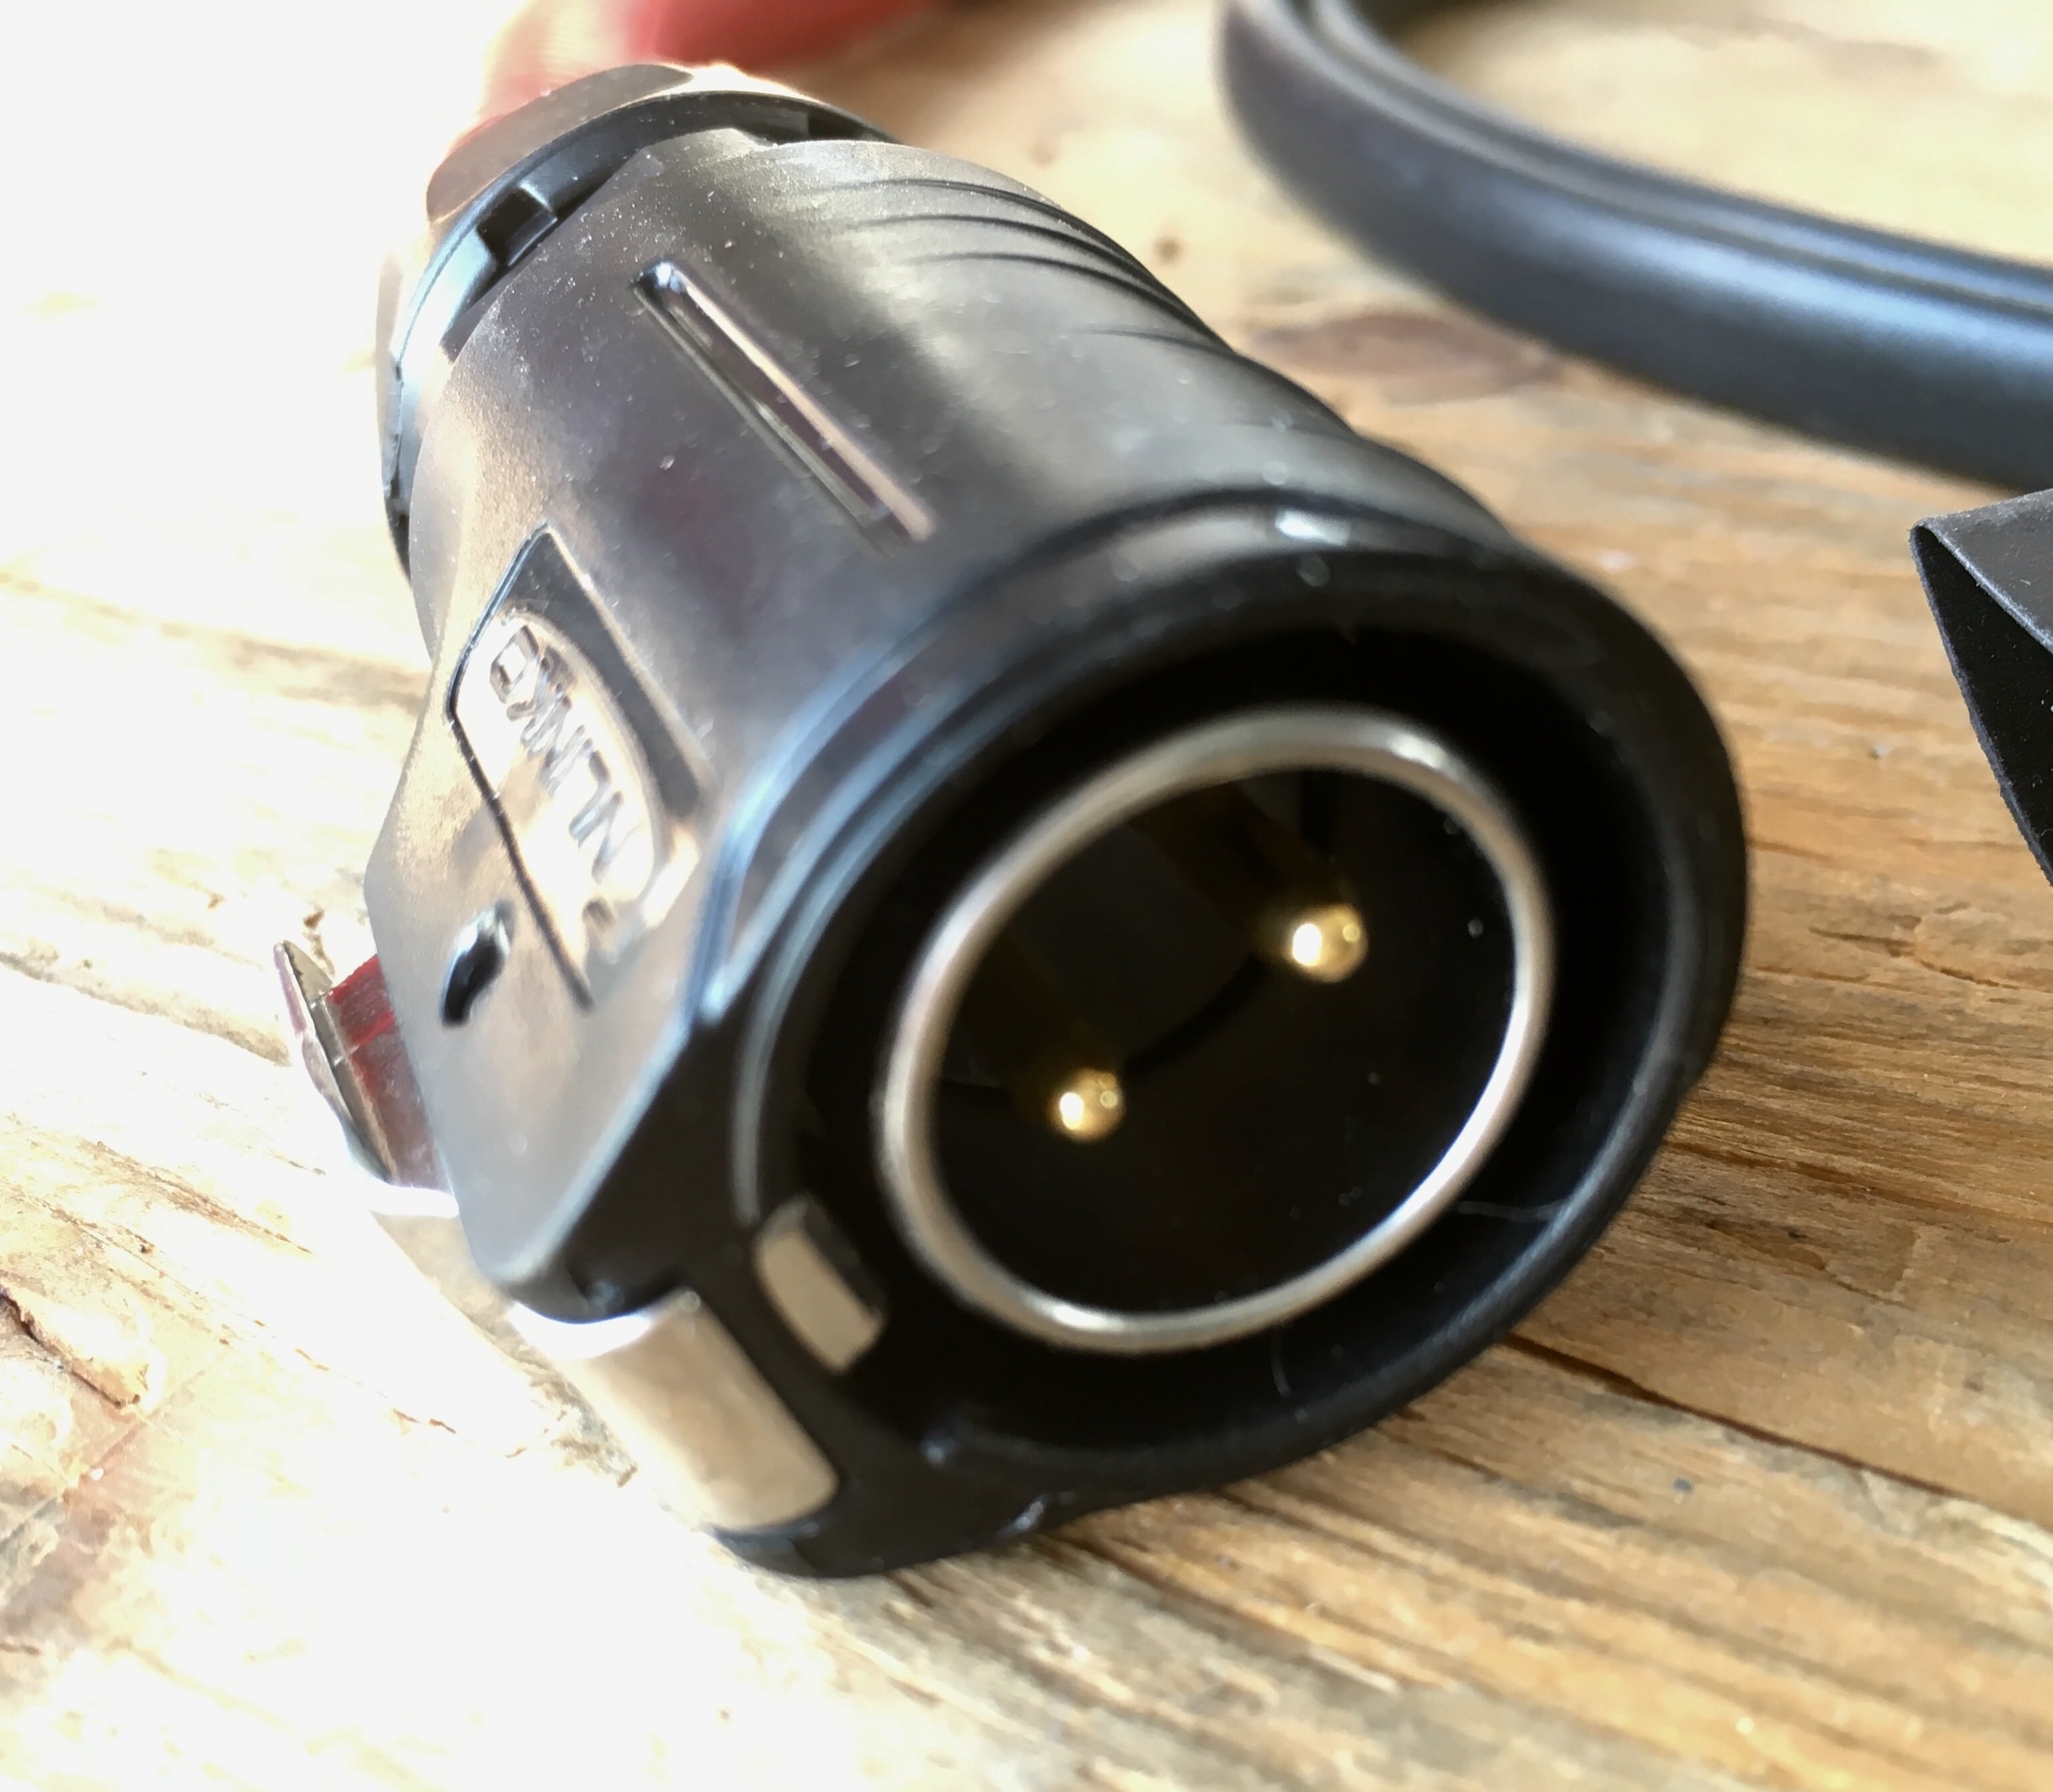
CNLINKO 2 Pin Power Industrial Circular Connector, Male Plug, Fit Furrion RV Solar Port:
https://smile.amazon.com/gp/product/B01M4RQ3X1/ref=ppx_yo_dt_b_asin_title_o03_s01?ie=UTF8&psc=1
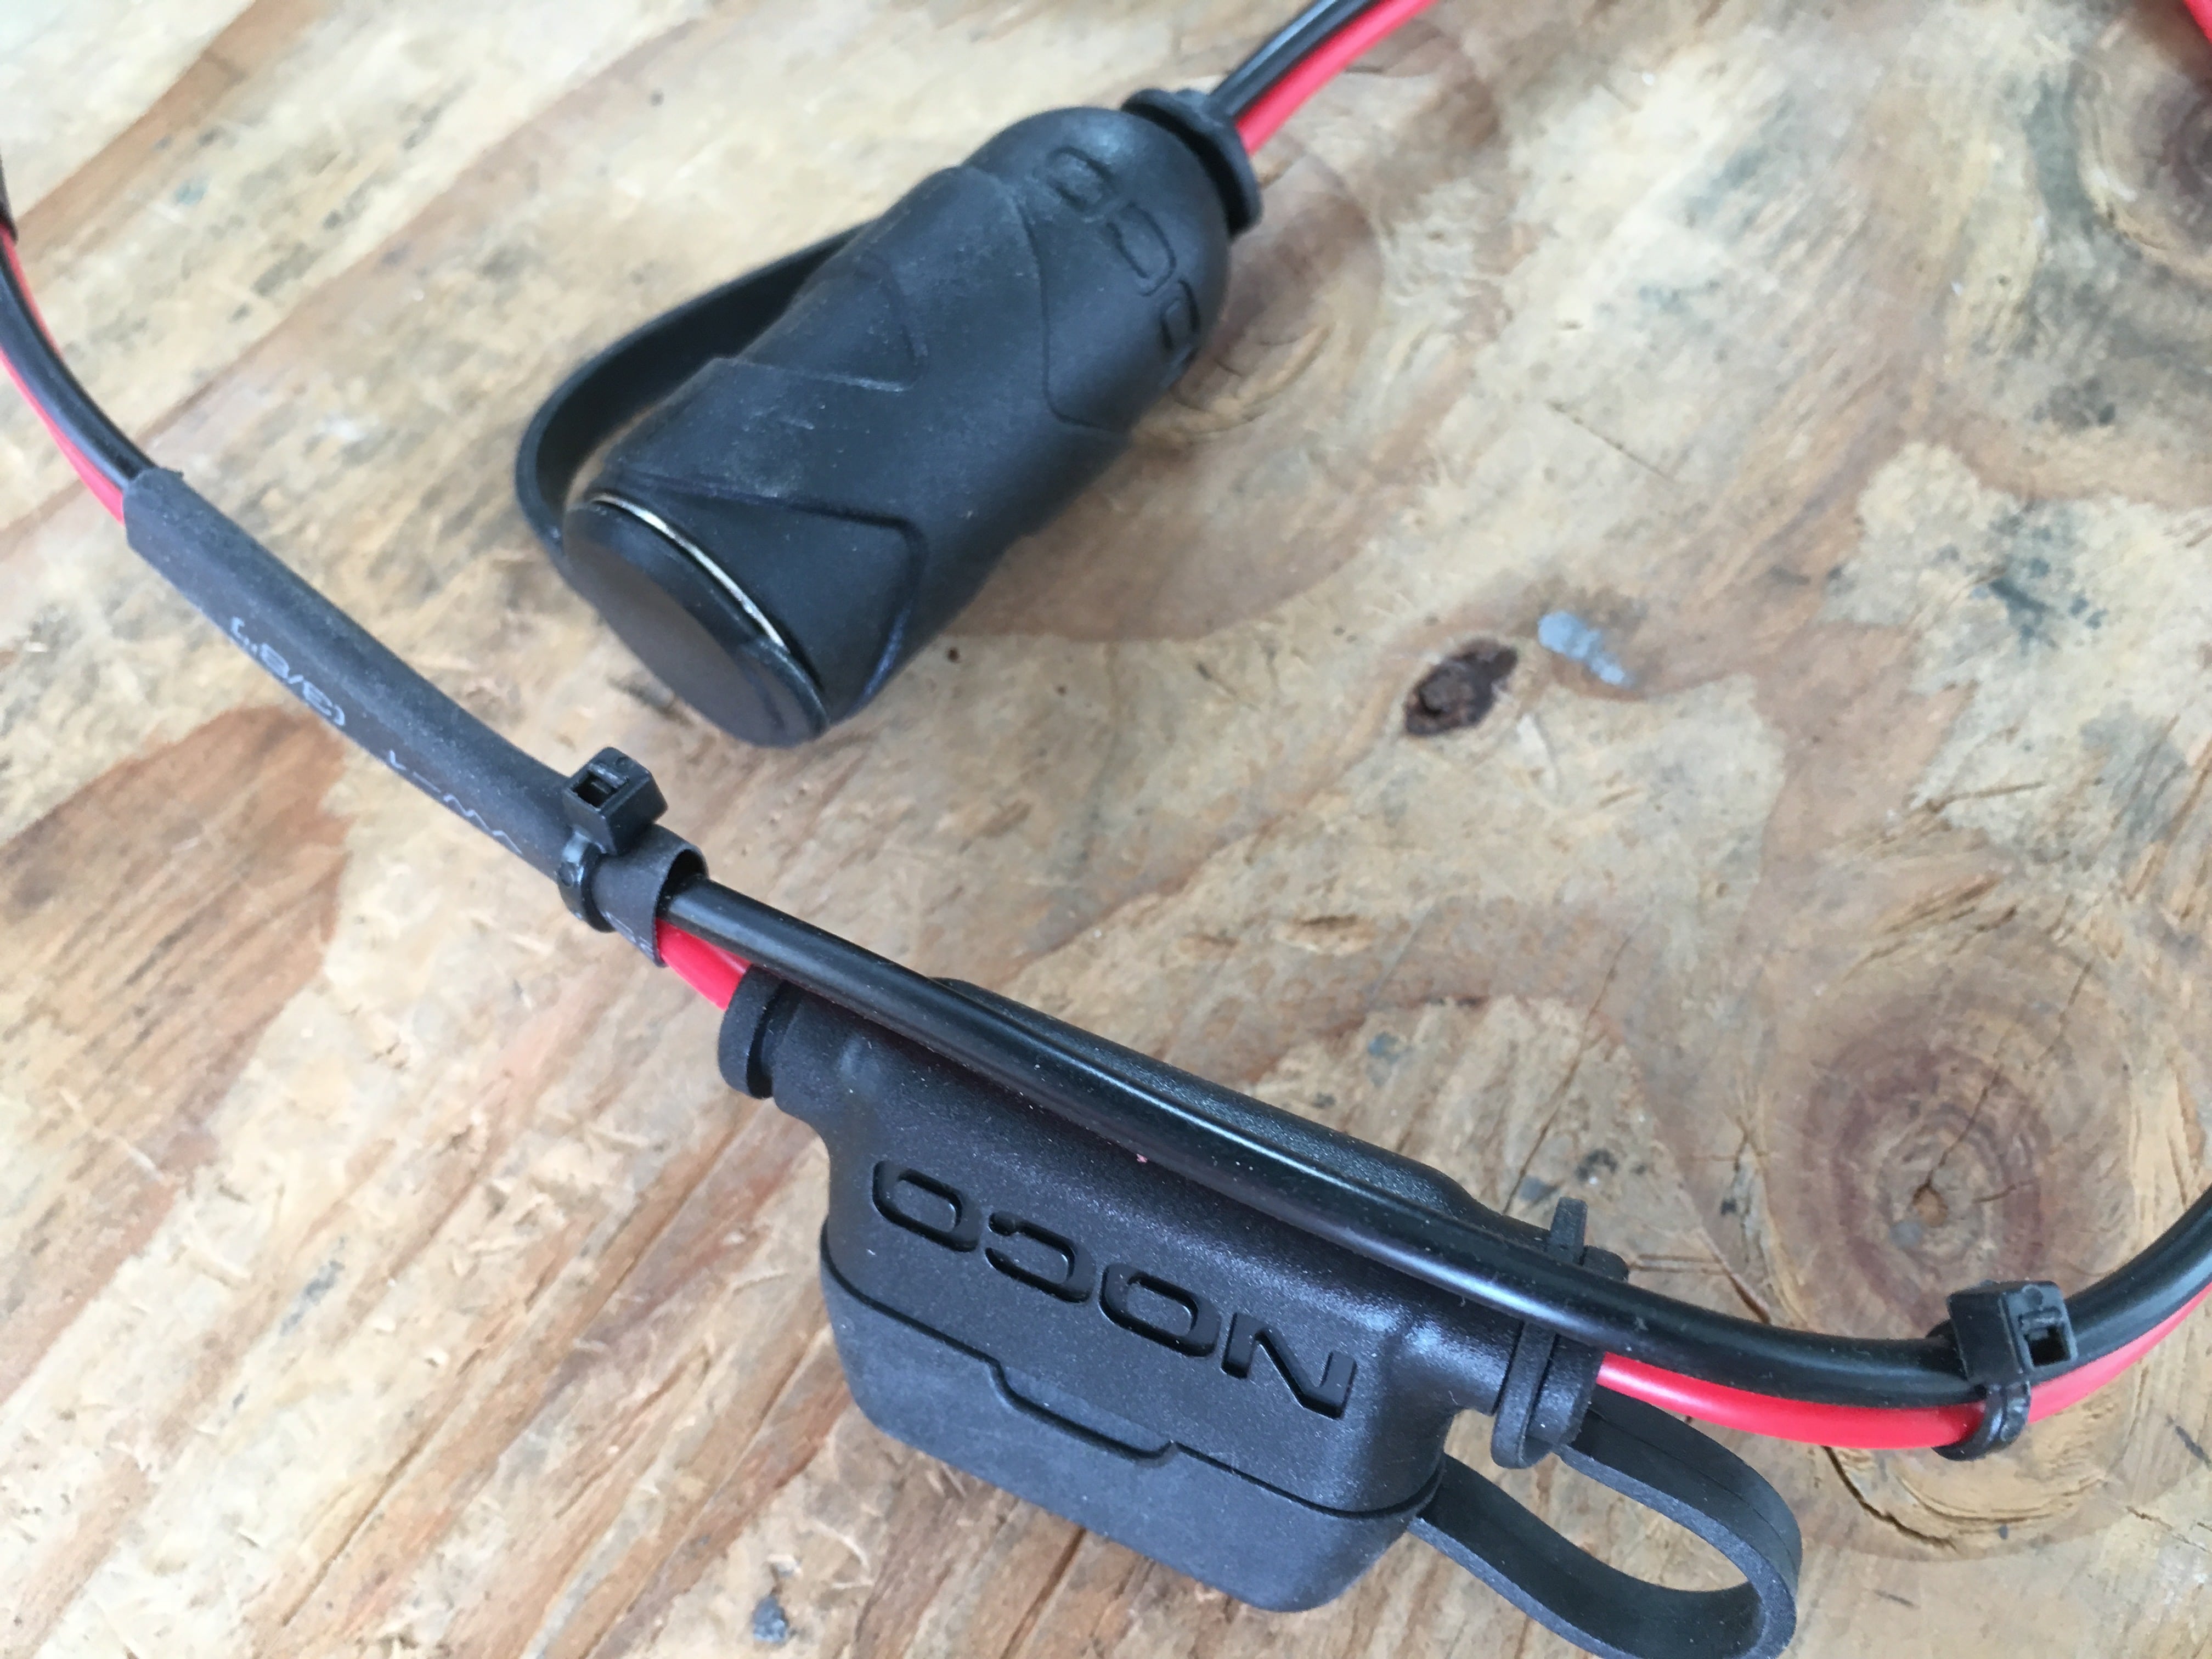
NOCO GC018 12V Adapter Plug Socket with Eyelet Terminal. Heavy duty socket, dust cover, big wires, well built:
https://smile.amazon.com/gp/product/B00G8WLW2Y/ref=ppx_yo_dt_b_asin_title_o03_s00?ie=UTF8&psc=1
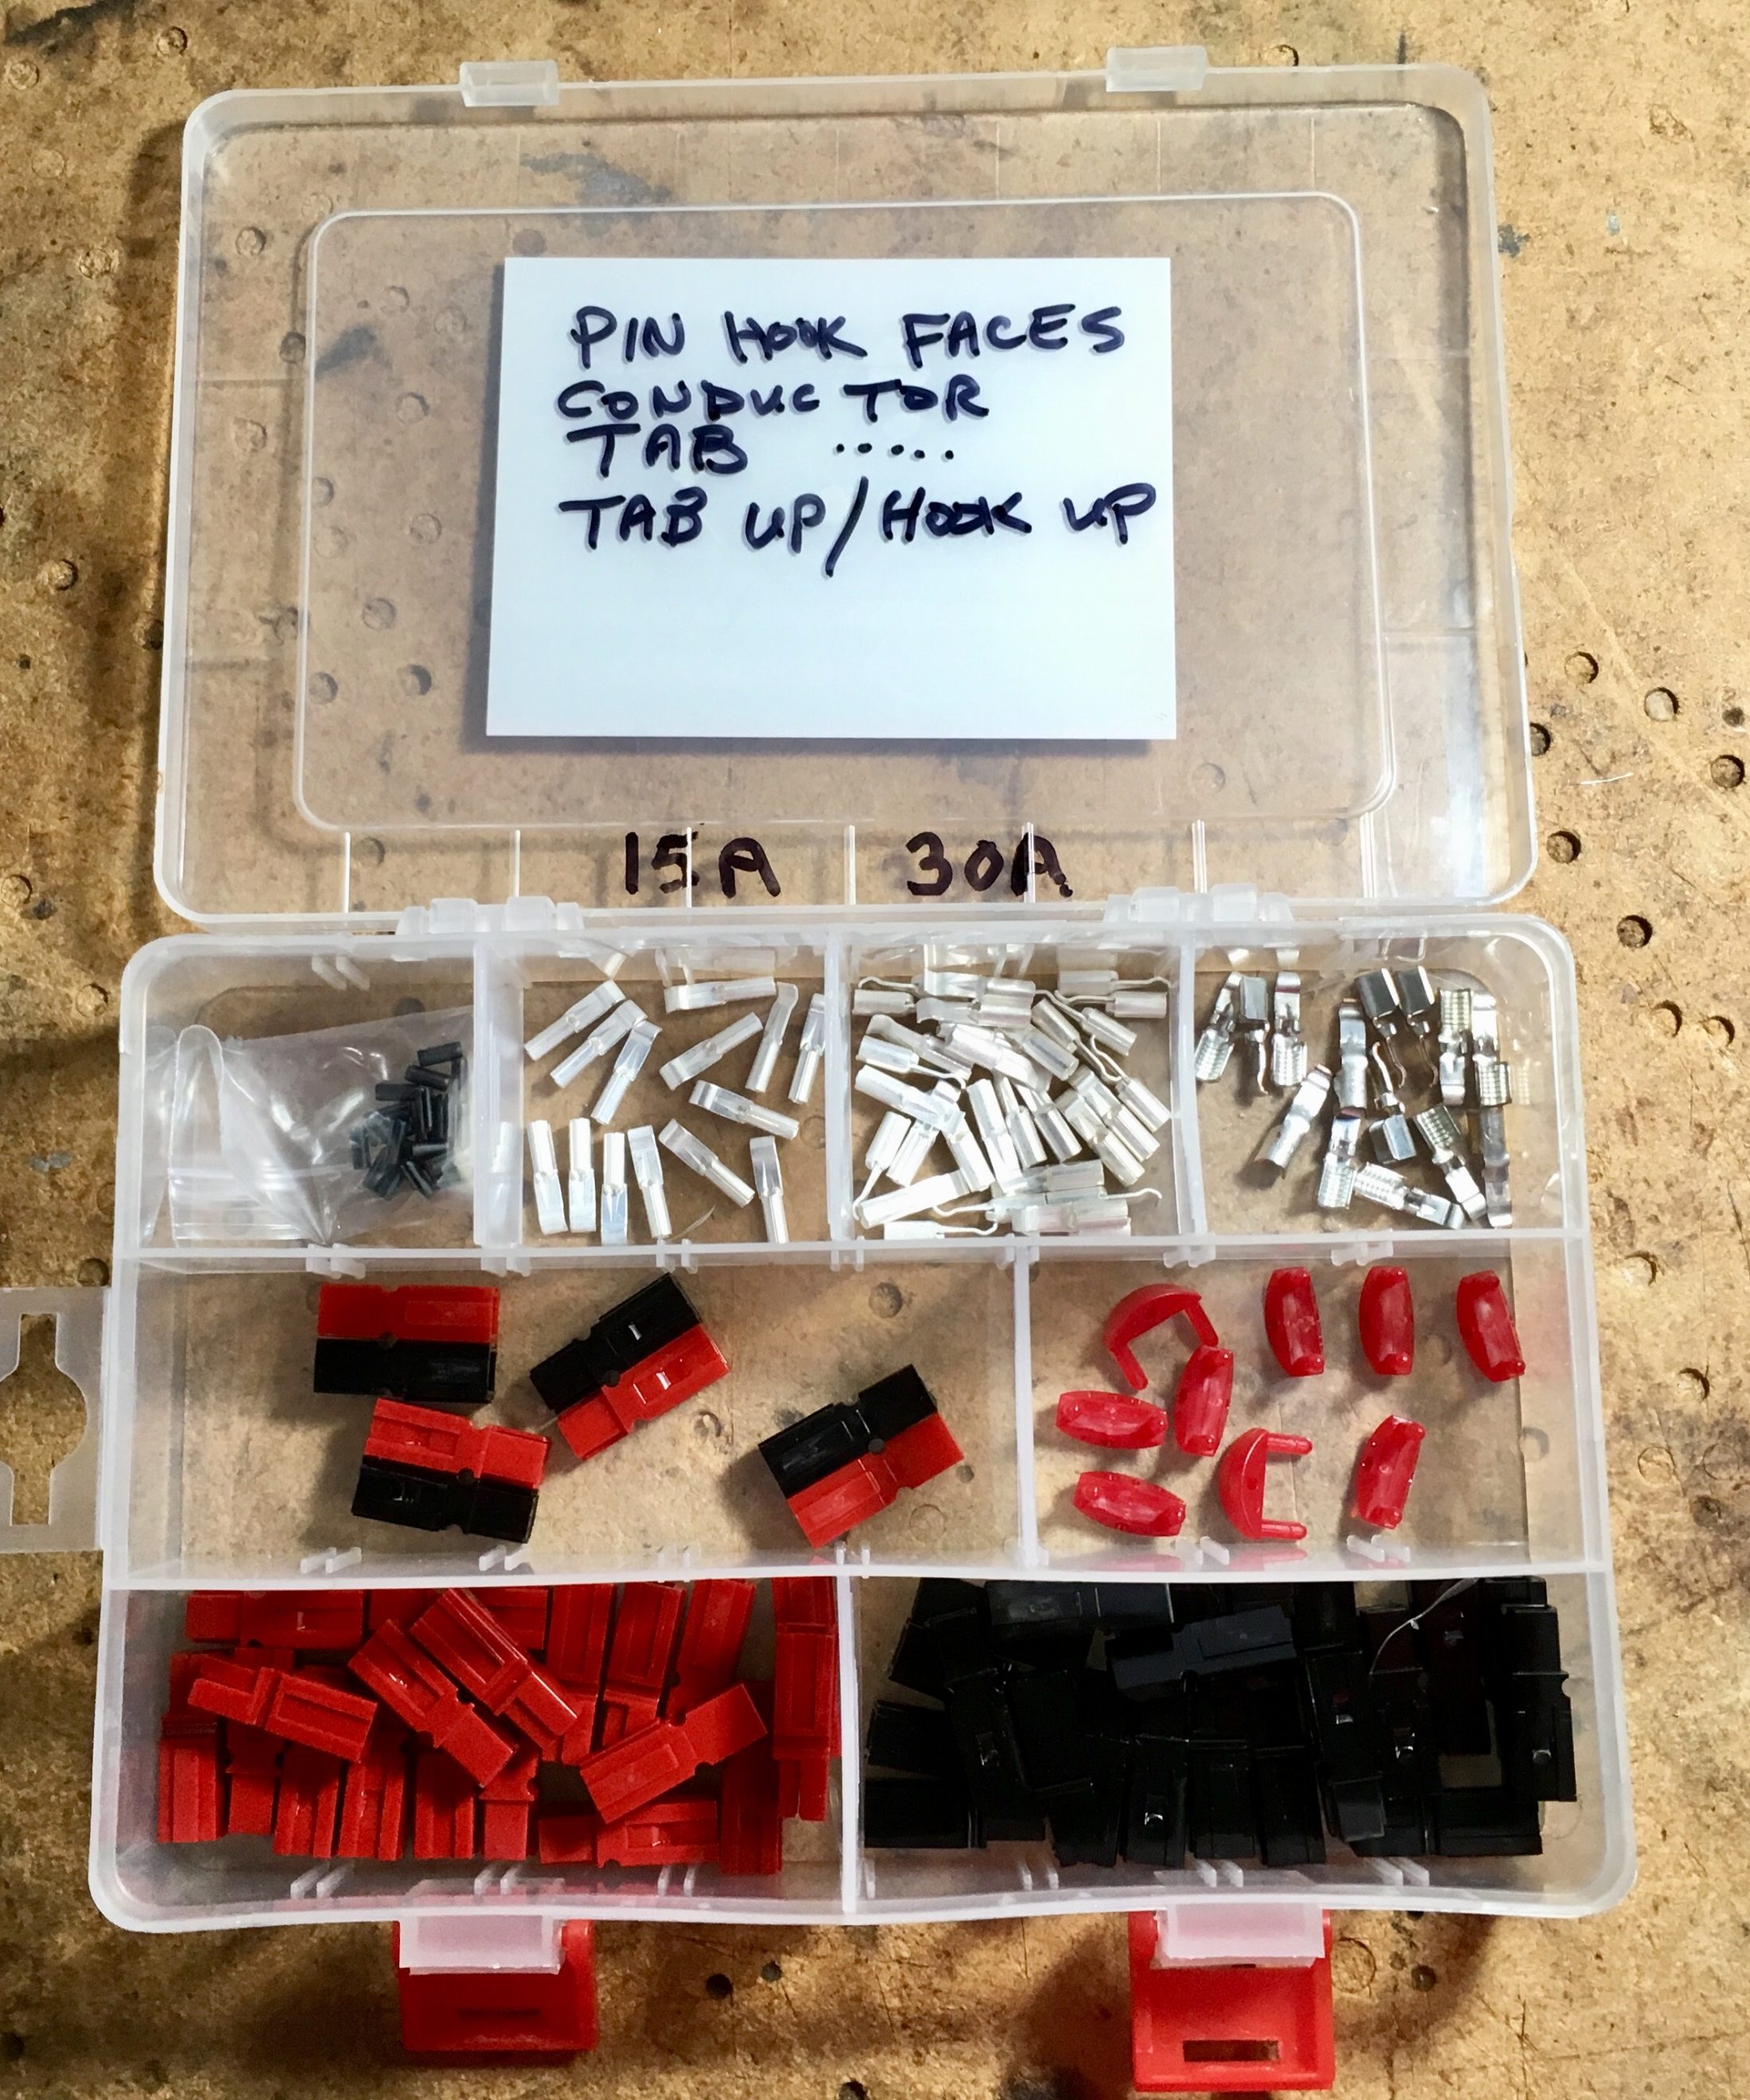
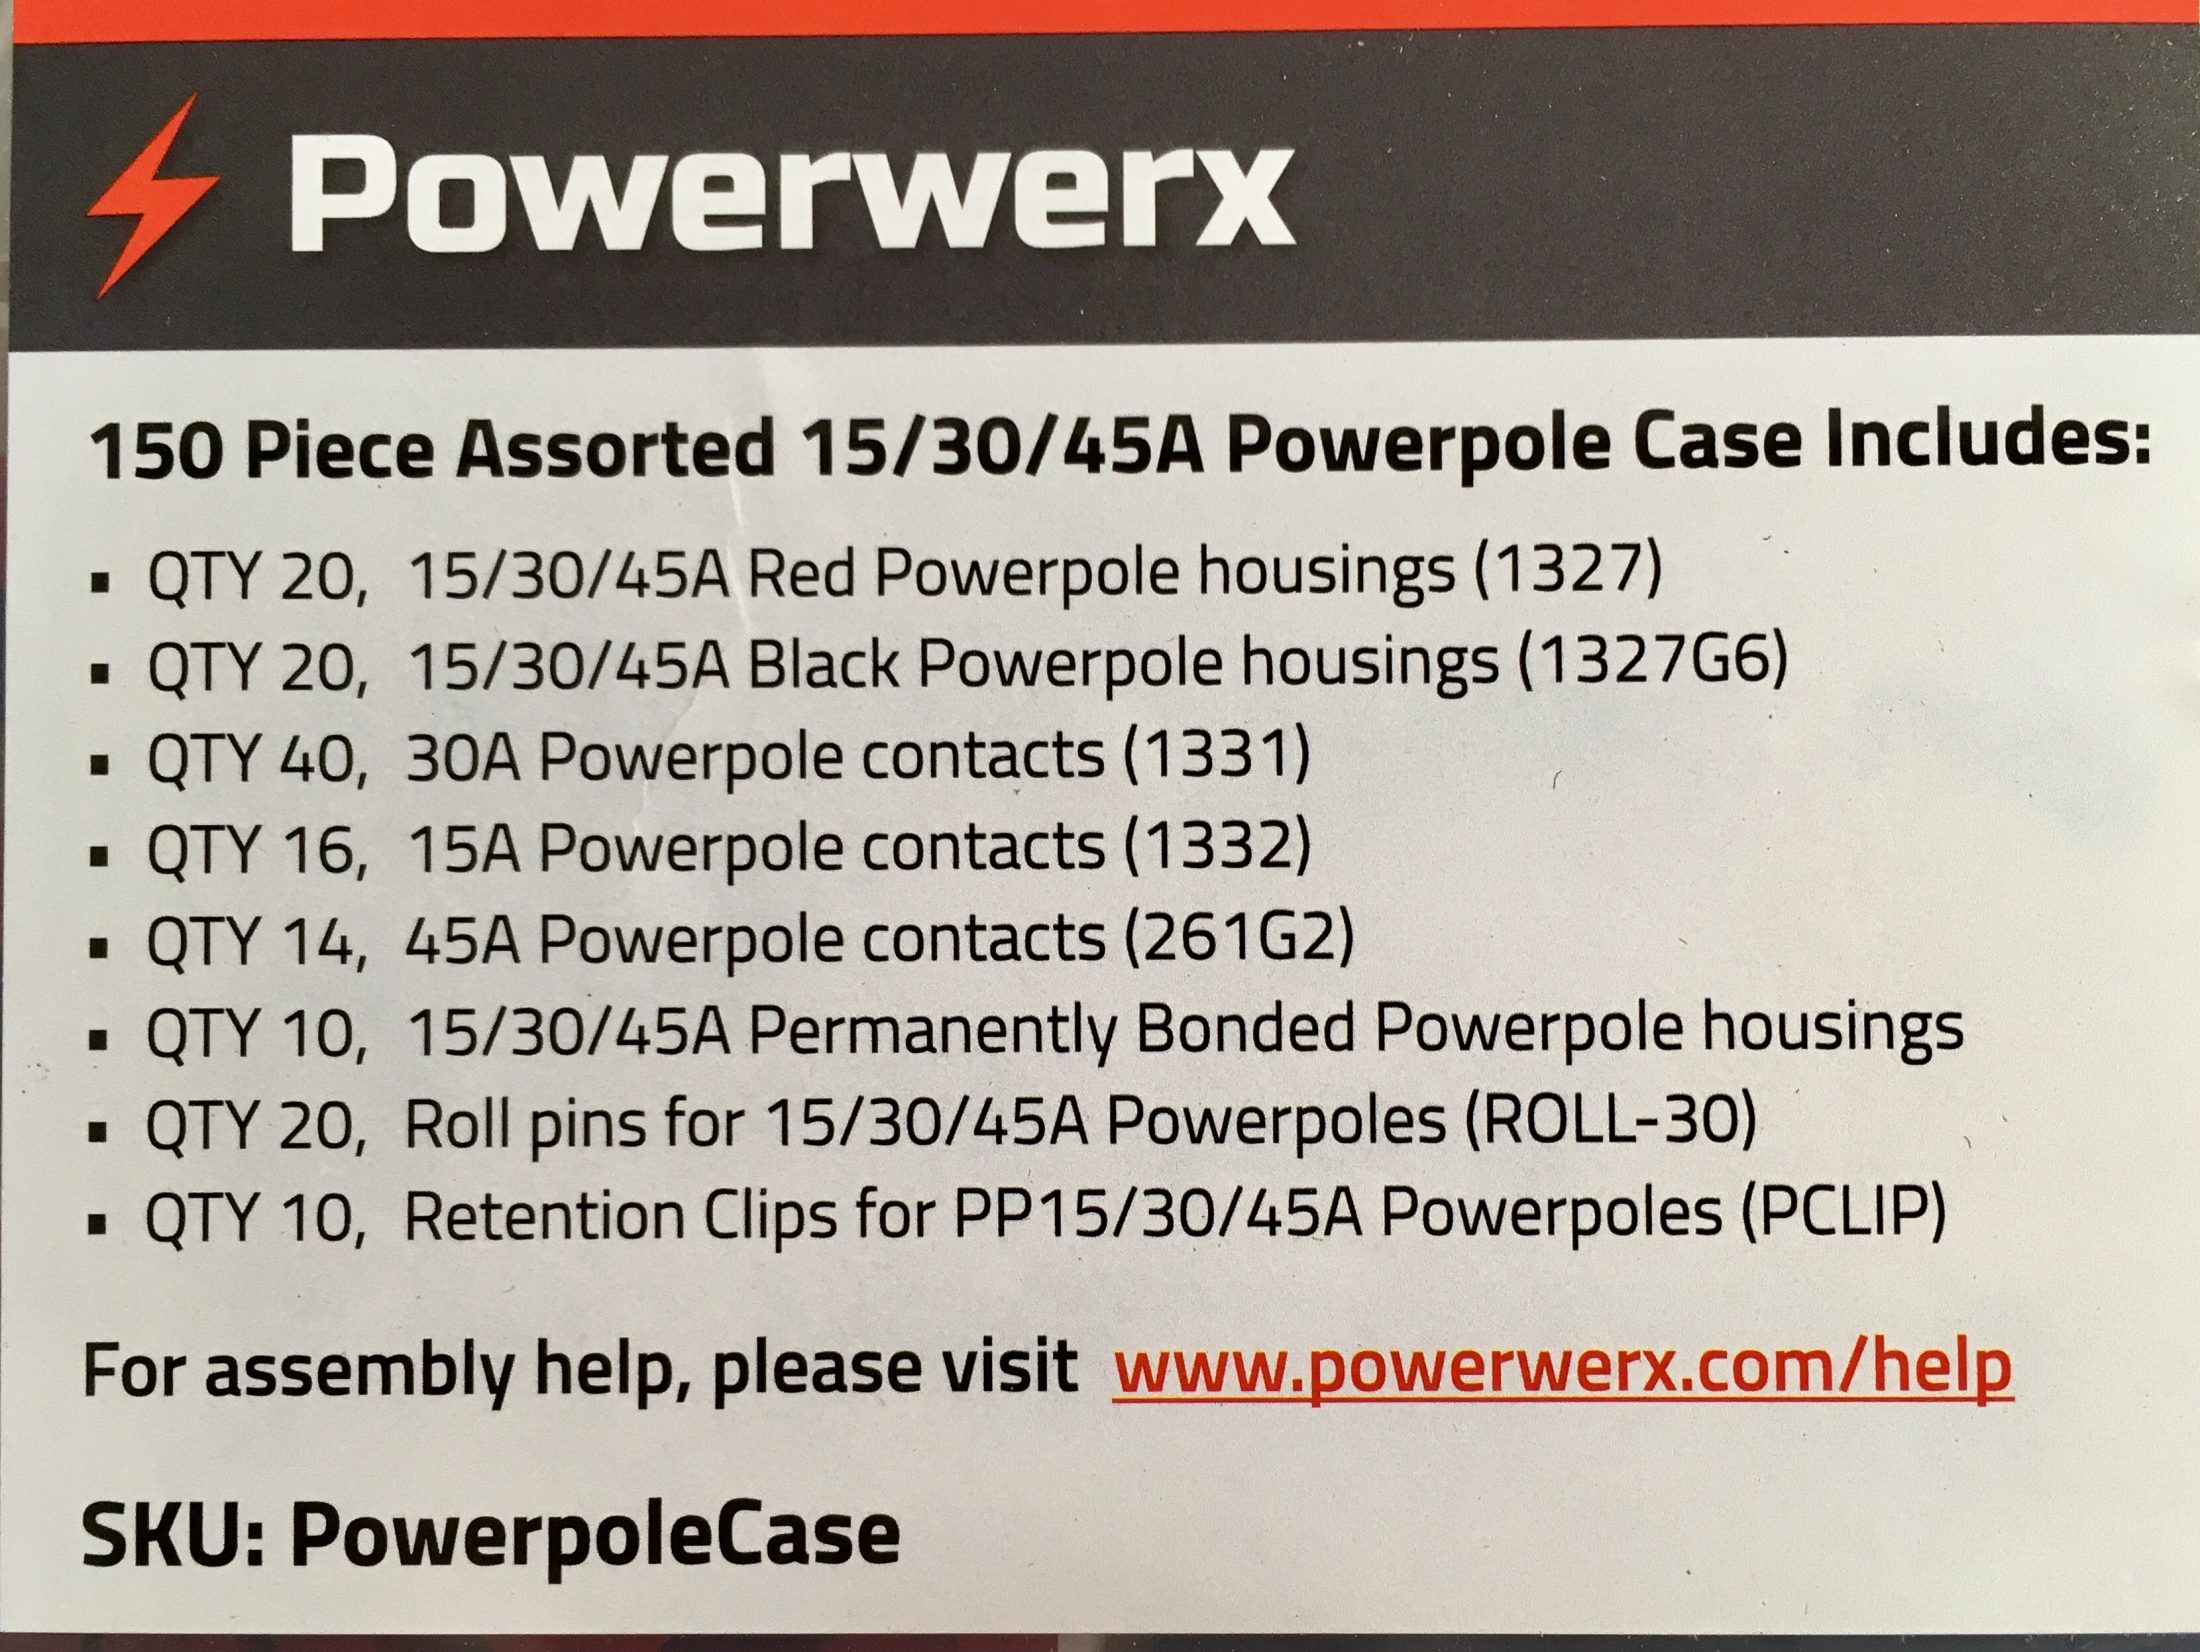
Powerworx Anderson Power Pole Connectors: The best choice for reliable exterior (or interior) connections, heavy duty and self cleaning contacts. I used the red/ black paired connectors, not the individual ones, and the 30 amp pins, which are for 12 to 14 AWG wire. It is impossible to connect them backwards. You can order packs of replacement parts from Powerworx to refill your kit.:
https://powerwerx.com/anderson-power-powerpole-sb-connectors
[attachment file=IMG_7251.jpg]
[attachment file=IMG_7248.jpg]
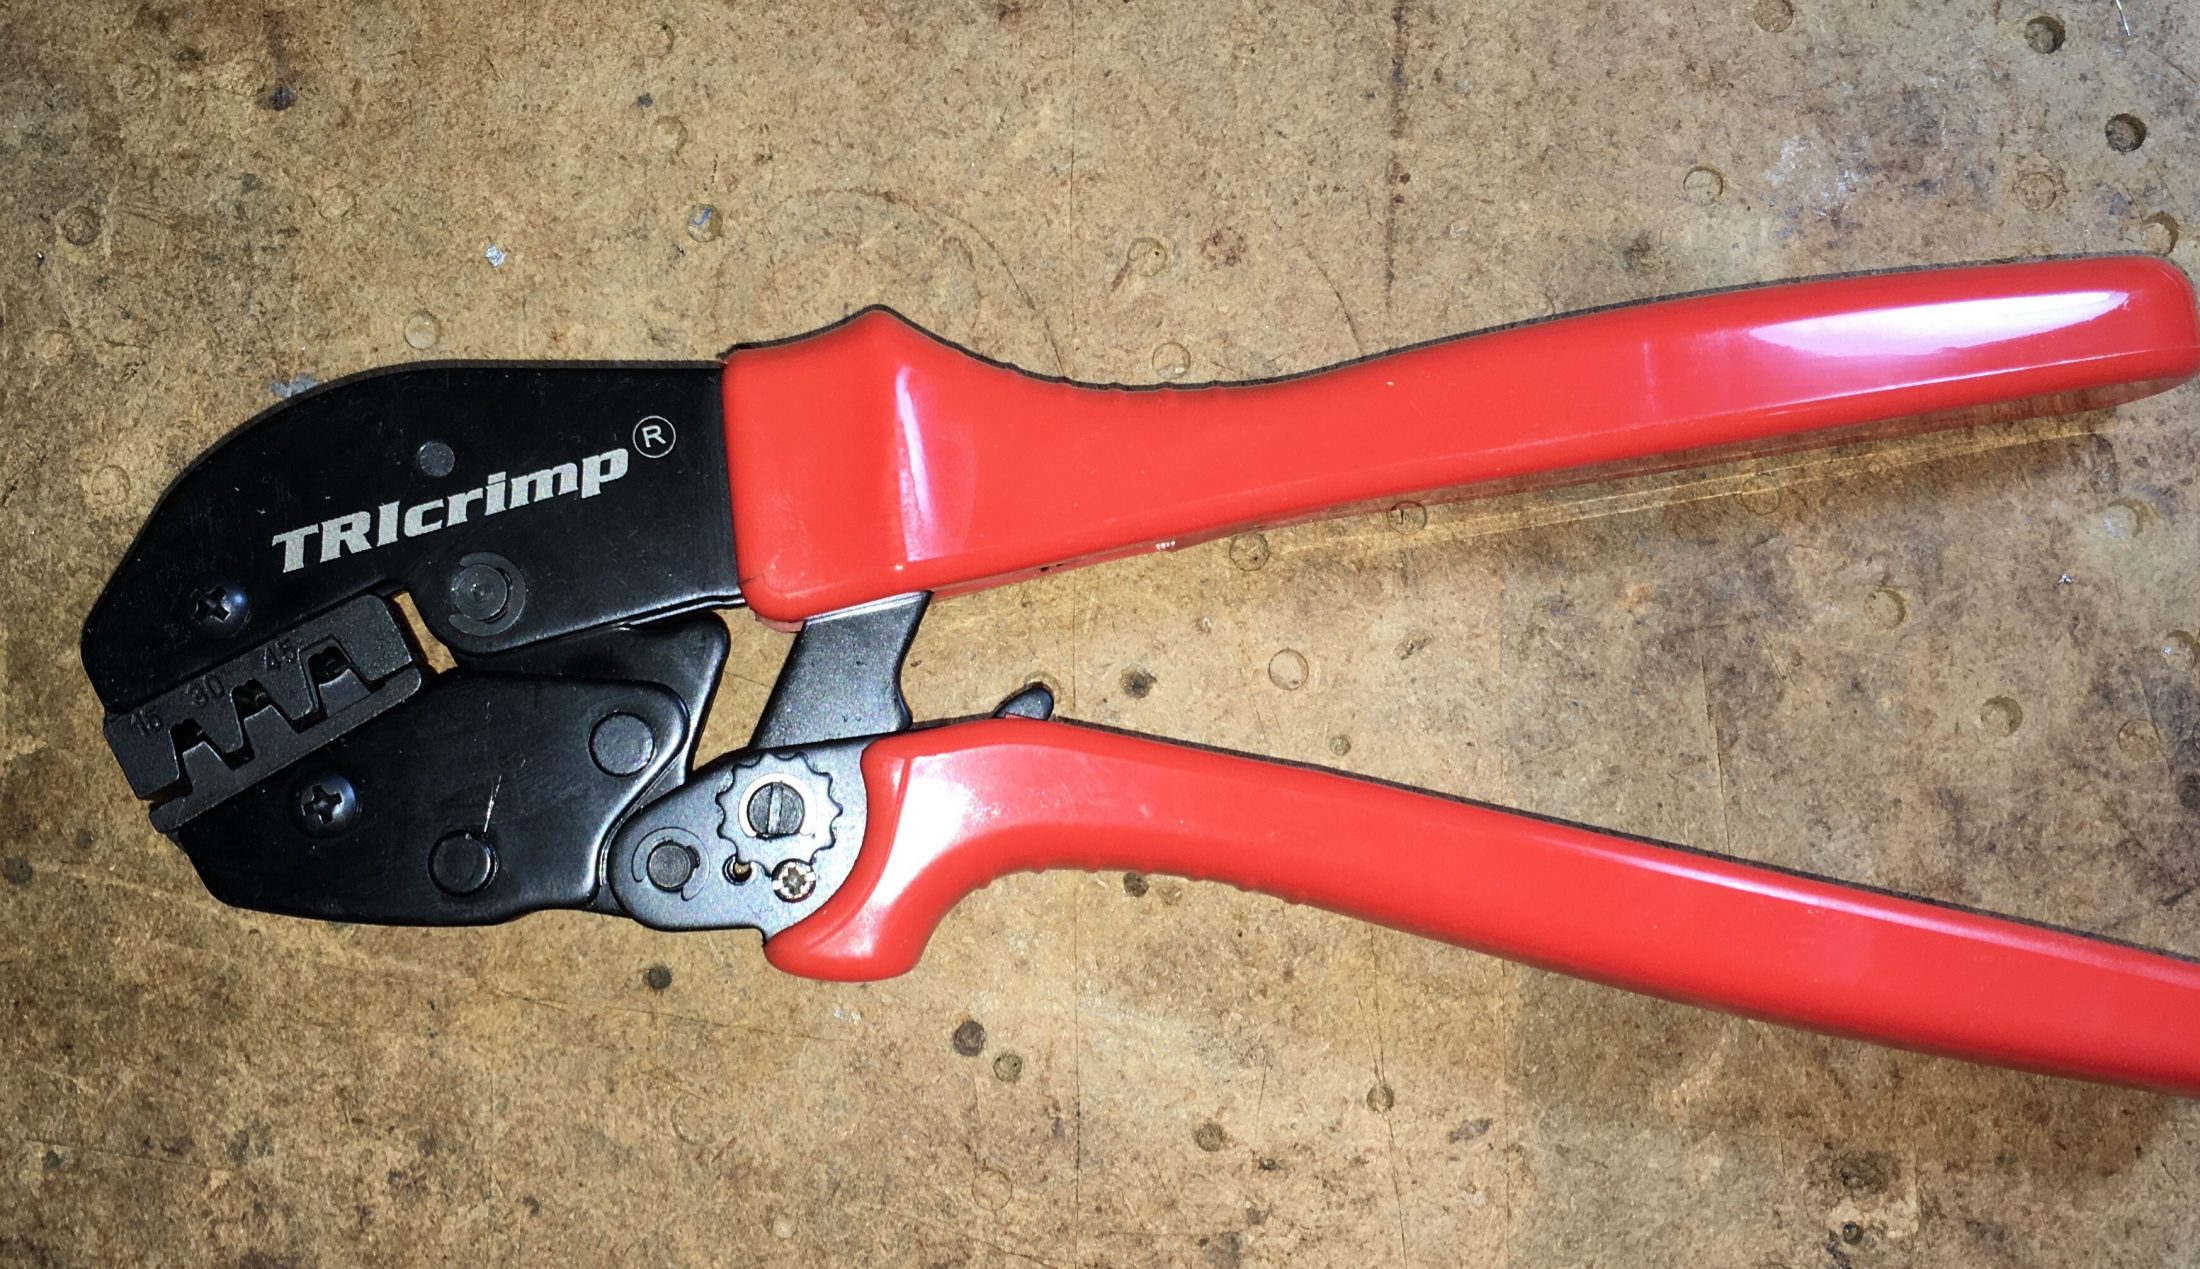
A special crimper is required: It would also be smart to order one or more of the pin extraction tools in case you make a mistake.
[attachment file=IMG_7254.jpg]
Instructions, getting the pin to click securely in place inside the housing may be tricky otherwise:
https://powerwerx.com/help/powerpole-assembly-instructions
If you don't have an external port on your Ollie, this is what the factory used on mine. I think it is standard equipment now. Be sure to use an inline 10 amp fuse to protect the trailer wires:
https://www.amazon.com/dp/B017P8H8PE/ref=twister_B017XOALKY?_encoding=UTF8&psc=1
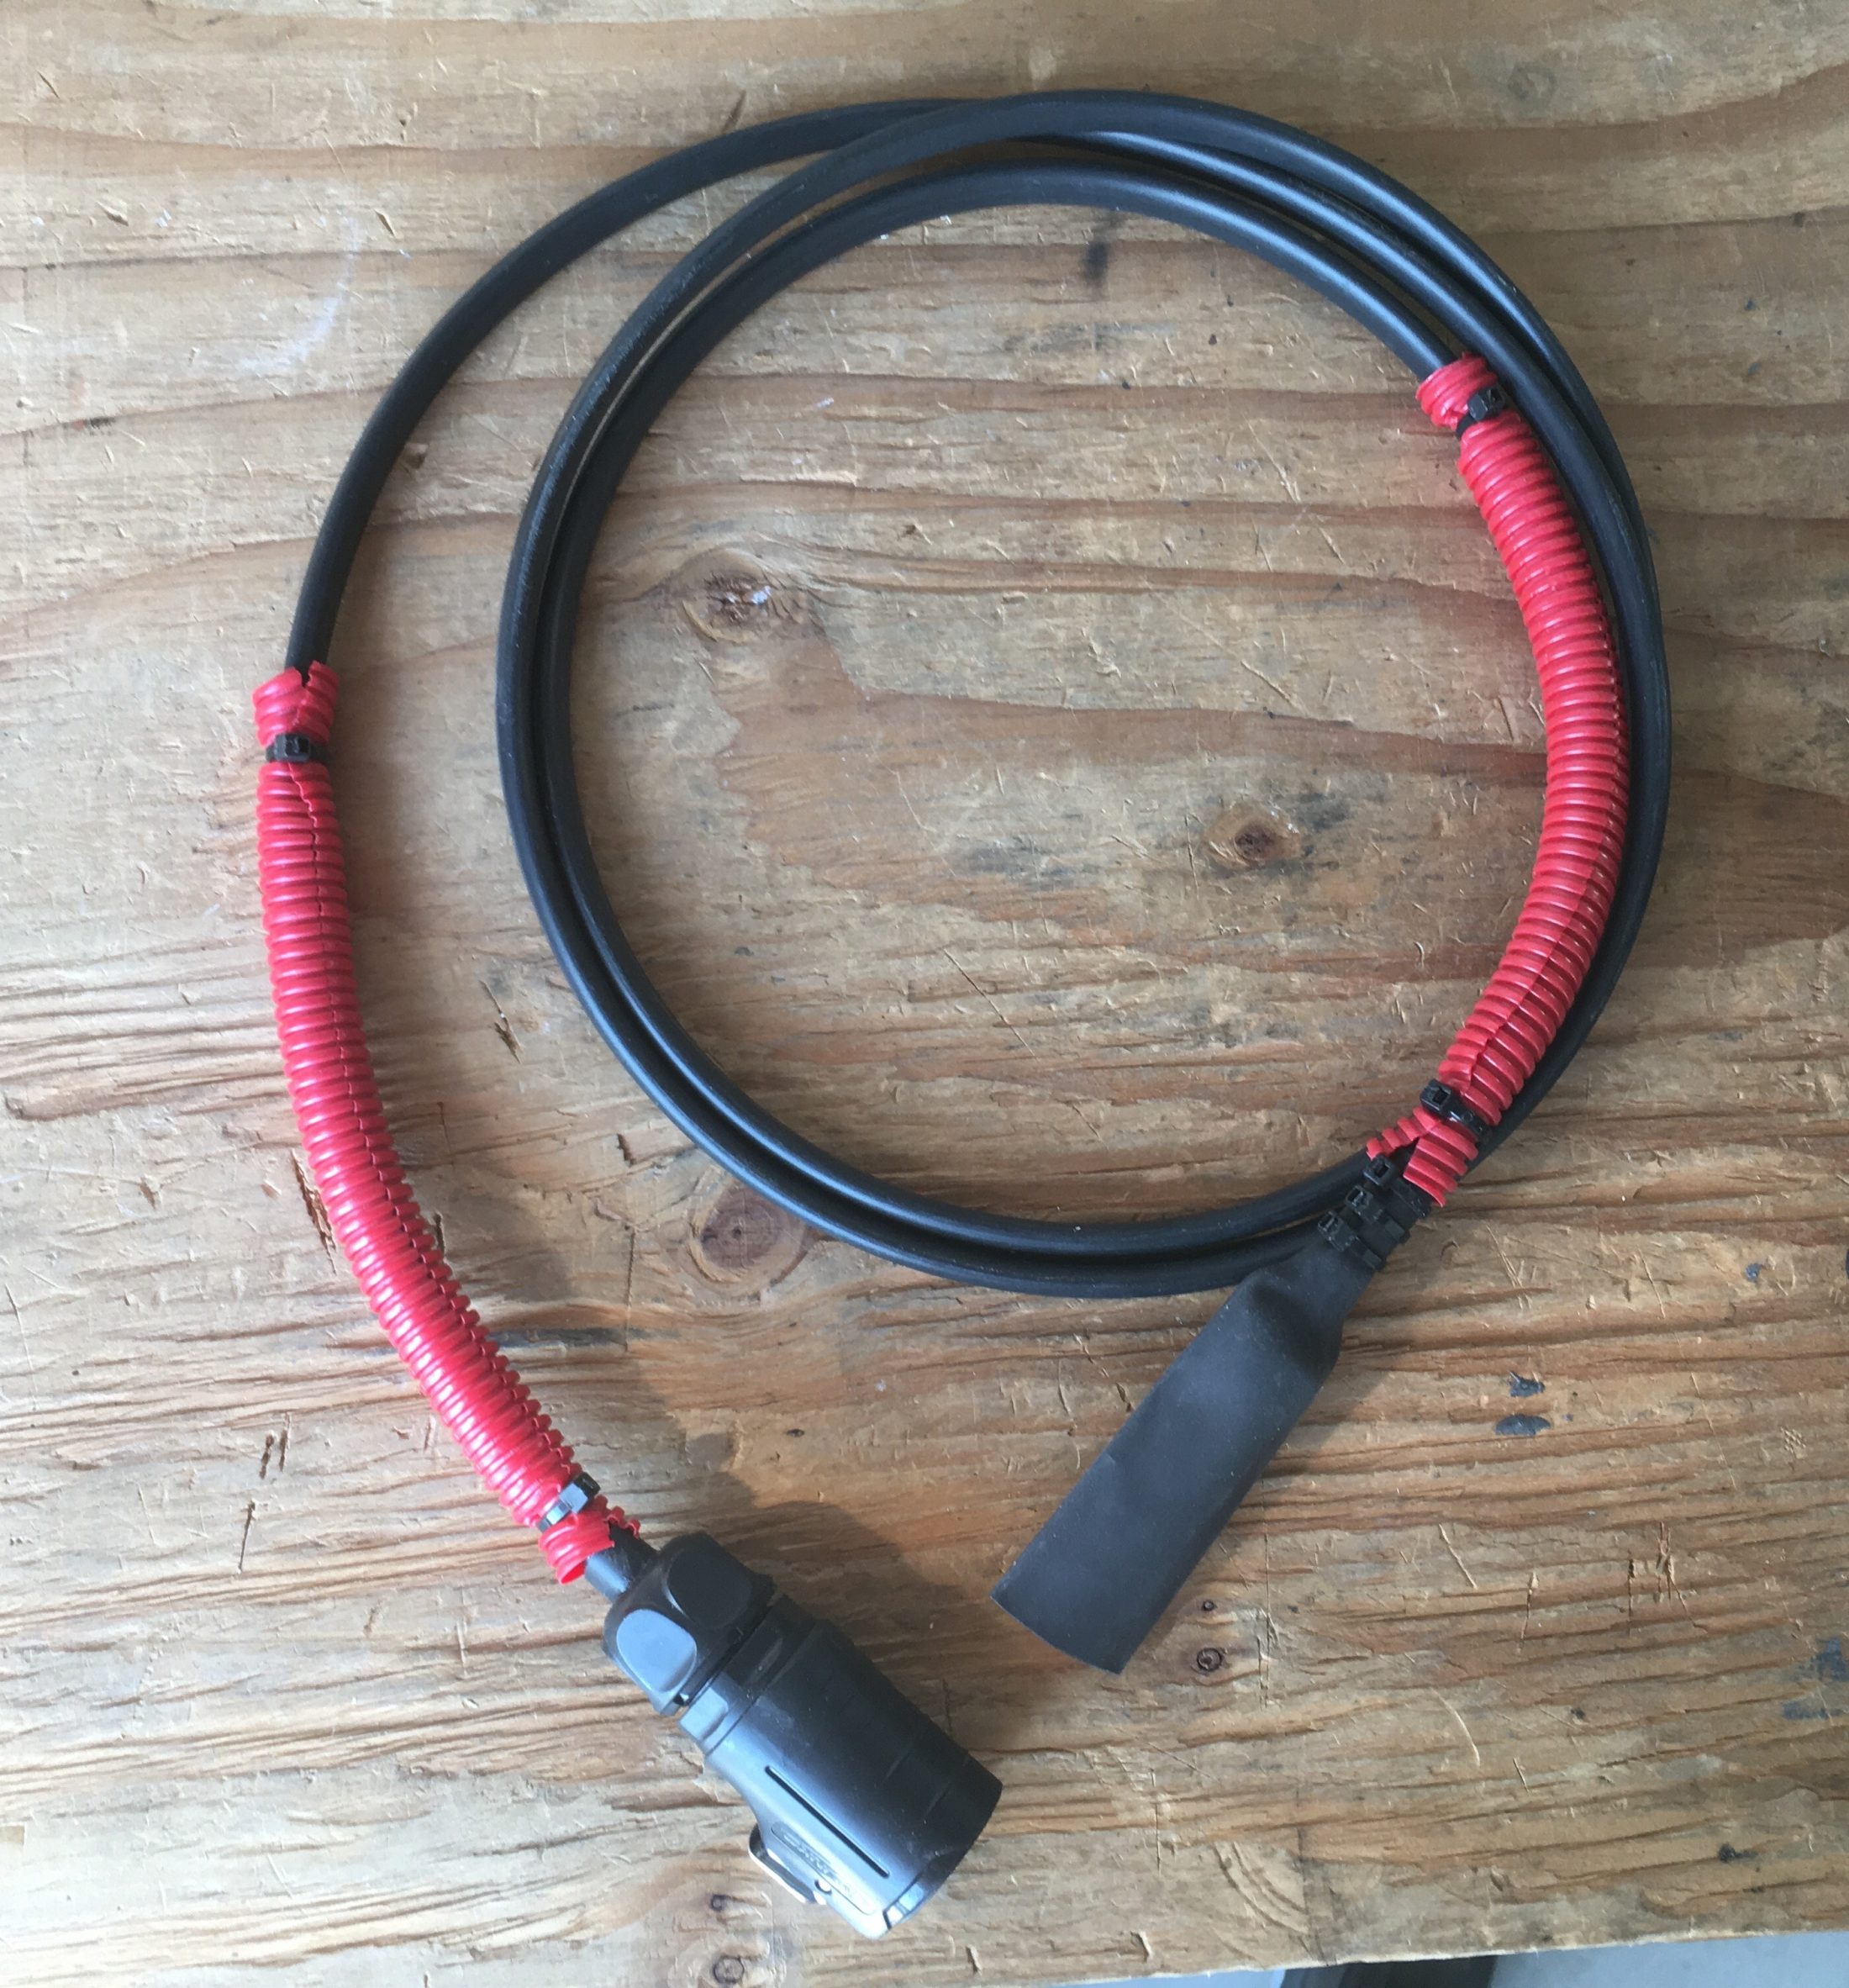
The rear section of cable, 5 feet long, from the external port connector to an Anderson red/ black pair. The black sleeve is heat shrink tubing, shrunk and secured to the cable only. It provides some rain protection, which is not really needed. It does however keep the inside of the connector cleaner, especially if you drop it in the dirt.:
[attachment file=IMG_7260.jpg]
[attachment file=IMG_7261.jpg]
Soldering the wires to the port plug is a challenge. You need to use rosin core electrical solder and a large high wattage soldering iron. The fat wires try to suck away all your heat. I added heat shrink where the wires entered, and "potted" the hole with silicone sealer to keep out water.
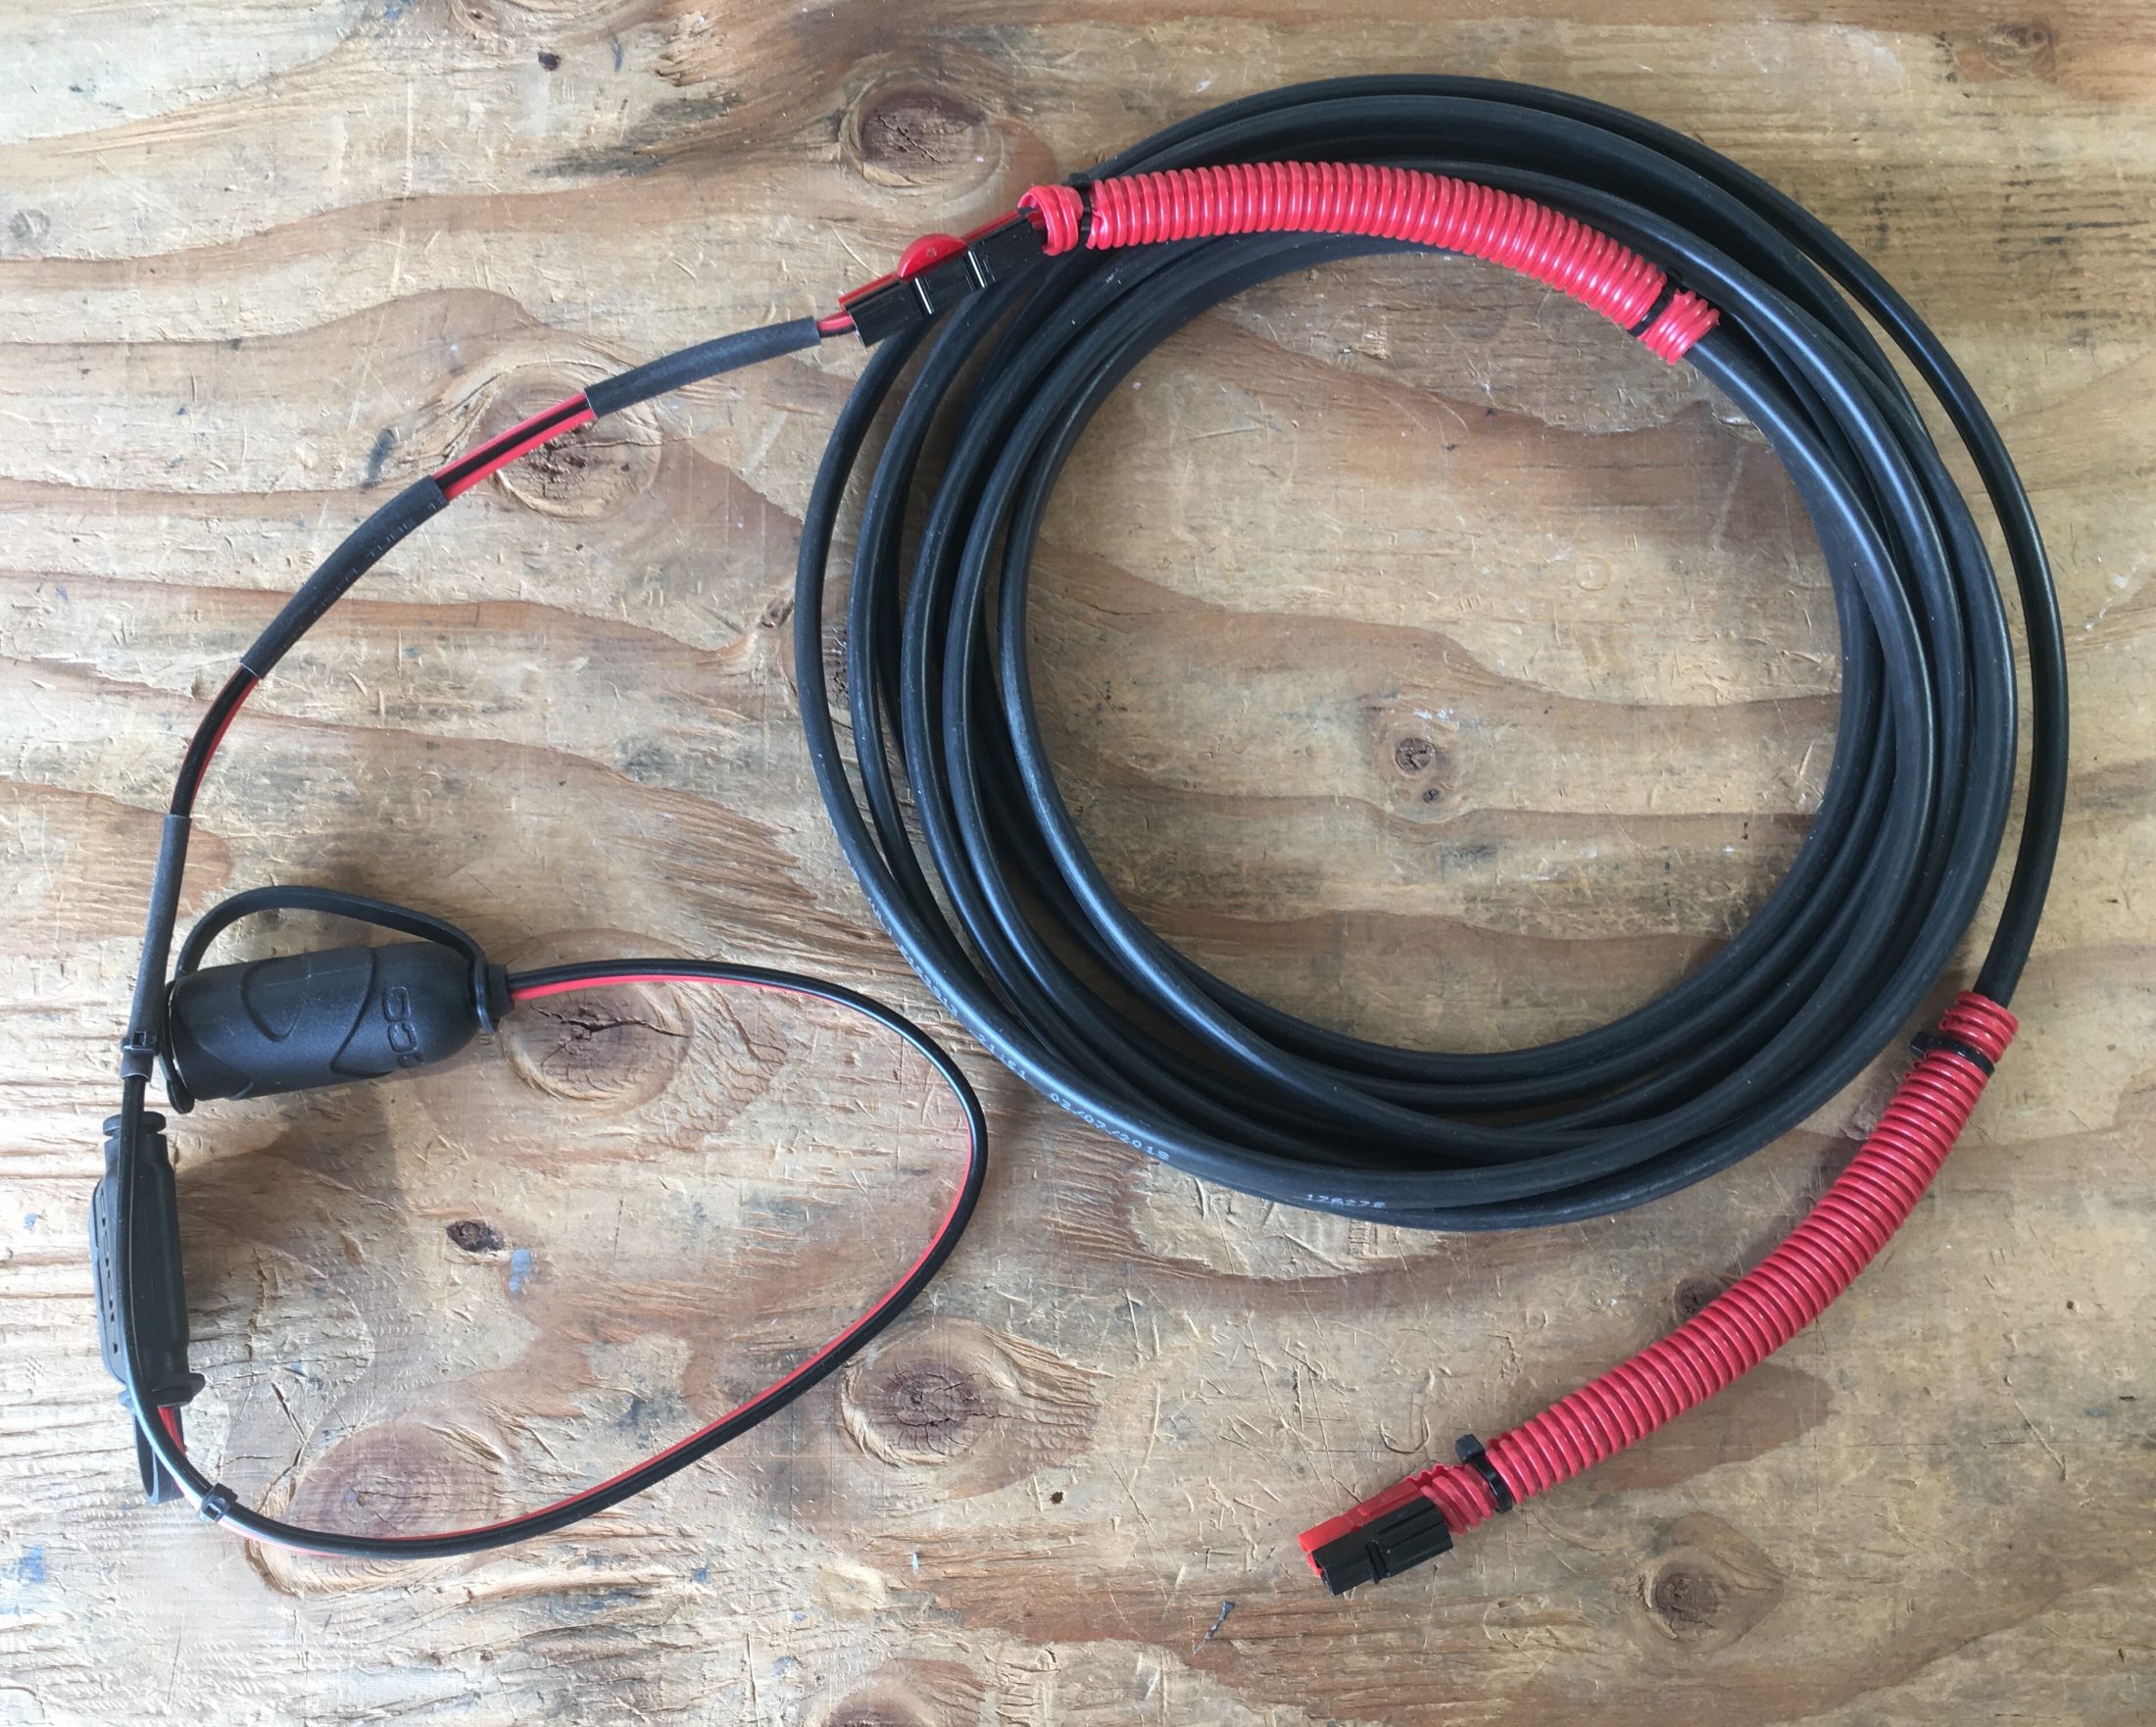
The main section, 25 feet long, with an Anderson pair at each end. It mates to a 5 foot "inside" cable to power the fridge. It has an Anderson pair at one end and a fused DC round socket at the other. The red sleeves are so I can find the ends easily in bad light or against a dark background.
[attachment file=IMG_7262.jpg]
The inline fuse holder for the round socket, rugged and reasonably weather proof. I used a 10 amp fuse since that is the rating for the Furrion socket; the fridge draws around 3 amps when the compressor is running.
[attachment file=IMG_7265.jpg]
The spare 25 foot extension cable, with Andersons at each end. Plus a 5 foot scrap, to use to make an adapter cable to a solar panel, if needed.
[attachment file=IMG_7266.jpg]
It works great, coils up and takes very little room on the closet shelf, and I am happy with the outcome. I might suggest a cable with a softer outer casing for more flexibility, but this works. It is actually hard to find cable with a flat profile, which I wanted. Most are big fat round things.
John Davies
Spokane WA
-
2
-
-
-
Congratulations, that van should make for a lot of smooth and relaxed highway towing. Do you mind telling us why you picked that passenger model over a cargo van, which offers better security for the contents? Are your back windows blacked out?
Have fun and post some pics along the way.
John Davies
Spokane WA
-
There is a little button at the very bottom of your Messages page called Download Chats History. I just discovered it. You get an unformatted text file showing all the conversations. I am not sure why you might want to do that.......?
Does anybody use this feature, and why? Am I missing out on something useful?
Thanks,
John Davies
Spokane WA
-
On ours you can disconnect the ground wire at the terminal block and kill the fan. We had lots of problems with one of our Escape fridges and had to pull it 4 times. Its really not a big deal and is just a few wires, propane line and a few screws
I am trying to establish if the fan is an Oliver add-on or if it comes with the fridge. My fridge manuals do not show this model as having one, and it isn't shown in the wiring charts. I would be fine with just disconnecting the circuit completely.
But if I have to pull the fridge out, it would be nice to be able to test the complete fridge operation with it standing on the driveway. I guess I could make a flexible gas hose extension and hook the 12 volt terminals to a battery and run it that way. I would like to be able to test the operation of the gas system, the replacement fan and temp switch before putting it all back into the trailer and re-taping the ducts. I would definitely remount the fan up high so it can be accessed from outside the hull next time.
Does anyone know a source for a high quality, QUIET, long-lasting, waterproof fan?
Anyway, I haven't heard back from he Mother Ship yet. I truly do hate RV propane appliances. I added a pic and a video link to my first post.
John Davies
Spokane WA


Anderson Hitch purchase?
in Towing an Oliver
Posted
Trainman, take a look here if you haven’t already....
http://olivertraveltrailers.com/topic/how-to-anderson-weight-distributing-hitch-center-frame-location/
John Davies
Spokane WA