
Dean and Mary
-
Posts
23 -
Joined
-
Last visited
-
Days Won
1
Everything posted by Dean and Mary
-
Thanks Snackchaser, that makes sense.
-
Thanks for the detailed response. I agree—the wiring is a mess, and that’s exactly why I’m redoing all of it. I did not know about the failure rate of the Optifuse. I’m also curious about the maximum of three wires on a lug, and why there are two connections ahead of the Optifuse. For my upgrade, I’ll be using the Victron Energy Lynx Distributor with ANL fuses.
-
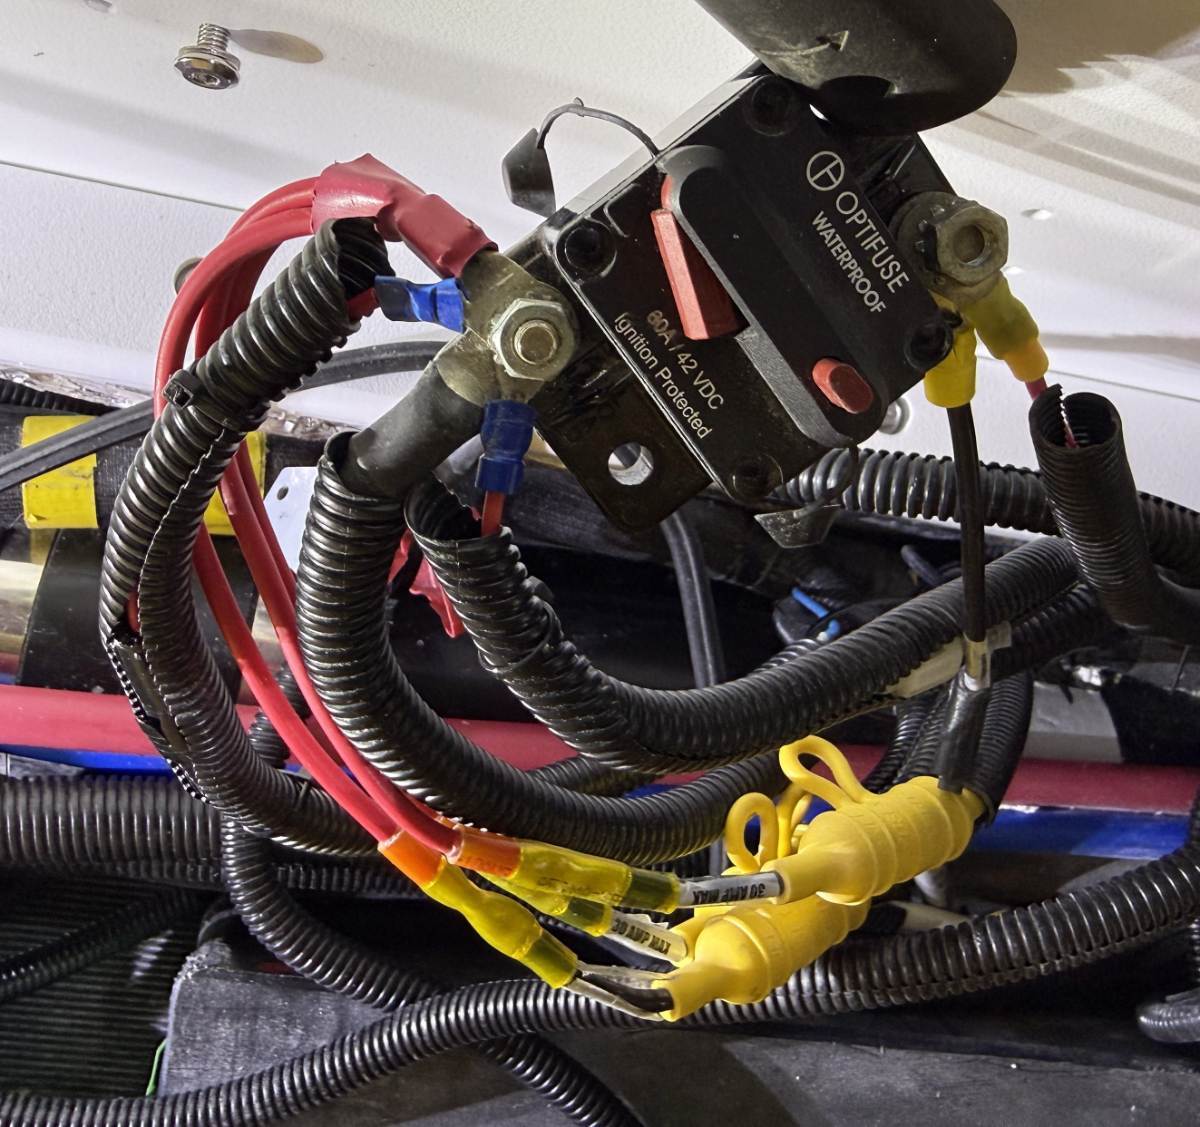
Imelda, Thanks for the update, and I’m glad you’re able to get home with things as they are. Just a quick reminder—the jacks don’t receive their power from the converter, but more of a direct connection from the batteries through the 60 amp Optifuse shown in my above image.
-
jd, thanks for sharing the photo of your original 12‑volt distribution. It’s definitely cleaner than what my original setup looks like. I’ve attached a photo of mine—minus the 8‑gauge input wire. I’m in the middle of replacing everything and wanted a picture before I completely disassemble it. On my install, there are two wires on the input side of the Optifuse (not counting the main 8‑gauge battery feed that’s been removed). I haven’t traced them yet, but I suspect one may be for the breakaway switch. I don’t want to hijack the thread until the main issue is resolved, but identifying these wires would save me some time. I know that the heavy red wire on the output side goes to the converter and the three jack fuses are also easily identified, but I have not traced the others out. As for troubleshooting the thread creators main problem, a ground can also be found on the inverter chassis for your voltmeter. I hope all is going well and solution has been found. Dean

-
Used Oliver advertisements Return to the Oliver Forum
Dean and Mary replied to dewdev's topic in General Discussion
Topgun2: Maybe in the future we’d be interested in organizing a regional rally, but right now life is just too busy—and we still feel a bit too new to the Oliver group. Thanks for sharing the information. -
Yes, I agree—the VHB tape has excellent shear and tensile strength, and on some materials it can even be peeled away slowly when no longer needed, which makes it an even better choice.
-
I also like using 3M 4950 VHB tape for mounting to fiberglass. I tested several products and ended up preferring the tape. I used it to mount the solar panels on the roof of our Bigfoot camper, and it’s held strong for 18 years so far. I’ve been following your posts—and others—on the A/C upgrade and plan to tackle mine next spring. Right now, I’m leaning toward the Furrion Chill Cube, but I’ll keep researching over the winter and make a final decision in the spring. I may have questions for you then.
-
Two weeks of feedback Apex #2 (Hull 1739)
Dean and Mary replied to Sentry62's topic in Getting Started
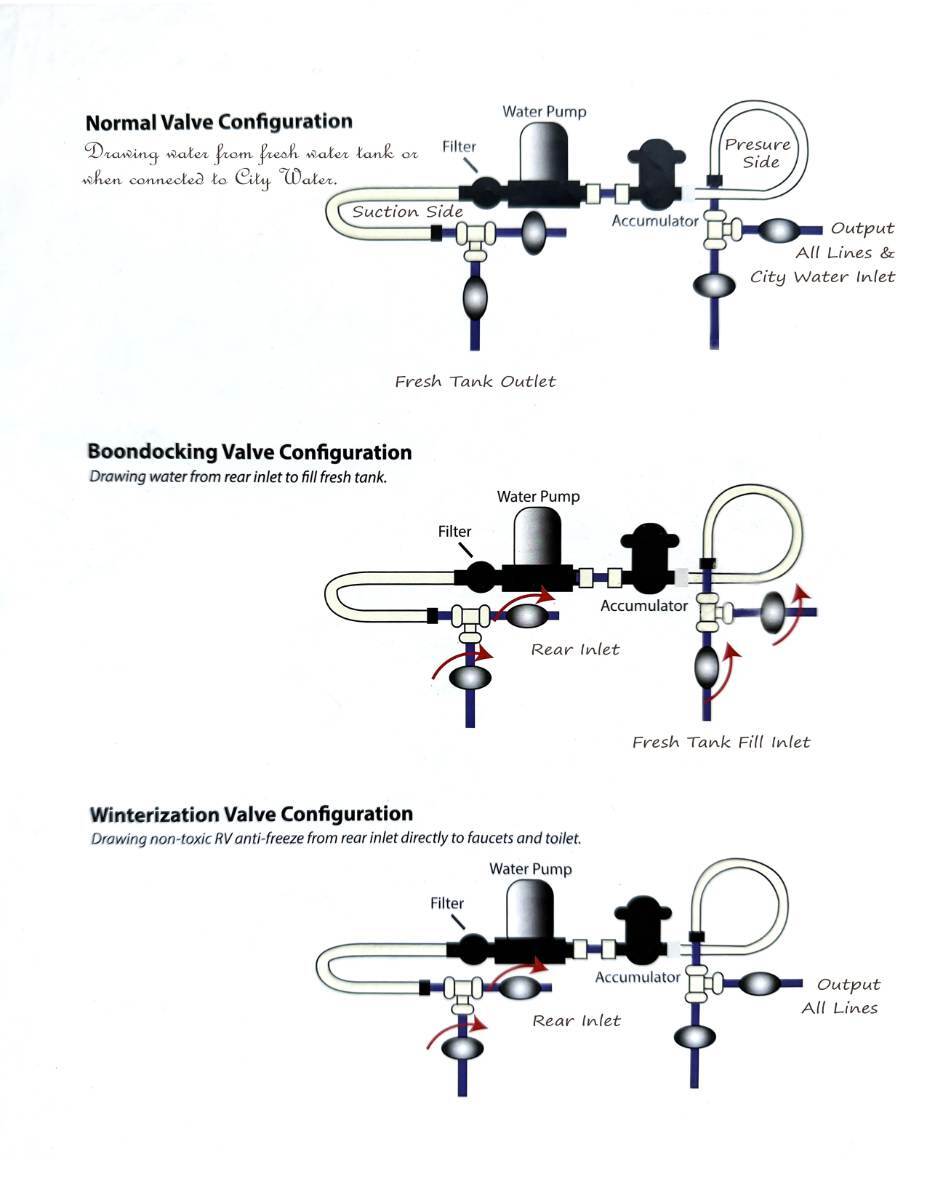
Our 2022 is new to us this year, and I shared the same initial confusion when looking at the water‑valve diagram. While it’s a great feature to have the valve positions shown based on the function you want, I also wanted to understand the actual start and end points of each line. So, I enhanced the diagram and placed a laminated copy under the bed next to the water pump. Below is that updated drawing. Please let me know if you spot any errors in it.
-
Do Not Overfill Your Fresh Water Tank!
Dean and Mary replied to Rivernerd's topic in Mechanical & Technical Tips
Wow, I’m really sorry this happened. I’ve heard of similar issues with other trailer brands when there’s little or no effective overflow outlet. That’s why most trailers are filled using a flex‑hose insert—to let air escape properly. With the direct connection on our trailers, it’s difficult to manually fill at the inlet and allow that air to escape. In your case, it sounds like the overflow tube may have been restricted, or the incoming water volume and pressure simply exceeded what the overflow tube could handle. Thanks for sharing this experience. And again, I’m sorry you had to deal with it. -
Electric RV jacks almost always have a manual method for raising and lowering them in the event of dead batteries. The connection point is located on top of the jack, and the trailer includes a tool designed specifically to operate it.
-
I should have started by asking whether you have voltage at the batteries, and then whether you have voltage at the input side of the 60‑amp breaker. A voltmeter will help immensely. It could even be something simple—like lithium batteries that were accidentally switched off. On my trailer, a 4‑gauge cable runs directly from the batteries to the 60‑amp breaker, and that circuit is independent of the heavier‑gauge cable feeding the inverter. I can double‑check in the morning, but I’m fairly sure the wire going to the converter is connected before the 60‑amp breaker, which would mean the breaker isn’t the issue. I hope this doesn’t add to the confusion. Dean
-
Imelda, The 60‑amp circuit breaker under the street‑side bunk also supplies power to the jacks in my trailer. Do your jacks work? If they do, then move on to the converter—located under the dinette in my unit—and check the fuses there. If the jacks don’t work, the breaker is most likely the issue. Dean
-
Upgrading from a Bulldog 2” coupler to 2 5/16 BD coupler
Dean and Mary replied to Patriot's topic in Ollie Modifications
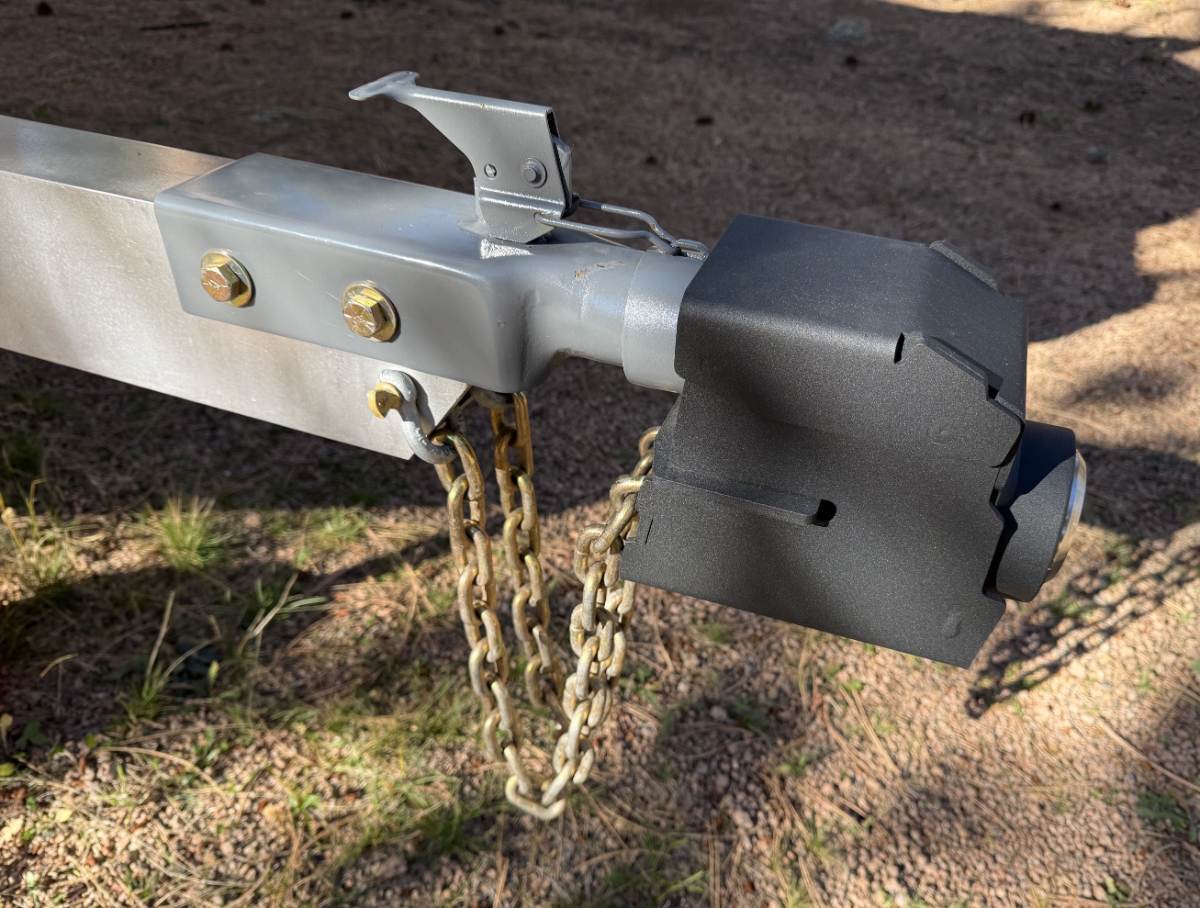
I just upgraded from a 2" Bulldog hitch to a 2‑5/16" hitch. Thanks, Patriot, for the information and the link to the Collar Trailer Hitch Lock for Bulldog‑style Couplers. I just placed my order, and it will definitely help with security while towing, since the wire that holds the collar offers virtually no real protection. I’ll be using a Proven lock on that collar so it matches all my other Proven lock keys.
-
Used Oliver advertisements Return to the Oliver Forum
Dean and Mary replied to dewdev's topic in General Discussion
We live in the mountains about an hour from Denver off Highway 285. We hope to attend a big rally someday if one is held close to Colorado, and a smaller regional rally would definitely interest us as well. Thanks for checking out our signature line about the equipment upgrade. I’m still working on it and hope to have everything wrapped up soon. Once it’s finished, I’ll put together a full write‑up and share the process. And yes—I agree that an Oliver‑offered Victron upgrade would definitely appeal to buyers. Dean -
Used Oliver advertisements Return to the Oliver Forum
Dean and Mary replied to dewdev's topic in General Discussion
The Oliver Travel Trailer for Sale Facebook page is actually where I found and purchased my used 2022 Oliver Elite II. I really like the idea JD mentioned about having a dedicated used‑parts section. The Oliver Facebook page doesn’t allow used parts to be listed, and while Oliver parts can be posted on Facebook Marketplace, having a specific section or page just for Oliver accessories/parts would be a great addition. I have, for sale, the solid aluminum front basket you are looking for JD, but I am not interested in shipping it. I also have a working Xantrex 3,000 inverter, a Seabiscuit rear storage rack etc.... If only there was a place to list the used accessories. -
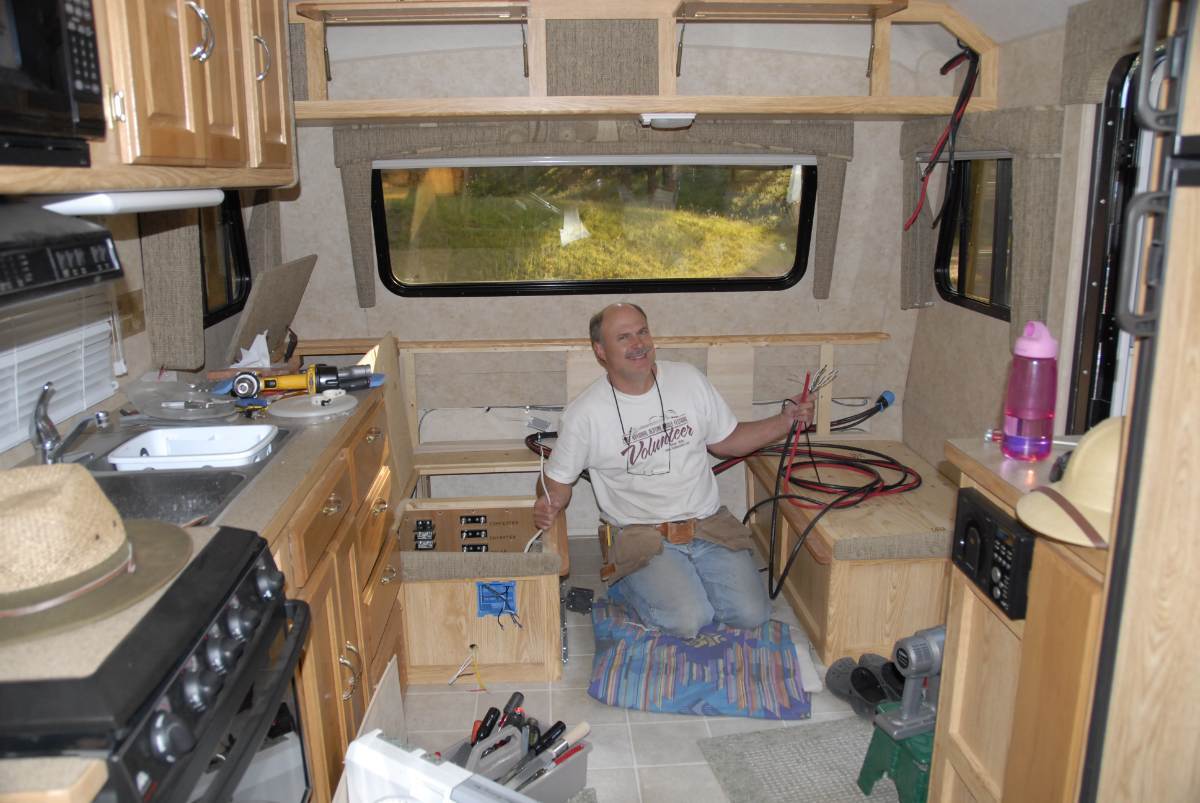
Thanks for sharing your Bigfoot camper information. We owned a 2006 Bigfoot 21RB for 18 years and sold it a few months ago. I installed solar panels, an inverter, and a battery upgrade back in 2008 after buying it used—photo of me working on that install is below. We purchased this Oliver used in June of this year, so RV solar isn’t new territory for me. Right now, the biggest challenge is simply the physical layout and mounting of all the components. Fortunately, I’ve been a woodworking hobbyist since I was a kid, and HDPE Boat Board machines just like wood, so all my shop tools are perfect for this project. After learning from nearly every mounting‑related post on this forum, I will definitely be installing the inverter on a pedestal. Below is a photo of the original Xantrex mounting board, which looks similar to what others have posted. Oliver’s glue works when the board is pressed firmly into the fiberglass, but like many have experienced, mine wasn’t—and it had broken loose by the time I bought the trailer. Initially, I wasn’t planning to upgrade my Xantrex 3000‑watt inverter, but since it needed a complete remount, it made sense to upgrade to the MP2 now. I’ll make the inverter removable (very good suggestion) so the gray‑tank waste valve can still be replaced if needed. I also purchased Wago pluggable connectors for the two AC lines, which will make disconnecting the inverter much easier. I’ll be installing components under the dinette seat as well. Oliver glued a panel there to hold the surge‑protection hardware. That board is solid and can’t realistically be removed, so I had to come up with a clever way to integrate it into a larger mounting panel. Much more to come in a new thread once the project is complete.
-
JD, Thanks for the quick reply and for sharing your additional thoughts. You’re a tremendous resource for this forum. The details you provided helped confirm the direction I’m taking with my Victron electrical upgrade, and the information about the supplemental fans was especially valuable. I had planned to install a single 140×140×38 fan, since it delivers a little more than twice the airflow of two 120×120×25 fans, and control it through the Cerbo GX. However, based on what you shared, I’m going to take a wait‑and‑test approach and add it later only if needed. Maybe others will chime in with their experience managing temperatures after installing everything in that tight space. Thanks, Dean
-
jd1923, thanks for all the information you’ve shared about your Victron upgrade. I’ve read through this thread—and many others—while working on my own upgrade on a 2022 Oliver. When my upgrade is complete, I will share the information in a new thread. You mentioned the new Victron Multiplus II 4000‑watt unit. One additional benefit in the 4K unit is the two cooling fans instead of the single fan in the 3K unit. The heat rejection has been substantial improved from 110 CFM to 260 CFM, which for me was actually the more important reason to step up to the 4K unit. The 1,200 watt increase in sustained output wattage would be a bonus, but one which I am not use I would ever use. That brings me to my question about your installation. Your setup shows cooling fans pulling air from the basement and pushing it through the main equipment area under the bed. After installing and using those cooling fans, did you find that addition necessary? If so, how often do the fans run? Do you open the interior basement door to allow cabin air to be drawn through? And finally—would you recommend adding the additional cooling fans? Thanks, Dean
-
Complete change-over to Victron equipment
Dean and Mary replied to ScubaRx's topic in Ollie Modifications
Thanks for sharing the information on your upgrade. -
Oliver2Roam, I’ll let you know when the Pelland product arrives. After posting my first response, I called Pelland Enterprise and was told the window seal is still on backorder, but they expect it to ship in about 2–3 weeks. Dean
-
Steele Rubber Products sells window molding weather strip (part # 70-4500-257), and it worked perfectly on my 2022 Oliver Elite II. I learned about it from another forum member who recommended it in a different thread. Another option is: Pelland Enterprises - (part # H109-376). I ordered both products to compare, but have yet to receive the Pelland product.
-
Dimmer switch to replace OEM rocker
Dean and Mary replied to Steve and MA's topic in Ollie Modifications
I’ve been looking for a quality dimming option for the three lights you mentioned, and I appreciate you sharing your results. -
Portable solar panel with legacy elite 2 platinum package
Dean and Mary replied to Brian H.'s topic in General Discussion
Thanks, Galway Girl, for the link to your solar panel kit and all the details. I found it very informative. Unfortunately, the cable is currently unavailable.