
Raspy
-
Posts
666 -
Joined
-
Last visited
-
Days Won
45
Everything posted by Raspy
-

Monroe shock absorber warranty? Two blown and leaking!
Raspy replied to John E Davies's topic in Mechanical & Technical Tips
John, I'll get out there and have a look at mine. Yikes! It may be time to upgrade to a KYB or Bistein model I bet you could cross reference at the parts store. BTW, how much tire pressure are you running. No flex in the tires puts more load on the shocks. I've been running 60 PSI, but the last trip I came home at about 45 psi. I went about 120 miles through Saline Valley on dirt, gravel, sand, rocks and washboard. Lowered the pressure to 25 as we started in and only filled them back up to 45 for the final leg home on the highway. Overall trip to the rally was a little over 6,000 miles. -
I had a leak in the older style faucet with separate hot and cold handles. I was able to go to Home Depot with the cartridge and match it up with some careful looking. The ceramic inserts were the same on several faucets, but the cartridges were different, so I got a couple of them and will just re-build mine. To get us by until that time, I cut a small piece of electrical tape into a circle and stuuck it in the valve. That stopped it temporarily, but might not work on the single handled model. I don't like that there is no access to the plumbing in the bathroom. The whole trailer must be shut off to make a repair. I'm also concerned about the flex hose disappearing into the abyss with no access. Best thing would be to come up with a way to get in there easily, like hinges on the door, or something. And then install valves on the lines for servicing.
- 28 replies
-
- 1
-

-
- repairs
- bathroom faucet
- (and 3 more)
-
It doesn't really work that way. The 2 5/16" coupler comes not-drilled. So thre is a bit of measuring and drilling involved. It is almost identical and fits the frame exactly as the 2" coupler does. Also, this will not stop the ball wear. For those using the Anderson hitch, you might check with them to see if they offer a 2 5/16 ball or not. I switched to the bigger ball and I'm glad I did, but it's partly to match other trailers I have and not entirely for strength.
-
Fender problem with larger rims/tires and E-Z Flex
Raspy replied to Foy_Mirna's topic in Mechanical & Technical Tips
Foy, If one side of the suspension truck is mounted farther back on the frame than on the other side, the trailer will not track straight. You can look for this in your rear view mirrors while driving. Sight back along the side of the trailer, looking through your mirrors, and project where that line hits the road, way behind you. As though you were sigting along the seam line looking aft. Or, put another way, look for objects that the rear corner doesn't quite obscure, way behind you. Do this on both sides, as you drive and you'll see if you are looking at spots way off to one side of the road, or not. If tracking straight, you should be looking at spots nearly straight behind you on the road. I've noticed that mine is slightly off, but not enough to worry about. If your right side wheels are farther back, you'll be looking at a spots to the right of the road. From the picture you posted, it looks like both wheels are aft of their ideal position, but if only one was aft, the one hitting the fender, it could be a broken spring center bolt ar a broken leaf. Another possibility is that the leaf springs on one side are backward. Sometimes, springs are directional and the center bolt is not on center. A quick measurement from the axle to the rear spring mounting bolt, on each side would confirm this is not the problem. Another quick check to add some data would be to park on a level surface and look at the shackles. Do this after stopping in a straight line so the affect of cornering doesn't factor in. Are all four resting at about the same angle? At the factory, they install zinc discs on the frame just ahead of the truck frame, on the bottom of the aluminum rail. This is about the diameter of a quarter and 1/4" thick. On mine, it looks like a mounting reference point with both truck rails pushed up against it. Look at yours and see if there is a gap on one side. Finally, if you can't find the discrepancy, get out a tape measure and measure from the ball, or a suitable center point up front, to the front of the tires on each side. I suspect the truck is crooked with one side farther aft. -
Rumline, Excellent. How exciting! John
-
Too bad I didn't have your hull number, I would have checked on it and taken a couple of pictures for you. We were just there and toured the plant on the 1st. There are some finished ones stored in the yard and partially done ones throughout the plant.
-
Laissez les bon temps rouler From Louisiana
Raspy replied to Professor57's topic in Introduce Yourself
The best thing might be to cruise over to Guntersville, Alabama and attend the Oliver rally May 3-7. You'll see lots of them and talk to lots of owners. Oliver offers a measure of quality, efficiency and practcality that I've never seen before. But your needs must fit what they offer or they might not work for you. They are well insulated, very strong construction, easy to tow, lots of battery power and good off-road. They have high quality suspension and heavy duty tires. The factory builds them with care and stands behind them. Some trailers, like Airstream, are more flashy and some trailers, like Scamp are cheaper. But Oliver is quality for the long run and excellent for boondocking or venturing into bad weather. I've been around boats for a long time. I finished out and rigged my 42' fiberglass Ketch, then lived on it for about 18 years. Sailed it thousands of miles around San Francisco Bay and then a trip to Mexico and back. Then I had a Morgan 33T and lived on it part time. I have also had a number of stick built trailers and got fed up with the poor quality. Then I discovered Oliver. Now, I'm a landlubber and have built a house. But we are currently in Alabama with our Oliver, on an extended trip from Nevada. Couldn't be happier. Come to the rally and see them! -
They're looking at 200-250 per year as a good level to get to. This would mean a full-time speacialized workforce and improvements in buying power and efficiency. It would mean more profit through lower per-unit cost with greater quality and more profit by producing more units. At the same time, they want to avoid hurrying the employees which would mean more stress and more mistakes. The low-stress atmosphere at the factory is impressive. They are making steady improvements in the trailers and it's pleasure to see it. They have recently made improvements in the galvanized truck under the frame, have made the EZ Flex standard, new faucets and bigger sinks, all have full size spare tires and better wheels, they have tongue and groove drawers and the wiring is all the same regardless of options ordered. So you can go back and add things easily. They are also watching the molds very carefully to keep them producing perfect shells and re-vamping them after only half the industry standard of shells produced. They have a "mold shop" with talented workers that are continuously fine tuning the shells whenever a minor flaw is found in the finished product. Check this month's, (June 2018) Trailer Life for an article on Oliver. I have only seen the magazine, but haven't read the article. Oliver is here to stay and they are setting a new standard. Watch for bigger news before long.
-
Overland, You're right. The lower the differential pressure in the pump switch, the less water will be available from the accumulator before the next pump cycle occurs. However, the larger the differential, the more pressure variation you'll experience at the faucet or shower head. Once you have the tank pressure set at just below the cut in pressure you are doing the best with the tank you have and the volume is just related to the tank size. Once you get a tank large enough to stabilize the system, a larger one just makes longer pump cycles. Remember, the pump will run just as much overall, but it will do it in longer cycles, when more water is stored in the accumulator. Shorter cycles mean less noticeable pressure differences, longer cycles mean larger apparant pressure changes at the faucet. The function is to stabilize the pressure through temp changes and to keep the pump from short cycling. Beyond that is just a trade of one aspect for another. I was considering a larger tank, but went with the little RV size. It's just barely big enough to keep the pressure rise from the water heater under control if set at just the right pressure. A bit too small for my liking, so I'll probably go to a #5 size domestic expansion tank. The #8 is a common size used in houses. Bigger is harder to locate and mount, as you seem to have noticed. If you need to mount the tank farther from the pump, which is normally a problem, there is a trick that will probably allow it using a waterhammer arrester teed in at the pump outlet, and then mounting the accumulator somewhere else farther away than normal. Another small benefit of the accumulator I notice is after I shut off the pump switch, as I lke to do normally, I can still get some water without switching it back on. This might get a glass of water or flush the toilet without running the pump. Quieter in the middle of the night.
-
My pump actually runs at a lower pressure than it's specs say too. No big deal assuming you don't want to firehose something and you don't have the tankless WH. It doesn't matter where you measure the static pressure in the system as long as it's downstream of the pump, but a long restrictive pigtail connector before the accumulator will make the pump stutter as it tries to shut off. You are adjusting the tank pressure in the right way. Matching the pump's actual pressure settings and allowing the accumulator to partially fill before the pump shuts off. There is no problem with the bladder and you are doing it correctly, but you will never get anywhere near two gallons out before the pump cycles. A 2 gallon tank will only yield a few cups before the switch differential is reached. It's not there to hold a lot of water, but to stabilize the pressure and reduce the number of cycles. If the bladder presssure was at zero, the tank would not work at all and if the pressure was above pump shutoff it, again, would not work at all. It should be set just below the cut-in pressure. This gives you a fairly large amount of water in the tank, for fewer cycles, and it allows for the expansion of the water caused by warming of the water heater. A good test is 1. install a 100 PSI pressure guage on the pressure side of the pump (a good plce for this is a T on the pump outlet or a T on the accumulator inlet). 2. get all air out of the water system by running the water until no air is present. 3. run the faucet to turn on the pump, shut off the faucet and allow the pump to reach full cut-off pressure with no water running. Don't run any more water. 3. then turn on the water heater and monitor the pressure on a guage. This will cause the pressure to rise. The more air volume in the tank, the less the rise. If you start a test about 40 PSI (the cut-out pressure), you should reach about 60 PSI or less as the water heater comes up to full temp. With no accumulator, the pressre will go up over 100 PSI and pop the relief valve. Overall, just find a happy medium tank pressure that allows minimal pump cycles and keeps the pressure as steady as possible while the water heater goes from cold to hot. This will be somewhere just below the cut-in pressure. All piping between the pump outlet and the accumulator should be short and relatively large in diameter. If not, the pump will stutter as it approaches the cut-off point.
-
Nice install. That is a pretty sink. What is the stainless grill on the left side backsplash?
-
David, We're thinking of heading down to Monument Valley from Northern Nevada soon. Do you have any suggestions where to camp? John
-
That's funny, but it makes sense. While boondocking, we don't have to do business with companies we don't like. That's part of the reason we go camping-to get away from it all. It may be unfair to beat-up on Anderson, but I see some parallels to his company. I've never been a fan of Andeson hitches and have discussed that position here. Questionable design and knee-jerk responses to questions or problems that just doesn't make sense, or are unsafe. It's an unproven design that requires the public to do the beta testing. Now, he's so sorry about the graffiti, but at the time, according to the witness, refused to stop doing it and sent the kids down to the car to "change" the license plates. What? Does he keep spare license plates handy and tools for the kids to change them? I don't know anyone who is honest, that is prepared to do that. Sounds like he's in over his head on a couple of fronts. I feel kinda sorry for the folks that think they have to buy that hitch in order to make their Oliver safe to tow. A large extra expense that is completely unneeded in most cases, and a questionable design.
-
Extend the trailer harness a few inches?
Raspy replied to John E Davies's topic in Ollie Modifications
Yeah, that is a nice looking compression fitting. What is that liquitite conduit for? Maybe jack wiring and breakaway switch? -
Extend the trailer harness a few inches?
Raspy replied to John E Davies's topic in Ollie Modifications
On mine, hull #92 from mid 2015, the cord, or wires, to be more precise, pass through a marine style through hull fitting with no actual seal from the elements. It's even already stripped of it's jacket before going through! There is a loop that could be straightened out and provide about six more inches if needed. Maybe that's because of the extendable tongue. By the time they got to hull 200, it was different again, but no female plug. Not sure how one could reach that spot to install a new connector in the body. -
Off-pavement recovery - equipment and best methods
Raspy replied to John E Davies's topic in Towing an Oliver
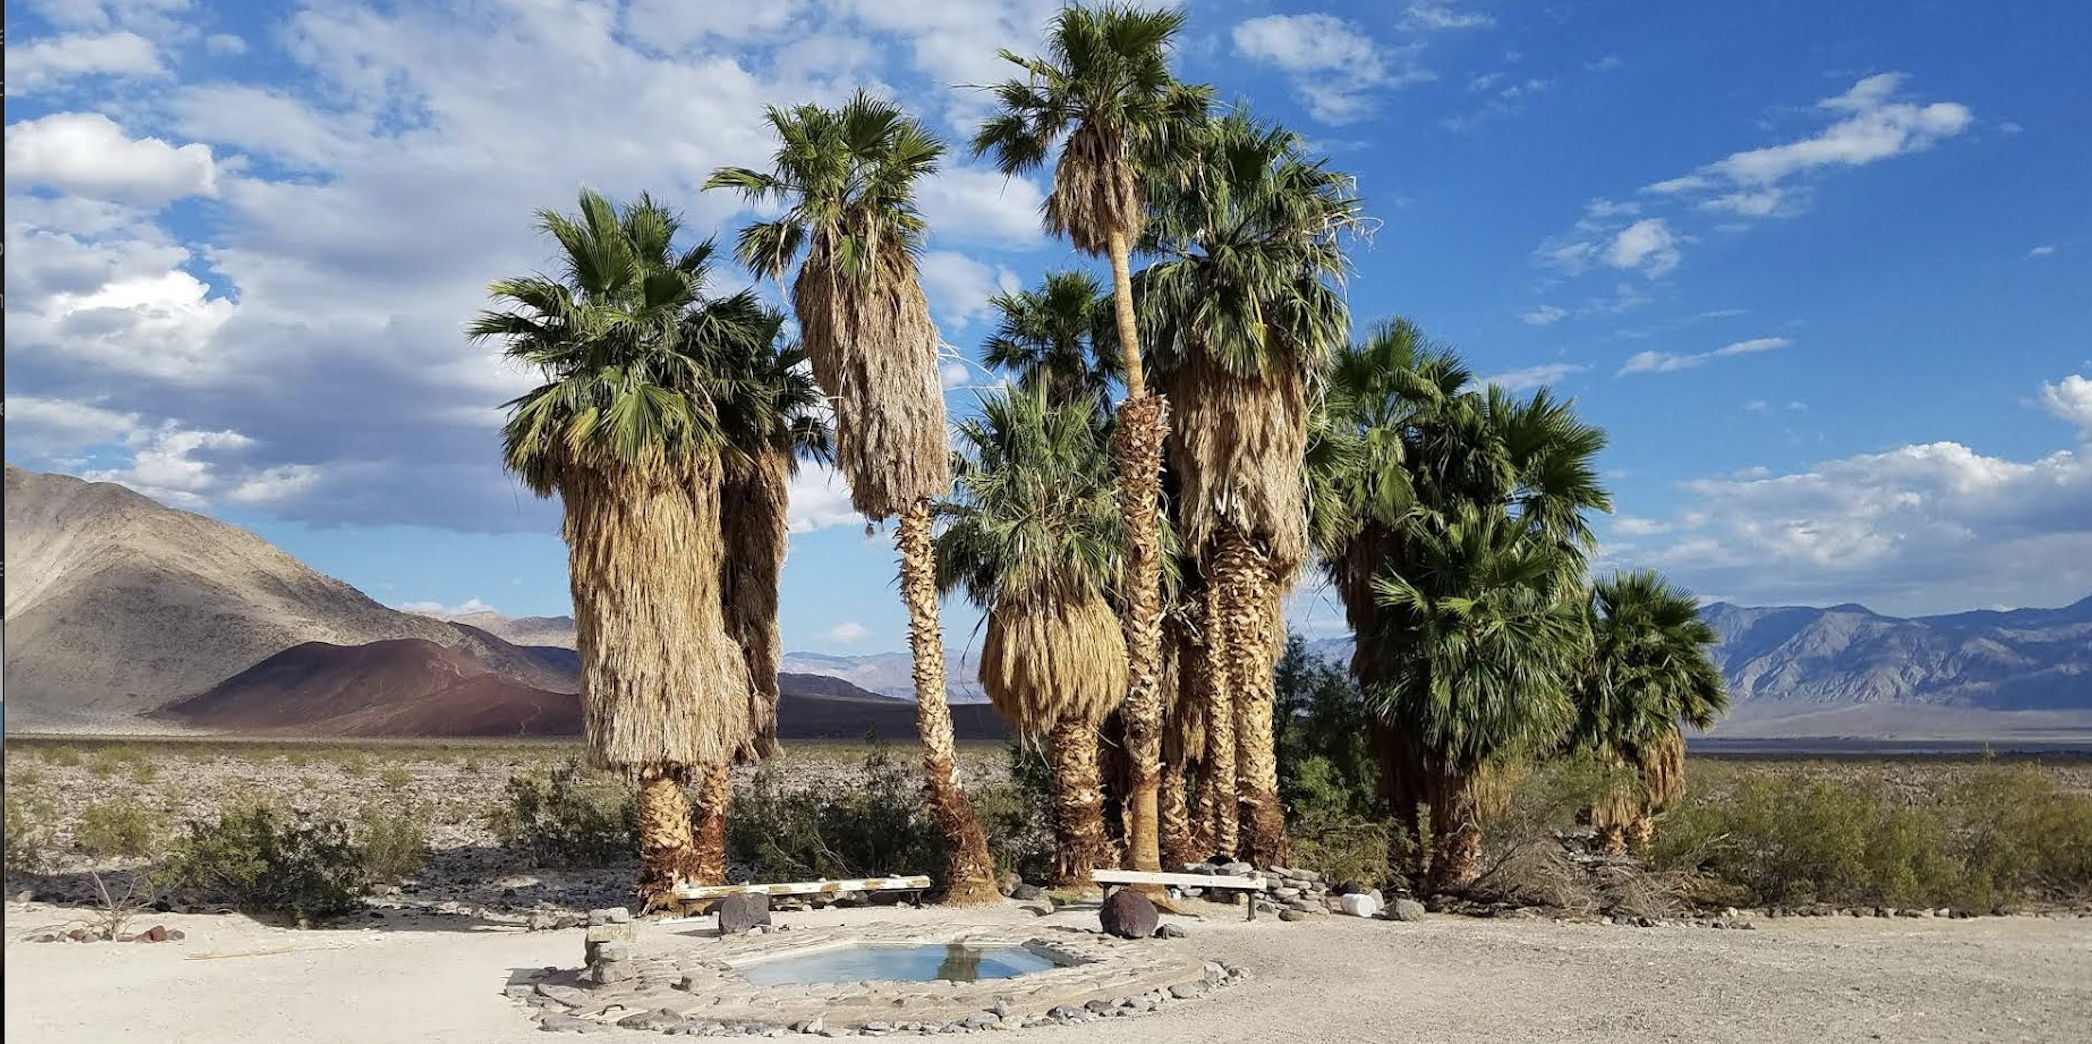
Steve, Yes I have. Going there as a kid, we could drive right out onto the plaza, but now, thankfully, it's blocked against vehicles and you can walk out there to look around. My favorite place to camp is Saline Valley. Near the South end of that valley is the Lippencot Road that is a 4WD road and is often washed out. It goes up out of the valley and ends up near the Race Track and there is another way to get there if you are not in Saline. Farther north in Saline Valley and off to the east, is Saline Valley Hot Springs. A delightful place to camp and hang out. It is truly a one of a kind oasis with burros, coyotes and lots of hot pools to enjoy. Probably won't last much longer as the Park Service wants s to buldoze it back to what they imagine it looked like a hundred years ago and close the access to it. Wipe out all the pools and any evidence that people have been there. A tragedy if it happens. Meanwhile, hot clean water is pouring out of the ground and filling the pools. The Race track is a nice day trip from the Springs. All of this became part of Death Valley National Park in about 1994 and the whole flaver of the place changed significantly. One of these days we could meet near Big Pine or Olancha, on 395, and venture in with out rigs. https://www.atlasobscura.com/places/saline-valley-hot-springs-2 -
Off-pavement recovery - equipment and best methods
Raspy replied to John E Davies's topic in Towing an Oliver
Steve, I agree. The front hitch would be a nice addition for a long reversal of direction on a narrow path. The jack wheel might be useful in some cases to turn the trailer around in it's own length too. We went about 7 miles up a very narrow path where it was not possible to turn around and all the way up I was hoping for a spot to turn around or an intersection. Finally found a wide spot at the top. Sand is another concern out in Death Valley. A spot we go has about 6 miles of flat sand to cross to get to our spot. I'm not against airing down the trailer and the truck and keeping the momentum up. I'm not going to install a winch, but a winch and a Fortress anchor could be handy there. I always shave a compressor on-board. Another good piece of recovery gear is a heavy duty brush guard front bumper, like the one on your truck, to help "recover" from a deer collision that could easily disable an unprotected truck. Forget about getting stuck in the mud, a bashed in radiator, in the middle of the night, way out on a lonely road, is not fun. I just can't plan and prepare for every imaginable problem. Pretty soon we would have so much gear we couldn't go, and I could still imagine more potential problems to prepare for. Much better to be prudent about what we venture into, than planning on getting stuck and bringing all the gear needed to get out. Even stranger is expecting Oliver to tell us how to get out. An impossible question for them to answer. -
Extend the trailer harness a few inches?
Raspy replied to John E Davies's topic in Ollie Modifications
John, They seem to be arranged differently over the different years. Mine might have enough to pll out some extra, and I can see the cable, but in another one I worked on we could not even trace it out very well, much less find extra length. You could certainly just cut the cable and route it into a water tight box up front where you could add a longer pigtail. This new box could be under the propane cover and, sort of, behind the tanks. -
Off-pavement recovery - equipment and best methods
Raspy replied to John E Davies's topic in Towing an Oliver
I can't imagine Oliver being able to tell someone how to "recover" their trailer without knowing the specifics of the problem. For instance, up to the frame in sand, one side in a mud hole, one side off the edge of the road, etc. And if someone is asking Oliver, the owner must have an idea of the problem. If you have an idea of the problem, you can likely avoid it in the first place. The tow vehicle is a huge part of the recovery. If you have a 4X4 truck, you can pull very hard compared to a 2WD SUV, for instance. If the truck is stuck too, a winch is probably your best friend to extract both at once. A winch can also be used to turn the trailer around in it's own length if you have a tongue wheel like boats use. Just disconnect and then hook the winch or a tow rope to the tongue to pull it around. If, for some reason you have to pull the trailer out backward, and you already have the truck out, the best thing would be to wrap a chain around the axle/spring/Ubolt area. Then attack a tug-em strap to pull with. Don't get a run at it, but just increase the pull until the trailer moves, either with a winch or a truck. Beast would be to attach on both sides and make a bridle. A long tow rope could also be attached to the hitch and lead back under the trailer to a assisting truck. It's also very affective to attach a come-a long to a wheel to act as a radius arm. This means the trailer or truck cannot slip farther off an edge when moving forward. Once hooked up, you just drive forward and the trailer comes back up on the road. So, basic recovery stuff is likely to be: A shovel and pick, good quality come-a-long, several chains with grab hooks, tug-em strap, several shackles, a snatch block, some heavy yacht braid or nylon to pull with, a few smaller pieces of yacht braid for tying off the snatch block to a tree or rock, or for tying the come-a-long to the trailer wheel, various pices of 2X6 and a wheel for the front tongue jack. If you have to disconnect from the trailer and are worried about it rolling while you are recovering it, just pull the emergency disconnect cable to activate the brakes while you work. The tongue wheel should be as large and as wide as is practical. I have already removed the "foot plate" on my front jack and I don't use it. This is quite easy with a 5/8" wrench and allows the front jack to slip into the wheel socket. This wheel will allow the trailer to roll along without being attached to a tow vehicle, or turned around in it's own length. It can be dragged along with a come-a-long or tow strap. The rear frame members are not designed for heavy recovery or any pull not directly in-line with the frame. I would never install any kind of recovery "eye" for such use. Only apply force where it is designed to handle such forces. The wheels, axle mounts and hitch are the strong areas designed for heavy forces from different angles. -
John, My trailer has the telescoping tongue, so it's a simple matter of pulling out the cross bolt, behind the coupler,and extending the tongue to where you want it. I don't remember how far it can be extended. Does yours have this telescoping tongue? Later models did away with this telescoping feature, and so to answer your question with respect to those, no. The bolts are only 2" from the end of the aluminum box that mounts the coupler, so it can't be moved forward and the coupler itself is already at a leverage disadvantage, so it's bolts, (the coupler bolts) should not, or could not, be moved 3" farther back to move it forward.. There is so much strain at that location that sleeves were installed by Oliver to help distribute the load from the coupler bolts to the aluminum box tube. These sleeves are 7/16" ID, about 3/4" OD and just under 3" long. They resist the pinching load from the coupler bolts and distribute the towing forces to 3/4" holes in the box tongue. I found the 7/16" holes in the coupler were slightly elongated from the strain, but the tongue was fine. The coupler bolt nuts had run out of threads and bottomed before adequately pinching the coupler against the tongue and it's sleeves, so the bolts were in pure shear and able to move slightly. The fix for this was to add a grade 8, 7/16" fender washer on each side of the coupler, on each bolt. Now it sucks up nice and tight.
-
I'm pretty much in the same boat. Three other trailers with 2 5/16" hitches. Plus, the bigger ball just seems a bit better, but not necessary for normal Oliver loads. I'm not running the anti-sway hitch so that is not a factor. In any negotiations with Oliver about changes, it might be better to leave this one alone because it's just an outside mechanical switch to something else and nothing that requires work to the electrical system or body. I converted mine to the 2 5/16" coupler and posted a couple of pix on "Modifications to hull #92" in the modifications section. This modification does not affect anything else on the trailer and can be done at home quite easily. The new "blank" just has to be drilled and then it slips right on. The new piece isn't really much stronger as it's the exact same channel welded to a slightly bigger ball coupler. It's mainly the ball that is reliably stronger. Instead of looking for the highest rated 2" ball just to meat the GVW of the trailer, you can easily find a 2 5/16" ball rated for twice that, or 14,000 lbs. My truck also has the class 5 receiver (2 1/2") and was bushed down to 2" for the stinger I was using. So I switched to a 2 1/2" stinger at the same time which got rid of a lot of play and rattling. I've also found that if you get a steel tube stinger, instead of a solid forged one, the tube type fits a bit tighter. Then I installed a 5/8" Grade 5 bolt and nylock nut as a pin (select a bolt with 3" of unthreaded shank. This turns out to be about a 5" bolt) This method is very strong and the bolt/pin cannot escape. It reduces the chance of theft and it can pinch the receiver tube down just a bit to eliminate any side to side play. Works very well.
-
Sherry, I agree. I mounted ours over the sink and bolted it through into the cupboard above with a couple of #10 stainless screws and nuts. Simple. Cheap. It will never fall off. I never really trust suction cups and don't need to spend more than necessary. John
-
Fresh water pickup tube factory fix, revisited
Raspy replied to John E Davies's topic in Ollie Modifications
Matt, Thanks for the comment. I'm sure Oliver is busy and I believe they are doing their best. It seems to me that this forum is being used as designed, as a place where owners can communicate with each other. That is where some of the friction shows up. Some of the issues that have come have been brought up directly with Oliver and have not been answered. I, for instance have called Jason several times with a friendly message and request he contact me about the water tanks. I was never contacted, so I addressed the problem myself. Months later, I have still not been contacted and it doesn't matter at this point. This has nothing to do with a need for instant gratification. Meanwhile, I and others have posted detailed pictures, procedures and videos about how to work around the problems, such as the water tank issue and the grounding problem. It seems like Oliver would want to be involved in that kind of stuff. At one point we were told that the grounding issue was fixed after a certain hull number or year, but it was not true, so I and others have addressed that issue ourselves too. During discussions about these issues we contact each other for advice on this site. I hope Oliver is monitoring the comments, but If they are not, and they don't return phone calls, or they give out false information, it leads to frustration. Again, I love my trailer and have a lot of repect for Oliver, but it's worrysome to be met with silence about problems. I'm not looking for any handholding and I can figure out how to jack it up, but it would be nice to be able to contact them and get a thoughtful response. I imagine that Oliver is very busy, and that is good, I want them to be very succsessful with their excellent trailers, but maybe it's time to get someone in that is designated as a liason and can return calls and give accurate information about the few troubling issues that have come up. Jason is very good at what he does and maybe he should be allowed to continue to focus on that, without distraction. If we, as owners, use this site as a way to communicate with each other, and it's an official site, then prospective buyers are reading it too. I have happily shown my trailer to a number of possible buyers and always tout the great design and special features, but it must hurt sales to have possible buyers read frustrated posts. Wouldn't it be better to have the contact person I suggested, to address possible issues before they get bigger? Some of the questions, like how to jack it up correctly, could have easily been resolved with a clear letter on this forum by a person from Oliver that could have explained the discrepancy. BTW, that has never been a controversial issue with me, but it was discussed a lot. Then there was the broken door slides (mine have been fine) that caused some folks to at least threaten to cancel their orders, when it could have been resolved very quickly if proper attention was given to the problem. So, I think it's just a communication problem and the sometimes seeming lack of dealing with problems. True or not, that is the root of the problem and the seed of the frustration. I have run a small businees for 40 years and I am acutely aware of how difficult and overwhelming public relations and problem solving can be. Those problems come with the territory and are a byproduct of success. The bigger Oliver gets the more squeaky wheels there will be and the more opportunites for developing a devoted following. -
Fresh water pickup tube factory fix, revisited
Raspy replied to John E Davies's topic in Ollie Modifications
I have a Porter Cable brand. The model number is either a 690LR or a 9690LR, depending if you read it on the case or the motor. It's 11 amps with a 1/2" collet and removeable base. Other models can be fine too, but the important features are: Powerful (I would not recommend a router smaller than 11 amps). Removeable base and handles with the switch mounted on the motor. 1/2" collet This router seems perfect for the job. Once striped of it's base plate and knob handles, it fits right down into the area where the spin weld is done. The switch is still easy to reach for accurate welding. -
Adding Water Accumulator to pre 2018 Elite II
Raspy replied to bradbev's topic in Ollie Modifications
The orientation of the accumulator is irrelevant. Vertical or horizontal is fine. It's more important to find a mounting that gets it as close to the pump as is practical and mounts it securely enough that it doesn't flop around. If the pump stutters when trying to shut off, the problem can be too long of a hose to it or too small of a hose diameter. The pressure should be a bit lower than the operating pressure of the pump switch. Enough lower that it accumulates enough water to reduce cycling and reduces high pressure buildup from expanding water as the water heater warms up. I set mine at 20 PSI and the pump wants to shut off at about 40 PSI. If the system is at 40 PSI and I turn on the water heater from cold, the pressure climbes to about 60 PSI. This is much better than going up over 100 PSI and popping the relief valve. It seems to me these accumulators are a bit small for the best operation, but they are much better than nothing. I'm considering changing mine to a domestic style, number 5 model designed for residential water heaters, but they do take up more room. As long as there is pressure in the bladder, the tank will empty completely when the system is drained. There will always be pressure as long as the bladder doesn't leak, and if it does leak, you'll know it by the sound of the pump as it goes back to cycling too much like before the accumulator was installed.
