
Raspy
-
Posts
666 -
Joined
-
Last visited
-
Days Won
45
Everything posted by Raspy
-
Mark, I'll measure it again and post the dimensions. Thanks, John
-
Mike, I will. Door is on and microwave fully installed. Doing the door catch this next week and will be done. Pix soon.
-
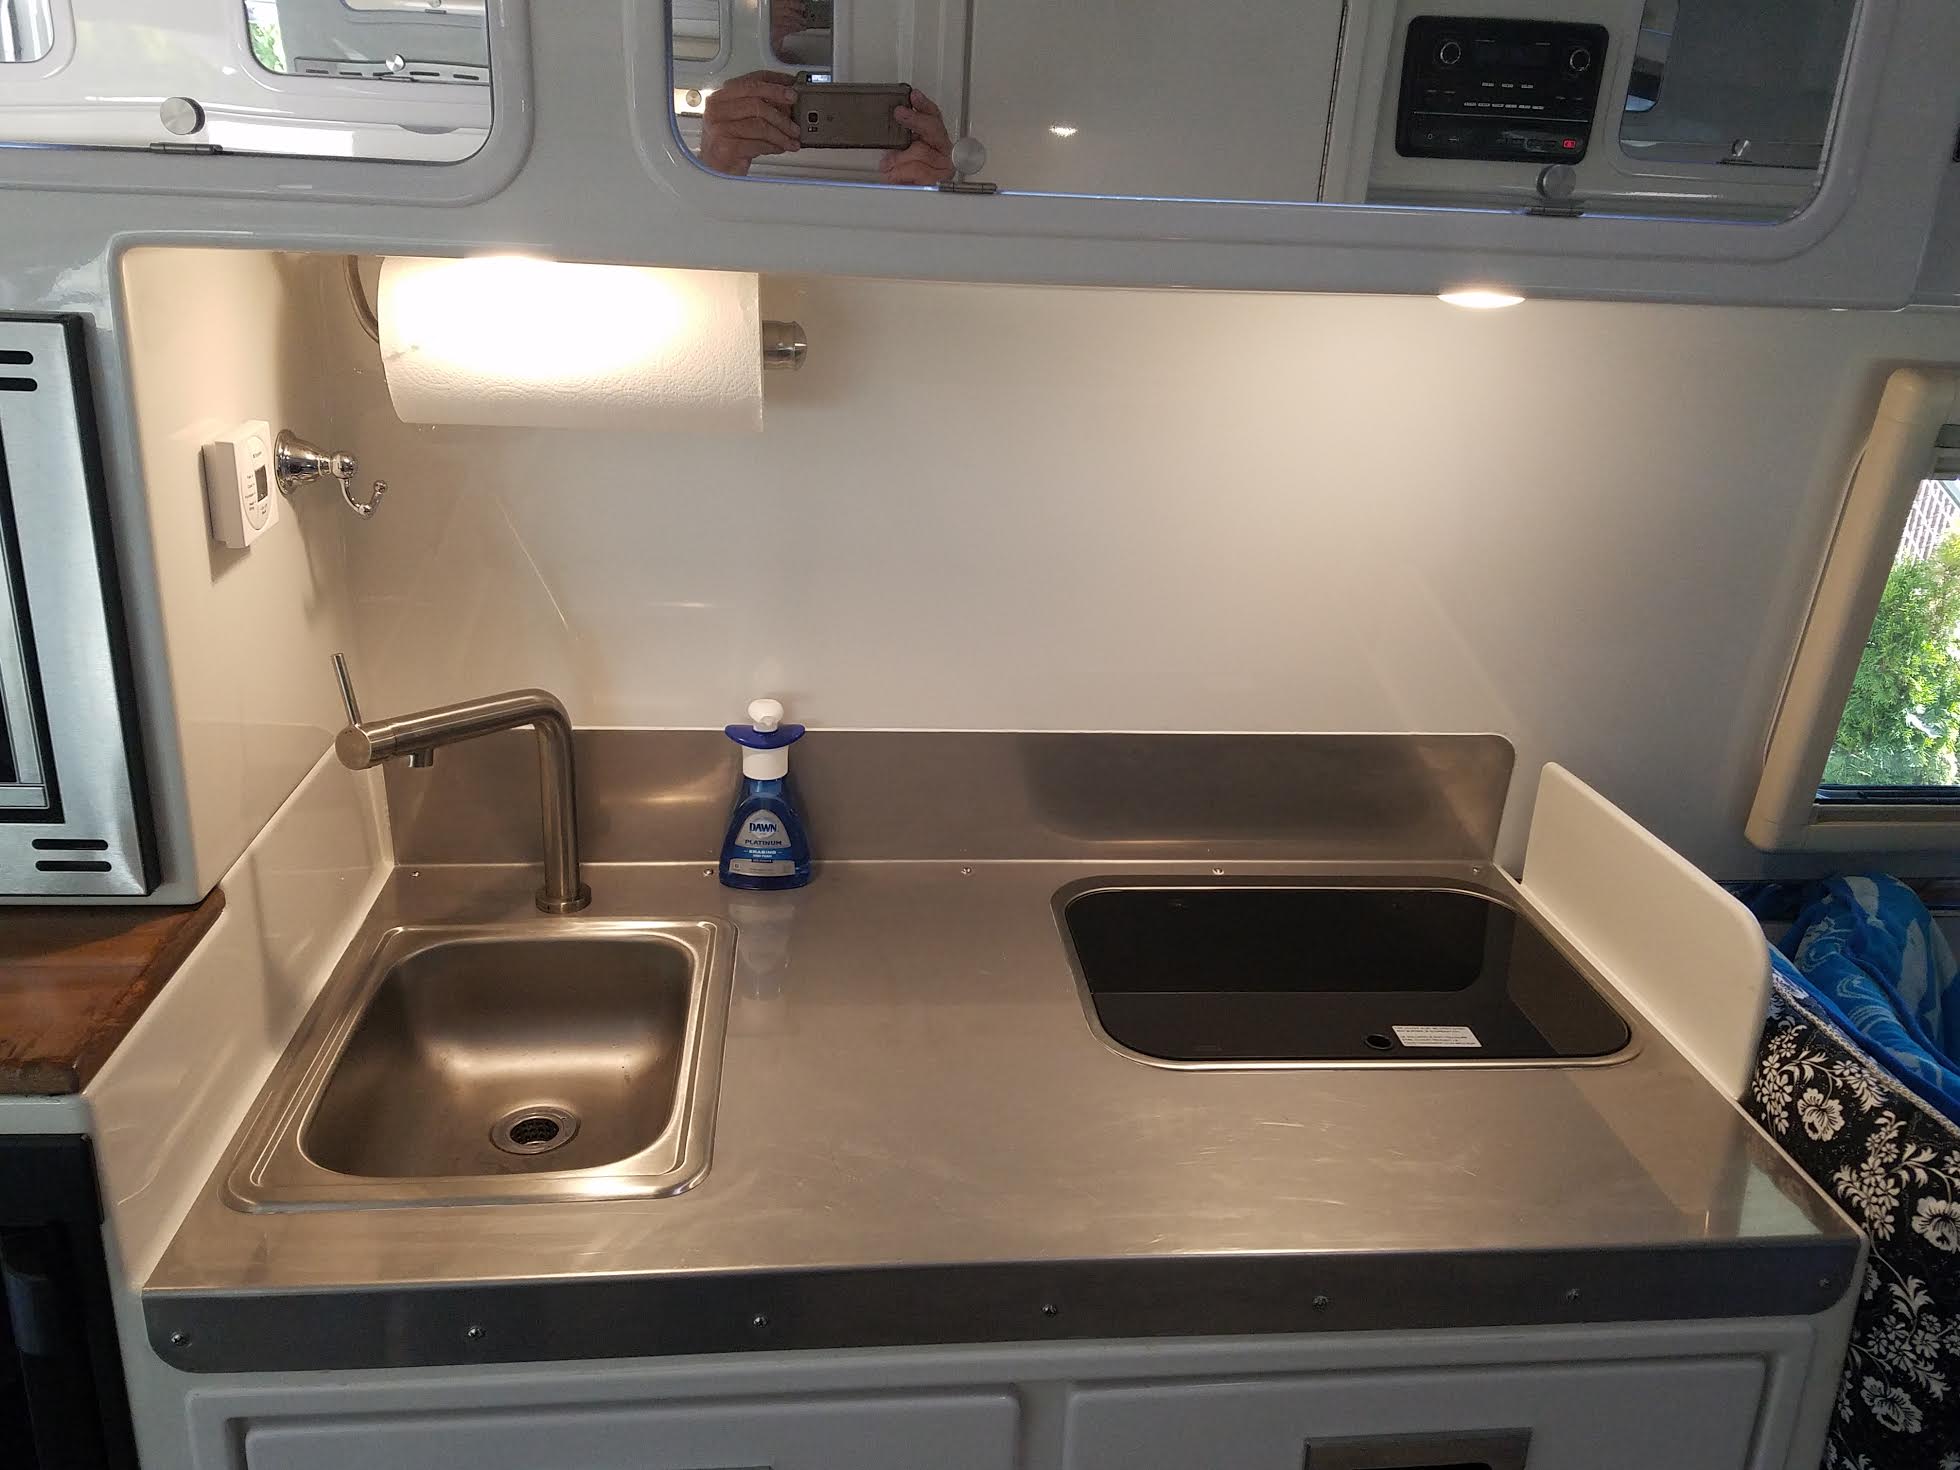
Vector, The material is 14 gauge, 304 stainless . This is a very corrosion resistant material and the 14 gauge is thick enough to prevent denting. It has worked out very well and can be used for preparing food without a cutting board if you wish. It is also much less likely to have any problem related to heat from hot pans. The surface is far more durable than fiberglass or faux granite. I think Oliver should have a stainless option. Everybody that looks at my trailer likes it. These counter tops could be easily produced and I see it as far more practical then what is being offered. To make your own, stainless pieces like this can be had at scrap yards for a low, per pound price. Then simply get it sheered and bent at a sheet metal shop. The cut-outs are easily done with a 4 1/2" grinder. If you notice where mine is screwed down, I was able to miss any obstructions in the counter framing and reach in to install nuts. It is glued down with stripes of silicone about 2" apart everywhere under it, and then clamped until set. The thickness is so little that it does not affect anything else. I have now added a side-splash next to the stove, made of Corian that prevents splashing hot stuff onto someone sitting next to the stove. I also changed the faucet. This has been one of the best modifications to the trailer. I'm now finishing up modifying the microwave cabinet. It now has a smaller microwave, with a drop down door that acts as more counter space and there is a wine rack and utensil storage in the cabinet with the microwave. This is much more secure while traveling and adds a lot of practical storage. Imagine the larger kitchen utensils and wine bottles completely contained where they can never fly around or break. And where the microwave door can never open, so it can be used to store bread or other light items while traveling. The drop down door is a good place to make sandwiches or set a dish rack while doing dishes. My original microwave tried to escape twice before I took action and re-designed the whole cabinet.
-
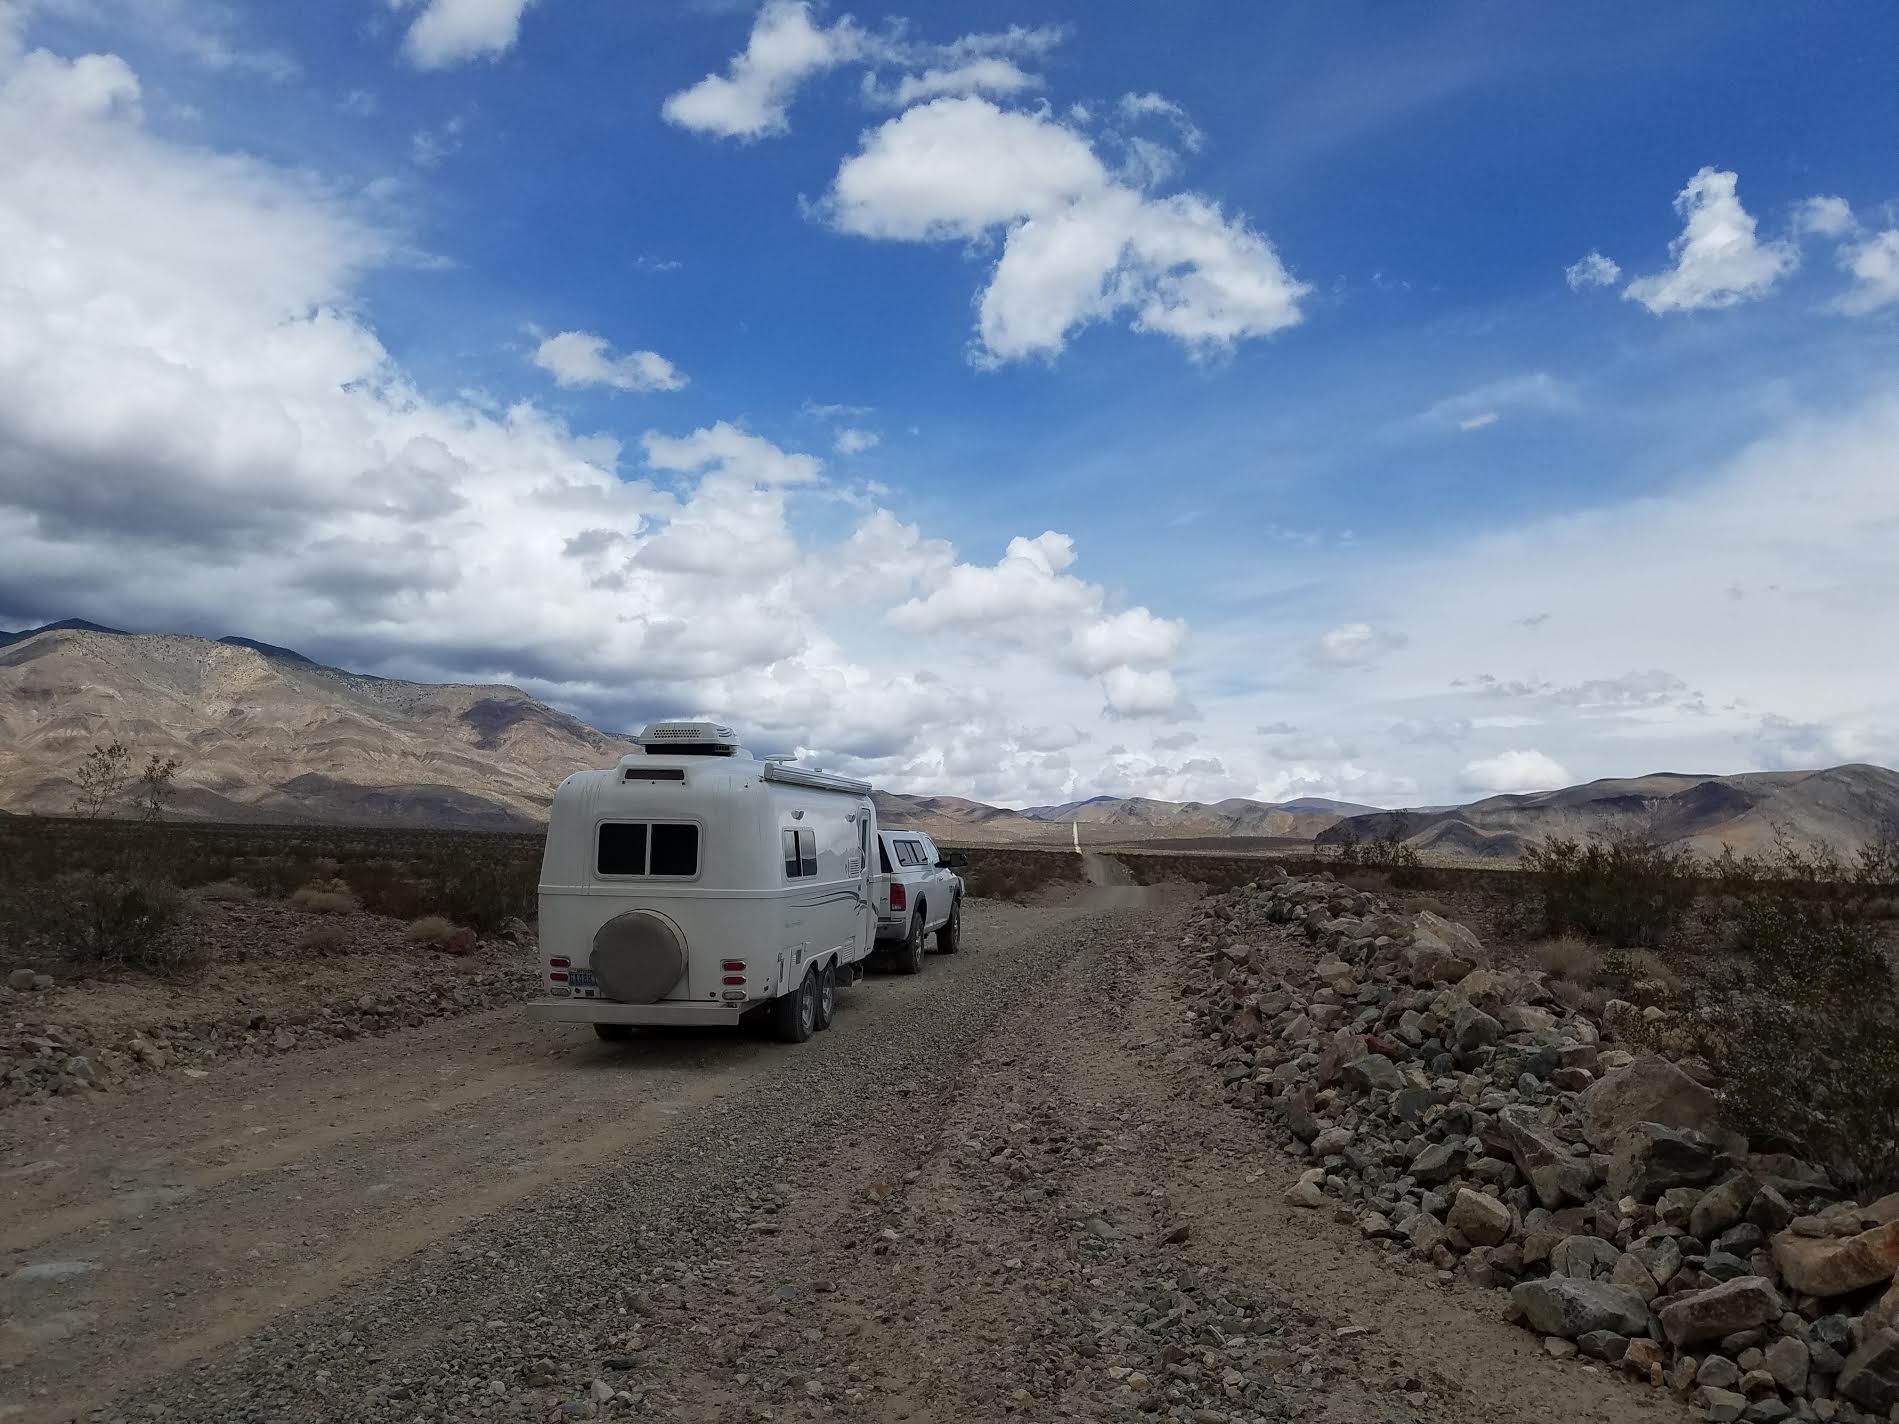
John, Thanks for the link to Moby in SLC. I'll check them out. That long travel setup would be perfect for the desert. Even with the tires aired way down on Ollie the interior still takes a beating on rough roads. We tooled along on the last trip to Death Valley on a dirt road for over 50 miles and it took hours. Even then, the microwave tried to escape, a couple of the window shades checked out, a couple of overhead cabinets would not stay closed and the seat cushions had their own ideas. We were only going about 10 MPH.

-
Geronimo, I'm not convinced a castellated nut is the answer. And remember, the shackle bolts in the Dexter system are specific to that design. They are shoulder bolts where the shackle plate is pinched between the shoulder and the nut. They are also serrated to lock into the other shackle plate next to the bolt head. If you try to use them with cotter pins, you'll have to cross drill all of the hardened steel bolts. Those nuts should be torqued properly, not just lined up with holes for cotter pins. You'll never get the right torque at the same time the holes line up. Without proper torque you'll get wear on the shackles and bolts. Axle nuts holding wheel bearings work well with cotter pins because they are not very tight and can be a little off without problems. Lock-Tite is the answer for the shackle nuts. Easy to do, and can be properly torqued.
-
John, I love that suspension system and so wish we had it on Olivers. Have you seen the Black Series campers? We'll be stopping in Utah on this next trip to check them out. Here's a pic:
-
I've wondered about the reliability of those nuts too. The best solution is to clean the threads thoroughly with Brake-Clean or equivalent spray, and a brush, to get all of the grease off the threads. Then apply Lock-Tite, screw on the nut, and re-torque to specs. With that, they will not come off, but at some point, you can still remove them many miles down the road, if needed. I'm just about to grease the bearings and was planning to do this before our trip to the rally. If you happen to break a spring some day and have to get it apart on the road, you can heat the nuts with a propane torch to soften the Lock-Tite.
-
It would be great if you two could stay in the area for a while and go to Guntersvile in mid May for the rally.
-
As mentioned, the whole place is very nice. D section is closer to the pavilion where displays, breakfast and talks happen, B has much more trees and is very nice, but a bit secluded. Some of us have been relocated from section D to section F with the same hookups, because of the re-model. But D section may open back up if they get done. Don't worry about getting a "good" spot. Just go and have fun. A bicycle is very handy. The Lodge is on the top of the hill and you must drive up there anyway. Olivers will be scattered all around the general camping area. Remember NOT to leave your awning out when away from camp! The wind is unpredictable and caused a lot of damage last year with ruined awnings. Careful. I posted this earlier, but here is the number again, if you need to call them. Call April at 256-571-5455. Here's a link: https://images.search.yahoo.com/yhs/search?p=Lake+Guntersville+site+map&fr=yhs-Lkry-SF01&hspart=Lkry&hsimp=yhs-SF01&imgurl=https%3A%2F%2Fcamprrm.com%2Fsite%2Fassets%2Ffiles%2F1226%2Flake_guntherville_sp-1.jpg#id=4&iurl=https%3A%2F%2Fcamprrm.com%2Fsite%2Fassets%2Ffiles%2F1226%2Flake_guntherville_sp-1.jpg&action=click See you there!
-
Nan, You can call April at the campground office at 256-571-5455. I just called her a week ago to switch sites and she was right there. Section D is closed for upgrades and those folks have been moved to section F with full hookups. John
-
Some of the walls are made with a poly core material, a honeycomb mat with gelcoat and fiberglass on each side. The wall between the bath and the dinette is about 1/2" thick and cored in this manner with a thin glass and gelcoat layer on each side. Most of it's thickness is air. Don't count on it holding a screw with any heavy loads, but you can drill through and snug up a nylock nut with a washer on the back side. This is the same as above the dresser under the rear electronic cabinet. To mount the TV on center, you must drill clear through and add a doubler plate in the floor of the cabinet. Then screw all that into a sandwich with the TV mount. I used a thin stainless plate about 8" square and carefully tightened the screws just enough to hold the load and not compress the area. Inside the overhead cabinets, their bottoms appear to be an insulating rigid foam board with a rubber mat over it. To mount the paper towel holder, just drill up through and put fender washers on the screws with nylock nuts. Trim the extra length with a dremel and replace the rubber mat. There is also wood between the drawers in the sink cabinet and on the bulkheads next to the drawers. It is about 1/2" thick and is where the drawer slides are screwed on. Next is the microwave cabinet. It is all plywood inside with no fiberglass. Apperas to be about 7/16" thick. Some places are simply chopper gun sprayed and rolled out. Some have mat glassed in over the chopped glass for re-inforcement (this is used near high stress corners and where the body mounts to the frame, it also is used, I think, on the rear of the lower hull to support the spare tire and stiffen up the whole stern area), some areas are cored construction (see the pantry door, the closet door, the hatch covers under the bed, and the interior bulkheads), then there are some aluminum blocks glassed in to mount things like the awning . Then there is a large metal stiffener that runs across the back in the basement ceiling.
-
I installed a small wall made of Corian that blocks sliding pans, or some splashes. It works well while making coffee in the morning while someone is still sleeping in that spot and never gets in the way of sitting there propped up. There will also be a flip-up counter extension beyond the Corian. Not there yet. For extra counter space, I switched to a new microwave that allowed me to also include a wine rack and utensil storage in the same cabinet. The whole front cover folds down to become a work surface of a bout 22" by 16". It's very strong and right next to the sink, in front of the new microwave. I'm installing the catch system now and finishing the trim work. Pix soon. Here is the Corian "wall".
- 47 replies
-
- 2
-

-
- counter
- counter extension
- (and 2 more)
-
That hitch seems good if you need to change the ball height frequently. But if not, I wouldn't get one. It's expensive and complicated and will definitely rattle. I selected a drop height that works with my rig with Ollie attached and ready to go. A good stinger with a three inch drop costs about 50 bucks and is a simple one piece design.
-

New owners: how is the Quality Control of your rig? Grade it!
Raspy replied to John E Davies's topic in General Discussion
It's clear, however you want to characterize it or seek actual evidence, that Oliver has had some problems. These fall into different categories. The "statistical Data" comes from conversations here and fixes that Oliver has made. Some problems are mistakes, some are design changes, some are poor workmanship. But none have been disastrous or have turned me away from loving my trailer. Some examples are: Drawers falling out, this was caused by the use of wrong screws and stripping them. Missing ground wires. This was careless and can be easily fixed. Change to a different solar control system, unexpectedly and after promoting the previous model. I'd say sloppy marketing here. Switch away from the telescoping tongue. This was previously touted as an Oliver advantage and then disappeared without notice. Use of an undersized spare tire. Microwave ovens poorly secured. And the water tank issue where only about 60% of the water could be accessed. I designed the fix for this and it went into all new trailers. These are a few examples that are well documented and were items of concern for some. The general wiring system has also been improved over time and the drawers are now dove-tailed construction. The sub-frame truck assembly has been extended to allow easier jacking and the whole jacking procedure has been re-written since the time they used to say the stabilizers were used to lift the trailer. So, some things were defects, some were oversights, some were carelessness, some were re-designs and some were just re-thinking earlier procedures. I've made about 30 modifications/upgrades to my trailer and it keeps getting better. It's a keeper. -
A missing ground wire is also the cause of the tow not charging the trailer through the 7 pin plug. Reed and I looked into this and found it missing on both of our trailers. #200 and # 92. I wrote about this a while back as something everyone should look at. Make sure you are charging from the tow, and if not, look for the missing ground wire that attaches to the ground lug below the rear dinette seat. I also called Oliver and was assured the problem was fixed before hull 200. They knew about it and it had been fixed. Not so. This is a different wire than from the inverter, it's the tow vehicle negative that is in the seven pin plug and must go to the trailer ground lug in order to charge and have correct brake operation. This missing ground wire seems to be the cause of Brake controller warnings too. The ground, actually the negative wire, is not completing the circuit back to the tow and the brakes are apparently grounding through the trailer ball. It sort of works, but throws a warning on the controller.
-
John, Nice work. But it's better to not solder the terminal connections. The best is to crimp only. This is because if the connection ever gets hot enough to melt the solder, the connection immediately fails completely. I have had this happen and was told very clearly when making up some welding cables to crimp only. With the connection crimped, it will continue to work up to the melting point of copper. If you are worried about corrosion, you can dip the cable end in No-Lox or equivalent before you crimp it. In your case the cables seem big enough that they will never get very hot so it should not be a problem.
-
Hey Reed, Thought you fell off the planet. We were going to come looking for you after Bandon, but the smoke was so bad we decided to head home and then on to Redwood City where the air was clear. Glad your doing well. If you're back near home we could meet up in Tahoe.
-
Out of town for a few days. If nobody posts a picture before I get back, I'll post a couple then.
-
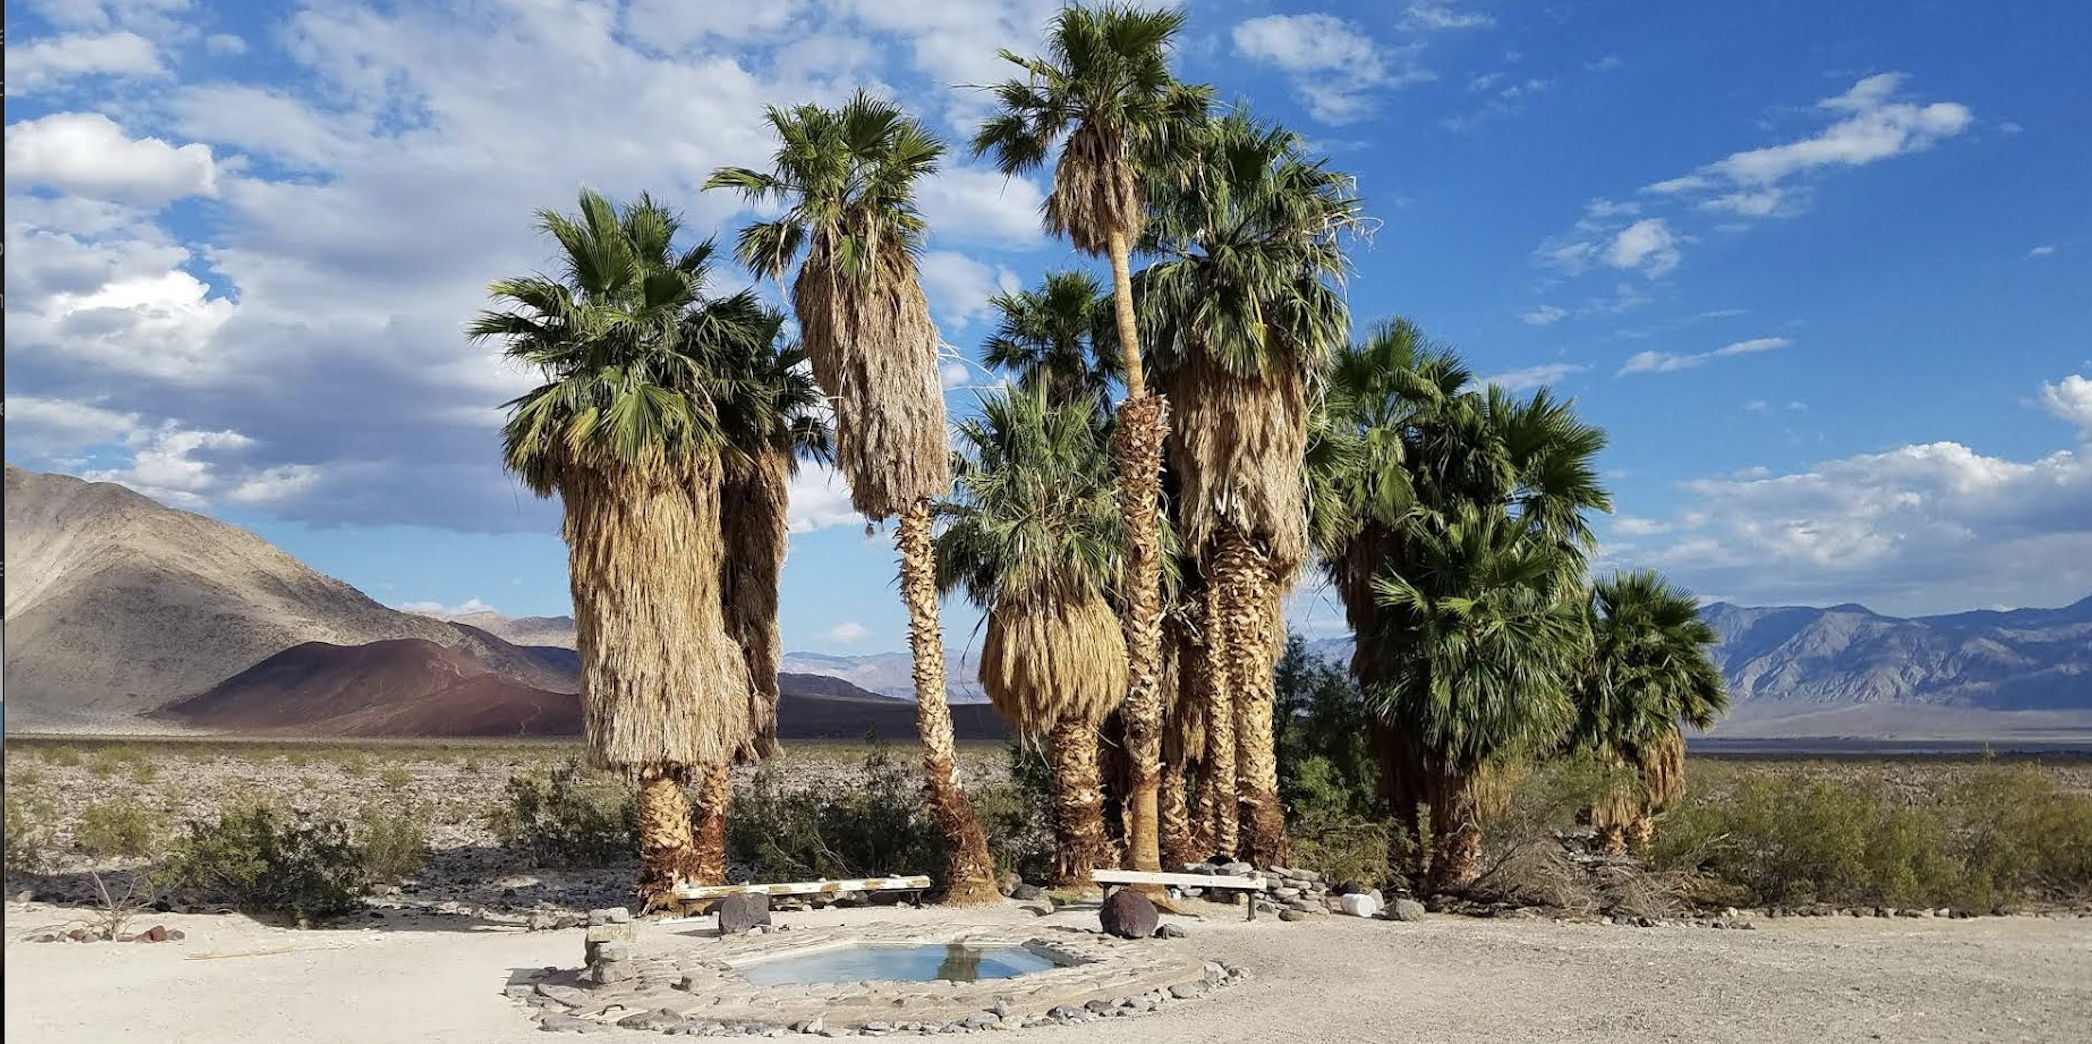
I signed up about week ago for 2019 and it's already filling up. Last year I was hesitant to go because it was so far. We live in Northern Nevada. But we decided to go after talking to Scott Oliver and I am really glad we did! The thing about trips is you can never judge them before you go and they always turn out to be so much better than imagined. So we took off with the absolute minimum of planning. We didn't even take a map and only had the destination date in mind. We wandered around and stopped when and where we wanted too. Sometimes 500 miles more east and sometimes a 100 mile detour to see something. We saw the vast emptiness of Nevada, Valley of the Gods, The Rio Grande and The Johnson Space Center. We toured the Oliver factory, visited Muscle Shoals Alabama and the Fame Music Studio, where so much music came from, toured the Helen Keller Museum, toured a Frank Lloyd Wright house, camped next to the Tennessee River at McFarland Park and had a marvelous dinner on a floating restaurant on a perfect evening. Crossed Mobile Bay on the ferry, and played in the Gulf behind the Flori-Bama Bar in Pensacola. we stopped at a "picnic area" in Texas for the night and the thunder and lightening was so powerful we stayed in the truck until it passed, nobody around for miles, and watched in wonder. Afterward everything was fresh, a fantastic rainbow and and evening with an endless view. We made zero reservations along the way and found so may beautiful places to stop for the night. Oh, and we had a great time at Guntersville. Met some great people and made some long term friends. Oliver went all out to make a very nice, fun and casual event. Coming home we played it by ear again and were able to wander along at a speed we chose. Cruised through Quartzsite after the rush and stayed in a BLM campsite, by ourselves, for free. Stopped in Death Valley and soaked in the hot springs for a couple of days as our last major stop before the final leg home. About 60 miles in on a gravel road and 60 miles back out on another gravel road. The last 6 miles is across the desert with almost no road at all. Finally, the Oasis arrives. Wild burros casually stroll by, looking for a cookie. Warm clear water fills beautiful soaking pools. Besides our nights at the rally, we only paid for four nights to camp during the month long trip. Two were $7. and two were $10. Each with full hookups. We entered federal parks for free with my Senior Card. If you want some good sippin' whiskey, be sure to get some Kirkland Premium Small Batch Bourbon at Costco before you go. It's hard to get and twice the price in Alabama. The final couple hundred miles up 395 wander through the eastern Sierra and past Mono Lake. Then up to 8,000 ft. A refreshing thundershower rinsed the truck and Ollie. We left pounds of dirt on the highway and got home with a clean rig. Two months later I eagerly signed up for the next one. We'll probably cruise through Yellowstone this time and see some different parts of the South that I'm so unfamiliar with. Alabama is full of beautiful parks. The food is delicious and everyone was very friendly. Heck, we might even take a map this time!
-
That is identical to mine. It must be the same one, just re-branded. I think I paid $93.
-
I like the look of the black frame against the smoked glass, but the original white outside frame could be used instead of the black one that comes with it. The only disadvantage of the vertical blind setup is that it's either open or closed. At night we leave ours partly open at the top and can see who is outside, if needed, with most of the window blocked. During the day nobody can see in even with the blind all the way open, because of the smoked glass. The folded shape of the blind blocks all light when closed because it's all one piece instead of overlapping slats. Either one is a big improvement over the original.
-
Mike, You have to open the door to get the screen door out of the way in order to move the shade. It has friction and stays wherever you put it, that's why it works right side up or upside down. I leave ours open about a third of the way (open at the top) during the night and open all the way during the day. This makes it easy to see out, and who is at the door, but not really possible to see in.
-
Sherry, No, I got an AP Products slim Shade from Amazon. This is a slightly smoked clear glass with pull up (or down) accordion style shade. It makes a big difference being able to see out the window. Then you can close the shade for privacy at night. With the shade open during the day, it's not really possible to look in from the outside because of the smoked color. It comes with the entire frame and screws. Takes about 10 minutes to install with a helper. Very nice upgrade. I installed ours so the shade pulls up. This gives better visibility from inside when partially open. https://www.amazon.com/AP-Products-015-201512-Upgrading-Window/dp/B01MRRNQNP/ref=sr_1_25?srs=12574135011&ie=UTF8&qid=1533749049&sr=8-25
-
Fresh Water Tank Overflow Problem
Raspy replied to roguebooks's topic in Mechanical & Technical Tips
Spike, I did read your post about that and I did turn mine upside down. I haven't adjusted the clip shape yet though. I tend to like them better upside down too. I discovered that washboard roads will reliably make them fall off and I've been looking for a way to reduce the extreme vibration that occurs in the trailer. I thought I could lower the tire pressure on those roads and get by, but haven't found the answer yet. Meanwhile, the microwave has tried to escape twice, one overhead door still occasionally opens and the seat cushions will not stay put even when turned sideways. I have fixed the microwave situation by re-designing the cabinet and replacing the microwave. Thanks for checking back in about the blinds. -
Fresh Water Tank Overflow Problem
Raspy replied to roguebooks's topic in Mechanical & Technical Tips
rouge, You'll have to look at the pump and figure out how to take it apart yourself. If you are not comfortable with that, call Oliver and ask them what to do. As I remember, it's a simple matter to remove the pump head and take it apart. Do it carefully and look for a piece of debris or a damaged part. It's good to know how to do it anyway in case you have a problem while out camping. I'm sorry you are so disappointed, but if you are that upset about this problem and expecting to never have anything go wrong with mechanical equipment, I'm afraid you are getting set up for more disappointments. In the world I live in, mechanical problems do occur even with the best of intentions. Oliver buys equipment from outside vendors and has to trust that the equipment will do the job. They even give you a guarantee that it will. It's incorrect to think that Oliver benefits in any way from a part failing or that they are willing to be careless or that they deliberately install bad equipment. In fact, they probably hate warrantee issues more than you do. If you find a problem with the pump I'm sure Oliver will take care of it. You might count yourself fortunate that you have not had to deal with several of the other problems that a number of us have, such as the drawer slide problem, the water tank problem and some others. I have, and I still love my trailer.