
Raspy
-
Posts
666 -
Joined
-
Last visited
-
Days Won
45
Everything posted by Raspy
-
I put a Rat Pack in the beed of my truck. Here's the link: https://www.amazon.com/Weather-Guard-3343-PACK-Drawer/dp/B00279RCHG/ref=asc_df_B00279RCHG/?tag=hyprod-20&linkCode=df0&hvadid=312061963574&hvpos=1o1&hvnetw=g&hvrand=10705243785031862010&hvpone=&hvptwo=&hvqmt=&hvdev=c&hvdvcmdl=&hvlocint=&hvlocphy=1013690&hvtargid=pla-569311574600&psc=1 I bought s a couple of these over 20 years ago and used then in two commercial trucks. Then, when I retired, I installed one of them in my Ram. They last forever and roll very easily. But they are expensive. Mine is about 22" wide, 48" long and about 12"-14" high. Pushed forward it allows a lot of area between it and the tailgate, and full length and height of the bed beside it. The biles can still roll in next to it under that camper shell. Mine is full of gear I seldom use, but must have along. Like the Viar compressor, floor jack, jumper cables, extra draw bars, tow ropes, etc. I'm thinking about sliding it rearward a ways to allow two jerry cans to sit in front of it. I don't want them in the trailer.
-
"Pros and Cons. Likes and dislikes concerning the Andersen Hitch. TV 2019 F250 diesel." Pros and Cons with regards to what? Towing, sway, factory support, problems with them, initial cost, ease of hook-up, effectiveness, suitability on various tow vehicles, installing on an Oliver? Don't know how to answer your question because there is not enough information. But if you are wondering about using one with an Elite 2, it's not needed with a heavy duty truck. I have one and have never used it. I see no reason to. It came as part of the equipment with my Oliver and has lived in the garage since I got it.
-
Don't you still have to vent the heat from the condenser of a compressor fridge?
-
The bracket screws are 10-24 machine screws and thread into something inside the outer shell. I asked one of the service guys, can't remember his name, and was told there were nuts inside. Yikes! I carefully removed and re-screwed them back in with no problem. There was silicone on the threads that might also be gluing the nut to something inside. I'm kinda disappointed in the Fiamma awning, but the new Dometic ones with no legs at all, really strain credibility.
-

2020 Jeep Gladiator 3.0 turbodiesel tow rating
Raspy replied to John E Davies's topic in Towing an Oliver
The Gladiator is a disappointment for me too. I was hoping for a real truck instead of an adapted Wrangler. As far as towing, more specifically, the Gladiator has a lot of rear overhang and a very light engine. The cooling system is barely up to the minimum as dictated by the Wrangler front end. Towing over 7500 lbs would not be what I consider safe. The Wrangler Unlimited four door is only rated for 3500 lbs and is nearly the same vehicle, with the exception of slightly heavier rear suspension and a pickup bed. Best to consider the Gladiator a Wrangler with a bed, instead of a truck for towing. As far as the engine is concerned, in order to get it to do anything near what is seems it should, according to the numbers, you have to rev it way up and put up with all of the inherent V6 "character". It's fine for off roading, but not fine for towing. -
Thanks to everyone who came to the rally! We really enjoyed seeing the trailers and putting faces to the names. Made some new friends and had a very nice time. Lots of fun and interesting conversations. Guntersville S.P. is a very nice place. It's fun to just hang out in such a friendly and easy going setting. Kinda sad to see everyone pulling out this morning, but we're all off on the next adventure. Hope to see you next year. Take care, Raspy John and Liye Roemer, and Gogo

-
Nothing "theoretical" about it. Easy Peasy. Takes about 10 seconds after you find the bolt and nut. Then you'd know if the old one was accurate and you could use it with confidence. One could live in the trailer and one in the shop, for instance. Or you'd confirm the old one was way off and should not be used. Without testing the old one, and not trusting it, you might as well throw it away.
-
You could connect your new and very accurate torque wrench to the old one you think might be wrong, and apply some opposing torque. A connector between the two square drives and pull one against the other. A nut screwed all the way onto a short bolt, and then a socket on each, will do it. When the new one clicks, see how far off the other one is. This will give you a reference as to how far off the old one might be. It might be 10% off, or ten ft lbs at 100 ft lbs, etc.
-
One of my Fiamma leg brackets, on the side of the trailer just fell apart in my hand. This bracket must work, or the leg can lift out in a breeze and wreck the awning. Look at this picture and see how weak they are. Just two little 1/8" wide aluminum points hold the cap that prevents the leg from coming out and dropping. Very weak. I thought it was made out of stainless until it came off in my hand. New sets are available for $45. from Oliver.
-
This could be the answer, and I can see it on a boat trailer, but I wonder if it would really improve the quality of the ride much? Our Oliver's have relatively soft springs and we need more than the 2" of travel. Plus we don't need a hard frame impact as the stop. That is very crude. The quality of the ride is really important and I find I have to just creep along on rough roads to prevent chaos inside. It just seems like trying to lift the trailer with more arch, on a spring under design, is working against yourself. Unless ride quality is not important, such as in utility trailers, for instance. The main area I would like better suspension in is the quality of the travel. If we had our 2" of travel and then a Timbren donut, it would offer a very progressive rise rate, without the hard stop. I changed the rear springs on my 1st gen Dodge Ram Cummins pickup. It had lifting blocks from the factory that allowed the stock springs to be relatively flat, or straight. The new springs had more arch and did away with the OEM lifting blocks, while giving an inch or so of added ride height. So, the springs had a much more pronounced arch to them than the stock ones. This made the truck handle terribly. The reason was the angle that the spring sat at from the front pivot back to the axle. A steeper down angle than stock, in the area in front of the axle. As the truck went around a corner and leaned, the outside spring would flatten out a bit. This moved that side of the axle back. As the spring went from a steep down angle to a more level angle, on one side, the axle was pushed toward the rear on that side. That meant the axle was not in line with the truck and was steering from the rear. It always felt like the rear end was trying to come around in a slide. Very unnerving and annoying. In a trailer setting, this affect would promote sway because as the trailer leaned, to the right, for instance, it would also steer to the right. Then lean to the left and steer to the left. It seems like it could become quite unstable as it steered back and forth with wider sway on each cycle, as it leaned more each time. Combine that with a higher center of gravity from the lift, and the problem gets worse. So, a flatter spring is better for stability. So much thought and energy goes into preventing sway, that it seems counter-productive to do anything that is known to decrease stability, even though Oliver's are very stable to begin with and may have some tolerance for change. I'd be willing to go up about 2", to allow more travel and have a Timbren donut, or to allow the tires to travel farther without contacting the wheel well interiors. But that's about it for me. And the springs will have to be as flat as possible. So that means a spring over, unless I want to modify the suspension truck, which I don't want to do. It seems it comes back to, once again, a spring over design with drop axles. Then the search for shocks will begin. I tried to do this exact thing on another trailer that I built, but the problem there was getting the right drop axles. I was not able to get axles that cleared the frame and would allow the spring perches to be where they needed to be. The forged drop piece has to clear the frame and then turn out to accept the brake flange while still allowing the wheel flange to be in the correct stock position. We can't change the axle flange-to-flange width unless we are willing to buy new special wheels with something different than zero offset.
-
John, You can search for shocks by length, but it can be a hassle. Once you find the ones, and what they are made for, you can just go ask for shocks for that particular vehicle. You have to know the mounting style on top and bottom of the shock. I once found that shocks for a certain year Corvette fit a trailer I built. Then I found some for a certain model Volvo fit my Samurai. I recently wanted Rancho shocks 2" longer than stock for my Jeep. The parts guy assured me they were right, but they turned out to be about 3 1/2" longer and would bind on compression if installed. Then the next set I ordered were said to be for a 2" lift, but were shorter than stock! So, you really have to know what extension and compression lengths you want and how much tolerance you have with those measurements. Then you have to find those measurements with the mounting style you need. Then, of course, with the shocks at the angle they are, you can't just add 2" for a 2"lift.
-
Good choice on the Tekton torque wrench. The possible inaccuracy of the torque wrench is much less than the acceptable variation in wheel torque. The nuts have to be tight enough to do the job without coming loose, but not so tight that the studs get over stressed. The cleanliness of the tapers and any lube on the threads will have a large affect on how much stud tension there is per ft lb of torque. Even the difference between a chrome nut against an aluminum wheel taper, vs a non-plated nut against a steel wheel taper will affect the torque vs tension ratio. And aluminum is more important to re-torque. I'm sure a low cost torque wrench is fine and much better than just guessing or making them up to as tight as you can. The need for a precision torque wrench is similar to someone saying we must have a high quality digital thermometer to measure the tire temp. When in reality, in the case of the tires, feeling the temp with our hands is all we need to know.
-
A "spring over" would definitely give you more travel and you could install a nice rubber bumper or Timbren donut. But It would be so much lift that it might affect stability. I don't think there is much we can do to significantly improve the "utility trailer" suspension system on our Olivers when compared to the fabulous systems on the Australian off-road campers. A nice compromise might be to modify the suspension truck with longer spring hangars as Overland suggested. But what a hassle. You'd have to pull out the truck and grind away the galvanizing to do it. Another idea is to do a spring over, but use a drop axles. This would give you approximately the same ride height as now, but with the springs over the axles for more travel. Then add the Timbrens for a kinder stop. You could keep the same soft springs we have now. It would probably work best with about a 2" drop, which would net about a 2" lift and give room for the wheels to go up farther into the wheel wells. If you chose to do that, you could upgrade at the time to 5200 lb axles and get the bigger brakes. I think this is the method I would pursue. If you just added a leaf, the ride would get stiffer. But if you could find a spring pack with the same number of leaves, and more arch, it might be a reasonable compromise. You may just have to stomp off in disgust and go buy a Black Series Caravan! I think the spring-over with drop axles, Timbren stops and stock springs, is the best I can come up with.
-
Don, Look at my post, a few posts back, that shows the actual measured weights at each tire and the tongue. The rear axle is carrying more weight than the front one and my trailer is nearly perfectly level when towing. This is puzzling because of the equalizer suspension system. It seems to me that the axles must carry the same weight, but they don't. If you are noticing a temp difference, it might be good practice to run the rear axle at 5 PSI higher than the front. I check my tire temps at every stop and have not noticed any difference between the rears and the fronts. I'm hoping to have some discussion about all of this at the rally. Vector's experience is going to open this subject up and I want to carry it on so we can all be on the same page, and in agreement with Oliver. See you at the rally. John
-
It does look like the nuts were all loose. But then there was a severe impact that bent the wheel. That actually looks like a very good wheel, in that it bent rather than just break. Maybe they are forged.
-
They make the steel wheels in a powder coated silver/gray that looks very nice. I had a set on an enclosed trailer. You could even get them in galvanized if you were concerned about corrosion.
-
I too like the Bulldog. I first saw the design as a kid and thought it was the coolest thing. So pleased when I saw it on our Oliver. I upgraded mine to a 2 5/16" size, but it's certainly not necessary. I'm also running the Michelin Defender LTXs on my truck. They run very smooth and quiet, and they have stayed perfectly balanced for about 20,000 miles now. I was a Toyo guy, but these have changed my mind. Good luck with your situation.
-
Pete, Mother-of-all-potholes. LOL! Yes, re-torquing is a very important step after a few miles. Good point. Torquing lug nuts could be a whole thread with lots of input from all. I'm thinking Vector's incident will be discussed for a long time. Possibly too much tire pressure, poor torquing practices, weak wheels, etc. It's a situation like this that will push Oliver to be less casual about all of that and set some new guidelines. At least we are running LT tires! They are tolerant of running lower than max pressure, and indeed should be run at less than the maximum.
-
Vector just lost two wheels from his LE2. At least one of them came off when he hit a pot hole. Some of the speculation is that the tires may have had so much pressure that they were unable to absorb the impact, and sheared off the wheels studs. The nuts may have been overtightened too, contributing to the failure. No absolute conclusions have been reached yet. 80 PSI, whether it contributed to his failure or not, is too much pressure, in my opinion. 60 is much better and 50 may be better yet. The tire chart shows a minimum required of about 35-40. I ran 60 for a lot of miles and the tires ran cool. I lowered it to 45 and found it was still OK, but the tires were warmer. Now, I've settled in at 55. The tires still run cool, but they have some flex if needed to take the shock out of pot holes. Still searching for the ideal pressure based on actual use. I'm thinking 50 will probably be it. On slow desert unpaved roads, I like 35. This minimizes the chaos in the trailer and can't heat up at low speeds. I have a feeling, after Vector's incident, there will be a clarification, from Oliver, on the policy they recommend. No more 80 PSI factory pressure.
-
I've had two sets of 5200 lb tandem axles on other trailers and they worked flawlessly. Both with the standard drum brakes. It's my favorite axle size. Also, I think Oliver uses a single 5200 lb axle on the Elite. I would upgrade without hesitation if I ever had a problem with the 3500 lb axles. In fact, I was disappointed I didn't get them from the factory. As I understand it, Oliver had a problem in the supply chain with the 3500 lb axles and the warrantee for them, so they temporarily switched to the 5200 lb model. They even advertised the brake upsize improvement in some of their literature. But then they went back to the 3500 lb Dexters. Some lucky folks got their trailers during all of that and got the 5200 axles.
-
Good point about over pressured tires being not able to absorb impacts. Check the pressures in the two other side tires and see what they are, just for reference. We have been talking about tire pressure lately and this may be a good example of why not to run the tires at full pressure. It seems I remember that the tires came to Oliver with 80 PSI and it seems a lot of folks like to run their tires at the max pressure. Not me. It could be that they all leave Oliver with 80 PSI.
-
Wow. Sounds like you handled the situation perfectly. PM me if I can help. We could bring you some parts, if nothing else. I'm not sure what wheels you have, but my Oliver had very weak wheels and I broke one. So I upgraded to aluminum star wheels with a 3200 lb rating. Your idea of steel sounds good. They will bend and not break. As far as axles go, if you change yours, get the 5200 lb axles that Oliver used for a short time. They are much stronger than the 3500 lb axles and the brakes are bigger. In your case, riding on a 12" drum, instead of a 10" drum, might have made a difference. Plus the brakes are stronger and will last longer. Keep us updated and good luck.
-
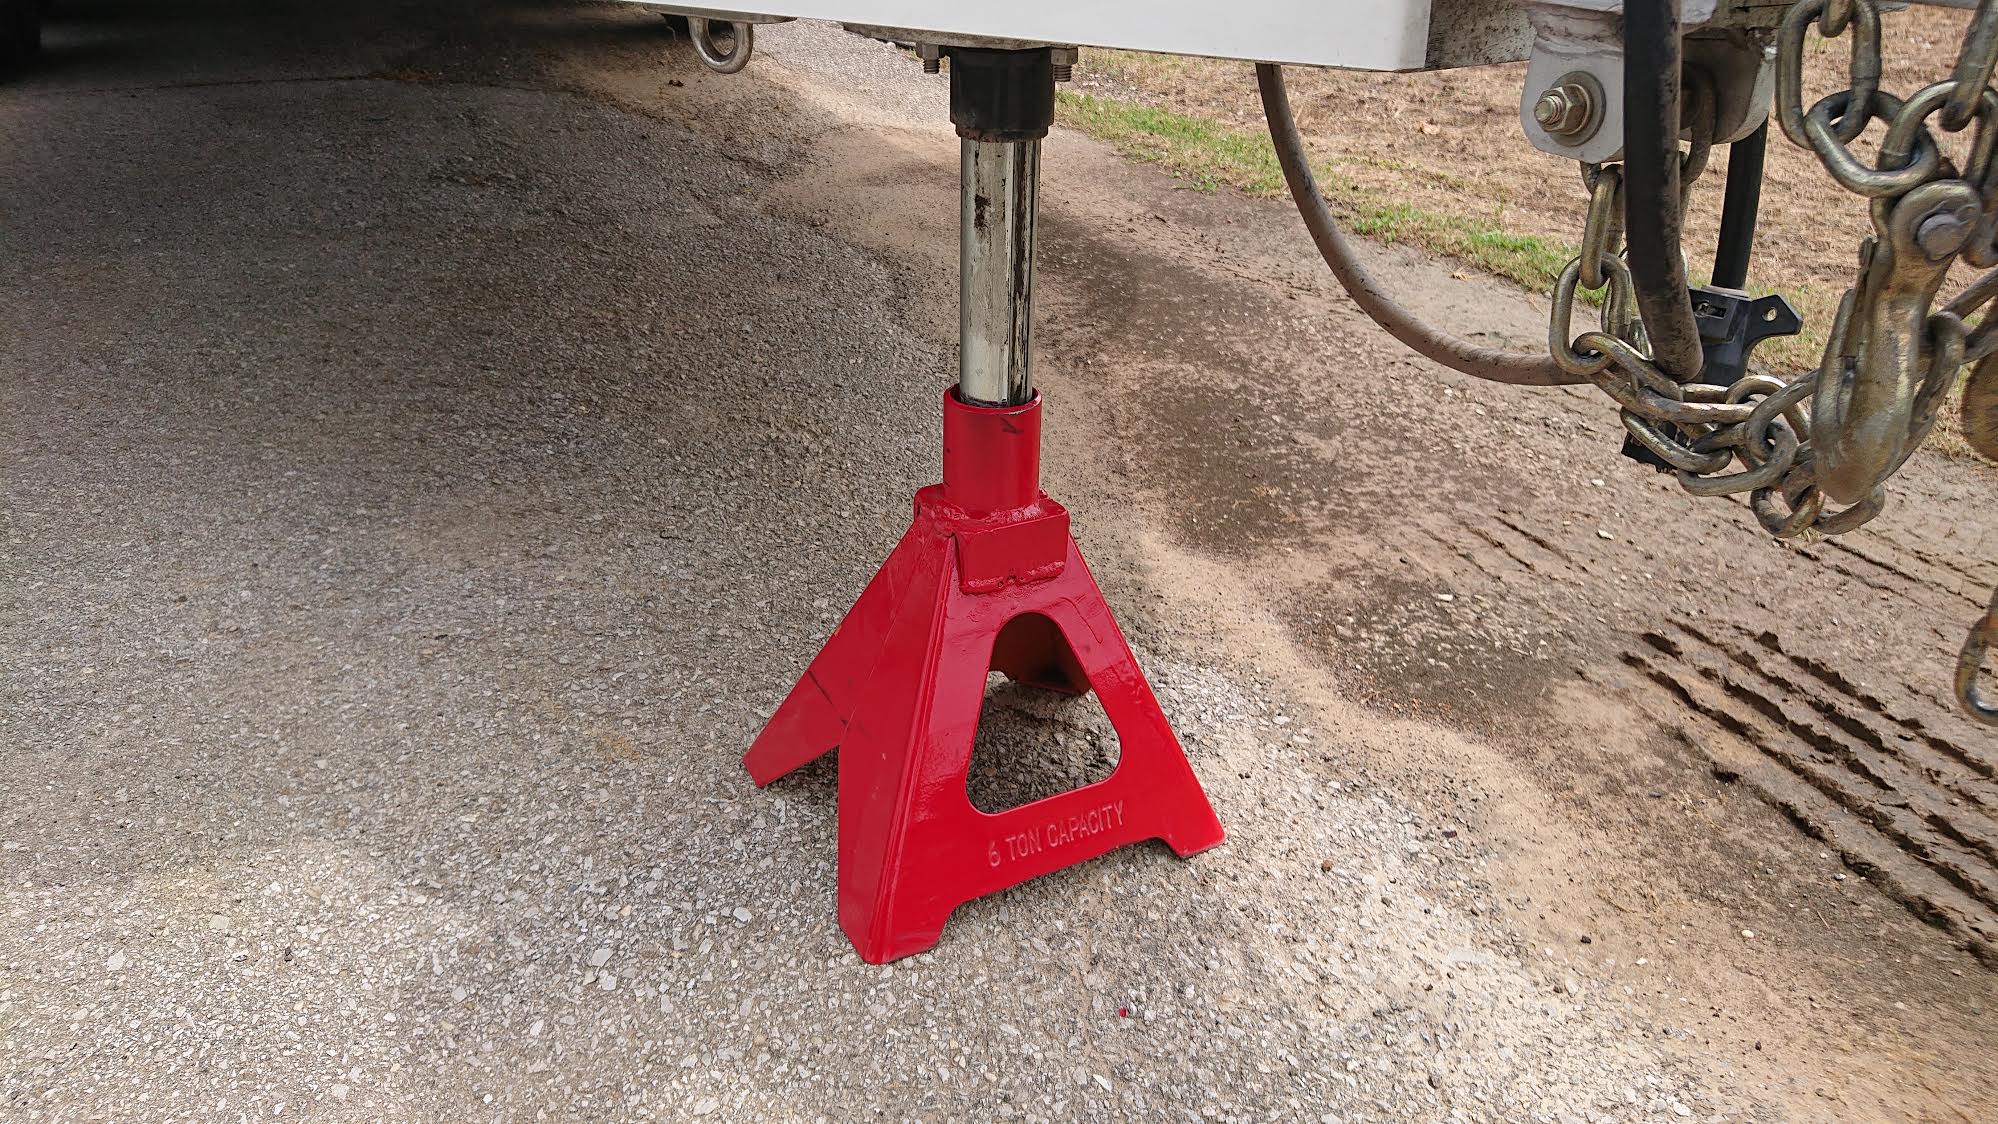
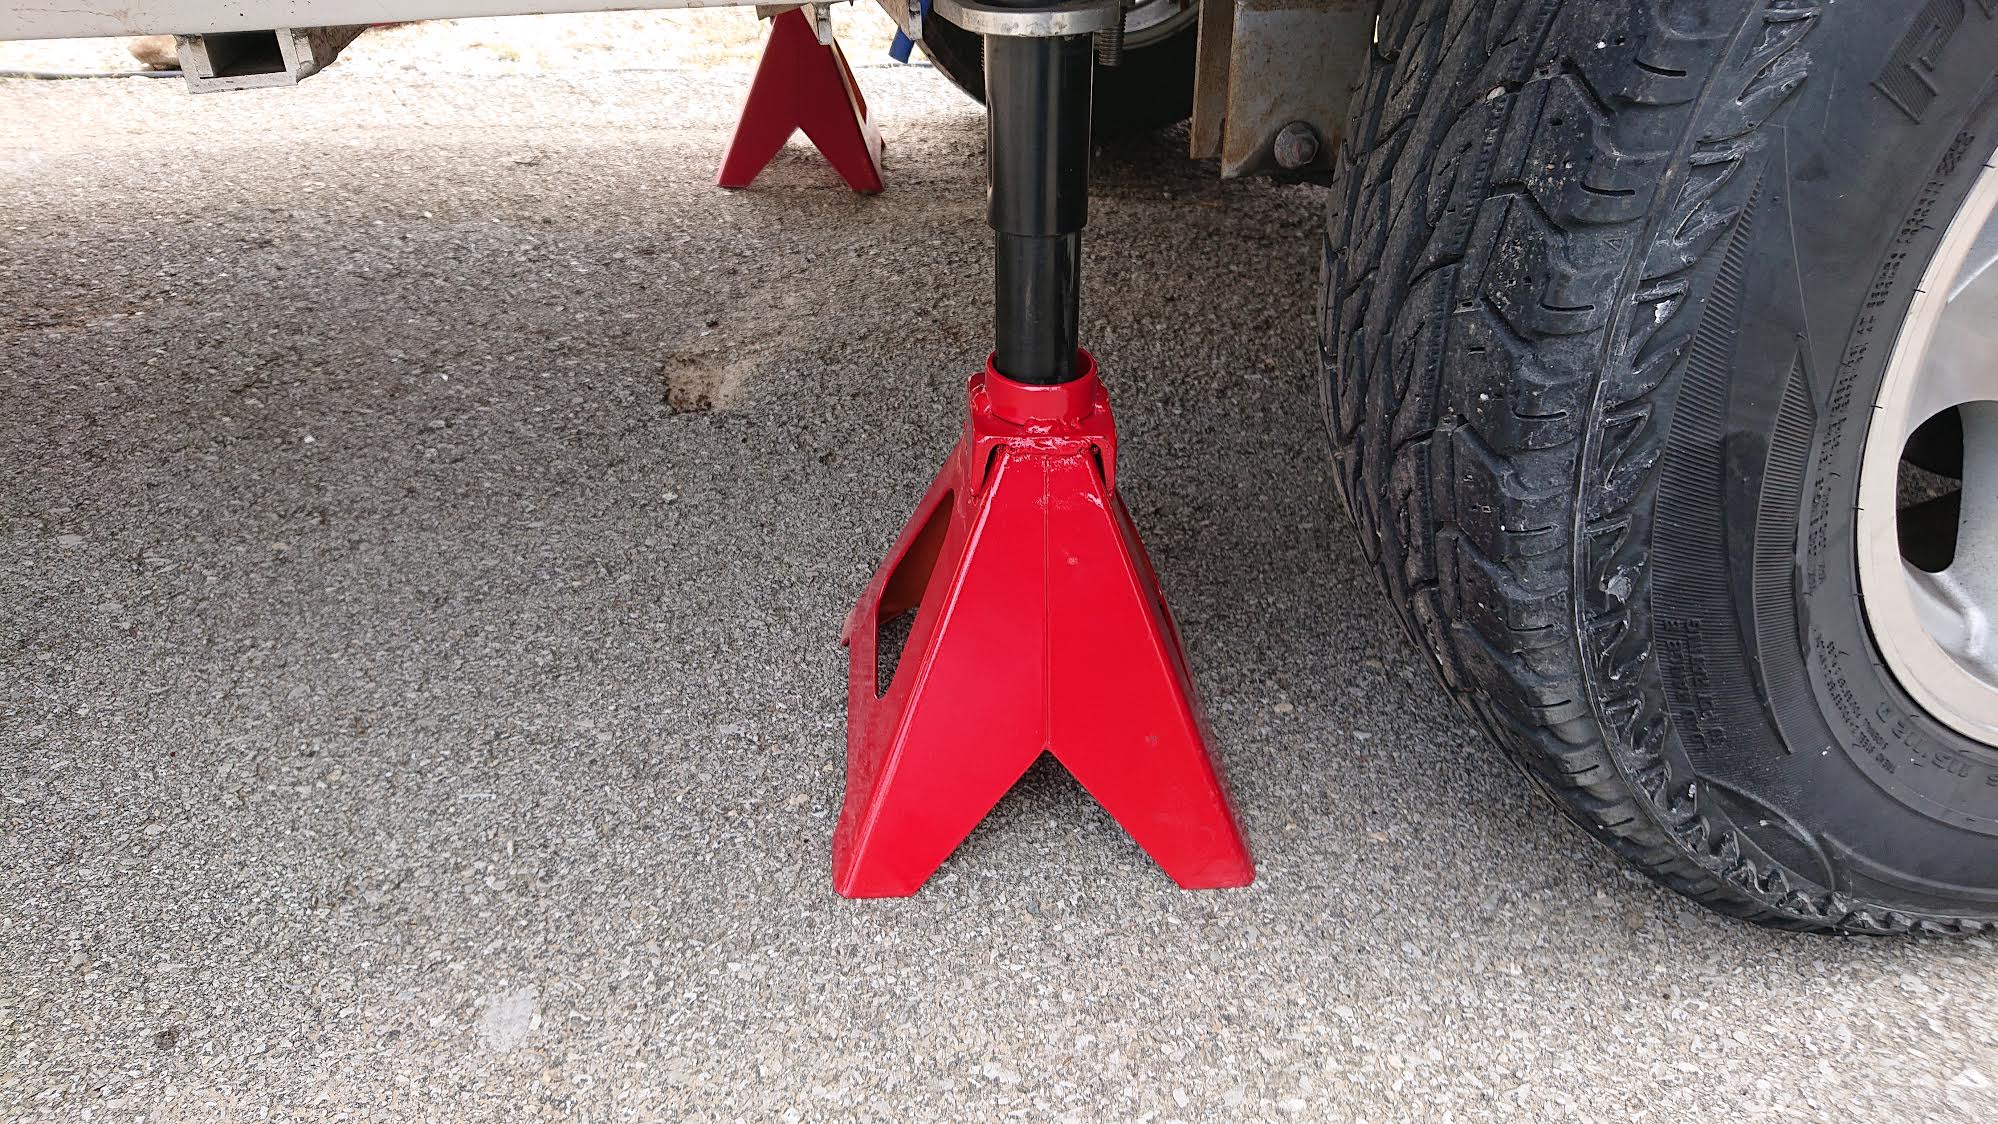
This is an update to the jack stand modification. I could not edit the earlier post, so I quoted it and added the pictures. These modified stands have worked beautifully. They are very stable, strong, easy to use and they stack for travel. Each one is rated for 6 tons. I modified them by welding on a piece of 3" channel and a piece of 2" pipe, after cutting off the original top ratchet part.
-
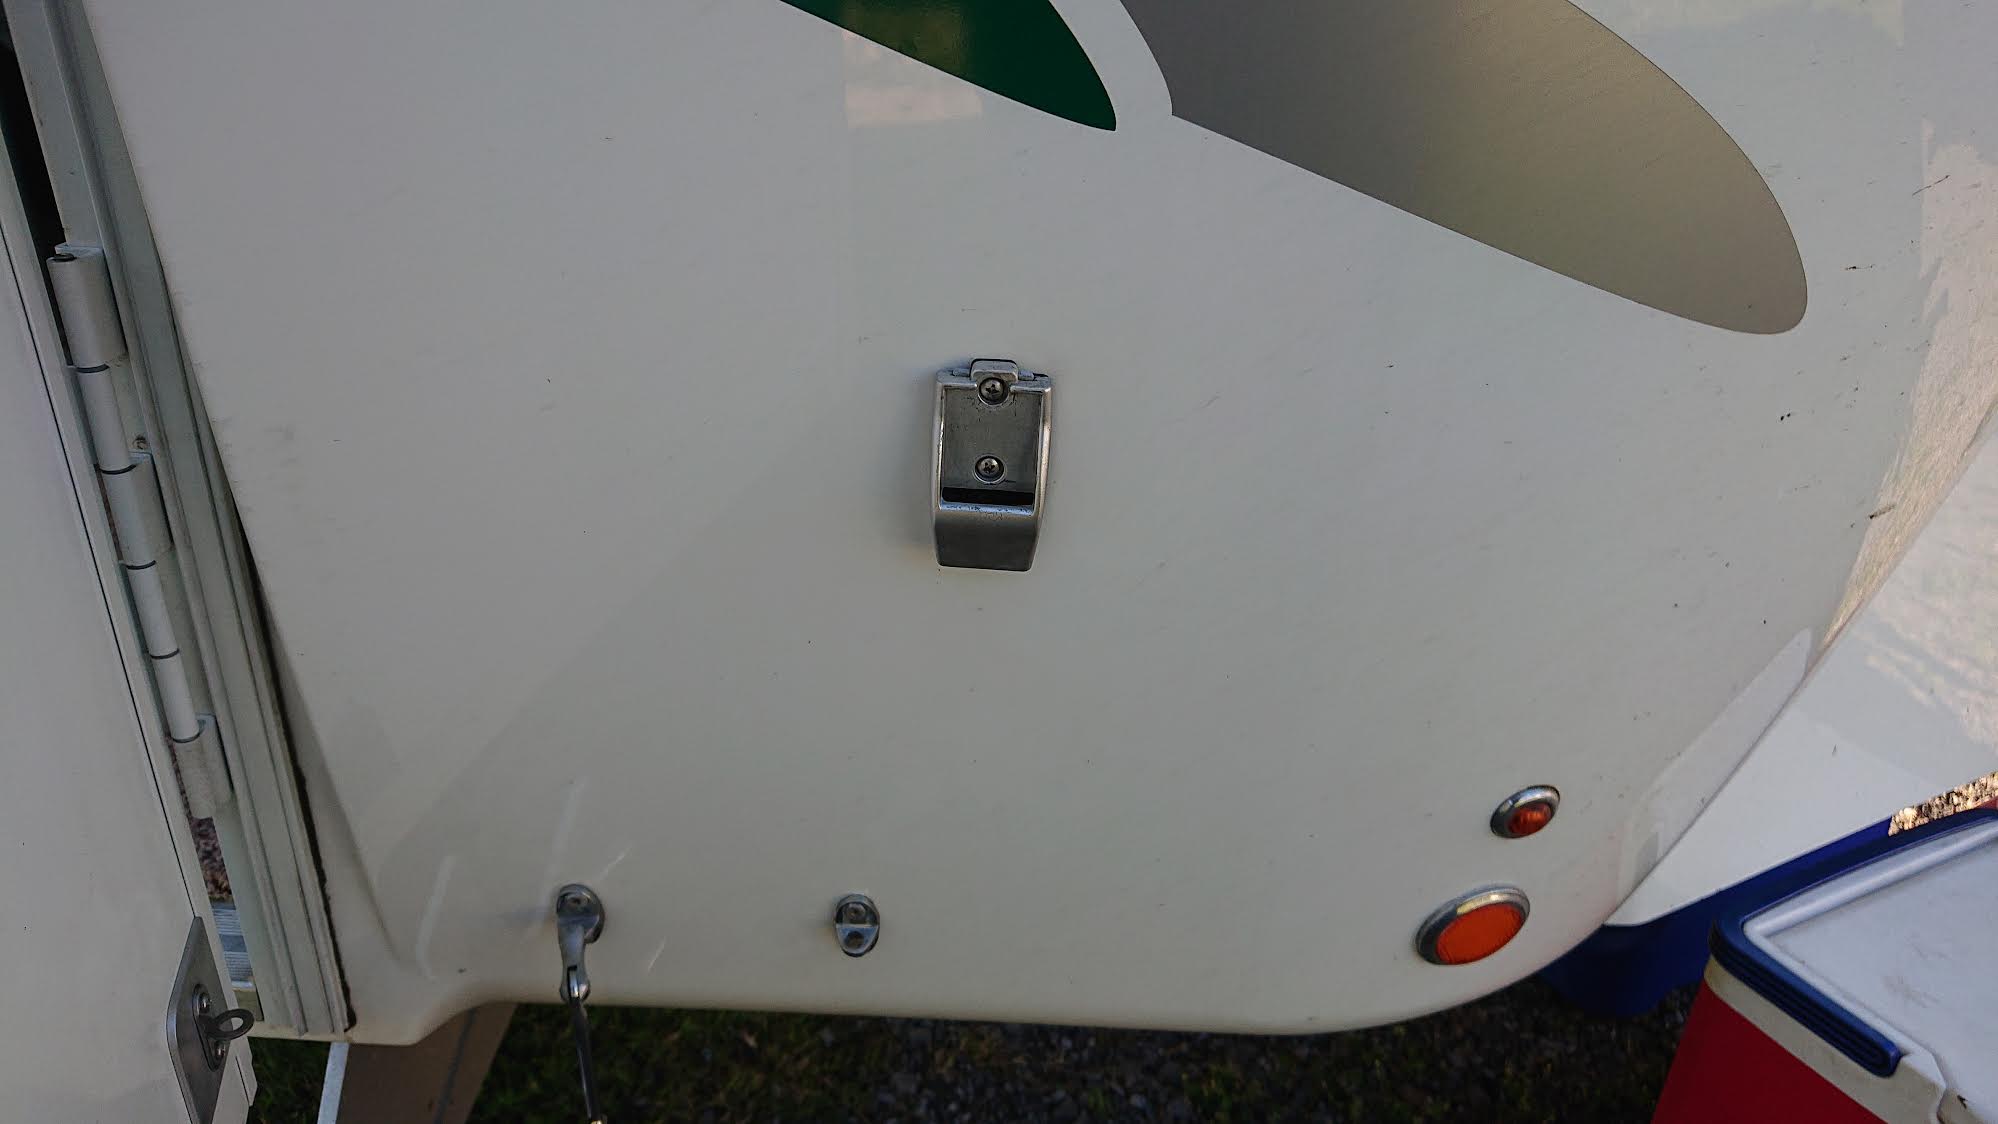
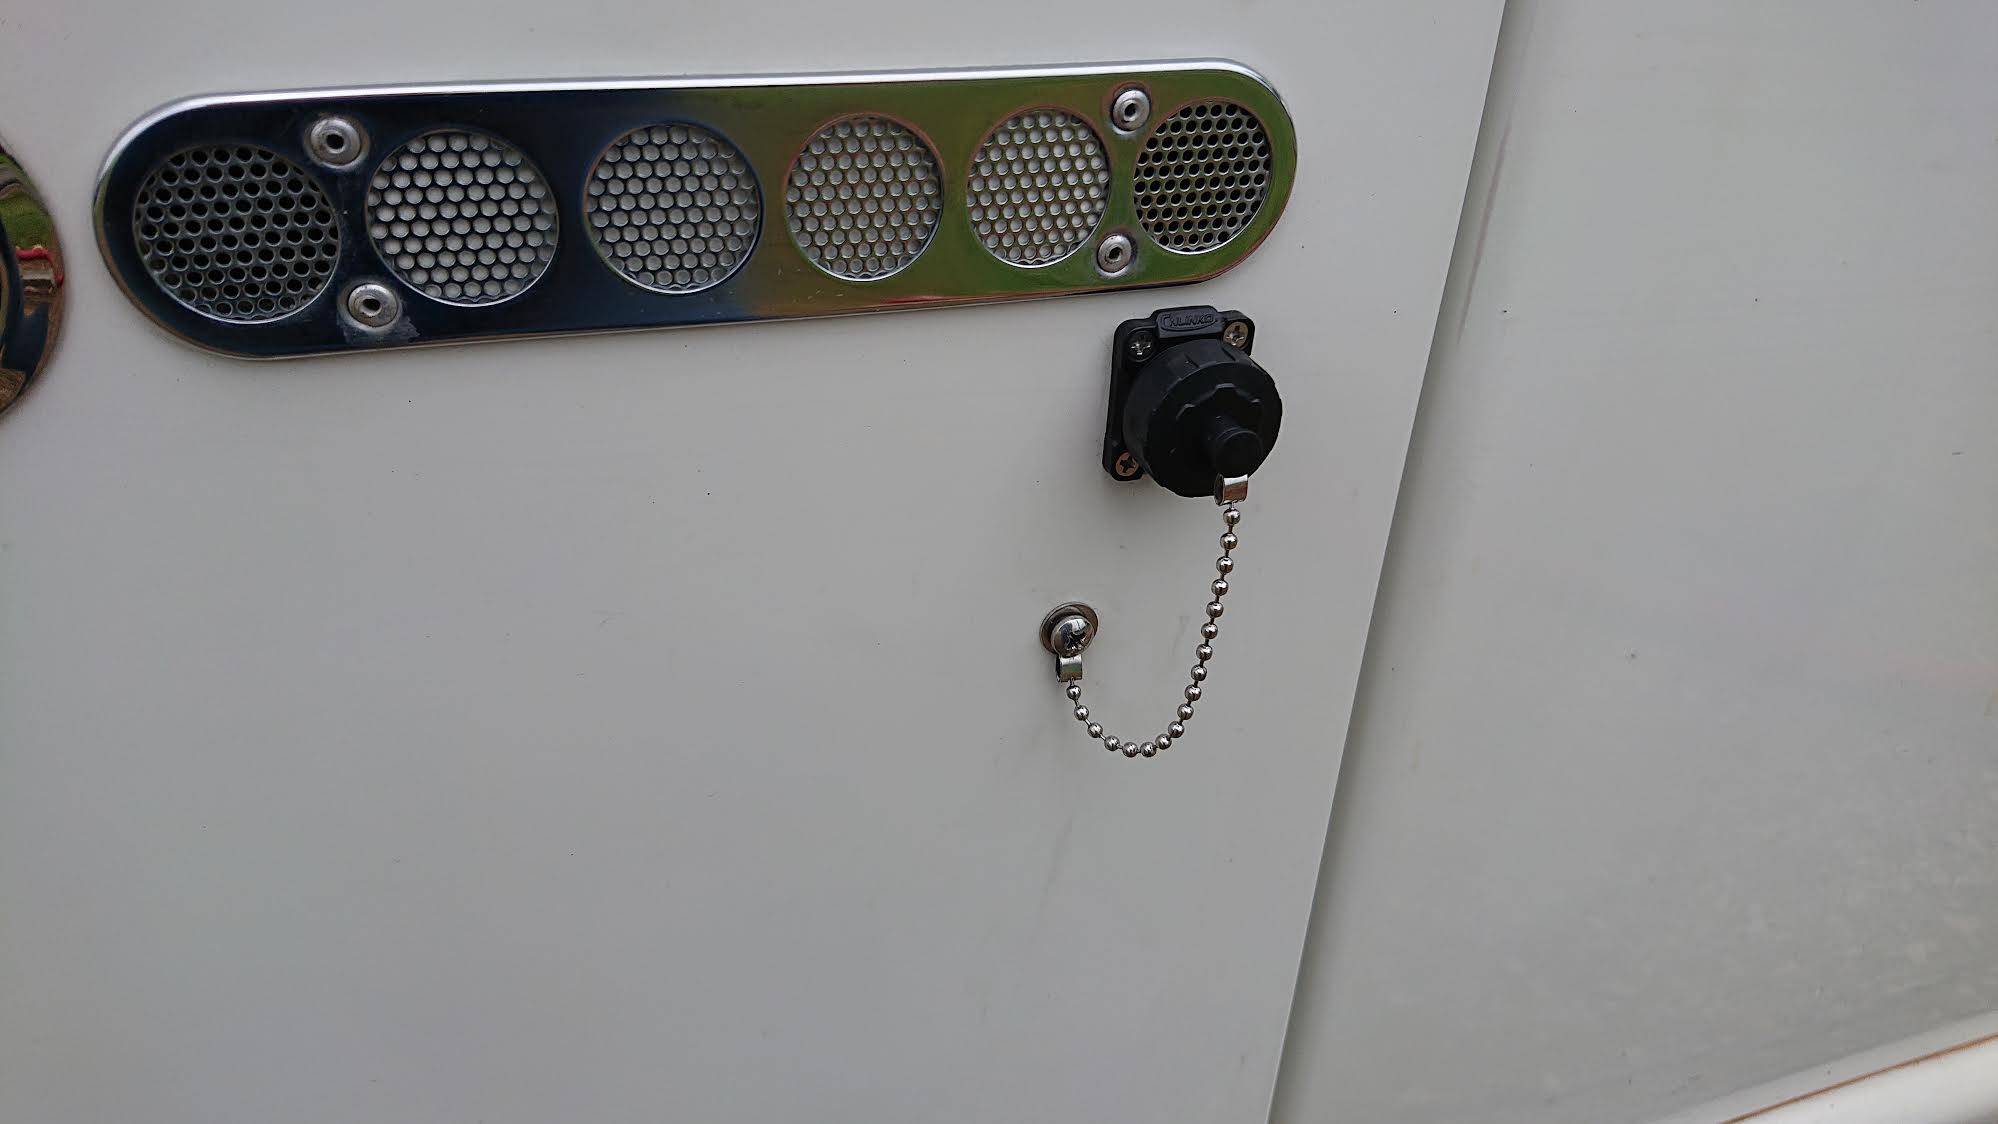
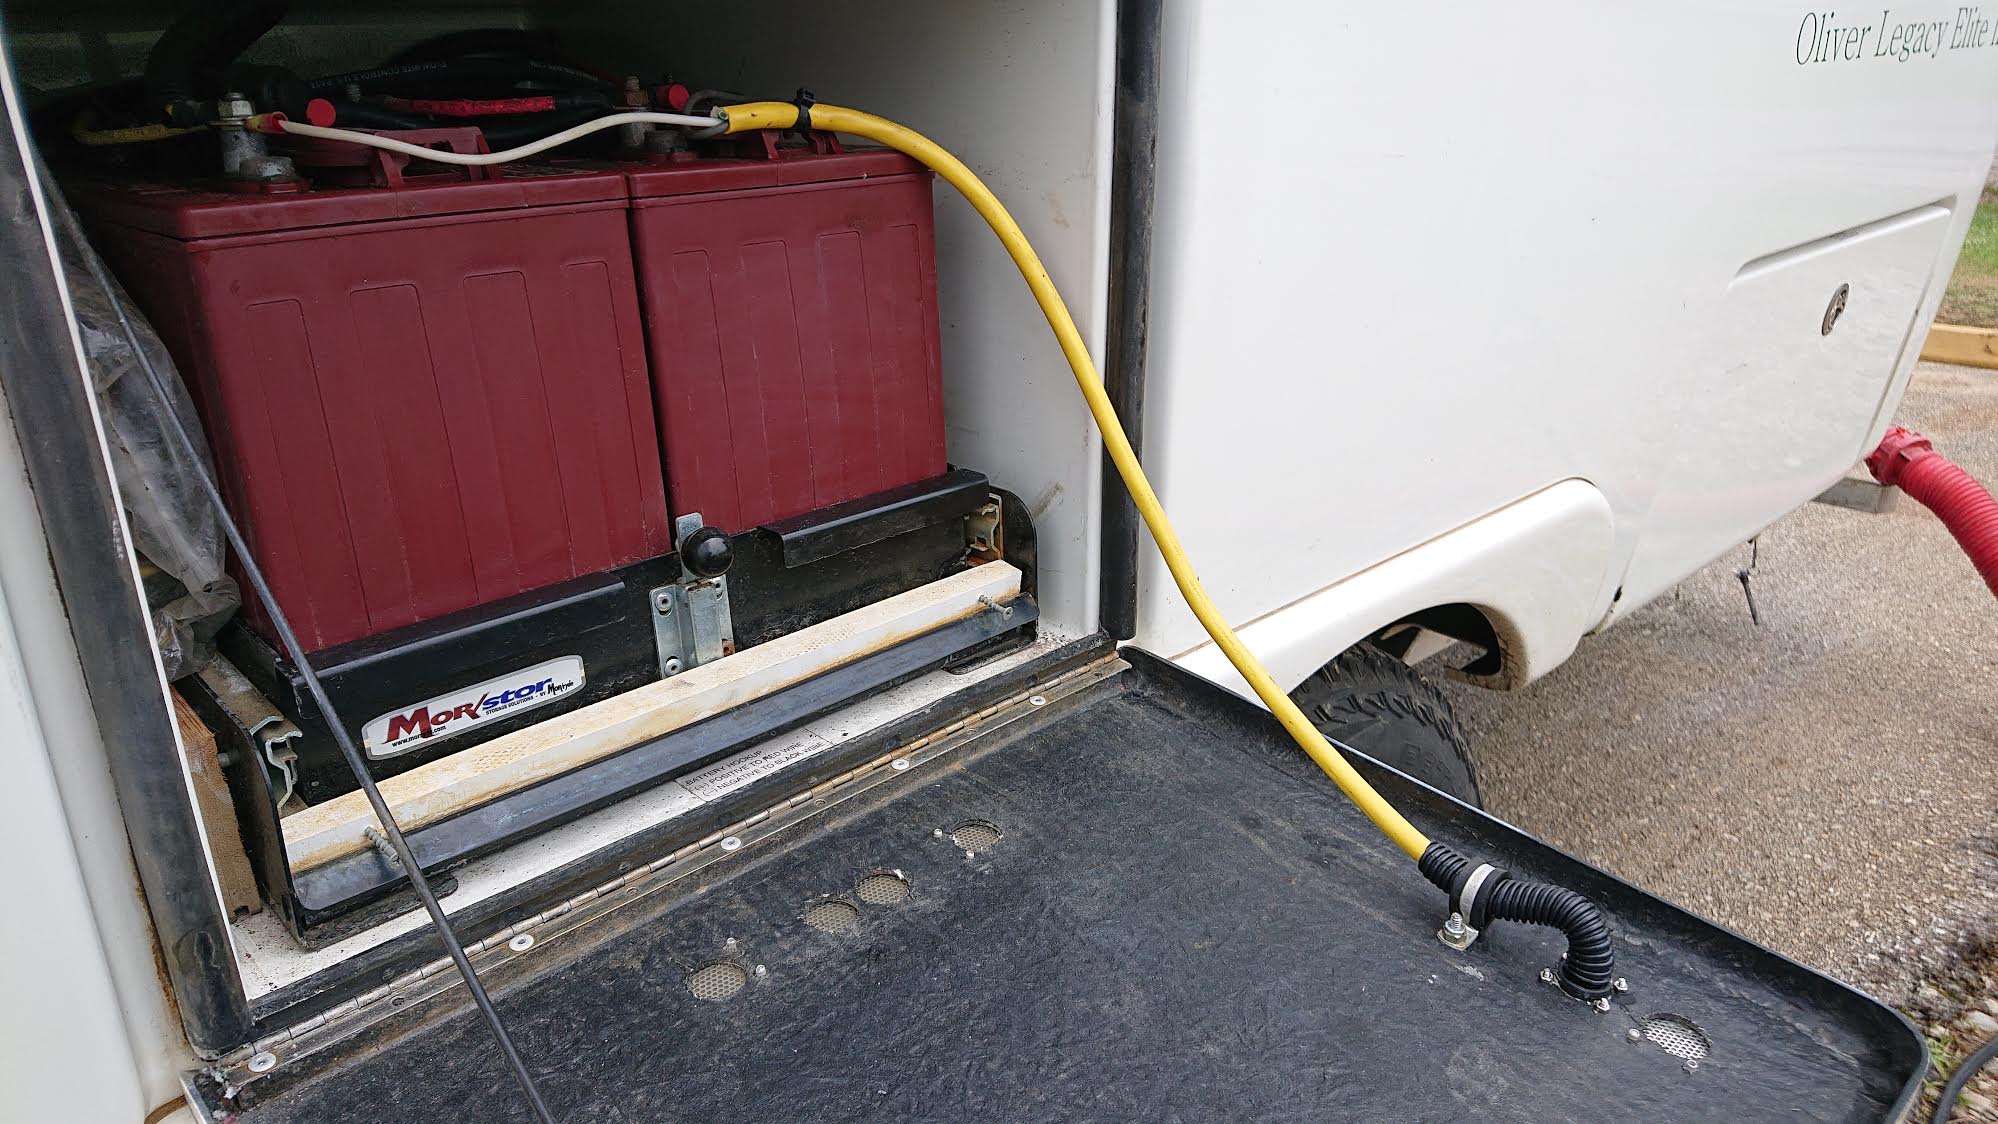
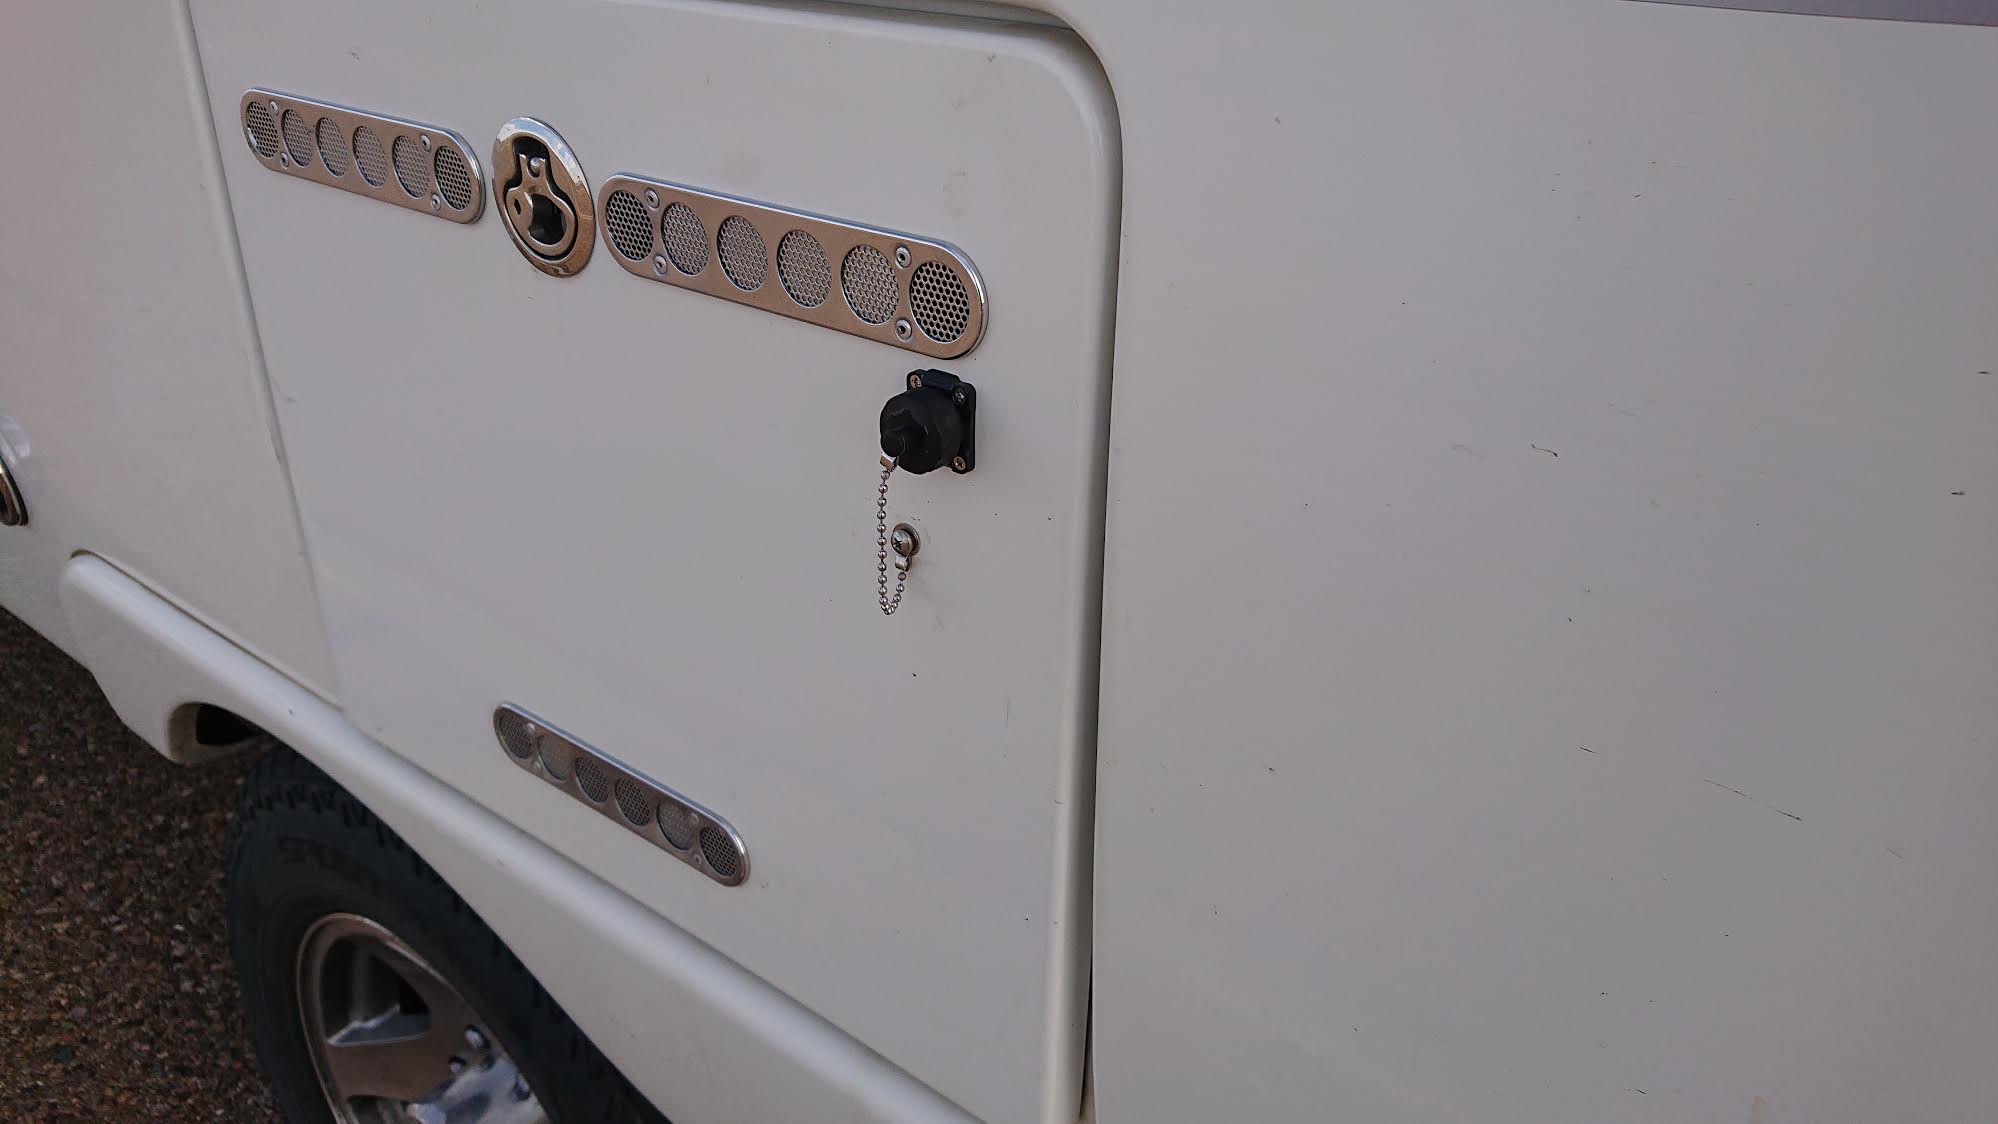
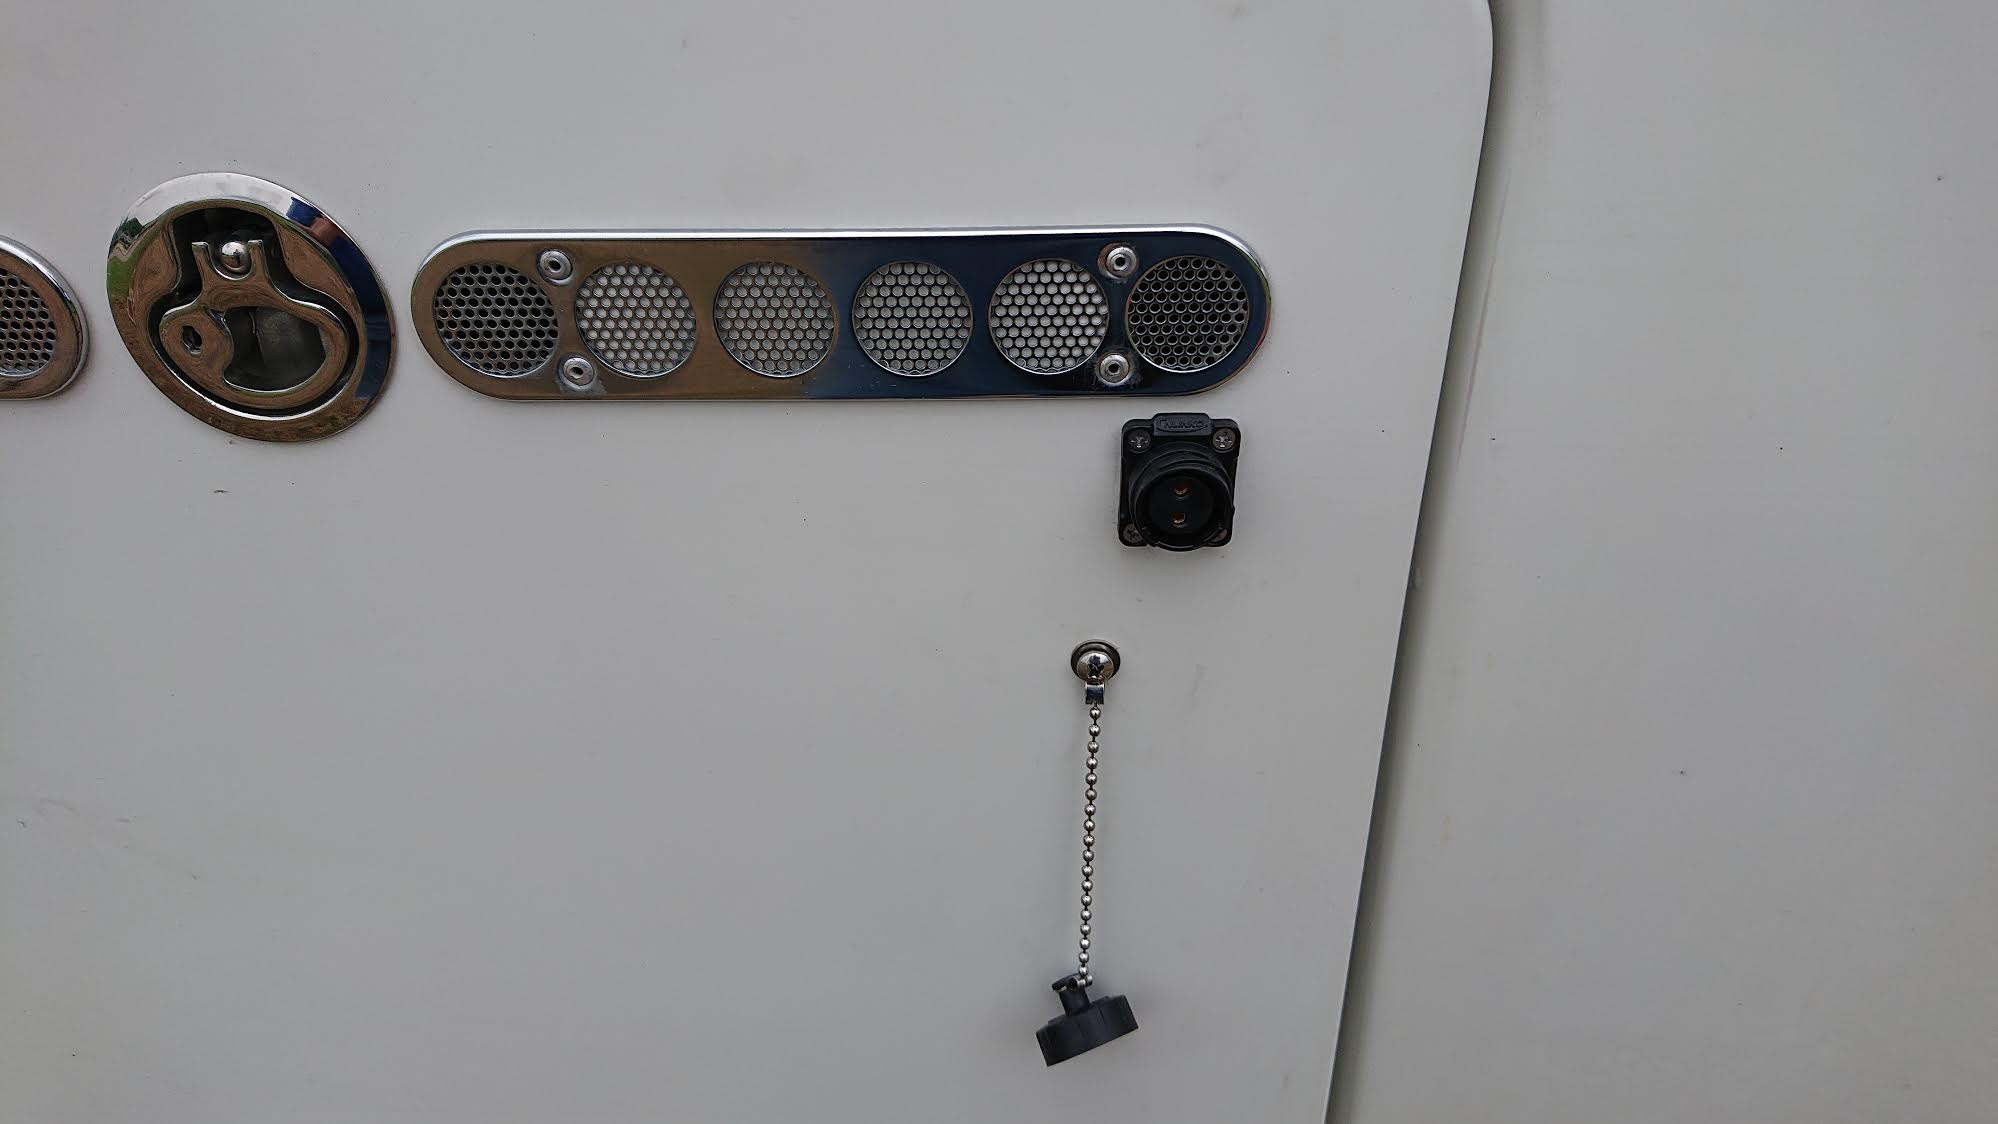
Here is the exterior plug installation for the suitcase solar. A very nice little 12 volt/20 amp plug, with cover and twist-lock plug that will not fall out or allow the connections to get wet in the rain. https://www.amazon.com/CNLINKO-Industrial-Connector-Receptacles-Waterproof/dp/B0795464LP/ref=pd_ybh_a_26?_encoding=UTF8&psc=1&refRID=9EBPJGFS22DYCSBDBBGV I cut a #12 exterior cord to 20' to use for the solar cord. This allows the collectors to be set facing wherever the sun is. The interior cord is connected directly to the batteries. This is a very simple setup that only requires a 7/8" hole. The cord folds away as the door closes.
-
Exterior solar plug pictures: This is a very nice and compact 20 Amp exterior plug. It has solder connections to gold (I think) terminals. Comes with screws, gasket and chain. I posted a link to it in an earlier post. The male end fits a #12 exterior extension cord and has a strain relief nut. The plug has a twist-lock design and will not fall out. It also keeps the connection dry while plugged in. https://www.amazon.com/CNLINKO-Industrial-Connector-Receptacles-Waterproof/dp/B0795464LP/ref=pd_ybh_a_26?_encoding=UTF8&psc=1&refRID=9EBPJGFS22DYCSBDBBGV