-
Posts
2,086 -
Joined
-
Last visited
-
Days Won
119
Everything posted by jd1923
-
Lots of good ideas here, thank you. Though I'm stubborn. Already made my antenna purchase. Winegard is expensive, but a quality product Made in the USA, which is important to me. The less of the money I earn going to the CCP, the better. Just spent $125 on a USA made Klien 25" cable cutter and could have bought the China cr@p for $30. Other criteria, we don't do extra temporary camping setups. We're not interested in portable solar panels (need a third panel later? will mount it on the roof or TV). We don't use the blue filters or external pressure gauges/restrictors for the water connection, and no portable EMS at the RV park pedestal (just installed the internal PI EMS). I ended up with a portable water filter setup but give me another year or so and I will figure out a slick way integrate it to the 3 Oliver water inlets. If the Oliver had a rear ladder, I would have a pole mount antenna (permanently installed). There's enough setup in camping regardless but keeping it to a minimum is the goal!
-
GJ, ya know they make truck mount vises! Amazon.com: Forward 1705A 6-Inch Hitch Vise Truck Bench Vise Mount Trailer Fits 2" Hitch Receiver : Automotive
-
Wow, very nice. Get that beast pointing in the right direction and it can likely receive stations 100 miles away!
-
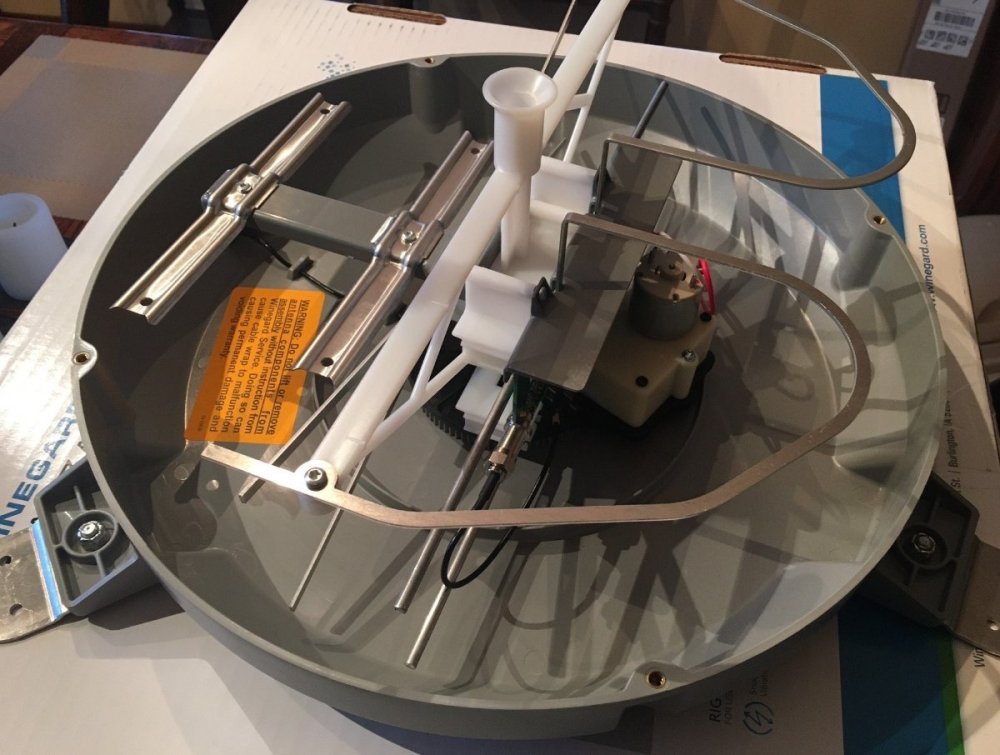
Thanks @Jason Foster and SeaDawg for your inputs, and you have me rethinking this. I had the shroud off last week, and it looked more like fiberglass vs. thin plastic, it's a good 0.20" thick, no cracks, bolt holes all good, so I was thinking with some reinforcement it could work. But likely the wind force could quickly make it show its age! Thanks again. Antennas work best when they are installed with a 360-degree unobstructed view. The install shown above on Jason's Oliver will work fine anywhere in East Texas (not West Texas), along the coasts, near the cities, the major TV markets, but you can see how about 150 degrees out of 360 is being blocked by the Truma A/C sitting well above it in height. This install will have reception issues in the distant areas of the West, when you park your trailer in the wrong direction. For example, for us to get TV reception at home, here in the Prescott quad-cities area (total pop. 150K), the broadcast companies send microwave signals to Mingus Mountain (7500 FT elevation north of Prescott, where Jerome AZ sits), and then they repeat the broadcast from there, 30 miles from us. You must have an antenna facing N-NE from here to receive TV, a few degrees off and you will lose half the channels. The antenna I have is designed to sit on a flat horizontal section of an RV roof with 2 FT clearance around it (not happenin' on an Oliver). This smart antenna senses the direction for the strongest signals and rotates automatically (see pic). Here is a great platform @Wildbrew fabricated, an amazing installation, that would work great for this application. But I did not want to invest this kind of work for a TV antenna (but certainly would for a Pepwave cell router install!). I'm now thinking of a sheet metal shelf that would sit closely just above the shroud, bracketed to the A/C steel frame vs. mounting directly to the shroud. At this time, I'd rather drill and mount several bolts into the A/C frame than into the fiberglass. (Note the white plastic cover is removed from the antenna in this picture.)
-
Nothing crazy here at all. For my part, I was only questioning two 30A chargers, but you've done your research and know what you want. Please post an upgrade thread along your way so we can learn from it. First time (on this forum) I've read re an alternator upgrade to match, and I commend you for doing this! Even the mighty F250 Super Duty diesel needs an alternator upgrade for two chargers (if not one). Me too, on the not affording to pay a shop to do this work, though some owners lack the knowledge or physical ability (to crawl under trucks!). I did a 420W Solar, 1800W inverter, 315AH AGM batteries, Bogart Engineering solar charger and battery monitor with Wi-Fi setup for $2,360 total in parts, on a Class-C Bigfoot. Labor at an RV shop would have been how much? Up to $10K? Who knows. We're only part of this Oliver family for finding an older hull for sale used, in fair condition at a good price. And so far, I've added $5,000 in parts in 7 months, plus 100-200 hours in "sweat equity!"
-
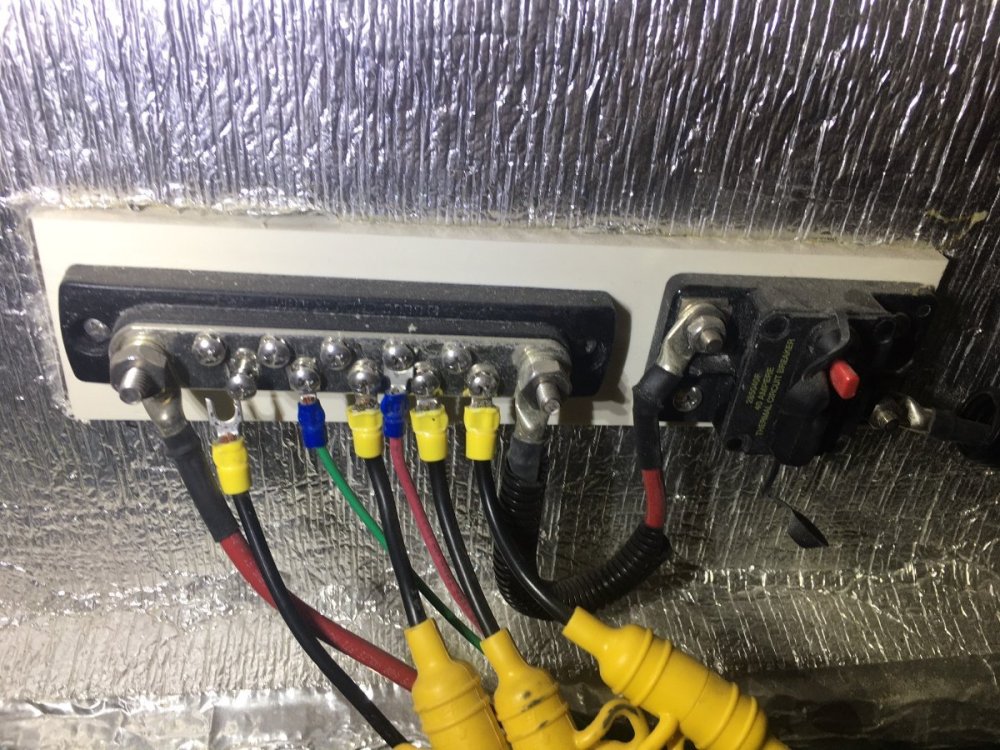
Thanks Bill, for asking! OTT disconnects the 12AWG Black wire when they install Lithium. They should ignore that Black wire in all the Olivers they build. Why run this wire to the positive bus at all? It has no viable purpose but could cause harm. This low amperage wire could heat up, melt insulation and perhaps create a fire. Given you drive long between overnights, the DC-to-DC charger at 4-6 hours can near fully charge your batteries (say 98%), and this is the reason. I was getting shocked when rewiring a new 7-blade connector on ours, and as soon as I figured out why, after checked the wiring diagram, I went under the streetside bed, disconnected it, taped the open end and dropped it down below, to never be used again! Regardless of the batteries, lead-acid, AGM, or Lithium this connection has no viable purpose. Anybody reading here, who did not opt for Lithium, should disconnect this black wire. I posted this pic in another thread, but it's necessary here again. Notice the black wire hanging. At best a 12AWG wire could deliver a trickle charge to ANY sizeable RV "house battery" bank. Say you have 450AH of lead-acid, as we do, and you drained the batteries down to 50% overnight. Then get up in the morning and hit the highway. Your LARGE AH STARVED BATTERIES would be asking for way more than that skinny little 12AWG wire can handle (hence the heat/resistance). I'm not a safety kind-of-guy, far from it, as I'd rather do this little task, than say put new batteries in a smoke detector!!! Proper design and prevention vs. detection, is my preference. I have little interest in a DC-to-DC, because our camping out here is mainly casual-local. There are many of you, from what I've read, that put on 300 miles +/- a day. I prefer when we go away for a 3-4 week trip, to drive 2-3 hours, every 2-3 days or more, drive less and stay more. For those that drive 300 miles in a day, the DC-to-DC charger has real value. In fact, if this is your style, you can skip the solar package and just charge daily while driving! Two DC chargers? Likely unnecessary. What size AWG cables? Consult an electrical engineer, and keep in mind the design must be right, since you are then asking your TV alternator to work a HD electrical task it was NOT designed for. So many of us want what's best for the Oliver and our travels but do keep the TV in mind! Thinking of installing one of these, talk to an automotive mechanic. See what you can do to ensure your TV alternator can handle the load. An alternator upgrade may make sense, may even be necessary, and keep your original alternator as a back-up (if ever you should need it, disconnect your DC-to-DC charger until service). Most trucks have a HD alternator choice producing about 10% higher amperage throughput. The Dodge Ram 2500 Cummins diesels (and other HD 2500s) were designed with this in mind (plus 2 starter batteries) and have a HD alternator OEM. Generally, this is not so with SUVs and the 1500 class truck. You do not want to charge house batteries while starving the ignition system and ECU of your TV! Your truck could stall while driving. The upside is you could watch television, cook dinner, sleep overnight, while you wait for your TV to be towed in the next morning for repair, resulting in installing a new alternator and perhaps a new starter battery.
-
YES, we're thinkin' along the same lines! Since ours is a slider, the view is not as nice as yours. I removed our half screen for a better view, and it will sit in the back of the Oliver trunk, just in case my wife asks one day to open that window!
-
I like when traveling watching a little local news to see what's going in in town. We have the Dish Network Winegard on ours and we're had Dish. It's been painful paying over $120/mo for Dish, though you only have to pay for one month vs. the DirecTV 2-year contract, but still 200 channels with nothing to watch, when most of the time I just want a local station. Wanting feedback from you experienced Oliver Owners (am I opening up the flood gates?) 🤣 I'm not ready to remove the Winegard, which takes so much room up front. Might want more solar later to better utilize that footprint. And the way Oliver runs their coax, multiple connectors along the way, OK for satellite perhaps, but that cable would add too much resistance to the signal. I want a fixed install, no pole mounts, and with the Oliver you can't mount the kind that requires direction control on the interior ceiling. So, we need an omnidirectional antenna. There is room behind the A/C which is where you want to be, so that a short coax will get you to the attic. I really do not want to build some large rear platform and the antenna should be the highest point in relation to other rooftop accessories. I just got a great open box deal on one of these: Amazon.com: Winegard Company RZ-8500 Rayzar Automatic Hd Antenna , White : Everything Else This smart unit calculates and sets the direction automatically for the strongest signal and comes in at only 4 LBS. Where I want your feedback, is I'm thinking of mounting it on top of the A/C. We have the old loud clunker A/C which we will likely replace in a few years, so I do not mind drilling three 1/4 holes through the A/C cover to mount the antenna, large washers on the underside. It fits nicely there adding 6 1/2" in height and in this location the antenna would have no rooftop obstructions. Not thinking of running the A/C while watching TV, as this would certainly cause electromagnetic interference. We often watch TV at night and sometimes in the morning, not in the heat of the day. The connection only requires one coax cable. I would cut off the cable terminal, remount it when inside, drill a 1/4" hole and dab of Dicor, or I may try to feed it through the rear camera mount (that we haven't used anyway). Would the extra height cause an issue? Any other concerns or considerations? Please let me know. Thanks 🙂
-
Thanks Bill, that is a scenario I had not thought of. Still, before I'm climbing out that window, I'd be removing the door lock which is simple enough from inside. There is nothing urgent in this scenario, so take your time. It's a good idea to have a small "Oliver toolbox." I have one on the floor of the closet, besides the one in the truck with the big tools. And someone would have to climb back in that window to fix the door lock!
-
I just looked at the Brightway website and it's not easy to navigate. I would call their customer service and ask them to send you the spec sheet for your specific battery model. All battery manufacturers have specs sheets with suggested charger configuration. On a side note, why two (2) DC-to-DC chargers? Wanting a higher charge rate? Make sure your TV alternator can handle the load of two chargers, let alone one. That's a lot of money @taylor.coyote! I see parts & labor come to $2000, so $4000 - Yikes! The parts add up to less than $600 total (100 FT 2 AWG cable, one charger, battery terminals (lugs) and misc.). Add another $260 if you really need two chargers. The cable is $215 plus tax: TEMCo INDUSTRIAL WC0180-50' (25' Blk, 25' Red) 2 Gauge AWG Welding Lead & Car Battery Cable Copper Wire Black + RED | Made in USA - Amazon.com This link comes up as 25 FT of red and black each, but you need at least 40 FT each, I'd buy 50 FT red, 50 FT black 2AWG to be safe. With one charger perhaps 4AWG is good, but I would need to see more specs to make a proper cable gauge decision. When purchasing, make sure you get pure copper welding lead. TEMCo is good and if you find cheaper, it is likely not the right cable. You allow the RV Co to make purchasing decisions and you will get the cheapest product they can source. The chargers are $240 plus tax: Amazon.com: Victron Energy Orion-Tr Smart 12/12-Volt 30 amp 360-Watt DC-DC Charger Isolated (Bluetooth) : Automotive "RV shops" are supposed to be experts, but not always true. The wait is often long and they always overcharge. I would figure out your design (good examples to follow on this forum), purchase the components yourself. Then given you will not do the labor yourself, all you really need is a local mechanic. Lots of local "mobile mechanics" that would love to come on your property for this job at a reasonable price! Priced at $4000, with $1000 in parts and say a shop rate of $110/hour, leaves 27 hours in labor. This job is nowhere near 27 hours and keep in mind, they have profit in the parts and labor. If RV shop had standard flat-rate hours as in the automotive industry, this would be somewhere between 8-12 hours, less than half of the quoted $$$. @taylor.coyote, it's good the "cost slowed me down." I'd say, leave that RV shop and drive away as fast as you can! They're wanting $2000 off the top and another $2000 in parts and labor (with considerable profit already in parts & labor).
-
I know exactly what we are doing too, we're going to use the main door! 🤣 I cannot fathom a scenario where I would use that window. If there was a kitchen fire, we'd certainly get past the fire quickly and use the door. Could another vehicle hit the Oliver, blocking the door while we are inside? Could the Oliver just roll over right, while we are in it? Maybe an earthquake or Sunami would have to be involved? It is a legal requirement for a second exit, but I believe I would have more injuries just getting out of that d@mn window than from anything else. It's not something that keeps us up at night. @Jason Foster if it was me, given the need you expressed, I would just build my own screen, even if it caused a few more seconds to remove it in an emergency.
-
Yeah, I get it @Jason Foster, since we lived East of the great Mississippi most of our lives. Mosquitoes in the upper Midwest are so large they have "stewardess on board" and the mosquitoes in Texas are nasty small, can hardly see them, but the bite is even worse! Down in FL where @SeaDawg and others here live, the flying bugs are as large as the hundreds of hummingbirds we have out here! Life and career moved us from IL, to VA, AZ, TX, S FL, and back again in AZ for the last 6 years, and we're not moving anymore. Hoping to visit Texas again in 2025 and meet many of you along the way in the "great state of Texas!" I'd say enter a service ticket, though I do not have much experience with this, since we bought an older used Oliver. Maybe OTT owes you a screen. Next, like you asked and I wrote before... Does anybody have a picture of a rear awning style window with a screen? We would all love to see it. Thank you
-
Our 2016 OE2 has a screen, and I took it out and put in storage (we really don't have flying bugs out here 11 months of the year, only in August when monsoon rains are heavy). Also, 3 screened windows we feel is often enough for cross-ventilation. I would LOVE to have this clear view window instead! Wanna trade? 🤣 Ours is a slider and likely no past owners used it because it is a BEAR to open! I'm thinking how do you add a screen to a full-length safety exit window? You have to be able to reach the handles. Does anybody have this style window with a screen? If so, please post a picture.
-
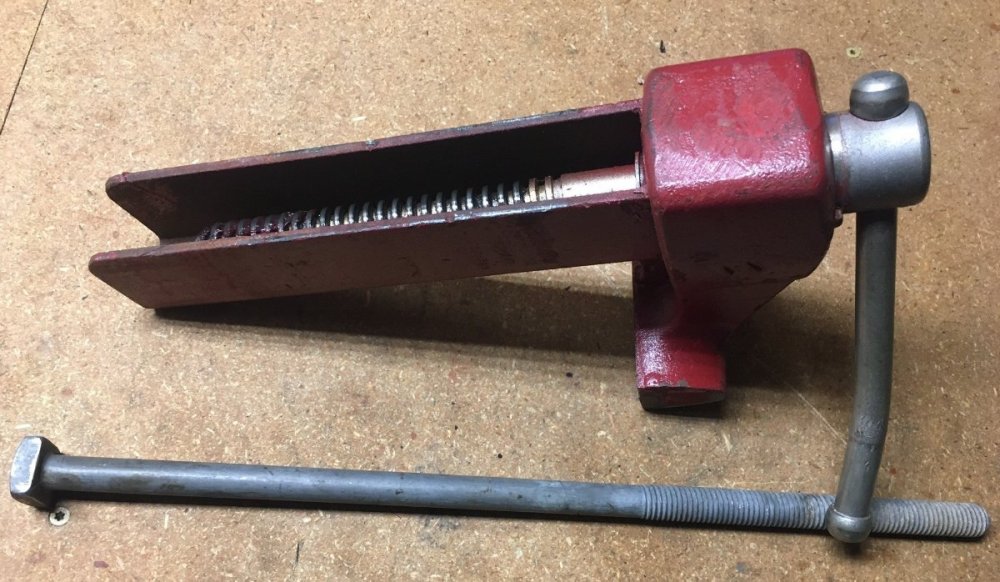
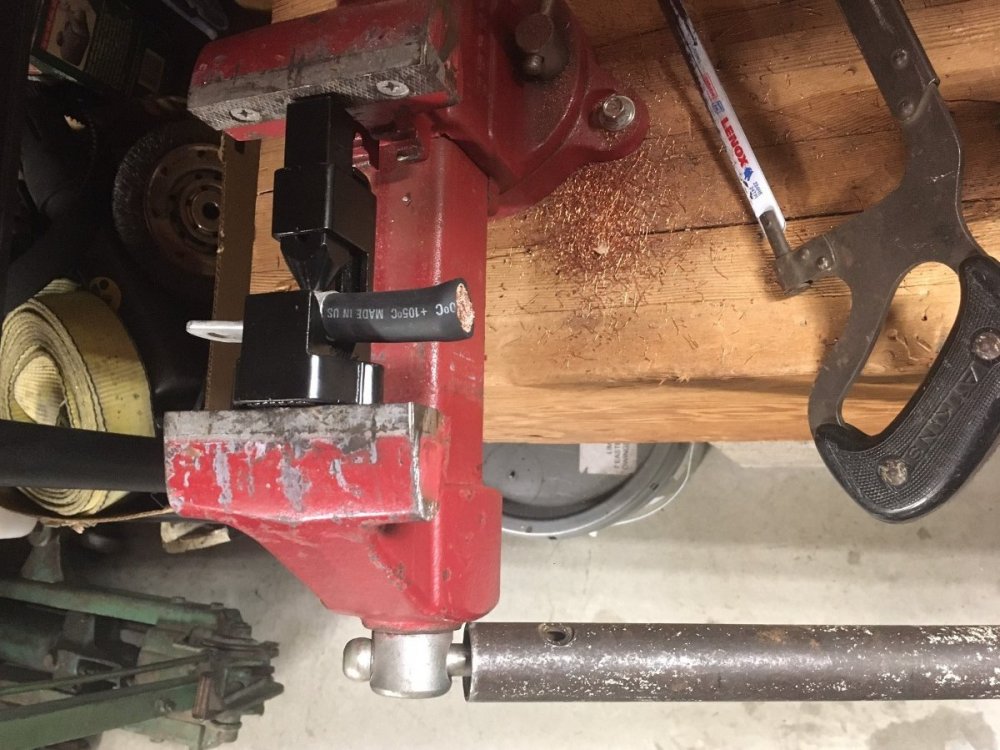
Thought I would take my own advice and lube the vise. I found this crazy long bolt on the edge of our property a few years ago, must be a 15" long, likely from the telephone co. If this is hard enough it will become my new vise crank handle. I love when I can repurpose parts saved along the way! 🙂 See what a "cheater bar" on a 4/0 lug can do! Thanks @Geronimo John! I'd have that new cable on the Oliver today, if the heat shrink tubing was here and it wasn't snowing today! Oh but, it will be sunny and nice soon again in the high country of Arizona.
-
Love your repurposed radius tool!
-
🤣 Agreed. I must confess that I bent the handle on my vice just making these two crimps! Made a dozen 2/0 crimps and many 4AWG and the handle was fine. Like I wrote earlier, crimping a 4/0 lug is a real tug! We have a couple of 4" vises here, that I inherited. I'm always looking on Craigs for a larger HD vise. Another recommendation, if using a vise run it all the way out, put a little wheel bearing grease on the main bolt threads, near the receiving end. Then run it in all the way, out again, and wipe off the excess. This will greatly reduce friction while tightening. I am rough on my tools, as for me it's the job that counts. Been collecting tools since the 70s and have many tools, some dating as far back as the 30s!
-
Thanks @Geronimo John. Yes, crimping one end before cutting the other will help to keep all the copper strands in line. The hydraulic crimper is certainly a nice tool. Too bad I did not think to purchase one a few years back when I bought this manual version: TEMCo Hammer Lug Crimper Tool - Crimps 8 AWG to 4/0 Battery & Welding Cables (Workbench-Mountable) - Battery Terminal Crimper - Amazon.com I would say if you're truly in the business of making battery cables, neither of these are satisfactory. You'd need to spend more and get one with individually sized dies for each gauge. Note the one I have is only $17 and the TEMCo TH1818 is $90. The "hammer style" is rated up to the 4/0 size, and by using a vise the crimps came out really nice, as you can see. They both have the same style crimping die, producing the same shaped crimp. The hydraulic version has one great feature, in that it can be used to crimp new lugs on existing cables in truck or trailer. This ability makes the cost it worth it, as I've only being able to make cables on my workbench.
-
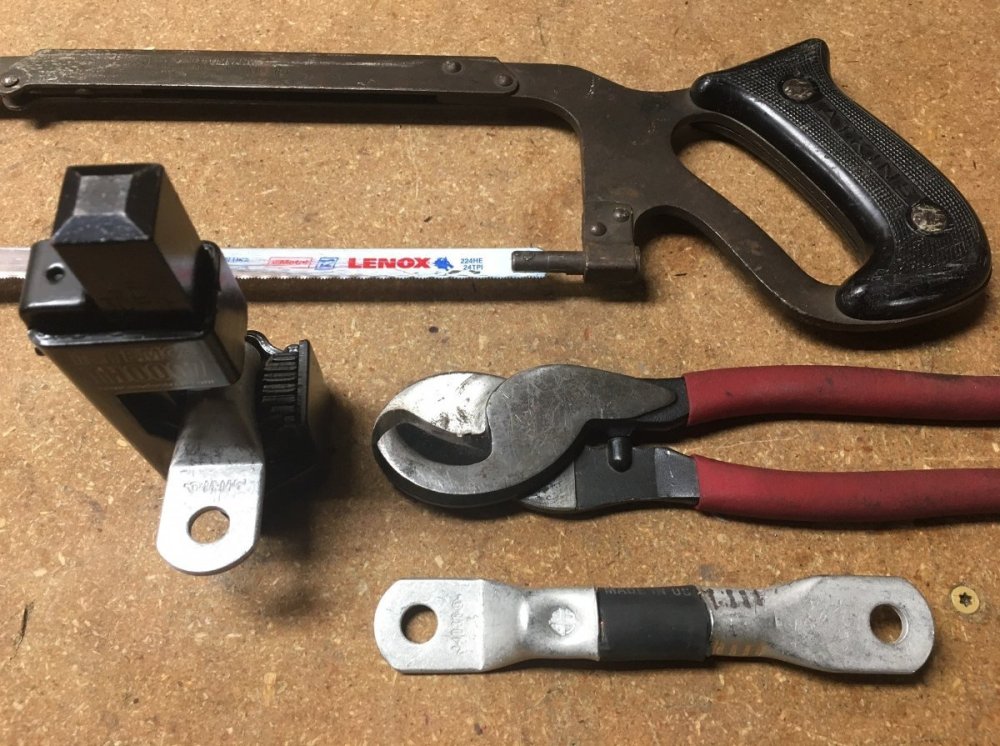
Using a hand saw to cut the cable worked for building one, got me through the day. Just put this one on my wishlist! Klein Tools 63041 Standard Cable Cutter, 25-Inch - Wire Cutters - Amazon.com More pics --
-
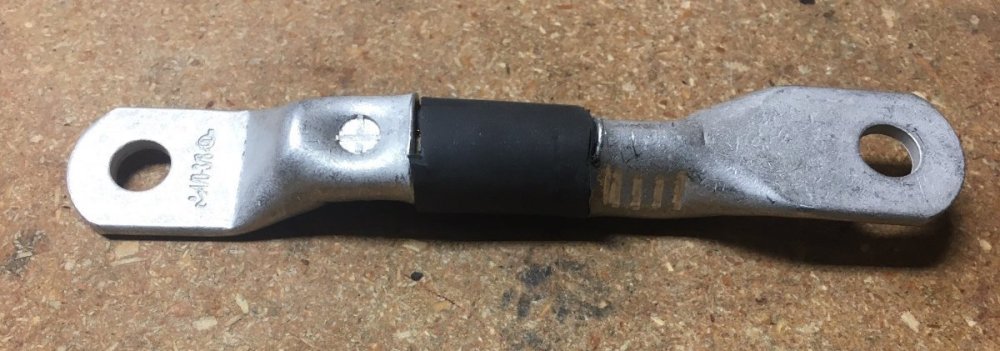
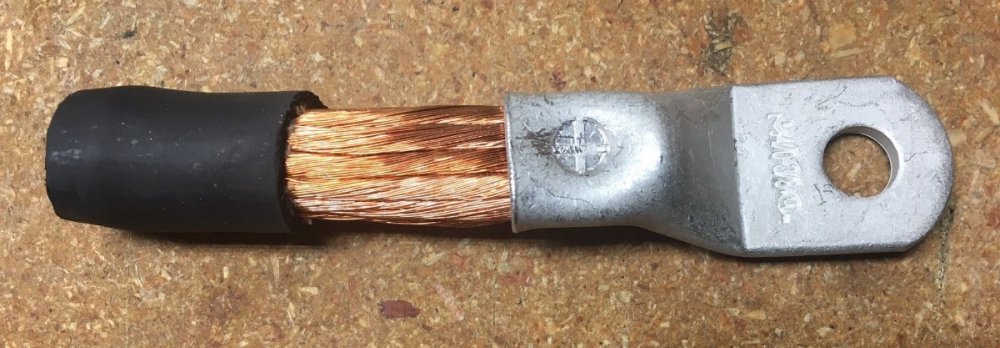
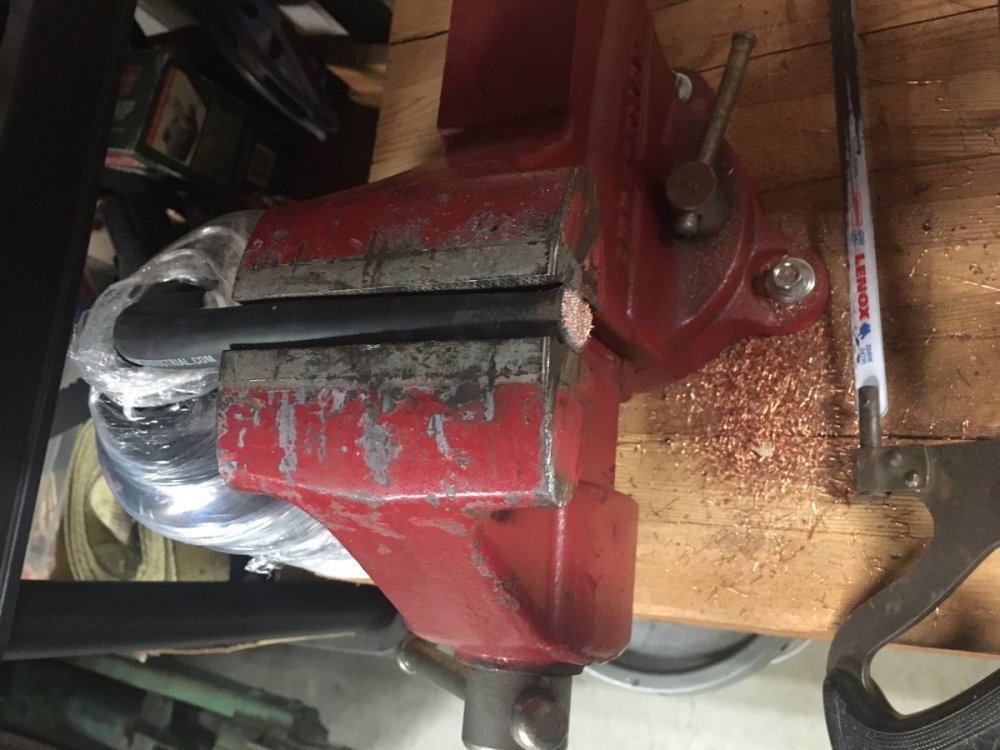
Recently purchased a Victron SmartShunt and I did not want to do a fancy install, perhaps later once upon a Lithium upgrade, but for now the shunt will be physically close as possible to the negative battery terminal. They don't sell shorty 4/0 AWG cables, as far as I can tell, and if you need a bunch of different sized cables, you can cut lengths to your needs and save money buying bulk cable and battery terminals (lugs). I installed the shunt last week to check it out, grounding it with two shorty 4AWG cables in parallel, because I had them on hand. Twas fine for the testing, but the cross-sectional area of the two 4AWG cables s is about 60% of one 4/0. Amperage capacity is directly related to the quality of the conductor (less resistance) and its cross-sectional area (more capacity). Cutting 4/0 cable is not easy. When I install an 1800W inverter 3 years ago, I used 2/0 and was able to cut that with the cutters shown. This tool is a bit dull and beat up because of that, and no way it was going through the 4/0. I put the cable on the vise and used the metal hand saw. Saw just touching the vise so that the cable stays put. A new fine steel blade would be best, fine since this is only copper. Today I crimped the shortest cable that I've ever made, only 5" long, hole to hole. The other thing is I customized it by turning the lug on one side 180 to the other side. This allows for a 1" height gain necessary to mount on the taller shunt (picture mounted later). I used Selterm brand tinned copper lugs, that are so big that the insulated wire between the lugs is only 1 1/4" long. It is extremely difficult to get all the copper strands into the lug, due to the sawed edges. Hammer the ends as round as you can before you strip the insulation, and then just strip a little at a time. I purchased TEMCo pure copper 4/0 welding lead "Made in the USA." The crimper tool is their brand too, that I had from last time. Some guys hammer this kind on crimper. But I prefer again using the vise. This is a tug! You'll need a strong extension bar to get the full crimp. The TEMCo HD crimp tool works great btw. I ordered heat shrink tubing which came in the wrong size, so later on that. Cool thing is 3" of heat shrink will go lug to lug on a cable this short, will show that later.
-

XANTREX FREEDOM XC PRO 3000 INVERTER/CHARGER
jd1923 replied to HDRider's topic in Mechanical & Technical Tips
By having the Xantrex OFF, you turned the inverter OFF, and with shore power disconnected you would have no 110V AC circuits. This does not turn off the converter/charger portion of the Xantrex. The converter was supplying +12VDC to the DC panel. The fan was running because this action creates a lot of heat, supplying 12VDC power with batteries disconnected. Similar to this scenario. Say you were off the grid for a couple of days and got your battery bank down to 50% for lead acid, or even lower with lithium. Then you arrive at a campsite and plug-in to shore power. The charger portion will work hard to recharge batteries from the newly incoming shore power and since your batteries are very low there is a lot of current supplied for charging, the fan will run on-n-off as it produces heat in the charging. I added positive and negative busbars to facilitate this. @Geronimo John added this statement; "If you have an Inverter/charger, that could provide an electrical path as well." True. I know when I installed my own solar/inverter setup in a previous RV this was certainly the case. The Bigfoot had its OEM PD9200 converter/charger and I added an inverter-only device. I installed heavy gauge battery cables, connecting the inverter to the battery bank independently. Investigating these issues would be so much easier if the Oliver pantry was not sitting above the battery bank hiding access to many of the cables. When I upgrade to Lithium in a year or two, I'll have to tear all that out, sort it out to simplify, and will then certainly gain a better understanding! -

XANTREX FREEDOM XC PRO 3000 INVERTER/CHARGER
jd1923 replied to HDRider's topic in Mechanical & Technical Tips
BTW, in the picture above, does anybody understand the term "REVERSE BATTERY FUSES?" What are they, where are they located? I have not had time to research this and have not previously read this terminology in other RV manuals. Perhaps this has something to do with the converter/charger? -

XANTREX FREEDOM XC PRO 3000 INVERTER/CHARGER
jd1923 replied to HDRider's topic in Mechanical & Technical Tips
Of course, when you are running AC appliances off the inverter, you want them OFF when not in use, since some pull very high amperage from the batteries. My inverter runs alone at -2.5A but turn the microwave on and it's at -127A! Two hours of microwave use would completely deplete my battery bank, but nobody does that! Our inverter is not capable to run the old OEM A/C unit, but if yours can, then yes running the A/C for 2 hours would use the majority of available AH in the battery bank. There are only a few AC appliances. You can see the list in the picture, the "AC BRANCH CIRCUITS" in our hull #113. The AC, HWH, fridge, 110V outlets, and converter/charger. Notice you do not see some others, like the microwave we have, our TV/Dish/Blu-ray/AV system. These must all sit on "110V Outlets - 15A" circuit (they really should have another 15A breaker for the Microwave that draws just over 10A itself). -

XANTREX FREEDOM XC PRO 3000 INVERTER/CHARGER
jd1923 replied to HDRider's topic in Mechanical & Technical Tips
This recommendation I Certainly agree with. When you have a remote installed, use it, makes no sense opening up basement access panel to physically push the main power button on the inverter. It's like at home, we all use the TV remote, instead of getting up to push the physical power button on the TV. -

XANTREX FREEDOM XC PRO 3000 INVERTER/CHARGER
jd1923 replied to HDRider's topic in Mechanical & Technical Tips
I'm sorry, but I tend to disagree with a lot of recommendations. I have been leaving inverters on, often around the clock, for 3-4 years now, ever since I've owned my first one. I could not RV without solar and an inverter. Lately, I left mine on overnight a few times, unintentionally. Watching news, playing music or something on TV while working on my Oliver projects. Each time, when I got back inside the next morning, my batteries were at 100% from the solar charger. I measured amperage draw on our Xantrex 2000 inverter at 2.5A (while not running AC appliances). Even without solar, it would take days to drain the batteries. We presently have lead-acid with usable 225AH. Given this battery configuration (and most of you with newer models have better), you can run 2.5A for 90 hours, close to 4 days. Of course, when know I'm not going to be in the Oliver for a while, then I look carefully to shut down all accessories. With the SmartShunt and the Victron app, I can now see the amps on my phone, and know for certain when I left something on. Better advice is always check your amperage draw when leaving! I have my inverter on 24x7, when camping or working on the Oliver. Let me give you a good reason to do so. When shore power gets interrupted, even for a few milliseconds, I'm still watching TV, staying connected, the modem and all other electronics are running, without missing a heartbeat. Inverters are designed to work in this way. I used to love testing this. Run your AC appliance, shore power and inverter on and pull the plug! Or trip the 30A main breaker, and it doesn't miss a heartbeat! If you feel safer fine, but you'll remember this, the next time you're waiting... while your systems reboot! Should Inverter Be On When Plugged Into Shore Power? Ultimate Answer (rvgoer.com) -
Compress the spring so that the straight portion touches the contact above. The rounded part of the spring will hold one end of the bulb and the other end of the bulb sits in the round opening in the bracket below, that wraps around the lens and connect to the other contact (terminal).


