jd1923
-
Posts
3,578 -
Joined
-
Last visited
-
Days Won
272
Everything posted by jd1923
-

HOW TO: VIP 3000 Electric Stabilizer Jack Service Part 2
jd1923 replied to dmtaylor2's topic in Mechanical & Technical Tips
Thanks Steve! Do you remove the two carriage bolts you see clearly in the picture or the two that go through the frame? (Only the heads of these bolts can be seen in the picture.)
-
HOW TO: VIP 3000 Electric Stabilizer Jack Service
jd1923 replied to John E Davies's topic in Mechanical & Technical Tips
I have VIP3000 instructions included in our 2016 OTT Manual and it is for the 3000 only not both models. A search for the word 'torque' bring zero results in this older version date April 2008. Confirmed, not such device in the unit I restored. Maybe in the 3500 model. The 'love' I gave ours, I will not touch again for another 5-10 years. Our VIP3000 lasted 9 years without any maintenance. It was apparent that the case had never been opened and only the original grease was there dried up given the years. The manufacturer suggests adding a useless dab of grease on TOP of the gears annually for legal reasons of course. I have not maintained the rear jacks and I'm not in a hurry to do so. They do so much less work in comparison to the front and they are not critical to travel like the hitch jack. Also, they sound good to my ear, unlike what the front sounded like prior to maintenance. Someday but would have to get rather bored with life to do so. Many worry about doing this annually as suggested by Barker and OTT but you can tell the difference between the dab of grease they suggest and a true rebuild that I've demonstrated. When the post assembly goes out, it must be replaced, or you could install a new complete unit or upgrade to the VIP3500. -
Agreed, this should be standard operating procedure. My wife does this by habit every time she asks me to turn the gas on. Then we switch fridge to LP and the hot water heater on LP (when boondocking). I've never had to turn the gas on slowly, did not realize there is an internal safety valve. Did you check the fuse in the 12V fuse panel?
-
Upgraded the 30 lb LP tanks to Aluminum with custom base
jd1923 replied to rideadeuce's topic in Ollie Modifications
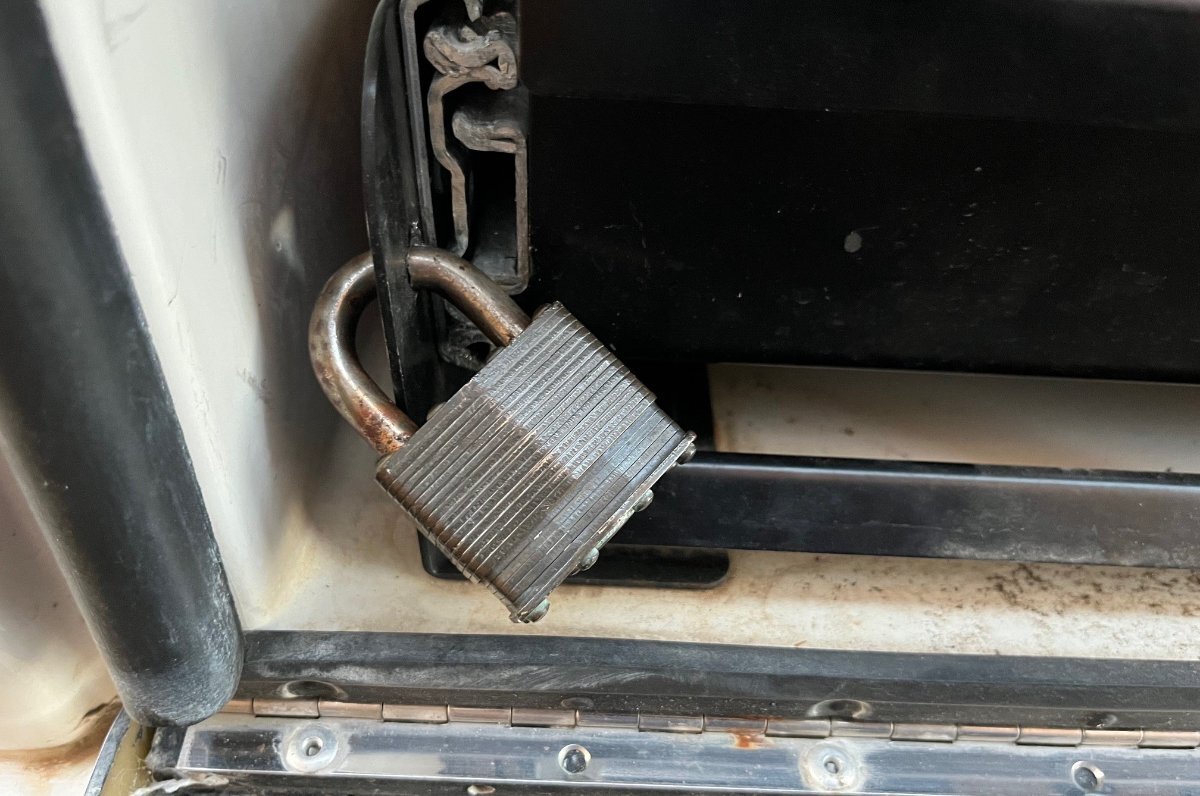
Sure, NP. I also put a 1" thick square of foam in front of the lock so it does not rattle on the fiberglass door. Best wishes John, to you and Wen!
-
HOW TO: VIP 3000 Electric Stabilizer Jack Service
jd1923 replied to John E Davies's topic in Mechanical & Technical Tips
OK, I get your question now. The "l-o-n-g" part internal to the "Post Assembly" is not a serviceable unit. Check the parts diagram in the manual. There must be some sealed drive assembly internal to the assembly. I just extended mine fully and cleaned the exterior down to the stainless steel. Some earlier in this thread suggested lube on the external post but I still maintain a year later to merely leave it dry. The Original grease on mine had hardened dry. I wanted it all cleaned out and wanted a better high-temp grease than that brown crud! Just because they don't say so, doesn't mean so! There is no clutch. I had the unit down to every individual part. The ratcheting sound is the drive gear being turned by the motor while the main gear hits the stop. You can see the slight damage to the drive gear in my pictures. This gear is part of the motor assembly, so replacement means new motor. Being careful, I have not heard that ratcheting sound ever since I rebuilt mine. I use 8" blocks on the rear and as soon as they are free I leave the post at that height, usually the height of the wheel centers. I keep my eye on the front and always leave it a few inches below the stop. -
I'm sorry Steve, maybe I'm wrong re Truma, but remember somebody writing a 15A number on this forum. It's hard to say with your setup plugged in. How many amps are being supplied by shore power and is it being supplemented by your Xantrex? Have you ever run it inverter/LiFePO4 only and measured amps from start-up to cool on a hot day? Just looked and Truma advertises 12A on high with an asterisk which states 95F external temp and 80F thermostat setting. This likely means 12A to maintain 80F with fan high. It's not like turning the air on one afternoon when it's 98F outside, 92F inside and you want to get it down to 76F. How many amps when full on compressor, high fan in harsh conditions? I did this test on our Dometic P2 and at started at 15A, then 16A and closer to 17A an hour later when the unit got hot from working hard. Truma is not a viable option for me and many owners who want to replace the Dometic Penguin II. They do not sell to the aftermarket, so given OEM installation, time and travel expenses puts total costs far out of reach for me and many others.
-
HOW TO: VIP 3000 Electric Stabilizer Jack Service
jd1923 replied to John E Davies's topic in Mechanical & Technical Tips
I want my electric jack! Not hand-cranking here. I never attended an Oliver orientation, but this person was improperly trained! The ratcheting sound is from over-extending. If you look at the pictures I supplied on page 2 you will see the scratches in the worm gear created from this practice. Since I rebuilt my front jack, I have made sure not to over-extend any of our 3 jacks. There was comment about grease not being needed under the gear, made by the Barker Rep, in the new thread on this subject. I strongly disagree and you can also see my reasoning in my rebuild post. -
HOW TO: VIP 3000 Electric Stabilizer Jack Service
jd1923 replied to John E Davies's topic in Mechanical & Technical Tips
First of all, the suggested OTT service demonstrated in the Oliver University video is a joke. Oliver owners that do not generally do their own service should not bother. Your hull is only 3 years old, so unless it is noisy when cranking up or down, I would leave it alone for now. The only way to damage these mechanisms is when the lift get over-extended in either direction causing the worm gear to slip scraping both gears. However these jacks are FULLY serviceable! Though likely I am the only Oliver Owner to ever work the full procedure. Read page 2 of this thread were I demonstrated the full service procedure in detail with pictures, -
@Galileo this may be the other A/C model you were looking for. I witnessed @Ronbrink’s installation in action. Very quiet, very efficient and runs at 10A on 120VAC compared to 16A or greater for Penguin and Truma, not sure re amperage on the Houghton. This model is on my list for Apr-May since we are traveling all of June this year. The efficiency of this unit will allow us to run A/C considerably longer on inverter!
-
Looking for details about Oliver’s new bathroom door design
jd1923 replied to Snackchaser's topic in Ollie Modifications
Nice, excellent design idea! -
Looking for details about Oliver’s new bathroom door design
jd1923 replied to Snackchaser's topic in Ollie Modifications
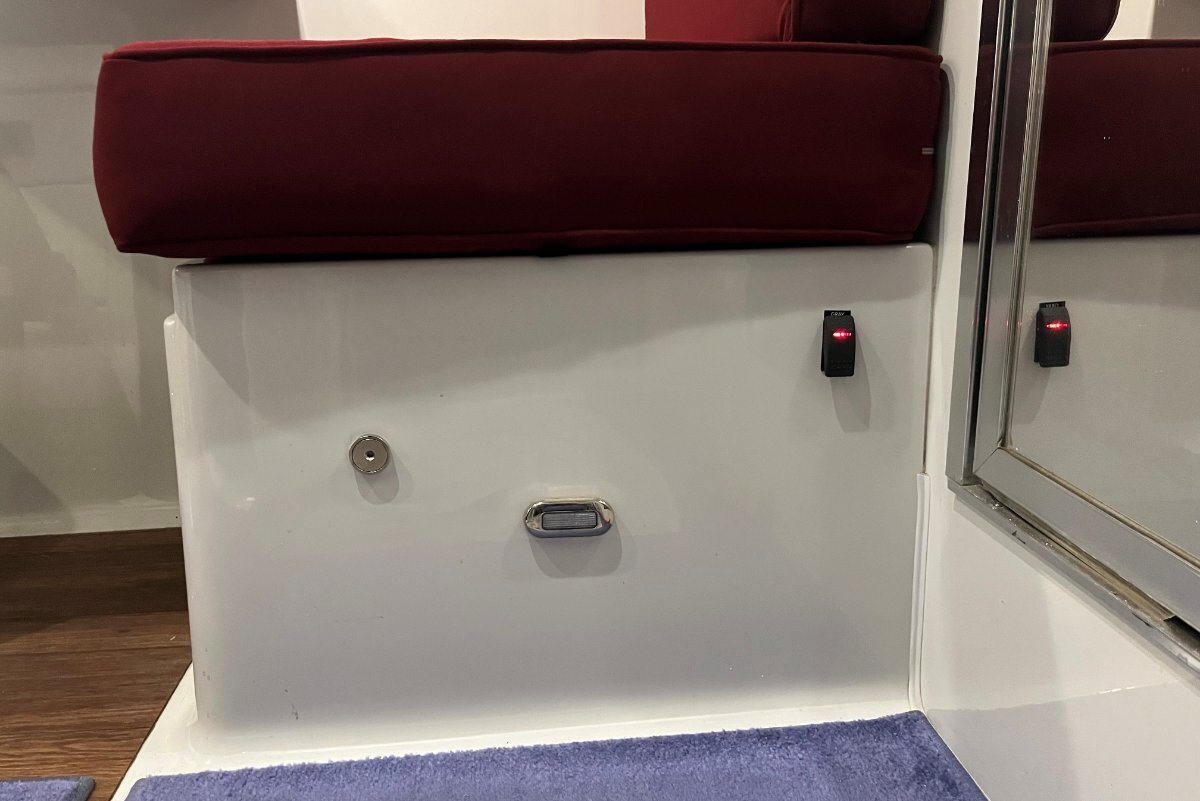
Any magnet will work since the door frame has steel in it. This is what I did (round magnet on left). I used 3M VHB to mount it. The magnet was too strong so I put some foam tape on the corner door frame to soften the pull.
-
Upgraded the 30 lb LP tanks to Aluminum with custom base
jd1923 replied to rideadeuce's topic in Ollie Modifications
We have a family saying that it's hard to get the Chicago out of the guy! Locked-n-loaded, an old baseball bat by the door... You too Val @Galileo! Being born and raised in a crime-ridden city like Chicago it's hard to feel safe through life and this feeling can get much worse with additional worry. Then we moved to better neighborhoods and couldn't help locking, double-locking, checking again to see if it's locked! It can drive you crazy, for sure. City life can cause PSTD. Here in Prescott and before in good VA and TX neighborhoods we've tried to not be so worried all the time. I leave my garage unlocked 24x7 when we're home, just to see if I can and live with it. It has a window half the size of the door and no deadbolt! If we still lived in Chicago I would have replaced it 20 years ago with a solid steel door and double-keyed deadbolt. On purpose, I often leave our cars and trucks, even the Oliver unlocked in the driveway as a kind of therapy. I put a lock on the LP tank spin nut. I locked the battery tray after our LiFePO4 upgrade since it was the single most expensive addition we've made. But the spare, OMG! 🤣I promise you, it has little to NO STREET VALUE! The other items mentioned, the crackhead thief can get quick cash on the street. Not an Oliver spare, nobody wants one except you. Heck, if I every wanted a bike rack (not me, unless it's a dirt bike), I would remove the spare and stick it in an outbuilding. But that's just me. -
Andersen WD Hitch Periodic Maintenance?
jd1923 replied to Galileo's topic in Mechanical & Technical Tips
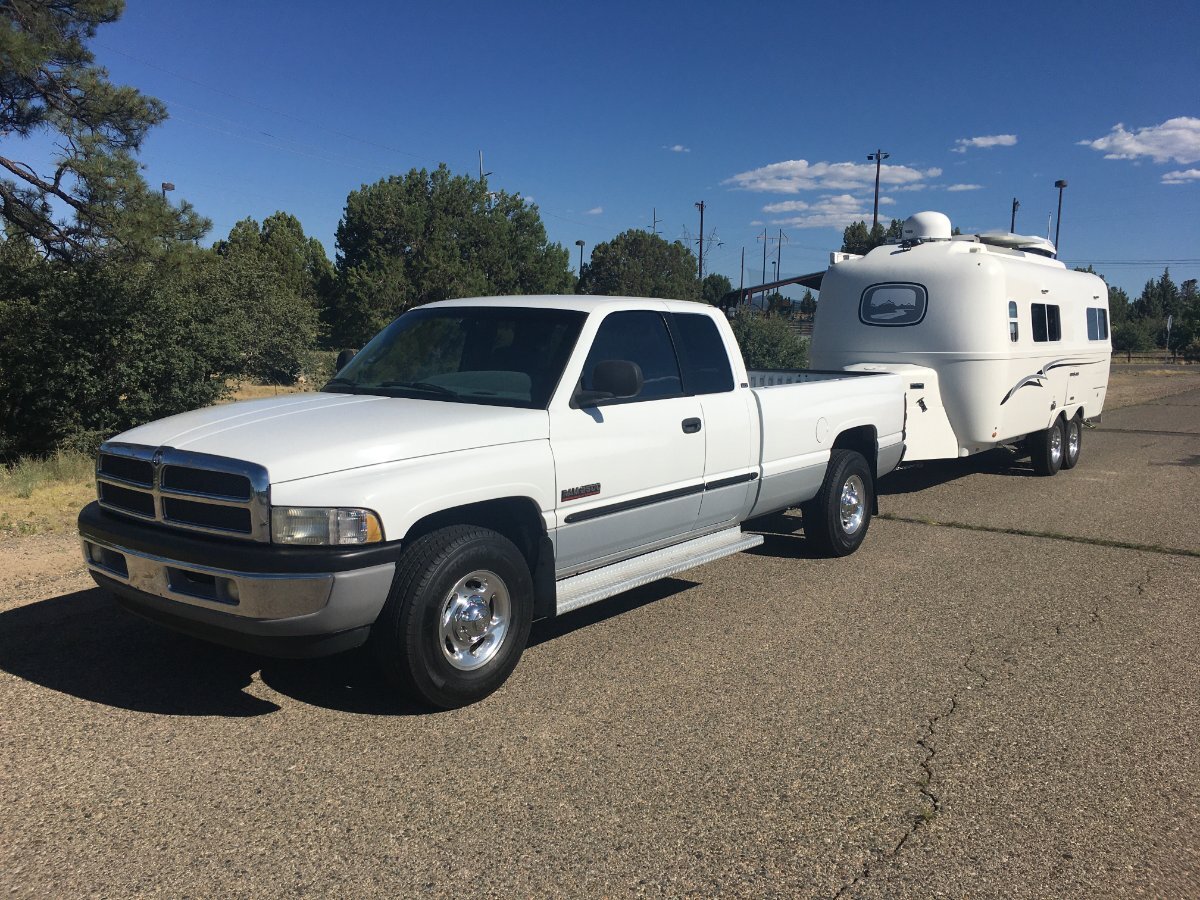
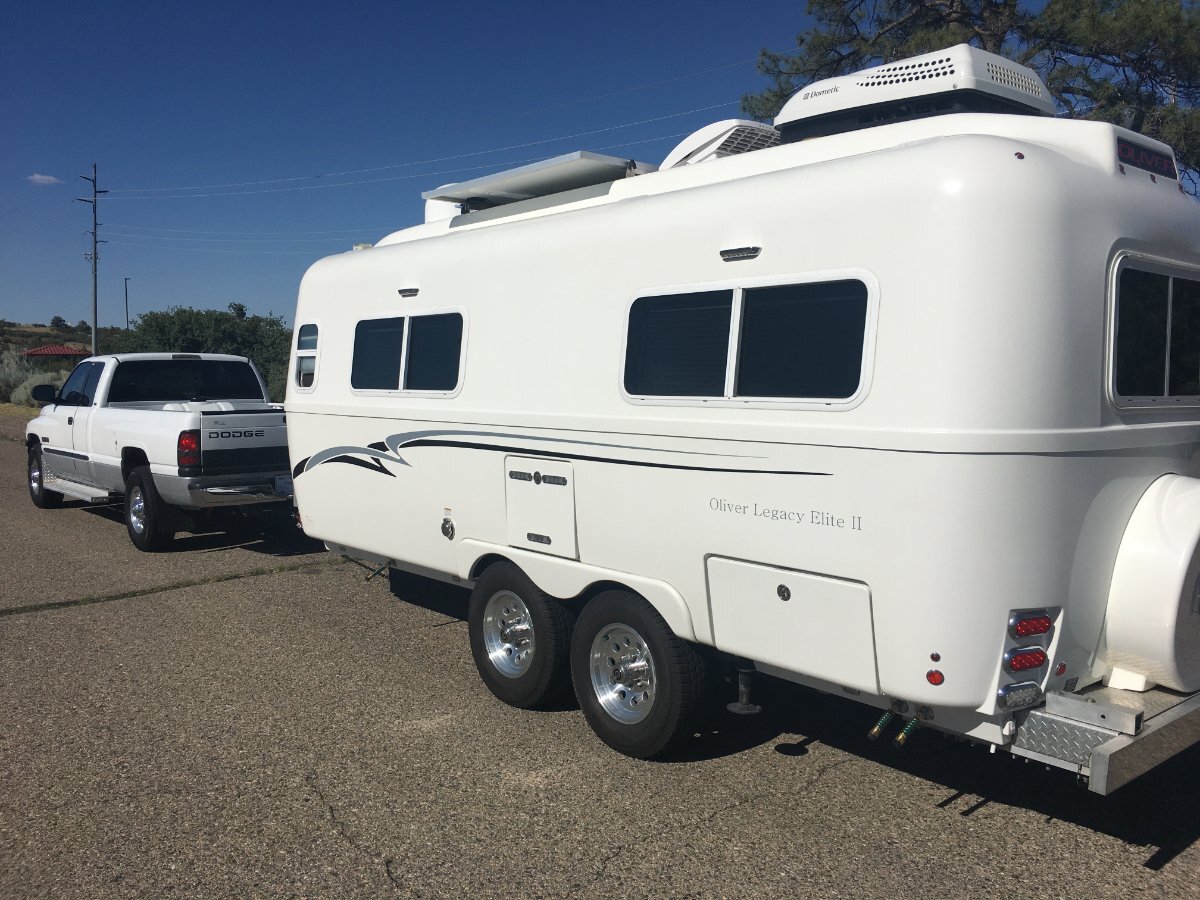
Thanks again, GJ. Love the PITA factor! 🤣 I went into Oliver ownership thinking I could pay about half the cost of a new hull with the used one I found locally, and then add $10K in component upgrades (plus my labor). I then purchased a truck at 20% of the cost of a new 2500 diesel truck (both were great finds!) and again invest another $10K in parts for TV restoration and upgrades. The plan has worked well except that I have added $12K in parts to the 2016 Oliver and another $12K to our 2001 Dodge Ram, so I'm $4K over budget and several hundred hours into maintenance and restoration labor. But as you can tell, I certainly enjoy this work! I would like to upgrade the A/C spending $1,650 plus labor and our Oliver does not need much more except for perhaps a Starlink Mini at some point. The Ram is in great shape today except I may spend on a stage II transmission rebuild someday which would certainly be WAY over budget. I like the classic look of our 2016 Oliver pulled by a matching 2001 TV. It suites our style! These pictures were taken about a month after our purchase in July of 2023, without new wheels and tires and all the Oliver mods! 😂 Oh, and I do use the Anderson regularly. Not for sway but for leveling. The TT and TV become one with the Anderson, otherwise it would be bouncy at the hitch (not enough tongue weight).
-
Upgraded the 30 lb LP tanks to Aluminum with custom base
jd1923 replied to rideadeuce's topic in Ollie Modifications
Yes, for sure. This would not work out west where you would want to boondock often! We don't camp summers nor harsh winters but the rest of the year is great in the SW and we would only leave the SW at the right times of year. Last week camping, day temps were upwards to 85. The first night I had not turned on the furnace and woke up at 5AM to find the cabin at 54F when I switched on the furnace set to 65F. Florida is the land of sweat and air conditioning 24x7 (we lived in WPB for 4 years). I could no longer stand to feel and hear A/C 365 days a year. Yes, there you need hook-ups. Although with 720W in solar, a 3KVA Victron Inverter, a 50A DC-DC charger, 600AH in LiFePO4 (can easily add another 300AH or more when needed) and coming very soon an Atmos A/C that cools well using <10A, we don't need no stinkin' hook-ups! It's such a great care-free feeling to do without. Often I ask for and sometimes get a half-priced stay paying cash without hook-ups. -
Another point to be made re this comment, but btw for or against, I love the dialogue and thank you for being a fresh face in our wonderful OTT Forum! From a recent post, from what I could tell, I'm not alone in that many of us use the FWT and internal water pump vs. using the City Water inlet which can vary in pressure and have other issues. I prefer when we arrive at a campsite that we have power and water and do not need "hook-ups!" We use a two-stage filter like this, but I made one myself using their parts and filters, but way cheaper than buying the complete system: https://www.clearsourcerv.com/products/clearsource-premier-mini-rv-water-filter-system We have good mountain water where we live but since we do not have our own well, of course the city adds chlorine and fluorides, etc. I use the City water line only sometimes to fill the HWH and prime the plumbing and leave home with 30 gallons filtered in the FWT, 6 more in the HWH, 2-3 in the plumbing lines and yet another 35 gallons in the TV bed and we're ready to go for near 10 days! Yeah, I drink hundreds of bottles of water, day in and out, whether home or away. I should get a home filtration system at least as good as the one I made for the Oliver (coming soon). Someday, but in the meantime I would not vote for banning plastic straws or anything equally crazy! When we visit friends, I hope they offer us a simple plastic bottled water vs. what comes out of their tap or even worse, their tap water with refrigerator made ice cubes, yuck! To be certain, this will not cool my Texas Vodka nor Kentucky Bourbon! 🤣
-
There is a local company that advertises there whole house water filtration systems. They state emphatically that RO systems remove the minerals that are important to our health, that you ant filtration of "chlorine, fluoride, lead, etc," but do not want to remove minerals that are already depleted from our soils in the foods we eat. Blah, the blah, blah, blah! We bring bottled drinking water and would not want our FWT to be filled with RO waste water nor RV antifreeze... We want to shower in relatively clean water!🤣
-
Upgraded the 30 lb LP tanks to Aluminum with custom base
jd1923 replied to rideadeuce's topic in Ollie Modifications
Nice mod and great installation work as usual Mike! @rideadeuce Love our 30# tanks and would upgrade if we purchased an Oliver with only 20s. I don't see the need for aluminum tanks with years left on our tanks that were upgraded by a previous owner. It's only a 16LB savings, the weight of 2 gallons of drinking water. I do like 8 vs. 6.8 gallons capacity but this is a lot of money. We traveled twice this February, 7 nights to Q and back and 5 nights to the Santa Catalinas near Tucson. Twelve nights out camping, cooking on the Weber Q grill and the stovetop, limited furnace use give the reasonable temps and we only used the fire ring on two nights! Our first 30# tank is now at 22% and the second is still full. If we had two 20s we would be into the second tank already! What if we lived or traveled north? Would you as well use enough, someday? I love that we can and have gone for 4 weeks and only fill tanks when we return home. 😂 -
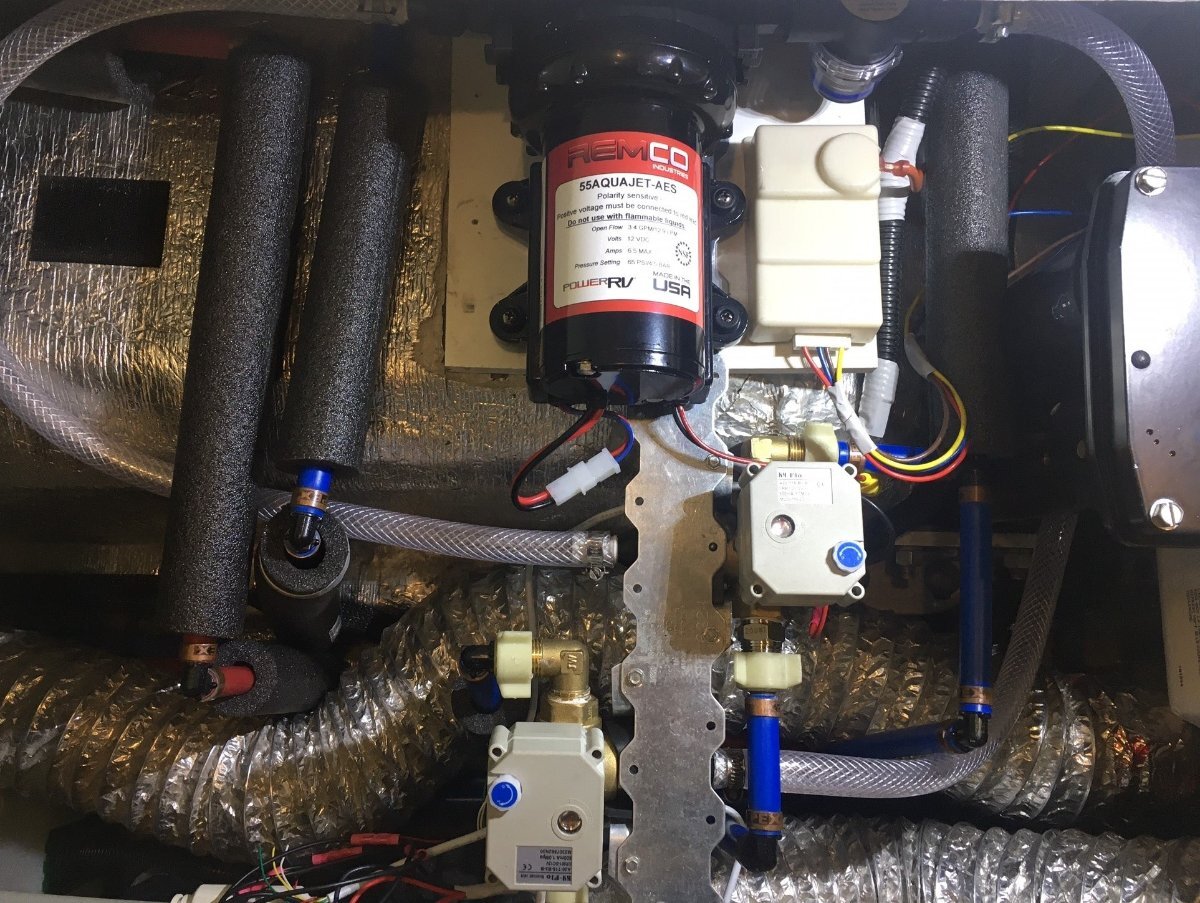
Thank you GJ, and yes, please swing by Prescott when you travel the mainland this year! I installed this pump Jan 2024 after earlier trying a Seaflo pump that did not work out to my expectations. I wrote up a mod post on this and the motorized valves installation here: https://olivertraveltrailers.com/forums/topic/9771-water-system-upgrade-for-better-water-flow-pressure OK, so y'all are going to love this! This guy, me, installation guru guy, I can be dumb, and yes dumber than the next guy! 🤣 I FOUND THE LEAK! Why did it leak on Day 2 of our trip but not during Day 1? As Chris has told me often, when I loose something, "retrace your steps." I started thinking in this way. Then realized, I used the outdoor shower at the campsite to rinse something our first day out. I left the cold water valve on. The only thing holding the water from flowing out fully was the water control lever in the shower head. I fixed this by merely closing the valve, OMG! I was hoping it would be easy to see and correct and it was. So, we're back to NO failures since we took possession of our Oliver, lucky number Hull 113 on June 7 2023. I'm knocking on WOOD now, three times, since saying this. That large block of WOOD, up top and center, often referred to as the NOGGIN!
-
We only get mosquitos a few weeks a year, once monsoon rains get the area wet enough (August +/-). No flies either though we ran through a lot of them to and from the Oct Texas Rally. Brought a couple home in the hull to the fate of death in the Arizona dry! 🤣 However years in the Midwest (stewardess on board?) and in Texas (those little nasty B-words) brings back bad memories. I always do yardwork in Jeans and long sleeves, hats and gloves even in the heat of the day. Always have two fans in my garage. One blowing at ankle height and the other chest height. As far as travel, we prefer not travel in those areas or seasons. Might have to miss that trip to Alaska. It's too far anyway! How are the bugs at the big rally on the Lake in northern Alabama?! Also, too far, maybe someday.
-
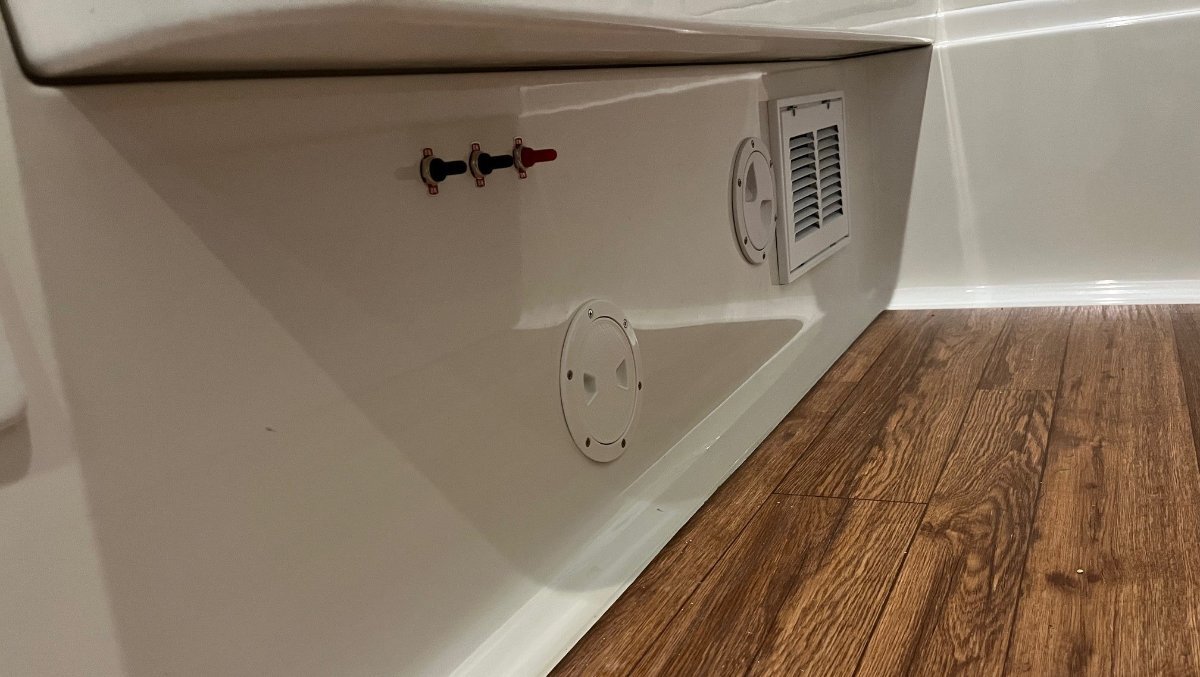
Gross, all that pink stuff in your FWT! Not easy to rinse without half filling and dumping it a few times. I only use air as a winterizing agent! 🤣 We travel with an extra 35-Gal FWT in our truck bed, using the Boondocking valves all the time! We can be off-grid for ten+ days when needed, given we can let a little gray water out in the back country. Turning two switches sure beats lifting a 10” mattress! The third switch empties the FWT. The picture also shows the heater duct delete and the added air intake filter housing.
-
And don't forget to remove the government regulated restrictor in the head of the faucet! When I used to travel for business a lot, I had a wrench and pliers in my suitcase so I could remove the restrictor from the hotel shower head. Got a decent shower instead of the designed trickle! Later I would nicely reinstall their device, prior to check-out! 🤣
-
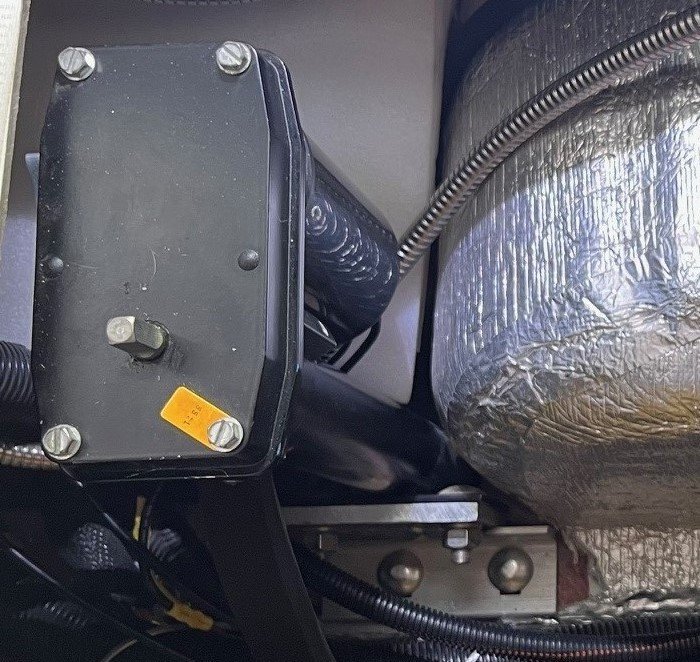
This pic shows the motorized ball valves I installed. More important to flow is the upgrade to the water pump! This Made-in-USA pump is 5 PSI higher and 0.4 GPM greater flow rate which is a positive yet conservative upgrade. I believe the variable speed motor also provides for greater flow rates when in use. This pump should last forever (can run dry for hours) but it's not near as quiet in my application as they claim. It could be my steel bracket holding the valves acts as a sound conduit. I should add softer rubber footings when I get under there this week. I could also insulate this bracket and the basement cover that sits above this area. I certainly hope to fix the leak before getting into additional mods. I truly hope the leak is obvious and easy to reach! 🤣
-
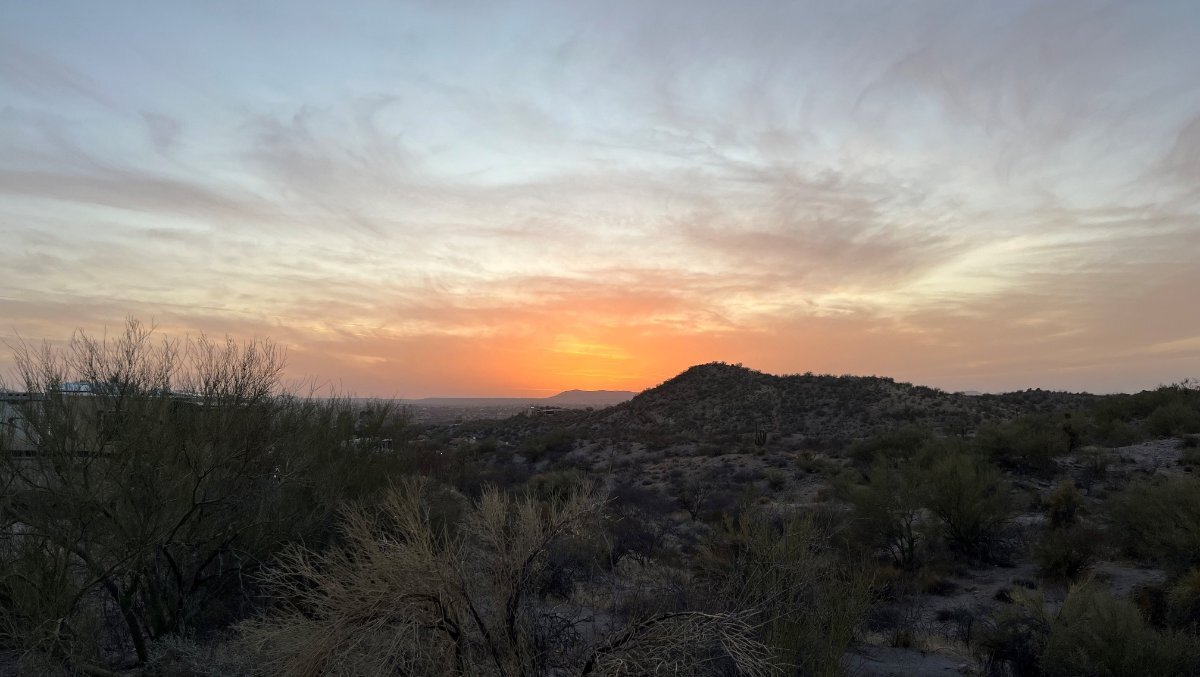
That was lucky! 4-5 weeks ahead I looked at both parks plus ALL of the Maricopa Regional Parks. There was not a single night available for the week of Feb 24th, in any local park between Prescott and Tucson. Then two weeks out a Thursday night at Catalina opened up and I grabbed it. A few days later the Monday night opened at Lost Dutchman. That was our first night out and I like when the first day is less driving, Lost Dutchman being half the distance to Catalina from our home. Then a week before Catalina had a Wednesday opening so we got 2 nights, at two different sites of course. I wondered, what would they do for a flood? Our visit to Catalina SP was OK, not great. After the first night we moved to the new site at noon and had the day to investigate. I wanted to see the town of Oracle AZ and drive into the north end of Coronado NF to take the back route up to Mt. Lemmon. We got a few miles past Oracle and there was an obvious Temperature Inversion. All of the dust from the dry conditions of the valleys were trapped so that we were driving through a huge cloud of dust! After sneezing a couple of times and the look of things we abandoned our trip. You could not see through the haze at all, not a single view of Santa Catalina Mountains while climbing up! One reason for your visit was to meet friends who had recently purchased a home in nearby SaddleBrooke Ranch. We played pickleball with them and others in the community on two evenings and had a great time. Dinner at their home the first night and a good strong hot shower the next morning! Drove up to Wickenburg for our last night, taking a detour around Phoenix to Gila Bend, Buckeye and up. We often prefer driving the back way up Hwy 89 to Prescott vs. I-17 (currently on a 5-year construction plan to widen it). This picture was taken from Constellation Park (found on Campendium $10/night) looking down at the town of Wickenburg. There was one site left available at 5PM! It was a short and sweet trip and we're back home today for the day of rest!
-
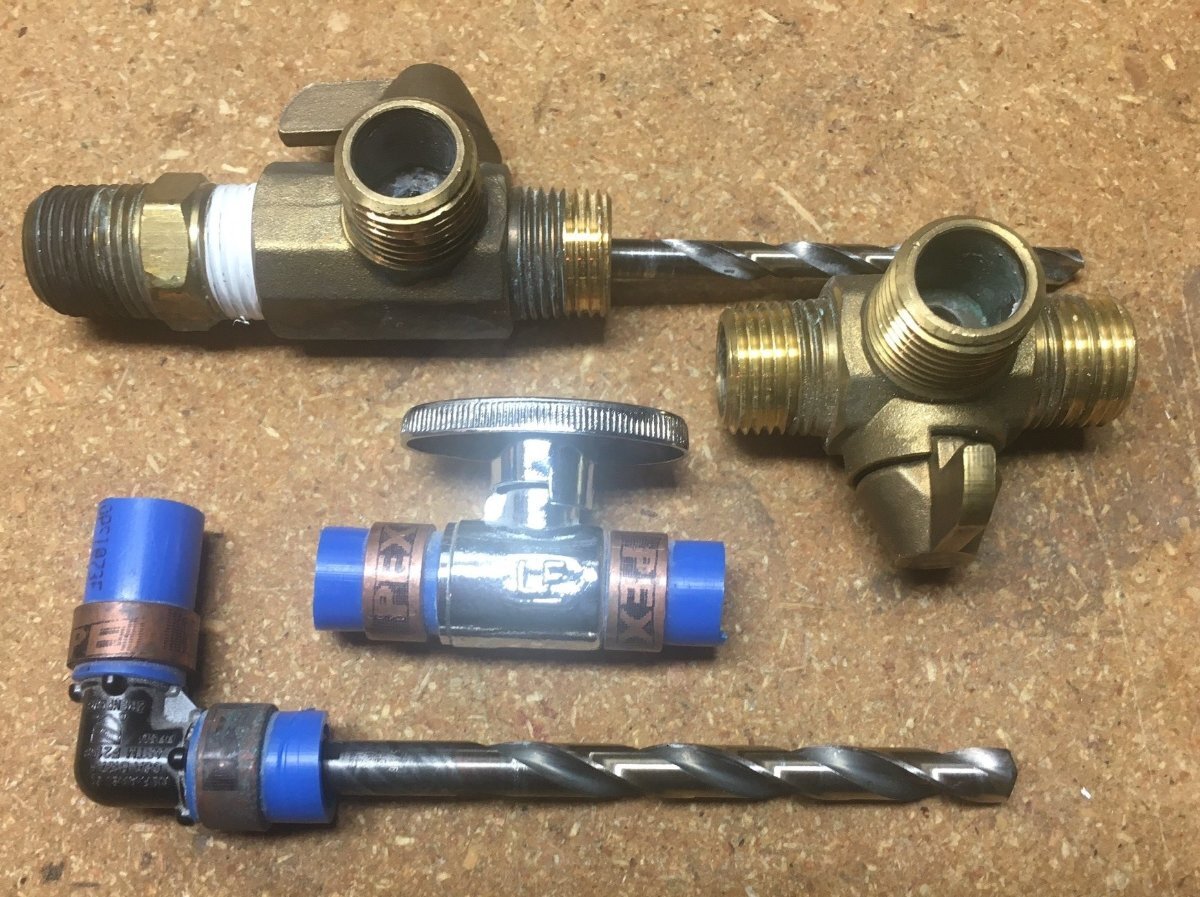
It's important to me. I've done a lot to improve water pressure and GPM flow rates. I replaced all OEM valves with motorized ball valves with true 12mm ID. The OTT installed valves were 1/4" ID (see picture, drill bits shown are 1/4" and 3/8"). Every 90 (too many of these installed) and ALL PEX crimped connectors have 3/8" ID. Newer hulls do not have the 1/4" ID brass valves but instead more of the other valves shown center of picture with 3/8" ID. The Oliver plumbing system is then a 3/8" system. If they had used SharkBite everywhere it would be a true 1/2" system.
-
My son’s first USTA tennis tournament was on the grounds of Texas A&M!