All Activity
- Past hour
-
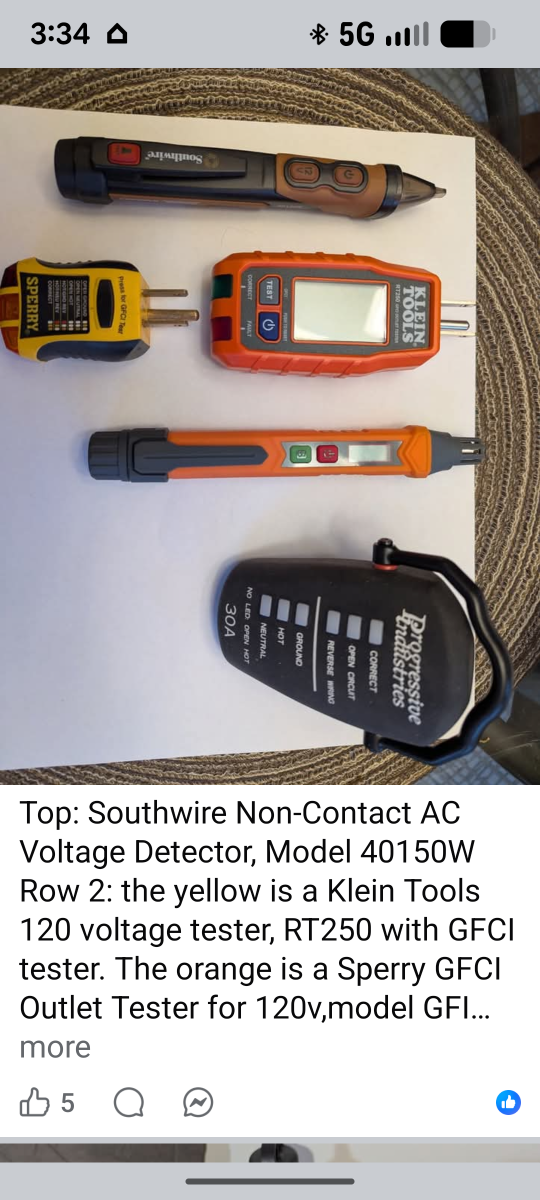
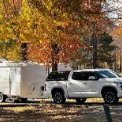
The black one is a Progressive 30-amp tester. Never rely on any shore power without testing it.

-
It appears you are plugging into a 15A GFCI outlet in your barn, and this outlet blows. If so, this has nothing to do with the Oliver except that it is pulling more than 15A. @Steph and Dud B mentioned this above. A 15A household circuit may not be enough to handle the load internal to the Oliver. Also, don't ever use a GFCI outlet as a source for shore power as they are designed to blow in milliseconds. Throw ALL the 120VAC breakers in your Oliver panel under the dinette seat. Connect shore power to another household circuit. Not a GFCI outlet and if you have a 20A circuit choose that over a 15A. Many of us have installed proper 30A outlets where we park our Olivers. Something to think about, relatively simple to install or hire an electrician. After connected to a proper circuit. Turn on your 30A main breaker and then one at a time turn ON and OFF each other breaker. When ON see if the named appliance is working that is connected to that breaker. I don't know enough about GFCI outlets, but I'll bet @Snackchaser does! Hopefully, Geoff will chime in. Using a GFCI outlet as a shore power connection could be your sole issue.
-
You should have these testers to check the shore power before you plug into your trailer. You have been asked where your trying to plug in, home, campground, 30amp, 120, 120 with GFCI. You should never plug your trailer anywhere without testing the shore power.
- Today
-
On the Dometic control behind the rear dinette seat, I’m getting a E1 error (Reversed polarity?) . How would I have reversed polarity, and how would I correct it. Batteries read real low … As low as 3.7 V. But now 4.9 while solar charging. Checked wires under left dinette seat. All seem tight.
-
I checked the cable contacts and the contacts where you attach the cable to the trailer. All seemed tight, with no wiggle room. I also tried throwing all the circuit breakers under the left dinette seat. When I plugged into shore power again, it still blew the GF on the barn plug. Does that definitely mean the cable is bad? I have used the barn plug other times with no trouble. Never blew the GF.
-

Furrion Chill Cube – Product Review and Installation
jd1923 replied to jd1923's topic in Ollie Modifications
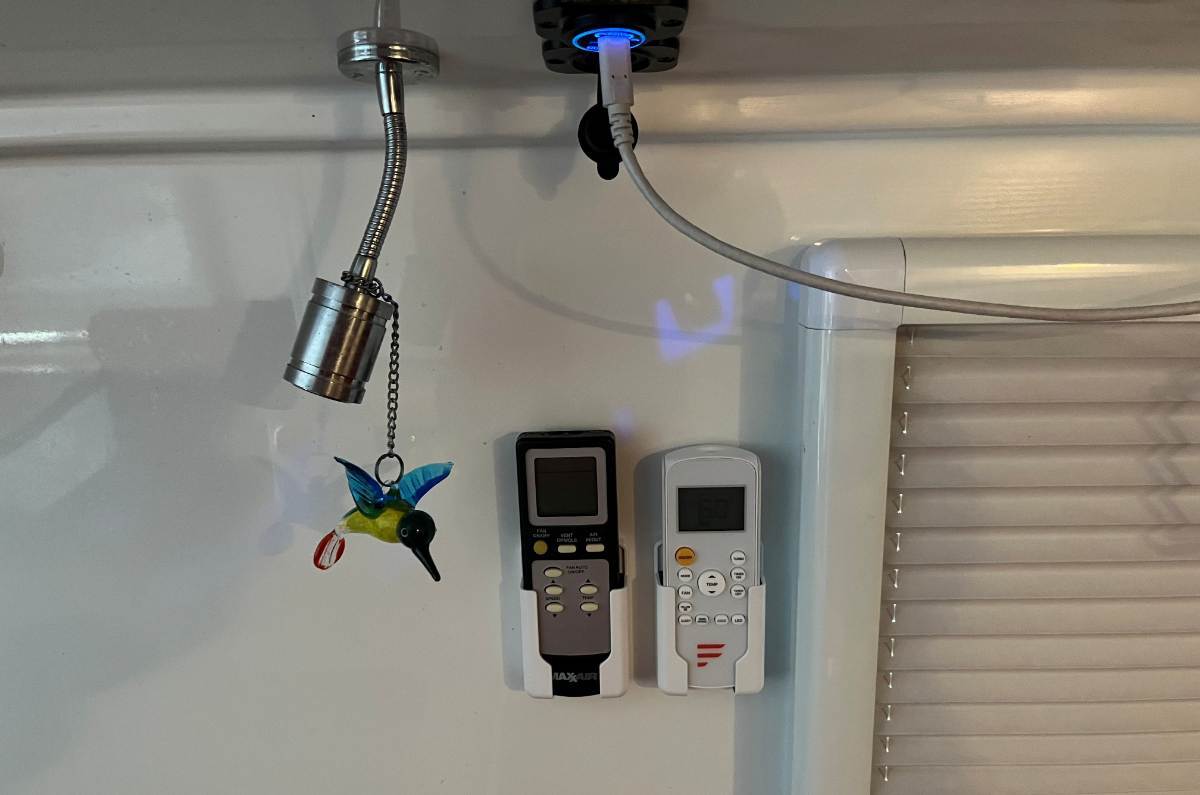
Can't wait to see your finished installation and get feedback on it's capability, given your Central Florida location. It must be getting warm down there! I have yet to see enough heat, and of course no humidity down here, to truly test it's cooling efficiency and Ah usage running on batteries! 😎 Will you run your A/C on inverter or shore power only? Here's my final touch. We have a half-dozen remotes in bins mounted front of the nightstand drawer. With the new Chill Cube, I decided to wall-mount two important remotes (mounted with 3M VHB tape only). These are now in a great central location which Chris can also reach from bed when needed!
-
Happy Travels -- hope to see you on the road somewhere!
-
Furrion Chill Cube – Product Review and Installation
OffWeGo replied to jd1923's topic in Ollie Modifications
Good point on including the Dometic thermostat with the old unit. I like the Honeywell thermostat too. Thanks again for all your help! -
Furrion Chill Cube – Product Review and Installation
jd1923 replied to jd1923's topic in Ollie Modifications
Before your model came to market, the ductless model that I purchased had no thermostat interface which the ducted version has. If your new model has such interface, you could study the interface and have one wall-mounted thermostat to control both the A/C unit and the furnace. My Chill Cube is operated by remote only which includes the follow-me temp control. Given yours does not have a thermostat interface, you could do what I did with mine or something similar. I removed the Dometic thermostat from the wall above the kitchen sink and replaced it with a simple 2-wire furnace thermostat which I mounted in a different location. I also ran two new 14 AWG wires I had on hand. Original wiring was just pushed into the wall unused, staying where it was. You could also remount a new thermostat in the same place, using the same wiring (grab the 2 furnace wires). BTW, I sold my P2 on Craigs and to sell a complete unit, the Dometic thermostat should really be included. I asked $500 for it, but after it was listed off-season for 2 months, a guy offered me $200 and my reply was CASH today, and he agreed. Glad to get that POS off my property which was sitting outdoors in the Vermont 2-wheel cart we use for yardwork! I always thought where OTT mounted the thermostat made little sense. So often at night, it was to hot or cold and you'd have to get out of bed to change temp. I mounted it in arms reach just under the pantry. I can reach it easily to change temp and Chris can see the actual temp reading from her curbside bed. It always frustrated me that the Dometic thermostat only showed set temp, not actual temp, so I had mounted a Ruuvi sensor above it. I wanted a new furnace thermostat that would display actual temp, so it can be compared to set temp. This is the product I purchased, simple and does the job well! It displays actual temp when idle and set temp when pushing the up/down arrows, go figure. One thing that seems backwards is the ON/OFF switch, where up is OFF and down is ON, where the reverse order would be intuitive. https://www.amazon.com/dp/B00H6ARNXO This build thread shows pictures of our new thermostat installed and the mask job to cover all the many holes in the wall above the kitchen sink! 😎 -
If you are plugging into a GFCI at home, that is more than likely your problem. Get a dedicated 30 amp (120/single phase for RV). What are you plugging into and where? Did you test the shore power plug with a 30amp ot 120 tester to make sure the shore power is safe?
-
 Timbo joined the community
 -
Thanks. A bit of searching and there is info all over the place. Sorry to bother.
-
Good instructions
-
-
 FreedomRiders2 joined the community
 -
We got hard copy manuals when we picked up our 2022 LE 2. There were instructions with pictures. I have had Oliver make needed adjustments when the trailer was in for service. You need to make very slight adjustments. Too much and the motor will keep running and could burn out the motor. If you Google Girard Awning adjustments you should get a detailed "How To".
-
Furrion Chill Cube – Product Review and Installation
OffWeGo replied to jd1923's topic in Ollie Modifications
I wasn't sure I wanted the heat pump until I watched install videos from some very seasoned RVrs, and they both said they really loved the heat pump. At today's prices it was a $230 difference, so I figured I would go for it. As for what's under the bump on the roof...there are two globs of resin under the front end of the bump that are roughly 2" x 3". I haven't figured out a way to remove these without damaging the gelcoat. I might just repostion the bump an inch or two toward the rear to cover them up. I did figure out the slope of the roof from the front of the Chill Cube to the back is about 3 degrees. Furrion says up to 15 degrees in either direction is acceptable, so there is no need for the bump with this unit. Once I tightened the four installation bolts it sat down on the rear support pads the way it should. I got the unit fired up yesterday and its amazing! Not sure what to do to make the furnace work with the Dometic thermostat, or if I'll have to get a different model. Anybody know the answer to this? -
Is there a link that guides one to make this adjustment?
-
I am challenged enough coming up with dinner ideas at home, let alone camping! Thank you so much for sharing your recipe! We are heading to southern Utah next week and I will definitely be making this. Any more recipes you can share?
-
What are you plugging into? I assume it's a campground 30A receptacle, right? If it's only a household outlet you could easily be overloading it with normal Oliver things like the water heater, fridge, battery charger, etc. But this did happen to us once at a campground. We had a loose connection at the water heater. Don't know why it blew the 30A breaker at the pedestal and not the 20A breaker inside the trailer, but it did. Anyway, check everything mentioned above first. If you don't find anything wrong in the shore power connections as mentioned above try this: while unplugged, turn off every breaker in the Oliver breaker box under the dinette, then try plugging in again. If you blow the pedestal again you've got a short in the cable connections or EMS. If the pedestal breaker didn't blow, turn on the 30A main Oliver breaker. If that's ok, keep turning on Oliver breakers one at a time until you find the one that's tripping the pedestal.
- Yesterday
-
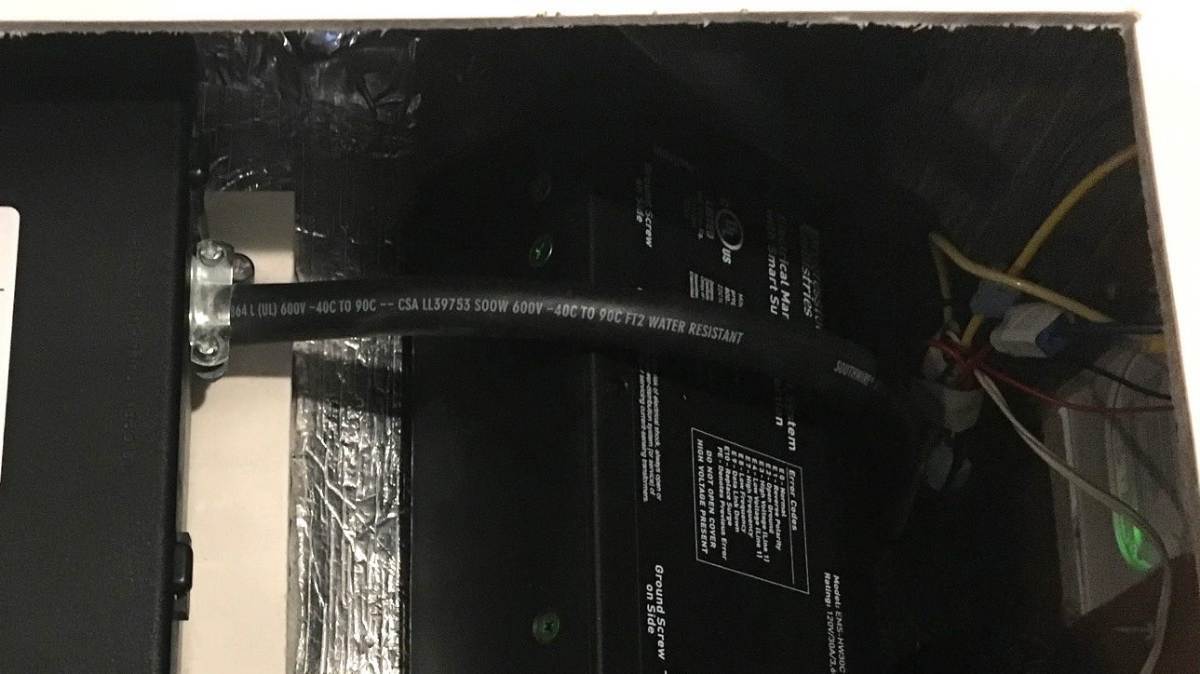
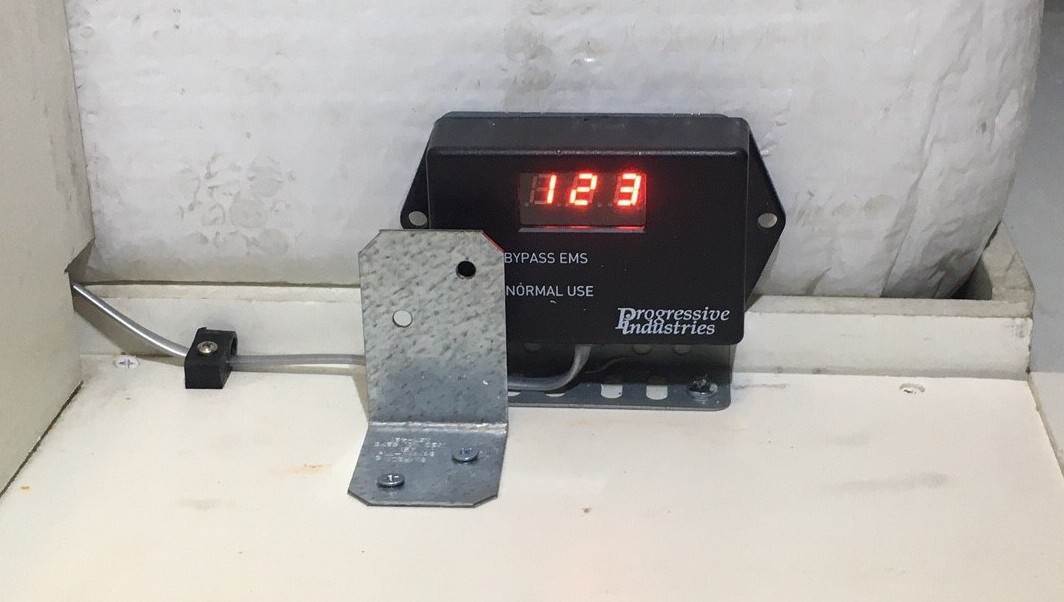
It "blows the circuit on the shore socket." What exactly blows? Does the 30A breaker on the pedestal blow? If so, you have a dead short in your shore power cable, the receptacle, or in the EMS (given you have one, more info below). The GFCI is after the fact. If wiring past the GFCI get a short, it will trip and all outlets are after a 15A circuit breaker. The jacks are 12VDC, so running off battery. If your jack has a short the yellow-jacketed 30A 12VDC fuse will blow. These items cannot be your issue. Do you have an EMS with a display? The display might be in the attic. If so, when you plug into shore power check the display for an error code. The display shows 4 readings for a couple seconds each. It shows voltage present and Hz, amperage being used, and error codes. If you see E0, it means no errors. If you have anything but E0, you have an issue with incoming power. The error code definitions are on the cover of the EMS. This is a picture of our EMS and our display (I installed ours in the trunk, readout in picture is showing 123V actual). We'll know more when you answer my first question and your EMS status...
-
Before you connect your power cable to the trailer check each of the three lugs on the trailer to ensure they are tight. I had a loose one and it ended up melting the connections on both the cable and the trailer. If they are tight I would track the cable where it enters the trailer (under the back dinette seat) and start checking connections along the path to ensure none are loose. Mike
-
When I plug my Oliver into shore power, it blows the circuit on the shore socket! Suggestions? I have checked the GF under dining table’s right side. I have checked that no Oliver circuit breakers were tripped. My front hydraulic lift is working on and off. Possibly there’s a short in there.
-
Furrion Chill Cube – Product Review and Installation
jd1923 replied to jd1923's topic in Ollie Modifications
When you're able to wait on a technology purchase, usually products improve over time and get cheaper. This one is not cheaper ($412 more than I paid for the Chill Cube w/o heat pump). Though heat pump functionality would be good backup heat for our hull and for Chris @CRM if this was available, he may have gone this route vs. the Turbro. For them, a heat pump was a mandatory requirement. Hope removal of your rear A/C platform goes well. Let us know. https://unitedrvparts.com/products/furrion-chill-cube-non-ducted-heat-pump-2025008214-18-000-btu-white-facr18hepa-ps-am-1 -
Furrion Chill Cube – Product Review and Installation
OffWeGo replied to jd1923's topic in Ollie Modifications
Thanks for the quick response. I'm in total agreement with you. I'm really surprised at the response from Oliver, but, as you said, they probably don't want the liability. -
@Grizz000 Thank you for the excellent write up on your Xantrex inverter/charger, battery and solar mod. I do have a question about your method of attaching the Coosa board to fiberglass. I am specifically interested in how you applied the G/flex 655 to the Coosa board panel. Did you apply the G/flex to both surfaces and was it applied in a bead or puddle and did you spread or tool it? Mossey
-
Furrion Chill Cube – Product Review and Installation
jd1923 replied to jd1923's topic in Ollie Modifications
Paul, that's a strange "bump" or platform that mine did not have. You can see in my installation picture above the roof is smooth. On our hull they merely made the rear legs of the P2 taller, since the roof slopes down. Good thing is the Chill cube is almost a foot shorter, when installed it sits only on the flat forward section. Anything can be removed and my guess is it's just glued down. OTT doesn't suggest removing it! 🤣 Likely, only because they do not want to suggest a liability and nobody working there today has any idea of how it was installed. If it was me, I would take another day or two and delete that platform. It's not pretty! I would remove the silicone caulk, scrape and use acetone. Then I would slowly pry up around the edges, and spend some time cleaning up the roof. 😎