All Activity
- Past hour
-
Thanks again, Bill. I would use glue or VHB tape and cover (hide) the existing screw holes. Also with 1/8" stock, add something like Geoff suggested. Maybe use aluminum stock vs. "wood cleats" for better strength and durability. Drill mounting holes through both after everything is glued in place. This way your mounting screws can grab the cover sheet and the metal behind.
-

Suburban Hot Water Tank Repair
jd1923 replied to Mike and Carol's topic in Mechanical & Technical Tips
As you know, the junction box sits on top of the HWH a couple inches below the fiberglass bed platform. Not like water can spill UP there, but it could be from humidity over time in the basement. Our Oliver has spent life in dry climates, but not that Boerne TX is a particularly humid location. I'd like to see a third picture, from someone who lives somewhere humid. And yes, it's quite a contrast. -
 John Thornton joined the community
 -

Furrion Stereo Upgrade: A Sound Choice
Snackchaser replied to Snackchaser's topic in Ollie Modifications
I design stuff with a simple and free on-line program called Tinkercad, you can export designs as an STL file that is 3-D printer ready. A simple bezel design would take a few minutes. I started off using Voice-to-CAD, and AI generated designs, until I figured out how much easier Tinkercad is. I just watched a few tutorial videos on Youtube and the printer is pretty much plug and play. Honestly, I'm still re-wiring my brain to think of 3-D printing first, it opens up project possibilities that couldn't be done before. There are literally thousands of free ready to print designs for all sorts of things, including some great gadgets and parts you won’t find anywhere else. Check out websites like Thingaverse. Some designs, such as boxes, can be adjusted to any size, they have working hinges, latches, and sealing gaskets. A myriad of materials are available, including ABS, Nylon, and TPU, a rubber like material for flexible parts like gaskets. That “sealed” the deal for me. For mounting a new stereo in your larger hole, you could use JB weld to glue a couple of overlapping wood cleats on the backside of the hole for the mounting screws. Then make a bezel like Bill’s to fit. Geoff - Today
-

Suburban Hot Water Tank Repair
Mike and Carol replied to Mike and Carol's topic in Mechanical & Technical Tips
The contrast is interesting. I don’t know how water could have entered our junction box, we’ve never had any kind of big leak. Possibly during its time in the factory? Strange. -

Furrion Stereo Upgrade: A Sound Choice
rideandfly replied to Snackchaser's topic in Ollie Modifications
Glad to help you feel better! 😂 Here's the recommended cutout for the DV 1100 and probably DV 1200, too: I don't have experience with a 3D printer. Thinking about cutting out 1/8" black plastic sheet (1/4" probably too thick) large enough to cover existing DV 1100/1200 cutout/ screws holes securing with black screws in existing holes, also with cutout for iRV unit to mount. Shape plastic sheet corners/edges with belt sander. - Yesterday
-
Bill, thank you for making me feel better! Now I'm happy ours is still fully working after all these years. I just remounted the bezel and speaker while listening to a CD that with the volume up sounded pretty good. You and I are both going to need that 3D printer! 🤣 Geoff, what does it take to program a detailed shape? I say this because the DV1200 is mounted by the 4 outer screws into the Oliver fiberglass. When you go to a smaller box there will be nothing to screw into. Good that the new units are likely half the weight. Maybe a plastic sheet thick enough to screw into and support the weight and/or a bracket or base the radio can sit on. Not so simple. Should the sheet be black or white?
-
That would be an easily accessible location. Another idea, a less conspicuous spot, might be around the corner on the wall near the TP holder.
-
Furrion Stereo Upgrade: A Sound Choice
rideandfly replied to Snackchaser's topic in Ollie Modifications
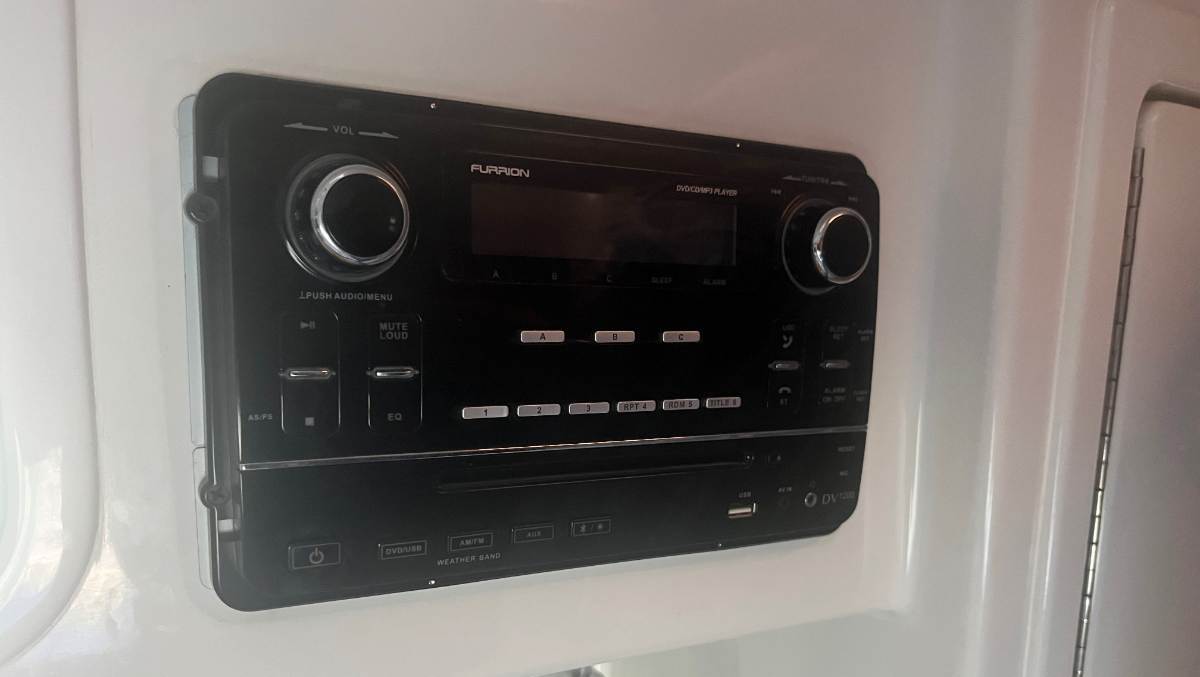
Our Oliver came with a Furrion DV 1200, the DVD player failed after a couple years. I found a new Furrion DV 1100 on EBay, new old stock, same size with same wire connections, it worked OK up until last year when it developed DVD issues. After looking at several units, I’m probably going to install an iRV unit with the unit mounted on black plastic sheet covering the existing cutout for the original Furrion unit. Just thinking about it for now! -
You may need one of these. I’ve found many steel parts in spots I couldn’t even see! https://a.co/d/0dLcMRie
-
Furrion Stereo Upgrade: A Sound Choice
Snackchaser replied to Snackchaser's topic in Ollie Modifications
Jd, you make a good point, I replaced a Furrion DV1230, and it is indeed smaller than the older unit you have. I 'll go back and make an edit.. BTW, a guy like you needs a 3-D printer! I can’t list all the tool parts, jigs and adapters Iv’e made. It's another tool you don’t know you need until you have it. You could actually print some pretty decent white grill covers, or a larger bezel to fit a new stereo in that oversized hole. Just sayin’ Cheers! Geoff
-
One post was re our hull. I got very lucky finding a local independent, referred by my auto body guy, who is quite meticulous himself. My price was considerably lower, but it's not just about price. Having good responsible local resources is best when available. Now I have a local go-to guy, making it easy whenever our Ollie needs a sprucing up! But we're rather far from the great state of Maine! Though I believe @ripple963 has the right idea in asking. Keep looking! Finding a local company was on my mind for two years as she got more and more pasty white! If not in Maine, maybe you'll find a great company in nearby New Hampshire! 😎 That great state of Tennessee is too far for most of us!
-
That is why I want to use a threaded body switch. I see that you have run into this problem also. I have used panel mounted switches in thick material by finding a hose that the switch will fit tightly into, cutting a short ring out of the hose, and then slipping the ring over the back of the switch to hold it in place, sort of like threading a nut on. I have found an adapter to mount a panel mount using a threaded bushing. I had rather use a threaded switch but I may have to use this
-
Interesting idea with Father's Day coming up!
-
Thanks!
-
Suburban Hot Water Tank Repair
jd1923 replied to Mike and Carol's topic in Mechanical & Technical Tips
So, I had this on my to-do list since Mike started this thread... What a difference in two hulls of the same era. Maybe the junction box on hull #135 took some water at some point. You can certainly see corrosion in Mike's pictures. Or maybe Mike got the bad installer on this one, right after the guy messed up something else on hull #113! Inside our junction box it's just perfect, clean as can be, everything tight! I didn't touch a thing, just replaced the cover, and for me this is not an annual inspection item.
-
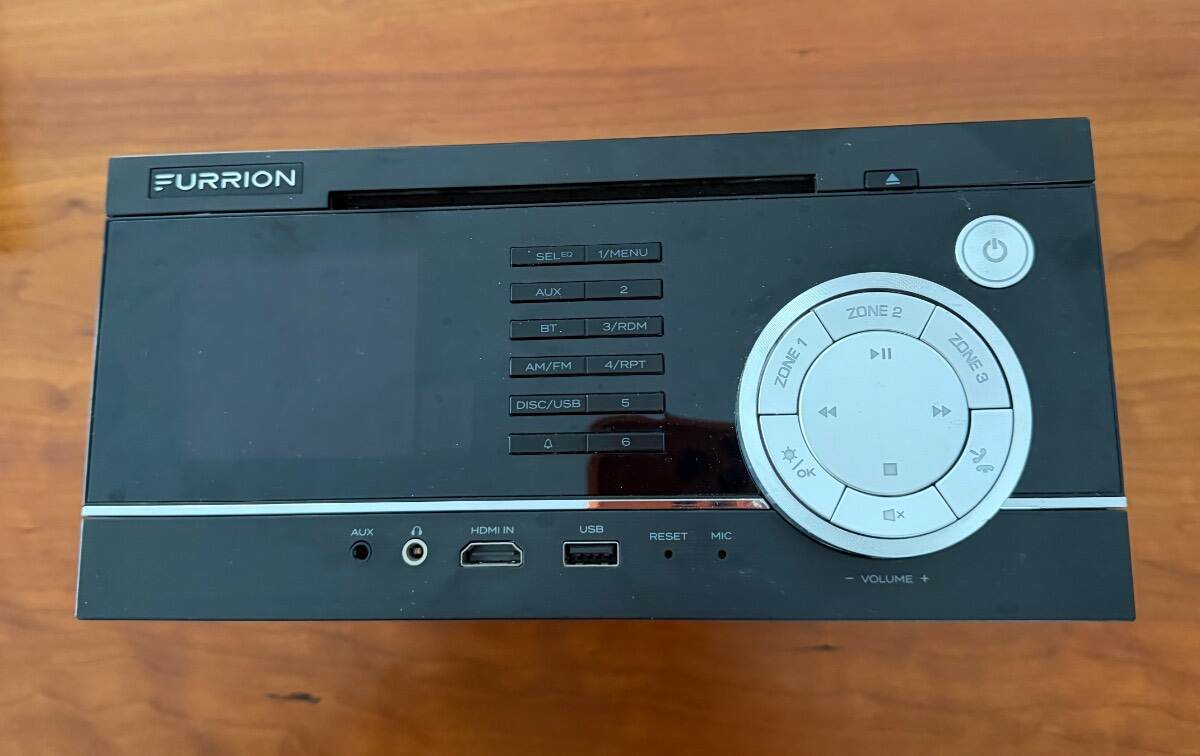
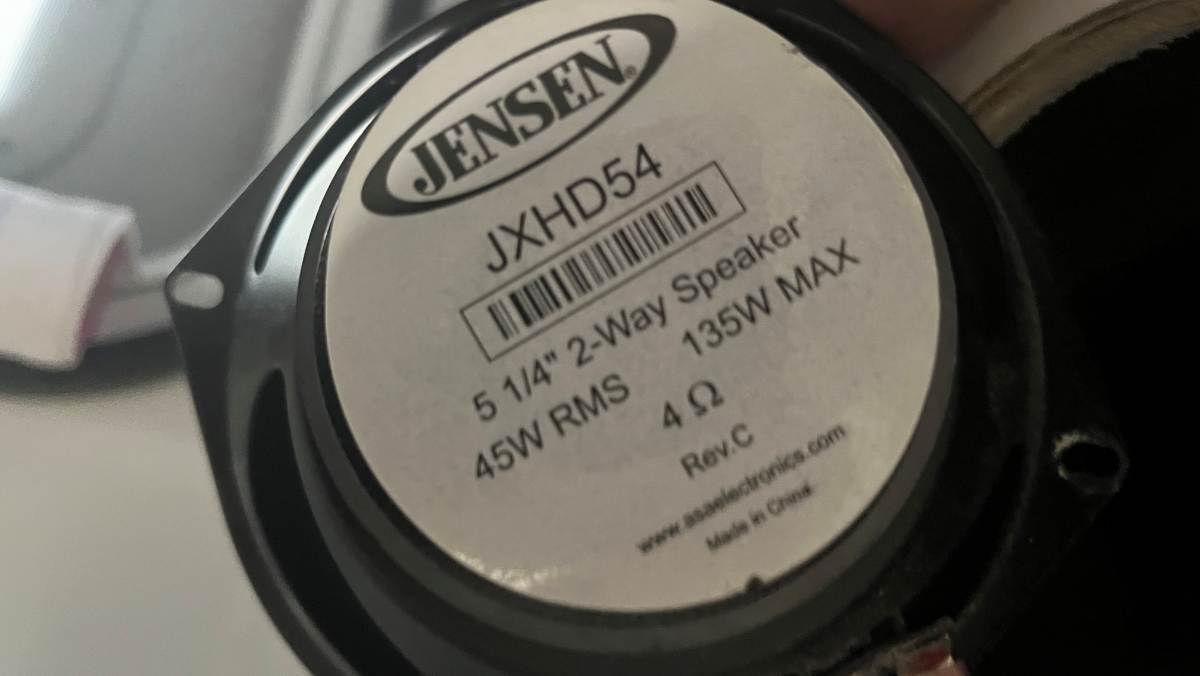
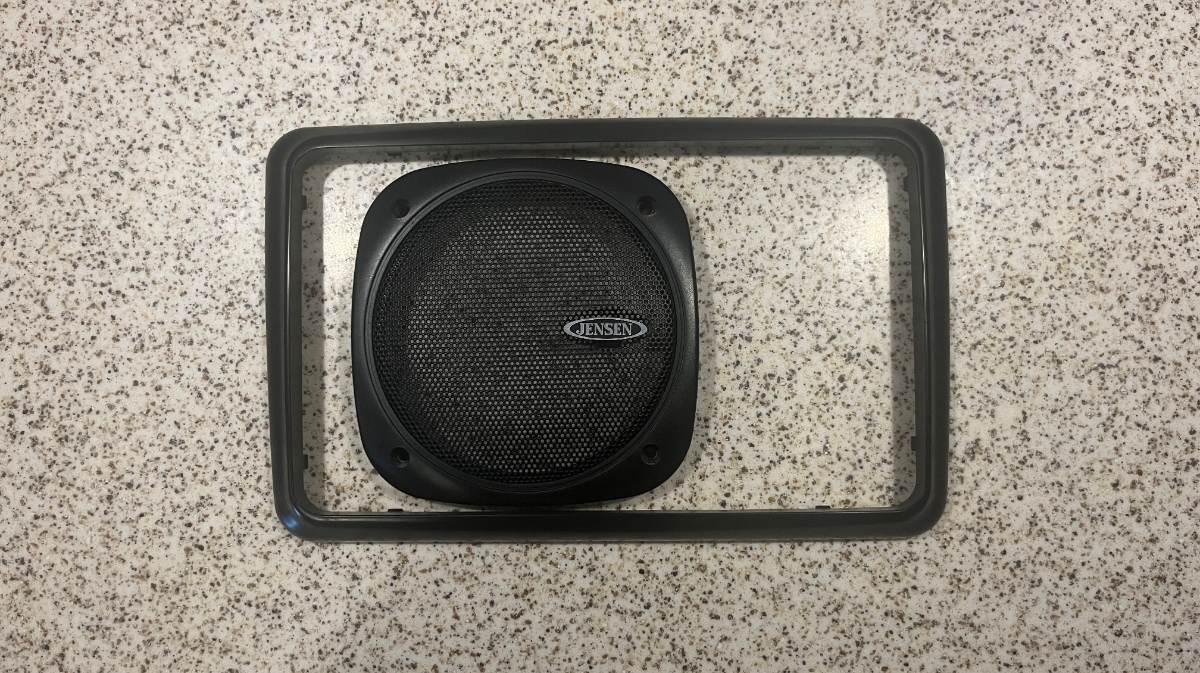
Geoff, thank you for addressing the speakers too. It's nice OTT is installing white-clad speakers in newer hulls. It's odd that advertised 6.5-in speakers are closer to 5.25". Maybe the outer dia of the grille is 6.5". On ours the circle for mounting screws is 5.4" dia and ours came with Jensen speakers. They're quite heavy and solid and to my ear still in good working condition after 10 years. Only OTT has the uncanny ability to drill holes and then drill more holes! I could insert a half dozen pics showing drill-happy installs!🤣 Shame we must do extra work to account for lazy work. You fabricated a very nice trim plate to cover it up! 😎 WARNING! If you have an older hull like ours, the IRV62 may not work for you! The cut-out on ours is 9 1/4" wide and 6" tall. The picture on the IRV62 Amazon listing shows the face is 8 1/4" x 4 3/8". Given this the IRV62 would fall right into the massive opening cut in our hull. No wonder ours is so ugly, it's BLACK and 11" x 7" HUGE! (picture shown w/o outer bezel) Yesterday I was working in the Oliver, fixing a couple of drawers, replacing the Blum undermount drawer slide on one and new orange latching ends on another. Because of your post, I thought to fire up the Furrion, listen to a local FM station while working. Yes, I needed the flashlight on my phone and it took me 5 minutes to figure out the interface! When we travel, Chris is usually the one to operate the Furrion stereo. She will pair it to her phone, or sometimes at dinner she will play a travel CD she burned for our trip. Kudos to her for learning to operate this crazy box. Your IRV62 looks much better and you can just look at the front panel picture to see the simple buttons make sense, are intuitive. If they only made one in white or gray! When searching online for wall mount RV radios, you'll find nothing but BLACK! I did find a Jensen model that would fit the larger opening cut into our hull. https://www.amazon.com/dp/B082VXFC7W/ In our 3-zone system, Zone A are the front speakers, Zone B for the rears and Zone C is not wired to anything. Yep, for the 4-speaker Oliver configuration two zones is all you need. It would be nice if Zone C was wired to two exterior speakers. But, the Oliver really needs a special zone! One that when eating dinner the speaker over my head is not powered on! Just bad placement. I would rather they had mounted both left and right front speakers above the closet. And sound from the rear speakers pointing down is lost in the bedding. Speakers left and right of the attic door would certainly produce better sound. The radio outer bezel popped off easily with a plastic pull tool. Then 4 screws and the entire radio pulls out. I also removed a speaker grill. Maybe paint would lighten up the look some. Though I'm cautious when it comes to paint. It goes on easy but you're stuck when not satisfied with the result! Much ado about nothing here, at least for me and for now, as I will likely leave well enough alone. 😒 I learned a bit though. Thanks again Geoff, and enjoy your new IVR62!
-
"My Bad" but, I have found that if wifey starts a conversation with, "Honey, I think you need a tool to help you do this", she has my complete attention for the duration of the conversation, no matter what else we discuss... I think she realizes it too, as we have had some rather meandering (like what do tools have to do with making sure my daily work clothes are in the hamper on laundry day...) conversations, but I was paying attention to every word until we were done. Before we were married, my father told Maggie, "He is not hard of hearing, He is hard of listening..." Now I have hearing aids, and I still do not listen. 🤭 B~Out, I just heard the word "tool".
-
I get switches from DigiKey. Use the more common DPDT like the original one. Part number CW110-ND. Haven't seen any with threads and nut, so be carful to drill the hole the correct size. The problem is that the fiberglass is too thick for the switches to snap in properly. Therefore some adhesive is needed. Oh, be carful to keep track that the center wire goes back to center, the other two don't matter. Good luck! Geoff
-
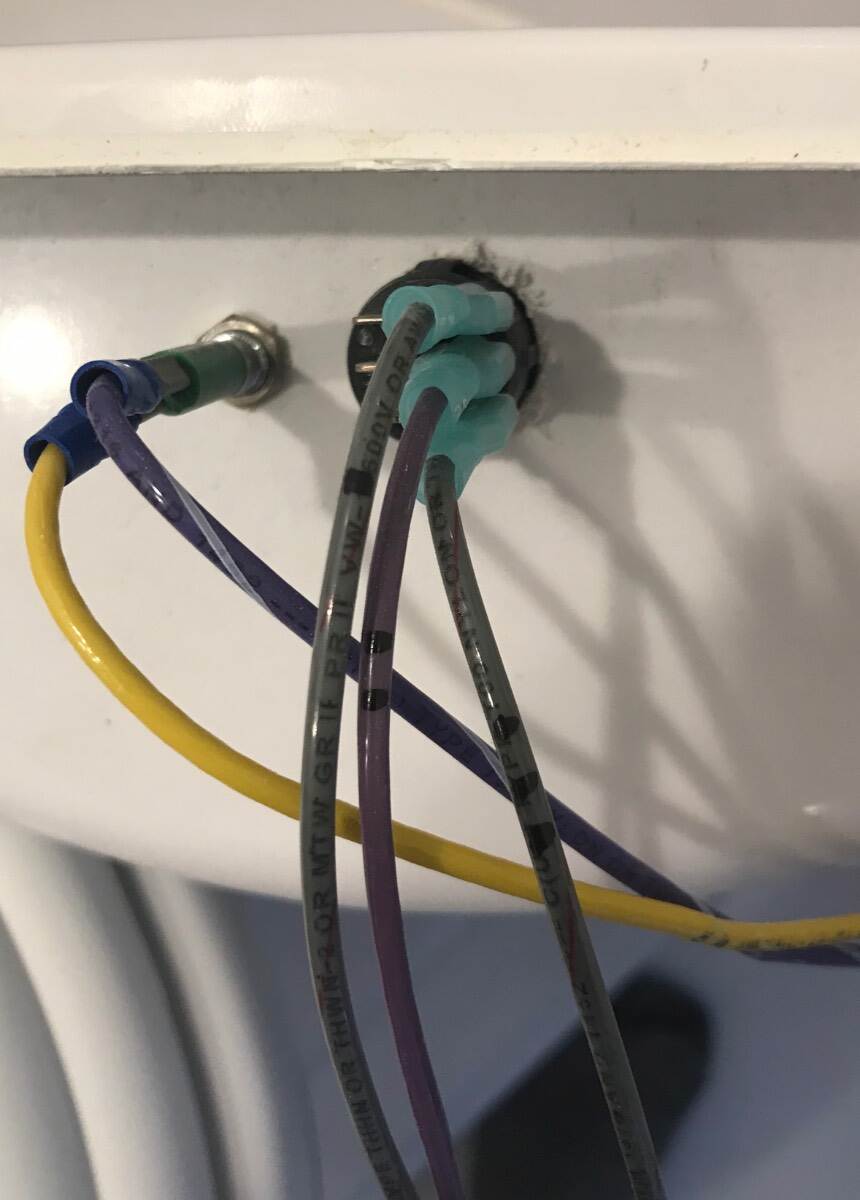
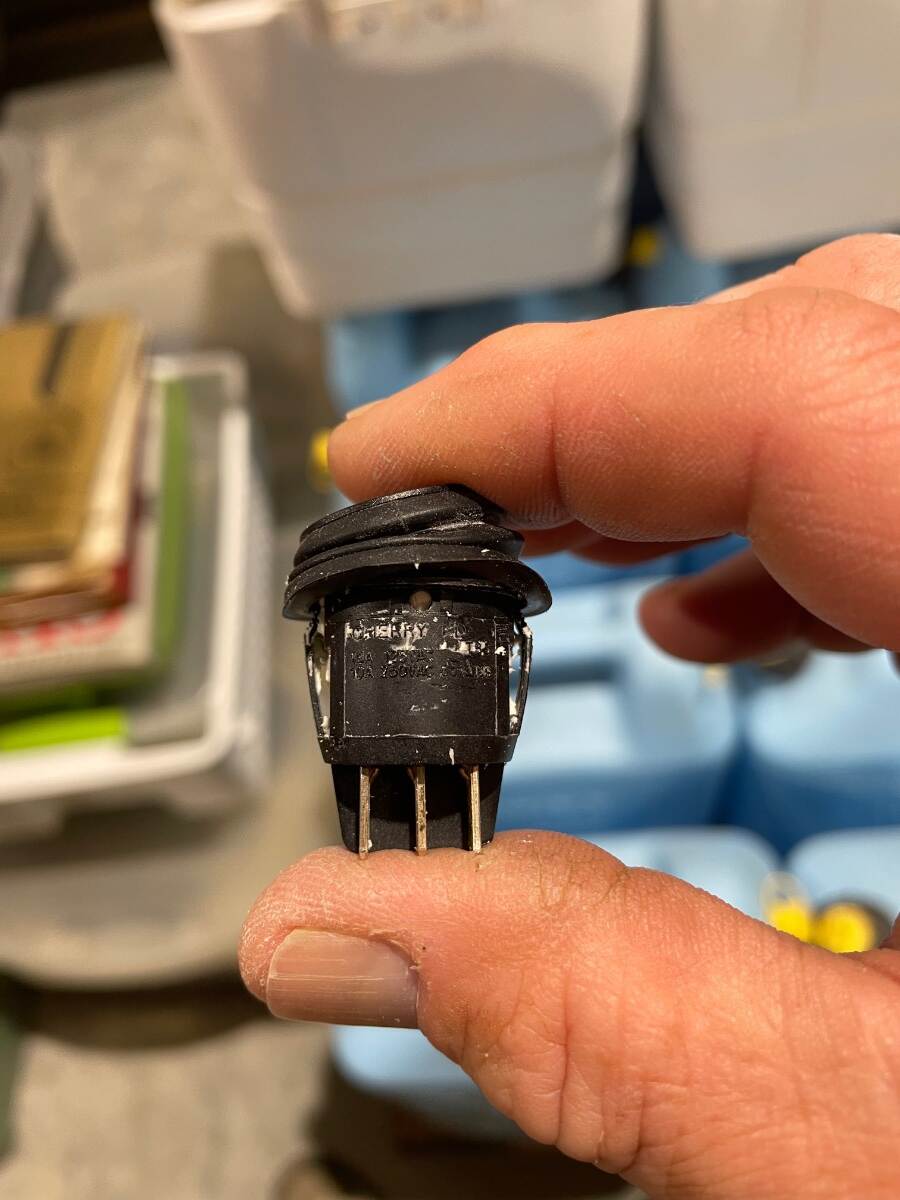
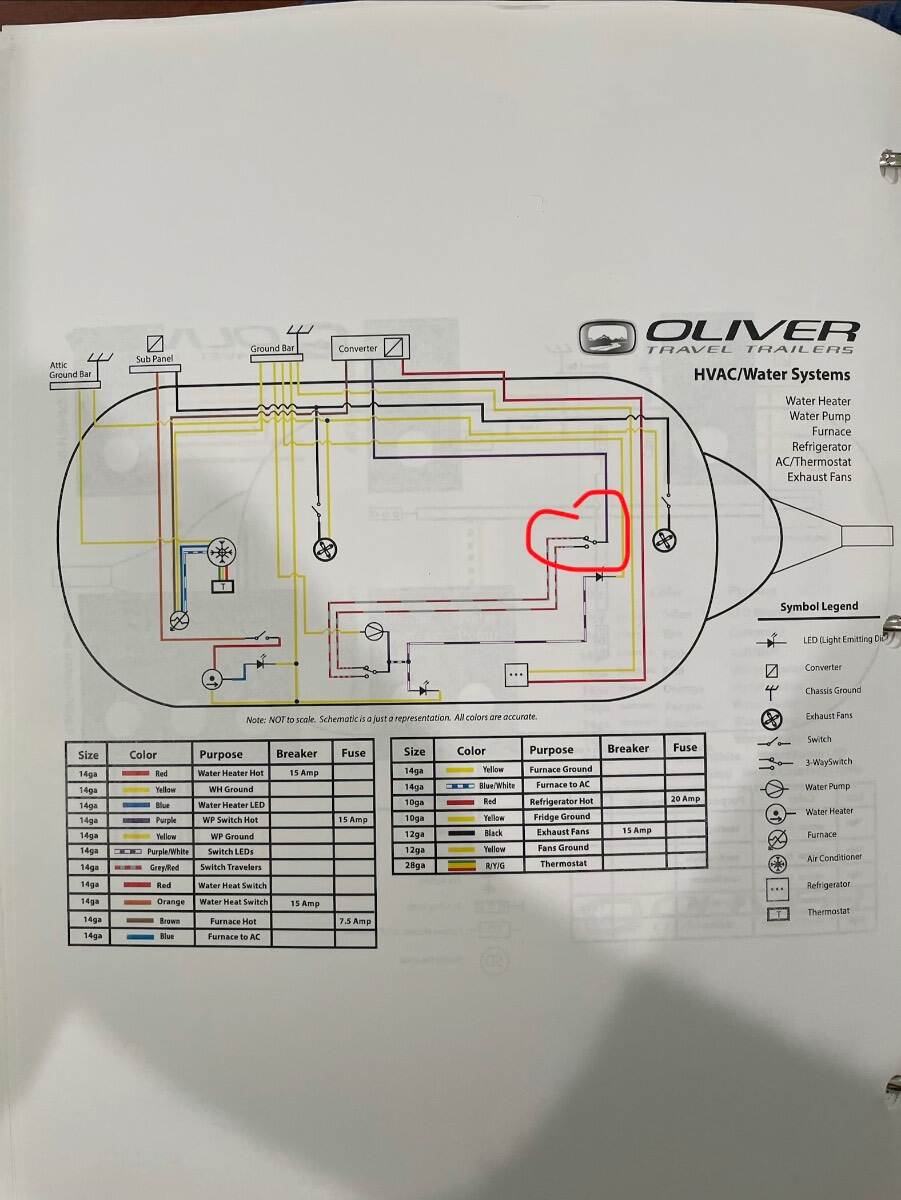
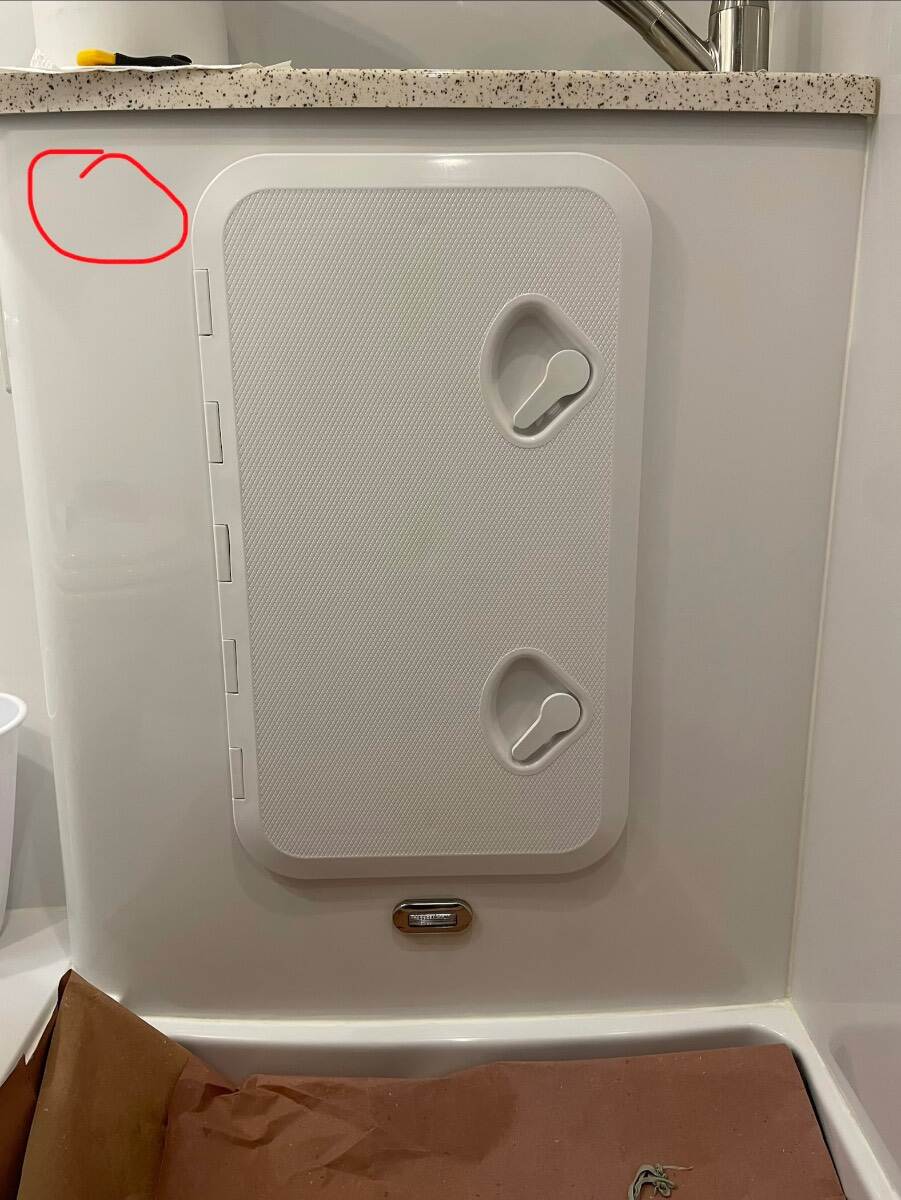
I am looking for a round rocker switch, SPDT, weatherproof, threaded mount, not lighted, blade terminals. I am not finding anything like this using my usual search methods. I have removed the shelf from the bathroom vanity and have installed a marine hatch in its place. I now must relocate the pump switch. The factory used what I think is a DPDT panel mount switch and held it in place with a wad of caulk. I want to mount the switch more securely. Switch as mounted in the shower shelf Switch removed from shower shelf Where I want to place a new switch Wiring schematic showing switch I want to replace Thanks for your help Bill
-
This is one of the major reasons I had my Ollie done by the CGI guys. Certainly I didn't want my Ollie screwed up by someone that really didn't know what they were doing. There are a few shops doing this kind of work in and around the Asheville, NC area, but, very few of them had ANY EXPERIENCE with fiberglass. And, reviews were generally mixed. After seeing how hard CGI guys work, seeing the results of their work and then getting to meet them at one of the Oliver Owner's Rallies, I was sold. There have been a few posts here on the Forum by members that have used other outfits and they have noted satisfactions with the results at prices that are competitive or even lower than CGI. Unfortunately, I do not recall any of those posts being for ceramic coating shops anywhere near Maine. Good luck! Bill
-
When I first starded to look for the missing knockout the first thing my wife said was I need a borescope camera. So in my thinking thats a green light to make the purchase. I'm sure they make one with a magnet tip just incase I do find it, LOL
-
"The price for a horoscope varies from around $30 to hundreds of dollars. " Darn Spell-changer's... 🤣
-
I got one for my phone three years ago, and find it really useful! Trying to run wires through a wall chase at home, but getting blocked? You can easily see what's in the way. Can't see the model number on the back of the stacked washer/dryer? Easy peasy! One nice feature on the one I have is that it does not plug into the phone. Instead it has its own transmitter that sends via Bluetooth to the phone. That makes it easier to manipulate the camera without the screen moving all over the place. Plus, when I bought it my phone used a lightning plug, and the current uses a USB-C plug. With the bluetooth version, it still works fine. There are also models with attached screens, but I've never used one of those. Here's mine, but it is discontinued: https://a.co/d/00RnxN3L
-
After reading @aaronorange recent post about their missing furnace knockout, I was thinking that they would have benefited from a borescope to look for it. My daughter gave me one for Christmas last year and it’s been way more useful that I would have ever believed. I use it all the time, especially in the Oliver. I’ve found wire routing paths, looked in concealed spaces, found dropped screws. I even found a lost factory screw that was grinding away under the sewer pipe. The price for a horoscope varies from around $30 to hundreds of dollars. Vevor company has models for around $65 that are ideal. It’s one of those tools you don’t know you need until you have it. Cheers! Geoff
-
Yes, Then you truly have a missing "knockout" as Craig astutely noticed, and again as he recommended you should let OTT service know by opening a ticket, and reporting such. Be sure to add your OTT model year to your salutation as that helps all responding better understand what the issue may be. B~Out