All Activity
- Past hour
-
The old Pullman Sleeper Cars had nicer looking blinds. They were nice and tight, not like a pillow🙃
-
It was delivered 2-tone by Oliver. I can't the original announcements. They were off Oliver website.
-
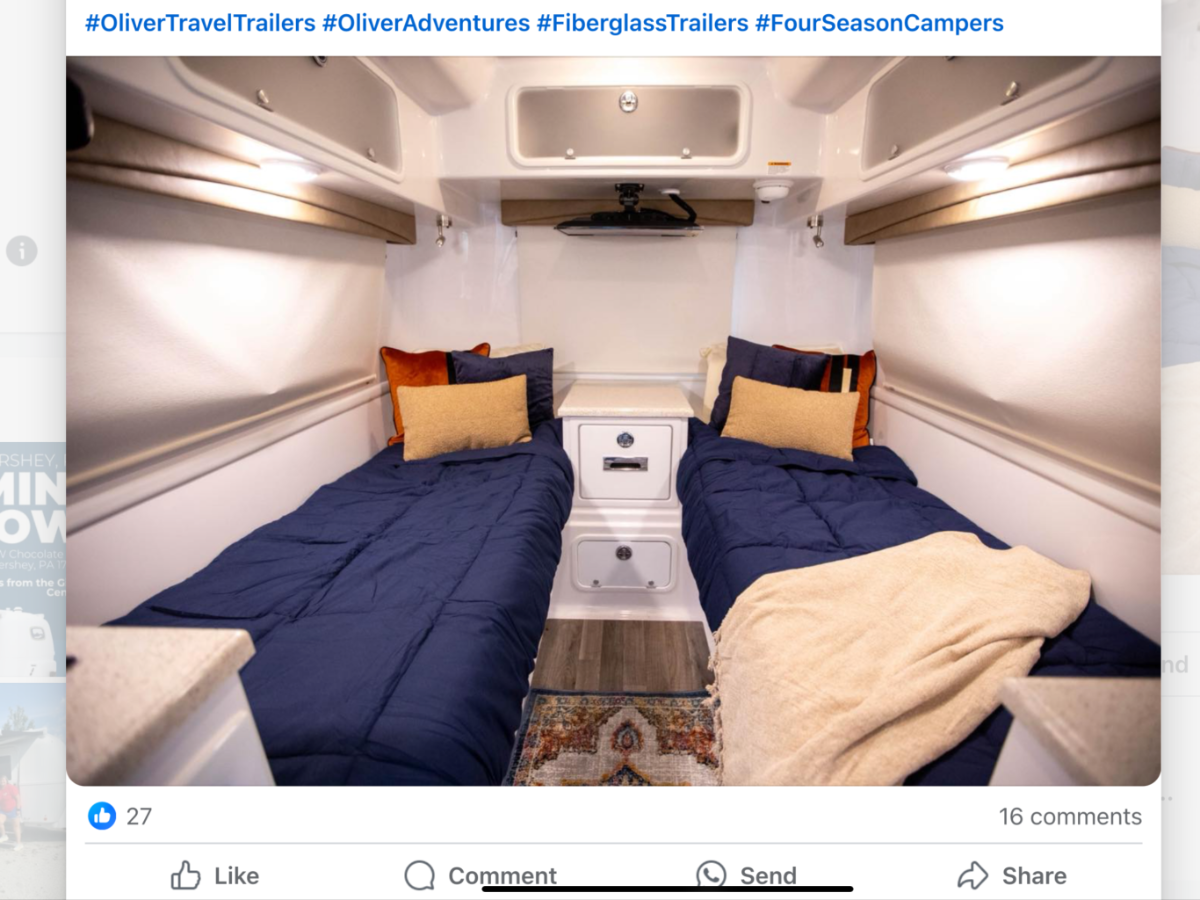
I saw that on Facebook and commented. Definitely not a fan of the new blinds! They look cheap compared to the current version, and that spot where it rests on the window handle looks like a wear/puncture point, as well as just plain ugly. The TV looks smaller, and the cable entry for the TV swapped sides. Chrome belly band seems to break up the interior better to my eyes. Overall, *I* think it is a step backwards in quality appearance.
- Today
-
It must have been painted or wrapped post sale.
-
Hull #1000 was built for couple from Tennessee that was 2-tone white/Gray. I heard it was sold. Memory was it was a white top and gray bottom, but I don't remember. It was a 2022. Not sure whether this is #1000 or someone else's. Who knows the story of Hull #1000
-
 Hey Geoff, I don't know him personally. You should contact him about the file. ABS?? Not sure what it is made of but seems to be really solid.
 -
This falls into the bucket of “Beauty is in the eye of the beholder”.

-
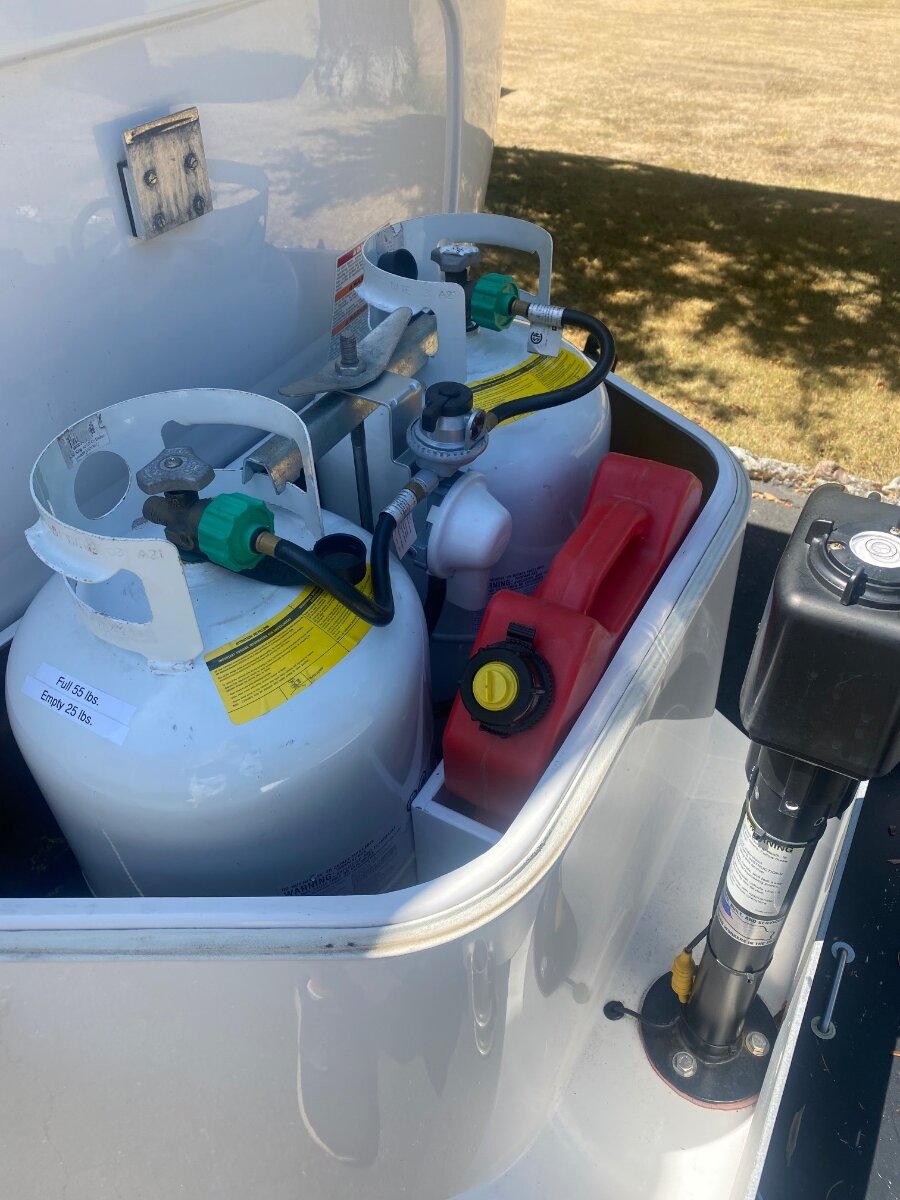
Very good use of this unused space! @ScubaRx put a disc brake controller up there moving the LP tanks back a bit. One day I’m sure I’ll mount something up there, TBD! 🤣 I’m sure you know this, but recycle this fuel into your gasser TV every time you return home. You can’t count on our regulated fuel today to last much more than 30 days without an additive. I fight this battle constantly with all the many (near 20) gas engines we have on the property!
- 1 reply
-
- 1
-

-
 David that's very cool and clever! Sounds like you know the maker! Do you think you could get the slicer file from him, or have him put it on Thingiverse? Is it made from PLA filament? BTW, I never mentioned it, but the rubber weather cap that comes with the Rj45 socket can be used under Furrion cap. Mine has disappeared though! Thanks, Geoff
 -

Goal: to Minimize the Need to Move the Beds while Camping
jd1923 replied to jd1923's topic in Ollie Modifications
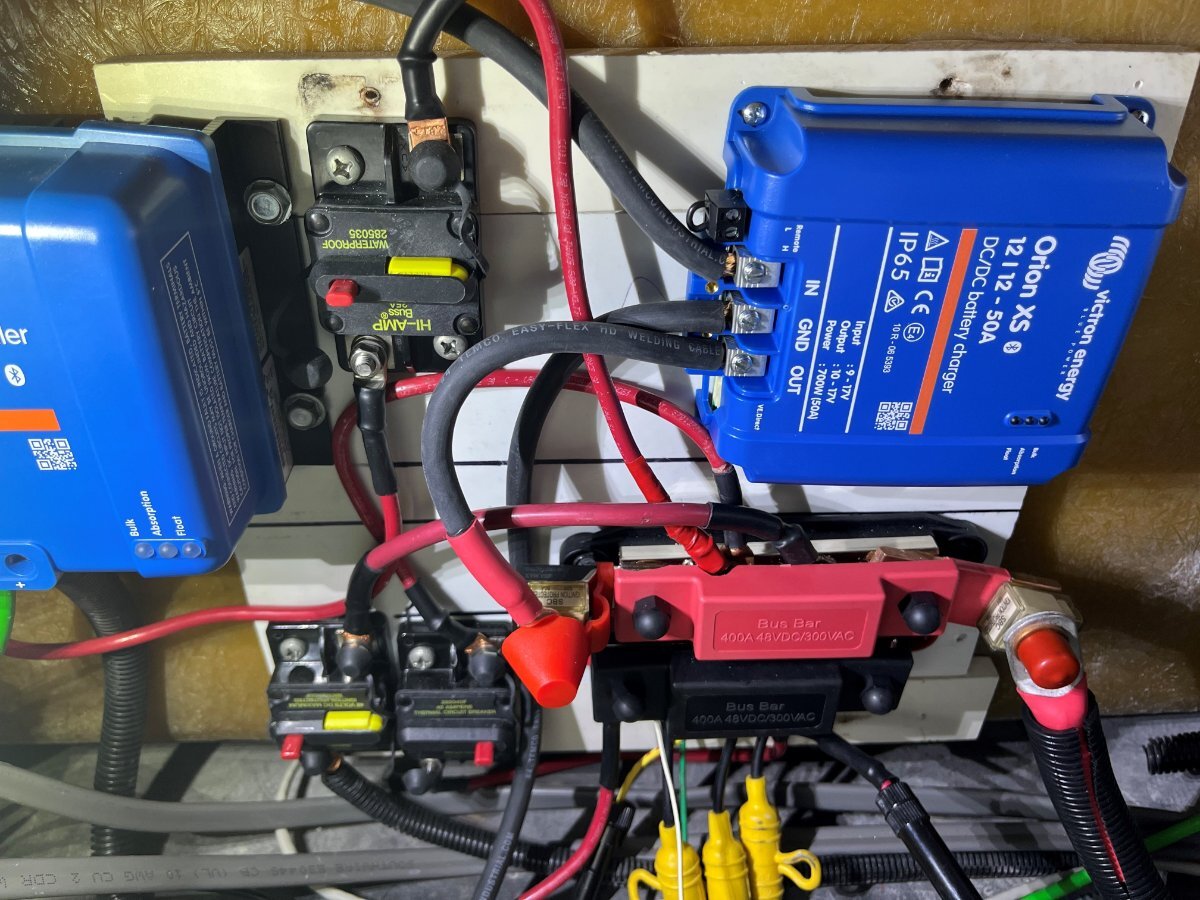
Final step on rewiring the basement electric. I had left room for the DC-2-DC charger and having everything conveniently rewired to the rear dinette seat made everything close and easy! 😂 I have another thread on the charger installation => https://olivertraveltrailers.com/forums/topic/10757-the-victron-orion-xs-1212-50a-dc-dc-charger-complete-installation-and-testing/#comment-115374
-
And thank you for saying so! More info here =>
-
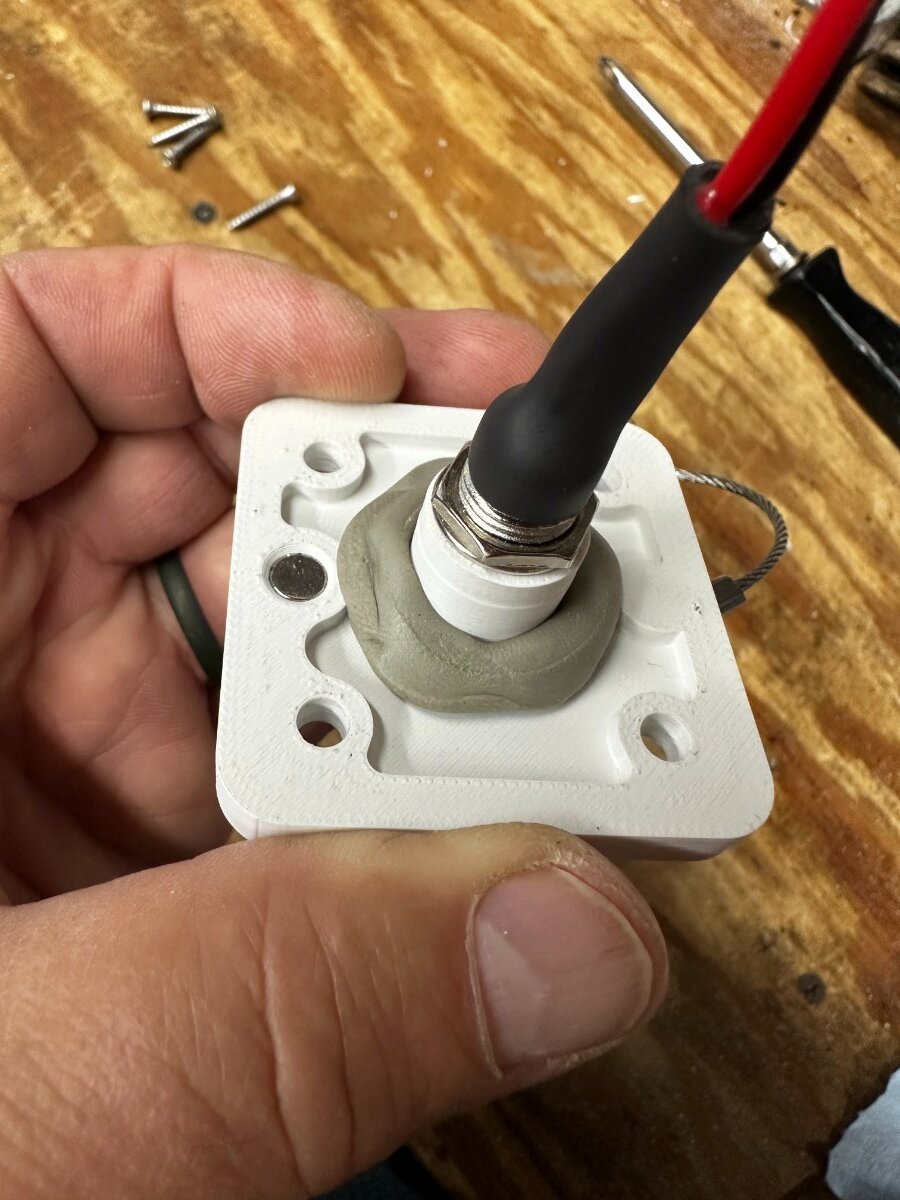
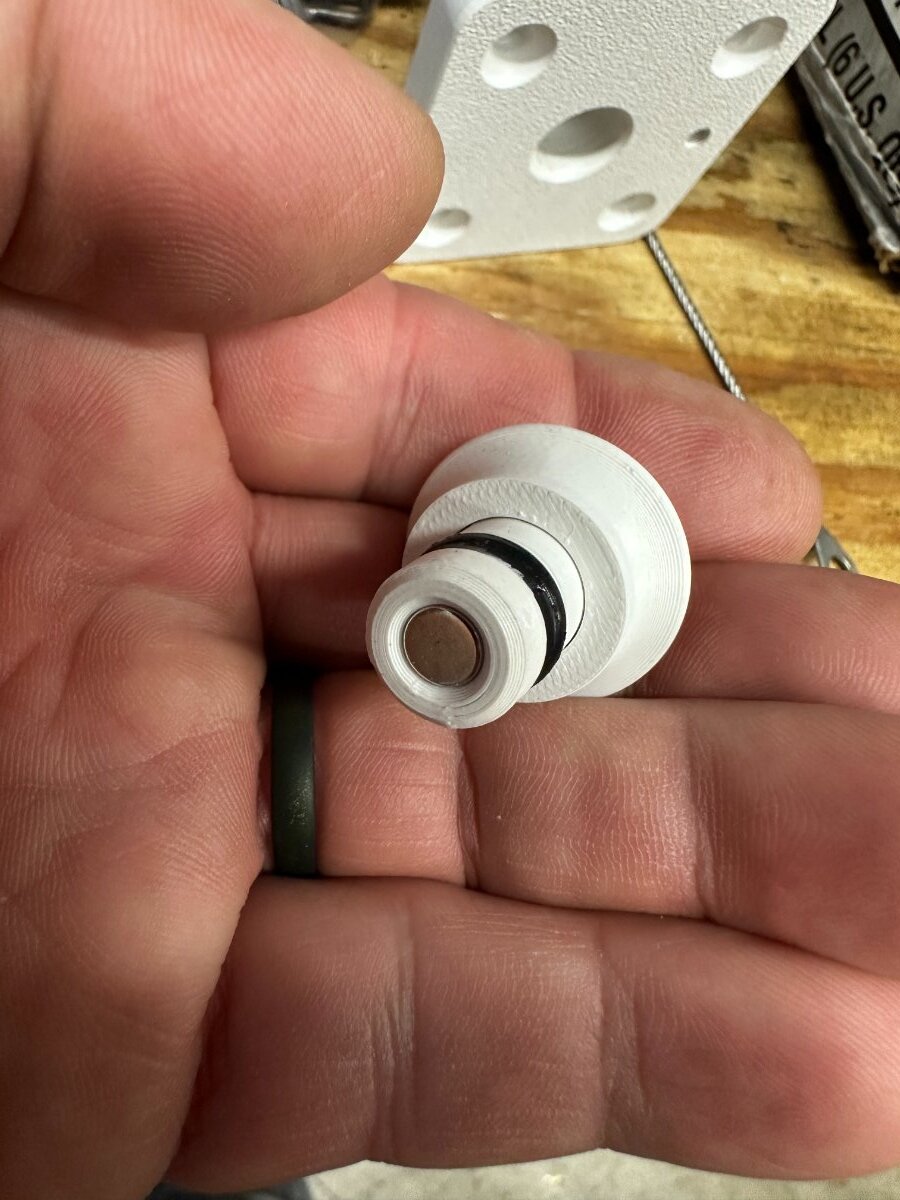
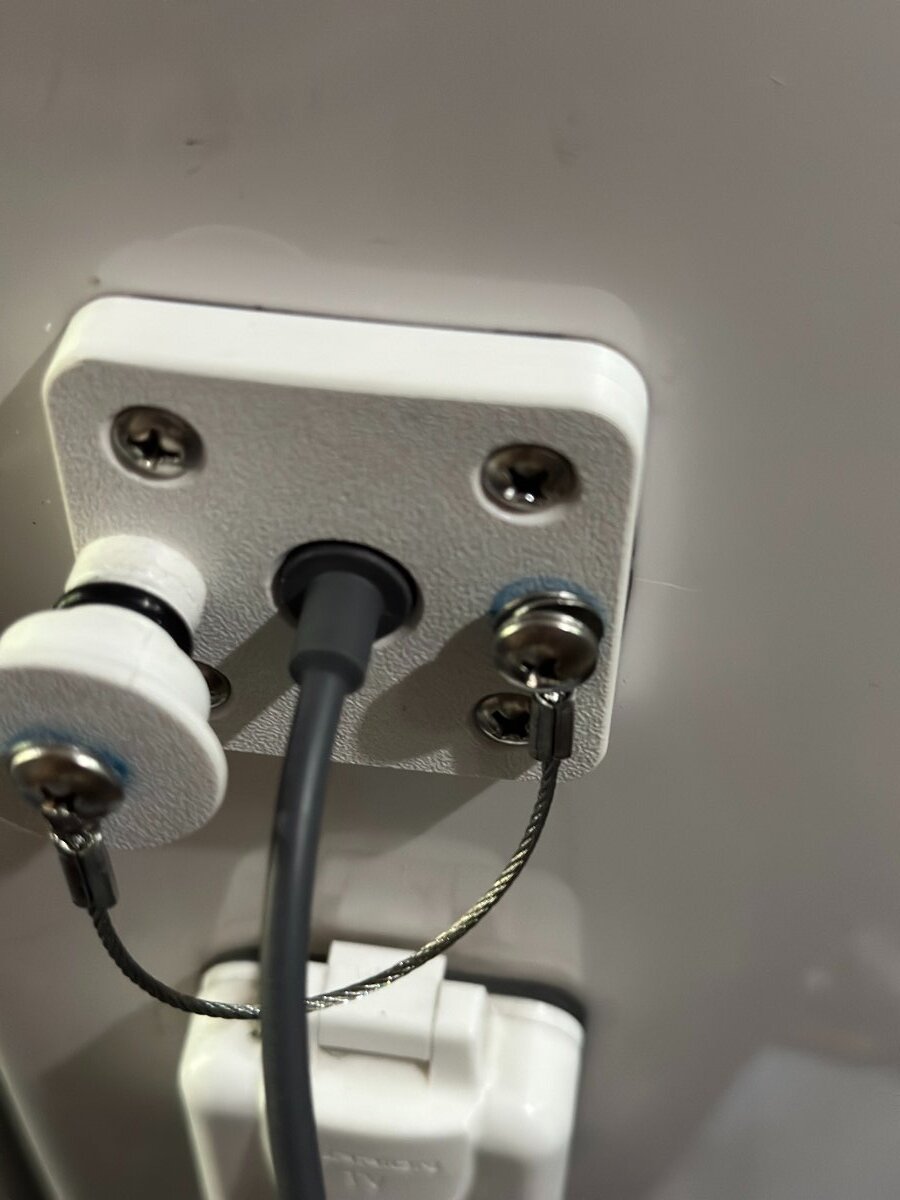
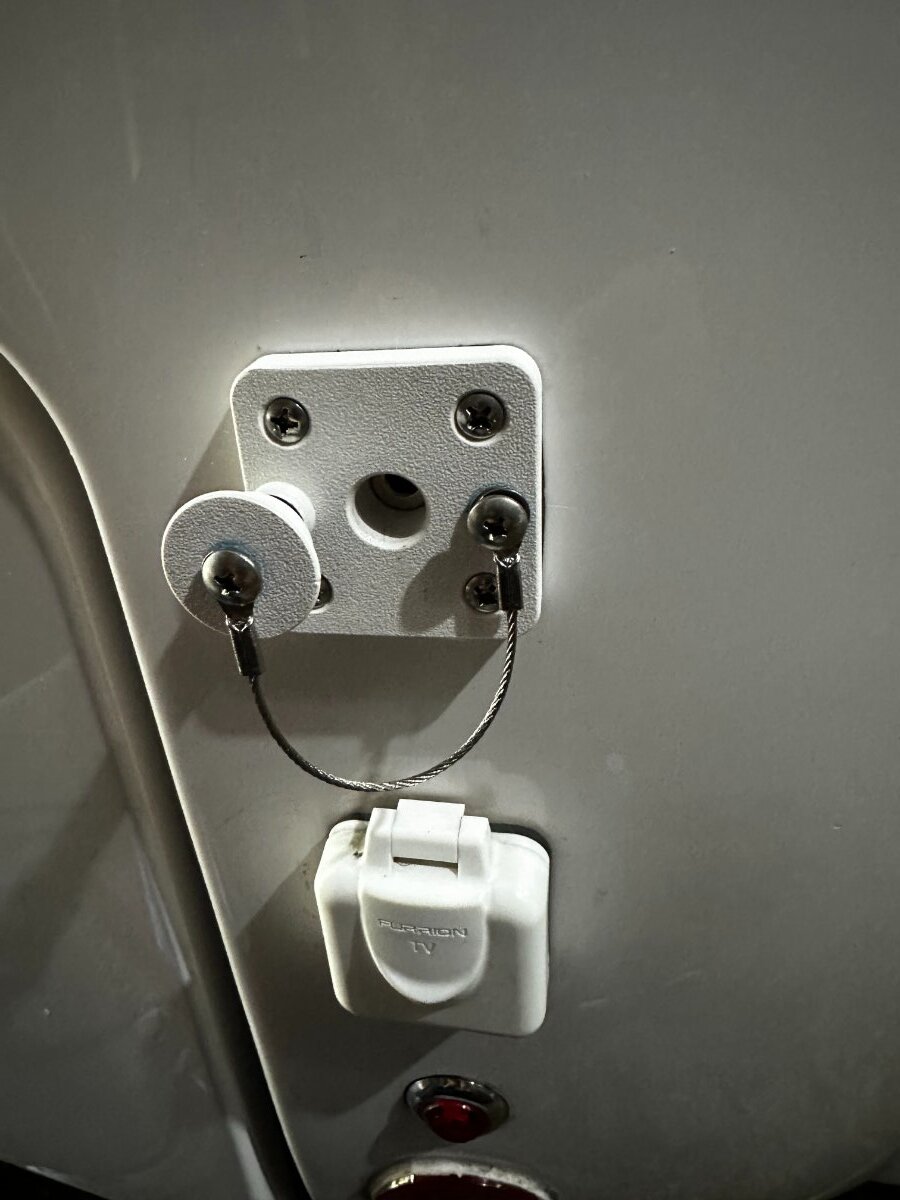
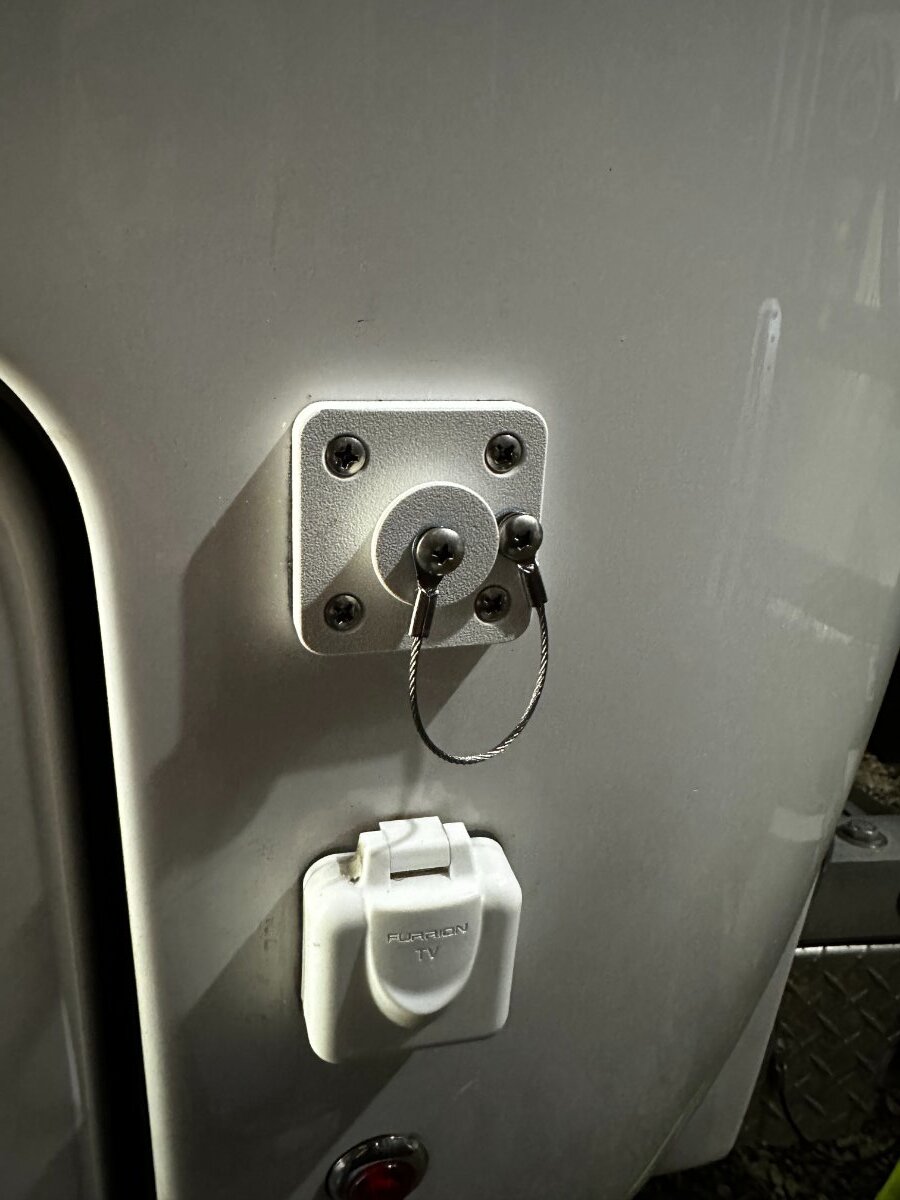
Going back to Geoff's original post on this thread, I did this (except for relay) and it works great but have been concerned about water penetration at the exterior socket when Starlink cable is plugged in. I have swapped mine out for a water-resistant component custom designed and made by Tom at Platypus3DDesigns in Mesa, AZ. Although the original socket worked great, it was not water-resistant so I asked Tom to create one that would replace the Furrion Mini TV/Satellite Inlet. Here is the link to his component. https://www.etsy.com/listing/4349330543/starlink-mini-dc-cable-pass-through It has 18 gauge wires attached and a magnet that holds the cap in. In addition, he adds another magnet on the side that can hold the cap when not inserted. I asked for a modification so I could add a lanyard. Tom drilled and threaded #8x32 holes for that. All screws and machine bolts were attached with blue Loctite. I was able to use the original Furrion gasket. I had to drill out the hole in the fiberglass a bit larger and I wrapped some butyl sealant around the barrel upon installation. Here is a link to the lanyards. https://www.amazon.com/dp/B0B4RXTKBH?ref=ppx_yo2ov_dt_b_fed_asin_title&th=1 To finish it off, I used a very small amount of dielectric grease on the cap seal and rubber fins on the Starlink cable end. Works great. David P.
-
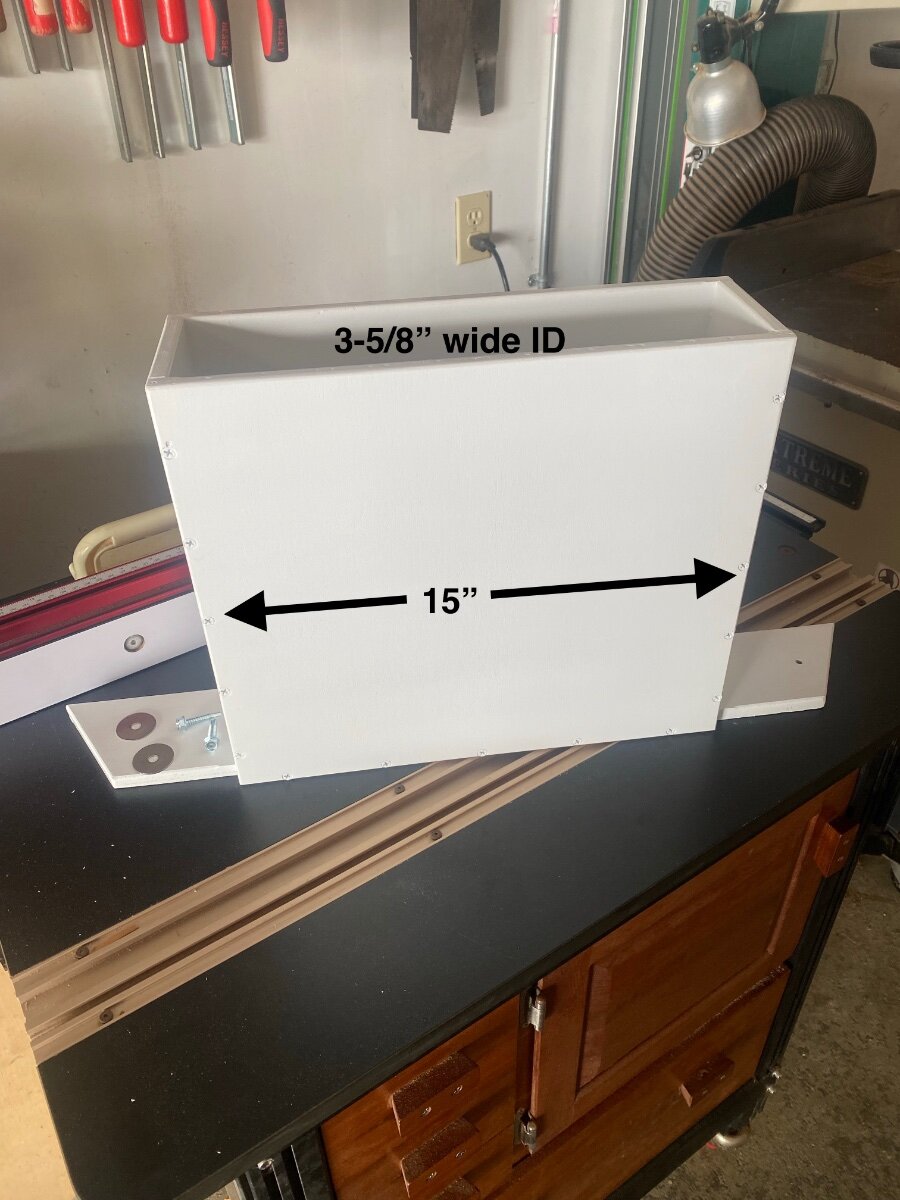
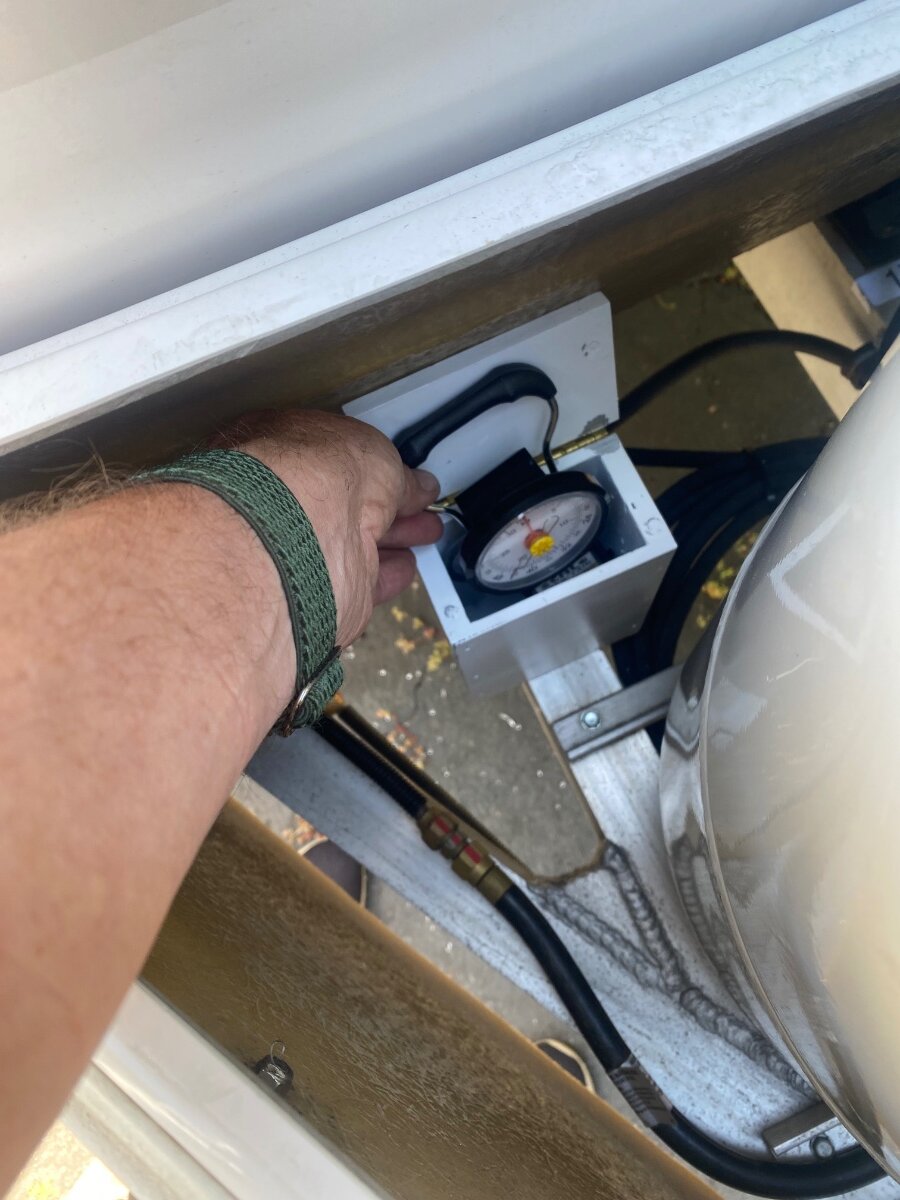
While preparing for an upcoming trip, where I’ll probably need to run a generator for AC, I decided to utilize some unused space in the dog house to store my RotoPax 2 gallon gas can. I used to carry it in the tongue tray with the generator, but now I’ll always carry it for emergency fuel. I made a rectangular box that's sized so there is just enough friction to hold the gas can snugly in place without needing a strap, and narrow enough to fit between the propane tanks and the front of the doghouse. The tank can’t come out anyway because of the doghouse cover. I measured the can after leaving it in the sun for a while to account for any expansion. The fuel can holder is made from 1/2” void free plywood (baltic birch), and it’s put together with glue and screws. It was rattle can painted with primer and plenty of white gloss, then attached to the frame with self drilling 1/4” screws, like the ones holding the propane tank tray. It can be locked through the handle if desired. The RotoPax gas cans were originally made for off-roaders, and they are pricey at around $85 each. But they are practically indestructible, and they come in different colors for diesel or water. I’ve had mine for around 7 years and it’s never leaked a drop. There are knock-offs available on AZ for about half the price, but I can't vouch for their quality. From the plywood scraps, I also made a little box for the luggage scale that I use for weighing the propane tanks. It was made in the same way with magnets to hold the hinged lid closed. It was mounted in the doghouse in front of the propane tanks. Hope someone finds this useful. Cheers! Geoff
- 1 reply
-
- 5
-
-
Just saw this pic of the 2026 Oliver “retro” interior with roller style window shades. 😳 Appears that the interior window latch may rub on the shade. Also note the white belly band instead of chrome.
- Yesterday
-

Million Dollar Highway in a half ton truck with LE2?
johnwen replied to routlaw's topic in Towing an Oliver
Yes, on the Ollie. -
 I like how you rewired. I need to do that. Thank you very much!
 -

Million Dollar Highway in a half ton truck with LE2?
routlaw replied to routlaw's topic in Towing an Oliver
Point well taken, and great info. I do run quite a bit lighter than you but still. Presumably the flat was on the Ollie and not your Silverado surely? Scary stuff. Likewise I keep a TPMS on ours too, monitors heat and pressure. -
Million Dollar Highway in a half ton truck with LE2?
routlaw replied to routlaw's topic in Towing an Oliver
Ah the beauty of a big diesel engine when it comes to engine braking. All that compression truly becomes helpful on these steep descents. A definite disadvantage for gas engines especially the 6 cylinders, turbo boost or not. A couple of years ago I learned this lesson all too well while going over Teton Pass dropping down to Jackson. By the time I was halfway down my then 2013 Ecoboost and Ollie brakes were all smoking. Even 2nd gear was not much use on a 10% grade that runs for about 10 miles. Not something I would ever like to repeat. We were not the only ones that day smoking brakes either. A fifth wheel just in front of us being pulled by a 3/4 ton truck was also in trouble and had to make an emergency pull over. Thus my caution on the Million Dollar Highway. -
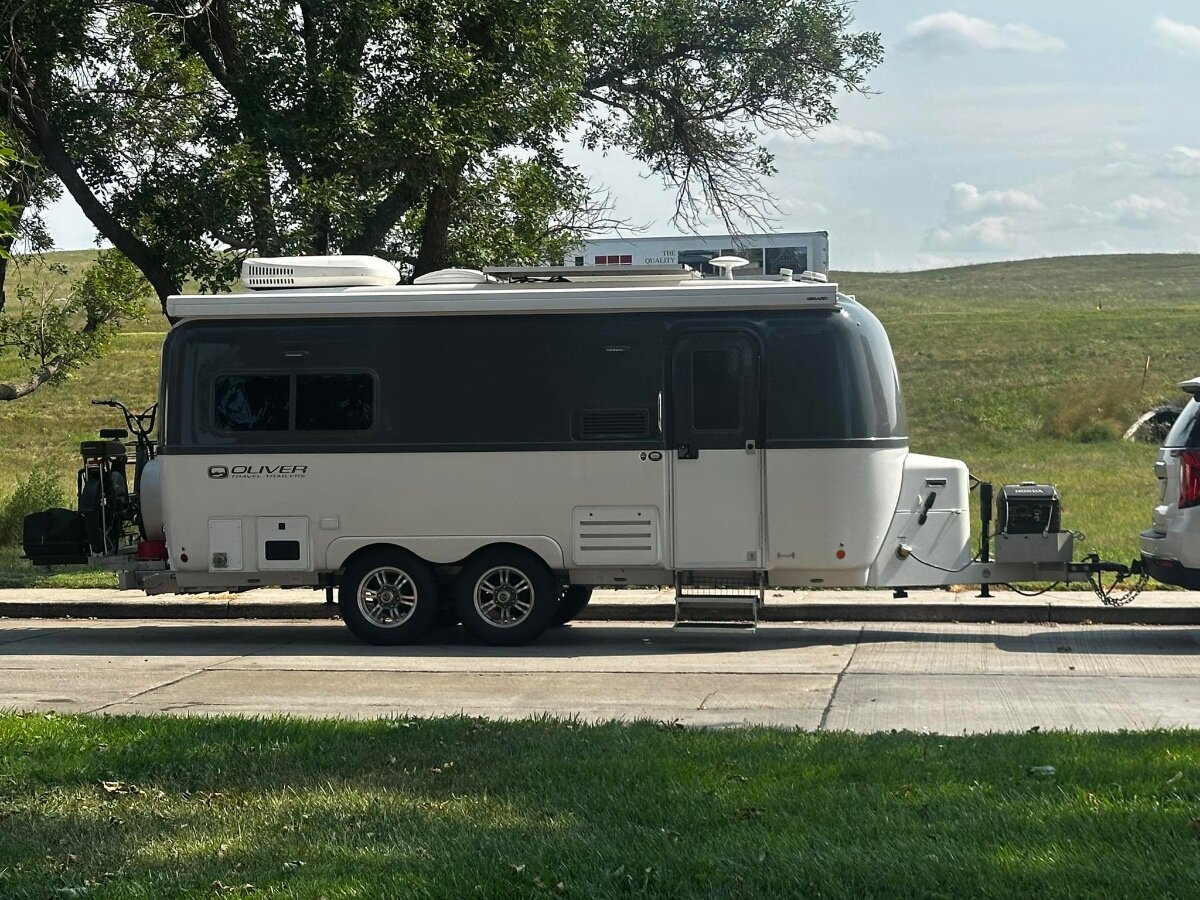
Saw a grey/white E2 heading West on I80 in Nebraska today (grey top/white bottom). Best-looking E2 I have ever seen. If this was you, how did you achieve the solid grey on the top clamshell (wrap, paint, gel coat)?
-

Haloview BT7 Touch Rear Camera installation on 2022 LEII
dhaig replied to dhaig's topic in Ollie Modifications
@Snackchaser, thanks for the kind words. I have admired you many technical posts. I recall seeing your posting on turning on the rear camera. I had several projects in my queue at the time, but will revisit. Don -
Million Dollar Highway in a half ton truck with LE2?
routlaw replied to routlaw's topic in Towing an Oliver
This is what I keep hearing from some YouTube videos. Might be a better route on my return trip vs on the way south. -
Haloview BT7 Touch Rear Camera installation on 2022 LEII
Snackchaser replied to dhaig's topic in Ollie Modifications
Nice work Don, very creative and well documented! Being such a handy guy, you might also like my post "Turning on the rear camera automatically." It sure beats always having to remember to flip the camera switch on and off every time. Cheers! Geoff -
Late-Model RAM Owners - how do you like your “tech”?
Snackchaser replied to Galileo's topic in Towing an Oliver
Just an FYI. If the digital rear view fails, it still acts like a normal mirror. It has to, because the camera doesn't work well in the dark. -
Much, MUCH better than the stuff coming out of Elkhart… That said, dropping the ball on a cosmetic issues on a LOT of units (based on comments above) gives a black eye. Our interior “belly band” started falling off on the curb side after a season or two. I suspect that improper/lacking surface prep combined with a heavy material - and likely shrinking with age - caused it to pull out of the corner(s) and progress from there. Back in the golden days (late ‘70’s - early ‘80’s) I used to install body side molding on new cars. Very very similar to this belly band material. Clean surface (acryl-sol) and heating the material were key to good adhesion. Even then, the material would try to return to its original coiled shape and start to pop loose at the ends. I purchased enough 1/2” 3M “VHB” tape to re-apply the band - but have not done so yet for two reasons: As with auto body side molding - getting this stuck on -straight- is damn difficult! I used to have a magnetic guide bar to assist - but that wouldn’t help in this case. I just don’t want some wavy install reminding me for the next 5-10 years what a half-fast job I did. I also don’t want the durn thing falling off again. Im thinking a much thinner, lighter type of trim tape would be a better solution. Actually, I just thought of a replacement that -may- be acceptable: https://www.3m.com/3M/en_US/p/d/b40068317/ I’ve used this to temporarily seal up holes or cracks on our sailboat until a permanent repair can be made. I do find that it doesn’t stand up long-term when exposed to sun, but inside the boat, it seems to hold up pretty well. I’d like it it were thicker - so that the holes below the seam didn’t “print” through, but lacking a thicker tape (or thinner piece of trim) it may be an acceptable option. Being white and easier to work with, it’s less likely to go on with curves and undulations, and less obvious if it does. Anyway, I’ll read the rest of the thread to see if anybody else can up with a better trim material.
-
Haloview BT7 Touch Rear Camera installation on 2022 LEII
dhaig posted a topic in Ollie Modifications
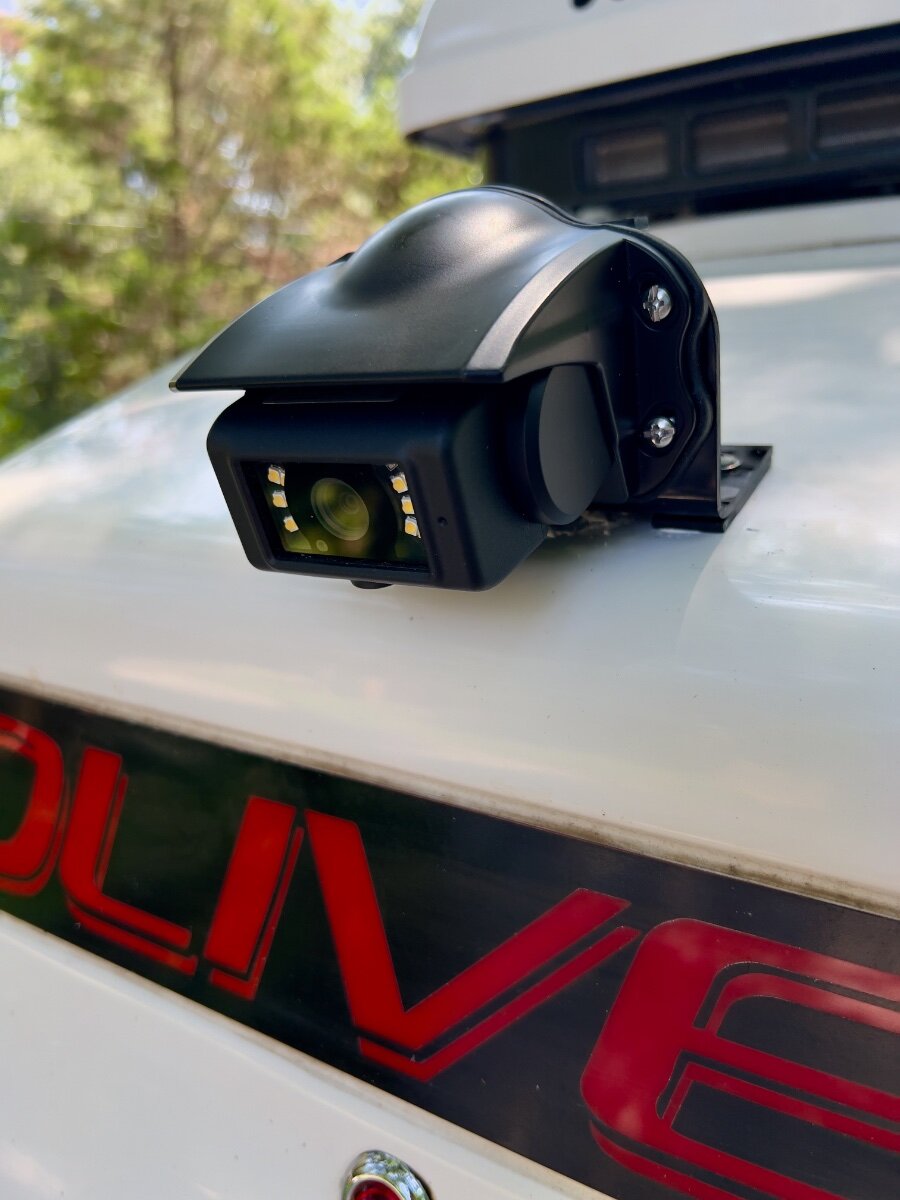
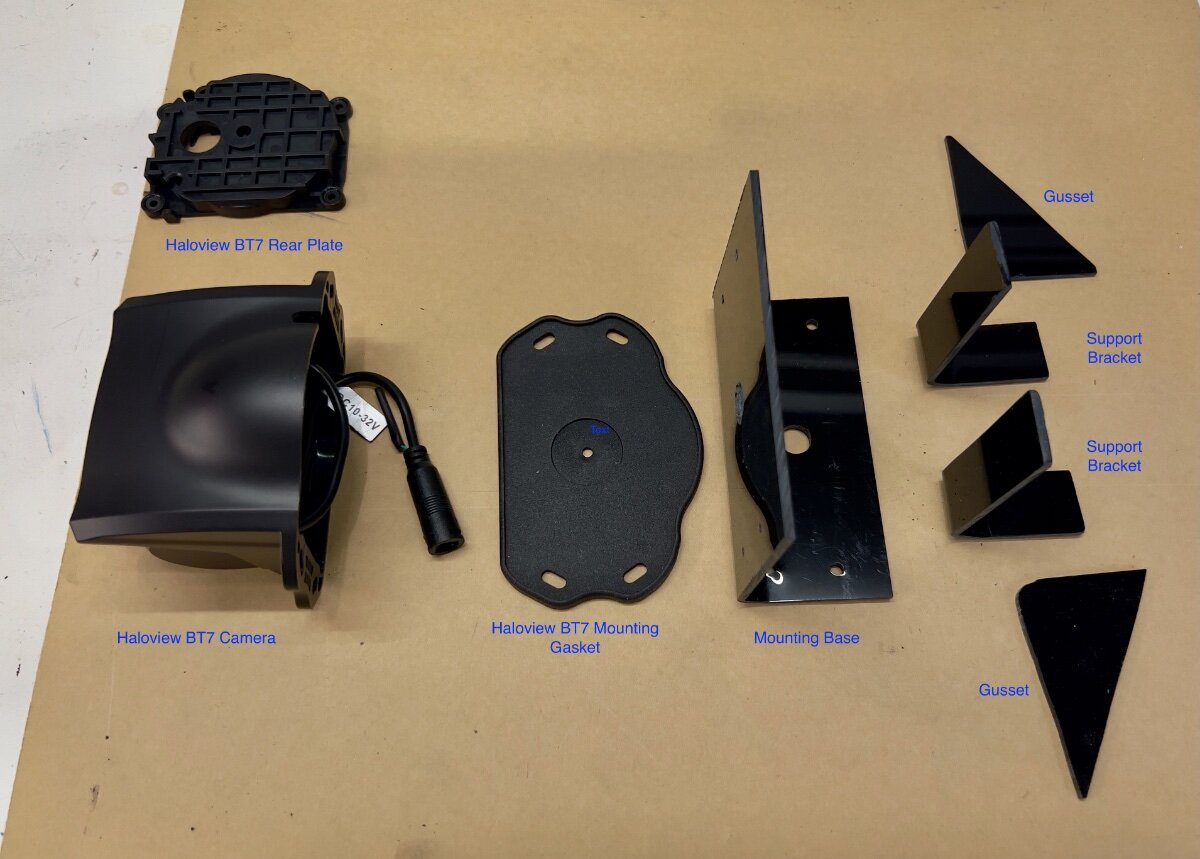
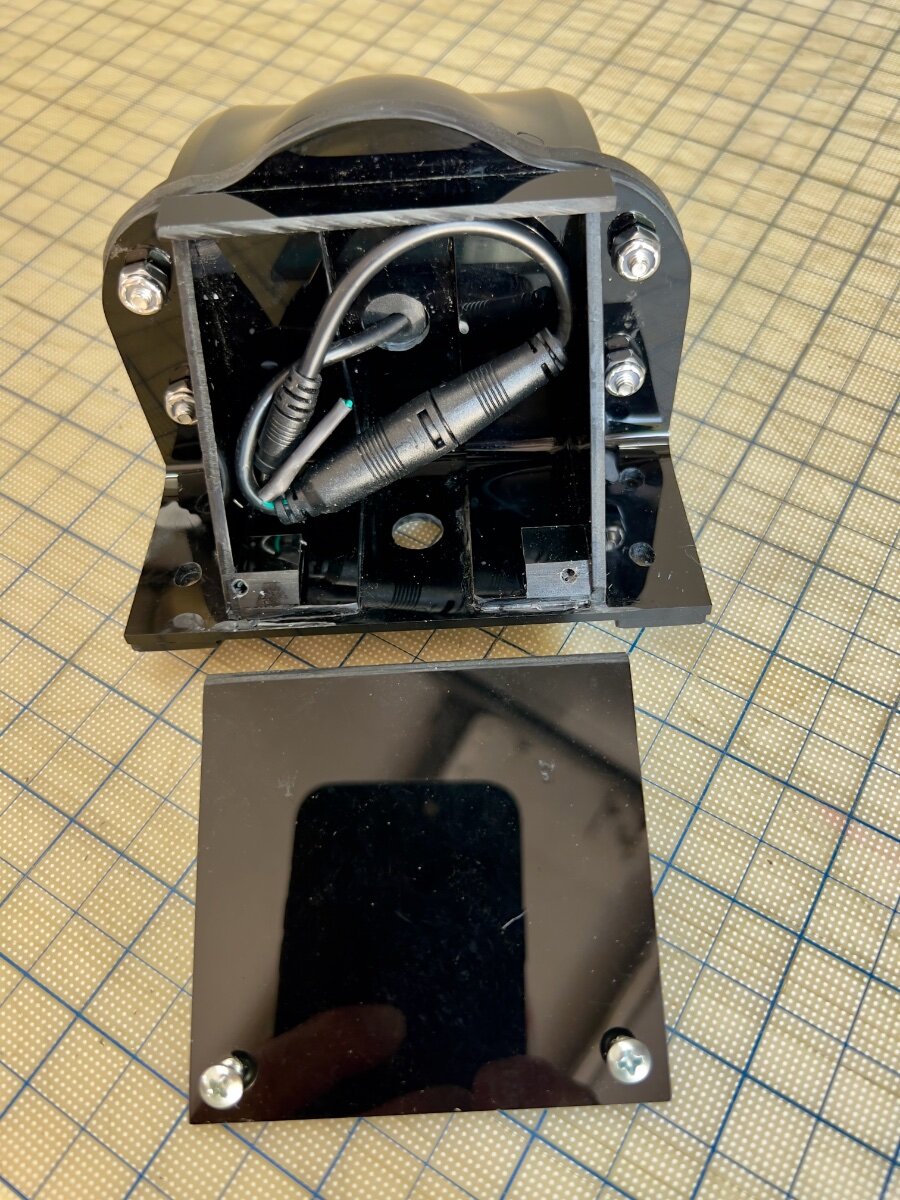
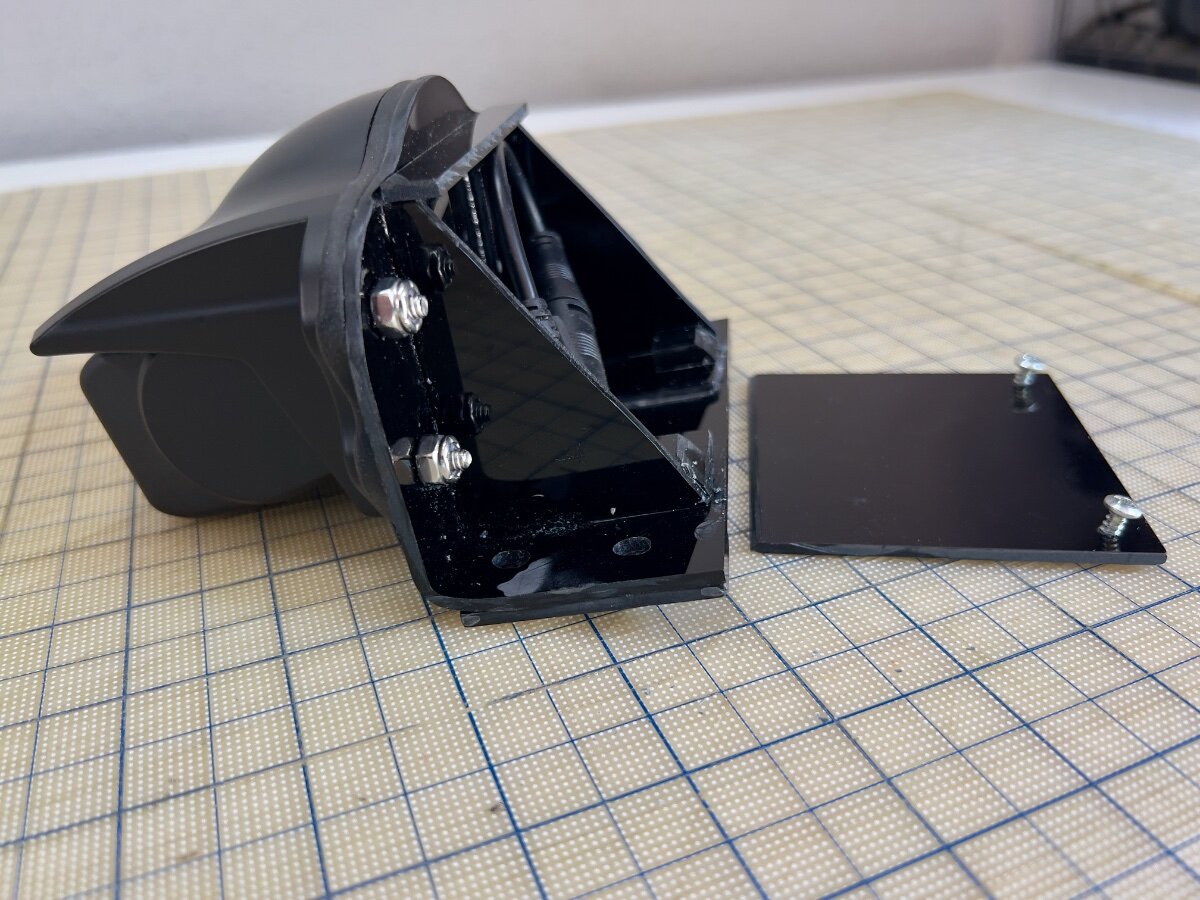
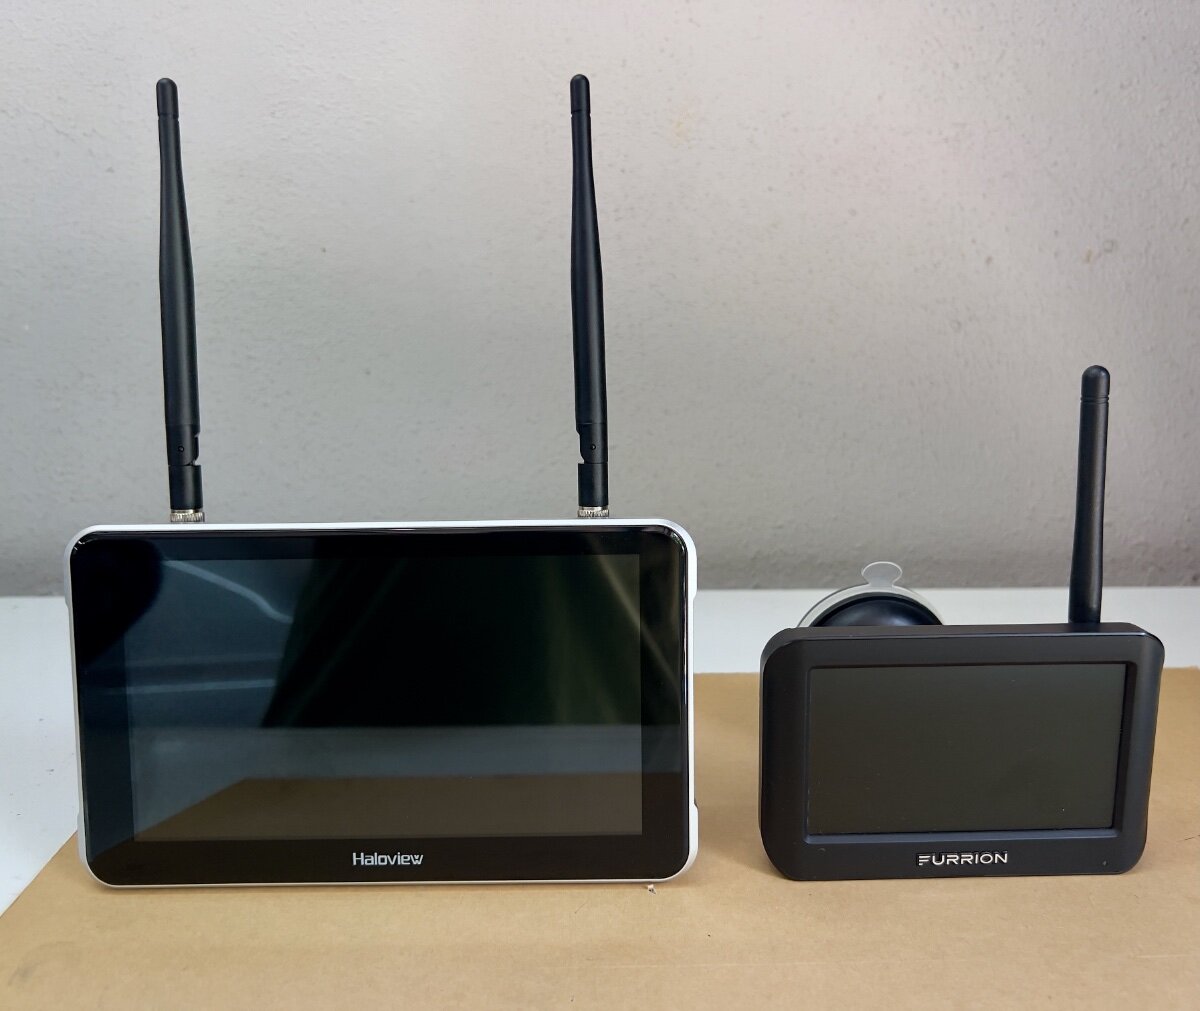
I recently purchased a Haloview BT7 Touch Rear Camera to replace the Furrion Vision S Camera System (Model F0S43TADS) we purchased as an accessory option on our 2022 LEII. Following delivery of our trailer in February, 2022, it was quickly evident the Furrion camera was largely useless. I continued to use the Furrion camera, with increasing frustration. The very limited view to the rear was a safety issue. I began to research RV rear cameras and after reading many reviews selected the Haloview BT7 Touch. I was impressed by the specs and favorable reviews, but failed to note the camera is designed to mount to a vertical rear wall, not the sloping rear roof of an LEII. I could have returned the Haloview camera, but I did not see a good second choice. Thus, I decided to fabricate a mount to be installed in the same position as the Furrion camera. The result is the custom mount below: Fabrication Process I had some black acrylic sheet, .010" thick, from a prior project (See: Window Vent Mod- Louvered Ventilators), which seemed suitable material for a camera mount. I had some thicker acrylic sheet, but decided to first use the thinner sheet to create a mockup by bending the acrylic sheet. Initially, I had concerns the thinner sheet would not be sufficiently rigid to hold the camera steady, but I was not sure I could bend the thicker sheet. The Furrion camera and its mounting gasket were removed from the roof of our LEII and used to begin the layout of the base for the new mount. I wanted to use the four existing holes in the roof which held the Furrion camera in place. I had a scrap piece of acrylic about 7" wide and 20" long. I used 2" blue painter's tape applied to the acrylic and, with a fine point mechanical pencil, began marking out the mounting hole pattern from the Furrion gasket. Next, I flipped the scrap sheet of acrylic over, applied blue tape and began positioning the Haloview camera on the tape. My initial concept was to have the main part of the mount be a single piece of acrylic bent to an angle of approximately 80 degrees. When mounted to the sloped roof of the trailer, the face of the mount would be approximately vertical for mounting the Haloview camera. The layout of the mounting base resulted in the base being approximately 2.0" wide, and the nearly vertical mounting face approximately 3.5" tall. I also allowed about 0.75" for the bend radius. So, before bending the rectangular sheet of acrylic was approximately 6.25" x 7.0". I cut this piece from the end of the 20" long scrap. Before bending, I drilled all needed holes in the mount base, as marked during the layout process. NOTE: See YouTube for many useful videos on bending acrylic sheets. To bend the mounting base, I sandwiched the rectangular piece of acrylic between two pieces of scrap wood approximately 12" x 3", with the acrylic area to be bent aligned on the long side of the wood scraps. I extended the acrylic from the wood scrap approximately 2.5" to 3.0" in preparation for bending. I clamped the sandwiched pieces to my workbench to ensure it would not move during the bending process. Using a heat gun, I began to heat the area to be bent, moving back and forth. Wearing gloves, I held two other pieces of wood, each approximately 2" x 5". As the acrylic became heated, I applied gentle pressure to the extended portion of the acrylic, using the pieces of wood in my hand. I continued to move the heat gun along the bend area until I could begin to bend the acrylic. As the acrylic began to bend, I used care to keep the bend straight and at 90 degrees to the sides. I used a steel carpenter's square to test the acrylic as I bent it. As I approached the desired finished bend angle, I released the acrylic to check the angle. Satisfied with the bend angle I trimmed the top of the mounting base to the contour of the Haloview mounting gasket with a scroll saw. Having the mounting base bent as desired, I began to plan how I would make it sufficiently rigid to hold the camera steady. The photo below shows the other parts which would comprise the rear support area. Also at the rear I wanted to enclose the wiring connecting the camera to the 12VDC power from the trailer. Haloview BT7 Camera and mount parts Once the mounting base was bent as desired, I cut two pieces approximately 1" wide from either end of the mounting base using a table saw. These two pieces became the support brackets. Being bent at the same angle as the mounting base, they fit well to backup the mounting face. The triangular gussets also add rigidity, being bonded to the mounting base and the support brackets. The photo below shows the mounting base (face down) with the support brackets and gussets attached at the rear. Acrylic cement was used to weld all parts together. Mounting base face down with support brackets and gussets in place Side view of mounting base with support brackets and gussets in place To protect the power supply wiring from UV exposure and squirrels, I added a cover and a top piece across the gussets. The rear compartment does not need to be watertight, since the wiring connectors are watertight. Haloview includes a short adapter which connects to the existing Furrion connector protruding from the roof. The photos below show the camera on the mounting base and cover from the rear and side views. Mounting base and cover (Rear) Mounting base and cover (Side) Mounting the Camera to the LEII When I removed the Furrion camera from the roof of the trailer, I noticed several things: The 12VDC power supply wiring passes through a hole in the trailer and was effectively sealed with the white caulking used throughout the trailer. This was not visible before removing the Furrion mounting gasket. The sealant was in good condition, however, it formed a small mound on the roof of the trailer. The base of Furrion camera was hollow and the mounting gasket conformed to the mound, allowing the outer shell of the camera to meet the trailer roof. The holes for the screws holding the camera to the trailer roof are NOT through holes, reducing the risk of water leaks into the trailer. The Furrion camera was not mounted at the lateral center point of the trailer, but not so far off that I had noticed in over three years using the trailer. The Furrion camera was also not quite parallel to the Oliver sign just below its mounting position. From the ground this was not perceptible. There were multiple trial fittings of the new mount as the fabrication process proceeded. From these fittings the following adjustments were made: The mounting holes for the new base were elongated (using a Dremel tool) to permit the new mount to be swiveled slightly in azimuth to have the front face of the camera parallel with the top edge of the Oliver sign. Two acrylic "runners" approximately 0.5" wide and 2.0" long, were attached to the bottom of the mounting base to straddle the mound of caulk where the power supply wire passes through the roof. I reused the mounting screws, putting fresh caulk into the screw holes and around the screws. The new mount covers the same area where the power supply wire passes through the roof. It is protected from UV by the new mount, but water can run under the new mount. The Results The Haloview BT7 comes with two mounts, one with a suction cup for windshield mounting, the other a 3M VHB bonded disk for attachment to the upper dashboard. I prefer the windshield mount, which is substantial and widely adjustable. It is very stable, with no vibration. The signal strength indicated on the monitor showed a 5 bar strong connection to the rear camera. Monitor comparison- Haloview 7" vs. Furrion 4.3" (diagonals) Yesterday, I took a 35 mile shakedown cruise for the camera on the way to the storage facility. The Haloview camera and monitor have met all my expectations. The visibility to the rear is vastly improved. I now see vehicles approaching in the same lane and in lanes on either side. I was particularly impressed to see merging traffic entering the highway on my right, before I could see them in my mirrors. Overtaking traffic is now seen well before they come abreast of the trailer. In bright Texas sun, the video on the monitor is clear and not washed out. There is no jitter in video from the camera, and the signal was always strong, even with the antennas folded horizontally across the top of the monitor. The touch screen controls work well and are easily used while driving. Also, my custom mount proved to be very solid, with no vibration of the video due to camera movement. I recommend the Haloview BT7 Touch camera to anyone considering replacing their Furrion rear camera. Unfortunately, Haloview does not appear to have a roof mount adapter available. I had sent an email query to Haloview Support and received a reply indicating they did have such a mount and provided the following URL: https://www.haloview.com/bt-series-camera-peaked-cap-bracket-compatible-with-furrion-and-voyager-pre-wired-rvs.html. Nothing on this page convinced me it was a roof mount. It does say the Furrion hole pattern is matched for mounting to the trailer. But only if the Furrion camera was mounted to a vertical surface. I have not yet received a reply to my email pointing out they sent me a link to a vertical mount. I hope this is useful to other OTT owners with Furrion cameras. Regards, Don


.jpeg.bc5410dca345743218c7cdd61cd7a837.jpeg)
.jpeg.db24308a47698837a565fc55eec3a655.jpeg)
.jpeg.b601f1e7eac4638423f2297d1cfed3e5.jpeg)