Leaderboard




Popular Content
Showing content with the highest reputation on 05/08/2026 in Posts
-
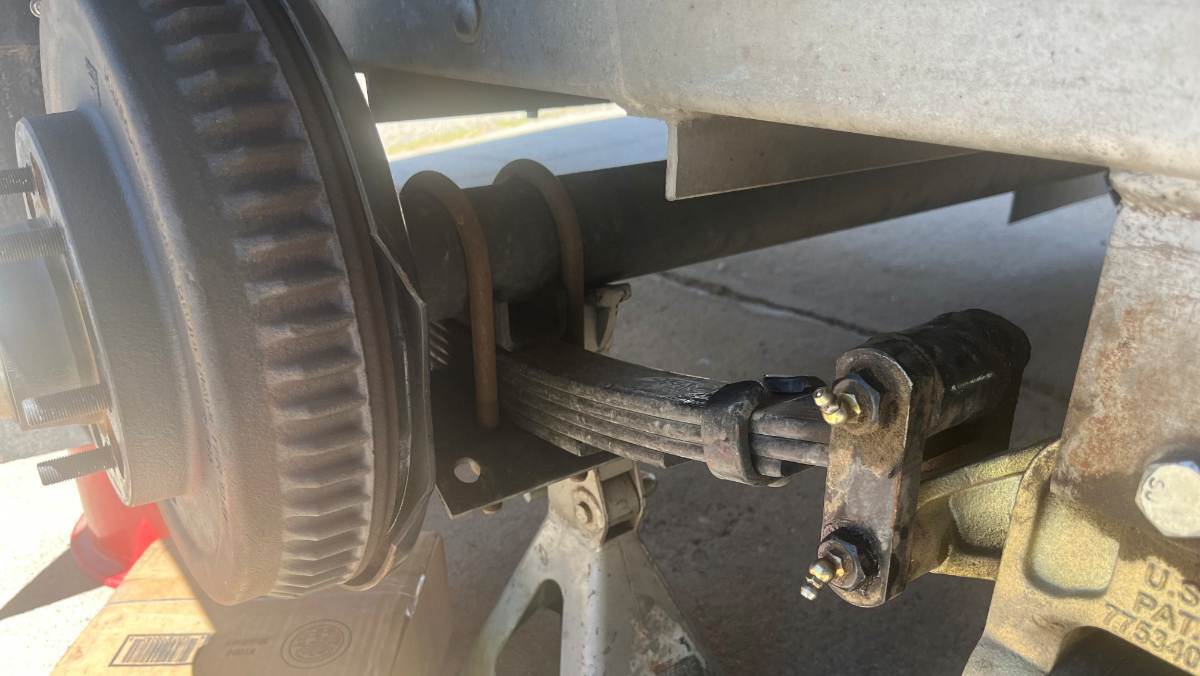
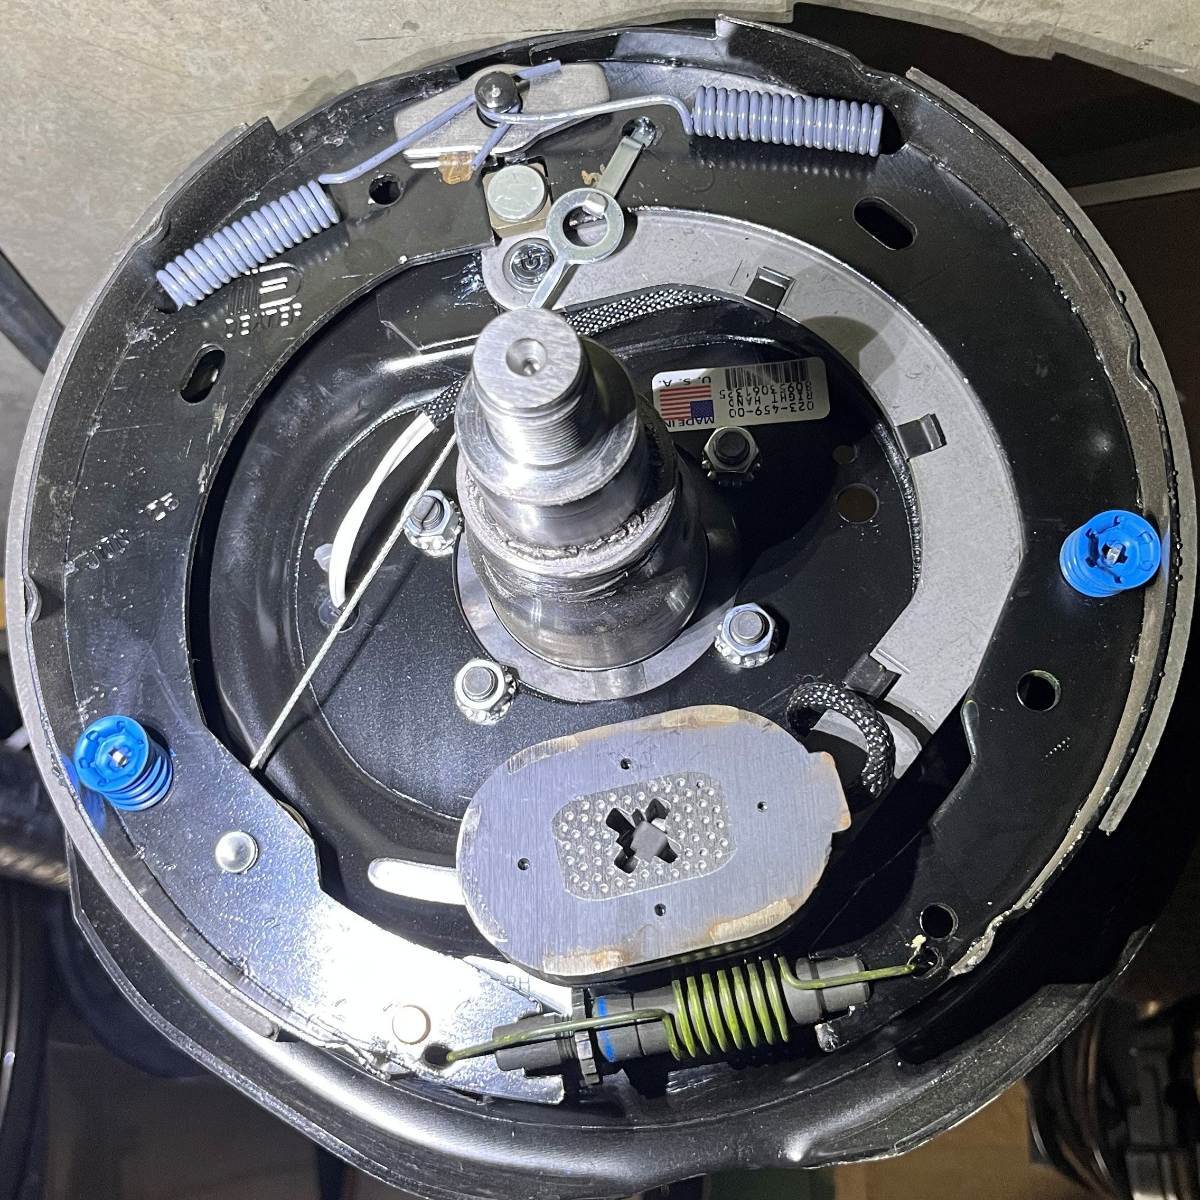
This maintenance can be completed in 2 hours (by the young experienced mechanic), or you could take most of the day! Have fun and pride in your Oliver! Take your time. I did the curbside yesterday and did the other side today (not young anymore, like splitting tasks across days). The second side went very fast today, done in only 90 min having the tools out and ready. This is just how I worked our suspension maintenance, in how it made sense to me, based on my automotive experience, not Dexter nor OTT approved! IMHO this maintenance should be conducted annually, or perhaps bi-annually for those who tow 10K +/- miles in a year. Some may work this routine every two years. Following is a suggested 10-Step Suspension Maintenance procedure: 1) On level ground, jack up one side of the trailer, using the rear leveler jack, while the Oliver is hitched to the tow vehicle (mandatory for safety). 2) Spin each tire to see if it rolls freely. Listen carefully for any unusual sounds. Try to wobble each wheel left to right (3-9 clock positions) and top to bottom (6 - 12) to observe any free-play. There should be no observable free-play with the Nev-R Lube bearings. 3) Remove the lug nuts on both wheels with impact (no impact, loosen with tires on ground). Place a jack stand under rear axle, close to wheel, for safety since your body will be under the trailer to do some of this work (see pic1). 4) Grease all six (6) wet bolts, plus two (2) grease fittings on the EZ Flex. Use a power grease gun if available with a LockNLube coupler attached. Add just enough grease to see some ooze from an edge. Wipe up all excess grease. A straight-blade screwdriver helps to remove old grease from recessed areas. Wipe grease fittings before and after and place caps back on (I don’t use caps). 5) Torque all suspension bolts to Alcan specs. 90 ft-lb for U-bolts, 80 ft-lb for the EZ Flex center bolt and both end-points, and 65 ft-lb on the shackle wet-bolts. The U-bolts will set at some point where they will not need further tightening. They rust into place and once this occurs, they’re done and you will not need to check again in future service (not true for the wet-bolts). I go lighter torque than Alcan specs on the wet-bolts, 70 and 58 ft-lbs which is an eighth (12%) lighter. The 80 and 65 numbers seem high to me. 6) Check drag on the drums. They should contact the shoes ON and OFF when spinning (shoes installed are not perfectly round). If they do not drag at all, the self-adjuster is not tightening properly (see pic2 brake assembly, adjuster at bottom). Mine were all dragging just right on like-new axles. There are two inspection ports on the backside. Unfortunately, there is no way to reach the gear to adjust it, due to the Oliver wide leaf/shock absorber plate. If adjusters are not working, the hub/drum must be removed (see step 8). 7) Pull the trailer emergency brake switch and turn the drums until they stop (to ground magnet). Check amperage draw at each wheel, placing amp meter clamp around ANY single wire behind wheel. Amperage should be 3A +/- without much difference between wheels. My LF wheel was 3.1A and the other three all read 2.8A, the two main brake wires coming out of the streetside Oliver hull read 6.1A front and 5.8A rear. These numbers look good enough to me! 8] Now the question is, do the brakes need a full inspection? I would say no for the first 2 years, then later with enough miles towed (>25K miles). Perhaps work a full inspection after 3 years. Then skip year 4 and do another full inspection year 5. Something like that! Clean brake dust without internal inspection: Use compressed air to blow through all openings of the braking plates to remove all shoe dust from the interior of the brake drums. Wear safety glasses and stay upwind from the cloud of brake dust. Blow throughout until you see only clean air. Full inspection of trailer brakes: Remove the bearing dust cap, the small outer circlip and spindle nut, then slide the drum off. Use compressed air to remove all brake dust (Brakleen spray unnecessary). Make sure shoes are clean, free of grease, clean if necessary (sand shoes lightly). Check shoe thickness, There is not much material there to begin with (Dexter shoes new have only 0.18" or 4.5mm material). They will look thin but when wearing evenly should be good for many more miles. Check the action of the shoes by pulling the magnet to see all is working as designed. Replace shoes if necessary, or replace the entire braking plate assembly, which is bolt-on and economical. If you have enough miles to replace shoes, the drums should be turned or replaced. Replacing shoes without doing so would result in poor trailer braking performance. Drum assemblies with new bearings are very expensive! The Nev-R Lube bearings are warranted for 5 years or 100K miles (our hull will not clock 100K mile in the next 10 years)! Some who tow a lot may replace bearings every 5 years. I will carry replacement bearings and tools with me to replace as needed, as they could fail at any time or last many, many years. Then replace the drum, washer and spindle nut. To retorque, mount the wheel, lower the tire to just touching the ground and torque to 155 ft-lb. Then replace the circlip and dust cap. Remove wheel again to mount center caps, though many of us go without center caps so that hub temps can be checked at stops while towing. 9) Remove gravel from the tread of both tires, using a thin flat-blade screwdriver, while inspecting for tread wear, tire defects and foreign objects. I do this with All of our vehicles, every time wheels are removed for any reason. I’ve found many screws and other sharp metal objects in tire treads, sometimes causing slow leaks that can be fixed now vs. getting worse on the highway. 10) Mount rims, lower hull to get rim close, making it easy to place wheel on studs. Use impact on light setting and snug up lug nuts evenly. Lower hull to sit on wheels, remove leveler blocks, and torque lugs to 90 ft-lbs. Repeat all 10 steps on the other side of the trailer. Let me know if I missed something or other suggestions! 😎
 7 points
 -
Read the post here on the Forum about how Oliver footed the entire bill for the repairs to the Truma water heaters. Bill5 points
-
See page 2 of THIS thread (i.e. back 1 page) and it is the 12th post down from the top. While I'm confident that your research regarding who actually pays for recalls, it should be noted that the original design work relative to Oliver using the Truma water heater was studied and approved by Truma. As I understand it, Truma refused to order a recall when the problems with the water heater became apparent and claimed that there were no similar issues with this water heater being installed in other RV's. Therefore, Oliver took it upon themselves to take care of the problem without any monetary assistance from Truma. Then, after Oliver took this step, repair parts availability from Truma became another source of issue (i.e. repair parts were very difficult to come by even though in the interim Truma redesigned the water heater in order to "correct" the very issue that was causing the recall. Bill3 points
-
Alcan specs 90-80-65 ft-lbs for U-bolts/leaf end-bolts/shackle bolts. I wet with 90-70-58 which is about 12% lighter on the wet-bolts. U-bolts need the 90 ft-lbs for sure. Just my gut feeling and what I went with. No science behind it. If you go too loose, the shackles can get damaged. You will need to tow some miles and work the retorquing intervals Alcan suggests. Next time lube first then torque. Torqued wet-bolt will likely refuse grease most of the time. The brass bushing will also set into the leaf eyelets with use. Yes, everything needs to wear-in a bit. You will soon love the ride! The other day, I took a traffic circle towing at 25 MPH! I almost forgot Ollie was back there. The Oliver stood tall and proud through the turn on Alcan Springs! 😎2 points
-
Greetings Oliver Family -- I have a couple of items that I need help with on my 2022 Oliver LE2 and I wonder if anyone has used Mobile Techs in Florida. I'm down along the SW Coast, though I am interested in knowing about any Mobile Techs here in the state, for future reference. * Reports on Good or Bad experiences can be useful * Thanks in advance for any suggestions!1 point
-
I changed out the cream colored blinds to white. I have both sets and they are free to whoever wants to pick them up. The new white ones started to get tiny holes in the fabric so they were replaced but if you're not as sensitive to light then they would be ok for you. cpaula2go2@gmail.com if you want them. Paula1 point
-
My wife Chris said, "The sound on this A/C is soooo quiet! I can't see it any taller from inside, so who cares?" I think it looks just fine up top (function over form) and would not want any Dometic A/C product ever, or Truma for that matter, with no aftermarket support and warranty issues with something like owner installation of a Soft-Start. BTW, Soft-Start should be inherent to the design, like it is on variable-speed or inverter A/C units (not after-the-fact with Truma service costs). I've heard the quiet Atmos/Tosot and they are quiet. The Chill cube is quieter, while using half the power. It's the height of this unit with huge evaporator fan, that creates its efficiencies and allows for an air handler flush to the Oliver ceiling. She looks just fine! We love this product. 😎
1 point
-
That was big of Oliver. In my opinion Truma clearly had an engineering problem but didn't have the capacity to correct all the units in the field. Oliver really stepped up and backed their customers; awesome!1 point
-
I’ll guess because it’s a high profile unit? They’re coming out with a lower rated low profile one but it’s not here yet. Seems like Oliver likes low profile1 point
-
FWIW I’m a noise freak, super sensitive to noise. The Truma Aventa is supposed to be among or the quietest on the market according to AI. At first I was disappointed hearing how noisy it is but I forgot that ACs need to break in. Used it yesterday, it’s really good! I can sleep with this. Don’t know why they’re switching from Truma, it’s a good combination1 point
-
Gravity or compressed air or time (in a dry place)1 point
-
I would not use Rvtech & Marine Service Center ( Fort Myers ), in my opinion, but do your own research if you choose to; just a heads up.1 point
-
OTT needs to get with it! Brinkley installs the Furrion Chill Cube. 😎 That’s 9 less than 3 feet from a freight train! 🤣1 point
-
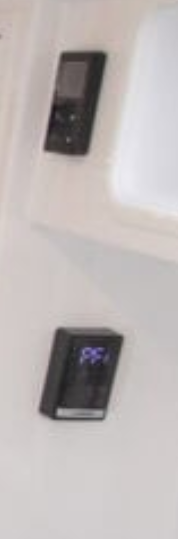
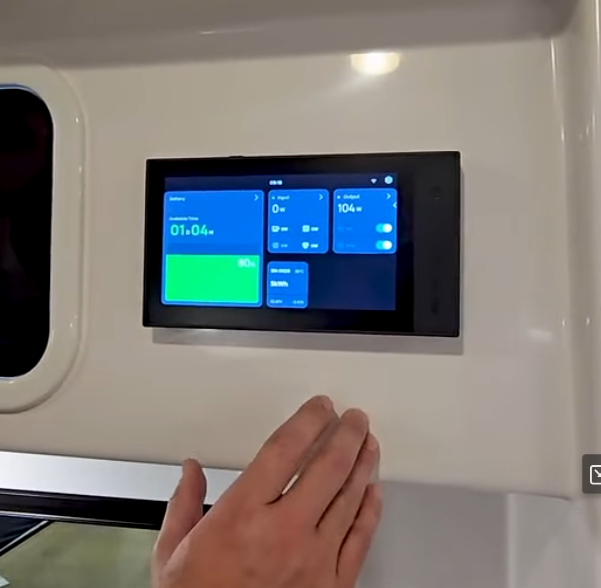
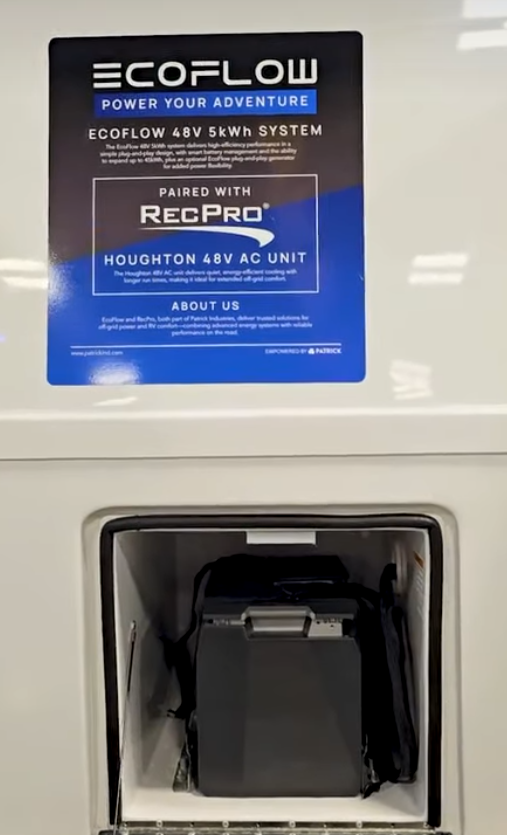
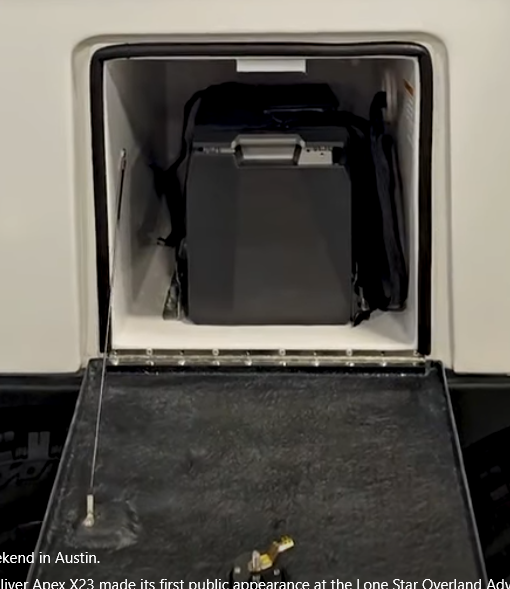
If you like nerding out on details ... Here's the control boxes, yay more LED's to cover at night. But see below, this might be just the PP model, or an early idea Here's the Ecoflow. That spot is blank on mine, unfortunately I lose cabinet space for no useful purpose The battery looks like a standard ecoflow bolted in there, with all the electronics and casing. No space to do a side by side like with the Lithionics. 5 kWh base, I have about 9 kWh with the Lithionics upgrade (which cost $$). Jason says it can be supplemented, maybe he means the Ecoflow daisy chaining feature with an external battery They dropped the vents. Those Ecoflows have built in active cooling and fans, maybe they figure that's good enough? Still need to dump heat somehow Different picture on the websidte compared to the Austin demo model. Two control panels and not one on the side pantry wall. Bottom is the tanks, the top looks like the Truma with the control knob. Probably something similar.
1 point
-
Truma did not do any work. All the work was preformed by Oliver guys. And they were able to have one fixed and up and running in under 30 minutes.1 point
-
Running gear looks the same , just a wheel & tire change and some black accents. At least they are trying something different. If they changed up the suspension for better off road that would make a difference.1 point



-
Recent Achievements
-