Tom and Doreen
-
Posts
250 -
Joined
-
Last visited
Everything posted by Tom and Doreen
-
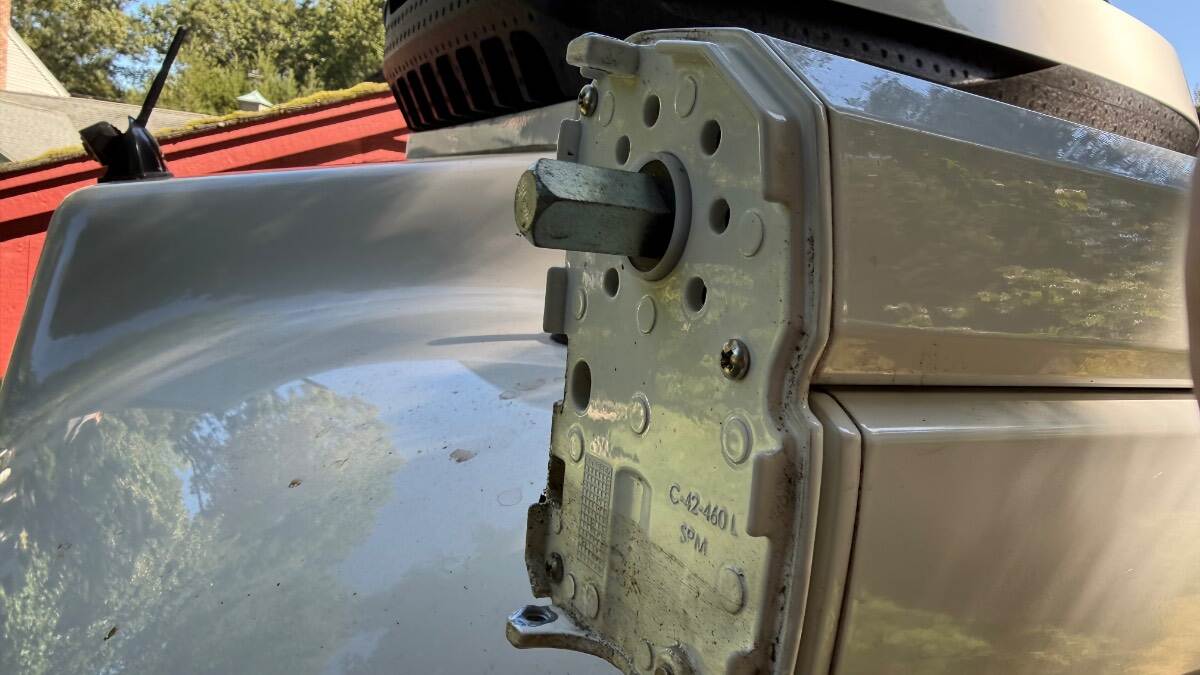
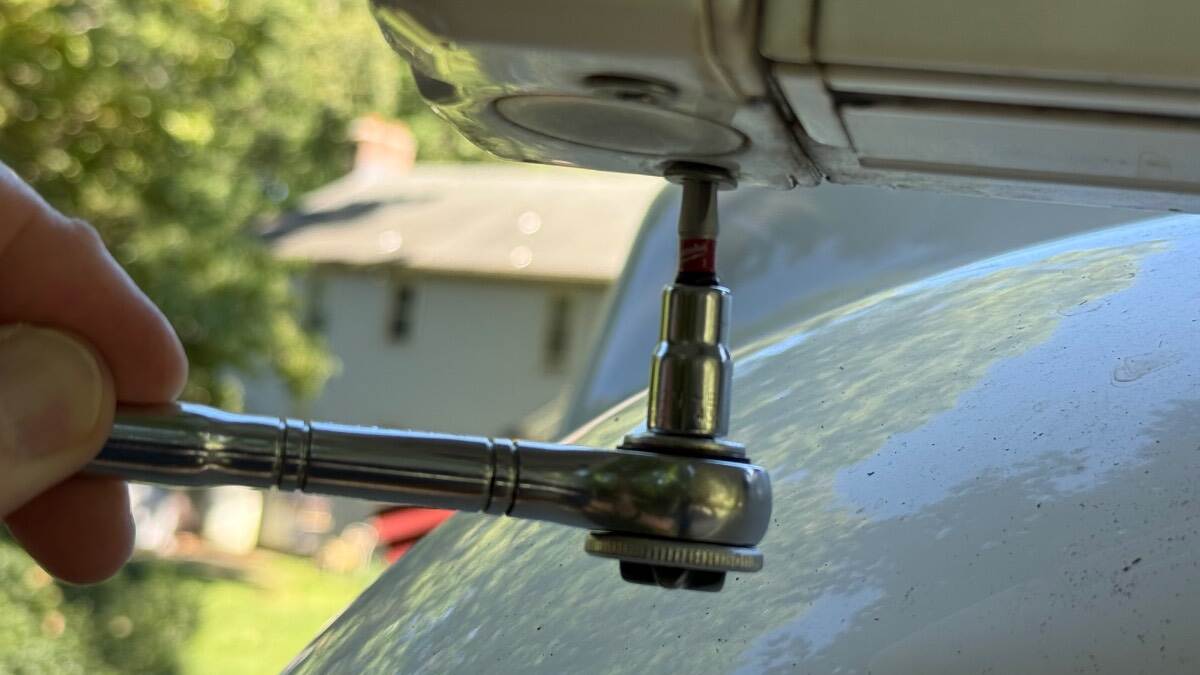
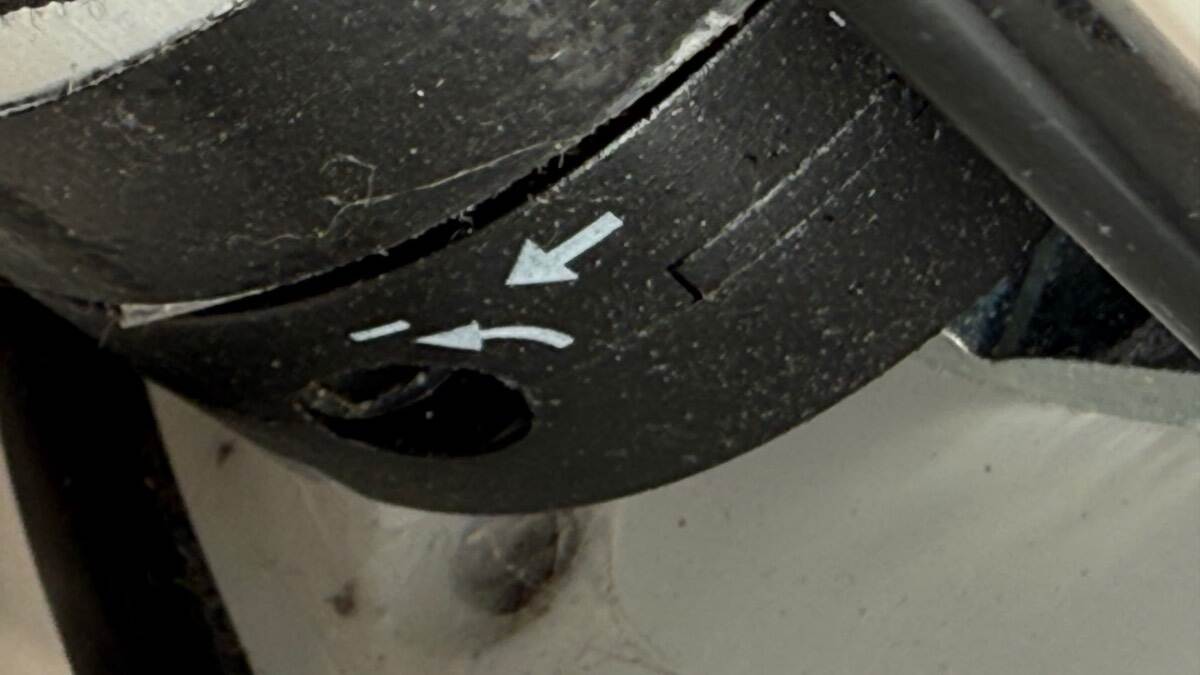
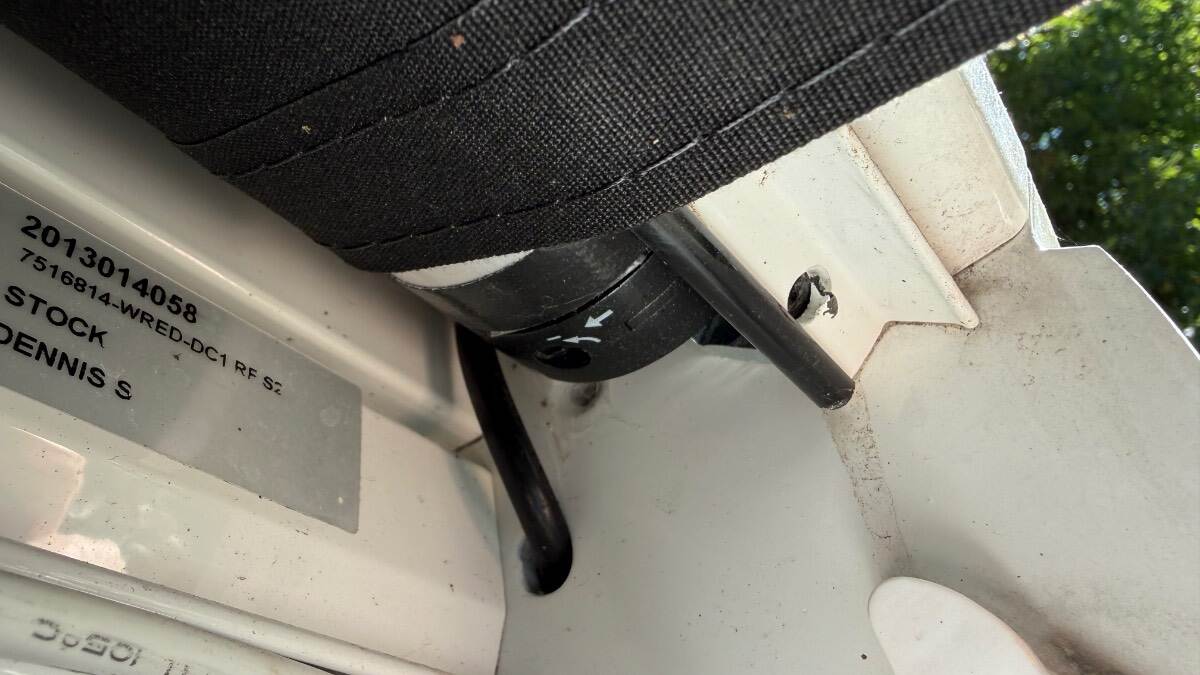
Girard uses #3 Phillips screws to secure the end caps to the awning, over time these screws can oxidize and become difficult to remove which may result in cam-out of the screws. Additionally the location of the bottom end cap screw closest to the hull prevents a normal sized screwdriver from positively engaging the screw head due to its proximity to hull roof. To aide in removing the screws a short right-angle screw driver or a #3 Phillips bit with a 1/4" socket wrench allows sufficient force to be applied and clearance to break the screws loose. Once out a coating of anti-seize on the screws will prevent future problems. My awning has only a single limit adjustment screw which is quite different than the illustration included in my Girard manual. I'll include a picture for reference. A little prevention goes a long way when your batteries in the remote go dead or the remote fails and you have no other choice than to pull the end cap off the awning and manually retract the awning. Notes: The limit screw requires a 4mm Allen wrench ( 1/4 turn = 1" of travel ) The retraction bolt requires a 13mm wrench

- 1 reply
-
- 8
-

-

-

Made in USA leaf springs
Tom and Doreen replied to Mountainman198's topic in Mechanical & Technical Tips
That's a tricky part of the job for sure. I remember using a bottle jack under the axle and also under the spring pack to help center the pin in the hole. I also jacked the other side of the trailer up a bit to allow the axle to be manipulated a little. It's tricky doing it by yourself. The important thing is to make sure the pin is aligned in the hole all around, any remaining gap will be taken care of when you tighten the U-bolts. It also helps to put a bit of grease on the pin. -
2022 elite 2 converter questions
Tom and Doreen replied to carpenter's topic in Mechanical & Technical Tips
I have a two Honda generator setup however in recent years I've just brought one when traveling to save space and weight. I have charged the batteries using the single Honda occasionally but it does obviously take longer (than if two Hondas are paired) and the Honda runs flat out. I do limit the Xantrex charge current. I believe that Honda now offers a single generator higher current solution that isn't too much bigger or too much heavier. If I were to do it these days I'd probably do that. -
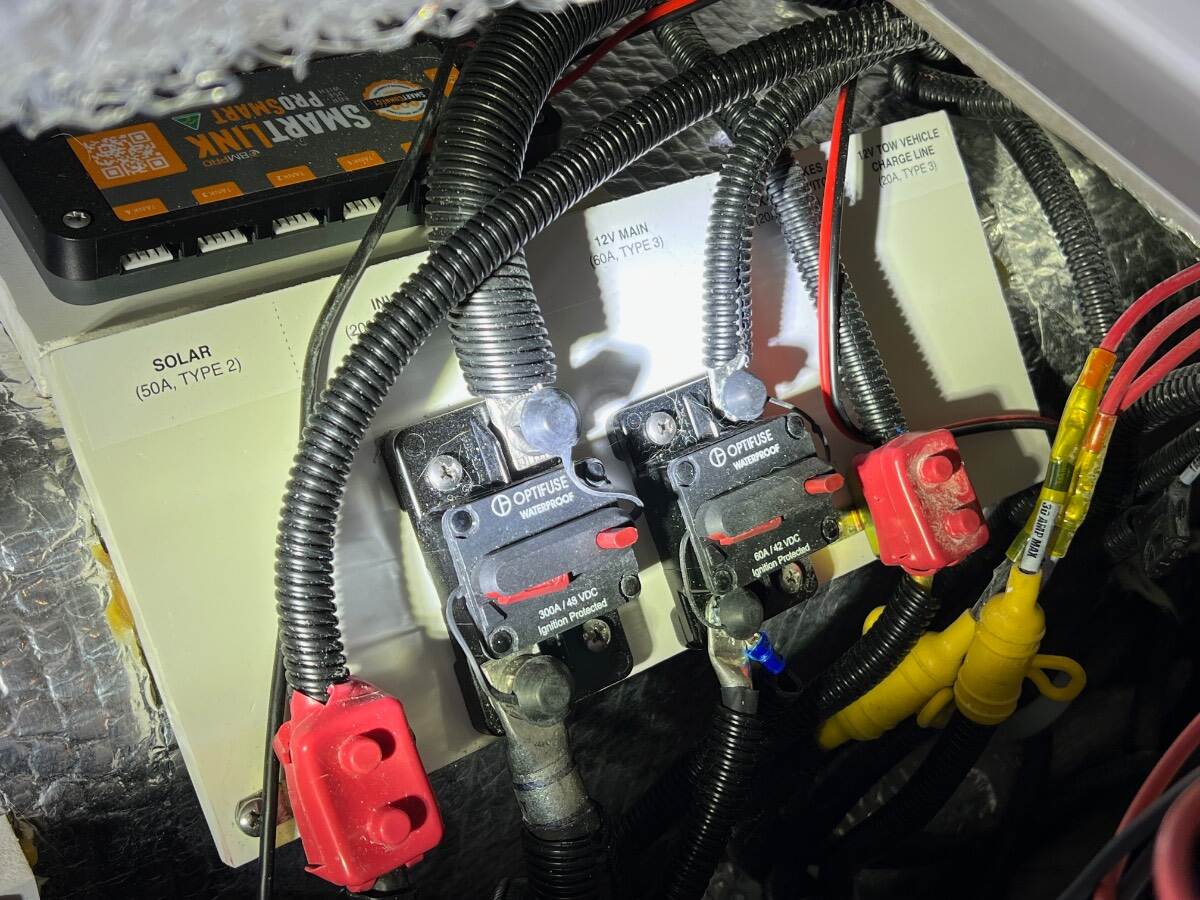
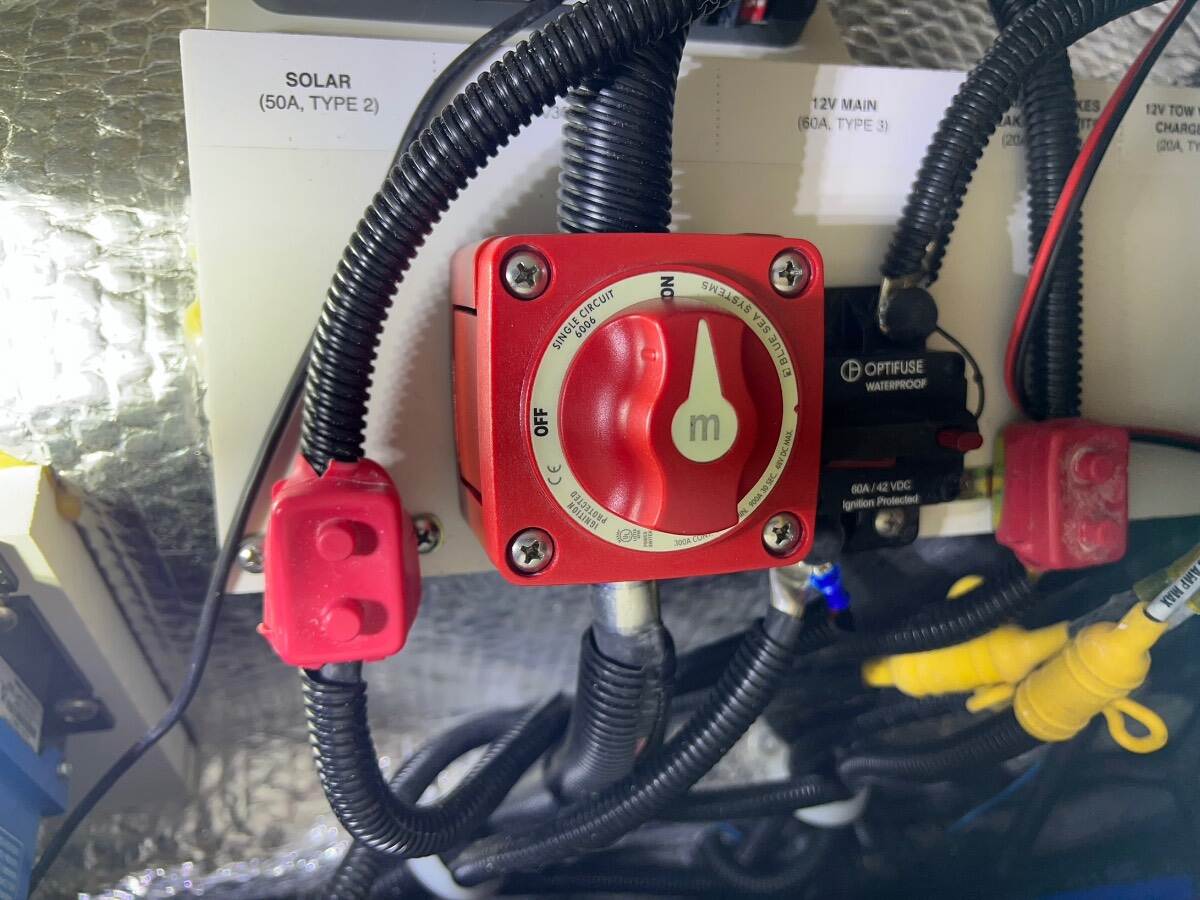
I'm not sure how the 2021 trailers are configured for power, mine is a 2023, but if you have an Optifuse circuit breaker on the input side feeding the Xantrex the Optifuse may be dropping some of the voltage. Mine was problematic, the symptom was a low indicated voltage at the Xantrex and when I would run high current devices such as the microwave the Xantrex would shut down. The solution for me was to replace the Optifuse with a marine switch. I would give Oliver a call and they can help to zero in on the issue.
-
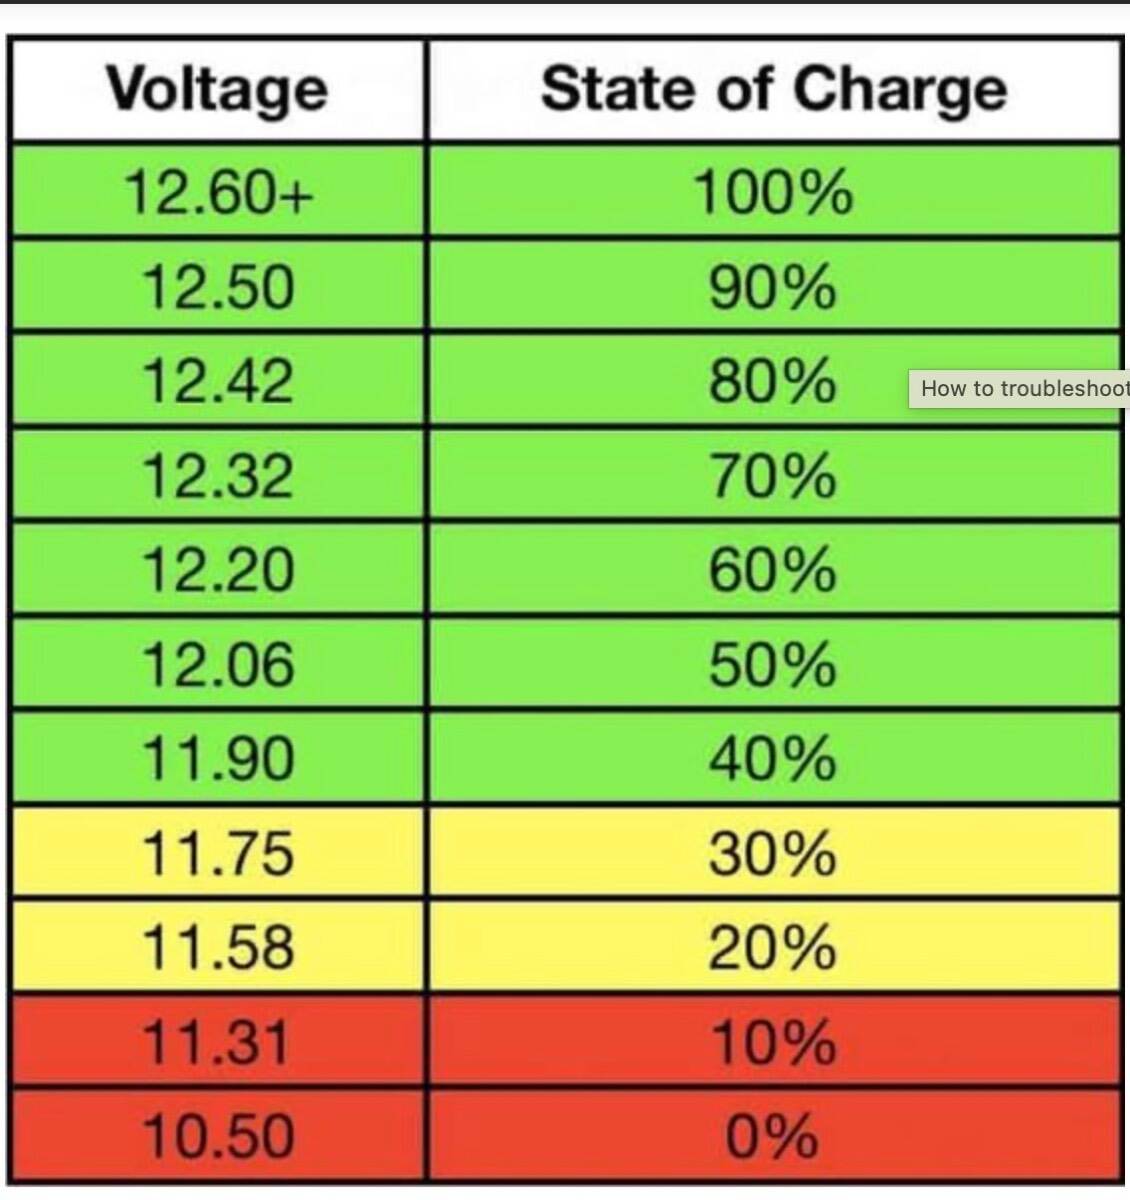
What is the voltage measured directly on the battery terminals with a DVM?
-
Air Head Tejo - Out with the Flush
Tom and Doreen replied to Half Fast Hugo's topic in Ollie Modifications
That's nice work and a good looking toilet! -
Low water pressure on city water
Tom and Doreen replied to Steph and Dud B's topic in Mechanical & Technical Tips
I have the same issue. The plumbing diagram in my owners manual shows no intended restriction on the city line but my city water pressure is not as good as when I use the water pump. ....You can activate the water pump and boost pressure when you're connected to city water however the water pump will pull water from the fresh water tank. I often use it this way when I'm at a campground and would like more pressure in the shower. -
Interesting story: I actually had fixed the problem before I got the official description from Truma due to the time of day that I had the failure. I had been driving through a raging rain storm during the day, ended up at a campground near Allentown PA in early January 2024. Temperatures dipped to freezing , set up late evening at 4 County RV Park that night and could not get the furnace to run. Because I had driven all day in the pouring rain I suspected that water may have entered the exhaust / inlet port of the furnace. I could find no description for the error that I was getting in the documentation or on line. I decided to take a hair dryer and blow warm air into the furnace exhaust / inlet port and after several minutes I was able to get the furnace to fire up ( luckily ). Called Oliver the next day and they had no listing for the error. I then put in a ticket with Truma and I got an email a day later explaining what the cause may be. I haven't had the problem since.
-
Thanks for the update. Unfortunately Truma doesn't publish all of the error codes and it can add additional stress to an already stressful situation when you have failures on the road so it's good to document them here. Sadly often times, as you've found out, there is little that can be done as an owner to fix these appliances being that Truma equipment is extremely proprietary, they won't sell repair parts to owners and they require that all repairs be done only by certified Truma technicians. The problem of course is that Truma service centers are few and far between which is a problem when you're stranded on a trip. I will say that their service centers are top notch if you can make it to one of those locations. I haven't experienced your error but I did experience an E5H error code at one point which at the time was not documented anywhere. The response from the Truma service person was; "ionisation voltage recognized during standby mode. Could have been from a solenoid sticking for a moment due to moisture on the sensor, or a voltage spike". As it turned out the service person was correct and it was simply moisture on the sensor which I was able to dry out. The other unfortunate thing about Truma appliances is that often times the "fix" is to replace the entire unit no matter how simple or inexpensive the failed component is. Along those lines the unit to replace the failed unit is a refurbished unit of unknown age / history. The unit will be "factory certified" so there is that but be sure to fill out your warranty card! Hopefully you'll be good to go and you won't experience any further problems. Enjoy your trip!
-
@Todd B, what was the part / component / assembly called that was associated with the error code? Were you able to get a reasonable solution from Truma without the expense of replacing the entire unit?
-
Made in USA leaf springs
Tom and Doreen replied to Mountainman198's topic in Mechanical & Technical Tips
@Hokieman you raise valid concerns regarding the Alcan wet bolts and shackles. I have the same concerns as it seems that there could be significant wear of the brackets due to excessive clamping force. I did speak specifically about that with Alcan and they were adamant that there "shouldn't" be a problem. Time will tell and I'll keep an eye on my installation. I've already been surprised by an unexpected broken (original Oliver) spring, I'd hate to have a bracket break on the road. Alcan has a good product and those guys have a great reputation and seem knowledgeable so hopefully there won't be any problems. -
Made in USA leaf springs
Tom and Doreen replied to Mountainman198's topic in Mechanical & Technical Tips
It's not a complicated job to do on your own but will take a bit of time and it helps if you have someone to help. I replaced all of my springs and associated hardware as well as the shocks last spring by myself out of necessity, (one of my springs broke on my previous trip). It helps to have a good impact wrench with associated impact rated sockets. In addition to using the Olivers jacks it helps to have a couple of bottle jacks for supporting and manipulating the axles (when lining things up). I also had a couple of jack stands on hand for additional security but luckily didn't need them. Just take your time and you'll be fine. -
Touch Light Replacement
Tom and Doreen replied to Boilermaker Chemist's topic in Mechanical & Technical Tips
You will appreciate the "memory" feature whereby they remember their last state, dim level, night light, on/off, etc.. With the original touch lights I would have to turn off all of the ones that I didn't want on whenever I turned the master power switch on when arriving at a campground. The new lights remember their previous setting. -
Custom Mud Flaps for the Tow Vehicle and Oliver
Tom and Doreen replied to jd1923's topic in Ollie Modifications
I feel your pain! We headed down a dirt road to visit Toadstool Geological Park NE a day after a rain ( without the trailer luckily ). The mud was sticky and slick all at the same time, completely filled the wheel wells and turned the tires into slicks. We paddled in 4WD for miles. Later the slurry dried nearly to concrete consistency! Weeks later I was still washing bits and pieces of the stuff out from under the truck! -
RVLock company stands behind its product
Tom and Doreen replied to Snackchaser's topic in Mechanical & Technical Tips
I've had this problem (twice) and I believe that it comes down to a mechanical tolerance and materials problem with the deadbolt mechanism. In their design they purposely overdrive the deadbolt motor ( since they don't have a sensor to determine the position of the deadbolt). When the deadbolt reaches the end of it's travel, motor torque increases and overcomes the friction material in the clutch mechanism allowing the clutch to rotate despite the fact that the deadbolt has reached the end of it's travel. This allows the motor to continue to spin, preventing it from drawing excessive current and shortening its life. I've forgotten their name for the clutch but it's a little barrel that contains a friction material that allows the motor to drive the deadbolt until excessive force (when the deadbolt reaches the end of it's travel) overcomes the friction material causing the clutch to spin freely thereby decoupling the motor from the deadbolt. The problem occurs when the materials in the deadbolt mechanism bind or stick, overcoming the friction material in the clutch, resulting in the deadbolt not completing it's travel within the time that the motor is commanded to operate as determined by the electronics. The symptom is that the motor sounds normal, a confirmation beep is heard signaling end of travel of the deadbolt, but the door either doesn't lock or in my case did not unlock. In short, by design the motor is commanded to run longer than the time that it normally takes for the deadbolt to complete a full travel and relies on the clutch to decouple it's mechanical connection to the deadbolt when the deadbolt reaches the end of it's travel. By doing so they eliminate deadbolt position sensors and save cost. It's clever providing it works reliably. Anything within the transport that adds friction or causes binding can cause a problem. Another issue can be a weak clutch. The company is very good about supplying parts but leaves the repairs up to the customer which usually involves sending videos, sometimes removing the lock and operating the lock by itself while making another video, then waiting for parts which in some cases does not fix the problem and the cycle repeats. I like the lock, it's very convenient, but I aways have my key in my pocket which somewhat defeats the purpose. -
Welcome to the community!! You'll find a wealth of knowledge here on the forum. There is an Oliver National Rally this fall, details of which can be found here. The demographics do tend to show a greater number of older folks most likely due to the fact that these trailers are fairly pricy and that they are favored as a "couples trailer", not so much for families. Lately I think that's changing a bit though with younger folks buying in.
-
....And springs!!
-
Hmmm.....I wonder if his trailer was bought from a dealer or he possibly bought it from a private owner.
-
SeeLevel Tank Monitor Issue
Tom and Doreen replied to marsharini's topic in Mechanical & Technical Tips
Is there power to the unit? Does your water pump switch / indicator work? I would check everywhere a service person may have worked to see if there are any pinched, broken, or unplugged wires. Are any other devices not working, check fuses, etc.. -
John, what an absolutely amazing job! It 'looks like' an Oliver but it's so much more now than that you've made improvements to all aspect of the trailer. I don't know if you follow the YouTube channel Dave's Auto Center but you could be the "Dave" of the Oliver world!
-
Could get a little exciting with an Airstream! On the plus side an Airstream probably would make a pretty good Faraday cage!
-
12Volt issue inside trailer
Tom and Doreen replied to Buddhabelly's topic in Mechanical & Technical Tips
On the 2023 Elite there's also a breaker (60A) for the +12V systems, it's probably a Optifuse like in the Elite 2s. I don't know where it would be located on an Elite but probably under a seat or bunk. The load side of this breaker connects to the fuse panel. The input side is connected to the +12V bus bar. -
Adding a Matching Rear Porch Light and some Front Lighting
Tom and Doreen replied to jd1923's topic in Ollie Modifications
Looks great John! -
Reset 2.0 has started squeeking when backing up
Tom and Doreen replied to DunnYet's topic in Mechanical & Technical Tips
It could just be that one of the brakes is out of adjustment. The drum brakes are 'self adjusting' but it's not always a perfect system. There could also be built up debris, brake dust, etc. that is interfering with the brake shoe or components. I think it's a good sign that the brakes don't squeak in the forward direction. Because the shoes wear-in mostly when applied when moving forward they are less likely to squeak when rotated in that direction. Because your trailer is used, do you have any data as to when your brakes were last inspected and what may have been found at that time in terms of the amount of wear? Your trailer is newer than mine so I suspect that your brake shoes still have a good service life left on them. -
Made in USA leaf springs
Tom and Doreen replied to Mountainman198's topic in Mechanical & Technical Tips
It's good that you got that taken care of. New or used the factory springs on these trailers are a significant worry. We have a 2023 trailer and one of our springs snapped on our last trip.