
rideadeuce
-
Posts
152 -
Joined
-
Last visited
-
Days Won
10
Posts posted by rideadeuce
-
-
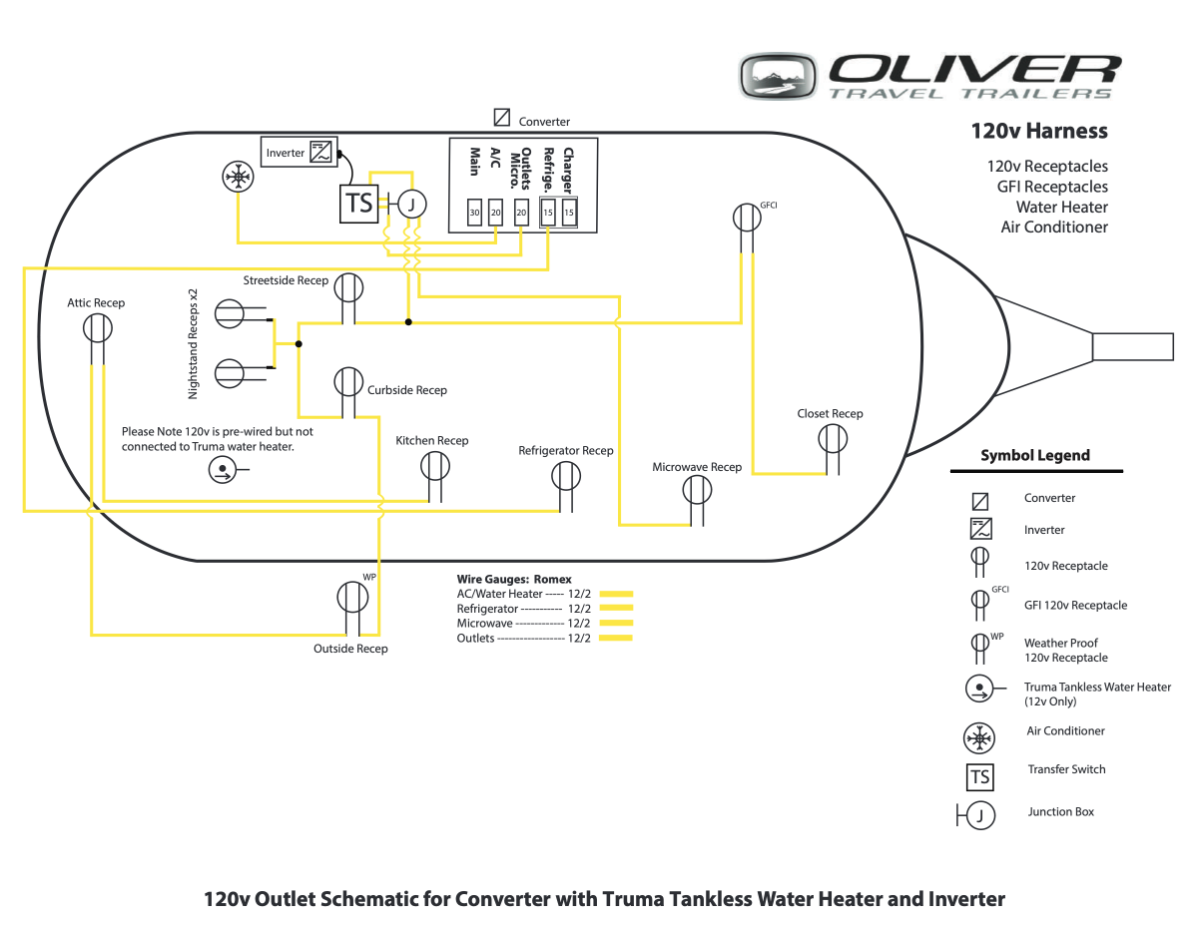
Anyone with a Multiplus II 3000W upgrade able to share how they powered A/C from the inverter. MPII has transfer switch built-in. So the plan is to remove the OEM transfer switch and Jxn box. Then connect the AC IN and AC OUT to the MPII from the old junction box wiring to power outlets and microwave.
The puzzle for me is wiring/powering Air conditioner off the inverter. On this schematic, the air conditioner looks like it is powered from the converter only.
My OTT is a 2018 with a 2000W ProWatt inverter OEM.
Planning stages of upgrading to MPII 3000W with larger lithium battery bank so that I can run the Air conditioner when off shore power.

-
Craig, so helpful. Thank you for explanation and pics. I am following you with everything but back feeding power thru the dinette GFCI to the A/C. I have a line 2 AC OUT on inverter if that helps.
-
 1
1
-
-
Love this diagram and explanations. Thanks for write up. The forum is so helpful. I think I have it all figured out it just seems too simple:
Remove Xantrex, transfer switch and jxn box. Install new mount and MP2
Wire up batteries, Take AC IN and AC OUT from the JXN box and plug into AC IN/OUT on Multiplus II.
Disconnect PD 4000 charger/converter.
I plan on installing shunt and DC to DC charger soon, so both of those included in write-up helps.
Thanks again, M
-
1
-
-
For those that have upgraded to the Victron MP2. I am thinking about swapping out my Xantrex 2000 for a Victron Multiplus II 3000 and installing Lithium batteries. The part that I need help with is the wiring from the PD 4000 distribution panel and bypassing or disconnecting the charger. Still need converter portion for shore 110v?
MP2 for Inverter DC to AC, power switch (Shore to DC, DC to Shore) and charging.
Does the OEM wiring from the junction box on Xantrex end just go into the AC IN and AC OUT on the Victron Multiplus? Or do you need to run the shore power out of EMS to Multiplus AC IN and then back to distribution panel.
Do you simply disconnect charger?
If you run new longer feed from the EMS to MP 2 AC IN then can you use the AC OUT back to the PD 4000? OR does the EMS to MP2 go back to shore power in the same AC in on back of PD 4000.
Any clarification on these questions or pics would be greatly appreciated. Just trying to figure it all out before hiring someone or diving in myself. I, also, just want to understand how it works.
Thanks in advance for any feedback.
Mike
-
1
-
-
I am thinking about swapping out Xantrex 2000 for a Victron Multiplus II 3000 and installing upgraded Lithium batteries. The part that I need help with is the wiring from the PD 4000 distribution panel and bypassing or disconnecting the charger. Still need converter portion for shore 110v?
MP2 for Inverter DC to AC, power switch (Shore to DC, DC to Shore) and charging.
Does the OEM wiring from the junction box on Xantrex end just go into the AC IN and AC OUT on the Victron Multiplus? Or do you need to run the shore power out of EMS to Multiplus AC IN and then back to distribution panel.
Do you simply disconnect charger?
If you run new longer feed from the EMS to MP 2 AC IN then can you use the AC OUT back to the PD 4000? OR does the EMS to MP2 go back to shore power in the same AC in on back of PD 4000.
Any clarification on these questions or pics would be greatly appreciated. Just trying to figure it all out before hiring someone or diving in myself. I, also, just want to understand how it works.
Thanks in advance for any feedback.
Mike
-
6 hours ago, Jason Foster said:
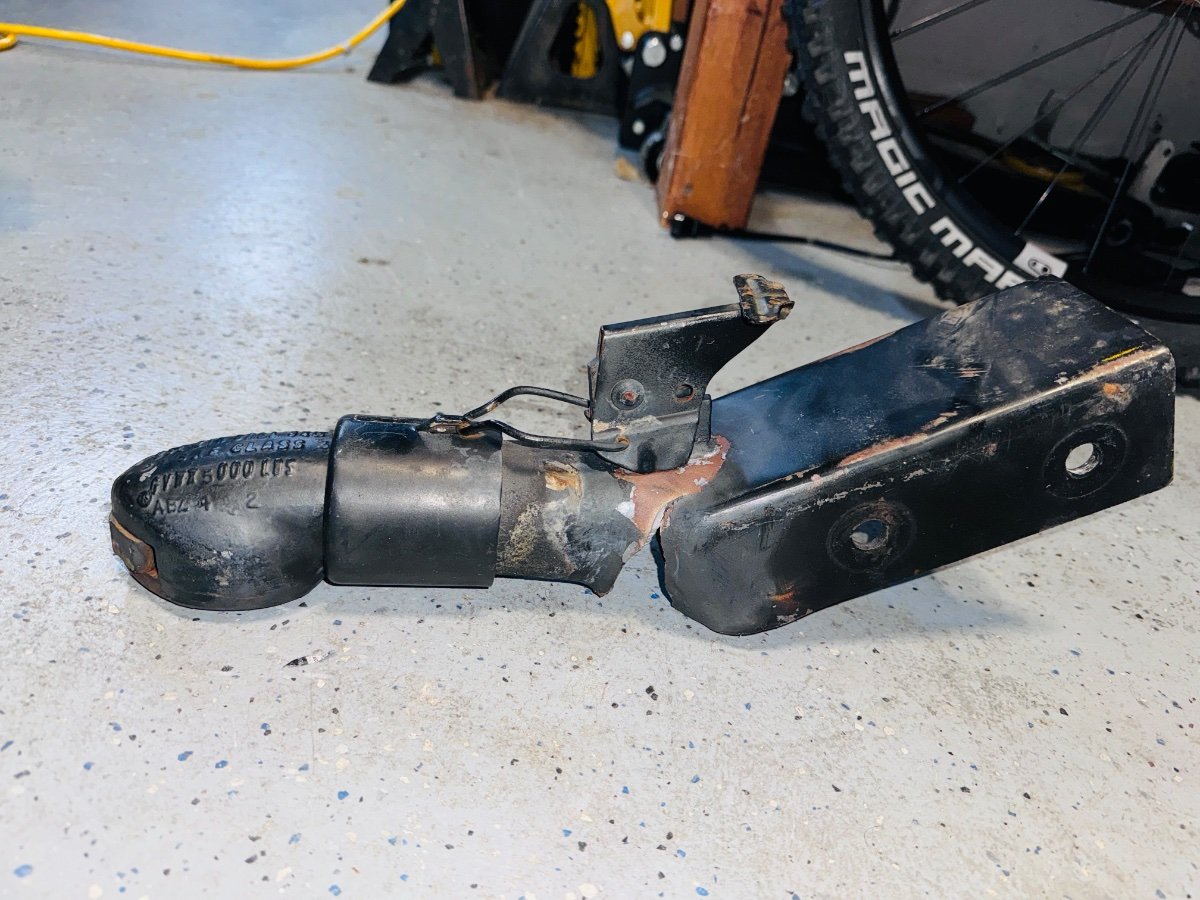
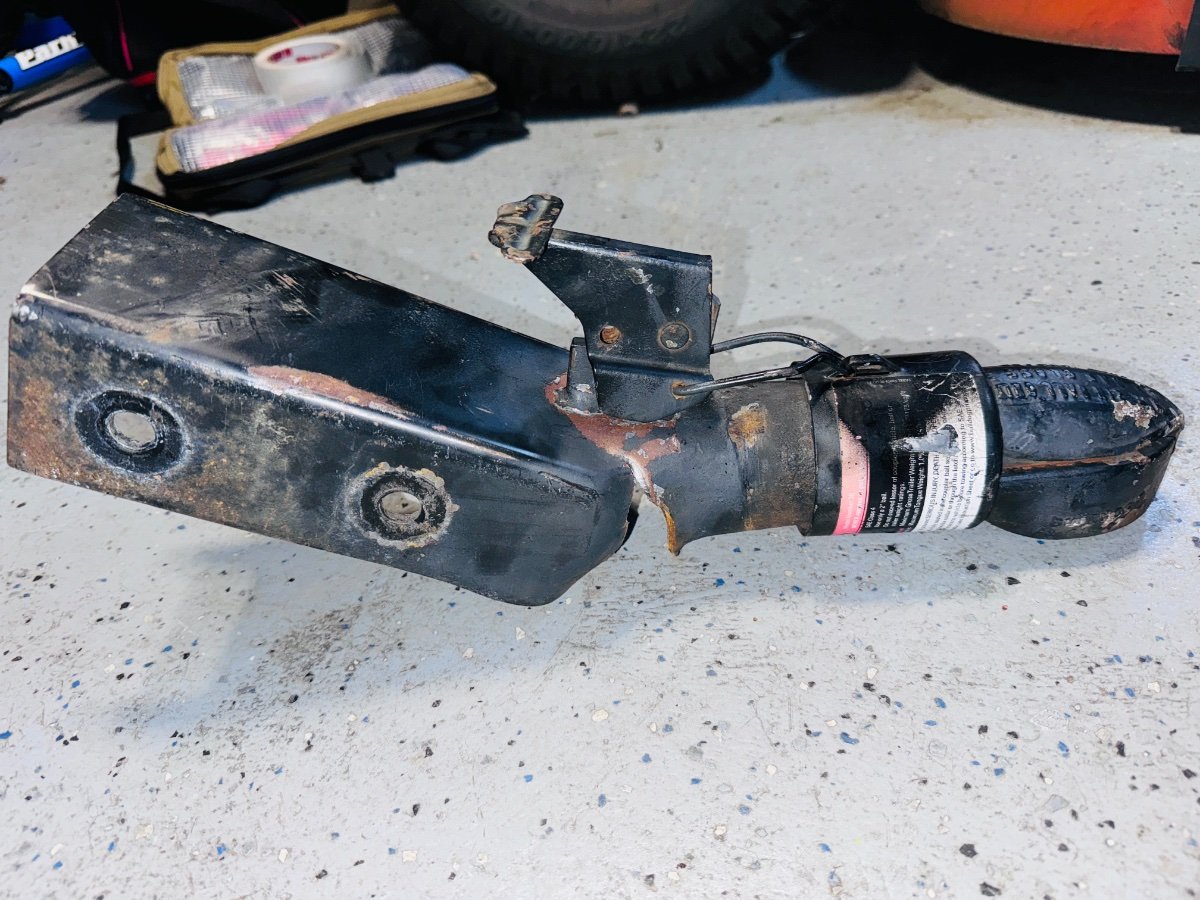
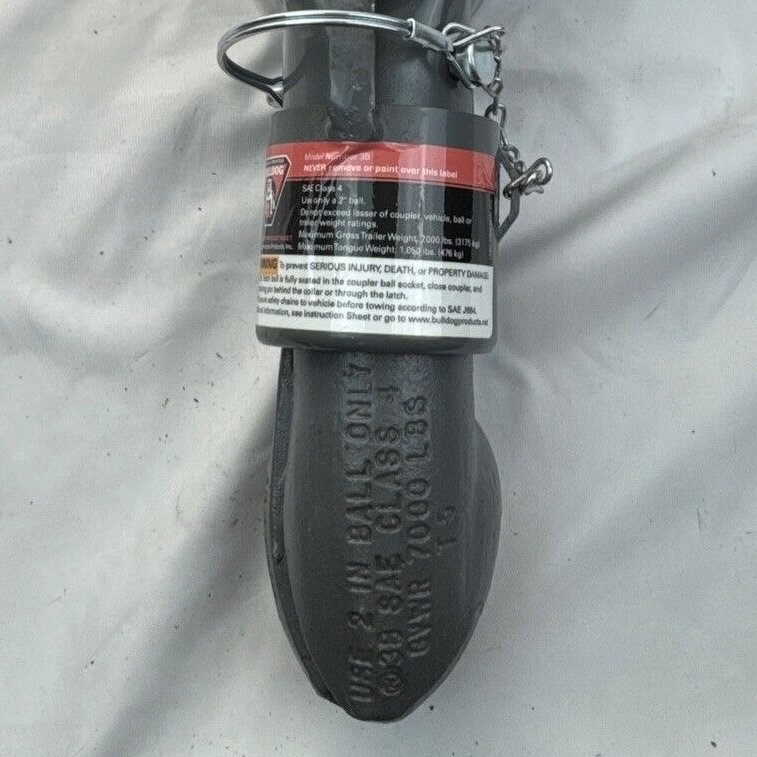
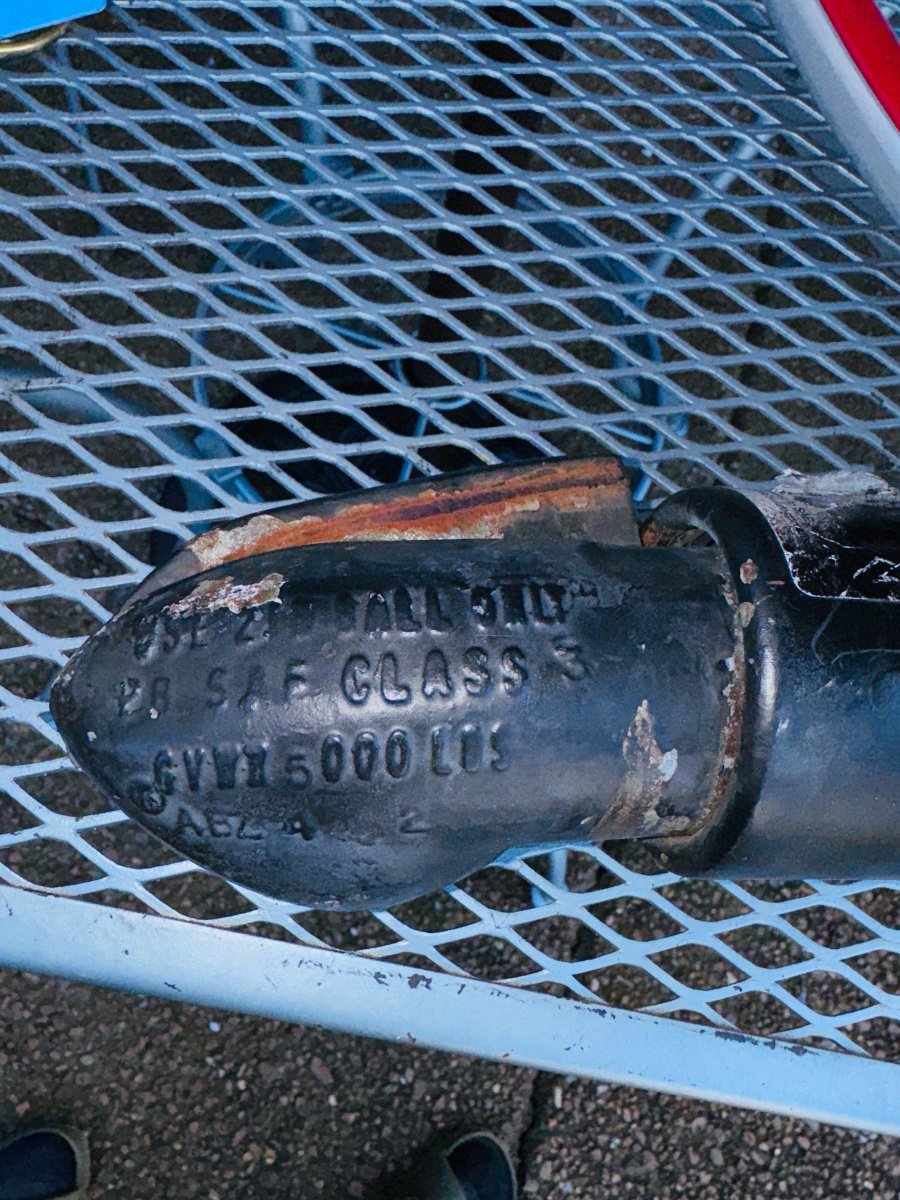
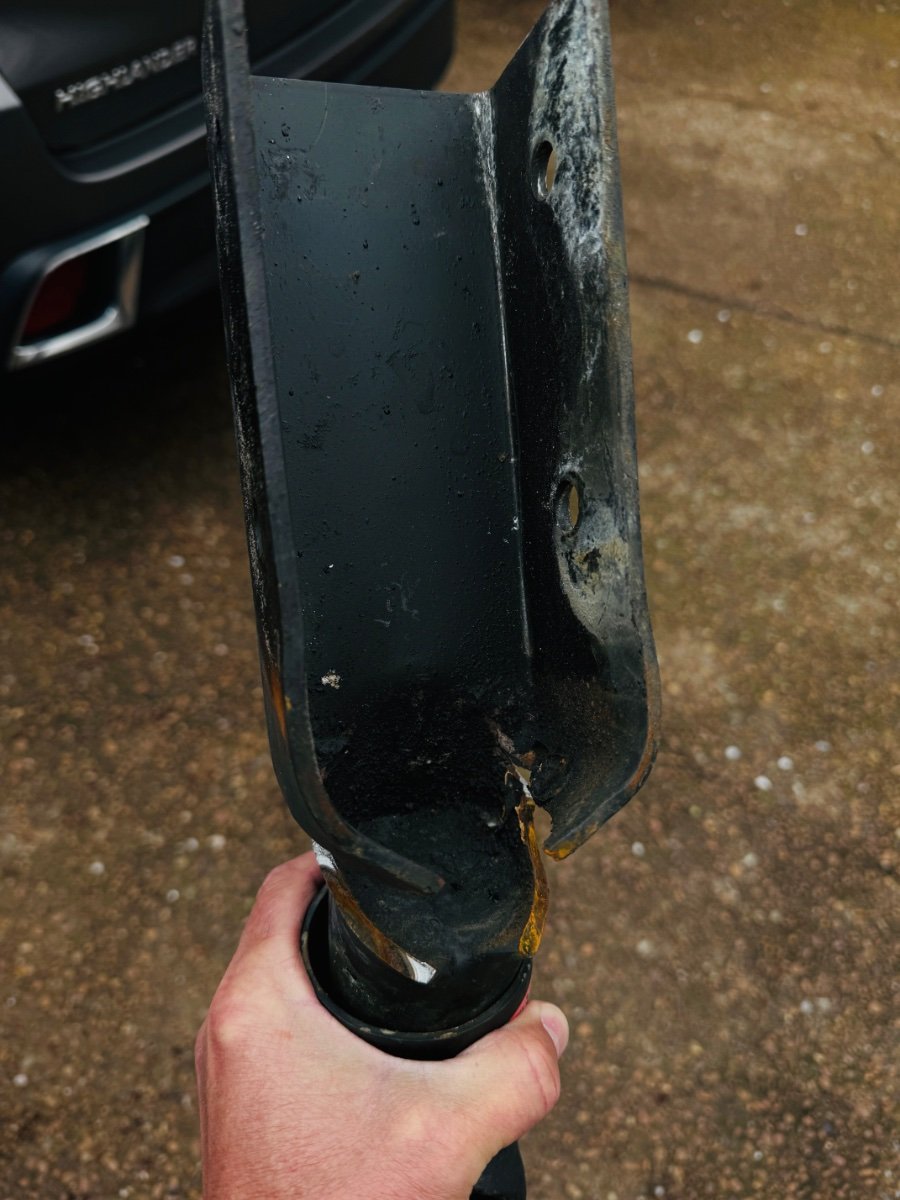
Hold up, ya'll. The top of his hitch says class 3 but the bottom says class 4. Which is it?
Good eye. The sticker and the mold identification are inconsistent. The sticker has a bit missing and some black overspray from previous year's touch-up. I believe that the wrong sticker was applied to the Class III 2 in coupler. Which also adds to the intrigue on how this all happened.
I tried to take some better pictures not sure if they show up any better. But I did find a new sticker picture for the Model 3B and it was for the 7k coupler (last picture). So looks like there is a mismatch on identification.
Appreciate your input.
Best,
Mike
-
 2
2
-
2
-
-
On 3/19/2024 at 3:30 AM, ScubaRx said:
The earliest model elites (2007-2009) were equipped with the 5000lb Class Two BD couplers. That is no longer the case. All the current Elites have a 7000lb BD coupler.
So this begs the question, How did a 5k coupler get put on a 2018 Elite II. Is my EII the only one that was equipped with the wrong coupler. I am a huge fan of the camper and the company as a whole. But having lived through this harrowing experience with my family, my hope is they do a thorough investigation and reach out to owners. Again, hopefully this is a one-off situation but really unnerving.
I will say the camper's build quality and durability has been phenomenal and my gut feeling (after all the great information from forum members) is that maybe, somehow BD sent over one in the mix by mistake and that this is an isolated incident. But because of the serious nature, it has to be investigated and quality control looked at. This has to be 100% correct every time. I am confident that OTTs will do it.
I still love my Oliver and look forward to being back out on the road.
-
6
-
-
On 7/30/2023 at 5:45 PM, Gliddenwoods said:
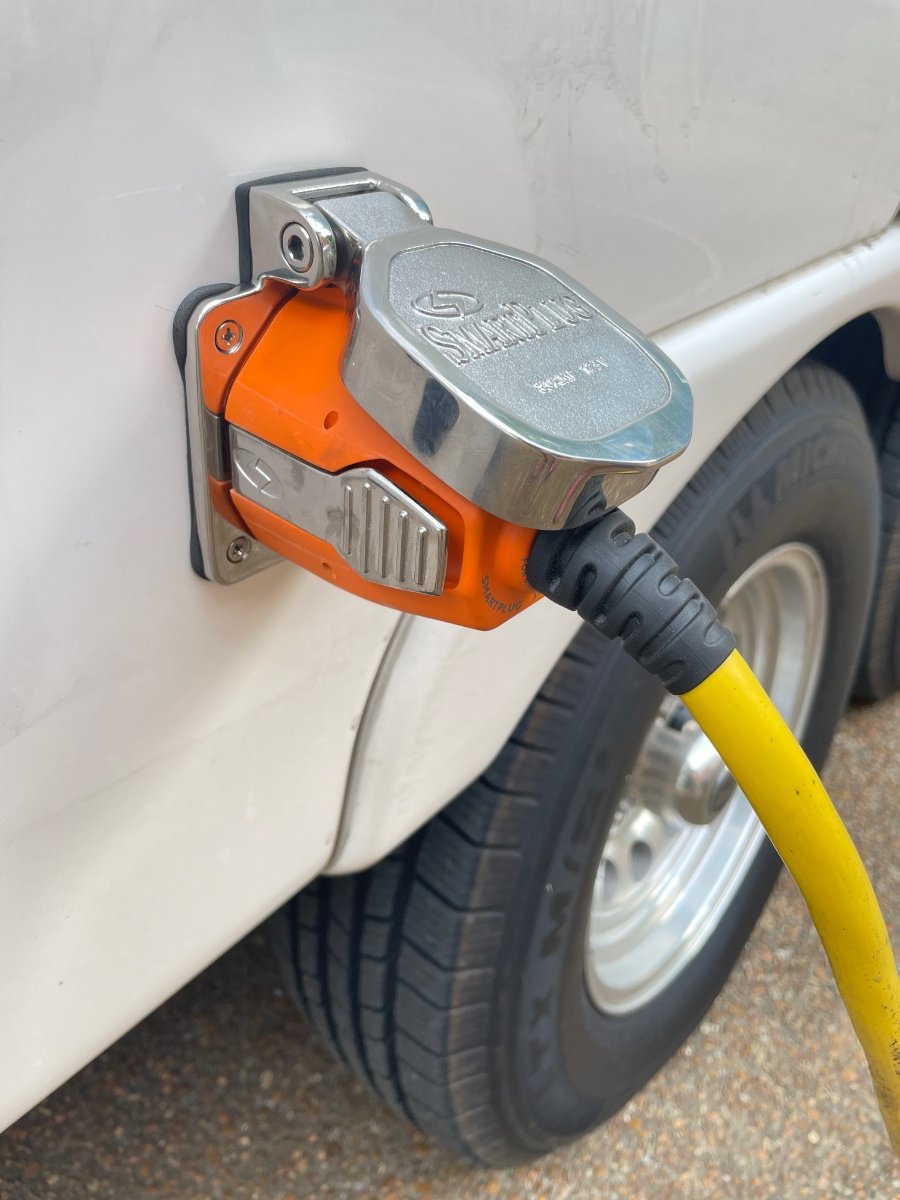
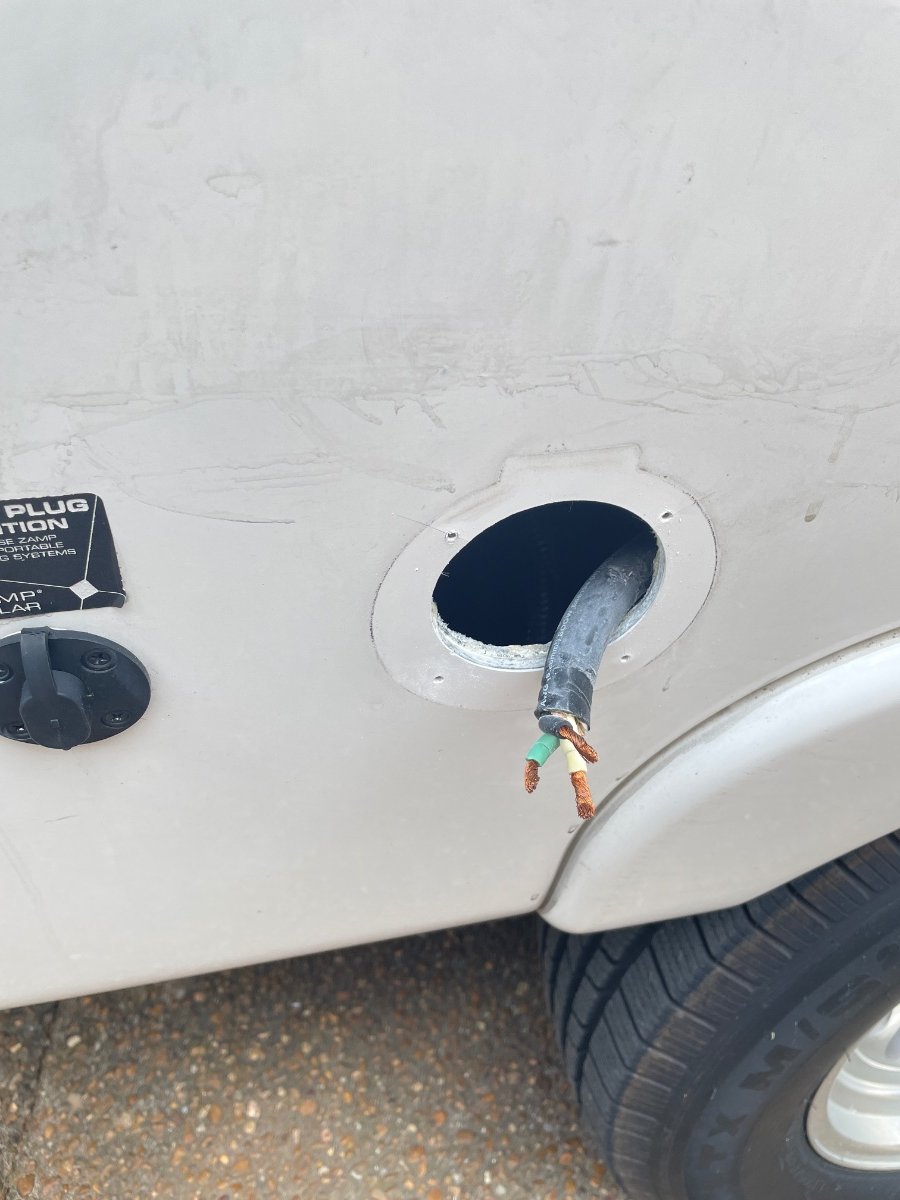
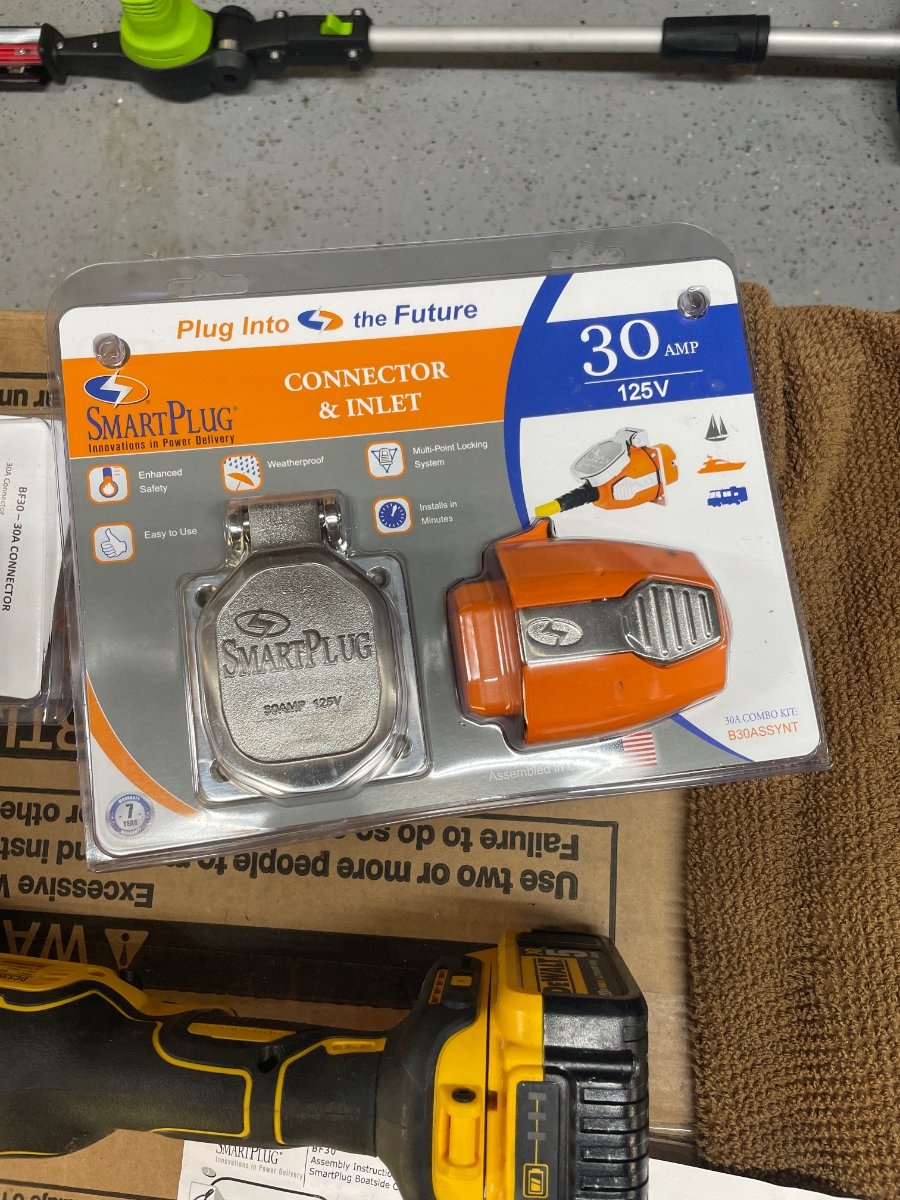
Has anyone completed the conversion to a Smart Plug? Advice? Post conversion regret?
We did this about a year and 1/2 ago because we had some melted wire at the connection interface while running the AC with a 12 gauge extension cord. I like it and have had no problems since converting to it. Fairly easy install. The connection is more secure IMO and easier to connect/disconnect.
-
2
-
-
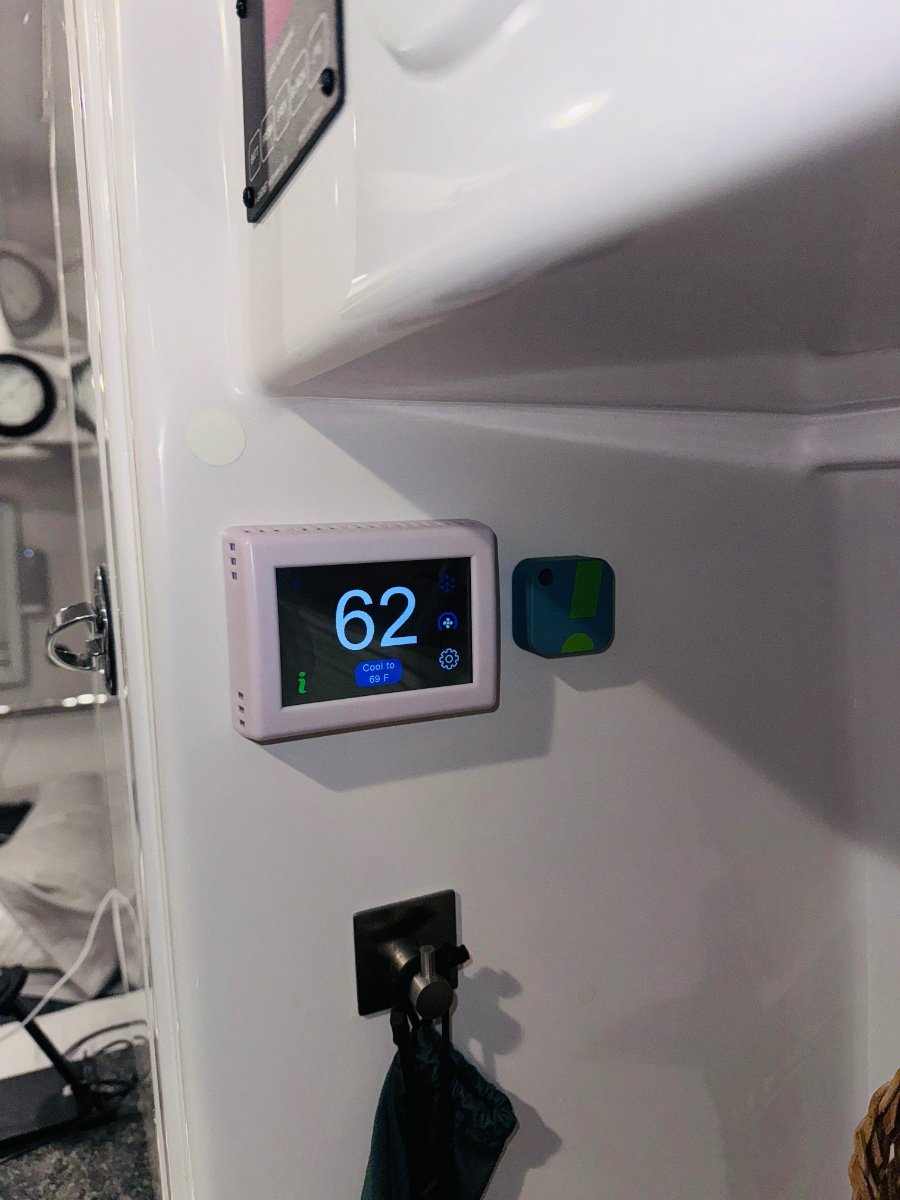
I have been using this for about a year and it works great. The app is wonderful to use remotely to check temperature and make changes remotely on the fly i.e. if it is getting cold for the night or you need to check on pets. Works off of bluetooth or WIFI. Super easy install. The unit itself is touchscreen and easy to navigate.
I know it works for the Dometic Penguin II, not sure about the Truma (it is not listed as compatible).
link:
https://www.microair.net/pages/the-easytouch-rv-wifi-thermostat?gad_source=1
-
3
-
-
11 minutes ago, Townesw said:
Is the “5” in 5000 a raised or a stamped number?
It looks different but it is raised not stamped.
-
1
-
-
9 hours ago, Geronimo John said:
The 2" Bulldog Coupler is rated at 7K.
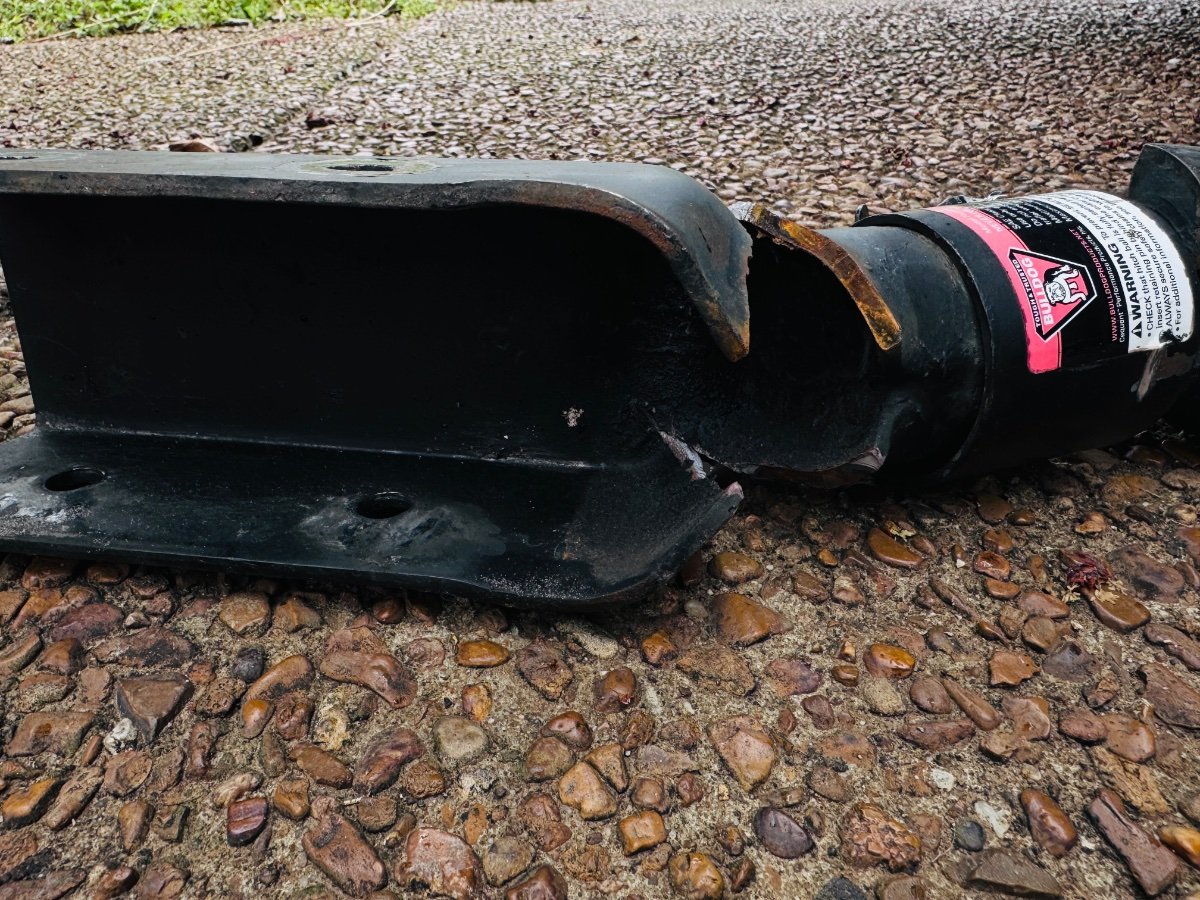
For me and everyone who owns an OTT E2, the issue is the 2 in BD coupler comes in 5k and 7k versions. They look identical except for a small gusset at the neck welded internally. During the build of Hull 308, a 5k coupler was used on my E2 by mistake and it failed while on vacation with my family.
Again, they look identical but the rating is shown on top of the ball end of the coupler. Everyone with an E2 needs to check theirs to make sure it is a 7k version and not a 5K.Best,
Mike
-
2
-
8
-
-
I just submitted a ticket through service online to make them aware. I explained what happened with pics. I will post when I hear from them.
-
1
-
2
-
-
Hey guys, I think I may have just figured out why this happened. If I am thinking about this correctly, looks like to me the wrong coupler was installed from the factory. 5k instead of the 7k coupler. Maybe one from the Elite I got put into the Elite II pile, they look identical, except for the notorious gusset. Just noticed this when I was looking it over again.
-
1
-
3
-
 6
6
-
-
Got an awesome Glidecoat applied by GCI in Murfreesboro before our trip. Not cheap but looks better than the day I picked it up 6 years ago. I know there is already a lot of posts about them, just wanted to give them another thumbs up! Great job guys.
Link: https://www.cgidetailing.com/olivertraveltrailers
-
1
-
11
-
-
15 hours ago, mossemi said:
If Bulldog does in fact send a replacement coupler, be sure to request the 2-5/16" coupler. Ask them to ship it to my house and I’ll buy you the beverage of your choice!😎
DEAL!
-
1
-
 1
1
-
-
6 hours ago, jd1923 said:
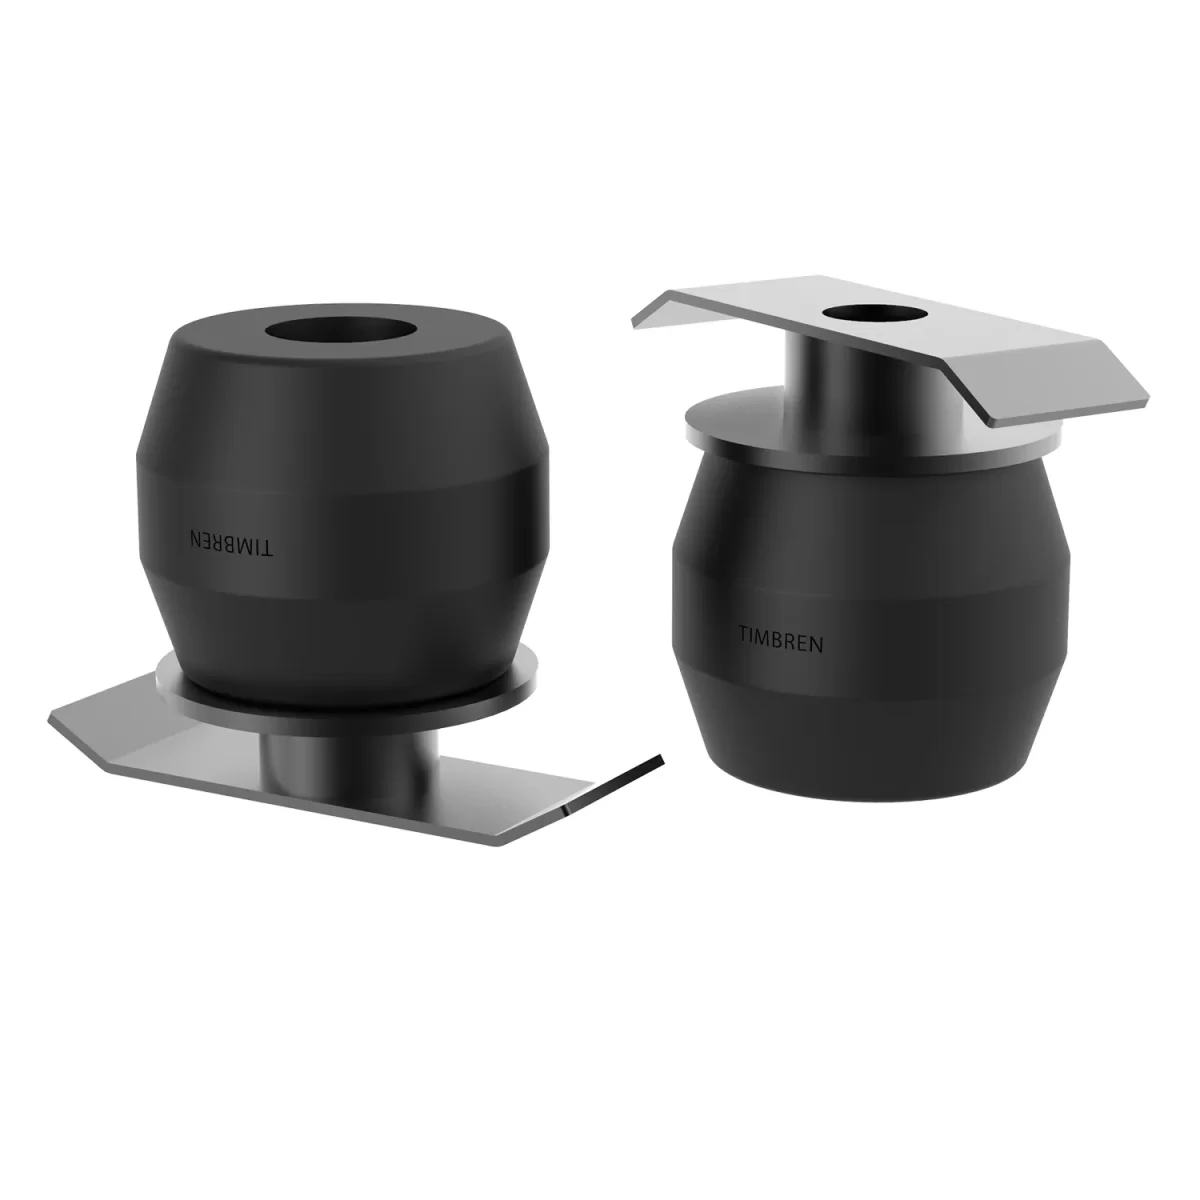
I recently installed Timbren's "Rear Suspension Enhancement." They are like rear axle airbags w/o the air (will never have an aired suspension product again, never, another PITA). The Timbren have 2 heights, to use the spacer or not. One is too tight in my application, and one is too loose! Go figure. I need to call them and talk engineer to engineer. The spacer is 1" and I likely need to make a 1/2" spacer to make it fit. When hitched to OTT, the Timbren is 1/4" to touching: Timbren Rear Suspension Enhancement System Timbren Vehicle Suspension TDR1525H2 (etrailer.com)
I forgot to mention that I have the Timbren SES suspension enhancement installed my Tundra as well. Link: https://timbren.com/products/torttn-toyota-tacoma-tundra-2000-2023-rear-kit
This and the Anderson Rapid hitch make leveling the TT easy and work great to help eliminate: squat, roll and sway on the Tundra. I seldom have any porpoising, so I have not really looked at changing anything like the gen in the front basket or the two bikes I usually carry in the back. The Oliver pulls amazingly down the road and off-road (My real frustration with a WDS).
But saying all that, I have heard WDS enough times during these discussions to where I am seriously looking into getting one.
I wanted to say thank you again for everyone's input and a healthy dialogue.
Best,
Mike
PS.
I did submit a report to the NHTSA and have sent an email to BD.
-
2
-
2
-
-
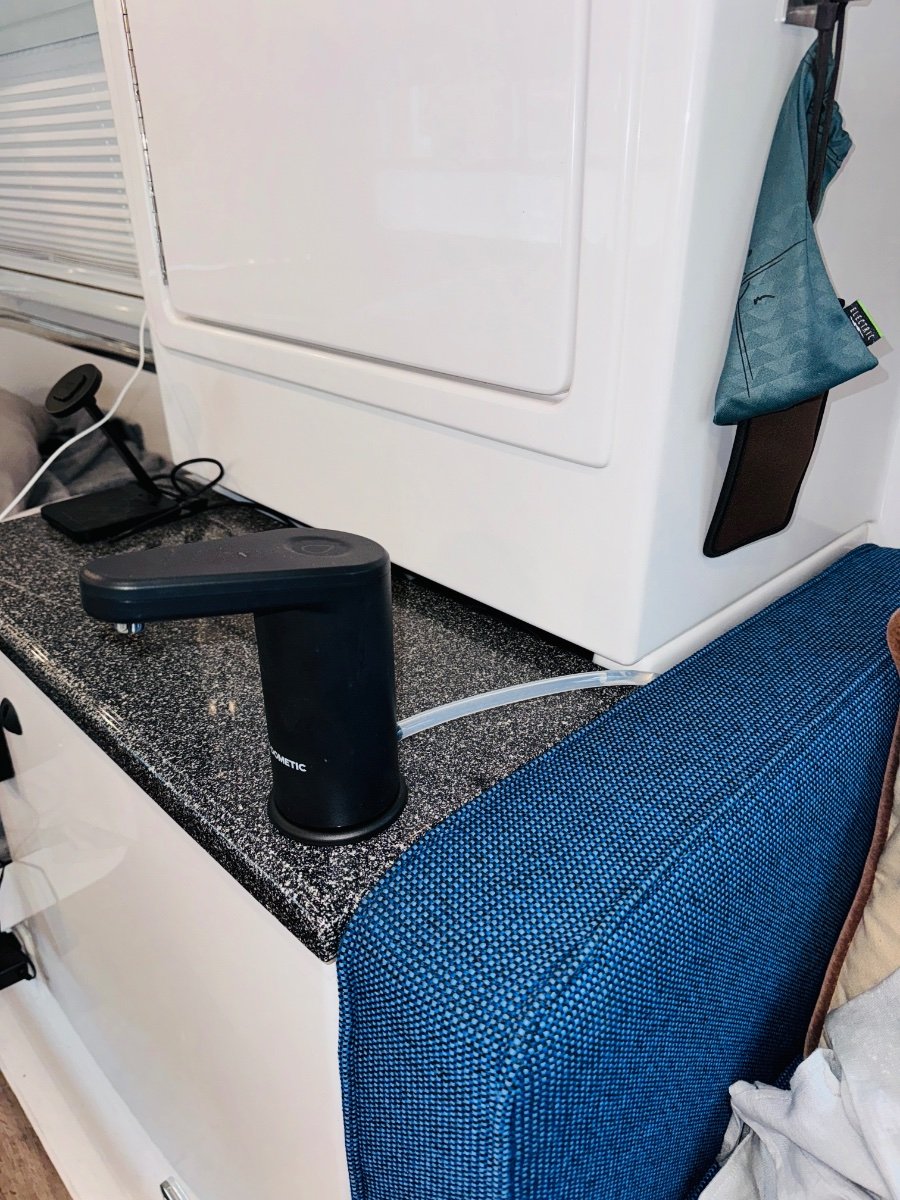
This was put in to use our last trip and we loved it, especially the kids. No more picking up heavy 3 gallon containers for drinking water. Faucet magnetically attaches to base and can be turned or moved. Easy 1, 2 tap On/Off. Easy to clean and store easier than other water containers we have used. As much as I would like to just use on board storage H20 it never seems to taste great despite keeping it clean and tank treated.
We added a 10 ft tube to make it easier to place where we want it. It came with a very short one. You can just use the connector from it for the new, longer tubing.
Links below:
-
3
-
5
-
-
1 minute ago, John Dorrer said:
Sorry this happened and glad your family are safe. What year trailer? We have the 2" on LE2, 2022. Will inspect ours . Keep us posted.
2018 Hull #308
-
2 hours ago, topgun2 said:
ALL 1/2 ton trucks that I'm aware of REQUIRE a weight distribution hitch.
I have never heard of this. My understanding has alway been that you don't need to start thinking about a WDS until what you are pulling begins to outweigh the PV. I know that WDS does not increase the trucks towing capacity or reduce tongue weight and that if your truck and trailer are level and the weight is evenly distributed over the axles everything handles well. Sway bars and WDS are dealbreakers for me, not needing them is one of the reasons I love my Oliver so much and stay away from single axle and longer TTs
Thanks for the discussion. It is necessary to remain vigilant about safely. Best, Mike
-
3
-
 1
1
-
-
26 minutes ago, Geronimo John said:
2. BD likely has millions of their 2" couplers in service and has an impecable reputation as being one of the strongest couplers on the market.
The mechanic at A and A hitch outside of Tampa has been working there since 1985 and said he had never seen it happen like that and they are a top tier BD installer. I suspect you are right and that the missing gusset is the primary suspect for me. Still, I am glad to have upgraded to the beefier coupler at the moment.
-
6
-
-
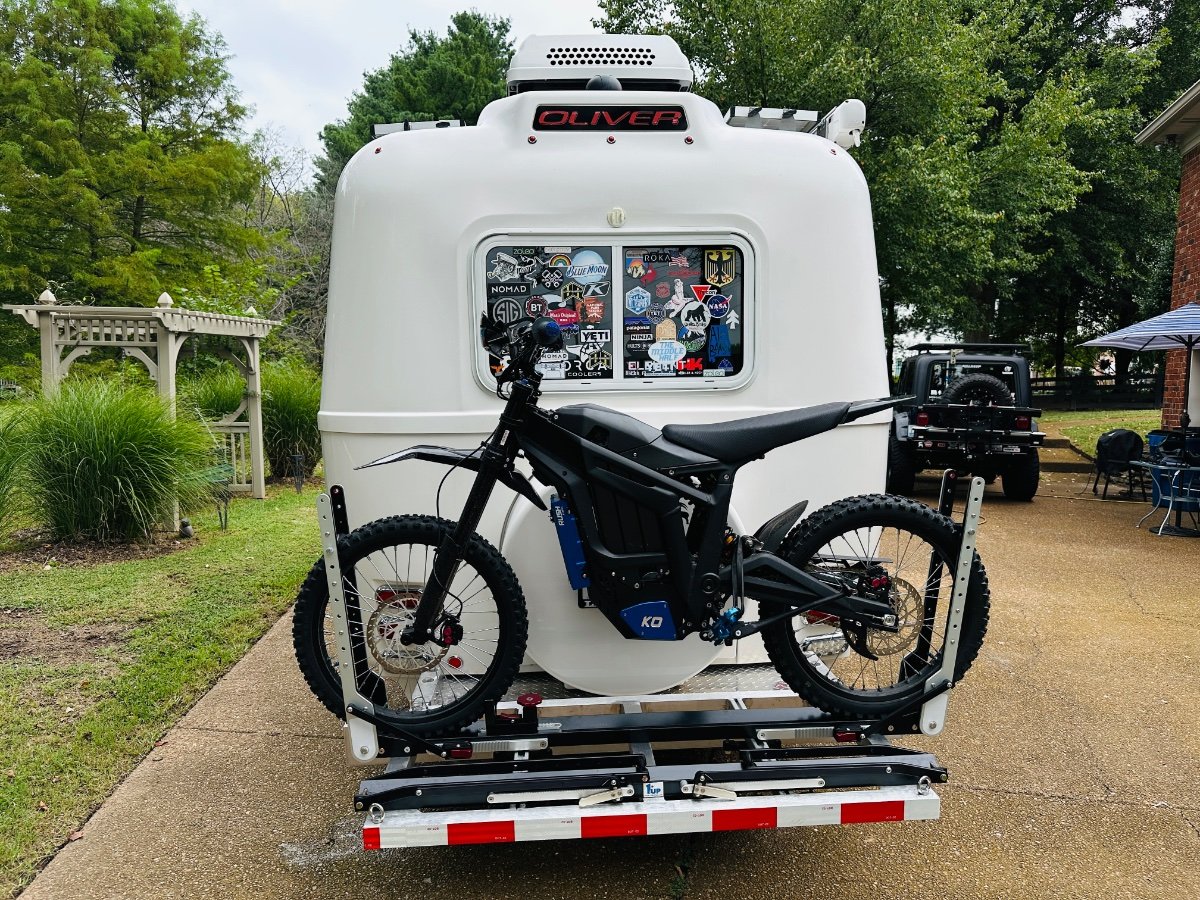
@jd1923 It is a heavily modified Talaria. Sur-ron is another sister brand and unfortunately if it has a chip or an electric motor or both it is most likely made in Asia. But it is a ton of fun. Link for a stock bike: https://lunacycle.com/talaria-sting-r-mx4/ Link for some fun upgrades: https://www.ko-moto.com/ko-talaria-upgrade-motor
@topgun2 Need to probably do both but haven't got to it yet. 3rd brake light with blinkers for sure!
@MAX Burner As far as departure angle. I have a pretty steep start to my driveway and the Ollie frame will hit occasionally but not the bike rack.
-
3
-
-
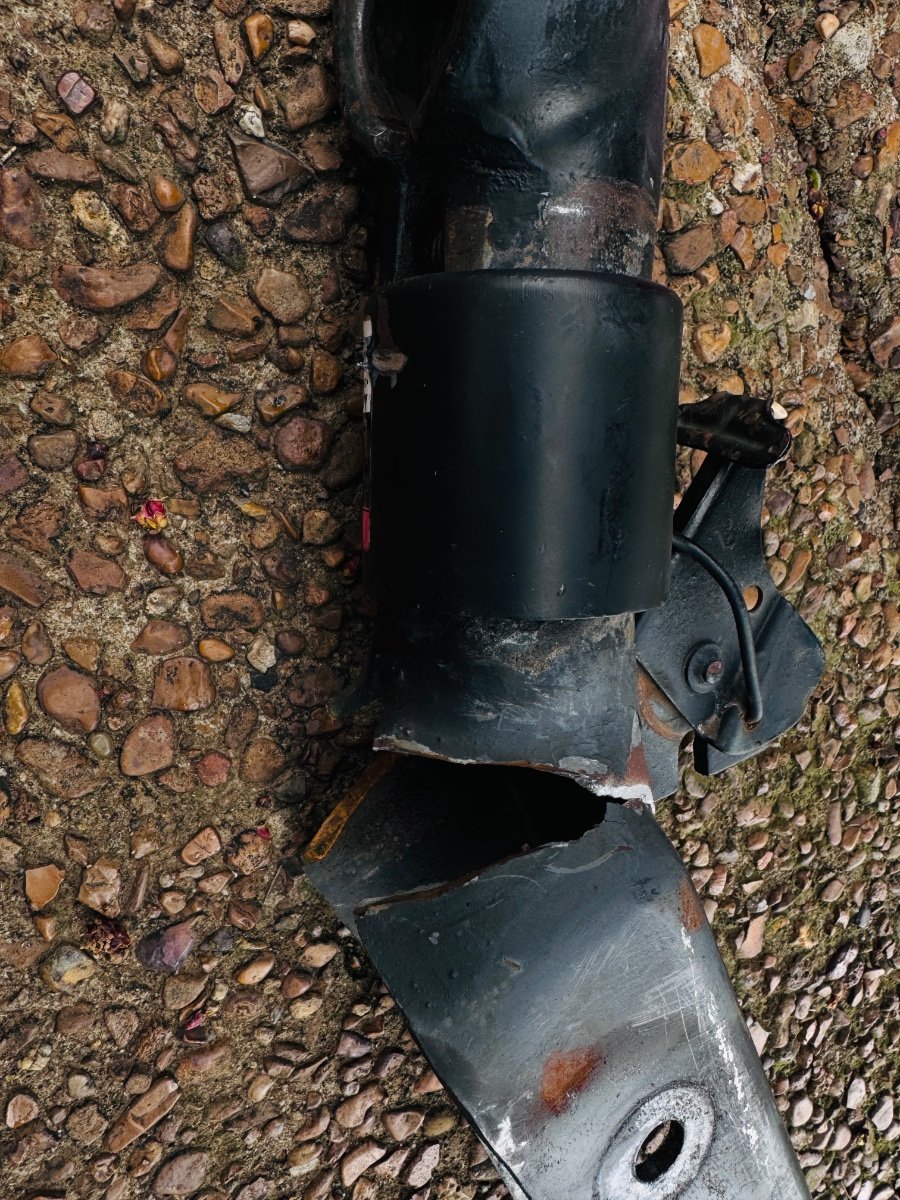
@mountainoliver @Steph and Dud B That is very interesting. Mine definitely did not have that gusseted welded section where the break occurred. I wonder when they made the change and why they didn't put out a recall if that is the case. Or mine was just defective from the factory. More pics of others pre-2018 might be interesting.
@Geronimo John I didn't see any signs of galvanic corrosion. Bolts, aluminum and steel around bolt sleeves looked good to me.
@MAX Burner I am just curious. How can the max tongue wt max be 485 lbs when the TT dry is 4900 lbs. A basic rule of thumb is tongue wt max 10% of total wt. Through various online sources, I have always considered the V-8 Tundra's to be in the 600-700 lb range. I would appreciate any input on this. I mean if you can overload your max tongue wt with a 55lb generator in the front basket I would be shocked again. And correct me if I am wrong, the Tundra pulls the Ollie incredibly well without a sway bar or WDS. SO why not just OEM the 2-5/16th coupler instead of the marginal 2 in. Lots of variables here to think about for me personally and fellow owners as well.
BTW, we are back home safe and sound in good ol' Tennessee!
-
2
-
3
-
1
-
-
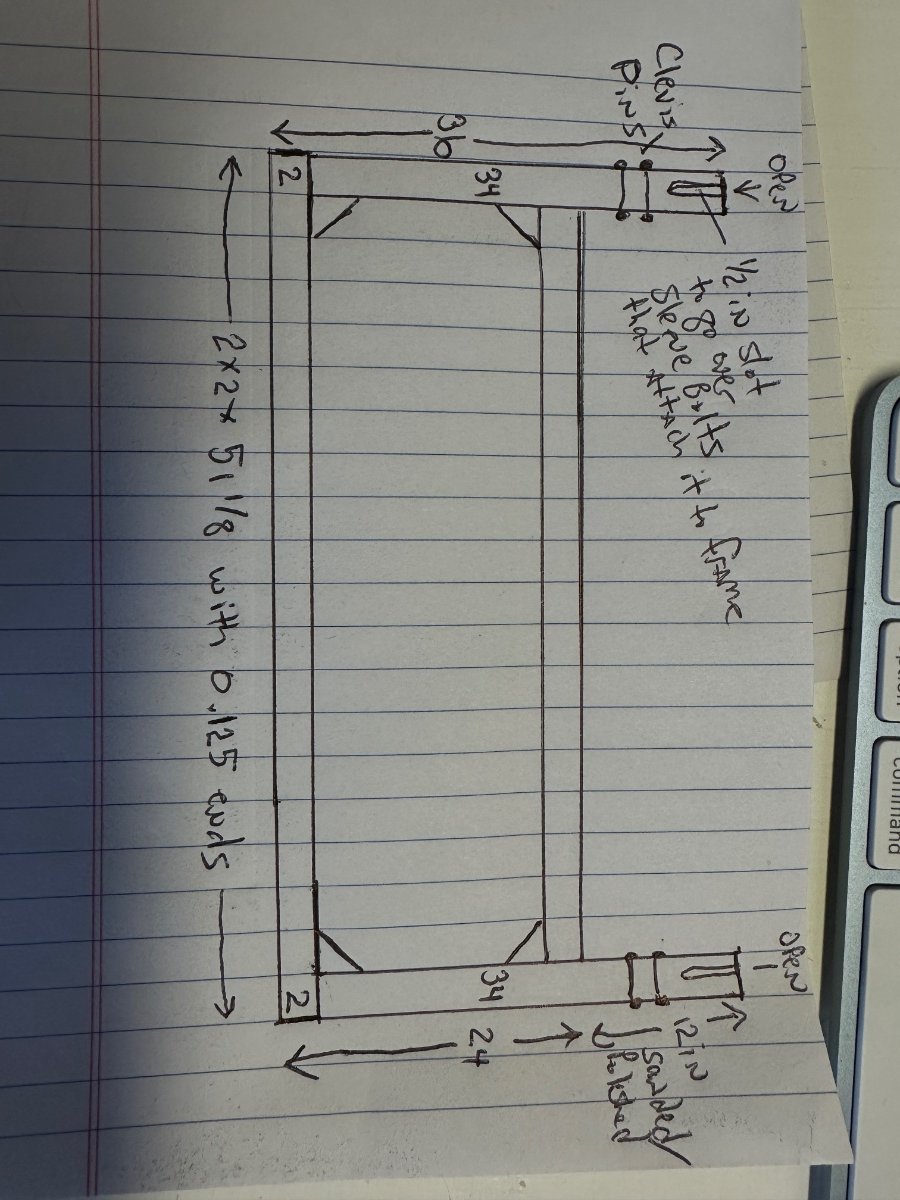
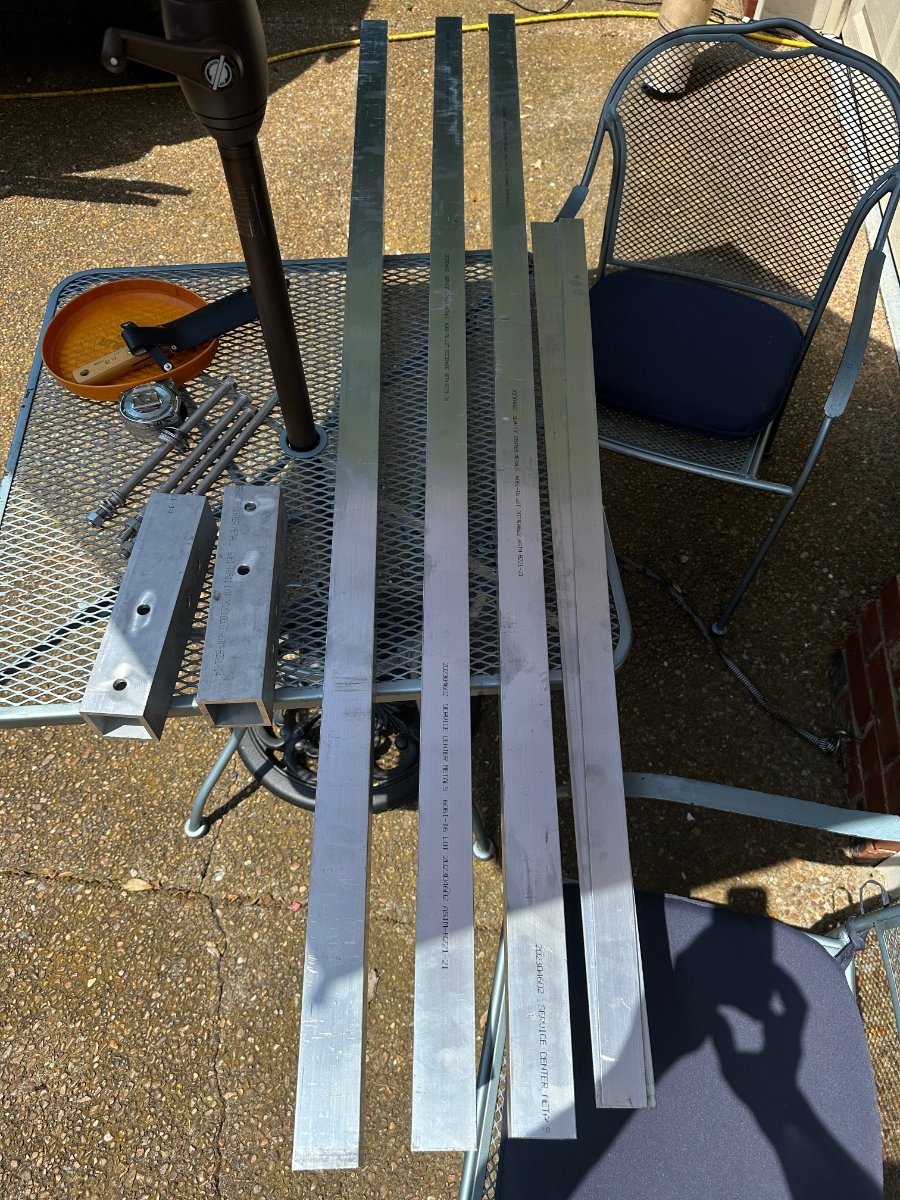
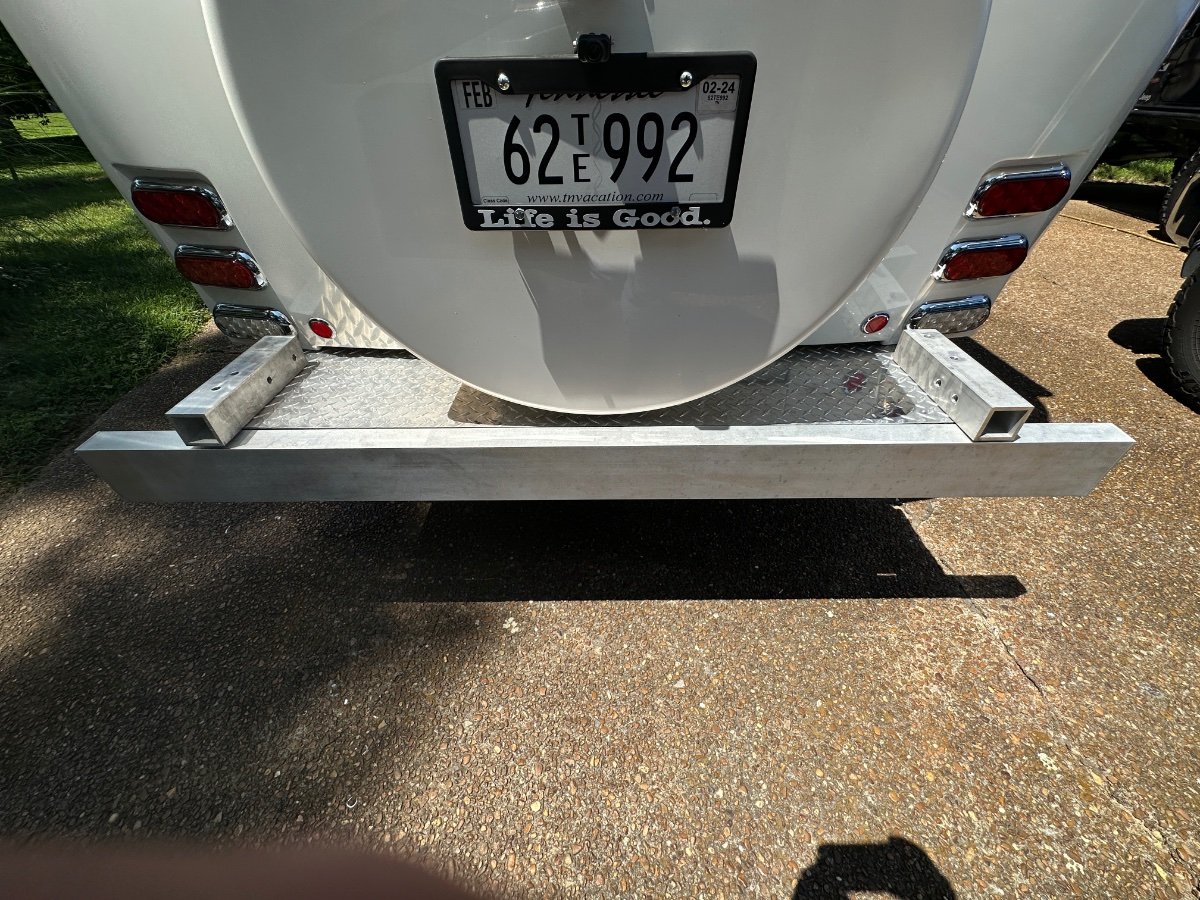
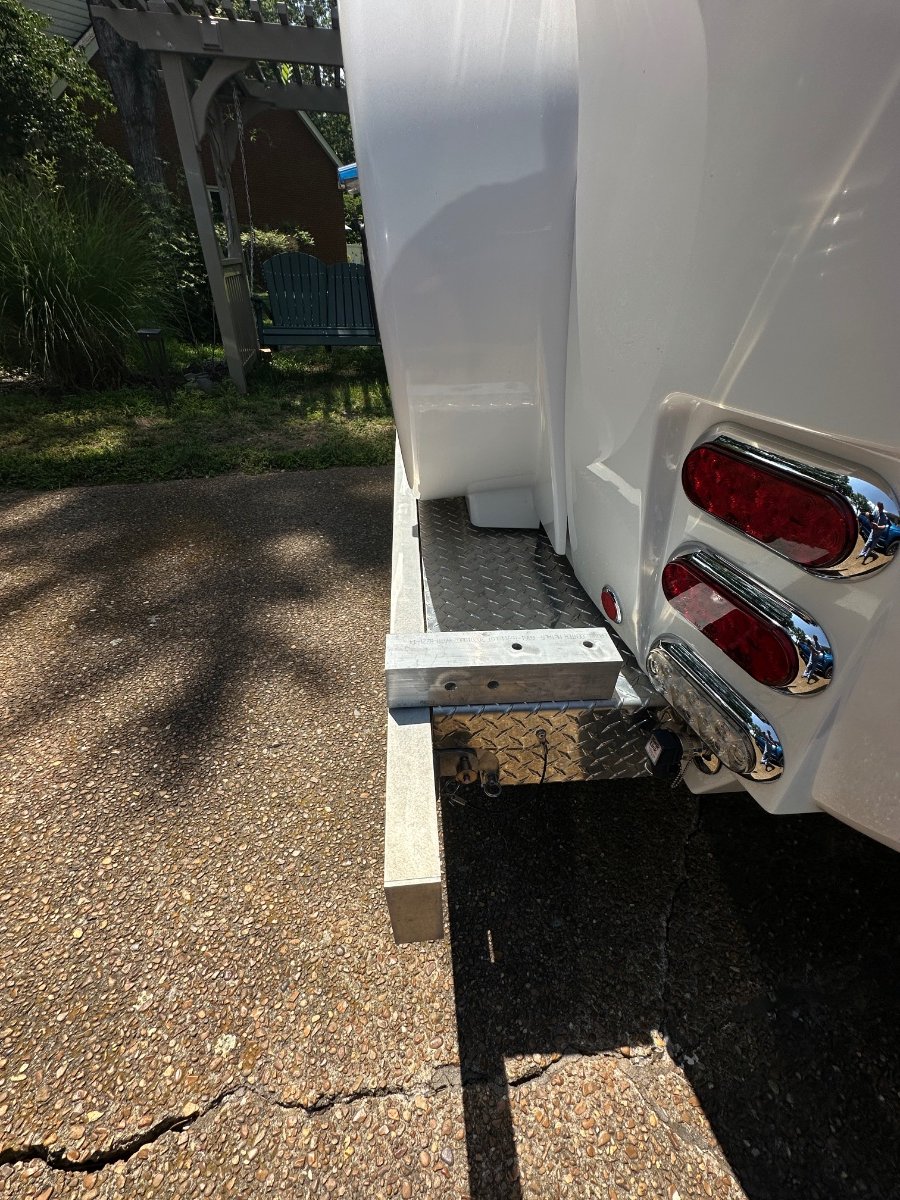
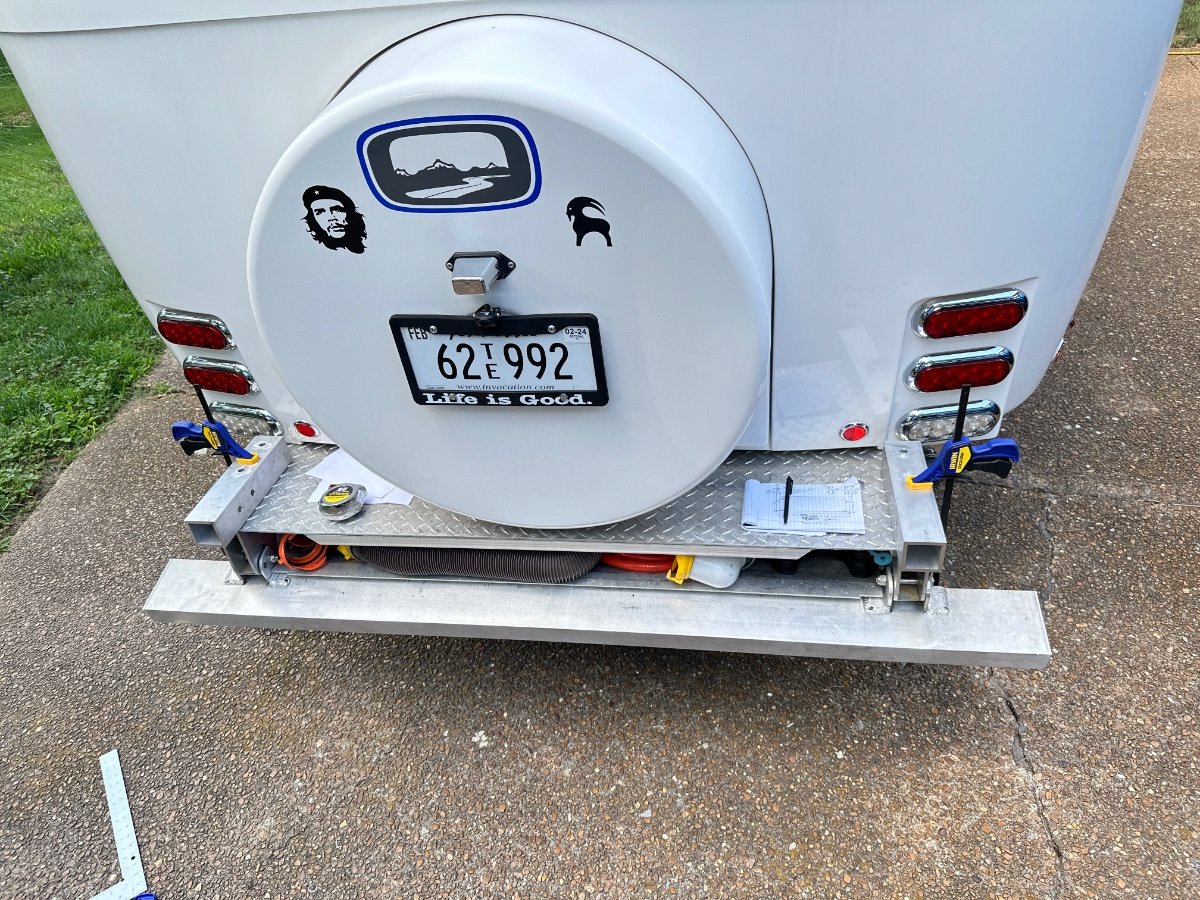
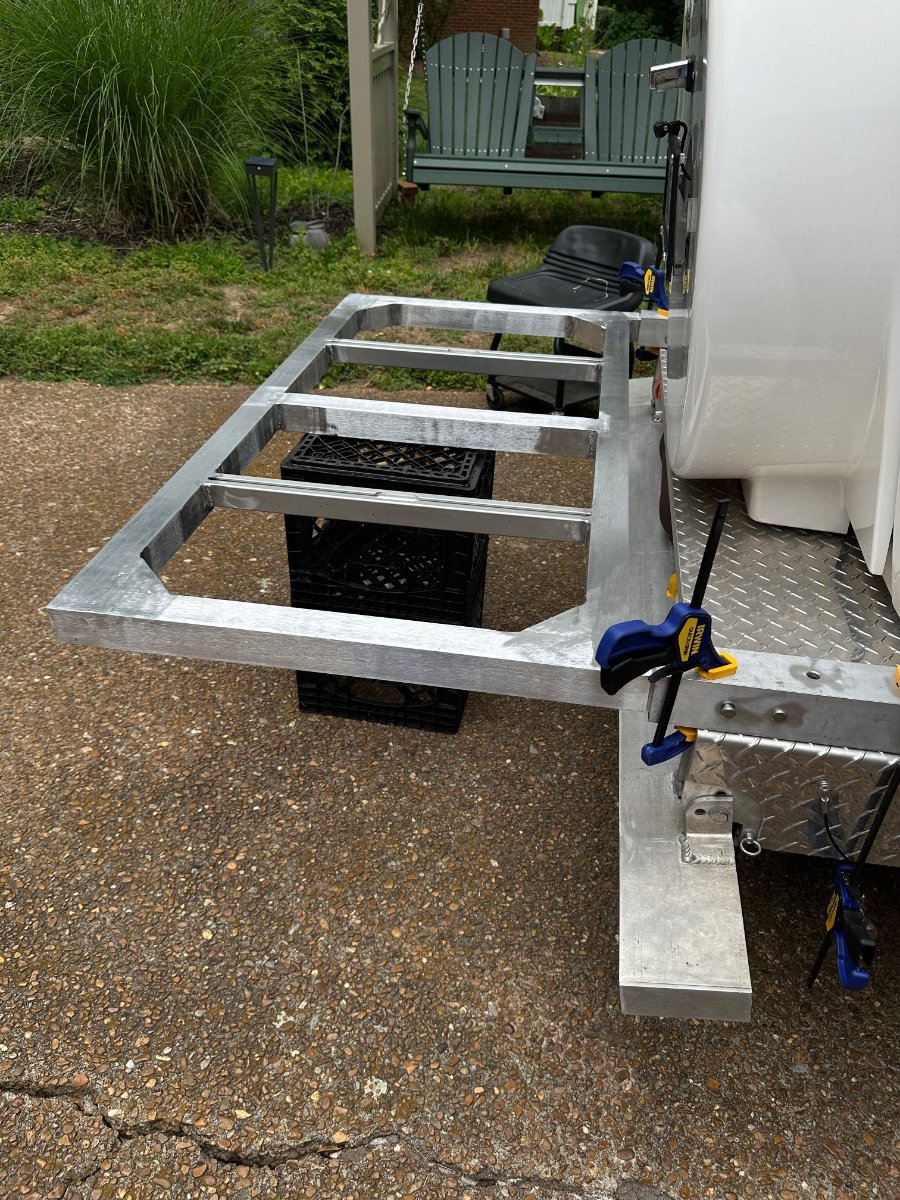
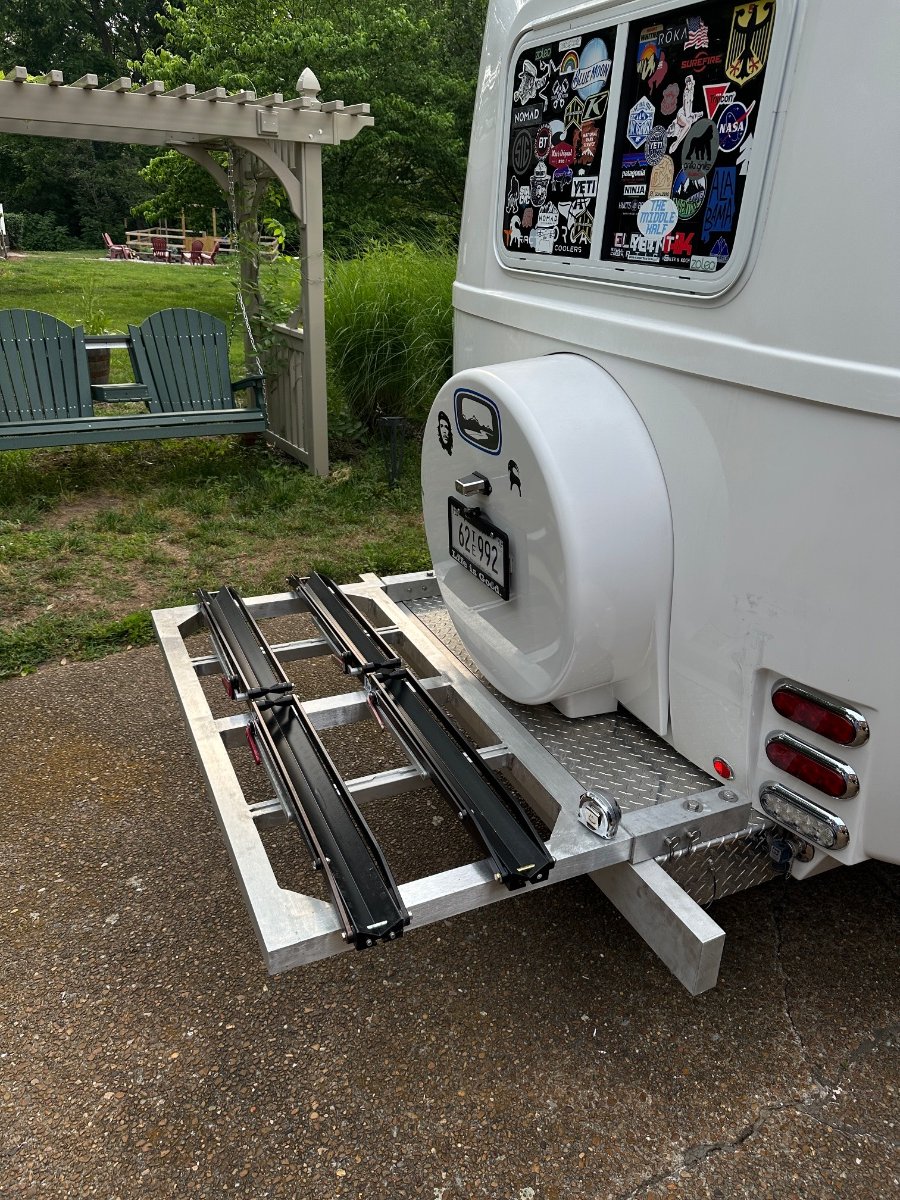
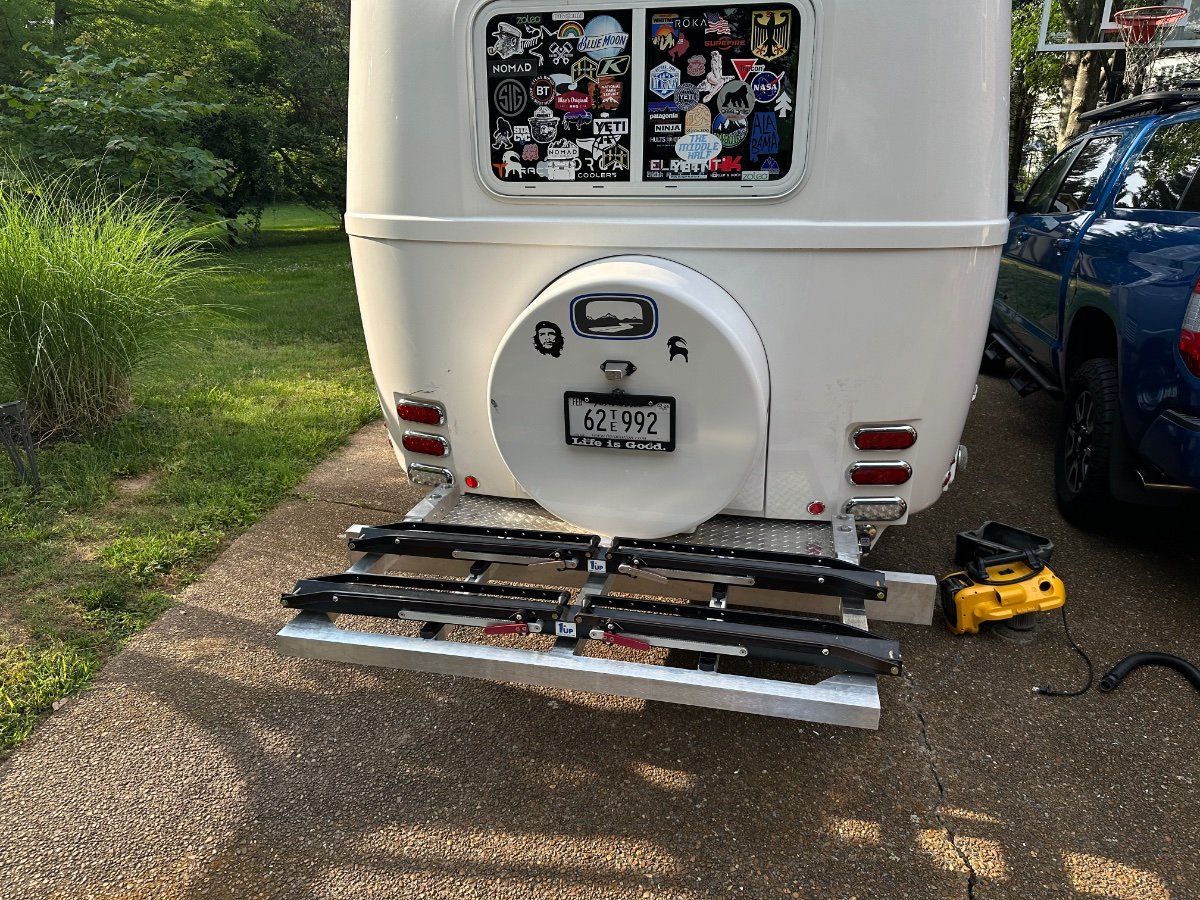
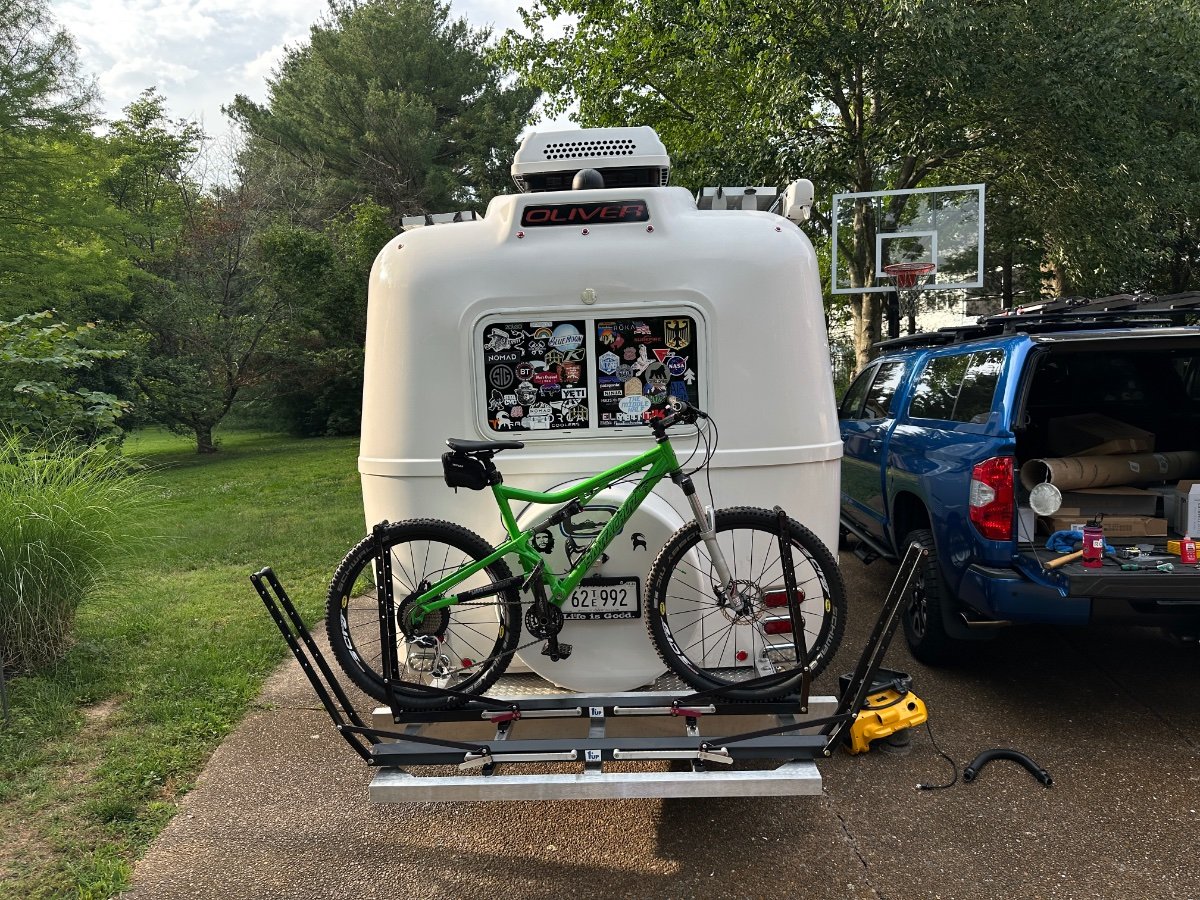
Last summer project that has enabled me to carry bikes much easier. I got the aluminum 2x2s, T-slot material online and the 2x2 sleeves and hardware from Oliver. Local guy in Nashville welded up the tray and cut out the slots to slide into sleeves clearing the bolts. Install was harder than I thought (you have to be very careful drilling the rear hole both sides to go in between downward slats on bottom of frame).
*** For transparency, I found this while going over things related to the front coupler failure. Got me thinking more about a WD system.
Best,
Mike

-
2
-
6
-
-
duplicate


Multiplus II with PD EMS wiring help
in Ollie Modifications
Posted
Ok, Perfect. The MP2 has (2) AC line outs. So just a separate AC out line 2 from inverter to A/C 20 amp circuit.