johnwen
-
Posts
626 -
Joined
-
Last visited
-
Days Won
3
Everything posted by johnwen
-
Hi David...hope ya'll are well. We're n Quartzsite at the moment. Do these pads add any stabilization against rocking (IYO)? They do not sell in 3 packs but will sell individually and that makes them a little more expensive than the discounted 4 pack of $121.45 Thanks :) John
-
4 yrs in Minot, back in the 70's ...I feel your pain :(
-
 JD...I did save Geoff's number at Epoch. (888) 859-7544
 -
JD, I talked to Geoff last year about adding a new, third battery to my two existing 300's and he said that they indeed don't play well together. I couldn't tell you why as it's over my head. But he did tell me if I added a third battery I should only use it and not the other two until I cycle the new one through 20 - 30 charge cycles and then all should behave. But my disclaimer is to talk to Geoff. I'm not totally sure of the number of charge cycles. See you tomorrow :) John
-
Ditto :) Thanks Wendy...
-
Always working....labor of love :)
-
Been there a few times...don't get too close to the edge :)
-
Alcan spring kit sprung stiffer or is it bad roads?
johnwen replied to taylor.coyote's topic in Ollie Modifications
Same here with 15,000 mi since install early this year :) -
Also, try "pip pins" :)
-
:)
-
Film/Coatings to Front Oliver to Limit Dents
johnwen replied to Bobfirst's topic in General Discussion
Nice :) -
Starlink Mini Installation- 2022 LEII- Alternate Approach
johnwen replied to dhaig's topic in Ollie Modifications
Thanks Don! Safe travels :) John -
Starlink Mini Installation- 2022 LEII- Alternate Approach
johnwen replied to dhaig's topic in Ollie Modifications
Hi, Don, Sorry for the intrusion on this holiday weekend... I'm about to hook up my SL Router Mini. I see on your picture of the POE injector that you have 2 blue wires and one red feeding into a 3 way wago. Is that red one the positive to the 12VDC auxiliary power outlet (cigarette lighter type)? which feeds to the Router Mini via the Anker plug? -
Use space heater when below freezing???
johnwen replied to Dennis and Melissa's topic in General Discussion
Good to know, Don. I have to call Oliver today about a new bolt for my entry steps so I think I'll add a regulator to the order. I've often thought what a pickle we could find ourselves in during winter in the boonies. Thanks for pushing me over the edge on this :) John -
Full Suspension Replacement - Alcan Spring and Dexter D52 Axles
johnwen replied to jd1923's topic in Ollie Modifications
I may follow suit John :) -
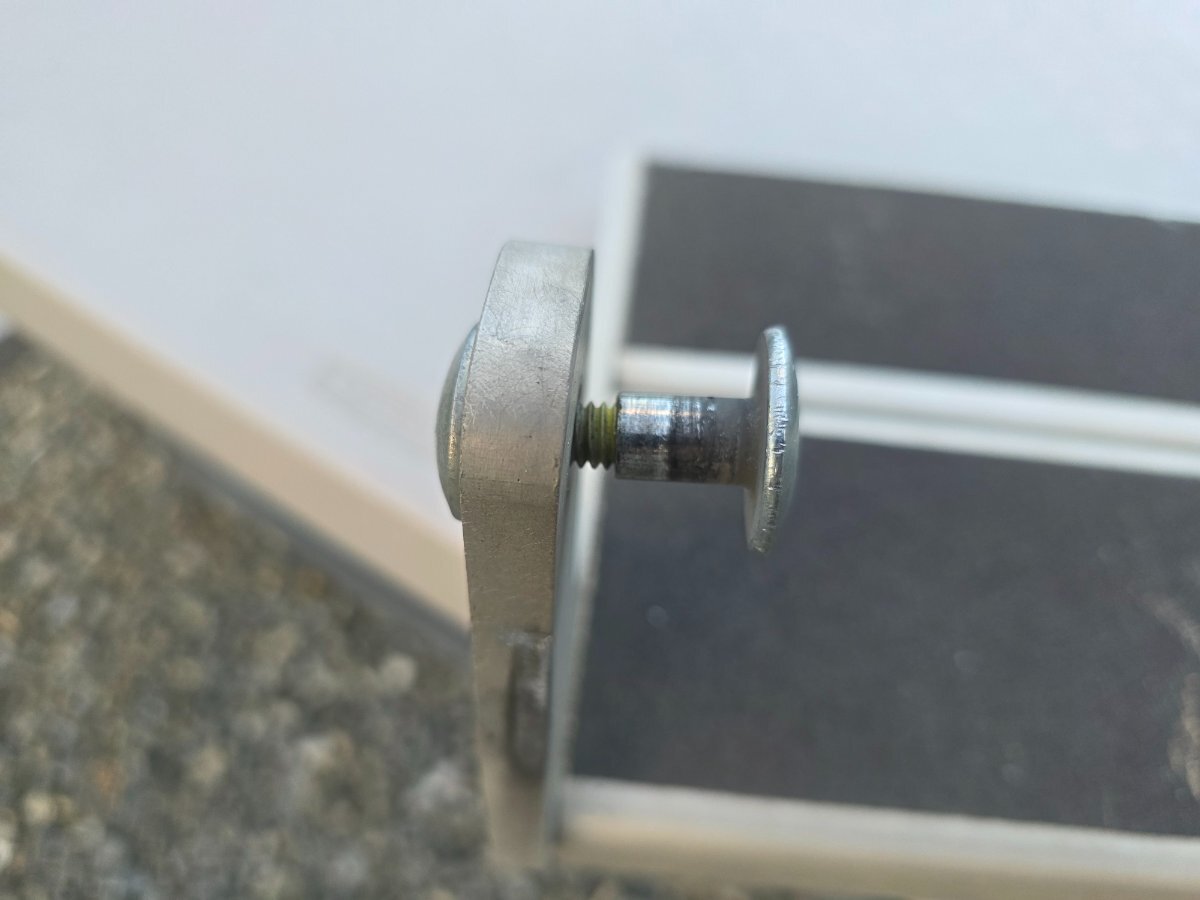
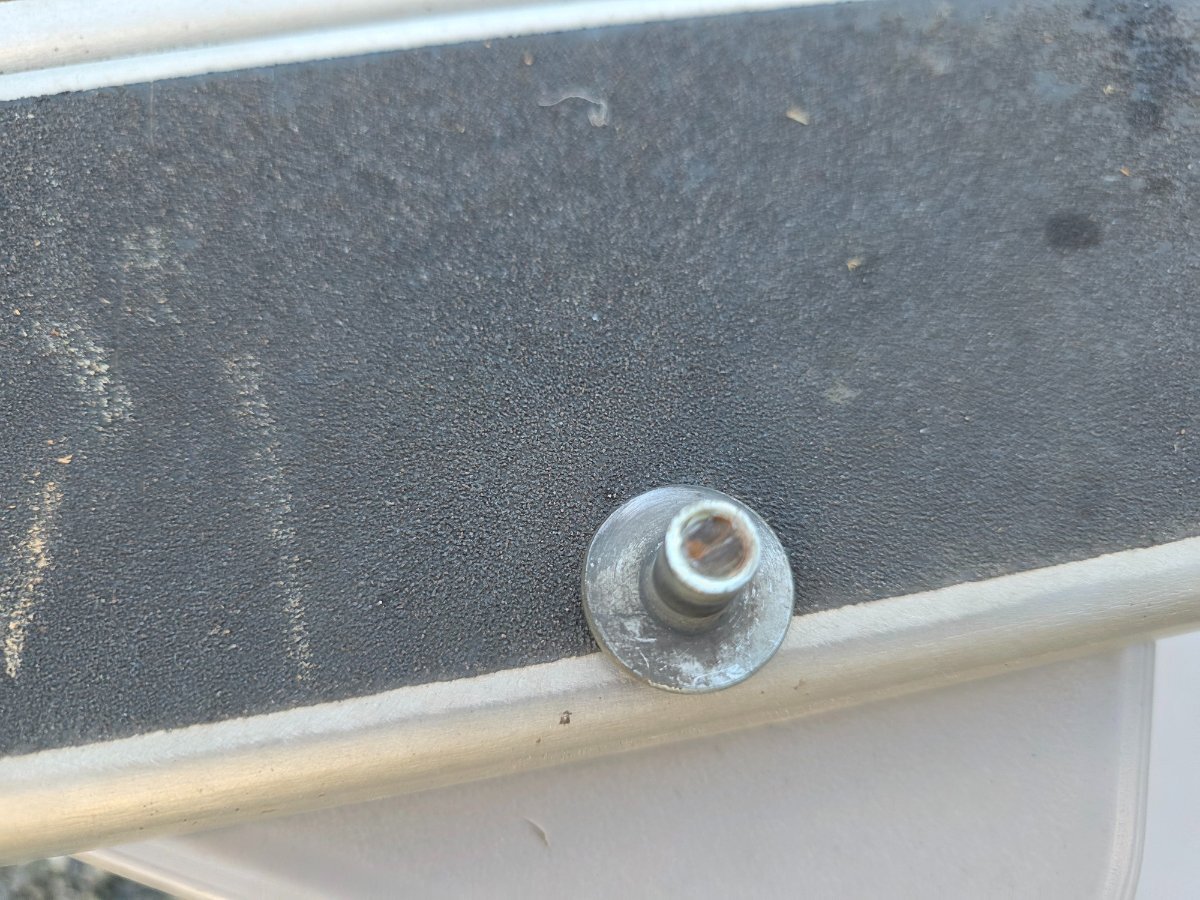
Thanks, Mike, I suspect the sheared one came loose some time ago and all those miles we've been racking up caused the shear. Hopefully no damage to an oncoming vehicle. I've never checked them...I thought they were riveted on.
-
Has anyone had to replace the mount bolts for the entry steps? Found this problem after arrival to campground. One sheared and half was missing, the other was loose but still useable. I'll check with Oliver on Monday. We have a few weeks of downtime starting tomorrow so I'll get to start on my "fix-it" list :) John

-
We have it...2022 Hull996. Our accumulator mount screws pulled out and left craters where the screws were. We tried VHB tape to no avail. I'm also looking to replace that board and looks like everything attached to it will have to come off. I haven't really studied the situation. We will be back in SC this weekend for a few weeks so I'll tackle the problem soon. We have hit some monster bumps and dips on the roads this year. Our "Bessie" joined the 64,000 mile club last week so I expect a few issues like this will crop up...gives me something to do :) Good luck, John
-
Bessie....for our Dads...Bob and Wes...and the result is our lady Bessie :)
-
Nice! :)
-
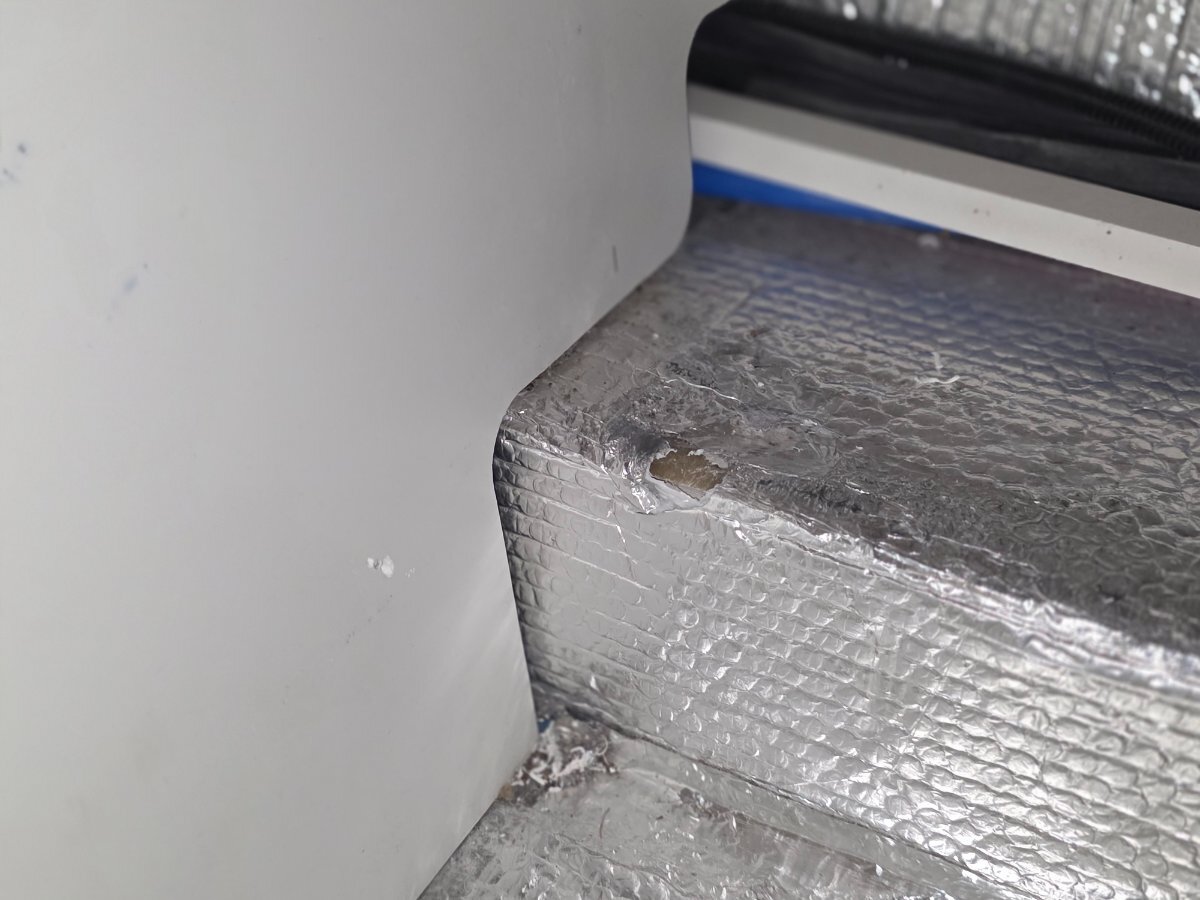
Thanks Mossey...I dug up an old photo from my first visit and indeed the gray tank appears to stop short of that space. The factory provided floor snapped in two and needs replaced. I'll use wood this time if I cover the space.
-
Has anyone put in a shower curtain who originally didn't have one installed as an option? Are you glad you put one in or not? It's getting a little more difficult to clean up the area as I age and am considering installing one :) TIA..John
-
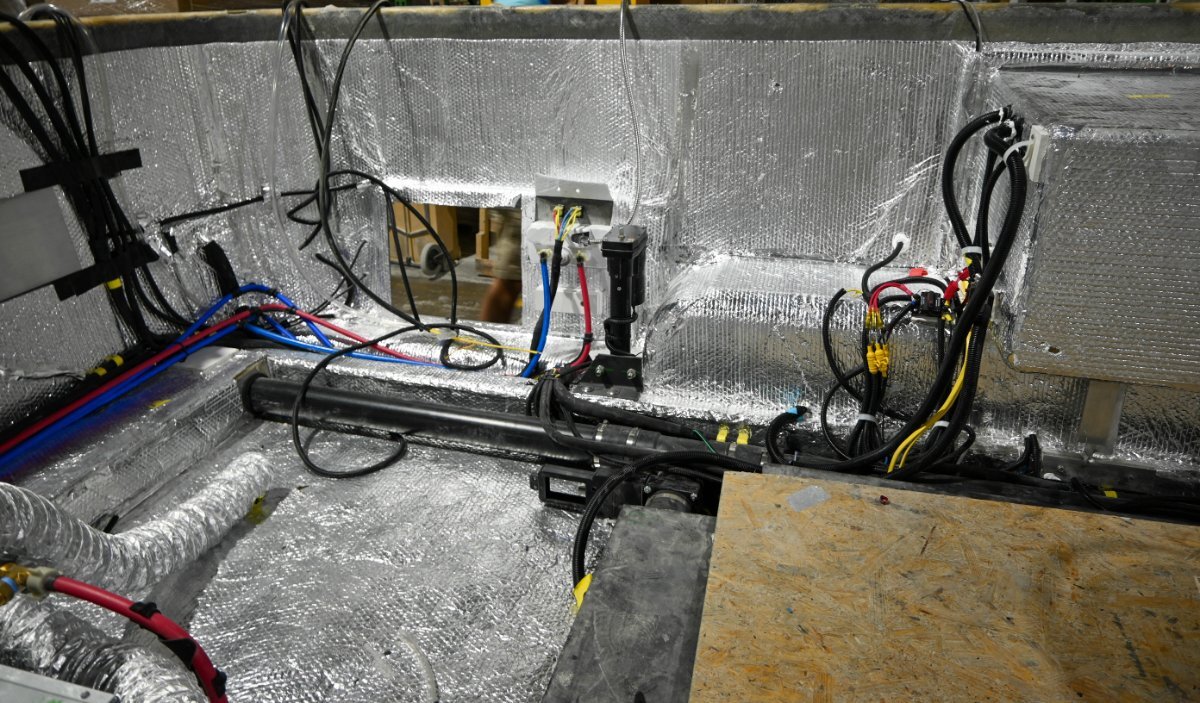
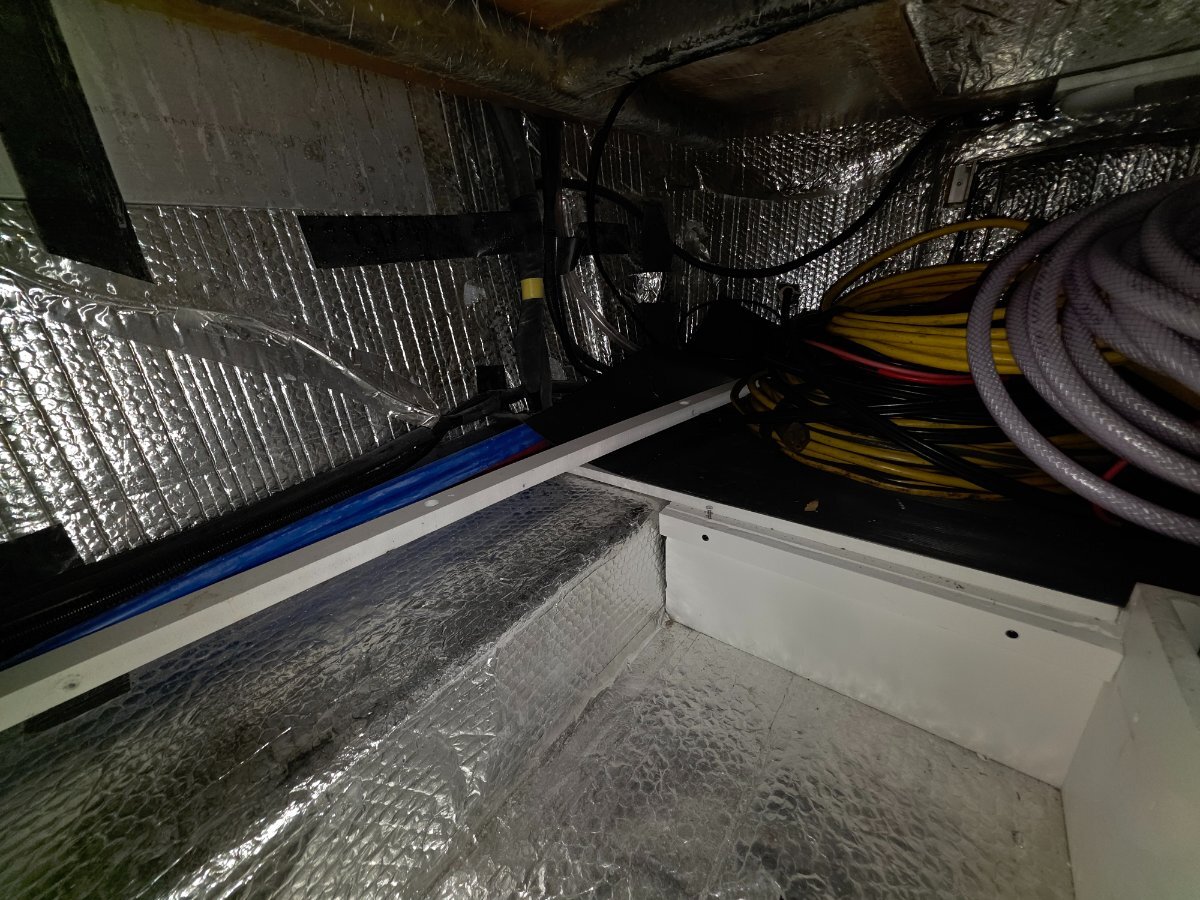
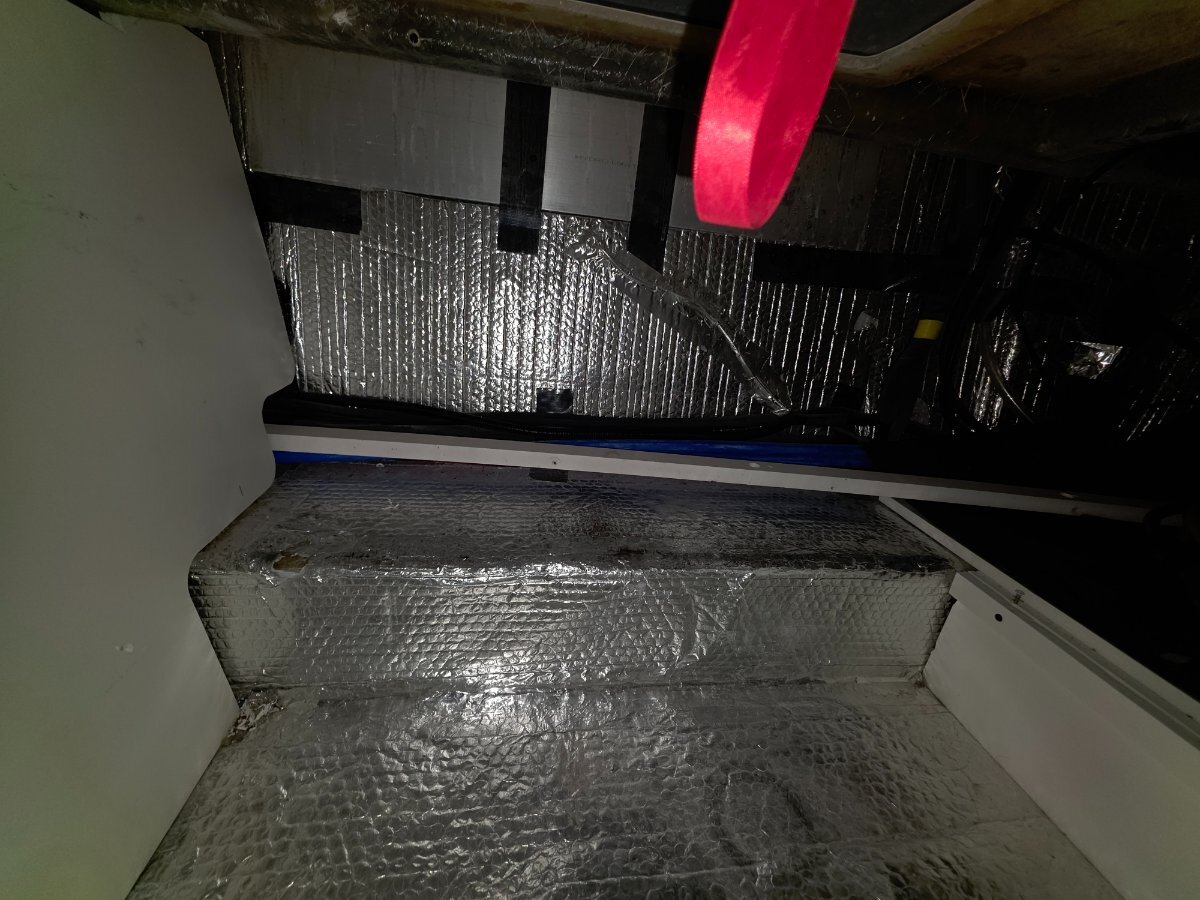
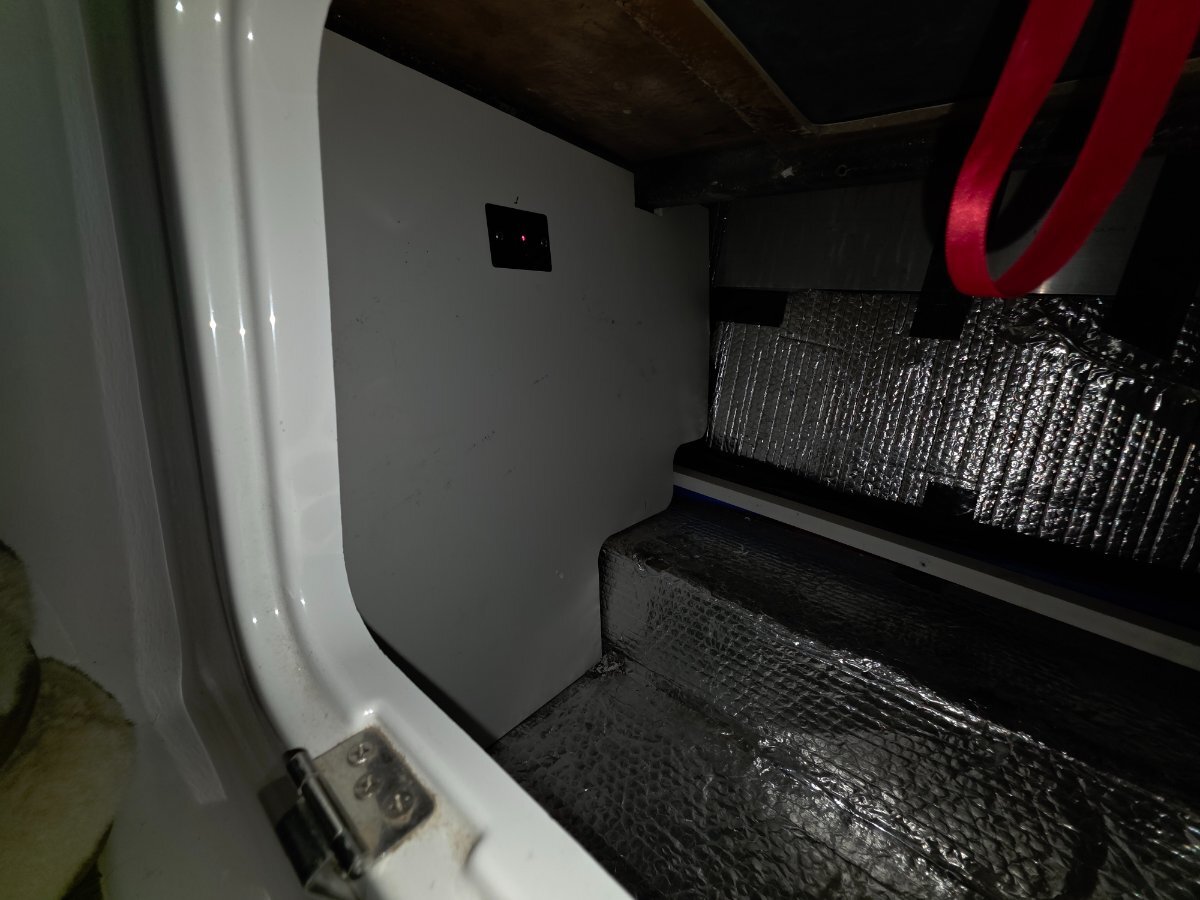
I'm sure some have experienced problems with the integrity of their basement construction. My 1/2 inch pvc/fiberboard/not sure of the material... has bit the dust and I'm going to reconstruct this area. I'll be using a different material and will post pictures of progress soon. My question is what is below the old basement floor? The whole area is insulated and I'm wondering if I can take advantage of the space below the previous floor. I've included pictures and would appreciate any help with any ideas. It seems I could utilize the area beneath (approx 28x18x5 inch deep space) the previous flooring but don't know what's beneath the insulation. Does the fresh/grey tank exist below? Thanks, John
-
A Convenient Location for the TST TPMS Repeater
johnwen replied to Tom and Doreen's topic in General Discussion
One note about the repeater...even if you don't need the extra boost it gives you, you still need to install it for warranty compliance. At least that's the way it was 2 years ago.. John