

John Welte
-
Posts
626 -
Joined
-
Last visited
-
Days Won
3
Posts posted by John Welte
-
-
Hi all, we're leaving in the morning and I am all hitched up. We're not level and I am running the refrigerator on propane. Is that a concern? We're currently nose down probably about a foot to a foot and a half down from level at the hitch. TIA
John
-
16 hours ago, topgun2 said:
The similar Camco pump at Menards is $17.79 (HERE) versus $7.49 at Harbor Freight. I'll bet that the fitting doesn't cost anywhere near the difference in price.
Bill
That's the one we use and it works great.
John
-
 1
1
-
-
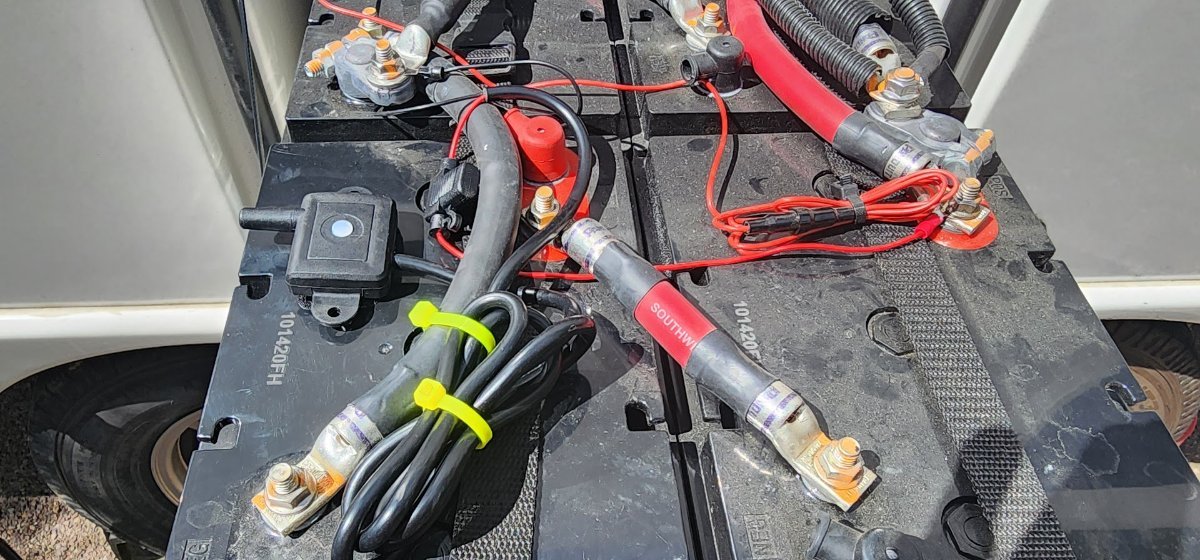
3 hours ago, johnwen said:
Here is where we put ours...thanks for all the help


That makes sense to put it on the batteries. Good idea.
John
-
 1
1
-
-
1 hour ago, 2008RN said:
ScubaRX,
I love the idea of wiring to the Rear camera switch. My Oli wasn't purchased with a camera. So I put in a camera year ago. My 2020 Oli fortunately was pre-wired with a camera Positive wire from where the switches are at to the rear upper section of the Oli. All I had to do was put in a switch in the panel and hook up wires.
I think from the rear camera wire, I could end up placing a repeater either in the rear, in the pantry, or in the vanity. I already have a sender for the camera in the vanity, I don't know if having 2 senders in the vanity would interfere with each other.
I have though about buying a TST system in the past, but I just figured on doing stuff the old fashion way. Now with this thread, I now think it is something that is more of a must instead of nice to have option.
A tire pressure monitoring system was the first thing we bought to bring at delivery day. We have the TST and like the monitor on the dash. After you set the parameters, you don't have to watch it as it will alert you if the tire pressure or temperature goes outside of your settings. I think it's a must have item.
John
-
2
-
-
4 hours ago, Steve and MA said:
As I recall, the instructions that came with my TST kit recommended installing the booster near the sensors and to connect directly to the battery. We installed ours in the battery compartment. It's about as close to the sensors as you can get, and there's no need to route the wires through the hull or under the frame. It's not a switched connection, but if you're worried about draining the batteries you can just remove the 2 amp fuse for storage.
Steve
Steve,
Did you use alligator clips on the battery terminals?
John
-
10 hours ago, Patriot said:
John,
I will weigh in here -
Per the TST tech I spoke with you will require the booster for TST to honor your warranty and for the TPMS to operate at its maximum potential. It takes a few min to connect the repeater. The TST tech also told me that using the system without the repeater you could easily have RF interference and you can easily loose your signal.
My TST monitor is always on while plugged in and charging. When I unplug it from charging, it will shut off via the switch. I highly recommend you consider installing the booster/repeater for a proper install. 3 years in and my TST TPMS is working great. I do monitor my tires when traveling for heat and tire pressure. The monitor is so easy to read right there on my dash eye level.
Cheers & Safe Travels from SW Colorado!
Patriot🇺🇸
How is the booster installed? I haven't installed it yet. Any directions for doing that? TST phone number?
John
-
2 hours ago, jd1923 said:
Thanks @John Welte, @Mike and Carol and @topgun2.
There are several reasons why I'm interested in the new Dill product, vs. TST and other like products. The Dill sensor is installed in the tire on an integrated valve stem vs. small plastic valve-stem-cap devices mounted outside in the elements. Dill sensors, like OEM automotive sensors, advertise a 5 to 7-year battery life. So, you replace the batteries when you replace tires every 5-7 years.
Another feature is not having to mount and wire a proprietary screen! Just read the tire data from your cell phone. Soon I will be mounting a small screen for gauges integrated to the truck computer (OBD II port), to read EGT on the diesel, trans temp, and much more! I have a good place to mount that, down behind the cup holder and really do not want anything on the dashboard. Full specs are not yet out on this new product, to be released by October end, but you must be setup a cell phone alert when tire pressure or temp is outside of control limits. Having the data view portable will also be handy when filling tires. I'm holding off on my new tire purchase until these are released, price and full specs advertised.
Sounds interesting. The main thing is to have a tpms with the trailer and you're doing that with this new product. 5-7 year battery life sounds great.
John
-
1
-
-
2 hours ago, Mike and Carol said:
Same here. We’ve used TST for 7 years, no booster.
How long do your sensor batteries last? I bought a package of 12 CR2032 from Costco that were on sale for about $12. I think that I put them on when I picked up our trailer in November last year. Do you just put new batteries in every year or wait for a loss of signal message? If you're not on the road is it still draining the battery? My wife retires in 13 days, so we will be doing more traveling. You two are out a lot.
John
-
1 hour ago, jd1923 said:
Thank goodness your family and your Oliver is all OK!
Years ago, pulling an enclosed cargo tailer from TX to AZ, we had a trailer blowout. Honestly, it's amazing that your OTT and connection to the TV is so solid, that you did not know the blowout even occurred - OMG!
Ours was so drastic, that I immediately felt a tug on the truck steering wheel! The belts from the tire tore the fender off completely and it then damaged the siding of the trailer (cheap alum, not our OTT fiberglass). Got a new tire, miles down the desolate dry western highway. Of course, had to park the trailer and run an 85-mile roundtrip with the wheel.
I'm going to purchase and install these from Dill. Our truck is 23 years old, so it did not come with TPMS. You can buy a set of 4, or 8 and monitor pressure via Bluetooth to your phone. I will purchase 8 and install inside of my OTT and TV wheels. Dill's new product will be available late October from Tire Rack (first reseller). For truck and trailer you would buy two sets (pat # 1604-V).
A TPMS is crucial to have. Check out TST and compare to the one you posted. It comes with a monitor that you can see on your dash and gives you pressure and temperature readings. We have that one and even though we haven't set up the booster, we have no problem getting the measurements from the Oliver LE 2. I have four sensors for the tv and four for the trailer. Tireminder is another brand.
John
-
1
-
-
1 hour ago, SeaDawg said:
@SomeDaySoon, I'm sure you can add to the conversation on Canadian campgrounds, among other things. A lot of us truly enjoy the welcome of our northern friends and neighbors, and your beautiful Provincial and territory parks.
Welcome from #12.
Love your chosen screen name, but I'll probably be listening to that old Judy Collins song (that I loved) in my head for awhile....🤣
Great song. I grew up listening to her. We had wonderful music in the 60's and 70's.
John
-
1
-
-
On 9/19/2023 at 11:28 AM, Brian and Brandelyne said:
@Ollie-Haus Chris - great idea, I also like the idea that the porch lights stay bright for looking outside when boon docking.
BTW - we were just on a trip to VA to go to my mom's funeral and "Whitezilla" died hard! Engine failure on the 7.3L. We were fortunate that we were 2 miles from a Ford dealer and they took us right in but unfortunately, the engine will have to be replaced and the truck is 6 hours from home. I had to rent a ridiculous F-350 dually with the turbo diesel and a long bed @ $900/week to get to VA and back. Then we had to tow the trailer all the way to TN and then drive the truck all the way back to London, KY to drop it off (had to drop it where we rented it) and then rent a car to go back to TN while we wait for the new engine.
It seems the lifter on #3 CYL kept sticking and it would cause the exhaust valve to stay open resulting in a #3 CYL misfire. I chased that for several months by changing plugs, wires, and even a coil pack for #3 then it finally showed why it was doing that when the lifter froze and caused the push rod to bend resulting in a horrible noise. I was hoping it was a rocker arm or something similar and easy to fix but NO.
The dealership, and two others I have talked to, said this is the first engine failure they have seen on a 7.3L gas. Not sure if that makes me feel special or just unlucky.
I will post a report on the Tremor forums as see if anyone has had a similar experience but haven't seen anything there so far like this.
Cheers,
Brian
I am sorry for the loss of your mom. The engine problems sound awful too. Hope the rest of your year is better.
John
-
 1
1
-
-
2 hours ago, Brian and Brandelyne said:
@Ollie-Haus Chris - great idea, I also like the idea that the porch lights stay bright for looking outside when boon docking.
BTW - we were just on a trip to VA to go to my mom's funeral and "Whitezilla" died hard! Engine failure on the 7.3L. We were fortunate that we were 2 miles from a Ford dealer and they took us right in but unfortunately, the engine will have to be replaced and the truck is 6 hours from home. I had to rent a ridiculous F-350 dually with the turbo diesel and a long bed @ $900/week to get to VA and back. Then we had to tow the trailer all the way to TN and then drive the truck all the way back to London, KY to drop it off (had to drop it where we rented it) and then rent a car to go back to TN while we wait for the new engine.
It seems the lifter on #3 CYL kept sticking and it would cause the exhaust valve to stay open resulting in a #3 CYL misfire. I chased that for several months by changing plugs, wires, and even a coil pack for #3 then it finally showed why it was doing that when the lifter froze and caused the push rod to bend resulting in a horrible noise. I was hoping it was a rocker arm or something similar and easy to fix but NO.
The dealership, and two others I have talked to, said this is the first engine failure they have seen on a 7.3L gas. Not sure if that makes me feel special or just unlucky.
I will post a report on the Tremor forums as see if anyone has had a similar experience but haven't seen anything there so far like this.
Cheers,
Brian
I am sorry for the loss of your mom. The engine problems sound awful too. Hope the rest of your year is better.
John
-
4
-
-
29 minutes ago, MAX Burner said:
We've been using the straight one that we bought from LockNLube, it hits all 16 zerks with ease and doesn't pop-off. Works as a great combo with the Lincoln grease gun:
Did you have to remove the wheels?
-
2 hours ago, MobileJoy said:
LockNLube has three right angle adapters. The more expensive one at $16.99 is the one that was linked earlier in this thread. The one I'm considering is this "simple" one at $10.99. The former one is shorter at 0.8" while the latter is 2.15". Anyone have experience with it, or with both?
The third one is the push-on adapter that looks like it will not work for the upper zerks.
I used the $16.99 one that has a screw on piece and external spring. There are three pieces that are inside the housing. Don't make the mistake that I did and unscrew the piece fully. I lost those three little pieces and had to reorder the piece. I have to finish the job still now that the replacement adapter came. They should warn people to not unscrew that, or maybe everyone except me just knew not to. I don't have experience with the cheaper adapter that you reference. Good luck.
John
-
 1
1
-
 1
1
-
-
11 minutes ago, SeaDawg said:
Well, that was a PITA. So sorry., but really glad for the persistent motorist who alerted you to the flat tire.
We have the TST tpms system. Though we haven't needed the repeater, there is one available to boost the signal forward to the display unit if needed.
I think a few other brands sell a booster or repeater, as well.
I have the TST also and monitor all eight tires. Four on the TV and the four on the trailer. It came with the repeater, but it hasn't been necessary. It does take about five minutes to start registering on the display, but after it does, it cycles through all the tires. It gives great peace of mind.
John
-
6
-
-
1 hour ago, ScubaRx said:
I think leaving the emergency flashers on is the best idea.
I agree
-
1
-
-
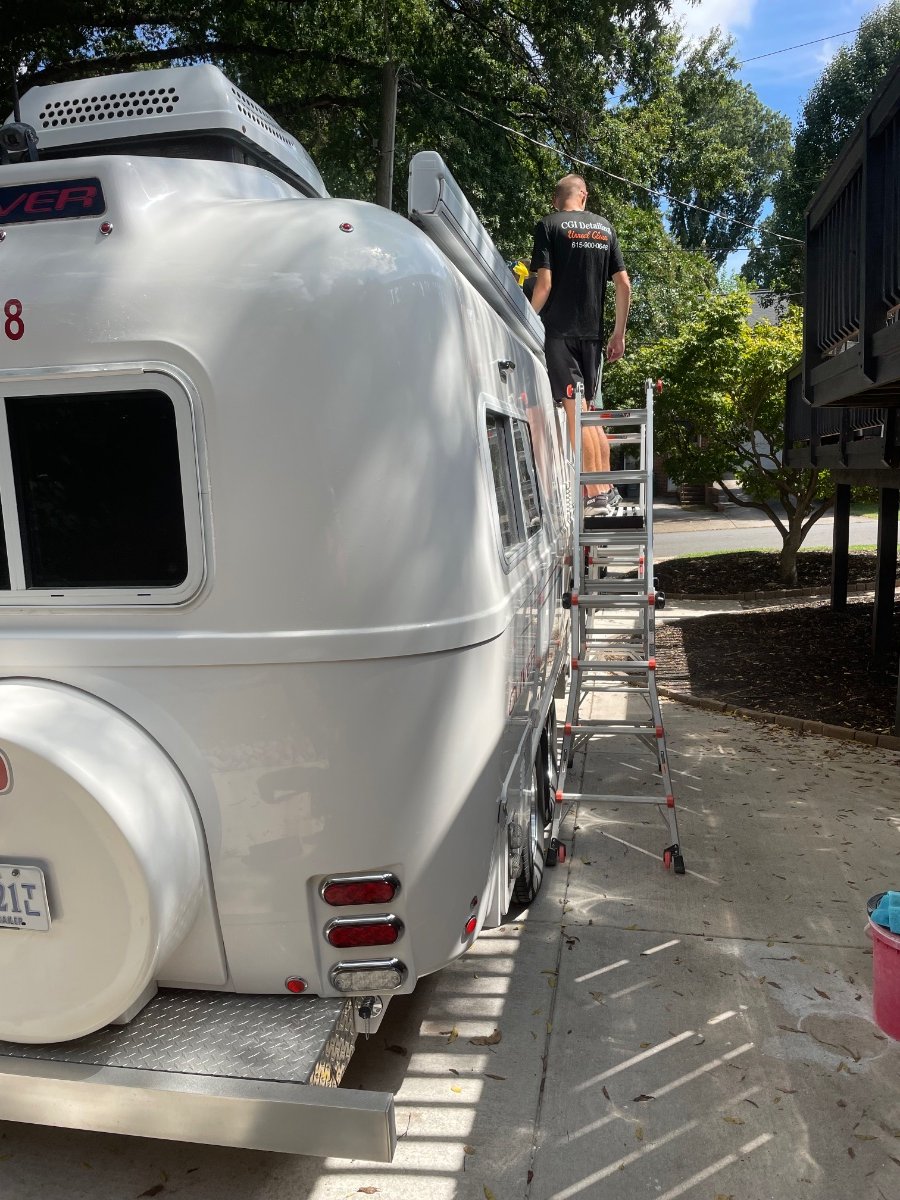
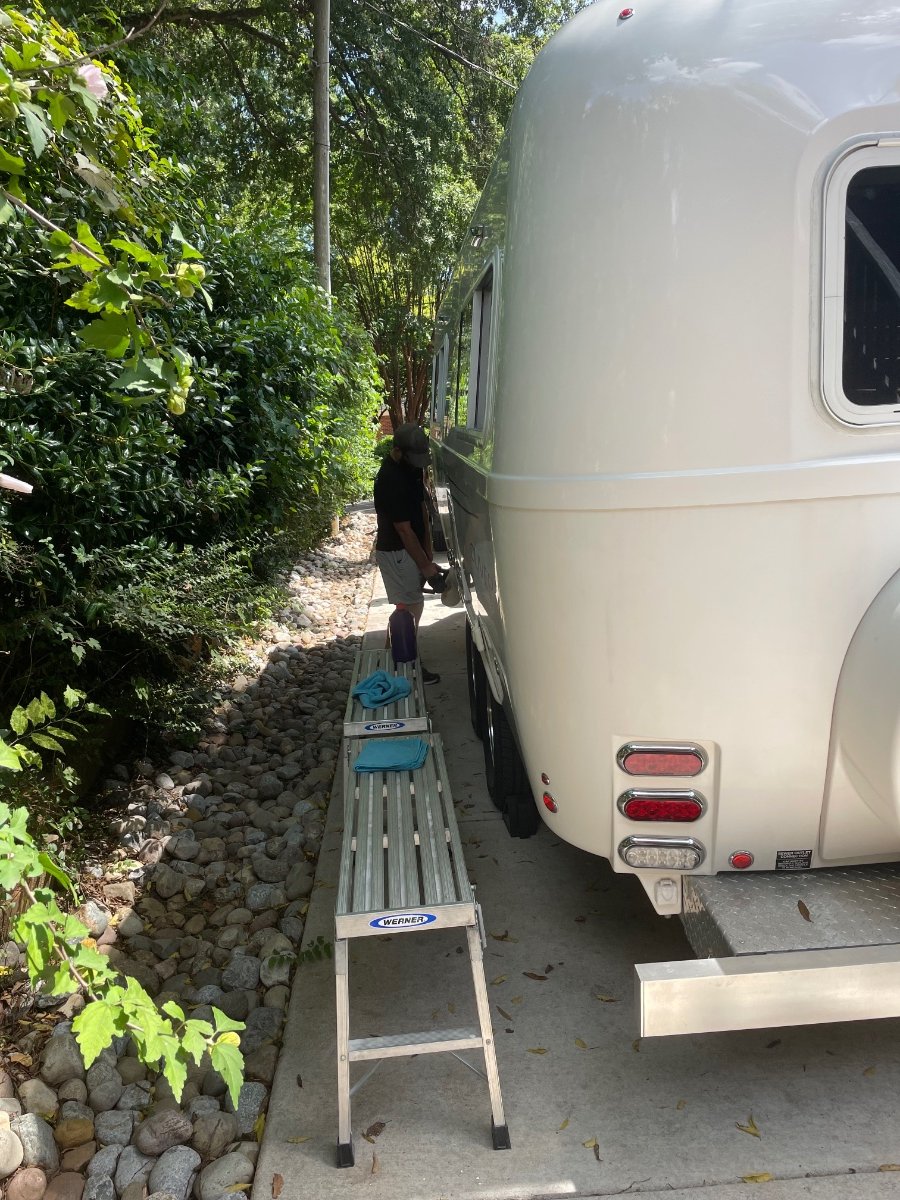
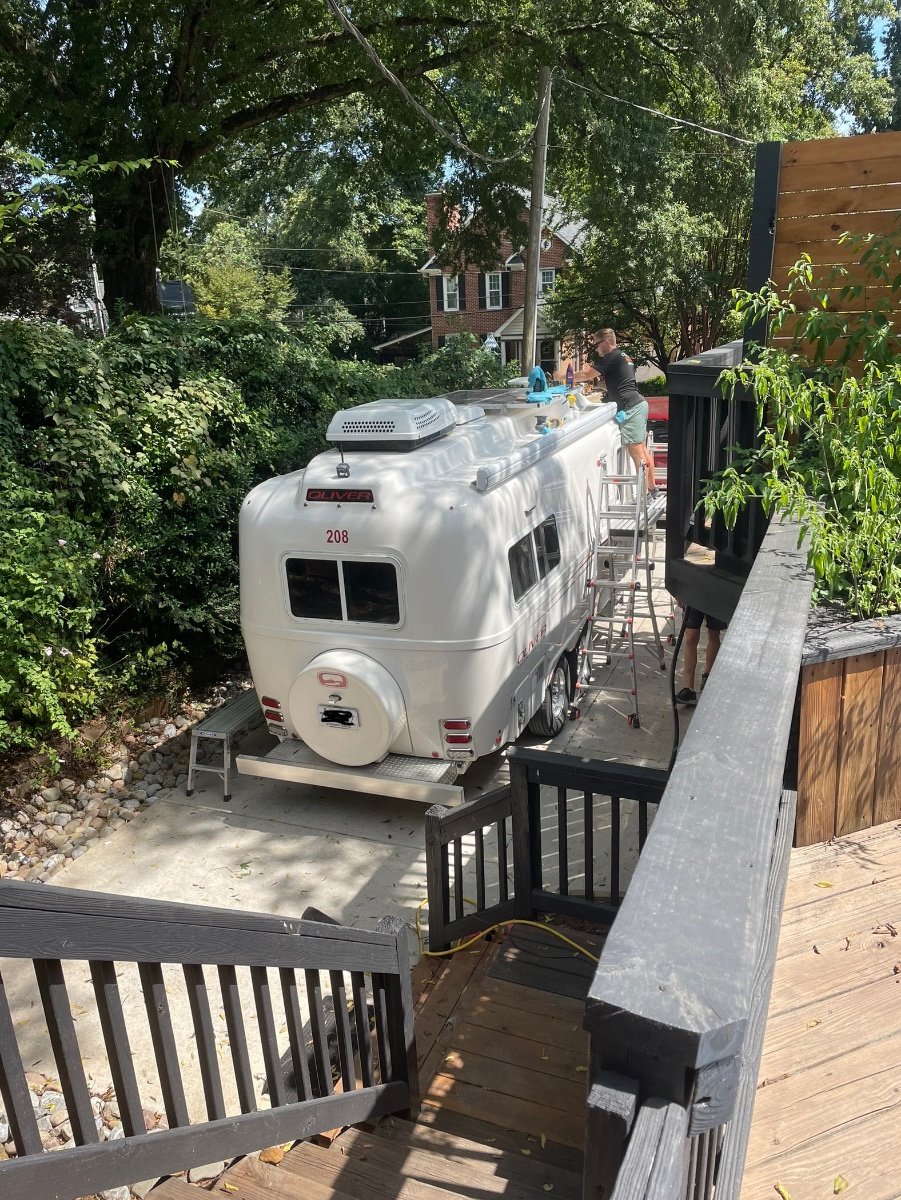
14 minutes ago, mountainoliver said:
We just got home from meeting the CGI guys in Charlotte, NC to coat our trailer. We met them at an air b&b and they did the whole job in the driveway. They certainly are the nicest bunch of guys! I can’t believe how hard they work at the whole process and what a difference between before and after! After six plus years outside 24/7/365 it really needed some help. Now knowing that the gel coat will be protected, looks better than new, and having a little easier cleanup routine really means a lot.
#1290 will get their treatment in less than two months.
John
-
1
-
-
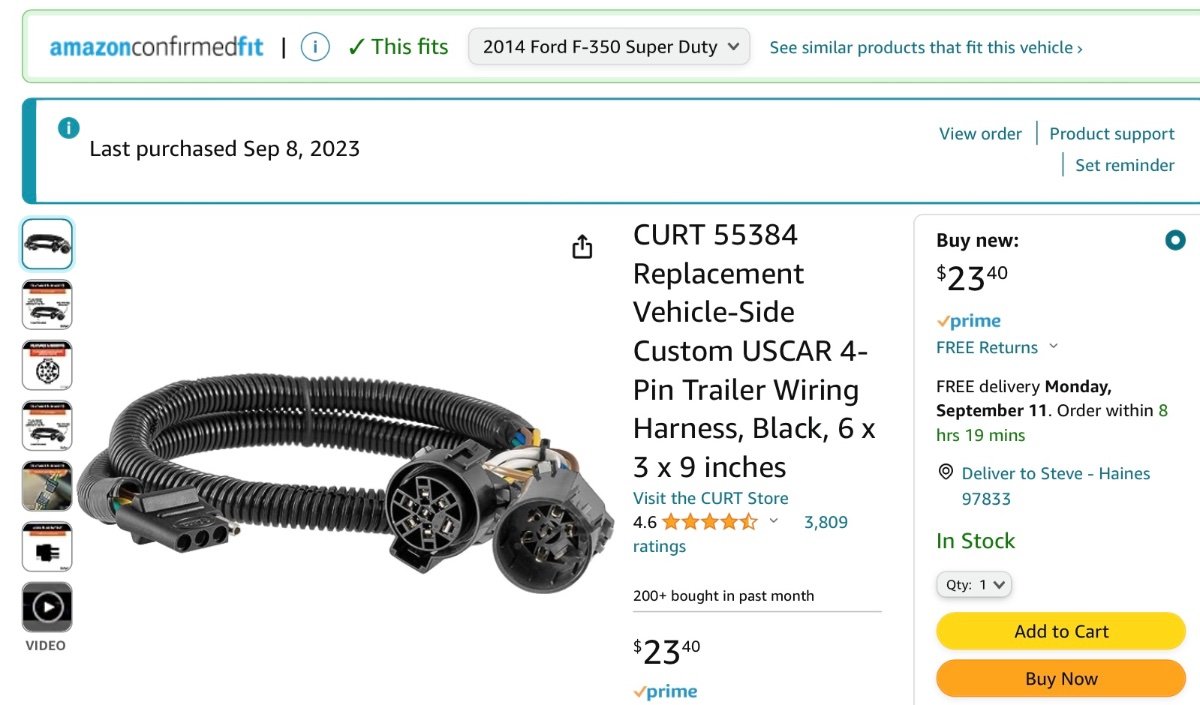
5 hours ago, Wandering Sagebrush said:
It took a bit of chasing, but I did find the inline T harness to 4 pin that @Mountainman198 mentioned. This appears to be a much better solution when compared to poking a hole through the protective cover of the factory connector.
Thanks. I will run this by service to see if I need to buy this for the wiring job.
John
-
1
-
-
4 hours ago, Wandering Sagebrush said:
John, rather than splice into trailer wiring, the previous owner of our trailer ran a second circuit from the tow vehicle to the back of the Oliver. It’s for the storage box on the back, and there is a quick disconnect for the box. Wiring is under the hull.
There is a down side to this approach, both he and I had to cut an opening into the door of the TV 4 pin to connect the new flat four circuit. I’m probably going to build a new jumper that comes off the TV 7 pin, and splits to a 7 and 4 so I can better weather protect the TV connection. If you would like, I can take photos for you.
Yes please. OTT will be doing the work since they know a lot more than me about wiring. I am in the information gathering stage to hopefully get the best solution.
John
-
3
-
-
Does anyone have an idea how to form a flat four way connector from the licence plate light wires on the back of the Ollie? The tv has the four-way connector as well as the seven pin connector. We're going in for service on October 30 and I mounted the light kit on the Yakima Stage 2 bike rack. I am guessing that the license plate lighting would not have the capability to power the brake, turning, and hazard lights. OTT will look at the wiring needed. Somehow I am guessing they'll need to run a 4-way from the tv to the back of the trailer to enable the light kit to do all the normal functions. Has anyone else done something similar? Does the wire go underneath from the hitch to the bumper? Does it somehow go between the hulls? TIA, John
-
1 hour ago, topgun2 said:
Four of the nicest , polite hard working young men you will ever meet. And, they do a good job of polishing and ceramic coating your Ollie - either at their shop in Murphreesboro, TN (just east of Nashville) or at your home.
The ceramic coating not only makes the Oliver shine better than new but it makes cleaning the Ollie much easier too. I'm DONE with that twice a year wax job!
Bill
Bill, I decided not to do the twice yearly waxing and will have our 10 month old LE2 ceramic coated in November by CGI. I hope it's a good decision. Our trailer is on a north facing hill in Oregon, so it doesn't get the intense sun that it might get in southern states. Time will tell. I wish I could have it under cover, but there's no room on the property for an Ollie barn.
John
-
1 hour ago, topgun2 said:
The guys from CGI Detailing "camped" in our lower level last night for the first night of a trip around North Carolina.
After a quick breakfast this morning we were out the door headed for the storage facility where I have to keep my Oliver. After a quick look and some elbow grease it was decided that Twist was back to looking as it should. The guys then headed off towards Charlotte but made a stop at Mount Mitchell (highest point in the east at 6684 feet) located just off the Blue Ridge Parkway.
Not only do these guys do good work, but, they also stand behind that work and they are fun to be around. Very much in what has become the "Oliver Tradition". My only regret is that I didn't have them do the ceramic coating sooner.
Bill
Bill, we're having our 2022 LE2 done by CGI almost one year from delivery day. We picked up on November 7, 2022 and CGI will do their coating on November 1 and 2. I currently have a coat of Rejex on it, which they said was ok to do. I am looking forward to seeing how it looks after they're done.
John
-
2
-
-
On 8/17/2023 at 8:17 AM, kmoon4545 said:
IMO....at night I like turning on the cabinet lights with the frosted doors. It is nice gentle light at night inside the trailer...vs the other more direct lights.
We do the same!
-
7
-
-
1 hour ago, topgun2 said:
No, but, I'm presently seriously considering it.
ScubaRx found the ones referenced by me and they are solid stainless.
Bill
I put in a service ticket to see if my wheels are aluminum on hull 1290 (I think they are), whether my lug nuts are aluminum clad (I think they are) and lastly if they know of what company to get stainless steel bulged acorn style lug nuts from for what I assume are aluminum wheels. I don't think the lug nuts that ScubaRx found are bulged acorn type.
John


Norcold refrigerator when not level
in General Discussion
Posted
John, you're right. We were parked on our hillside all hooked up. I had unplugged from the garage and the refrigerator was full so I ran it on propane for the night. To hook up, the nose goes down about a foot to 18 inches to hook up to the tv. No apparent damage. In the future should I just leave it plugged in if I am getting ready to go in the morning and not use propane at that angle?
John