Steve Morris
-
Posts
807 -
Joined
-
Last visited
-
Days Won
17
Everything posted by Steve Morris
-

2026 YM Oliver awning style windows and other changes
Steve Morris replied to Patriot's topic in Ollie Modifications
In a different view, the flexible reading lights are different, with the switch on the base. -
Haloview MC7108 Rear View Camera Install
Steve Morris replied to Boilermaker Chemist's topic in Ollie Modifications
Thanks Mike! After seeing your setup at Lake Guntersville, I ordered and installed the same unit, although I used the adaptor kit you had recommended and simply tucked the wires away under the camera. Unfortunately, my experience was not as good as yours. I had frequent loss of signal, and terrible signal delay. To the point that a car would sometimes be beside me before it showed up as behind me on the display. But this only happened at highway speeds. It worked great when stationary or backing into a campsite. I thought it might be engine interference, so I put the truck in low gear at low speeds to get the RPMs up, but it still worked great then, too. Haloview Customer Service was useless in resolvingtheproblem. Looking at reviews online, this is a common complaint. So I'm now back to the original Furrion camera. It's not great, but it at least works for me. If anyone wants a Haloview MC7108 for a truck camper or backup camera for a car that didn't come with one, I'll sell you mine for $100 plus shipping. Cost new in June was $200. -
That's why I changed to a POE cable to the Mini, as several others here have done. Here in eastern US, trees are everywhere, and I might need to get the Mini 50-150 feet away to connect. But instead of Starlink's router, I've connected it to my Peplink cellular router, so the cell connection can kick in whenever there's a Starlink dropout.
-
I already had. Nothing there. Maybe because I’ve never used pause since activating my account.
-
Hmm, I did not receive an email from Starlink concerning anything about pausing my account. 🤷♂️
-
Starlink Mini Installation- 2022 LEII- Alternate Approach
Steve Morris replied to dhaig's topic in Ollie Modifications
It is a nice addition to my system, and has an inbuilt angled surface for easy alignment. But the subscription fee is $23.86/month! 🤣 I have a tripod adaptor for any of my several tripods, and I'm waiting to see what Flagpole Buddy's Labor Day sale is going to be. -
Starlink Mini Installation- 2022 LEII- Alternate Approach
Steve Morris replied to dhaig's topic in Ollie Modifications
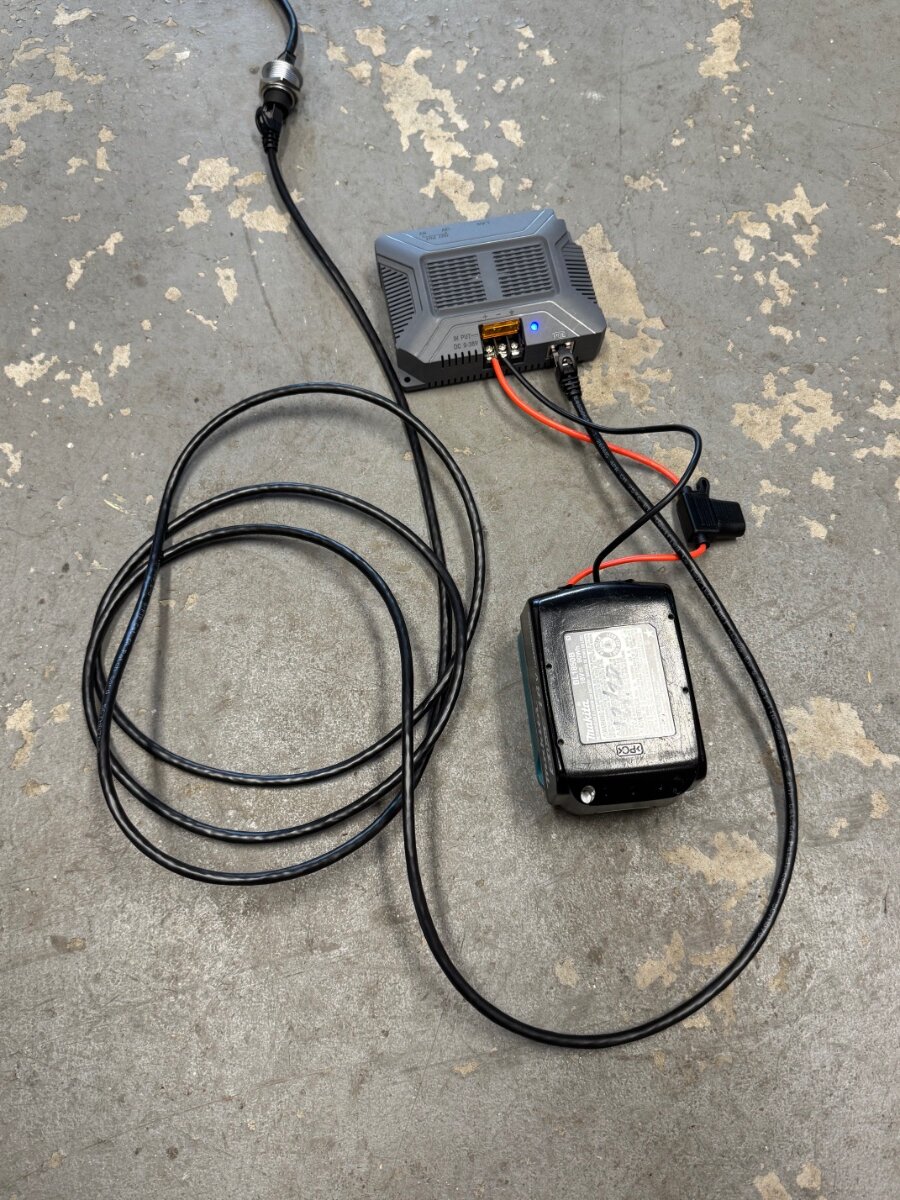
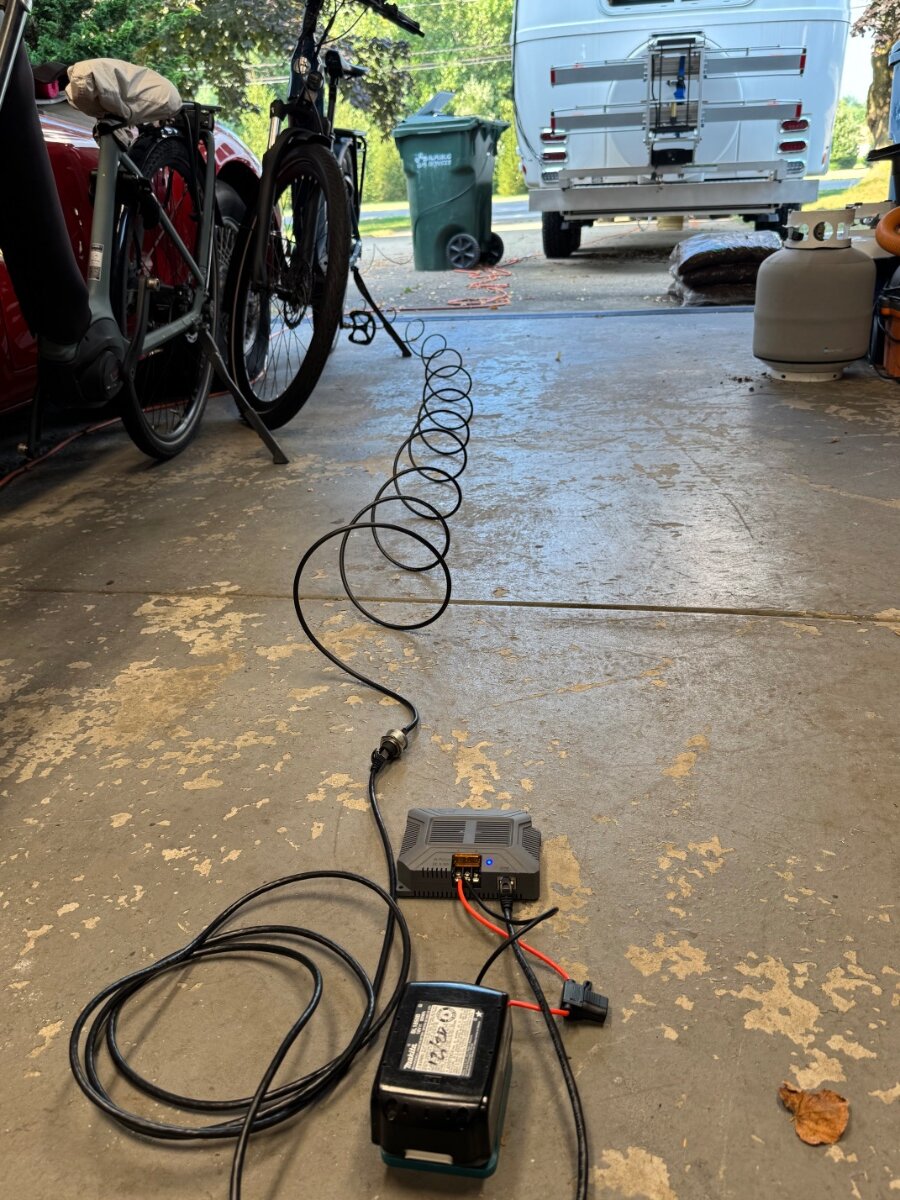
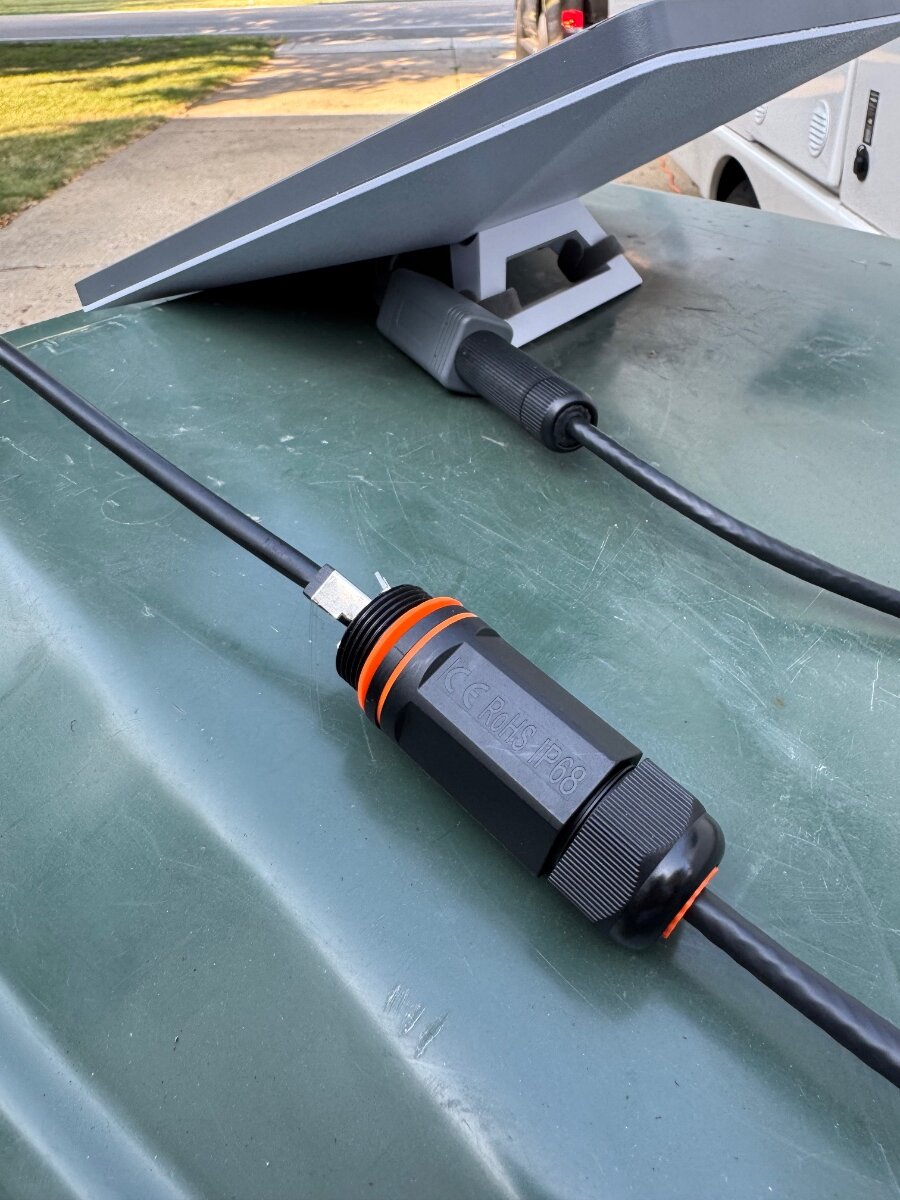
@dhaig Thanks again for the tips. I received all of the POE bits, so mocked it up in the garage. Makita battery powering POE box -> thru-hull port -> 50’ Cat 6 shielded cable-> waterproof junction-> Splitter -> Starlink Mini. I really appreciate the idea of adding the short cable from the splitter that will make assembly easier. Once installed there will be a Cat6 cable from the POE box to my cellular router, and will be connected like you did utilizing the new switch in the basement. Works like a charm! Thank you, and everyone who contributed before!
-
Haloview BT7 Touch Rear Camera installation on 2022 LEII
Steve Morris replied to dhaig's topic in Ollie Modifications
Thanks, Mike. Yes, the Pepwave system is on all the time. But if that's causing interference, I would think it would also occur stationary and with the Furrion system. The Furrion has been reinstalled, with a new dash mount instead of the window suction cup mount. I might see if the 7" compatible display is available so I can see it without glasses. -
I’d read in another post here or on Facebook that the speakers are gone, replaced by Bluetooth speakers. I don’t know if that is an option or standard equipment. I’ve never used the inbuilt audio system. We don’t use DVDs, and we have a Sonos Move for streaming audio inside or out.
-
Haloview BT7 Touch Rear Camera installation on 2022 LEII
Steve Morris replied to dhaig's topic in Ollie Modifications
Thank you! Great information and I look forward to hear how it works on your trip. -
Haloview BT7 Touch Rear Camera installation on 2022 LEII
Steve Morris replied to dhaig's topic in Ollie Modifications
Don, how persistent is the connection between the camera and the display? Are you seeing dropouts and/or lag? After seeing Mike Urbancic (@Boilermake Chemist) using a Haloview MC7108 at this year's rally, I ordered one, too, along with this adaptor plate with furring to Haloview connectors. https://a.co/d/iMfzTgw The setup worked beautifully in the driveway! But a couple of weeks later when we took our trip to Adirondack Park was the first time I used it on the road. As soon as I got up over 30 or so MPH, I started getting a lot of dropouts. And when there was a signal, a lot of the time there was significant delay. I'd see cars beside me that were just coming into view on the backup camera screen. We moved the receiver all over the dash, against the sunroof, Deb holding it next to the window, all while adjusting the antenna to get best signal. Nothing helped. We were on a 10 day trip, and my return window was 4 days away, so I'm stuck with it. Worse, the Fusion camera and monitor were at home in the garage. I don't really use the camera for backing up, instead preferring it for lane changes and keeping an eye on traffic approaching from behind. I've got it on Facebook Marketplace now, describing how it would be good for something shorter like a truck camper or back of a truck cap. But no interest so far. Haloview Customerservice was useless, answering there first email with generic tips, and never answering the next three or four I sent... So, I'm curious to see how yours works with two antenna on the monitor. The only thing I can think of to cause my unit (and many others after reading more reviews) to lose signal at speed is due to 4K bandwidth of the new camera compared to whatever low resolution is on the original Furrion. But it can't just be interference from engine noise, because I manually kept the truck in first gear to test it at low speeds but high RPM, and no loss of signal or delay. I'm perplexed. -
I saw that on Facebook and commented. Definitely not a fan of the new blinds! They look cheap compared to the current version, and that spot where it rests on the window handle looks like a wear/puncture point, as well as just plain ugly. The TV looks smaller, and the cable entry for the TV swapped sides. Chrome belly band seems to break up the interior better to my eyes. Overall, *I* think it is a step backwards in quality appearance.
-
Starlink Mini Installation- 2022 LEII- Alternate Approach
Steve Morris replied to dhaig's topic in Ollie Modifications
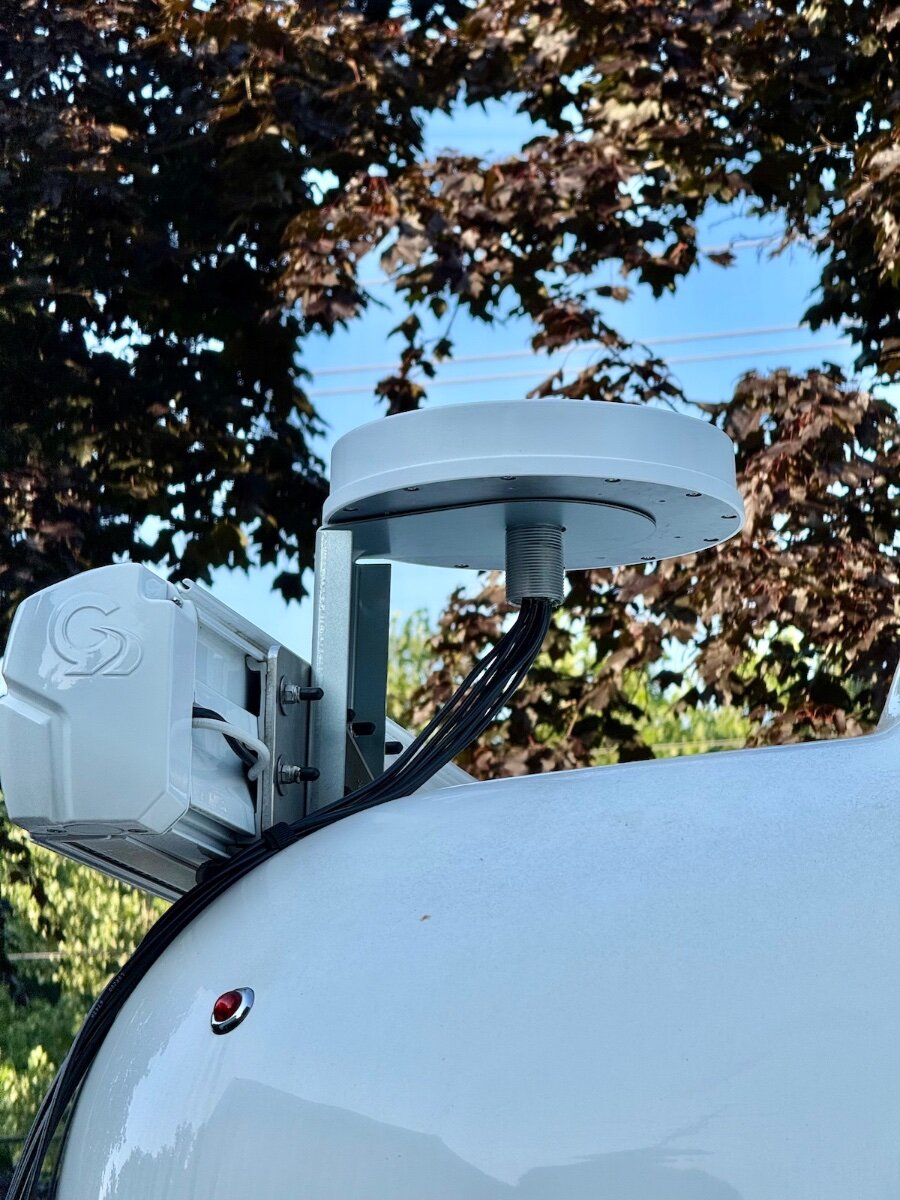
Don, Excellent timing on this post! After two years, I'm finally mounting the cellular/wifi antenna on my roof rather than rely on the stubby antennas on my Pepwave cellular router. At the same time, I'm adding the Mobile Must Have POE injector for the Starlink Mini, and converting the exterior port to RJ45. I'll be mounting the POE injector similar to your setup, and adding the power switch in the basement is a great idea, as you're already there plugin in the Ethernet cable. Nicely done. I'd really like to move the router to the same area, but there's no way I could route the seven antenna cables down there! Plus, they are not long enough. So I'll run a short Ethernet cable from the port to the POE injector, and then a longer Ethernet cable to the back of the basement, up along the nightstand somewhere, and then up behind the rear window shade and into the television port. Only a couple inches of the cable would be visible, which I can live with. It will then go into the WAN port on the Peplink to feed the Apple TV and security camera hub connected to the LAN ports. Any more, and I'm going to need a network switch! When I ordered the POE injector, I also added the optional Pepwave 12V connector, eliminating needing to power both devices separately. With the POE injector in the bilges, I won't be needing that connector, but gain the feature of the exterior switch to power the POE injector separately. That's even better! Thanks for the details. Switch and RJ45 port are on order now.
-
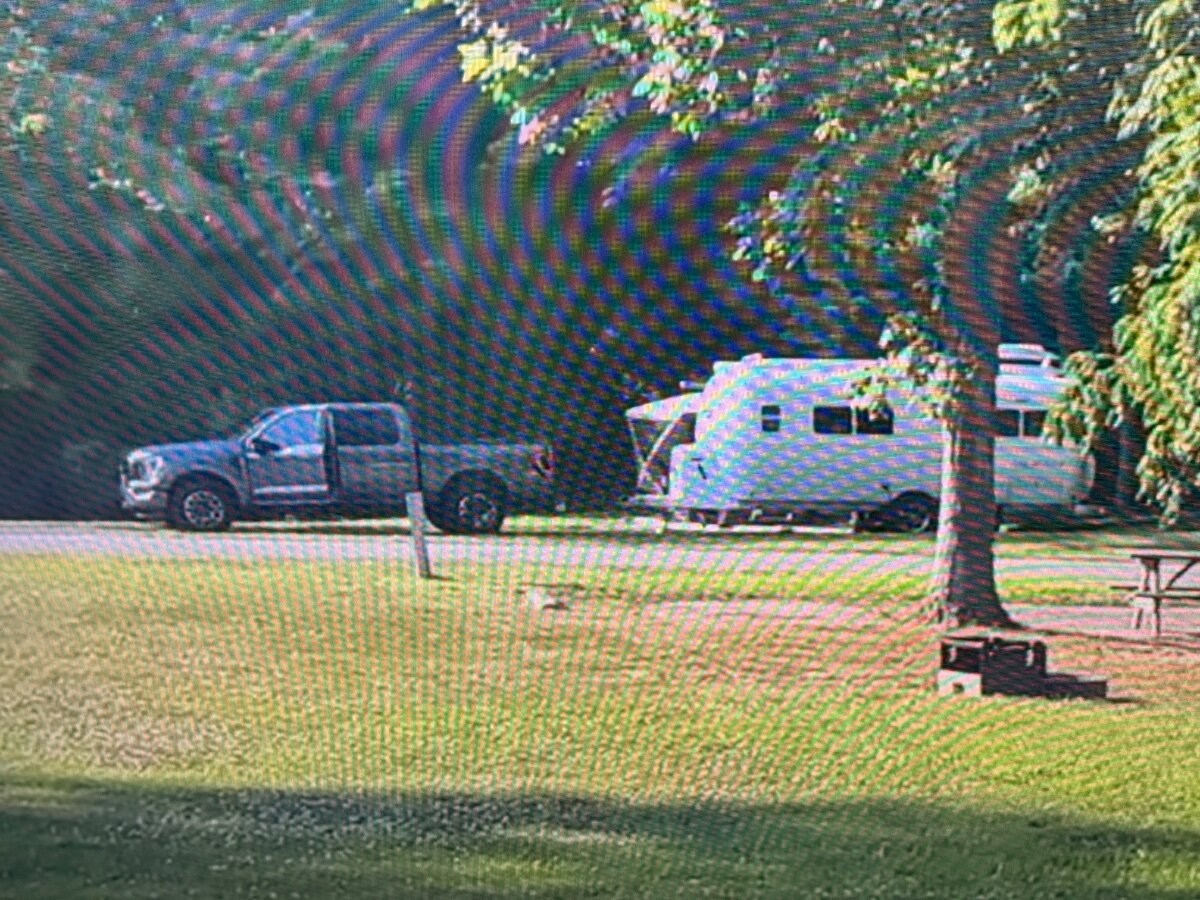
Who was at Patoka Lake in Indiana during a recent heat wave? You made it in the background of “We’re the Russos” latest YouTube video. https://youtu.be/Fnykd-E1qw4?feature=shared
-
Yet Another Portable Solar Charger Project
Steve Morris replied to Steve Morris's topic in General Discussion
The external SAE port goes directly to the battery, not to the charge controller. Even if it did go to the charge controller, you wouldn’t necessarily be able to tie into it. In my case, the Oliver mounted panels are 24 volt, where my portable panels are 12. Mixing voltages drags the 24V panels down to the lower input. And if both your installed and portable panels are the same voltage, you might need a larger charge controller to handle the combined input. I’ll eventually mount a controller inside for convenience. But having the setup that I have now has already saved the day for a friend while camping with no hookups. He was able to use my kit to keep his battery charged enough to run the fridge instead of having to go home early. -
Wet-bath Sink Faucet Modification - September 2024
Steve Morris replied to NomadLife's topic in Ollie Modifications
Gary, send me a message with your address. We’re away right now, but when I get home I’ll see if I can find them. I recently cleaned my garage, and now I don’t know where anything is! 🤣 -
Truma Aventa Condensate Drainage
Steve Morris replied to Rolind's topic in Mechanical & Technical Tips
Mine almost never go down the tubes. One side occasionally, the other not at all. I’ve run string trimmer line up from the bottom, but that doesn’t seem to do anything. I haven’t popped the cover, yet -
Very nice! Foy sells three sizes, standard (24.25 X 28.125), Extended 29.25 X 28.125), and Mega (29.26 X 32.125). Yours is even longer, by 3" each side. That's a lot of space you've made available. Thanks for sharing!
-
That’s been one of my only complaints on our trailer. Why would they use black material top and bottom!? It’s like an oven underneath! Even having a reflective top would be a huge benefit.
-
2" 1UP hitch post doesn't fit 2" Oliver bike receiver 😵
Steve Morris replied to GlacierGirl's topic in General Discussion
No, I had not read that question earlier. It should function fine either direction. The only negative would be if the weld that holds the tube to the plate were to fail, the collar wouldn’t capture the cross pin, allowing the rack to become lost. But I’m pretty confident that the Reese receiver is far better than the no-name options available, and have not seen a review with a weld failure. Ours has been fine for over 12,000 miles now. -
Dometic Stove Grommet Gone Missing
Steve Morris replied to Boudicca908's topic in General Discussion
Mine frequently end up in the silverware drawer under the stove. I’m missing one now that’s completely gone. If you find a replacement, please post a link. -
Some ford trucks are missing a brake pedal spring, which can result in total loss of braking. Here is the recall information: https://www.nhtsa.gov/?nhtsaId=25V401000 Summary Ford Motor Company (Ford) is recalling certain 2025 F-550 SD, F-450 SD, F-350 SD, and F-250 SD vehicles. The brake booster pushrod retaining spring may not have been installed, which can allow the pushrod to disconnect from the brake pedal and cause a sudden loss of brake function. You can search to see if your vehicle is effected (or if any vehicle has a pending recall) here: https://www.nhtsa.gov/recalls
-
How many different KEY's do you have?
Steve Morris replied to Dave and Kimberly's topic in General Discussion
8 ~Oliver Door Lock ~Basement/Battery door ~Master tongue lock ~Bike rack locks (all keyed alike ~2 Bicycle keys ~Cable lock across tongue box ~Toyota key But at camp, I only carry the door lock key, and while travelling, just the door key and the Toyota key. I have two duplicate sets stashed, because I once arrived at camp with just the door key. So I spent four days without unhooking from the truck, leveling, dumping, or external power... -
It gets better!