
Boilermaker Chemist
-
Posts
73 -
Joined
-
Last visited
Everything posted by Boilermaker Chemist
-
@Steph and Dud B Thanks for the info, I’m one year in with the Bauer and no issues yet. But if I have a problem I’ll keep this in mind.
-

Trailer Separation from Tow Vehicle
Boilermaker Chemist replied to John Dorrer's topic in General Discussion
To each his own, but from what I’ve seen from trailer sway videos, I’d rather have more protection than less, so I’m willing to forgo a little wear on the ball in the unlikely event that I would have to take evasive action at highway speed. So I’m stayin’ on the “Don’t lube your balls team” for now. 🤣 -
Trailer Separation from Tow Vehicle
Boilermaker Chemist replied to John Dorrer's topic in General Discussion
Just a note for those who are using the Anderson WD hitch - you are not supposed to lubricate the ball. It has to swivel with the trailer, otherwise you interfere with the anti-sway function. -
Trailer Separation from Tow Vehicle
Boilermaker Chemist replied to John Dorrer's topic in General Discussion
Anybody notice that they appear to be using a different coupler on the new Apex X23? -
Touch Light Replacement
Boilermaker Chemist replied to Boilermaker Chemist's topic in Mechanical & Technical Tips
-
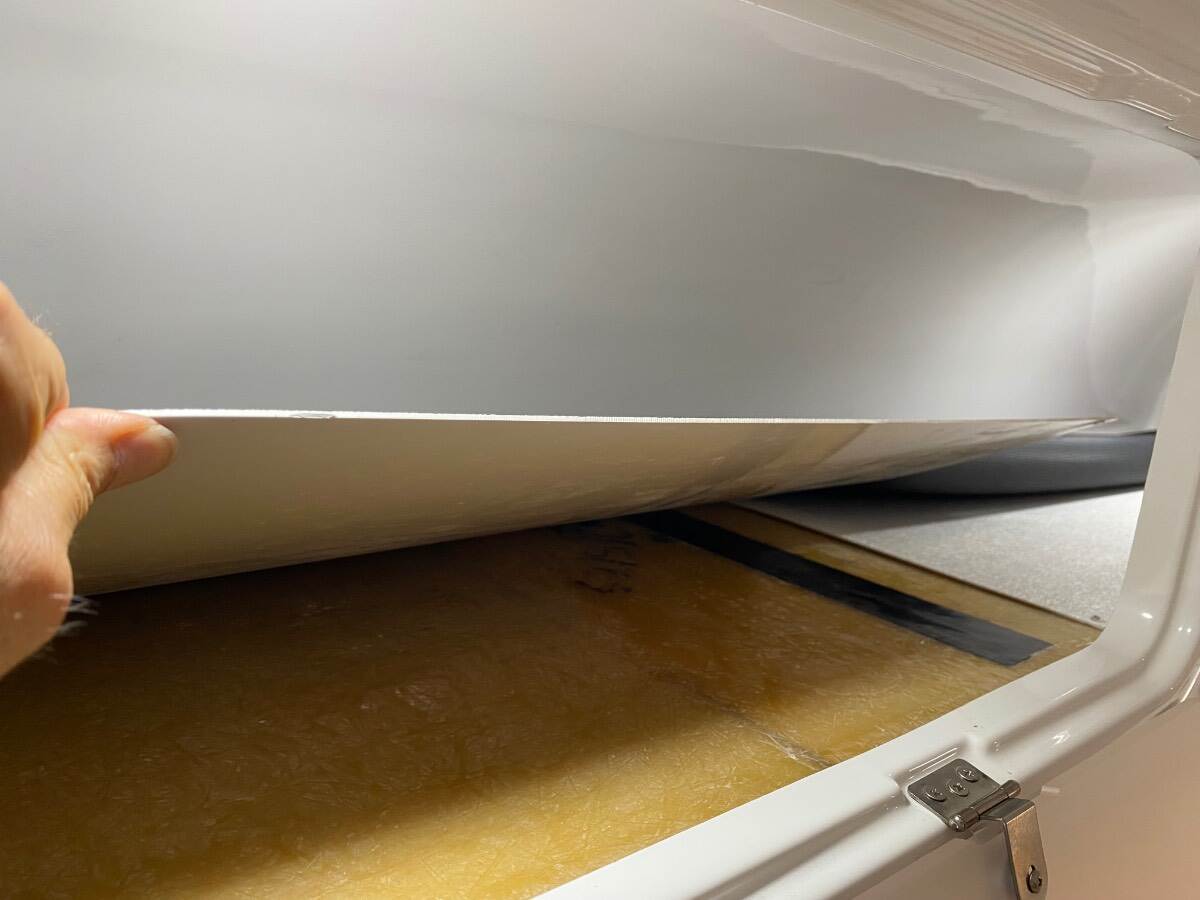
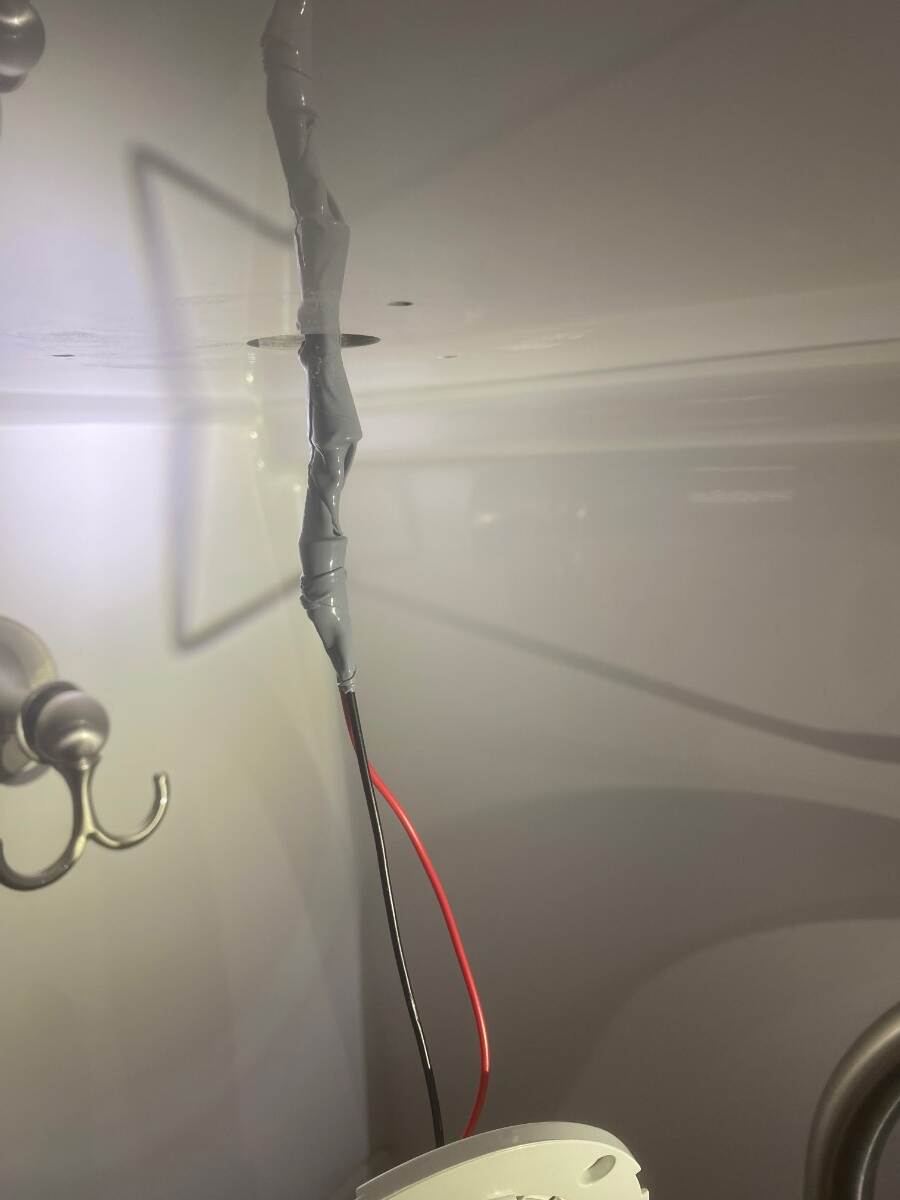
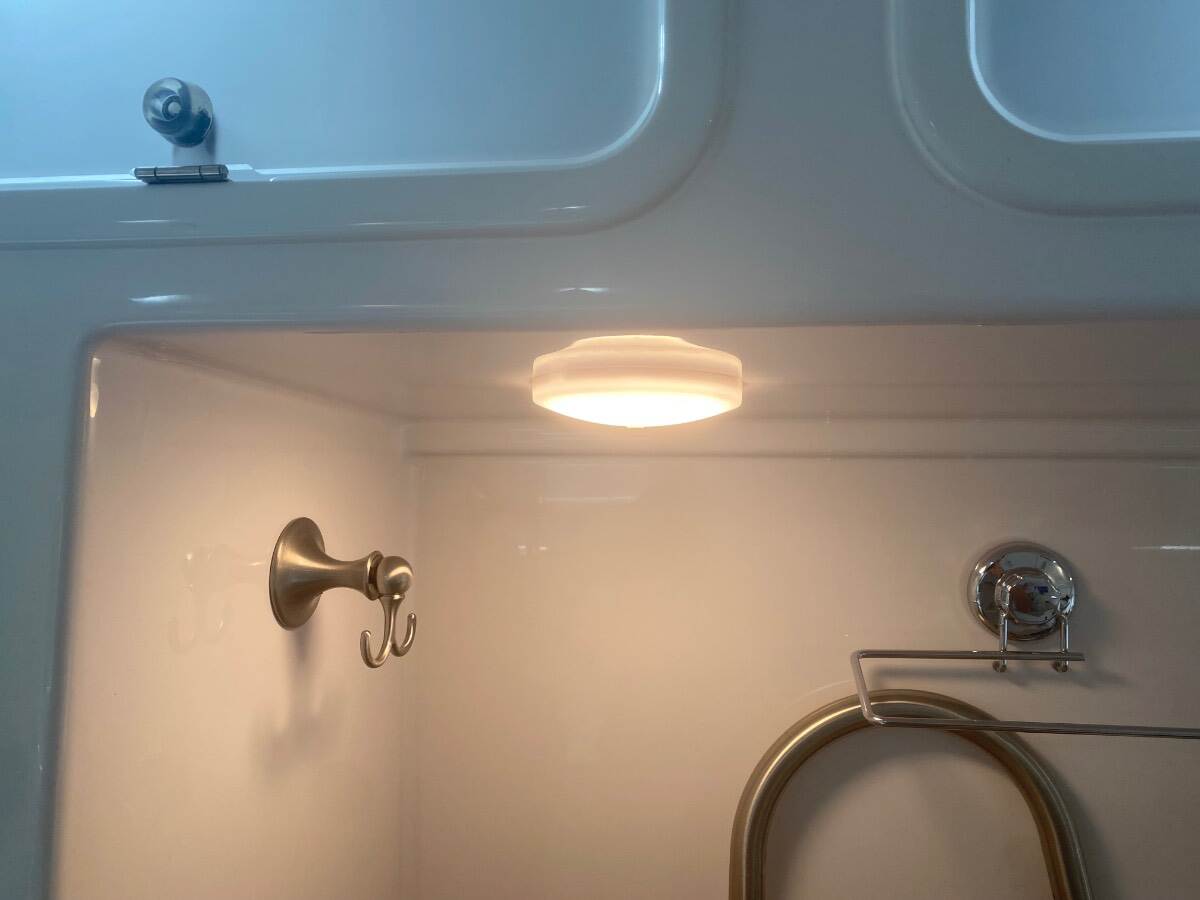
Like many others, I had to replace one of my touch lights because it went “wonky”. For the replacement, I purchased the 3000K Obeaming RV Interior Ceiling Dome Light 4.5 Inch from Amazon: https://www.amazon.com/dp/B06ZZDM19W?ref_=ppx_hzod_title_dt_b_fed_asin_title_1_1&th=1 In the hope that it might help others, here are a few things that I observed during the repair. The light that failed was over the sink. Since the original light was fastened with rivets, I used a 1/8” drill to remove the old rivets. Apparently there is another layer of fiberglass inside the overhead cabinet that would have had to be removed to get access to the rivets. So I just used a needle punch to push the rivets out of their holes without bothering to retrieve them. After removal, I cut the wires close to the old light. The wiring was about 20 gage, so I used small wire nuts to connect the new light. Note: make sure you rewire based on polarity and not color. In my case, the black wire on the old light was positive but the black wire on the new light was negative. I wrapped the connections with silicone tape to prevent the wire nuts from loosening up. There was enough room to stuff all of the wiring back in. As luck would have it, the mounting holes on the new light were a nearly perfect match to the old one, so no new holes needed to be drilled. I used 1/8” x 3/8” rivets to fasten the new light in place. I like that the new light has its own push button switch. Hopefully that will help prevent it from getting “wonky” :-).

-
True enough but there will be 7 of us owners there. Assuming the forest fires don't get us it should still be fun. And I will just happen to be in Colorado at that time so for me it makes sense. Nevertheless, I AM looking forward to the "real" Oliver rally in October too.
-
You might be interested in the Rocky Mountain Rendezvous. See: https://sites.google.com/site/rockymountaineggrendezvous/home. It is not exclusive to Olivers, but open to any molded fiberglass trailers such as Scamp, Casita, Bigfoot, etc. Unfortunately registration is full for 2026 so they cannot take any more campers for this year’s rally. But maybe something for you to consider for next year. Also in the past there has been a local rally held in Texas in October. But now that the official Oliver rally has moved to October I’m not sure when that one will be held again. But you can keep your eye on the Events and Rallies topic in this forum where that information should be posted.
-
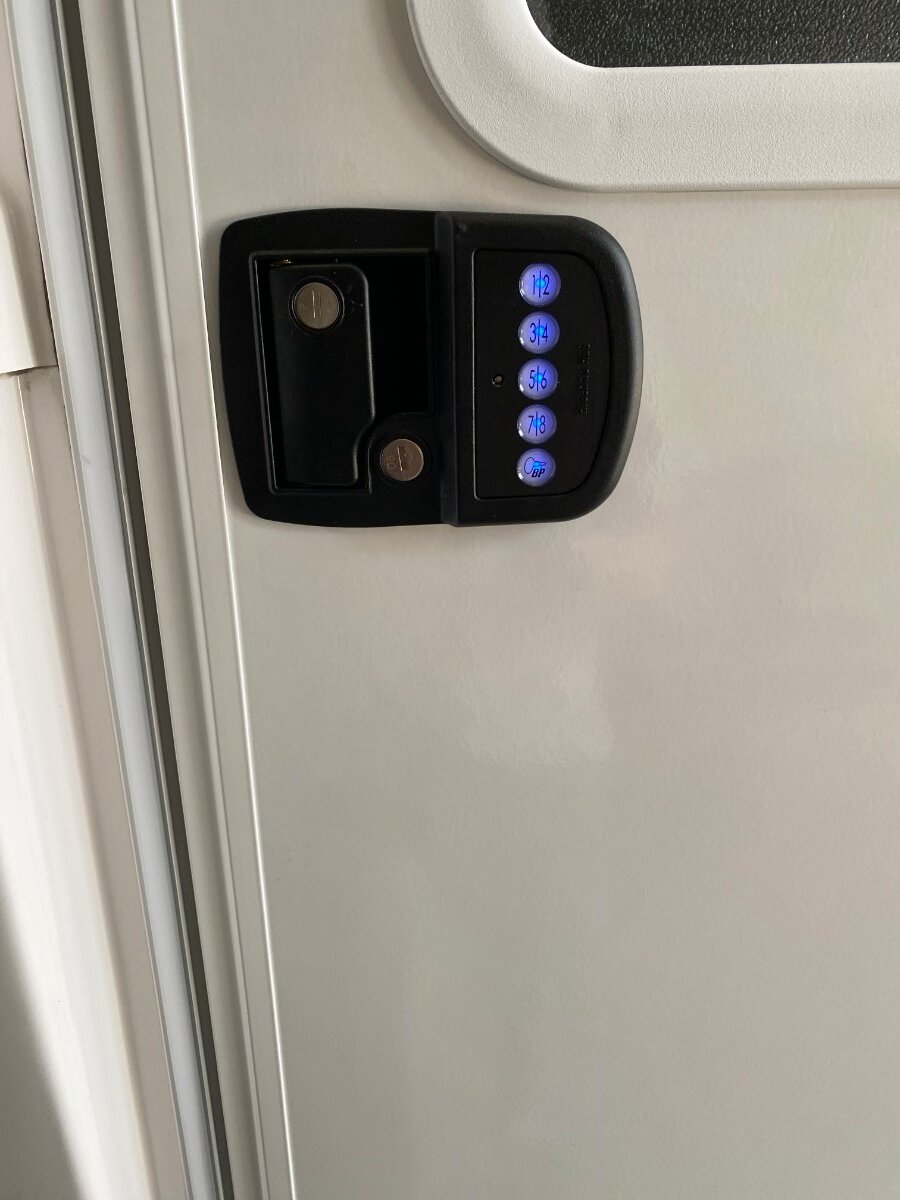
I get that. On the other hand, I had to replace the lock anyway, so keeping in mind resale, I decided to upgrade to the keyless entry lock which many people like. When I sold my previous camper, the buyer told me that all the accessories that I had added was a key factor in their purchase. Plus the lighted keypad looks really cool! 😂
-
@Patriot thanks for the suggestion, here you go: https://www.campingworld.com/bauer-bluetooth-keyless-rv-entry-door-lock-124590.html?objectID=124590&queryID=46bc1a32228c9fdf516d0676ebf18aca&indexName=production_na01_campingworld_demandware_net__CampingWorld__products__default Also, E-trailer has a nice video review here: https://www.etrailer.com/RV-Door-Locks/Bauer-Products/BA53UR.html E-trailer also has spare keys for the lock too.
-
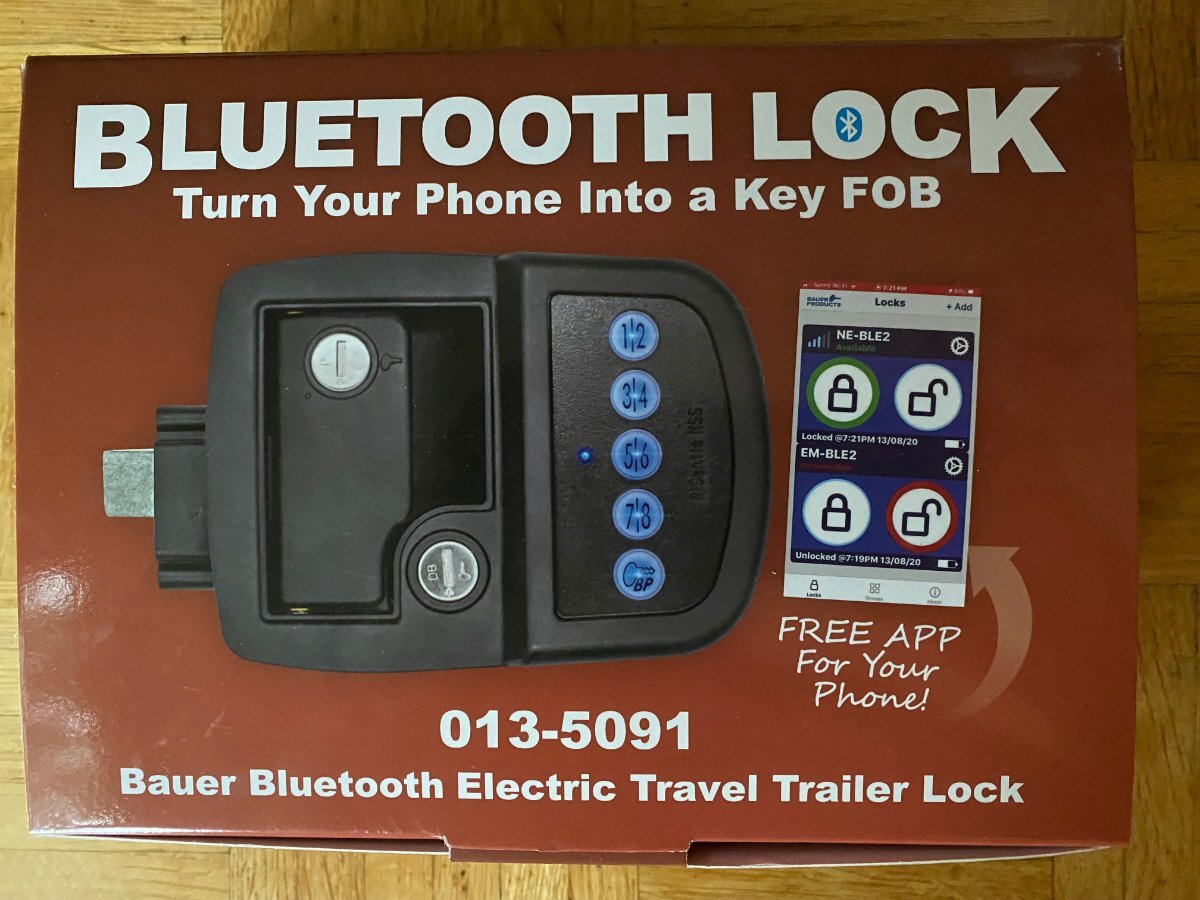
I just installed a Bauer Bluetooth Keyless Entry Door Lock. Currently on sale at Camping World for $217.
-
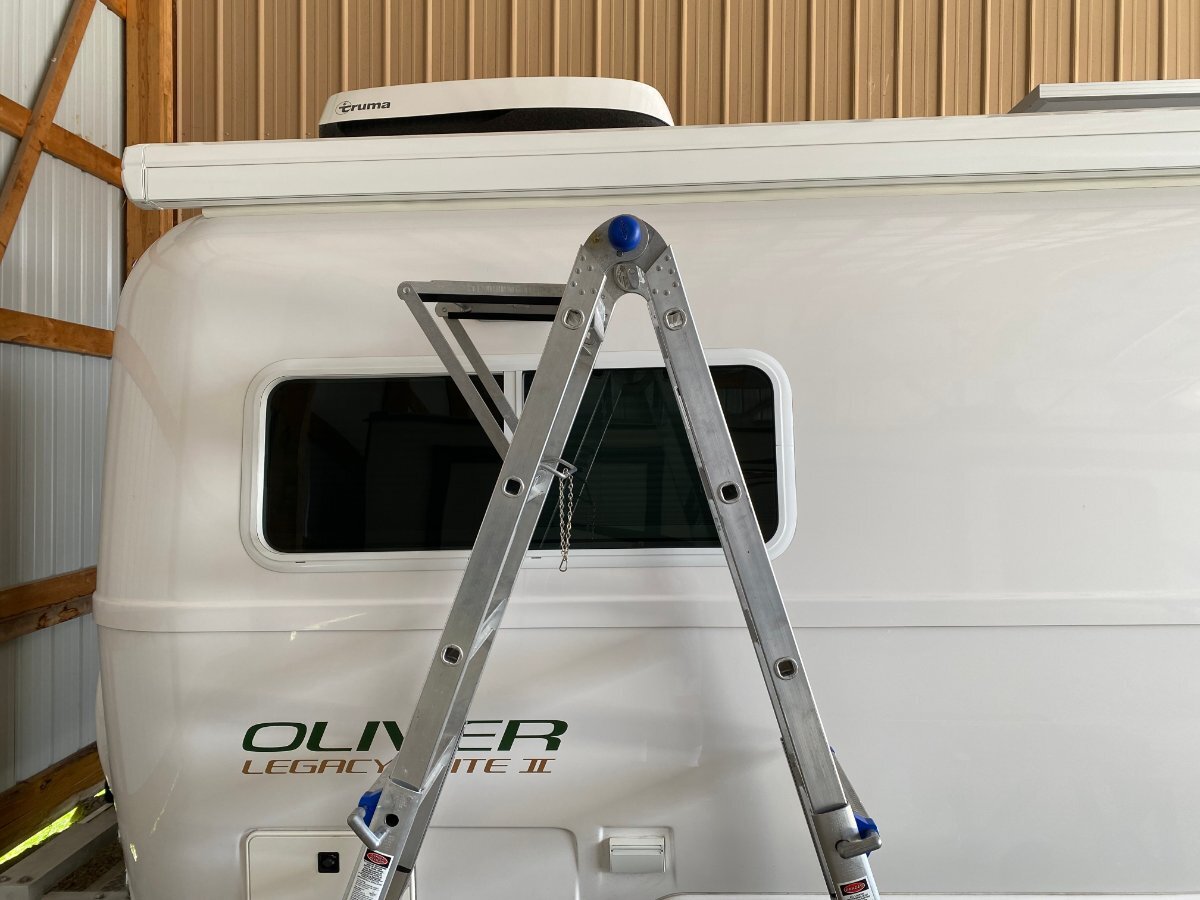
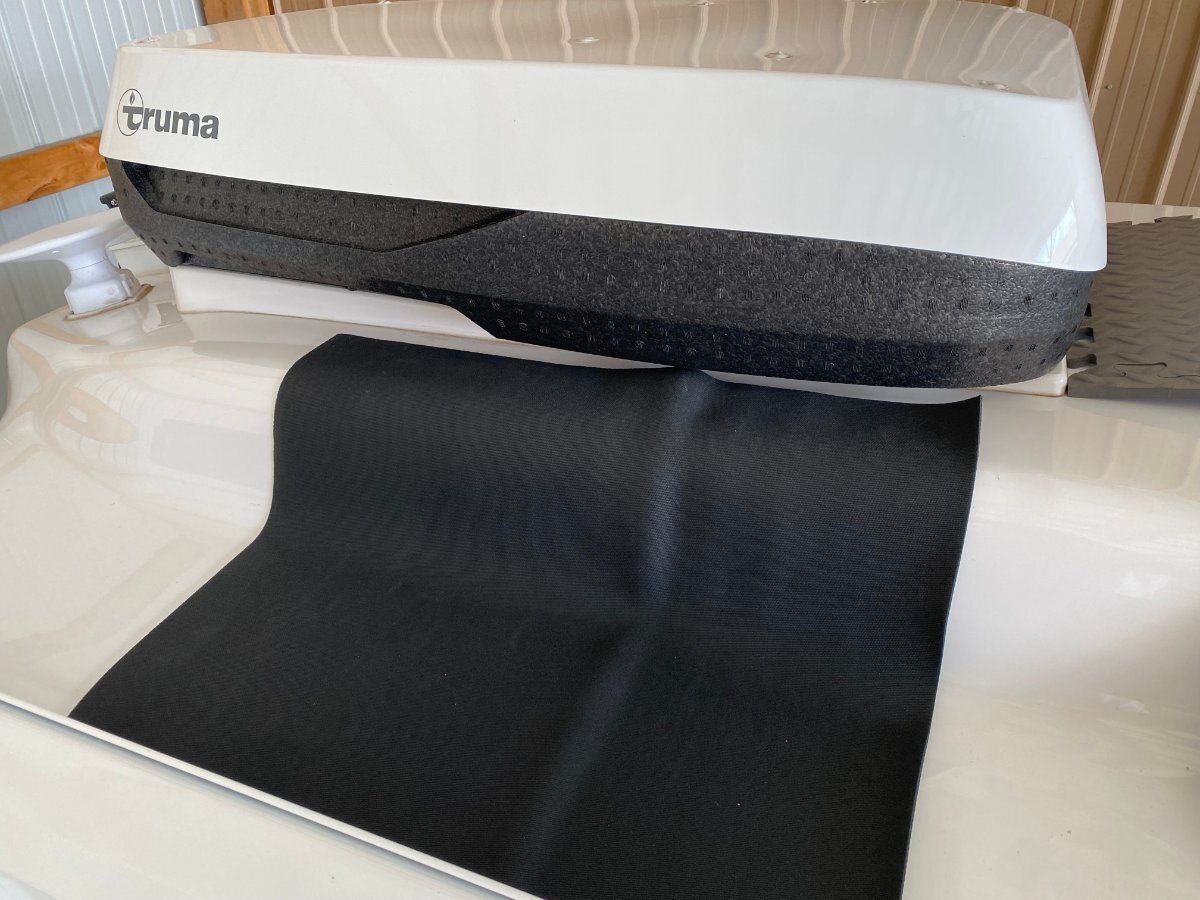
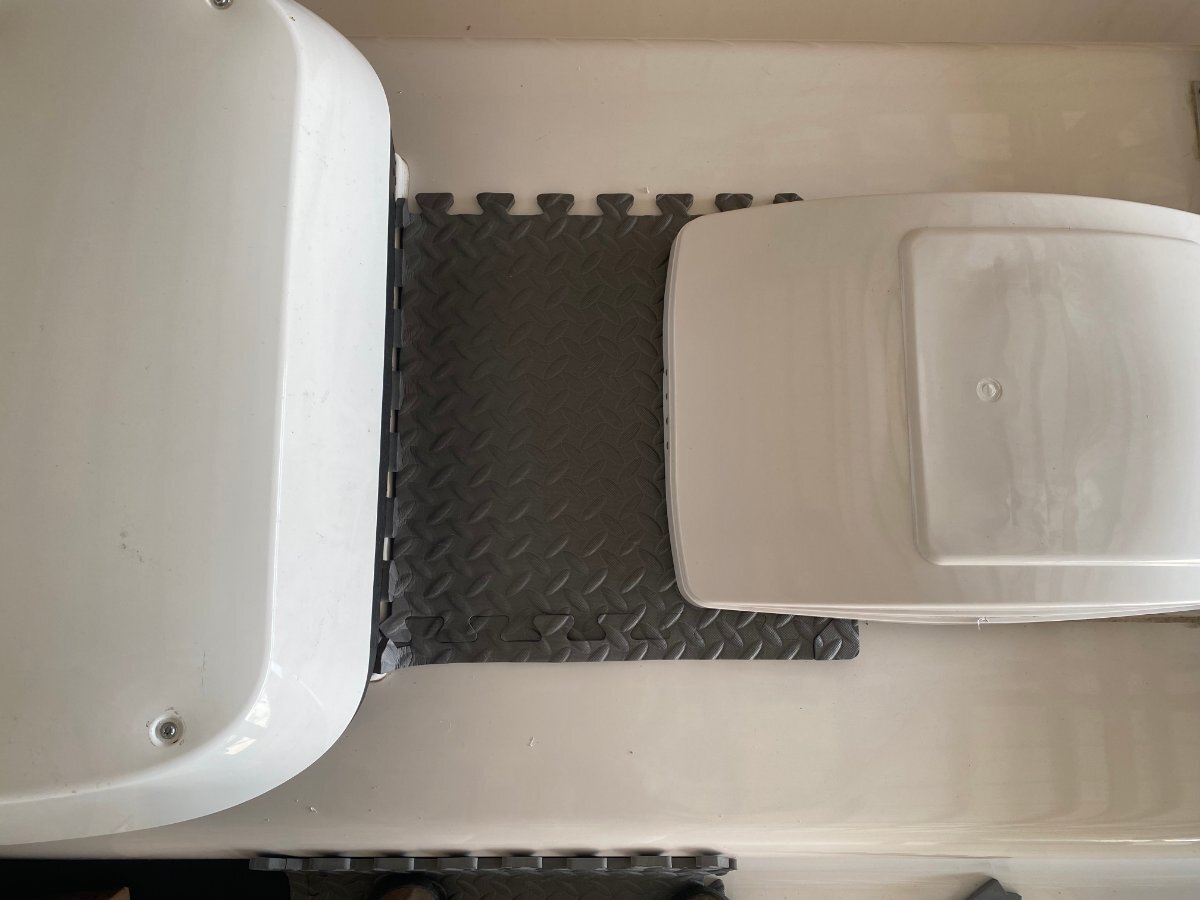
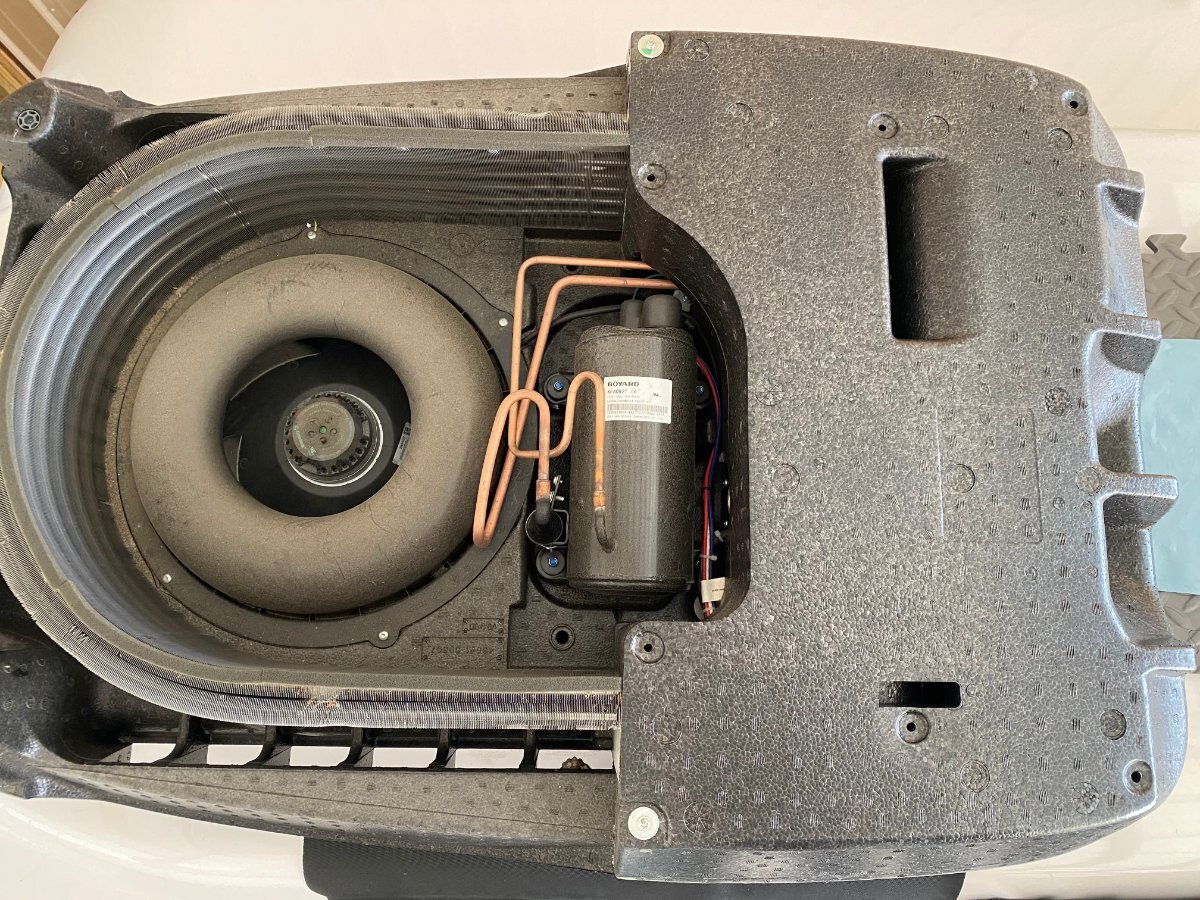
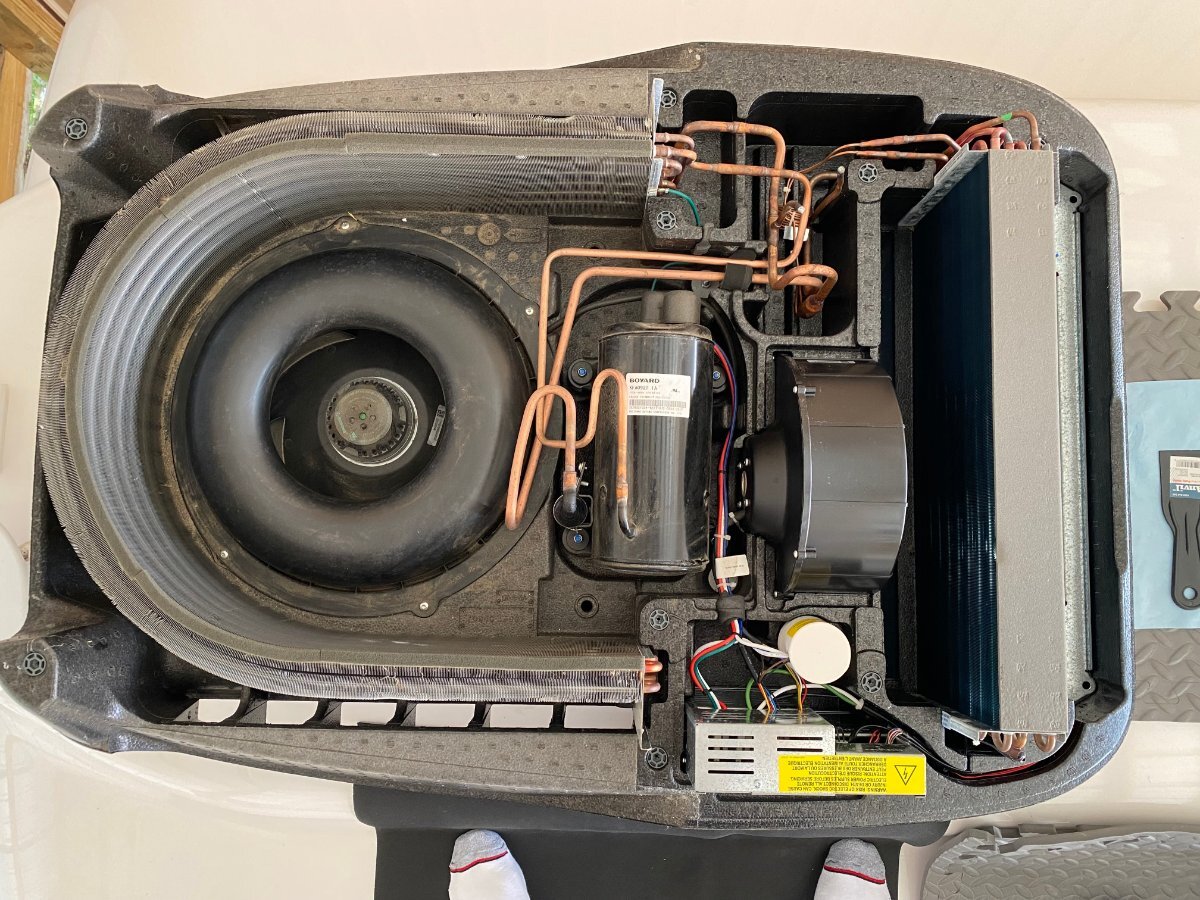
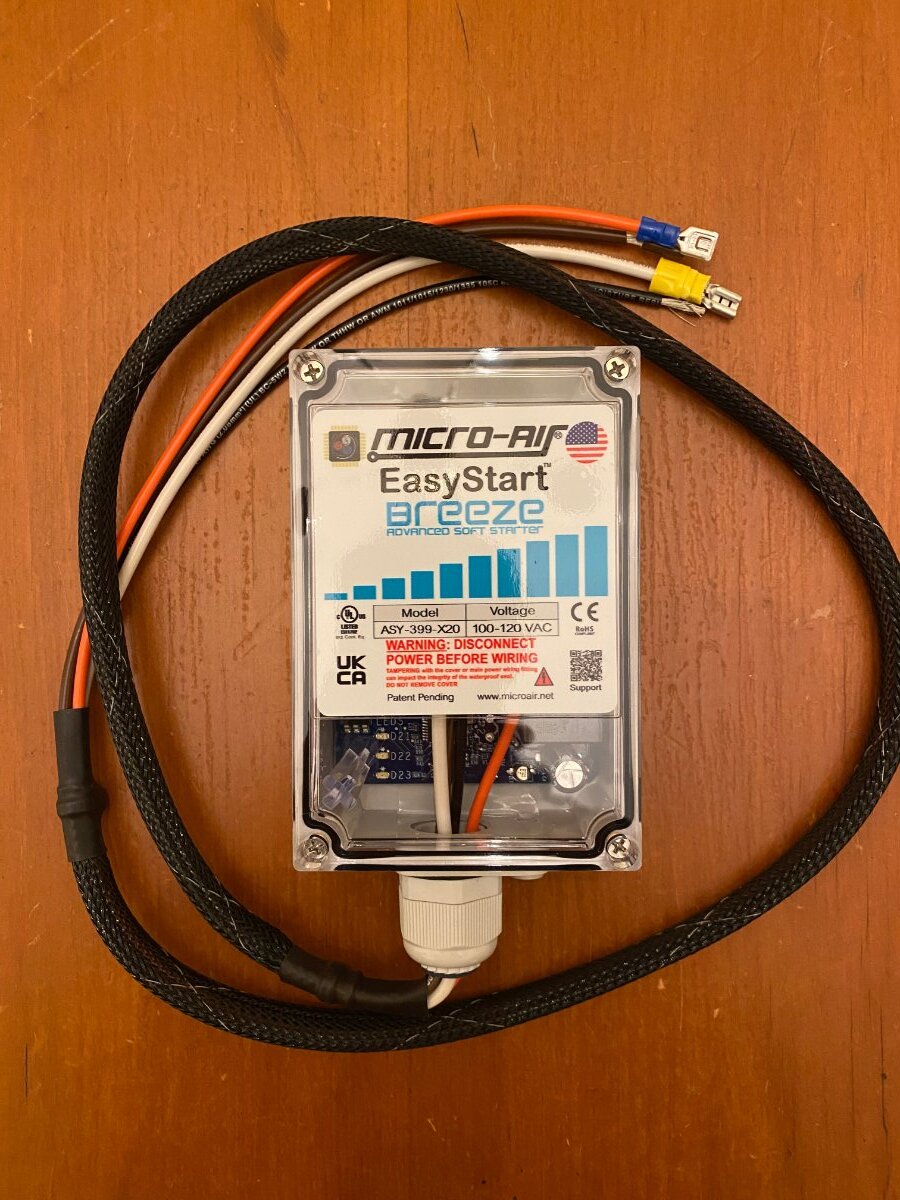
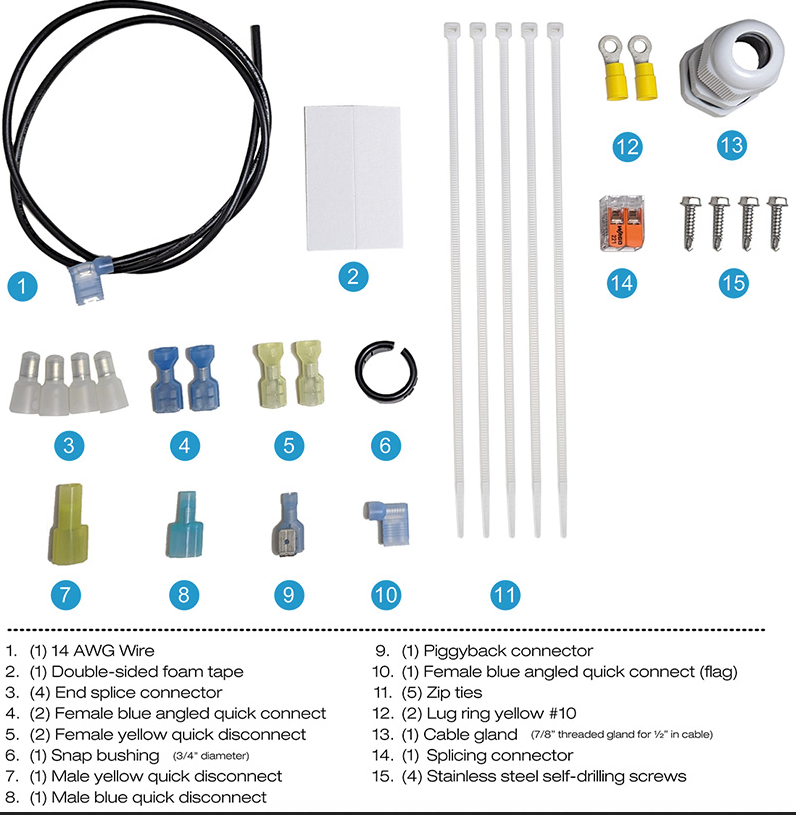
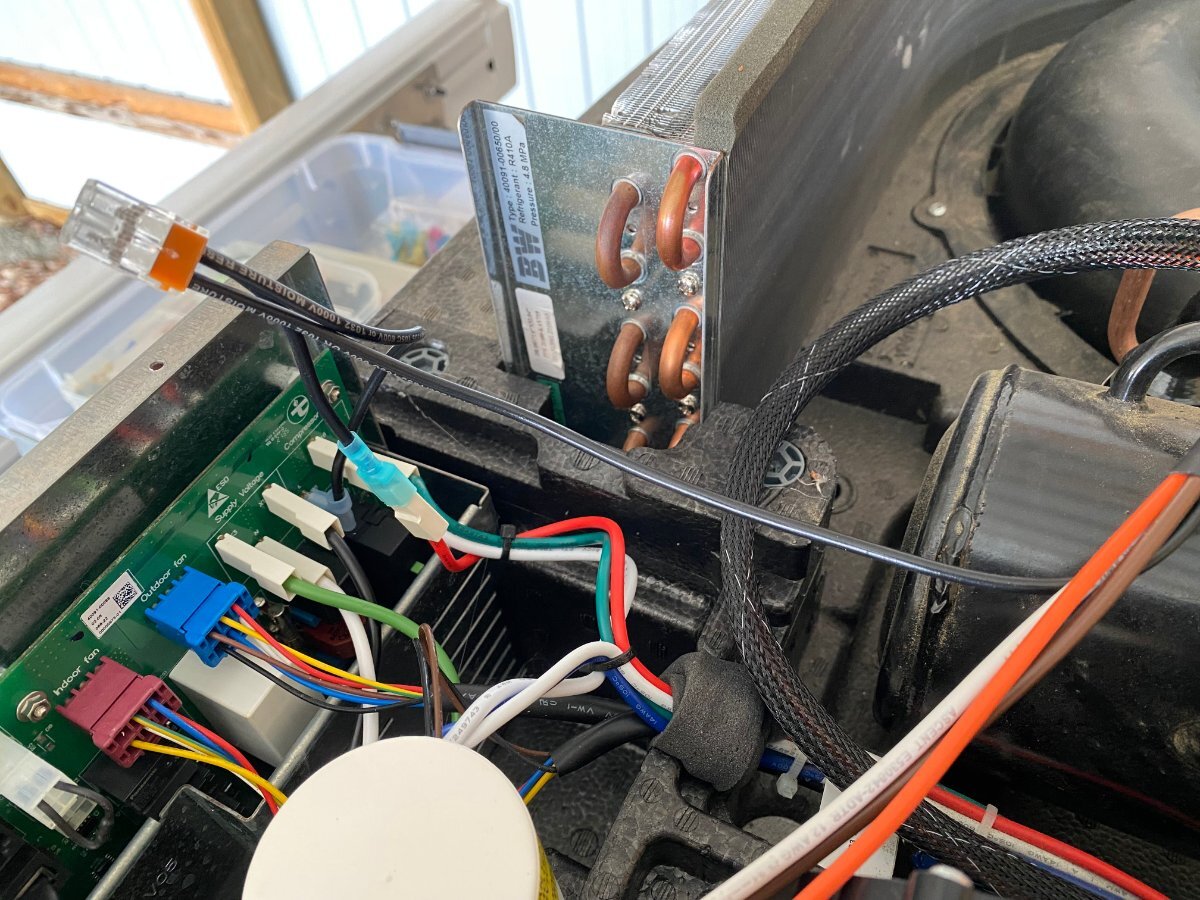
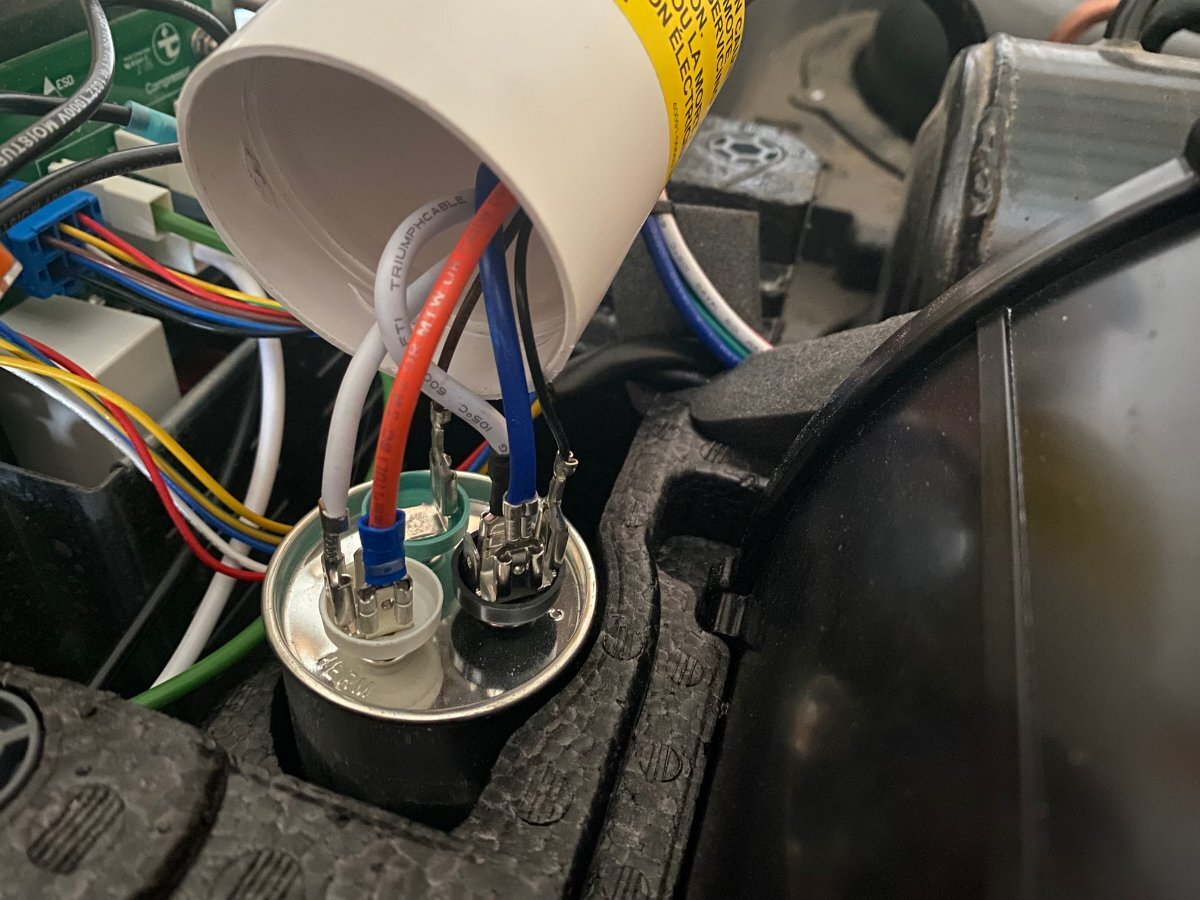
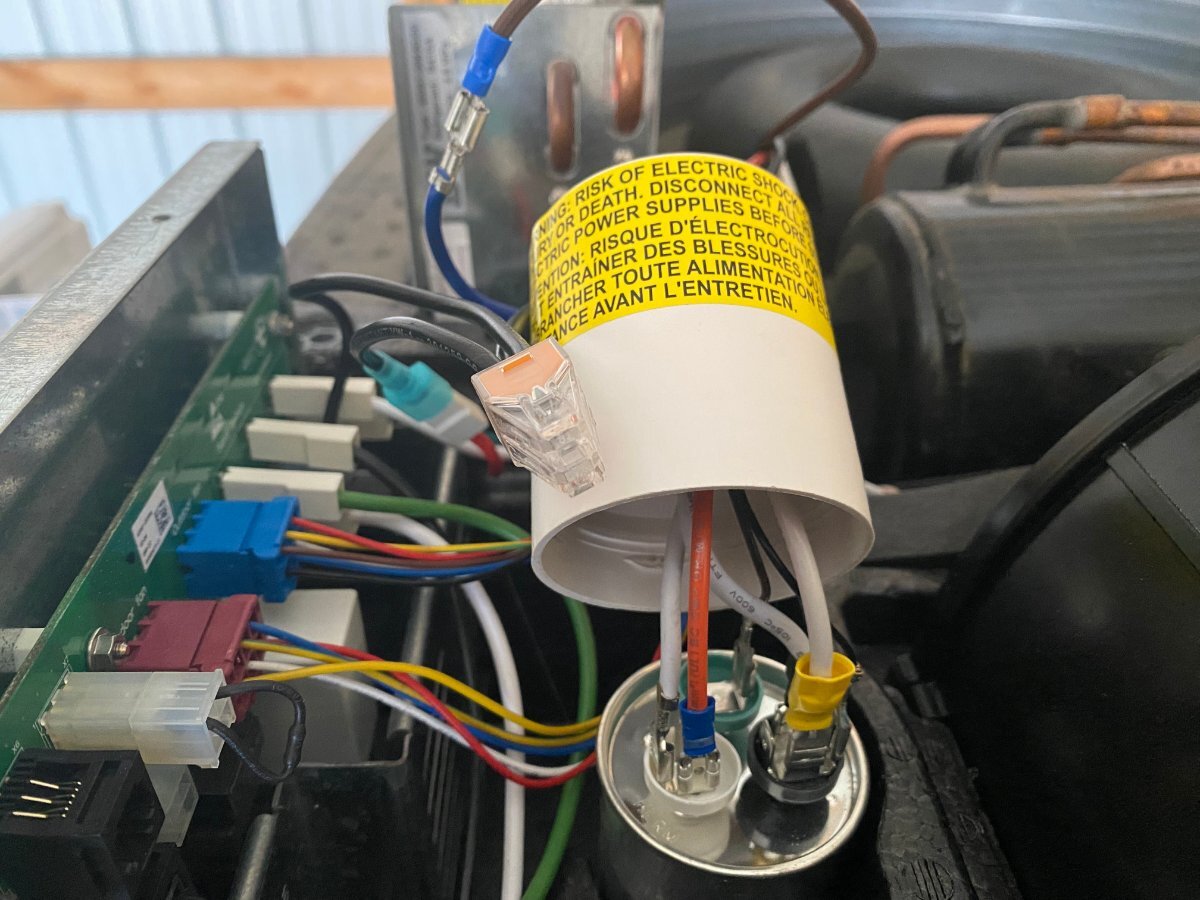
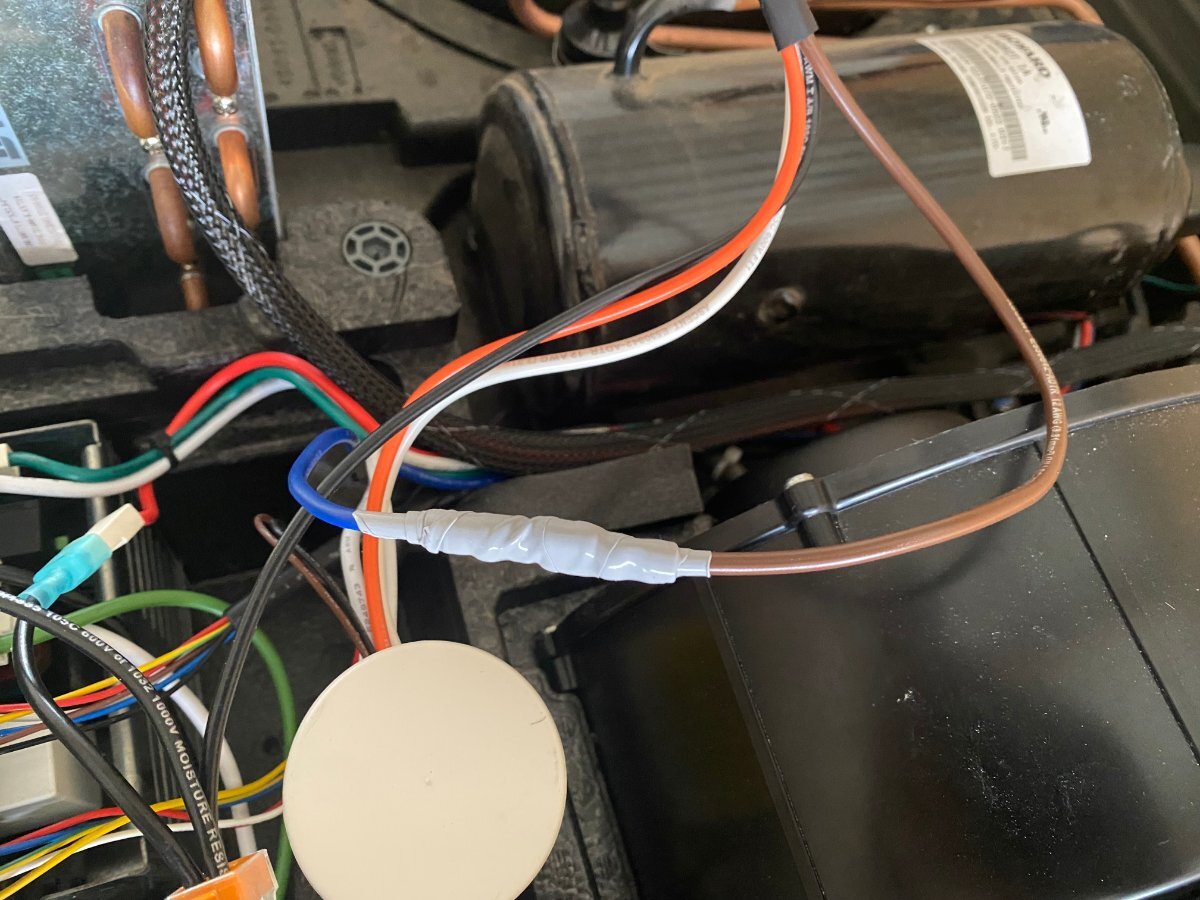
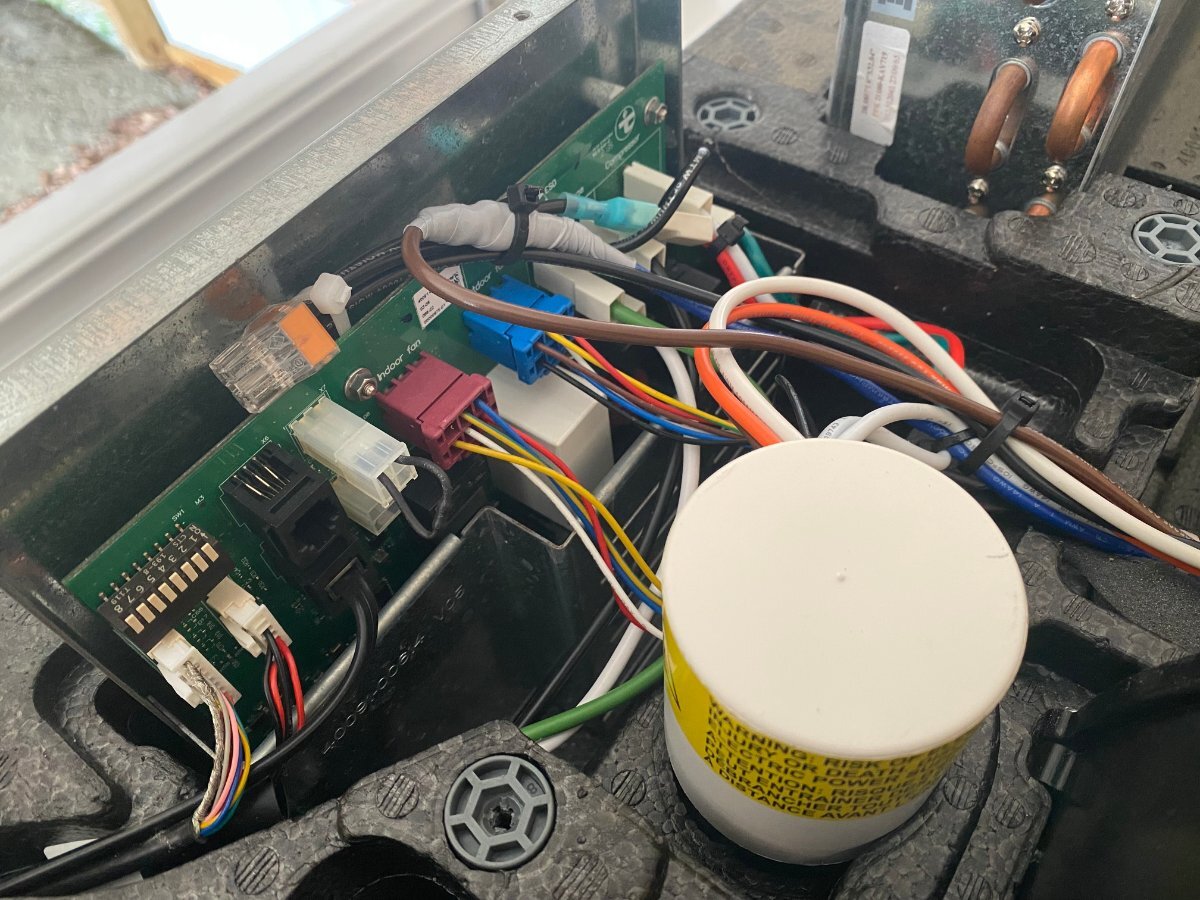
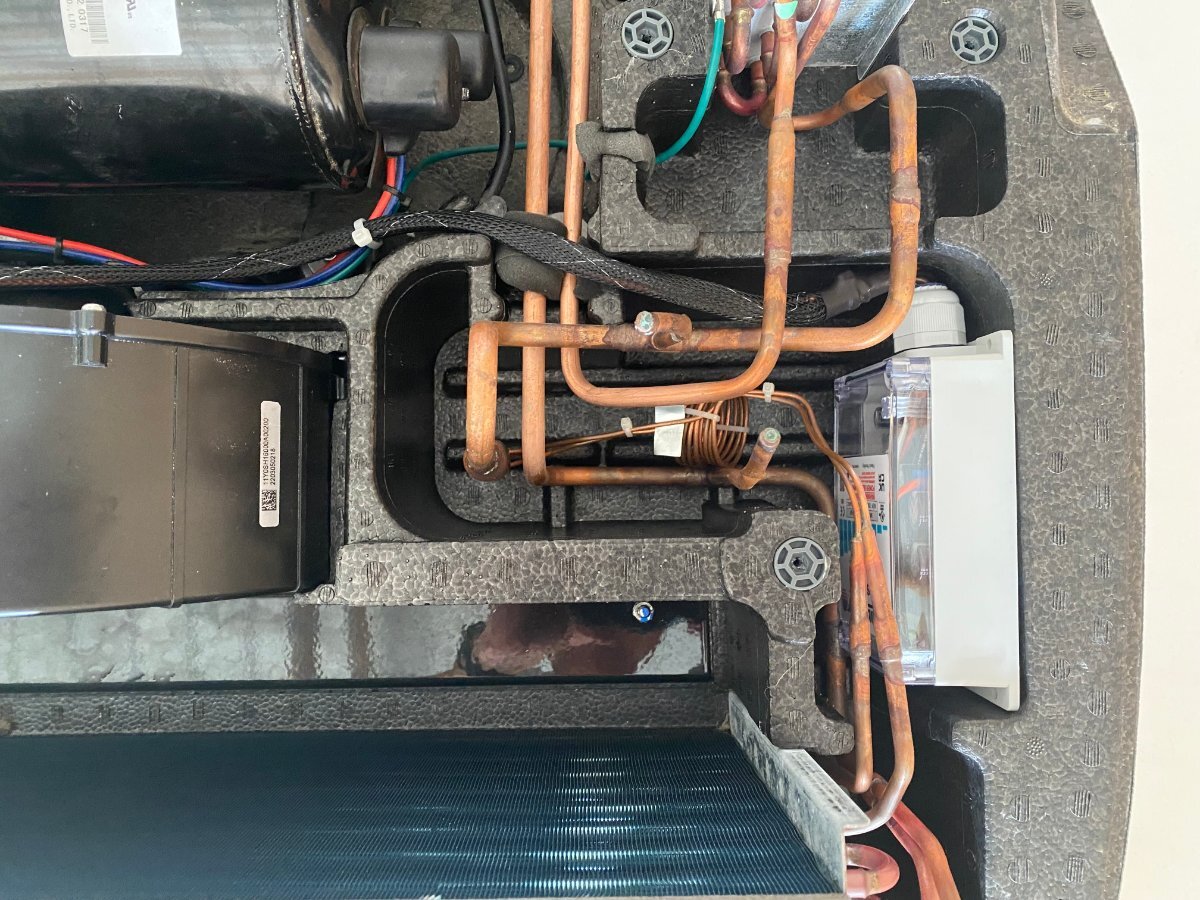
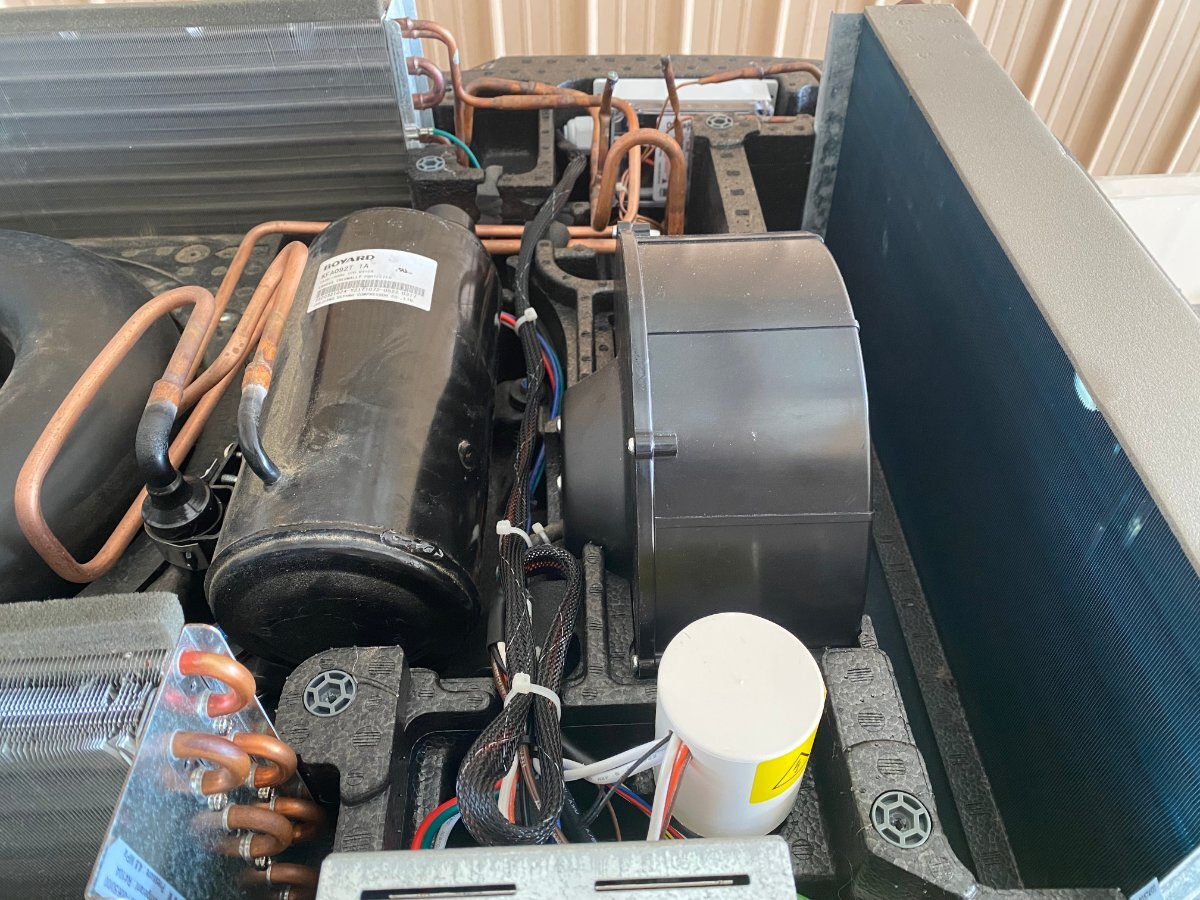
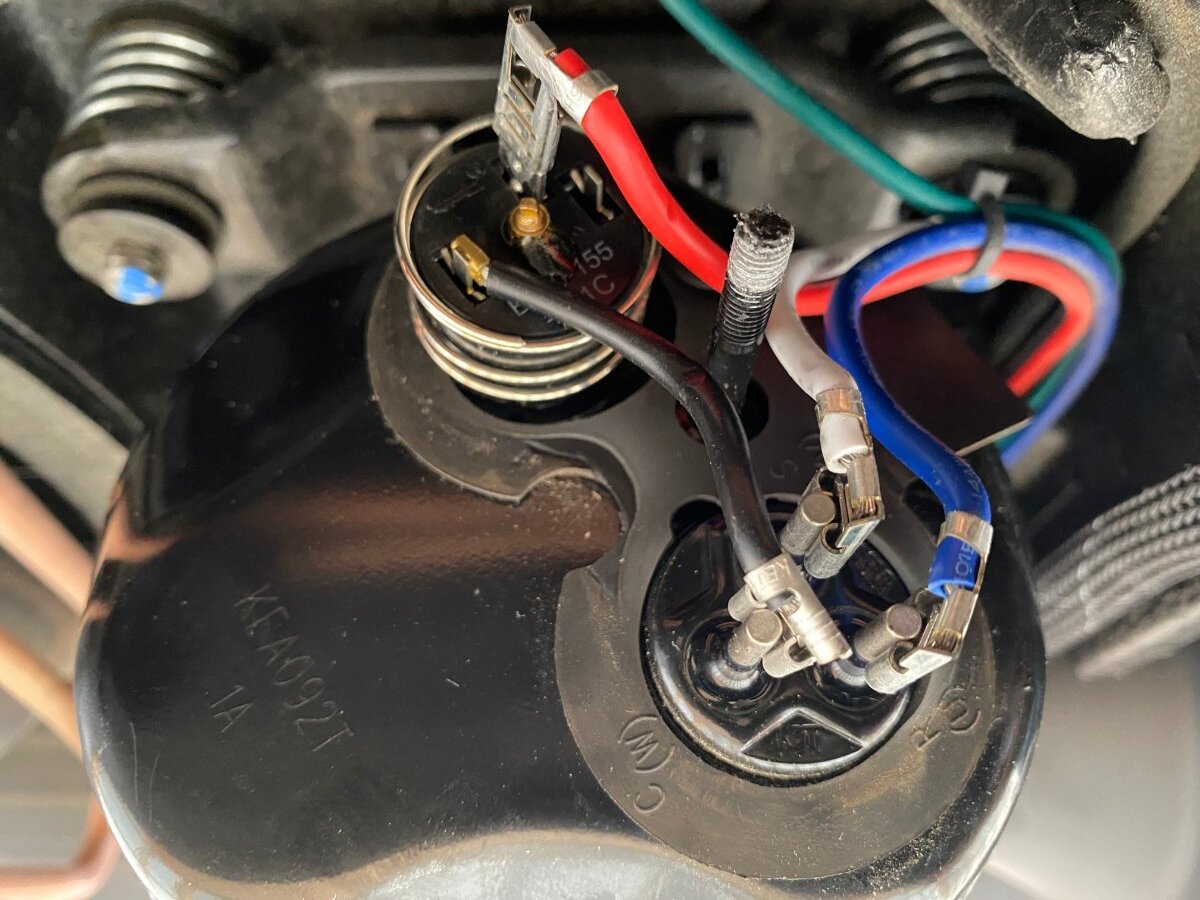
Since purchase of my OTT last year, I had been thinking of installing a MicroAir EasyStart on my Truma A/C. However, I wasn’t sure if it would allow my Truma A/C to run off my Champion 2000W generator, especially since I run it on propane and often camp at elevation. Fortunately for me I met @mossemi at the Oliver Rally last May and it turns out that he has the same generator and like me, runs it on propane. He told me that with the EasyStart, his A/C ran fine off his generator even at elevation. Thanks to Mike for that info. So now you can imagine my excitement when they announced that there were going to be ten EasyStarts given away at the Rally! But alas, I was not one of the winners. However, I met a nice couple from Oklahoma who did win one. And as luck would have it, they had decided not to use it, so they graciously gave it to me! Although I made several attempts, they refused any compensation. So I owe them a big thanks. Below are the details of my installation. First, thanks to @Patriot for previously posting this video: SoftStart Install on Truma A/C I found it to be very helpful for understanding how to remove the A/C covers, where to mount the EasyStart, how to run the wiring, how to get access to the control board and for making connections to the capacitor. However, DO NOT follow the detailed wiring instructions because the video is for a SoftStart not an EasyStart. Next, a couple of thoughts on safety. After I removed the A/C cover I found an old mud dauber’s nest. Fortunately it was not inhabited at the time. But they seem to like that area, so beware. Second, the video doesn’t mention it but you should make sure that the capacitor has been discharged before working around it. Since I’m not a qualified electrician, I won’t comment any further. Finally, I used my 17’ Werner ladder to get access to the roof. The optional Werner platform made this much easier. Also, accessing the roof from the curb side felt safer since the awning acts as a short railing. I used a sheet of rubber tool box liner and a piece of interlocking foam utility mat to protect the fiberglass and provide slip protection. With those additions, I felt safe enough to work in my stocking feet. As shown in the video, the white cover can be taken off by removing the eight screws (covered with lap sealant) with a T30 Torx driver (note that the two screws at the back are shorter than the others). Following that, removal of two additional T30 screws allows the foam cover to be lifted off. Be careful as you work with the cover off because the exchanger fins are easy to dent. Access to the silver electrical box is achieved by removing three T15 screws (one on top, and one on each side). Here’s the EasyStart device that I installed and the universal installation kit that comes with it: In general, I followed the wiring instructions provided by Micro-Air. I will say that I found the generic wiring instructions to be a little confusing (did I mention that I’m not a qualified electrician?). However, I was able to find specific wiring instructions for the Truma (that even I could understand) here: EasyStart Wiring Instructions for Truma A/C Although not necessary, I first removed the cap covering the wiring connections to the compressor motor with an 8 mm socket to confirm the wiring colors at the R, C and S terminals. (I don't know why but this photo is upside down and I couldn't figure out how to change it). I did deviate slightly from the installation instructions in one aspect, as I chose not to cut any wires but instead use terminal connections. That way, if I ever decide to remove the EasyStart, I can put everything back exactly the way it was. So instead of cutting the Red wire coming from the control board, I removed it and installed the provided 14 gauge Black wire with female terminal in its place. I then cut the Black wire and crimped on a male terminal to the portion not used and connected it to the female terminal on the Red wire that I had just removed. Finally, I used a WAGO push-in wire connector to tie these two to the black wire on the EasyStart. Next, after removing the white cap from the run capacitor, I installed the Orange wire from the EasyStart onto the Herm terminal next to the White wire. Then, I removed the Blue wire from the capacitor terminal and replaced it with the White wire from the EasyStart. Finally, I connected the Blue wire that I had just removed to the Brown wire from the EasyStart. Here’s a look at the wiring after everything was tidied up with zip ties: Overall, I’m pretty happy with the installation. However, looking back there is one thing that I wished I would have done and that is to add a bit of HVAC tape to the top of the EasyStart to give some additional support. I’m not sure how well the double sided tape will hold to the foam, especially given the conditions that some of our roads are in. I’ll probably go back and do that at a later time. BOTTOM LINE: After the install of the EasyStart, I noticed a very gradual ramp up of the compressor, as expected. More importantly, I can report that my Truma A/C runs very well with my 2000W Champion generator running on propane, even at 6000’ elevation. Added bonus: Unlike before, I can now run the A/C off my 15 A circuit at home. If you have any questions about this install, feel free to comment below.
-
- 12
-

-

-
2026 YM Oliver awning style windows and other changes
Boilermaker Chemist replied to Patriot's topic in Ollie Modifications
Considering the mixed reviews on the changes for 2026, I wonder if Oliver does any consumer research before deciding what to change. For example, has this forum ever been used by Oliver for customer feedback by way of polling the changes they are considering ? -
I would guess it’s the Dometic NRX 130C. I believe the door has to be removed to take out the freezer. Not sure how difficult that would be.
-
Truck Charging Wire location inside OTT
Boilermaker Chemist replied to dewdev's topic in Ollie Modifications
I would think code would require a fuse on that wire. -
Battery and Solar Disconnect Install Questions
Boilermaker Chemist replied to Tony and Rhonda's topic in Ollie Modifications
I’m curious, has anyone that has installed a battery disconnect switch addressed the potential issue of “inadvertently de-energizing the emergency breakaway brakes? I wonder where the power for that switch comes from. -
Well, it’s only been a few months, but so far they work great. I will say that the gauges appear to be much “beefier” than the tiny indicator on the manifold so my guess is that this will be a lasting solution. If not, I will repost any issues that I have. But for the minimal cost, I’m not too worried about it. Also, if one of them fails, I still have a backup.
-
Oh, the changeover regulator works fine, it's just the indicator that stops working. In essence, I just added a couple of new indicators for $30. instead of replacing the whole regulator for $75 and then have the problem happen again.
-
I wish I could depend on that. On my previous rig, the indicator got stuck and no longer worked. Although it was replaced under warranty, after several months same problem. Same thing happened on my Oliver. Seems to be a quality issue.
-
I agree, I always have my own tanks refilled, often at a Tractor Supply. I find AllStays to be a good app to find sources of propane when I am traveling, not to mention nearest Love's, Costco, etc.
-
I came up with an equally inexpensive yet much simpler approach that also avoids the use of batteries. I thought about buying the tanks with integrated gauge from Costco that @routlaw mentioned but I didn't like the thought of getting rid of two perfectly good LP tanks. Then I saw these gauges at my local Wal-Mart for about $15. They simply screw right onto the tank. Just open the porthole access and peek inside to see if your tank is empty.
-
Haloview MC7108 Rear View Camera Install
Boilermaker Chemist replied to Boilermaker Chemist's topic in Ollie Modifications
@Steve Morris sorry to hear about your issues. Knock on wood I haven't had any issues to date. On my Winnie Minnie I purchased the external antenna and attached it on top of the air conditioner shroud. You might try that. But mine works fine on the Ollie without it. -
Haloview BT7 Touch Rear Camera installation on 2022 LEII
Boilermaker Chemist replied to dhaig's topic in Ollie Modifications
@Steve Morris, sorry to hear about your issues. Knock on wood I haven't had any issues to date and just posted my install to this forum. On my Winnie Minnie I purchased the external antenna and attached it on top of the air conditioner shroud. You might try that. But mine works fine on the Ollie without it. -
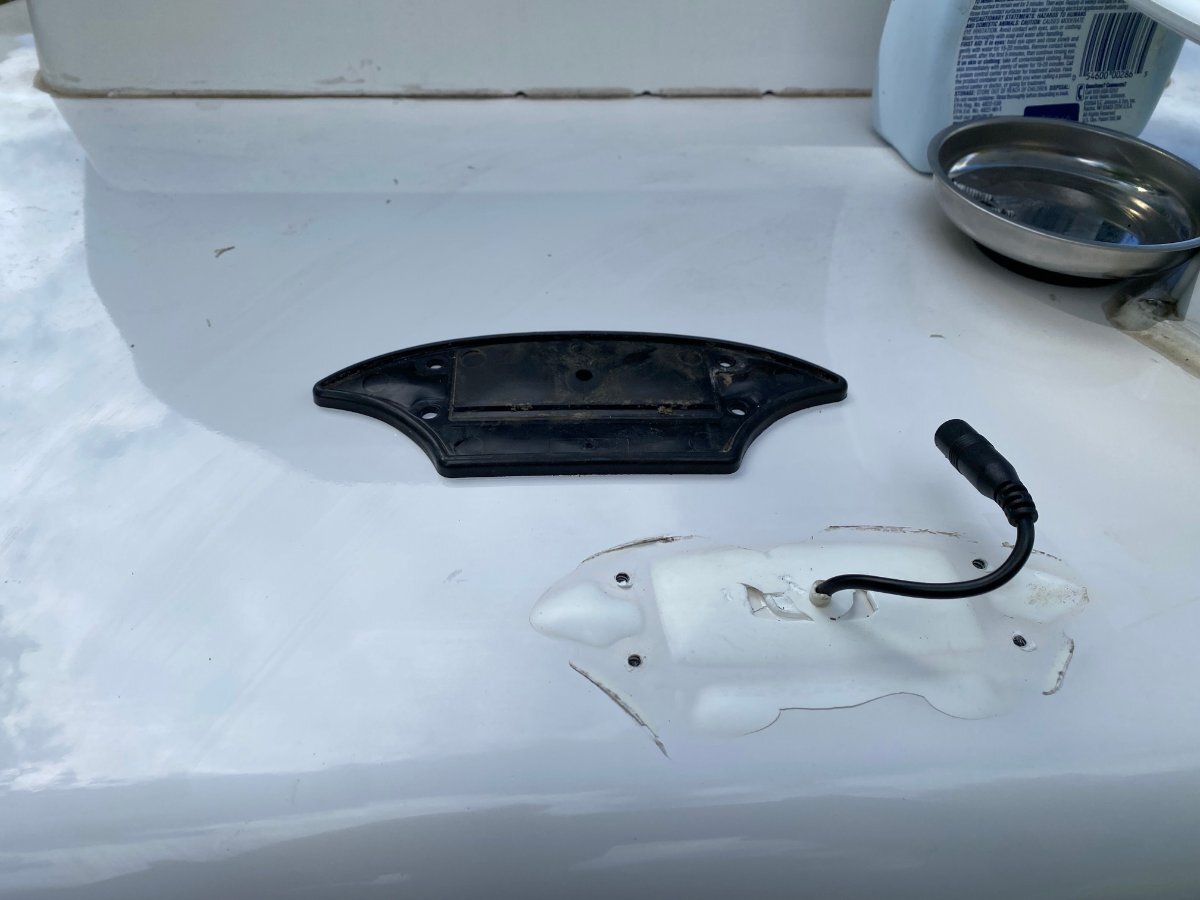
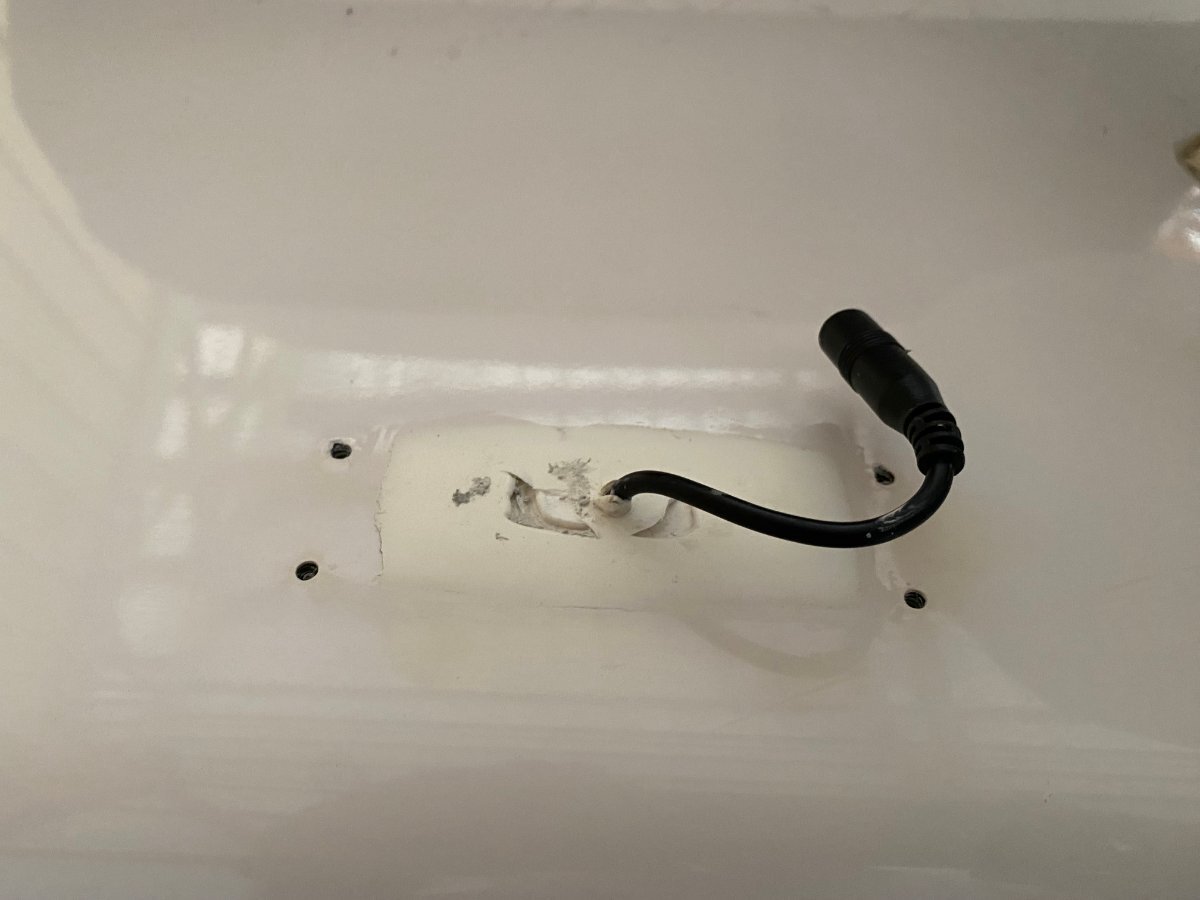
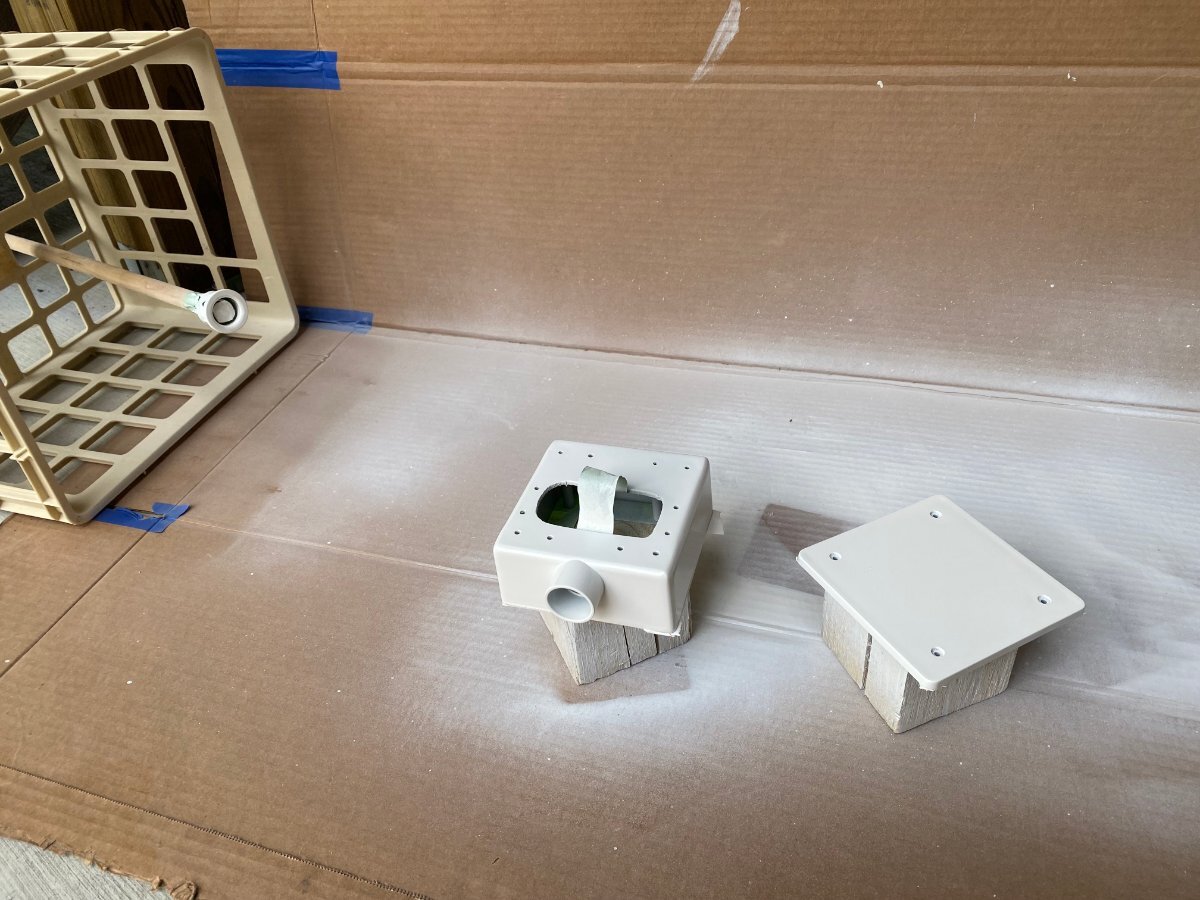
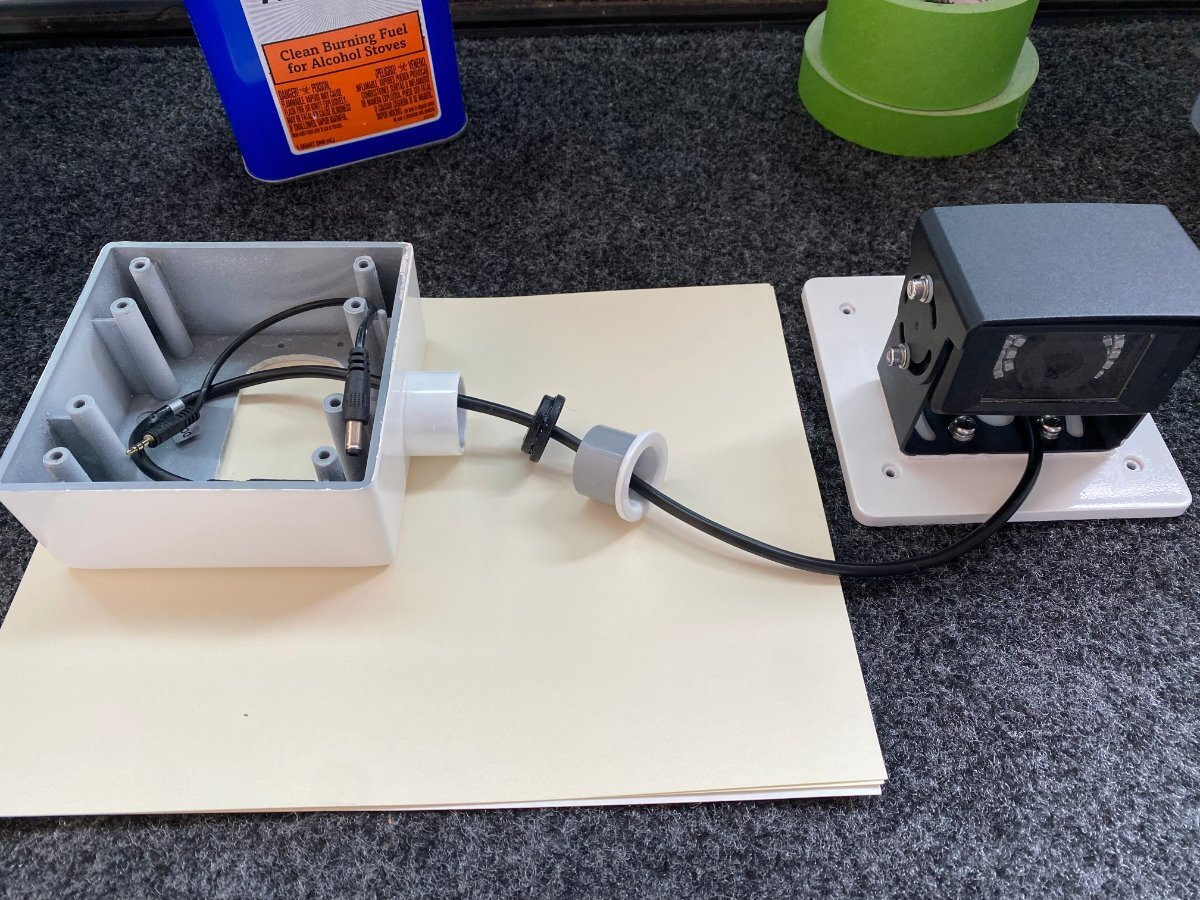
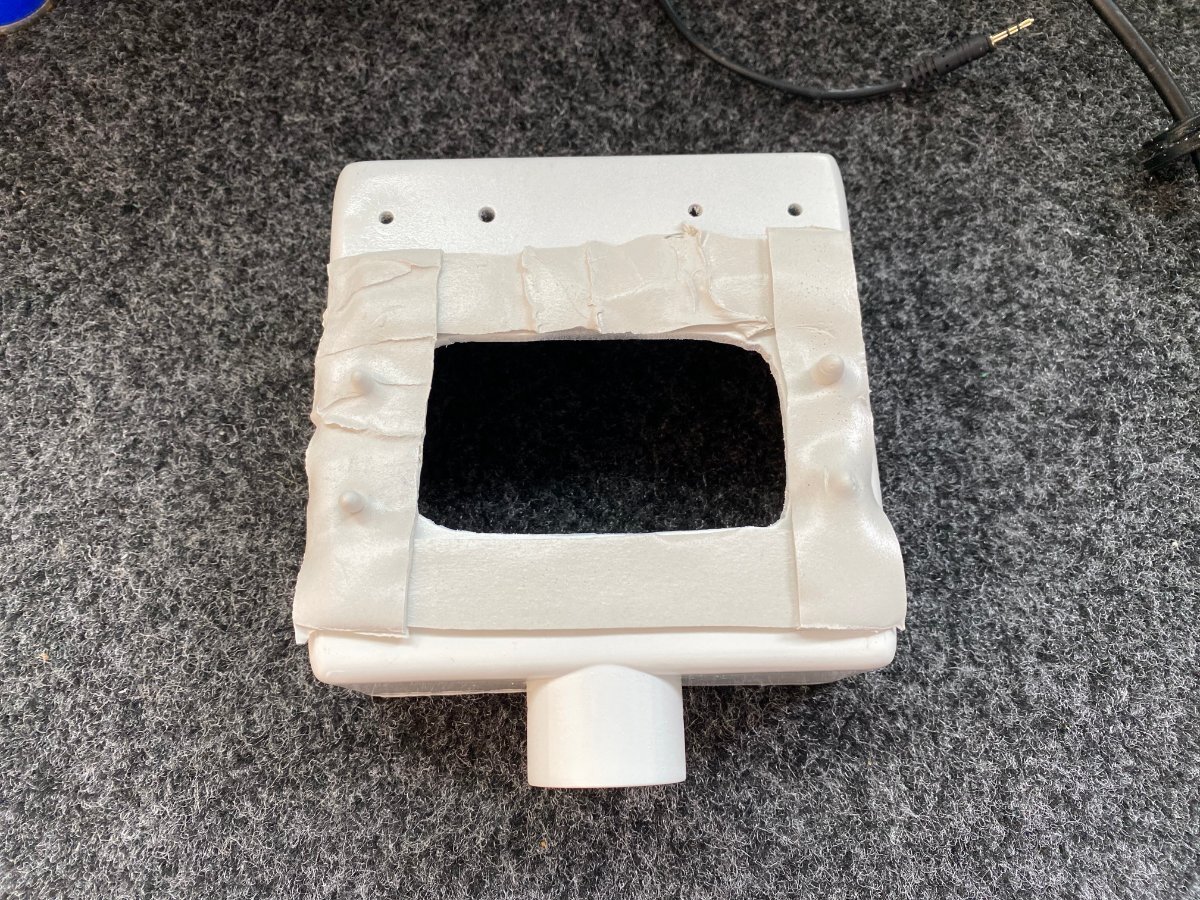
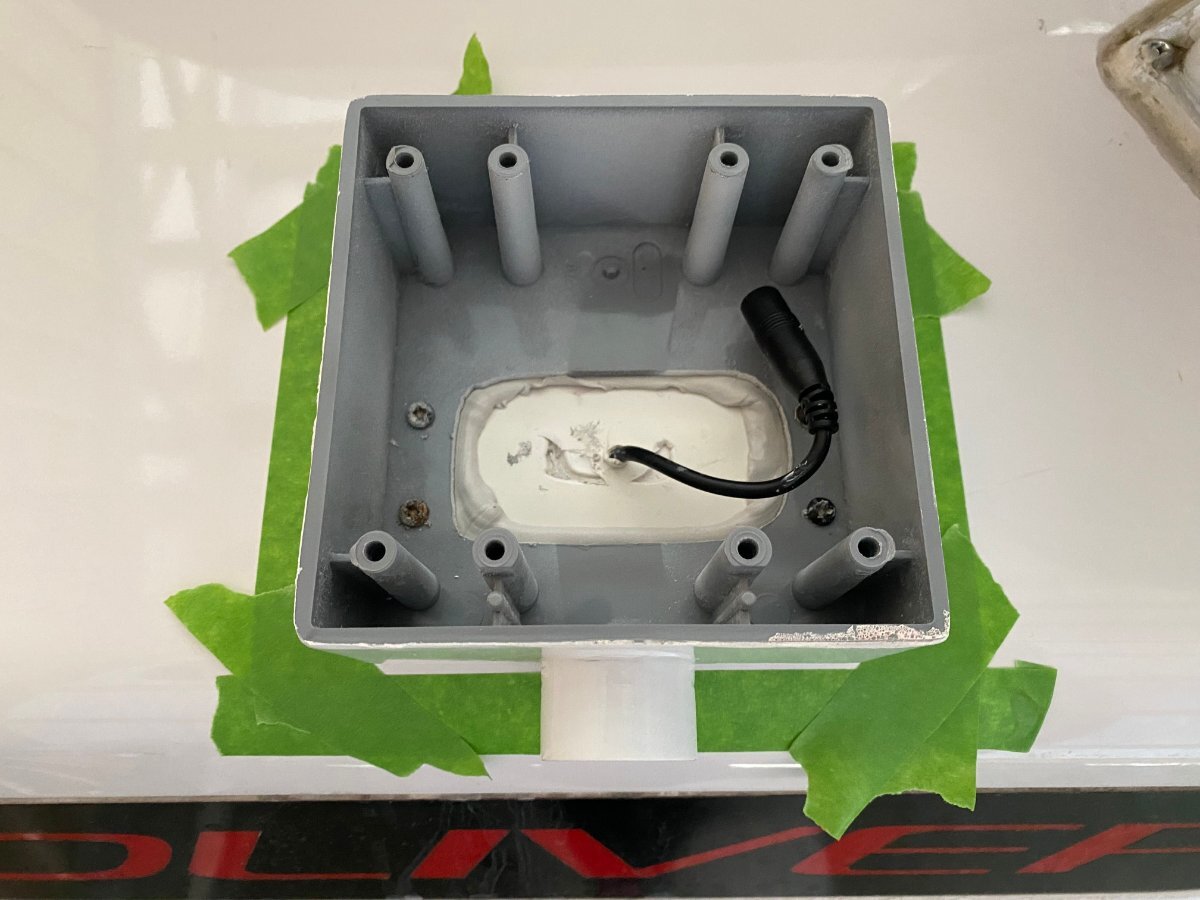
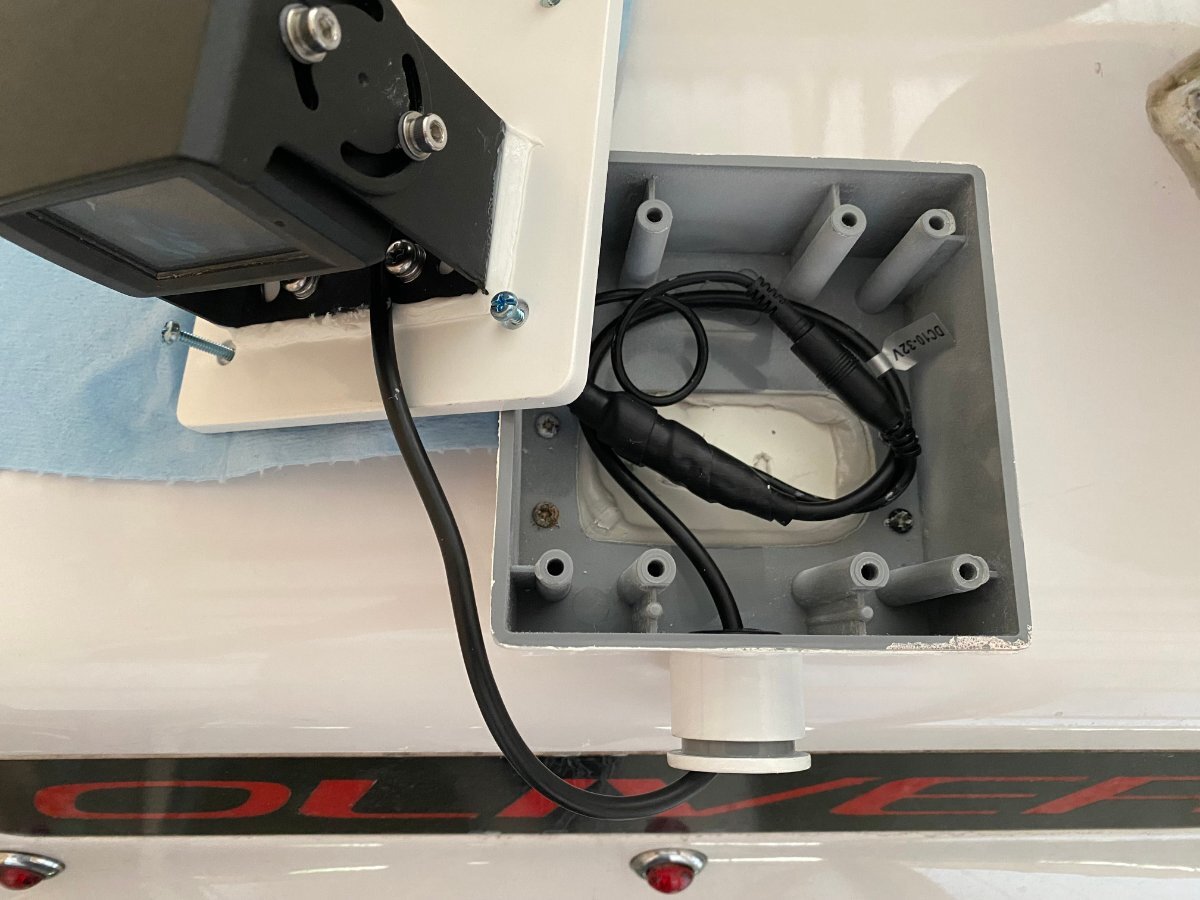
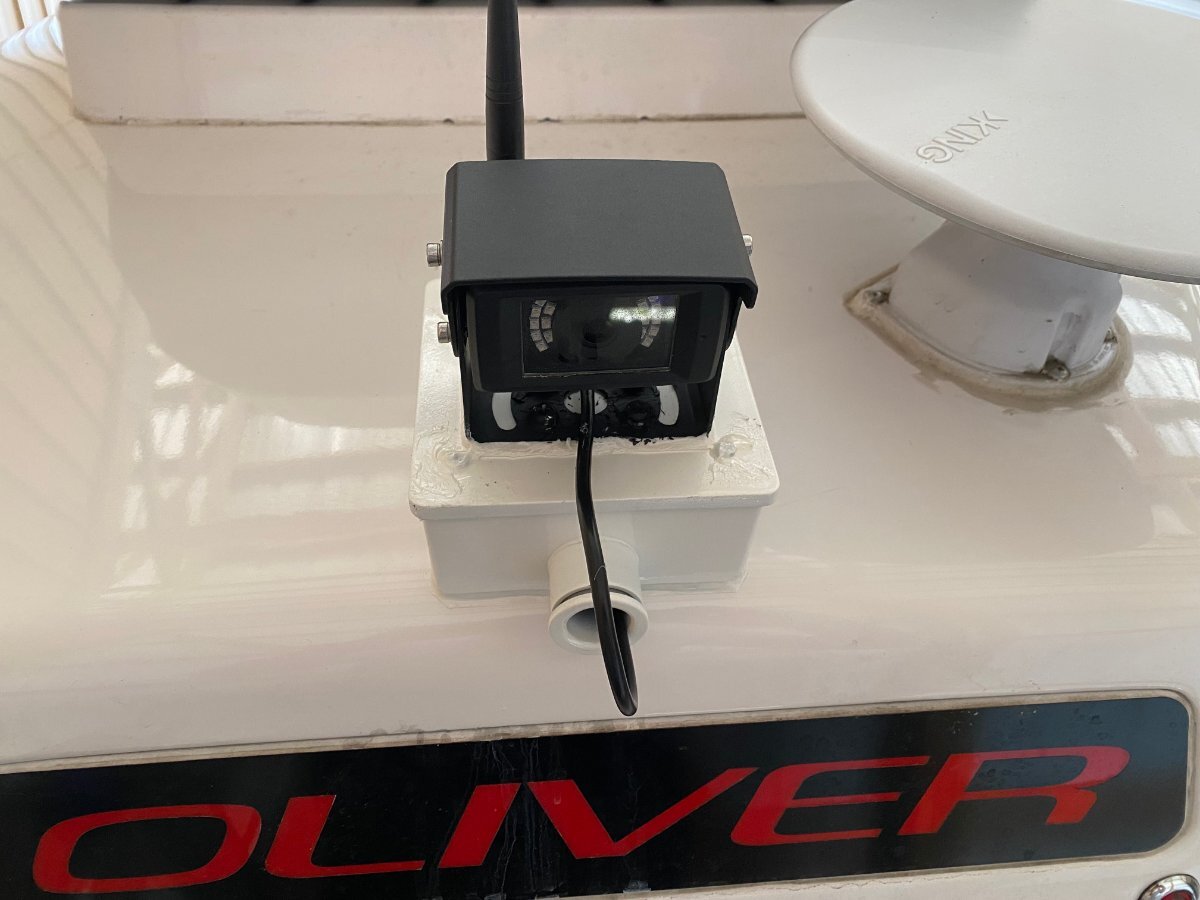
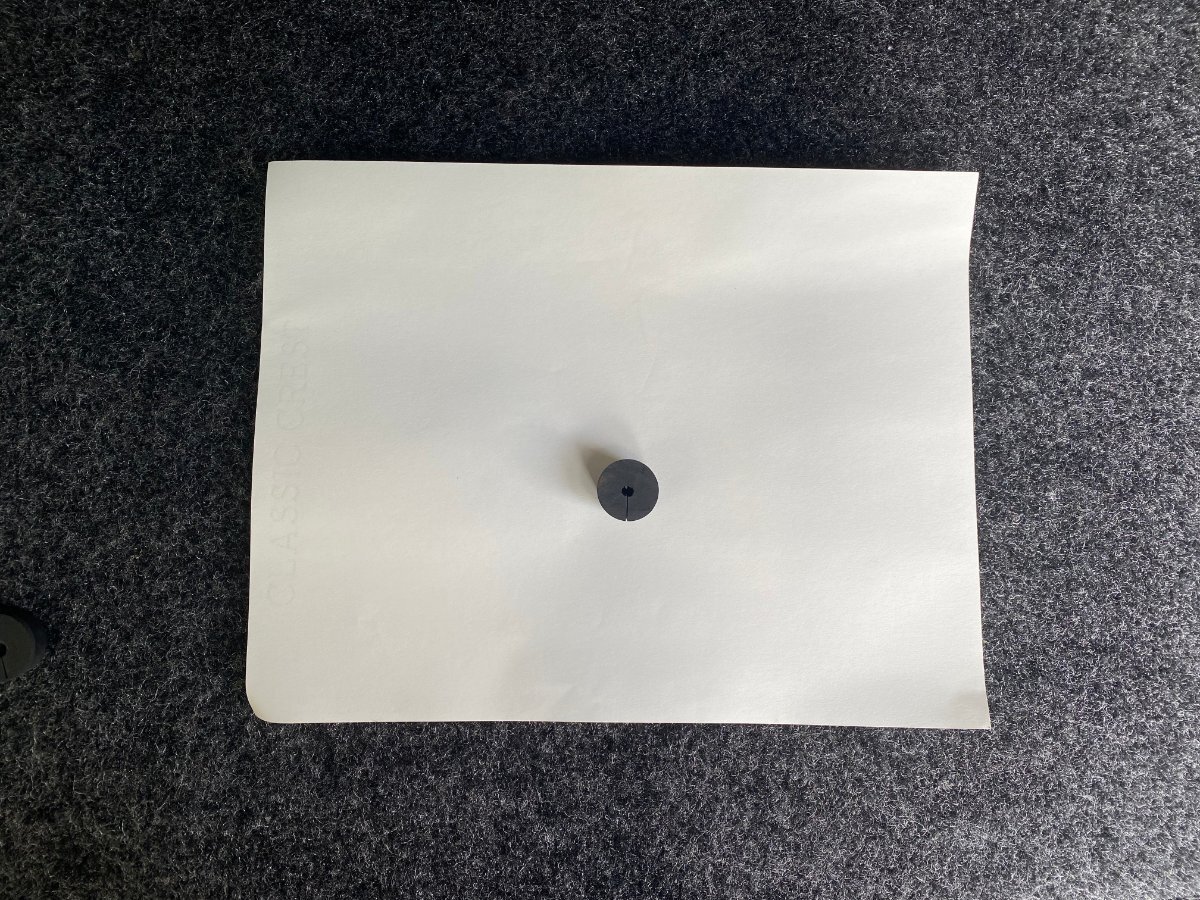
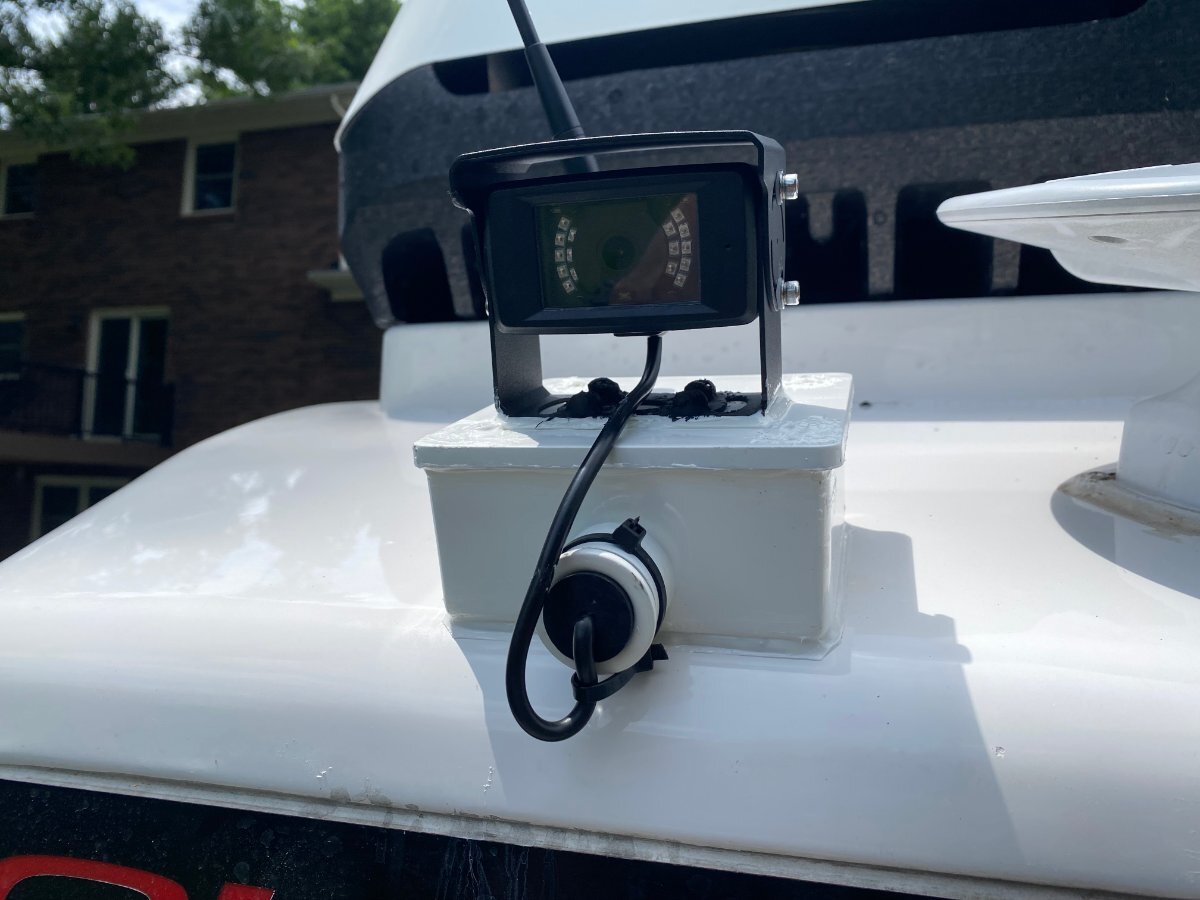
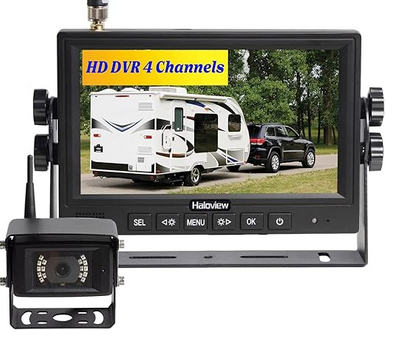
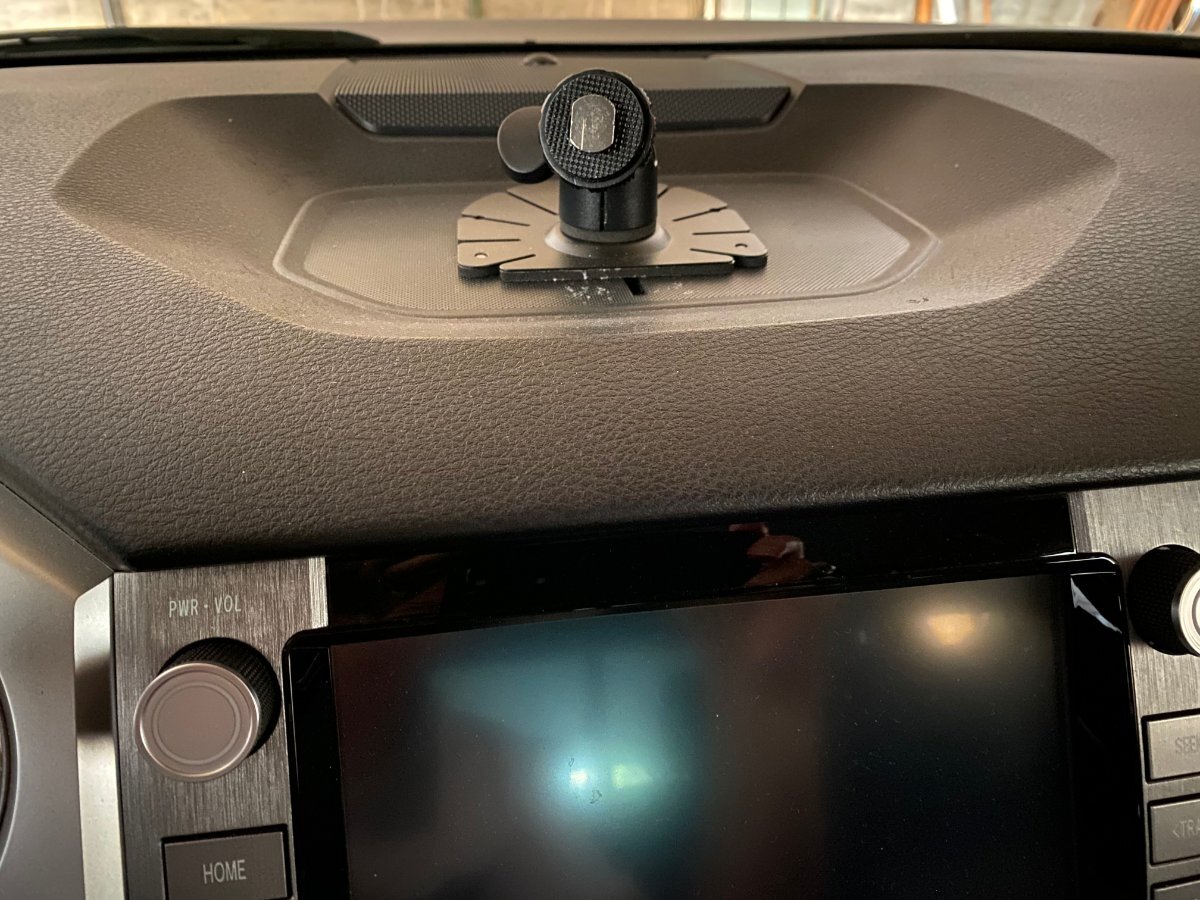
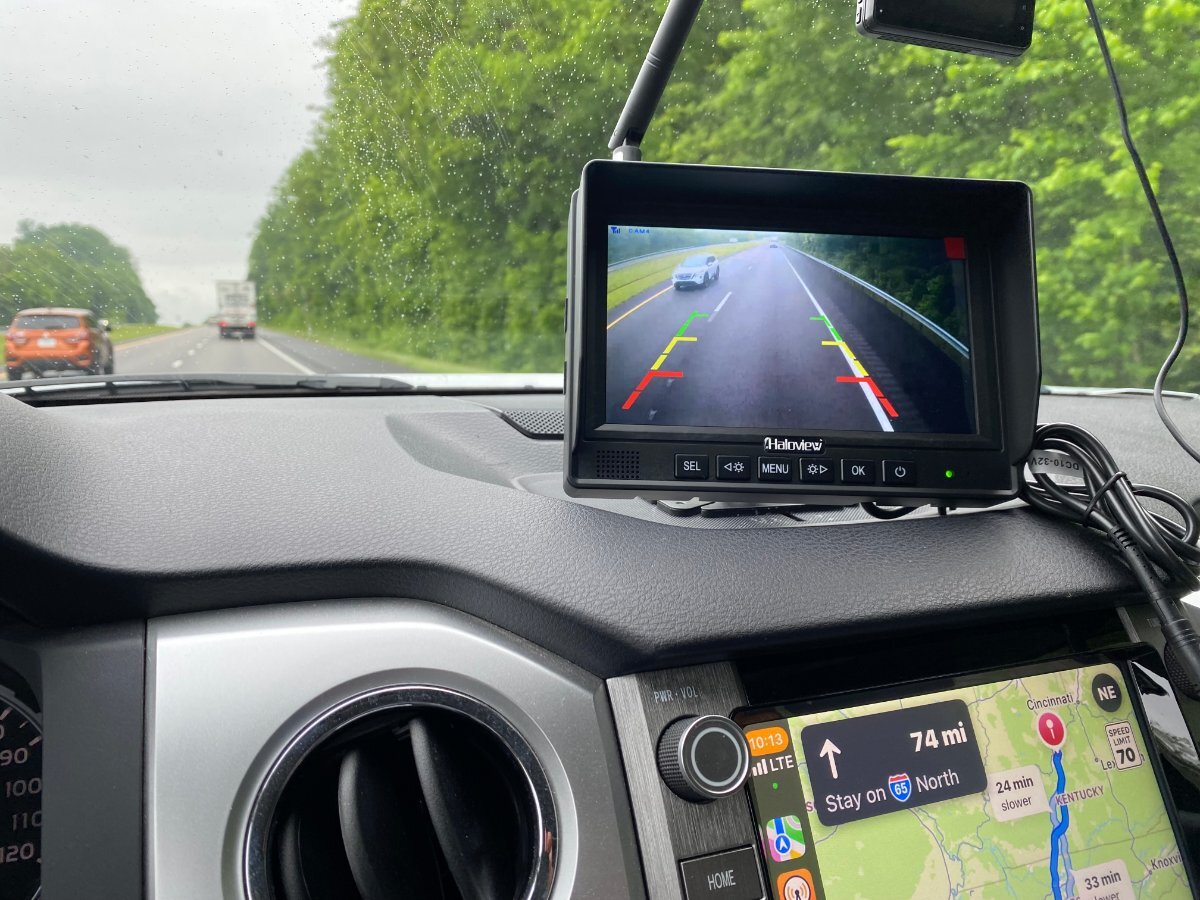
One of the first things that I did after I bought my Winnie Minnie back in 2020 was to install a rear view camera. After doing some research, I chose the Haloview MC7108 Wireless RV Camera with 7'' Monitor. I was not disappointed. It had excellent resolution and the image on the screen had brilliant color. Fast forward a few years and I bought the Oliver. Although nearly everything about the Oliver was an upgrade, IMHO the Furrion rear view camera was certainly not. First, the image on the tiny 4” monitor was so small that I could hardly make out any detail. Even worse, the image brightness was so poor, if I had my sunglasses on I couldn’t see anything but a blank screen (yes, I tried adjusting the brightness and contrast). So I finally scrapped the infuriating Furrion and replaced it with another Haloview MC7108. I am very happy with the replacement. Below are the details of my installation. In making modifications to the Oliver, my number one rule is to try to avoid drilling any additional holes in the fiberglass. With that in mind, I also purchased the Yinettech Camera Bracket Adapter Kit for Furrion. The steel adapter plate is made to screw onto the Furrion “shark fin”. The kit also included a Pig Tail Plug Adapter since the plug on the Furrion camera is not the same type as the one on the Haloview. It turns out that the Haloview camera is much heavier than the Furrion. So I was concerned that the plastic “shark fin” might not hold up over time, especially considering my lengthy travels and the state of some of our roads. Also, the Haloview camera comes with a rather long cable which won’t fit inside the “shark fin”. Rather than take a chance on using the “shark fin”, cut the cable and make new connections, I chose to mount the camera on top of a Carlon PVC Type 2FSE electrical box. This provided plenty of room for the long Haloview cable and the Yinettech plug adapter. So the wiring was essentially just plug and play. When I removed the “shark fin” gasket from the Ollie I noticed that the area underneath it had been filled with caulk and this was raised above the fiberglass. I decided not to disturb the caulk around the opening for the cable since it was in good condition. Instead, I cut an opening into the bottom of the PVC box to accommodate the raised area and thereby allow the box to sit flat on the fiberglass. I cut off the mounting feet on the box and using the Furrion gasket as a template, drilled holes to match the existing ones in the fiberglass. Since the PVC box was grey, I sanded down the exterior, wiped it down with acetone and then applied several coats of Krylon Fusion All-In-One Gloss White spray paint and primer. This paint is formulated to bond well to plastics like PVC. A weatherproof cover plate was treated similarly and painted. Coincidentally, the rubber gasket that comes with the camera also fits nicely inside the conduit opening. Adding a PVC conduit adapter holds the gasket firmly in place. In order to keep water out, I overlapped butyl tape all around the bottom edges of the PVC box, covering the screw holes. I then secured the box to the fiberglass using the original screws that were used with the “shark fin”. Next, I used Geocel ProFlex RV white sealant around the exterior edges of the box, the top cover plate and the bracket supporting the camera. Screw heads on the cover plate were sealed with the GeoCel and screw heads on the camera bracket were sealed with black Dicor. Finally, I used two cable ties to form a drip loop on the cable to keep water out and used a gasket cutter to cut a hole in a rubber stopper to make an additional seal for the cable. The Haloview kit comes with two nice options for mounting the monitor on the dash. One is a U-shaped bracket that can be secured to the dash with screws. I chose the other which is the center mount bracket. It is simply attached to the dash with 3M tape but is very secure. I am extremely happy with the addition of my new rear view camera system. I think the resolution and color of the Haloview system are exceptional. There are also a lot of extra features on the Haloview system that you will not find on the Furrion.
-
Fast question about meals at the April Rally
Boilermaker Chemist replied to Teaney Hull 292's topic in Events & Rallies
If you are looking for a restaurant, we had a nice dinner at Rock House Eatery in Guntersville last year. It's about 10 mi from the campground.