All Activity
- Today
-
 Dean and Mary changed their profile photo
-
Interesting that the Imperial RVs came out of the Ice Fishing market. Looking at the various models this is the design intent :"Four-season performance is standard. Nearly 3 inches of composite insulation, thermally broken windows, and heated water tanks keep the OB120 functional in extreme temperatures, with the cabin and systems engineered to perform down to -40°F. This cold-weather capability is no accident — it's the direct result of Imperial Outdoors' roots in building ice fishing structures designed to survive Wisconsin winters, applied to the most compact trailer in the lineup."
-
That is a splice connector, specifically a Wago brand lever nut splice connector. Considered a good easy to use connector joining two or more wires together.
-
No worries at all! Honestly, a loose battery connection is one of those things that's so simple it often gets overlooked. We've all chased complicated problems only to find out it was something basic in the end. I'm just glad you found the issue and got it sorted out. You definitely didn't waste my time. Troubleshooting is just a process of eliminating possibilities until the culprit shows itself. Great news that you're back up and running. Thanks for letting us know what the fix was!
-

Two weeks of feedback Apex #2 (Hull 1739)
Dennis and Melissa replied to Sentry62's topic in Getting Started
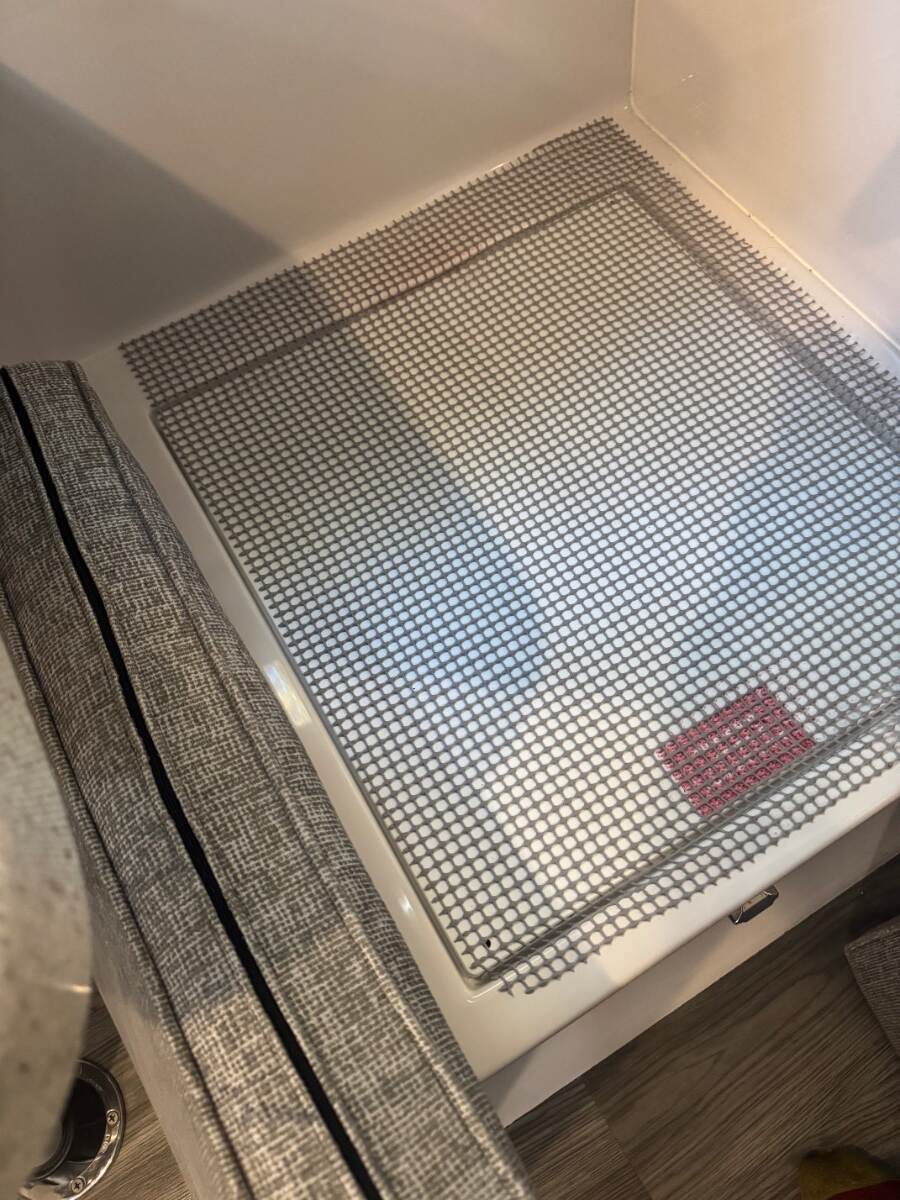
My wife’s solution to the dinette cushion YMMV
-
Living in Montana I do NOT think of the Oliver as a 4 season camper. Yes you can camp in moderately chilly weather as most of us have done at one time or the other but 4 season no way. If you want a true 4 season camper look at Imperial Outdoors and a few others built to similar standards. On our 2015 EII we have the suburban furnace installed which is only 16K BTU but runs at 40-50% efficiency cutting that value in half, and believe it is considerably undersized and noisy to boot. Not sure what they install on the newer models.
-

High Pointe Convection Oven Tripping CGFI Breaker
2008RN replied to 2008RN's topic in Mechanical & Technical Tips
Thanks it does. It gives me some structure to start with. I will ohm on a cold baseline with several components before I try heating. I wish it would fail on the bench. It would make it easier to troubleshoot. Maybe decreasing the amount of airflow on the back and sides may simulate the Oliver environment and help to cause the failure. I can hold the cover and 2 shields in place with 4 screws. Try to induce the failure, and then remove the covers and have time to do the testing. Otherwise I will run it in Grill/convection mode for 20 minutes then remove the covers, and then use a heat gun on possible failure points. Question: If the cord was the failure point, would I feel more heat in the area in question on the cord? - Yesterday
-

High Pointe Convection Oven Tripping CGFI Breaker
Snackchaser replied to 2008RN's topic in Mechanical & Technical Tips
We will be traveling overseas in a few days and I may not be able to respond for a while. Hopefully we'll be returning with our daughter who has been waiting 10 years to get through the legal immigration process🙏 Anyway, you're on the right track now, only remember that a current leak does not have to be on the specific component related to the mode. It also could be related to the neutral which is common in all 3 modes. Albeit, a neutral ground fault needs to be lower resistance for current to take the ground path. Think of it like this; 1 ohm or less is a direct short, under 1k on the neutral could cause a ground fault trip, anything under 25k on the hot side will cause a ground fault trip, anything up to a meg ohm is not great, but it might not trip the GFCI, and over a meg ohm is good insulation. Your right to relate the problem to heat, only the heat is just exposing an insulation weakness that is causing a ground fault enough to trip the GFCI. Do your testing after the breaker trips when it is still hot, or try a heat gun all over suspect insulation. Test hot and cold, and remember the resistance will change a little with temperature swings. Look for more significant changes. Since the power cord might have been pinched the first time you removed the oven, the heat could be softening the insulation at the pinch point causing current leakage there. It might not be easily seen, so It's worth examining very closely or just replacing the cord as a cheap first step. Hope that gives you something to start with. Good luck! -
High Pointe Convection Oven Tripping CGFI Breaker
2008RN replied to 2008RN's topic in Mechanical & Technical Tips
We have a mixture in our home, with CFGI outlets, and a GFCI breaker. I added a pole barn for the cars and where I do most to the mechanical work. I have several 20Amp GFCI circuit breakers in the panel for outlets. -
High Pointe Convection Oven Tripping CGFI Breaker
2008RN replied to 2008RN's topic in Mechanical & Technical Tips
Thanks I will get back with you. My electrical knowledge is very rudimentary. I saw the capacitor and the large transformer that feeds the microwave emitter. My spidy sense was turned on immediately. I remembered being warned years ago: use only one hand when working around capacitors, the other is behind my back. Thanks for reinforcing the safety. I spent a few years around ME, EE, and Electrical techs, and electricians, but that was 30-40 years ago. They help me with a couple of different projects. I built a timing comparitor circuit with relays to turn off a cleaning pump while an automated feeder was running on an 150 gallon tank. I also rigged up a bunch of heavy duty resistors in parallel to a motor and measure voltage drop (I think) across the resistors to calculate amperage of the motor under different loads. Since my microwave failures happened in 3 different modes grill, convection, and microwave. Heat and moisture would be involved in all 3. Although each has it's own separate heat source. ie: 2 different burners, the microwave emitter. The way I am doing testing only one heat source is on at a time, and the convection fan only operates in the convection mode. There is a main fan (below the electrical input PCB. that operates when any of the 3 modes are active. I haven't looked closely at this fan. It does have an external winding next to the fan in the fan assembly. I haven't seen this before. I will take a physical look at the burners, insulation, and closeness to the chassis. I will look for anything that could be close to shorting to ground. I will inspect the main fan assembly while I'm mucking around. After that I will contact you! it might be a couple weeks, I got some other stuff planned. -

High Pointe Convection Oven Tripping CGFI Breaker
jd1923 replied to 2008RN's topic in Mechanical & Technical Tips
OTT installed our microwave on an independent run to the 120VAC power panel, using white Romex (14-2 AWG). On a separate 14-2 run are the 110V outlets. OTT wired two (2) hot/black wires to one 15A breaker. In how they wired this, better not run the microwave and a blow dryer at the same time! 🤣 Wiring to the 20A breakers, for A/C, HWH and Fridge, is the yellow Romex (12-2 AWG). I understand OTT in later years used 12-2 Romex for all 120VAC wiring. The first outlet which is under the dinette is a GFCI outlet, so all other downstream outlets are hence GCFI protected. Our microwave was not wired by OTT to a GFCI circuit and therefore neither is our new air fryer. Since I disabled the PD converter when installing a new inverter/charger, I used the 15A circuit breaker for the converter now for our oven. Now we can run the oven and blow dryer at the same time on the two 15A breakers since the inverter can handle it. In our 1980 built home, we have one 15A GCFI breaker in the 200A panel. It protects 5 outlets in three bathrooms and 2 exterior outlets on the deck. There must be 150 ft of #14 wire connecting these 7 outlets. I guess that was local code 46 years ago. What I've read here is new homes now have GCFI outlets throughout the garage, bathrooms of course, and exterior walls, etc. -
High Pointe Convection Oven Tripping CGFI Breaker
jd1923 replied to 2008RN's topic in Mechanical & Technical Tips
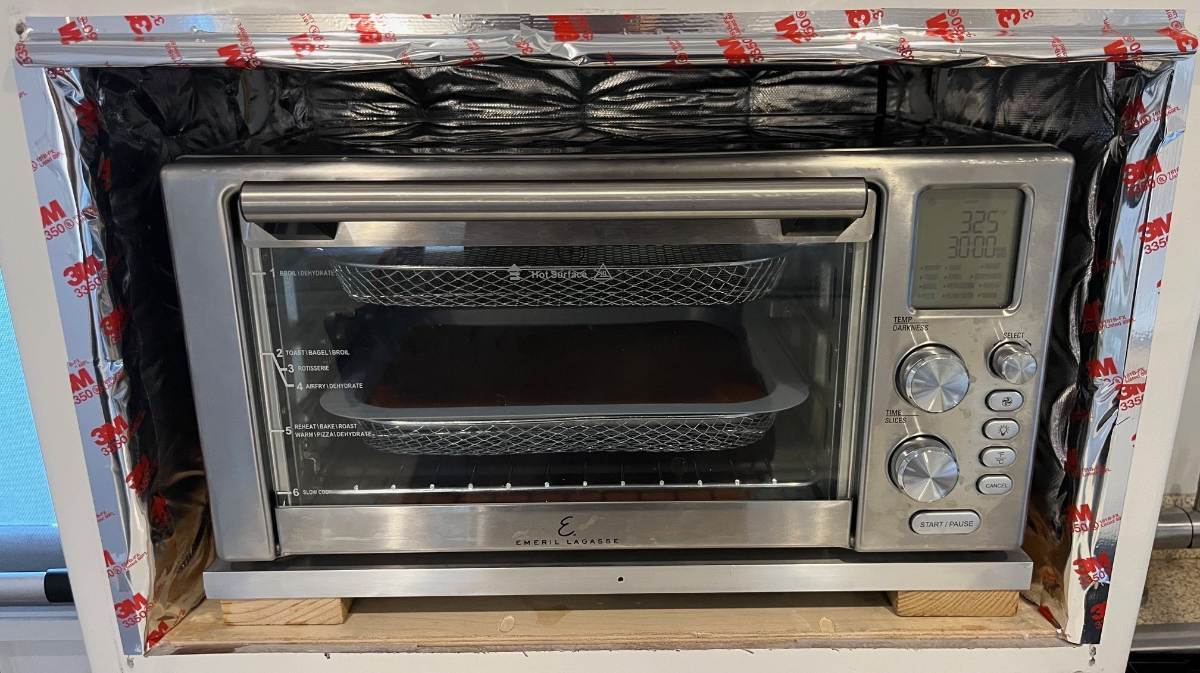
It would be cool if you could troubleshoot your oven with Geoff's help! I'm sure we'll hear back on this. If you have to replace it, there should be several models that would fit. Now that you had it out, you know the internal dimensions. I was able to repurpose the OEM microwave grill to fit around our new oven (by merely cutting off the inside plastic tabs). I'm actually surprised OTT would install an oven in an uninsulated closed cabinet. I know some of the very early hulls had oven vents but they stopped that (history provided in the thread linked above). We had microwave only, so without the oven feature there is little external heat, no real need for proper insulation and venting. However, a convection oven is a different thing! I suggest any Oliver owner who has an oven and uses it for more than a few minutes at a time should add proper ventilation! Two 3" vents in the top-back corners truly allow the hot oven air to escape without needing a fan. Kiln insulation helps too. We use our oven regularly, running on inverter, 400F for 20 minutes or more and the cabinet surround and the kitchen cabinet above are just warm to the touch. 😎 Good luck with this, Bob!
-
Most 30-40 degree nights when using the furnace we find that just cracking the Maxxair vent a tiny bit using the hand knob is sufficient venting to prevent humidity/condensation buildup. We never open it all the way with the furnace on.
-
High Pointe Convection Oven Tripping CGFI Breaker
Snackchaser replied to 2008RN's topic in Mechanical & Technical Tips
It still sounds like the oven is failing. Something probably has a high resistance short to ground when it gets hot, and it un-shorts after it cools. A GFCI doesn’t trip on heat or overcurrent, rather it detects a current imbalance such as a high resistance short to ground. It only takes about 5 to 8 milli amps to trip a GFCI, and you have tripped several different ones. The most likely culprits are the heating element or fan, and they can short due to moisture which explains why the microwave sometimes trips it. For example, if the heating element insulation breaks down when it gets hot or damp and leaks current to ground, then the GFCI will trip. However, this condition will not trip a normal breaker, or the ovens thermal protection elements. BTW, a thermo element will open the circuit, but that does not cause a GFCI trip. Your 0.02 ohms reading is fine. Don’t modify the cabinet either, because it’s not excessive heat that trips the GFCI. BTW, I’m sure you know this, but please be careful when removing the oven covers, the microwaves high voltage capacitor can give a nasty shock even when the oven is unplugged! You seem to have electrical knowledge, so PM me if you want help with some simple troubleshooting and possible repair of the oven rather than replacing it. It may take some back and forth that's better done outside of the forum. Good luck, Geoff -

High Pointe Convection Oven Tripping CGFI Breaker
topgun2 replied to 2008RN's topic in Mechanical & Technical Tips
I'm sure that someone here on the Forum will have some "trouble shooting" tips for you on this problem. But, I can tell you that Oliver spent several years trying to find a way to install something other than the "simple" microwave. As I understood the main issue during the time they were trying, heat dissipation was the main issue they were dealing with. Therefore, it seems (to me) likely that you have basically honed in on the root cause of your problem. Good luck in fixing what you have. Bill -
We just had a freeze last night. My preparations were: turn on the "antifreeze" function for the water, disconnect the hose (we currently have fresh water hookups), "argue" with wife about the setting on the heater (she prefers 62, I prefer 60). EZPZ In my previous post I ignored a "feature" of the Ollie that I have found MUCH more challenging over the last 2.5 years: the CO alarm under the table. The Ollie seals up so tight that you could easily not use the heater on many freezing nights. Body heat is absolutely trapped. It's the perfect tent. So perfect, that certain gases accumulate and alarms get triggered. 😂 So, venting is required. Too much and you might as well be outside. Especially if it's raining. Too little and alarms will wake you up repeatedly. Last night we got it just right: Max air vent open, but off; heater ran intermittently, but never labored, no alarms. Comfort and safety. Check.
-
High Pointe Convection Oven Tripping CGFI Breaker
2008RN replied to 2008RN's topic in Mechanical & Technical Tips
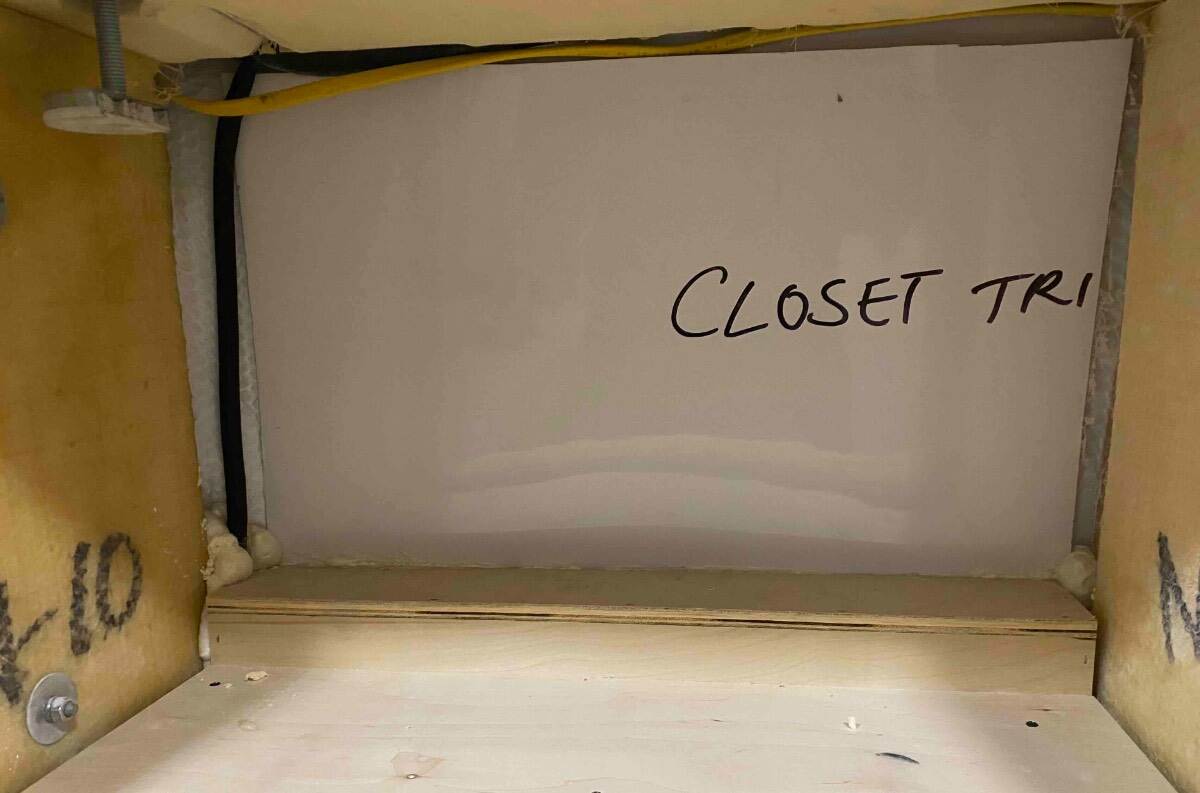
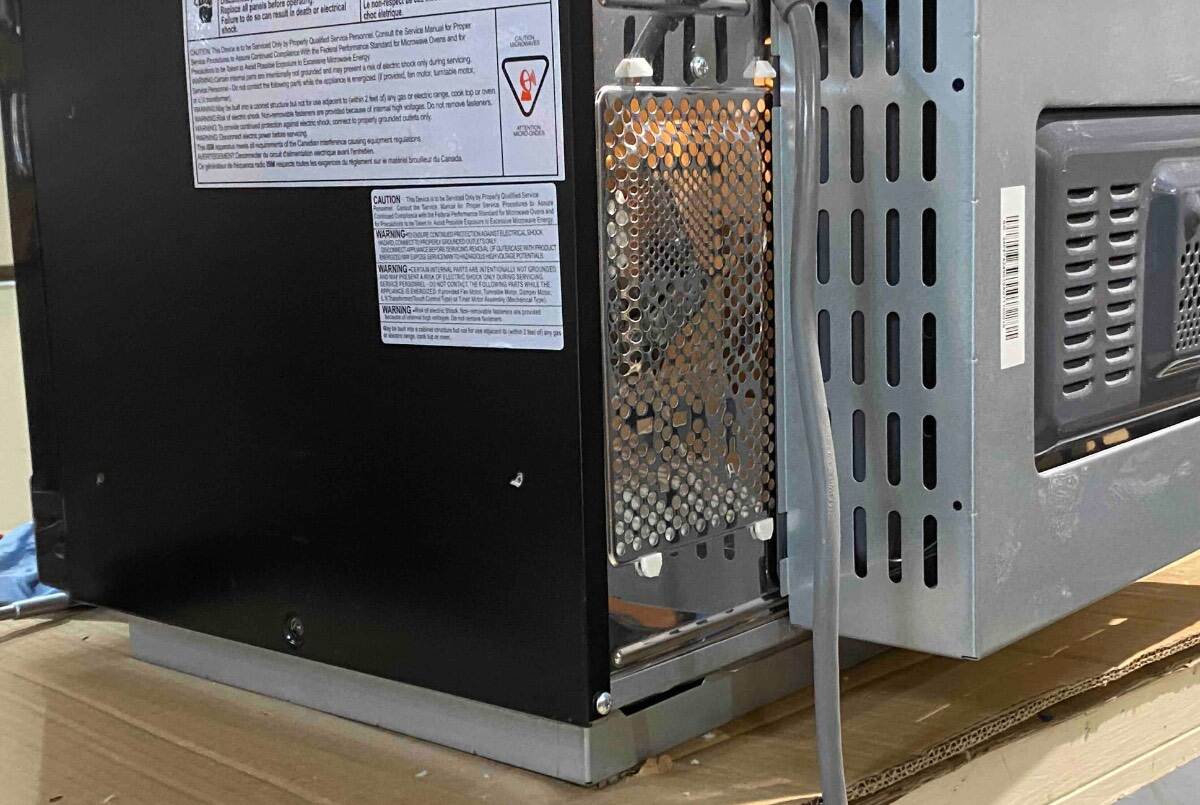
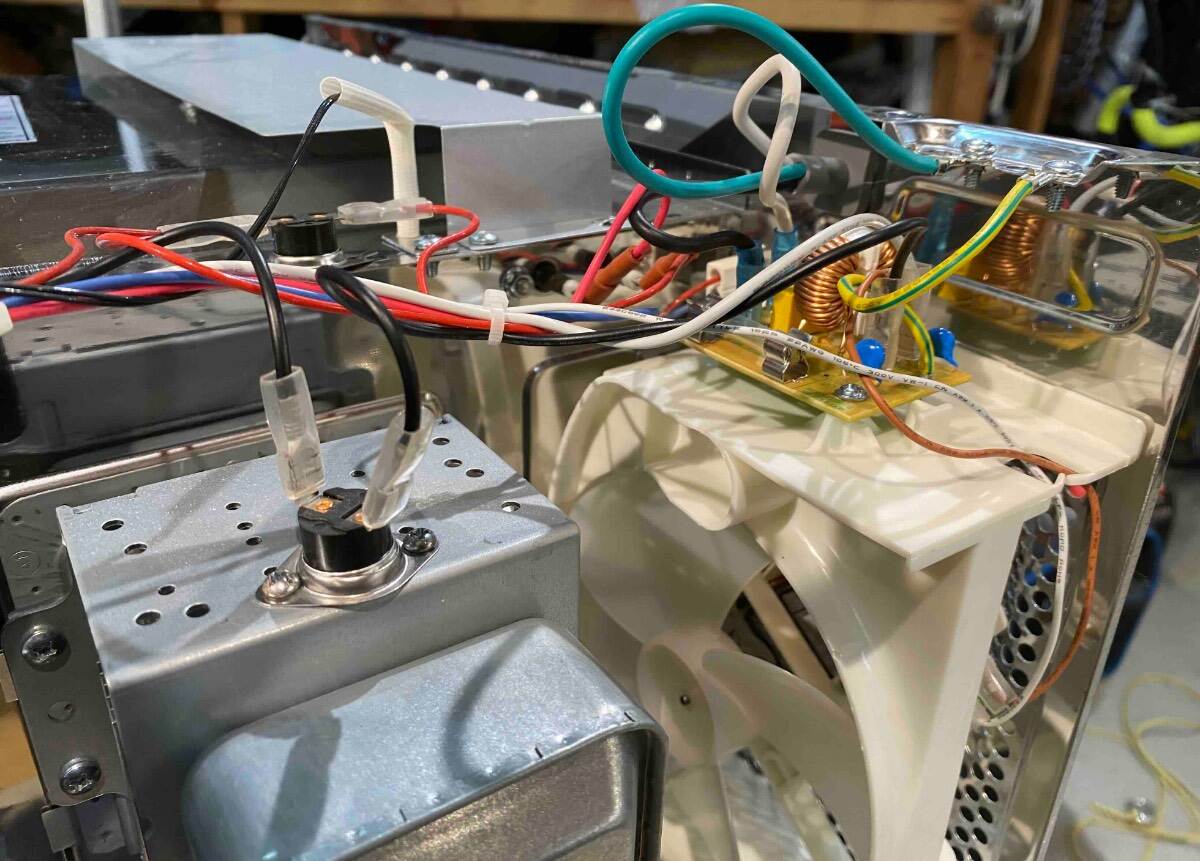
Sorry, I have got side track on this project. We went to Colorado first couple week in August. I left the Microwave in place and we decided to just microwave things. Well we had some frozen homemade soup, and forgot to thaw it out. My wife just put in the microwave at full power. After about 5 minutes, the Microwave popped the GFGI switch in the camper. It has never did this microwaving before. So this has happened on grilling, convection and now microwaving. After the trip I connected the microwave directly to a garage GFCI outlet with a 100' 20Amp extension cord, and tested again with the Convection. It popped and It seems to take more time to reset itself. So I started looking at microwaves to see if I could find a replacement microwave, but without removing it and taking outside dimensions. Also the size of the front panel and door needs to fit the trim plate, and cannot find that data online. So I stalled out, and planted more grass at home and then took another trip. I had a couple of days to play with the Microwave and pulled it out and removed all of the sheetmetal covering the unit. i looked at every wire, connector, PC boards and nothing looks a miss. No signs of over heating. I am not an Electrical tech or EE, so I can do a few basic things. First I was surprised that the PCBs were through-hole and not surface-mount technology. Last time I have seen a through-hole board was in the late 1990's. I found 3 thermal circuit breakers. One feeding the Grill mounted to the top inside sheet metal. This feeds the Grill burner only. I found another thermal breaker for the convection in the back next to the Convection fan on the cover of the Convection burner that protects the burner and fan. Then last and not least is the thermal breaker on top of the cover to the actual microwave emitter. This connected to the main incoming circuit. The power comes into the microwave and connects positive and negative to a PCB and the ground goes to the frame, and then another wire from the frame goes back to this PBC. There is a fuse and some other components that I don't know what they do. I ohm the 3 thermal breakers at 0.02 ohms and the fuse at 0 ohms. I decided to test the Microwave. I tried each mode with the covers off for about 15 seconds, ensuring all fans were working correctly and they were. I put the main cover back on and then used the convection mode at 350. It went 15 minutes, so I stopped it and put the rear and top heat shields/vents on and then restarted and went for 20 minutes, then started the grill and ran for 20 minutes. I changed the water for new cold water in the bowl and then used the microwave to heat the water for 10 minutes. The top left rear got around 130-140 degrees I am guessing. Hot enough that I could only touch for about 1 second but it did't burn me. The Microwave unit never failed. I measured the inside cabinet and the microwave, and found for the depth was less than 1/2" clearance. In fact I problems getting the microwave to set back in, and it was so tight that I think the cord got caught between the back. Also there is a little shelf in the back and the rear shield sets directly on it. covering up 1/2 of the rear vents. Also the way the side of the trailer slopes in I was very close to touching the top back side to the side of the trailer. Also Oliver had ground a small section out of bottom of the storage cabinet above so the top rear left corner would fit in there. Darn that is tight. I had never tried the convection/grill until I started this thread, but the previous owner did use the convection. I remove the microwave in may/june to add the refrigerator fan upgrade. When I used a coat hanger wire to go from inside the microwave area into the external fridge compartment for the wiring it dropped through and down into the fridge area without resistance. The taping inside the upper corners of the fridge was poor at best. So after I pass the wire and 1/2 sheathing from the switch panel down into the fridge area with no problems, i re-taped several areas long the top of the external fridge area, with higher quality aluminum tape and sealed this whole section up. I have probably been getting some CO in the microwave compartment from the propane burner in the fridge. I decided to seal the area between the microwave cabinet and the fridge exterior compartment with spray foam. I also think I sealed the area between the hulls when I did this so I was not getting any air coming up from the basement. I am thinking that everything was so tight in the cabinet, that reducing that small amount of possible airflow caused increased temp and the main thermal breaker to open. I'm not exactly sure how this popped the GFCI unless there was arching when it opened. I have thought about testing this theory, by running in convection mode with all of the covers off, and getting the main thermal breaker positioned so i can get a heat gun to heat up the breaker and see if it trips the GFCI breaker when thermal breaker opens. I am thinking of removing the small step/shelf in the back of the cabinet. Removing the white board in the back removing some of the bubble insulation behind the microwave and then digging some of the Foam insulation to possibly get some air-flow from the basement. Questions 1. Do you think I am on the right track? 2. If my theory is correct. and the Thermal breaker has been opening. Should I replace the thermal breaker just because it has opened at least 10 times in all of my testing? You can see the shelf in the back that covers the bottom vent holes, and the white panel in the back, as well as the foam I sprayed in on the sides. Back of the microwave, the sheet metal cover that sits on the shelf. The main thermal breaker and the PC board for incoming power.
-
I can relate. Many years ago, we headed south I -40, I was asleep in the passenger seat, my wife driving. I wake up - "what is that thumping?" Oh it started a min or so back! We pulled over, the tire on the boat trailer was just about gone, and the fender was toast. Lessons learned. TPMS is invaluable. RB
- Last week
-

Do Not Overfill Your Fresh Water Tank!
HDRider replied to Rivernerd's topic in Mechanical & Technical Tips
I had the cutout plug in my black tank. Luckily it flowed out without too much trouble. -
I do miss the comfort of the RAM Air on the 1500. Plush.
-
I've towed our Ollie with a RAM 1500 gasser for 2.5 years (see map/signature below). We're from FL, and on flat land we get 13 mpg towing at 65 MPH highway. Tows like a dream. In mountains, it still handles very well. But mpg is dramatically worse and you either have to rev like crazy or slow down. I slow down (and dream about upgrading to a 2500). The RAM 1500 is also a very comfy daily driver. Best of luck.
-

Fresh Water Tank Overflow Condition
Steph and Dud B replied to Wayfinder's topic in Mechanical & Technical Tips
The screen should be at the end of the tube, not part way up. Plenty of room for a wasp nest below that screen. -
I have created a Google My Map of known Oliver owner rallies as well as a link to the fiberglass RV Map maintained by another. For that external map, see the RED star icon in the Atlantic ocean. It will take you to the google map for general fiberglass rallies for 2027. The map I created is a private map, and only those with the link will be able to find it. Then again, this is an open forum, so forget what I said. All this info is public knowledge. https://www.google.com/maps/d/edit?mid=1dsUQmPEsXOhV3KgTIkwI1QzIeWChkCw&ll=38.15274742744178%2C-102.1311338875&z=5 This should be for open rallies only. If you want a private rally, then don't tell anyone you don't want to show up. 😉 A life lesson. Let me know if you want anything added or suggestions for changes.
-
Yikes! As late as last fall they still had the $18 flat fee no matter the order size. Any time I needed something, I’d tack on a box of nuts, bolts, or washers in a size I was short on to offset the shipping. I guess I’ll be buying even more fasteners the next time! 🤪
-

Fresh Water Tank Overflow Condition
Geronimo John replied to Wayfinder's topic in Mechanical & Technical Tips
keeps the bugs out of your water system. GH -
Shower drain pipe: Is this normal?
Geronimo John replied to John and Jodi's topic in Mechanical & Technical Tips
Assuming the tank is still secure in it's original position I have to agree. That is clearly a MFG Latent Defect. OTT needs to determine the obvious and fix your issure despite the warranty being out of play. In the past, they certainly would have. Suggest elevation of the above relivant posts to Jason E. GJ