All Activity
- Past hour
-

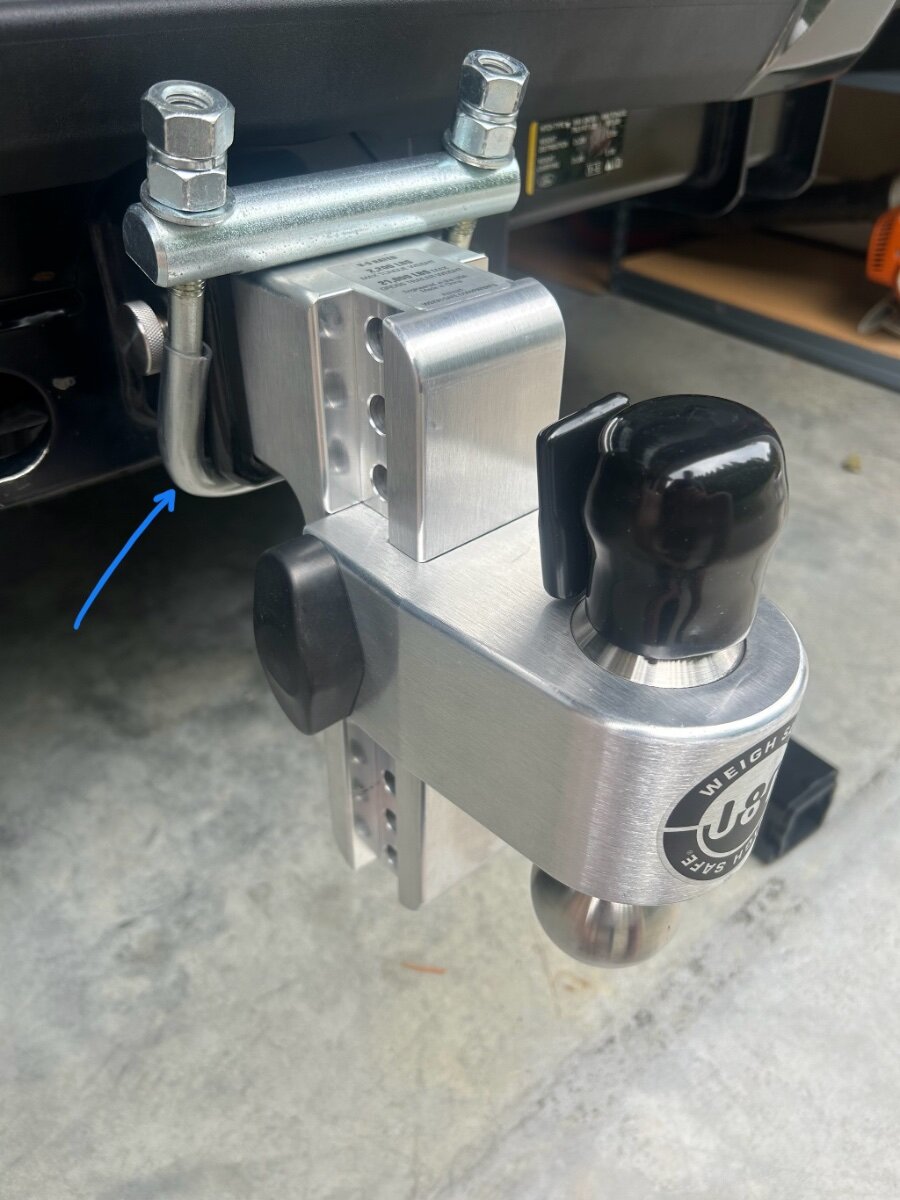
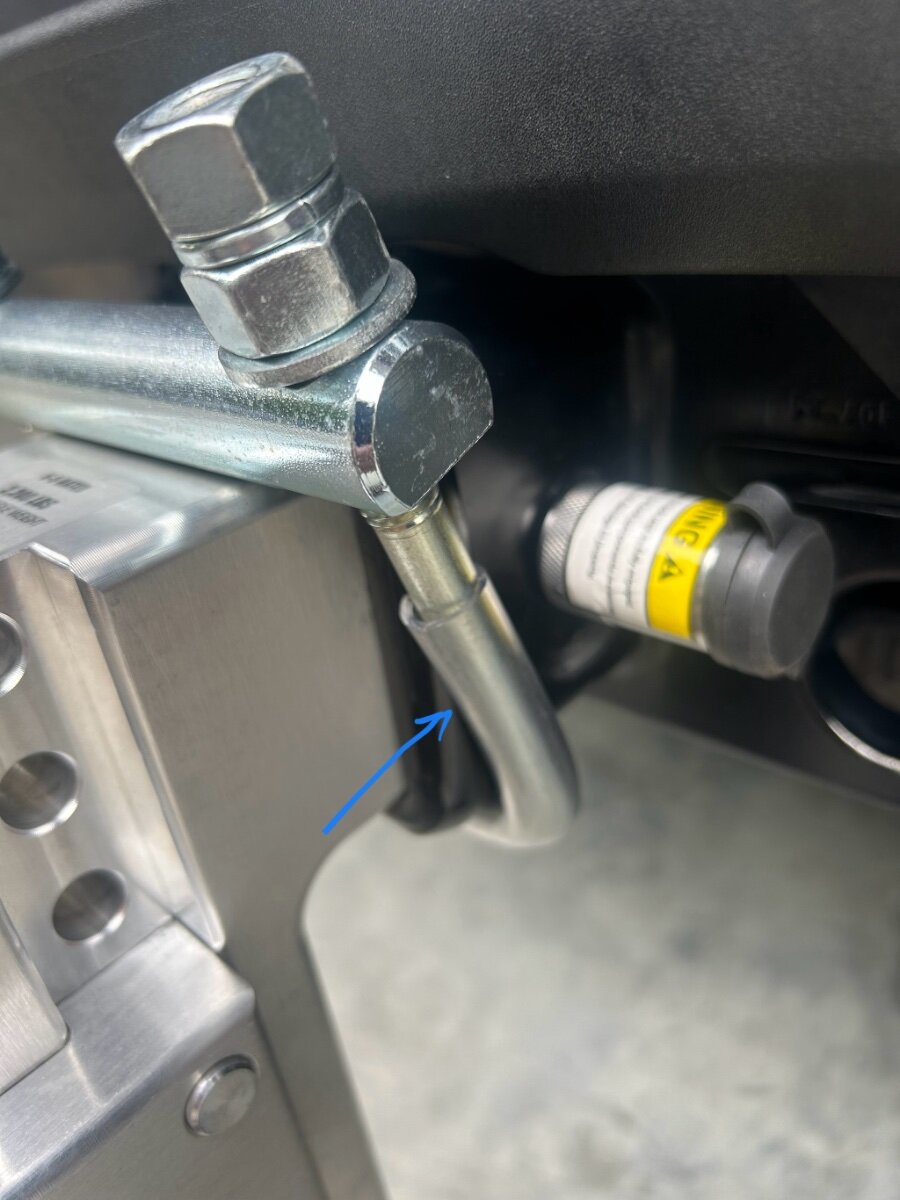
Weigh Safe 180 Aluminum hitch with 3” shank, 10” drop
Patriot replied to Patriot's topic in Towing an Oliver
Field use follow up. After towing our OLE2 I can report that the hitch 3” hitch clamp worked exactly as designed. The 3” shank while inserted into the 3” receiver is completely silent while under way. Win! It’s recommended to periodically check the clamp fasteners which I did. They stayed tight the entire trip. I opted to add a short piece of plastic tubing to insulate the bottom of the clamp from metal on metal chaffing the bottom of my receiver. (Pic) It took a little while to get this tubing to cooperate while sliding it on to the clamp. I warmed the tubing up in hot water which made it a little easier. I am satisfied with the outcome.
- Today
-

3500 pound versus 5200 pound axles on a LE2
John and Debbie replied to John and Debbie's topic in General Discussion
Ours does have D52 so we have the 5200 pound axles on our 2022 hull #1290 -
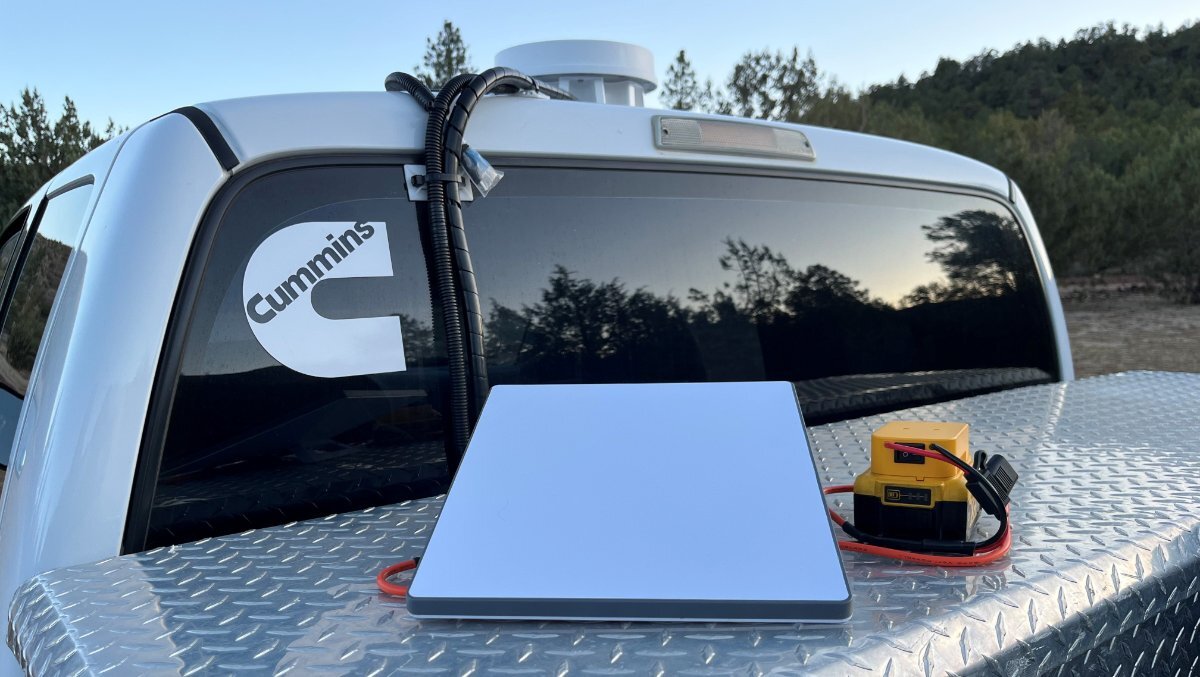
Thanks, Geoff I'm now refocusing on the Gen3 because of obstacle interference, it's going to come down to "Does the larger unit actually receive any better with partial tree obstruction?" Wish us luck :)
-
I see the Starlink Gen 3 Step Up Converter on line and it seems a pretty easy install!
-

Installing Pioneer Inverter AC
jd1923 replied to Treasure Coast Vault's topic in Ollie Modifications
I read a review today, after reading several I forgot where. The reviewer stated one con was that the internal fan speed was constant, not variable speed. This comment upset me if true. I woulda thunk variable speed compressor and external fan should have a variable speed interior fan, allowing the interior fan to match the cooling needs as the inverter compressor does. This may be why it is not as quiet as could be and he denoted it as an area of improvement. Anybody here know more? -
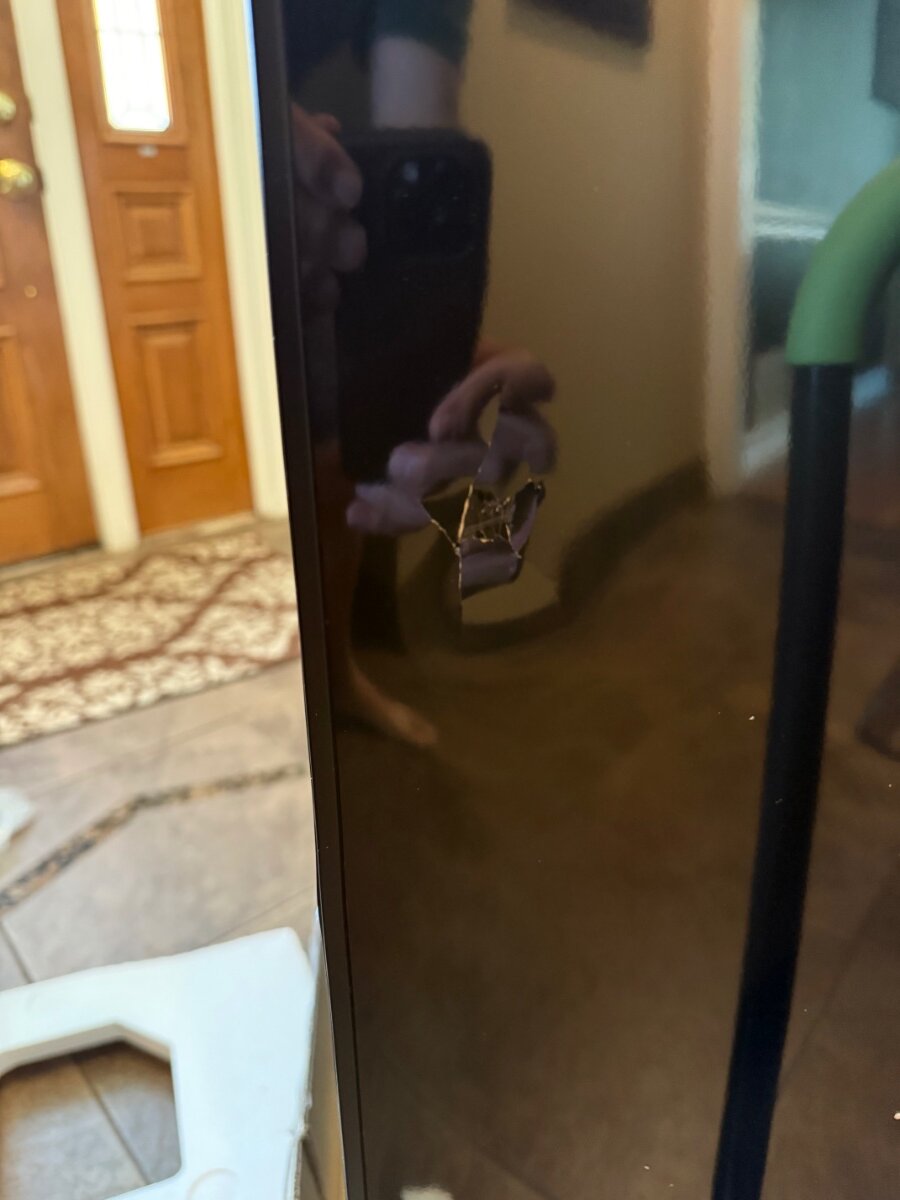
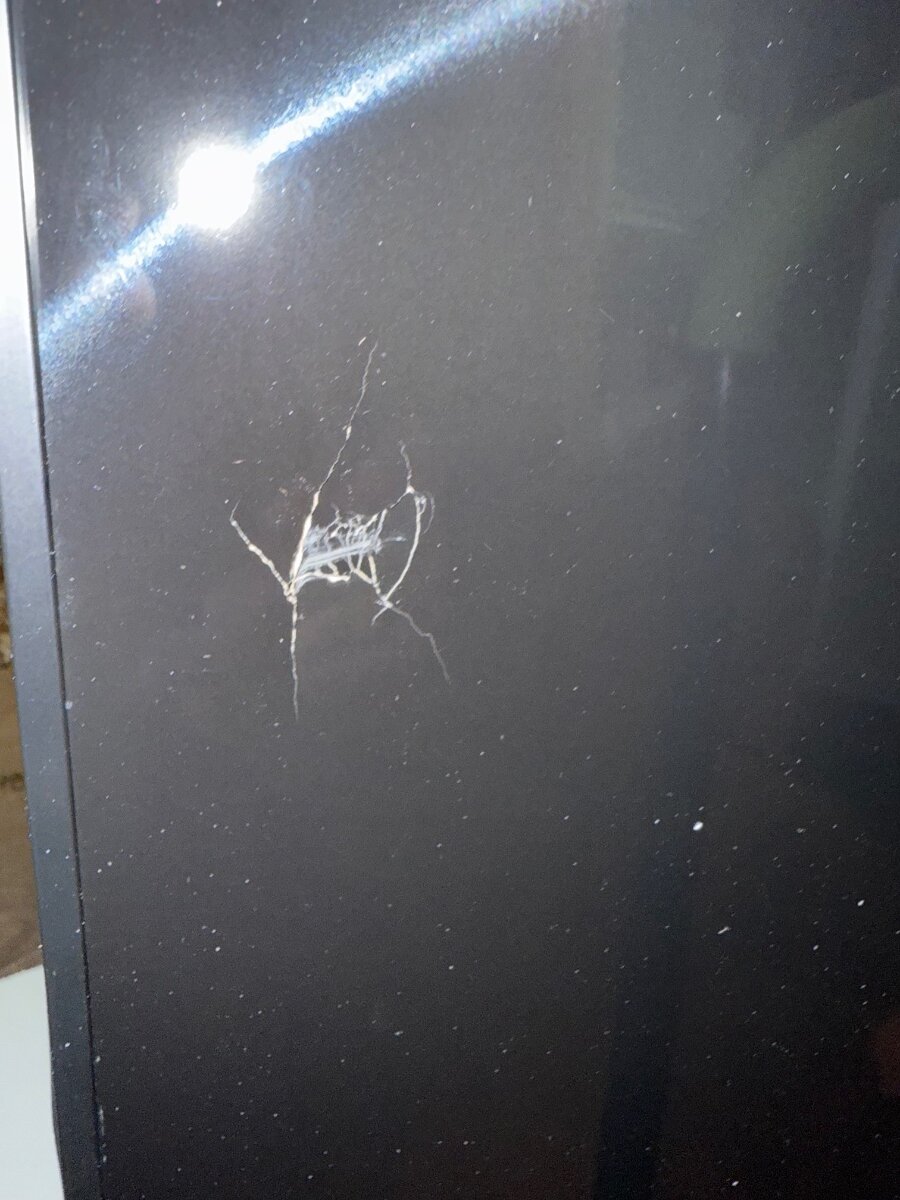
Not going to be one of those people who never closes out the thread… My adult supervision found out that the Dometic was not going to be available any time soon. (She really wants a working fridge.) She also had concerns about a situation where I was going to be in proximity to Hull 1364 wielding a jigsaw or an oscillating tool. (And I don’t even have an oscillating tool, so now I’ve lost my (current) excuse to get one.) So - after all my pledging to never own another Isotherm, I am now the proud owner of a new isotherm with a damaged in shipping door. At least they are going to replace that. Hopefully the information in this thread will be helpful to others. Watch for a new thread asking the smarter than me people on this forum questions about how to make my new Isotherm (which because of supply chain issues is 12v only) operate on shore power. 🙂
-
Cut the cord! 🤣 (I also purchased the Mini Router per @Snackchaser post proving its use, but have not had the time to pull it out of its packaging.)
-
Hi John, We cut the cable years ago, and I’ve used the larger units, Gen-1 and Gen-3 for the Oliver. Now I use the Mini exclusively with no complaints and we still keep the Gen-3 active at home for security devices and guests while we're away. The Mini, with it’s built in Routrer, looses speed the farther away it is. This is due to the WiFi signal dropping off. So if you go with the Mini Dishy, then I recommend getting a Mini Mesh Node Router for $40 because there are times when you will need to move it farther away to find clear sky. See my post: The new Starlink Mini Router, for what ails you. Starlink Beam Switching keeps improving and there are increasing numbers satellites so reception keeps improving and the Mini seems to work as well as the Gen-3 in that regard. My Mini isn’t quite as fast as the Gen-3, but it’s still blistering fast, and way faster than most cable connections. There are a number of options to run the Mini from the trailers 12 volt system. You just can’t use the included 50’ cable because of voltage drop without boosting the voltage. You can do that with a voltage converter to increase voltage, or one of the available power supplies, or use a shorter cable. Hope that answers your questions! Cheers! Geoff
-

Battery and Solar Disconnect Install Questions
Galway Girl replied to Tony and Rhonda's topic in Ollie Modifications
Our installed wires from solar were 6awg zip line. The original terminals were 6awg so I left them in place. -

Battery and Solar Disconnect Install Questions
Tony and Rhonda replied to Tony and Rhonda's topic in Ollie Modifications
This was/is @dewdev's idea. I haven't pulled much wire but there seems to be plenty and this location may actually be a shorter distance to the panels. After watching the EXPLORIST Life switch installation video recommended by @rich.dev I wanted the dual circuit switch but I did not want the big breaker box as installed on EXPLORIST Life. Your m6010 switch uses the same size hole as my m6006 so I may change it in the future. @Galway Girl What gauge is your solar wire? Mine is 6awg and as far as I can see, they are separate wires, not the dual bonded wire in your photo. After looking at the crimps on the (undersized?) Zamp ring terminals, I don't want to reuse them. Perhaps the installers ran out of some supplies and made it work with what they had? @dewdev stated his solar wire is 8awg. Is that what most have? -
The convertor converts your onboard 12v DC to 57v DC so no AC power needed at all.
- Yesterday
-
Thanks, CRM, We full time and our address is an UPS box back in SC so we would be totally "roaming". The 12v converter you mention would connect to A/C I suppose? so I have the choices of shore power, the trailer inverter (2000W) or an Anker 1056 WH Solix power bank to provide the A/C. Guess it's going to come down to performance differences. Thanks, John
-
We went with the Gen3 for a couple of reasons- you can switch between residential and roaming plans with it, and the residential plan is less expensive with higher bandwidth. As of now you can't do that with the mini. The Gen3 is supposed to have better performance though I can't give an opinion on that since I've never had a mini to compare it to. Also, you can run the Gen3 off of 12v DC with a convertor though it will still use about 20-30 watts more than the mini does. When it comes to the residential vs roaming, *so far* we've been lucky and haven't had to switch to a roaming plan when we hit the road. We just change the service address from our home address to the campsite and it works within minutes. You can do this an unlimited amount of times but must be prepared to be denied access if the area you are in is not allowing any new residential connections. If this ever happens we would just change to a roaming plan until we got back home.
-

3500 pound versus 5200 pound axles on a LE2
John Dorrer replied to John and Debbie's topic in General Discussion
-
I WAS going to break down and get a standard unit this week, but....in light of David's post on beam switching I may have to do a little more research. I had gravitated to the larger Gen3 because I would prefer the stronger reception and upgraded router. But the mini has the advantage in size and weight savings. And the DC power ability. And less equipment re the built in router. Does the larger unit actually receive any better with partial tree obstruction? We are not power users but we do stream a good movie occasionally. This beam switching seems like it could bring me back into the "mini" market. I finally talked Wendy into the Starlink technology so I want to make the smartest choice. We've boondocked 4 out of 7 months this year and have had really spotty connections with our Verizon unlimited plans. They work very well if within reach of their towers. How long of a cable can be used to move the mini dish to an unobstructed site? Is there anyone who switched from the larger unit to the mini who wishes they had stayed with the larger? Thanks for any help, John
-
To add to this topic, In 2019 Models Oliver didn't install a solar cutoff switch. I've posted a how to add a solar cutoff in this blog post. link below: https://4-ever-hitched.com/blog-articles/f/install-a-solar-cutoff-switch#ba015e70-35c6-4ccf-a9f3-b05f12d7eb30 Craig - Hull 505 - Galway Girl
-

3500 pound versus 5200 pound axles on a LE2
Gliddenwoods replied to John and Debbie's topic in General Discussion
Alcan said they contacted Dexter and Alcan said Dexter my Oliver did not have Nev-r-lube. In addition others had a different opinion of both you and Alcan. So I went on a mission to determine for myself even tho you, and others, were so sure of themselves. Not until late this morning did I determine for sure I have both. Oliver websites have alot of "experts" who are often wrong. -

Installing Pioneer Inverter AC
Treasure Coast Vault replied to Treasure Coast Vault's topic in Ollie Modifications
I don't think the numbers will change one bit. It cools the Ollie so effortlessly there's not much load in cooling an insulated cooler! ;*)) -
Tech moving fast with beam switching. 👍🏻🇺🇸 https://www.dishytech.com/starlink-beam-switching-upgrade-improves-reliability-for-obstructed-dishes/
-
Battery and Solar Disconnect Install Questions
Galway Girl replied to Tony and Rhonda's topic in Ollie Modifications
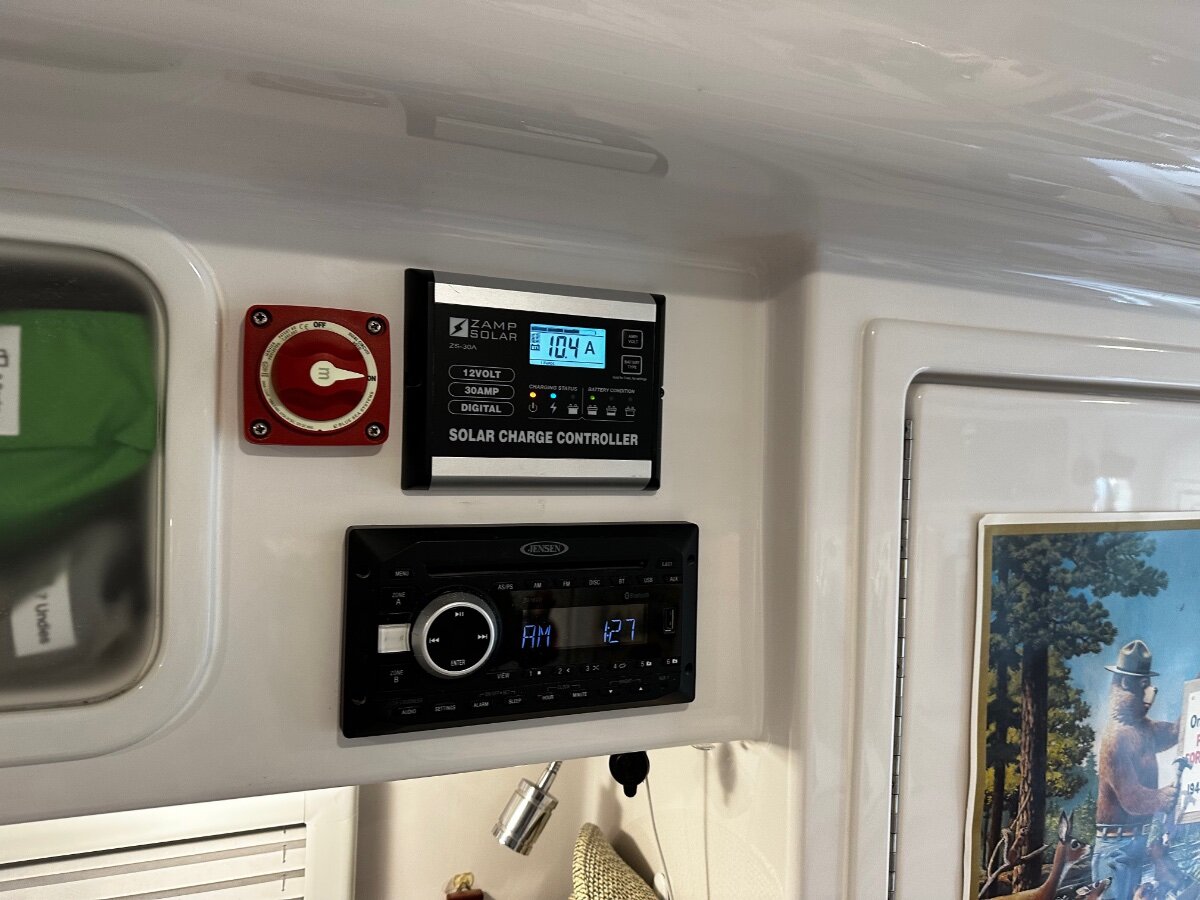
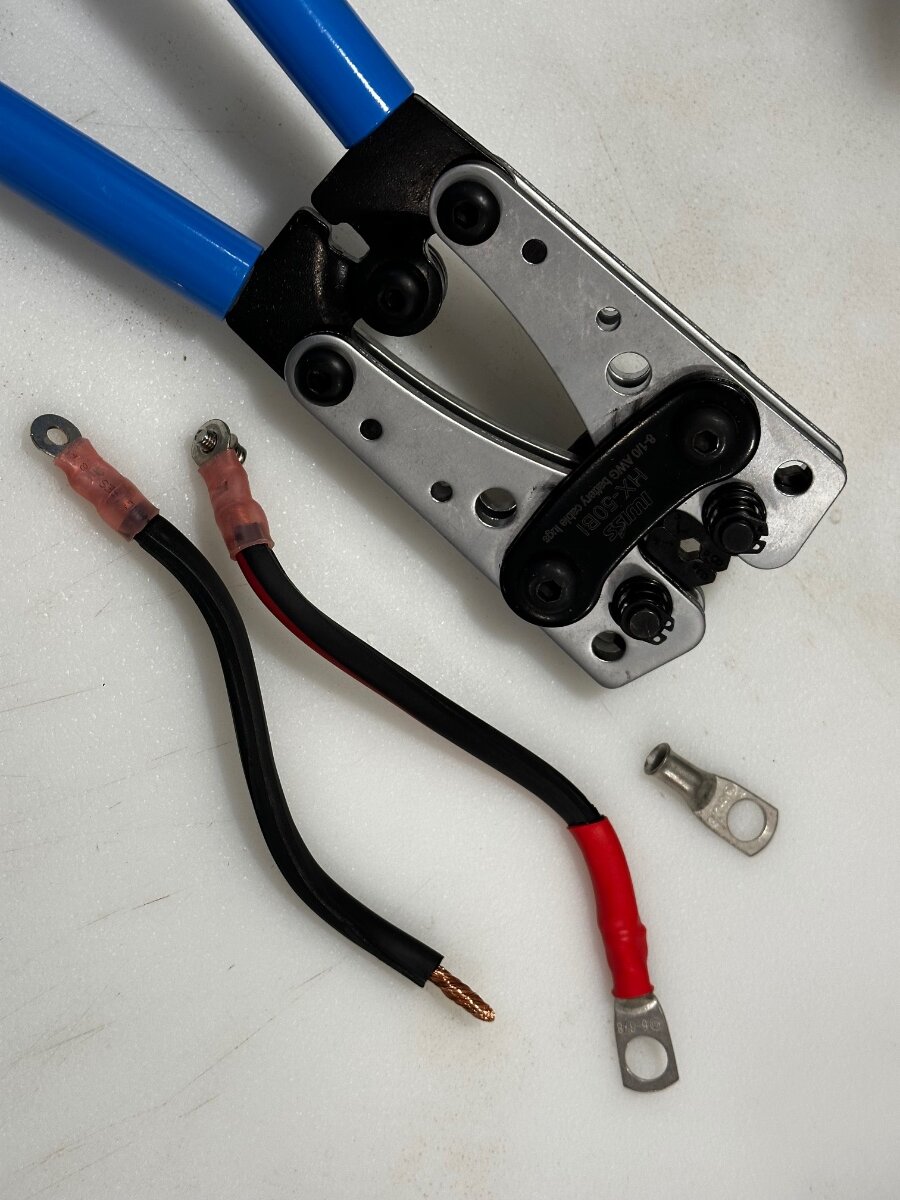
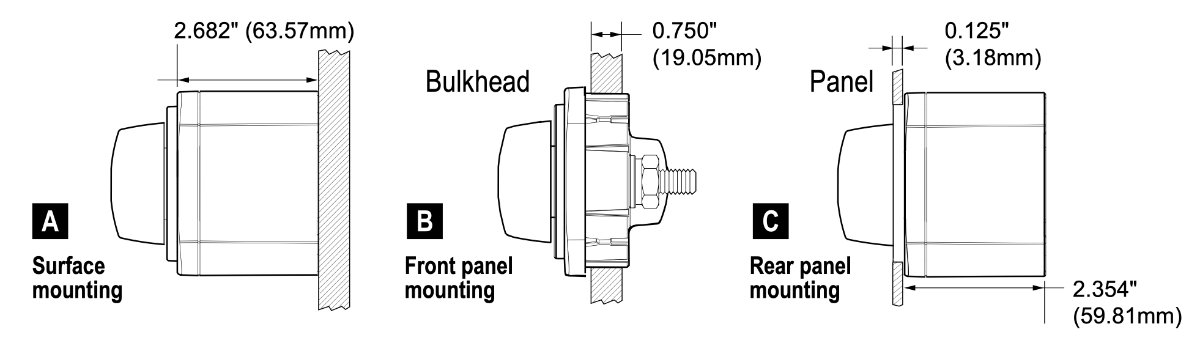
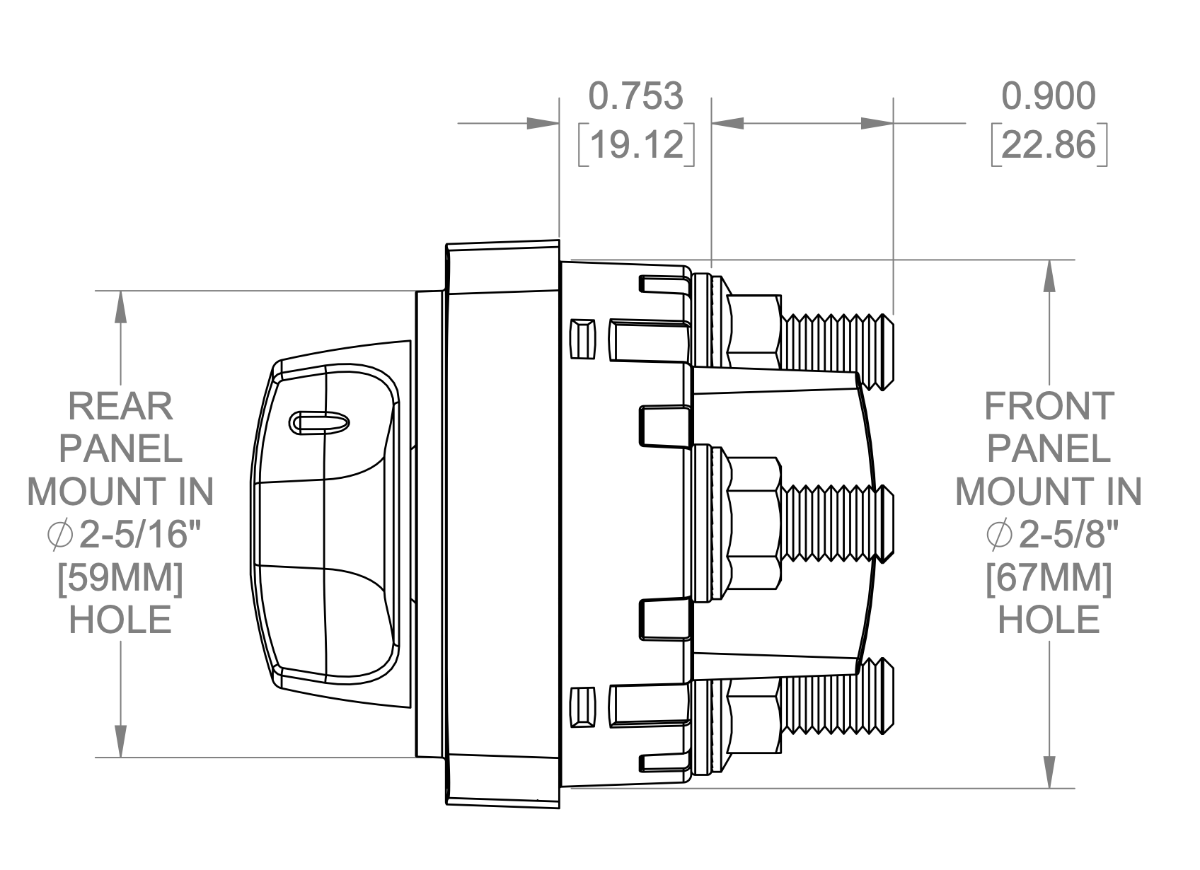
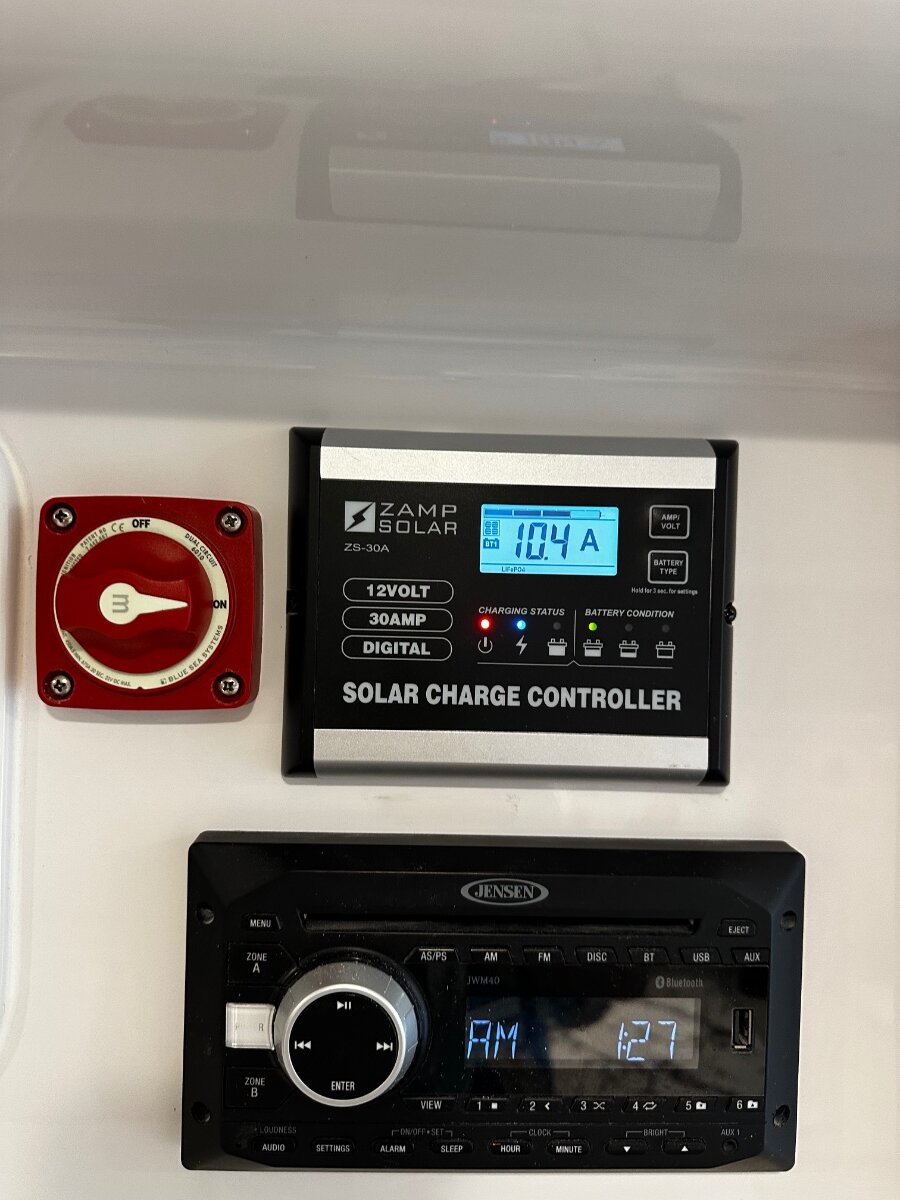
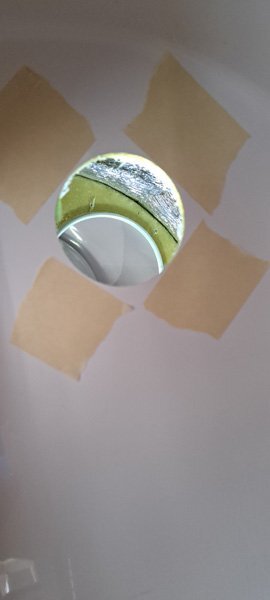
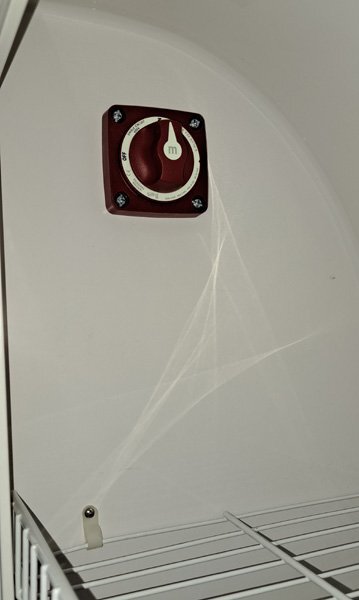
I like where you put your unit in the side of the pantry. I assume you had enough original lead wire coming from the solar panel to reach over to that wall. In hull 505 they left a ton of wire for the run after the controller down to the battery, but not an extra inch on the roof solar leads. I also just finished the installation of a Blue Sea Dual Circuit Cutoff Switch m 6010 and then read your post. Thanks for showing the pix ! Full Blog Post here: https://4-ever-hitched.com/blog-articles/f/install-a-solar-cutoff-switch?blogcategory=Electrical+Upgrades After inpecting the space I decided to mount the switch to the left side of the Zamp solar controller. A bit ugly but very visible to anyone using the trailer. I'll be adding a label just above the switch for instructions. Finished Installation Below - M 6010 Blue Seas Dual Circuit Cutoff Switch mounted as a bulkhead mounting. Here are a few "in the process" photos and the steps taken for this installation: SWITCH USED: Blue Sea Dual Circuit Cutoff Switch m 6010 WHY: The code for Solar Cutoff is that the switch must disconnect both legs of the solar panel leads. This means a dual pole (dual circuit) switch is recommended. Buy it from Amazon: Blue Sea 6010 Dual Feed Switch Mounting considerations: This switch can be mounted in 3 ways... I chose the middle - bulkhead front panel mount - for ease of installation. 6010 Blue Sea Switch Dimensions - Front Panel Mount hole saw size is 2 5/8". Installation Process: 1) Covered the solar panels with cardboard so the panels were dark with no voltage output. 2) Unplugged trailer from Shore Power and turned off the Lithionics Batteries. 3) Removed the 2 screws holding the Zamp Controller and inspected the space for positioning of the switch. 4) Decided based on my particular situation to cut off 5" of the leads coming FROM the Solar Panels. I reuse the cut portion leaving on the Zamp connectors to connect between the switch and the input side of the controller. (Note: If you have a bit more length on the input solar cable, it would be better to have about 8" of cutoff to make mounting the switch easier.) Here are the leads being prepped that will go from the output side of the switch to the input portion of the Zamp controller. The switch has 3/8" (M10) lugs, so I crimped #6 x 3/8" lugs to each of the cut wires. Heat shrink was added to each. (Note - I left the Zamp output leads mounted to the controller as they were and just checked for tightness when re-installing Zamp into mounting hole.) 5) Mounted the leads back onto the controller. Crimped the leads onto the lines coming from the solar panels. Next phase is drilling hole and mounting the switch. 6) Prepared and drilled the hole at the centerline of the controller and centered on the empty space. As I was doing a front mount of the switch I needed to use a 2 5/8" hole saw to match the engineering drawings for the switch. The bag at the bottom is to catch the shavings that come out the front as the hole is drilled. 7) Attached the input leads and output leads to the switch and tightened using a 14mm Deep Socket. 8. Mounted the switch by predrilling holes and then attached with stainless pan head #10 screws / 3/4". (Note - I drilled the holes slightly smaller than the screw so they had bite. You can also just drill holes and use stainless bolts with lock washers on the back side.) 9) Go remove the covers from the solar panels and test....voila you now have a solar cutoff switch for storage and safety while working on your electrical systems. Craig Hull 505 - Galway Girl
-
I think the highest watts draw the engineer in the Youtube video was able to see at max power was around 1100. Still far less than any of the single speed compressor units of comparable size. In our small insulated spaces I'm guessing we would be consuming around 500-700 most of the time once setpoint is met.
-

Installing Pioneer Inverter AC
Ronbrink replied to Treasure Coast Vault's topic in Ollie Modifications
I suspect the “numbers” will increase somewhat as the compressor will work harder to reach and maintain temp in ambient conditions. However, likely less than what is typically seen with conventional units. -
3500 pound versus 5200 pound axles on a LE2
John Dorrer replied to John and Debbie's topic in General Discussion
I have shared with you numerous times that 2022 LE2 's have: 1. 5200 lb. Axles 2. Nev-R-Lube axles/Hubs 3. Nev-Adjust brakes This was confirmed by Oliver. Your Hull # is 200+ after ours. Since I'm responding to this again, why are you replacing springs? The problems were with old Oliver's with the 3500 springs. You have the beefer axles and shouldn't need to replace them at this time. Unless you are planning to drive to Alaska, or drive wash board roads, and/or chemically treated roads, you shouldn't need to replace them. -
3500 pound versus 5200 pound axles on a LE2
John Dorrer replied to John and Debbie's topic in General Discussion
According to Oliver all 2022 LE2 's received 5200 lb. axles, with Nev-R-Lube axles/hubs, Nev-Adjust brakes. His trailer is 200+ Hull #'s after ours😊 -
Battery and Solar Disconnect Install Questions
Tony and Rhonda replied to Tony and Rhonda's topic in Ollie Modifications
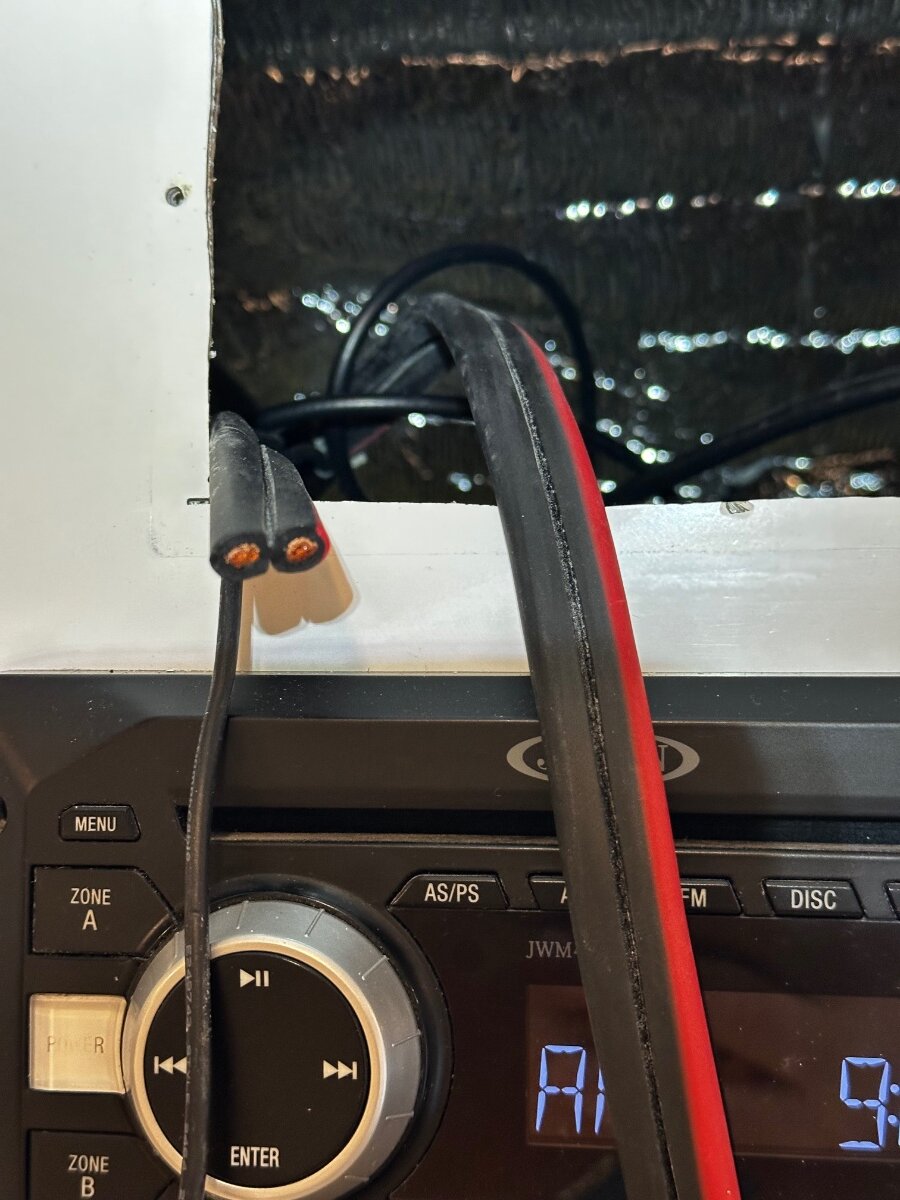
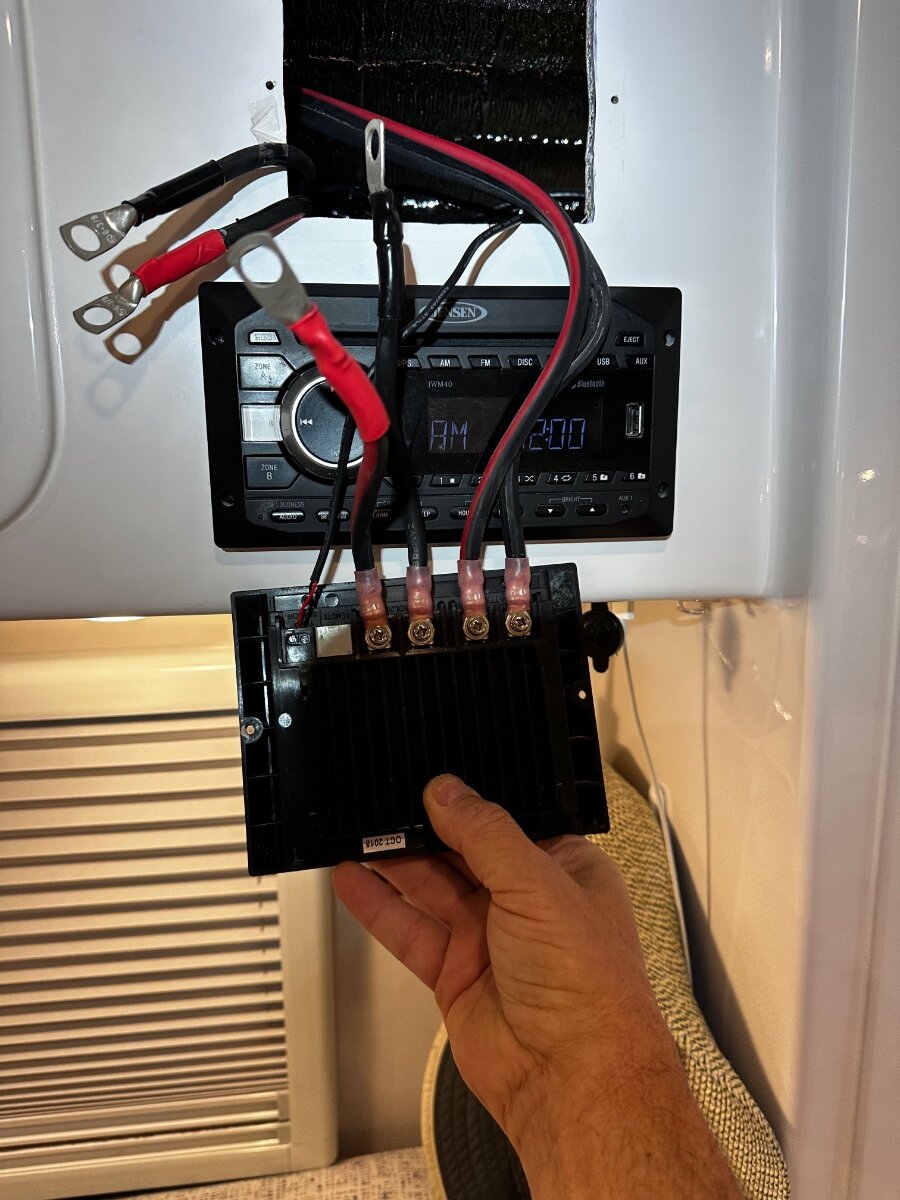
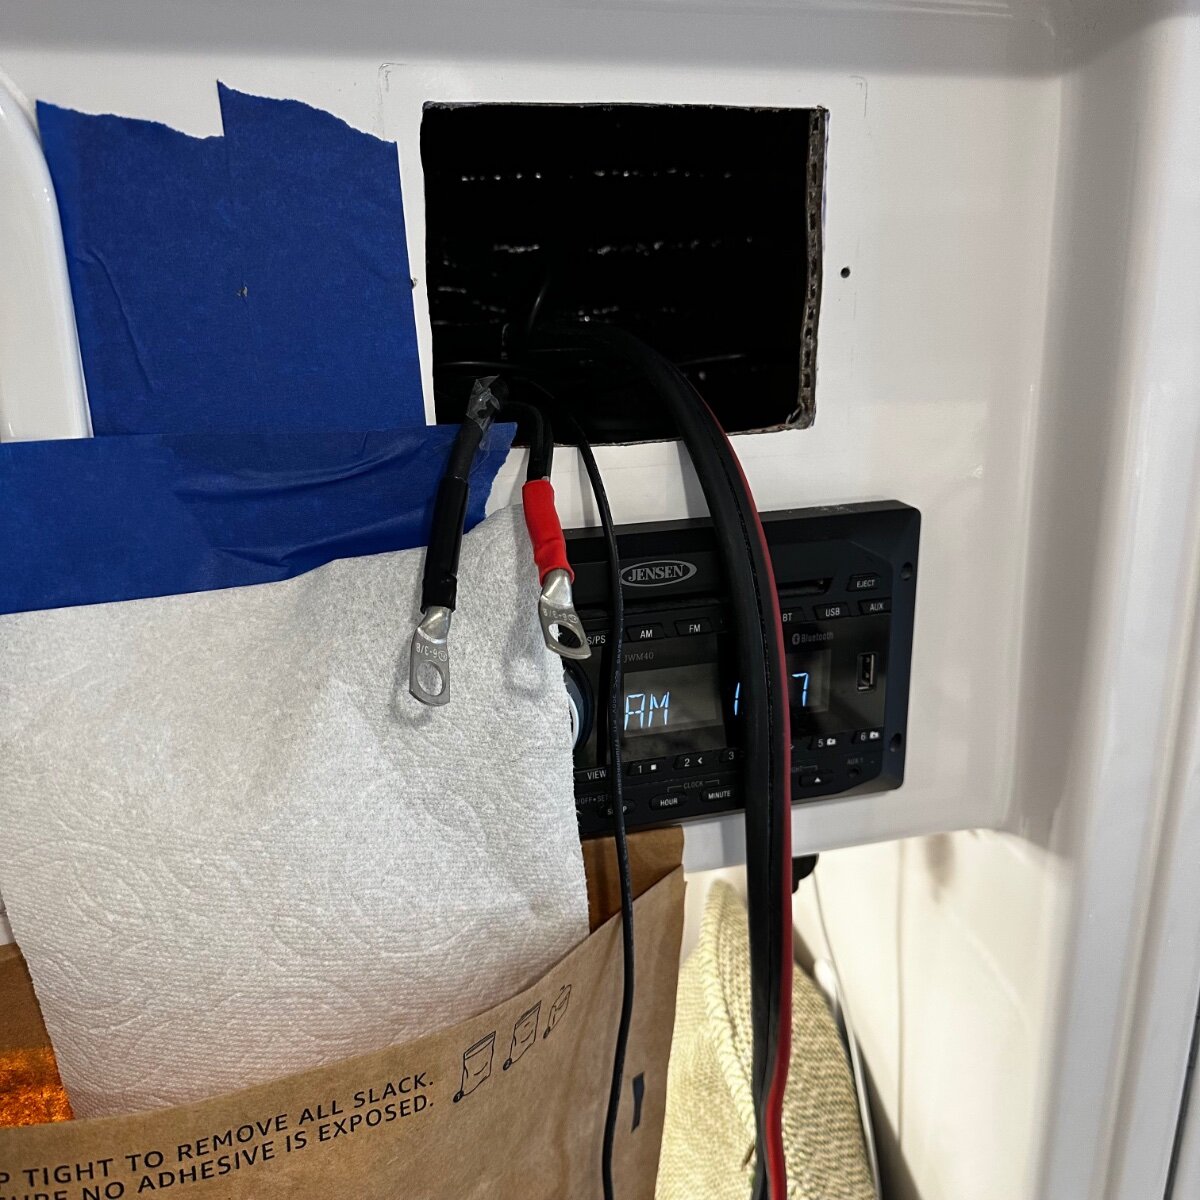
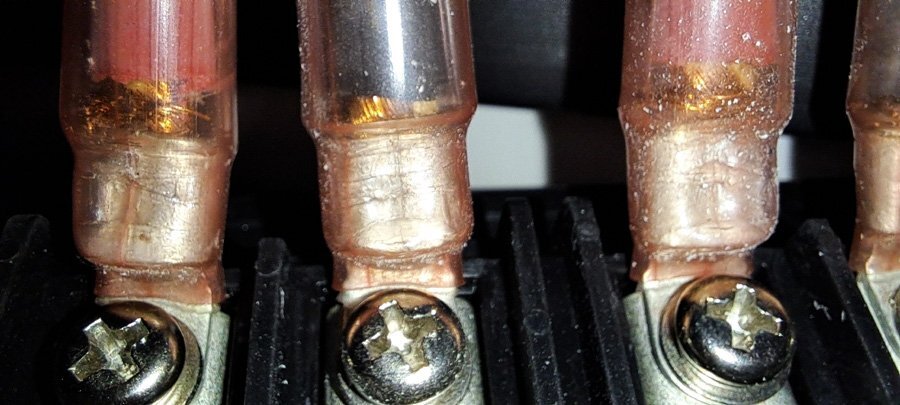
I'm happy to report progress on my solar disconnect switch. I've drilled my first hole in our Oliver. And installed the switch. Unfortunately I ran into a problem as I was making the short wire between the 3/8" ring terminal post on the BlueSea switch and the ring terminal to the back of the Zamp. I ordered 3/8", 5/16" and 1/4' ring terminals for the 6awg wire attaching to the back of the Zamp. Unfortunately it uses 3/16". They should be in today. I also noticed something that makes me a little concerned about the solar wiring safety. I'm not an electrician but this install does not look like it was done by an electrician either. If you look closely at the red (+) wire connections in the photo below, it appears at least a couple of the ring terminals used on the 6awg solar wire are under sized. It's hard to see but the "excess" wire strands are wrapped around the ring terminal and covered by heat shrink. The black (-) wire connections look OK. Not sure if this is common practice but it seems unsafe and more like a DIY rather than a professional install. I haven't removed any of these ring terminals yet but, but once I do, I'm going to cut off the heat shrink to examine this more closely


.thumb.jpg.e34bf01ef7f7d5e99ad31856d45afbeb.jpg)