
Leaderboard




Popular Content
Showing content with the highest reputation on 05/15/2019 in Posts
-
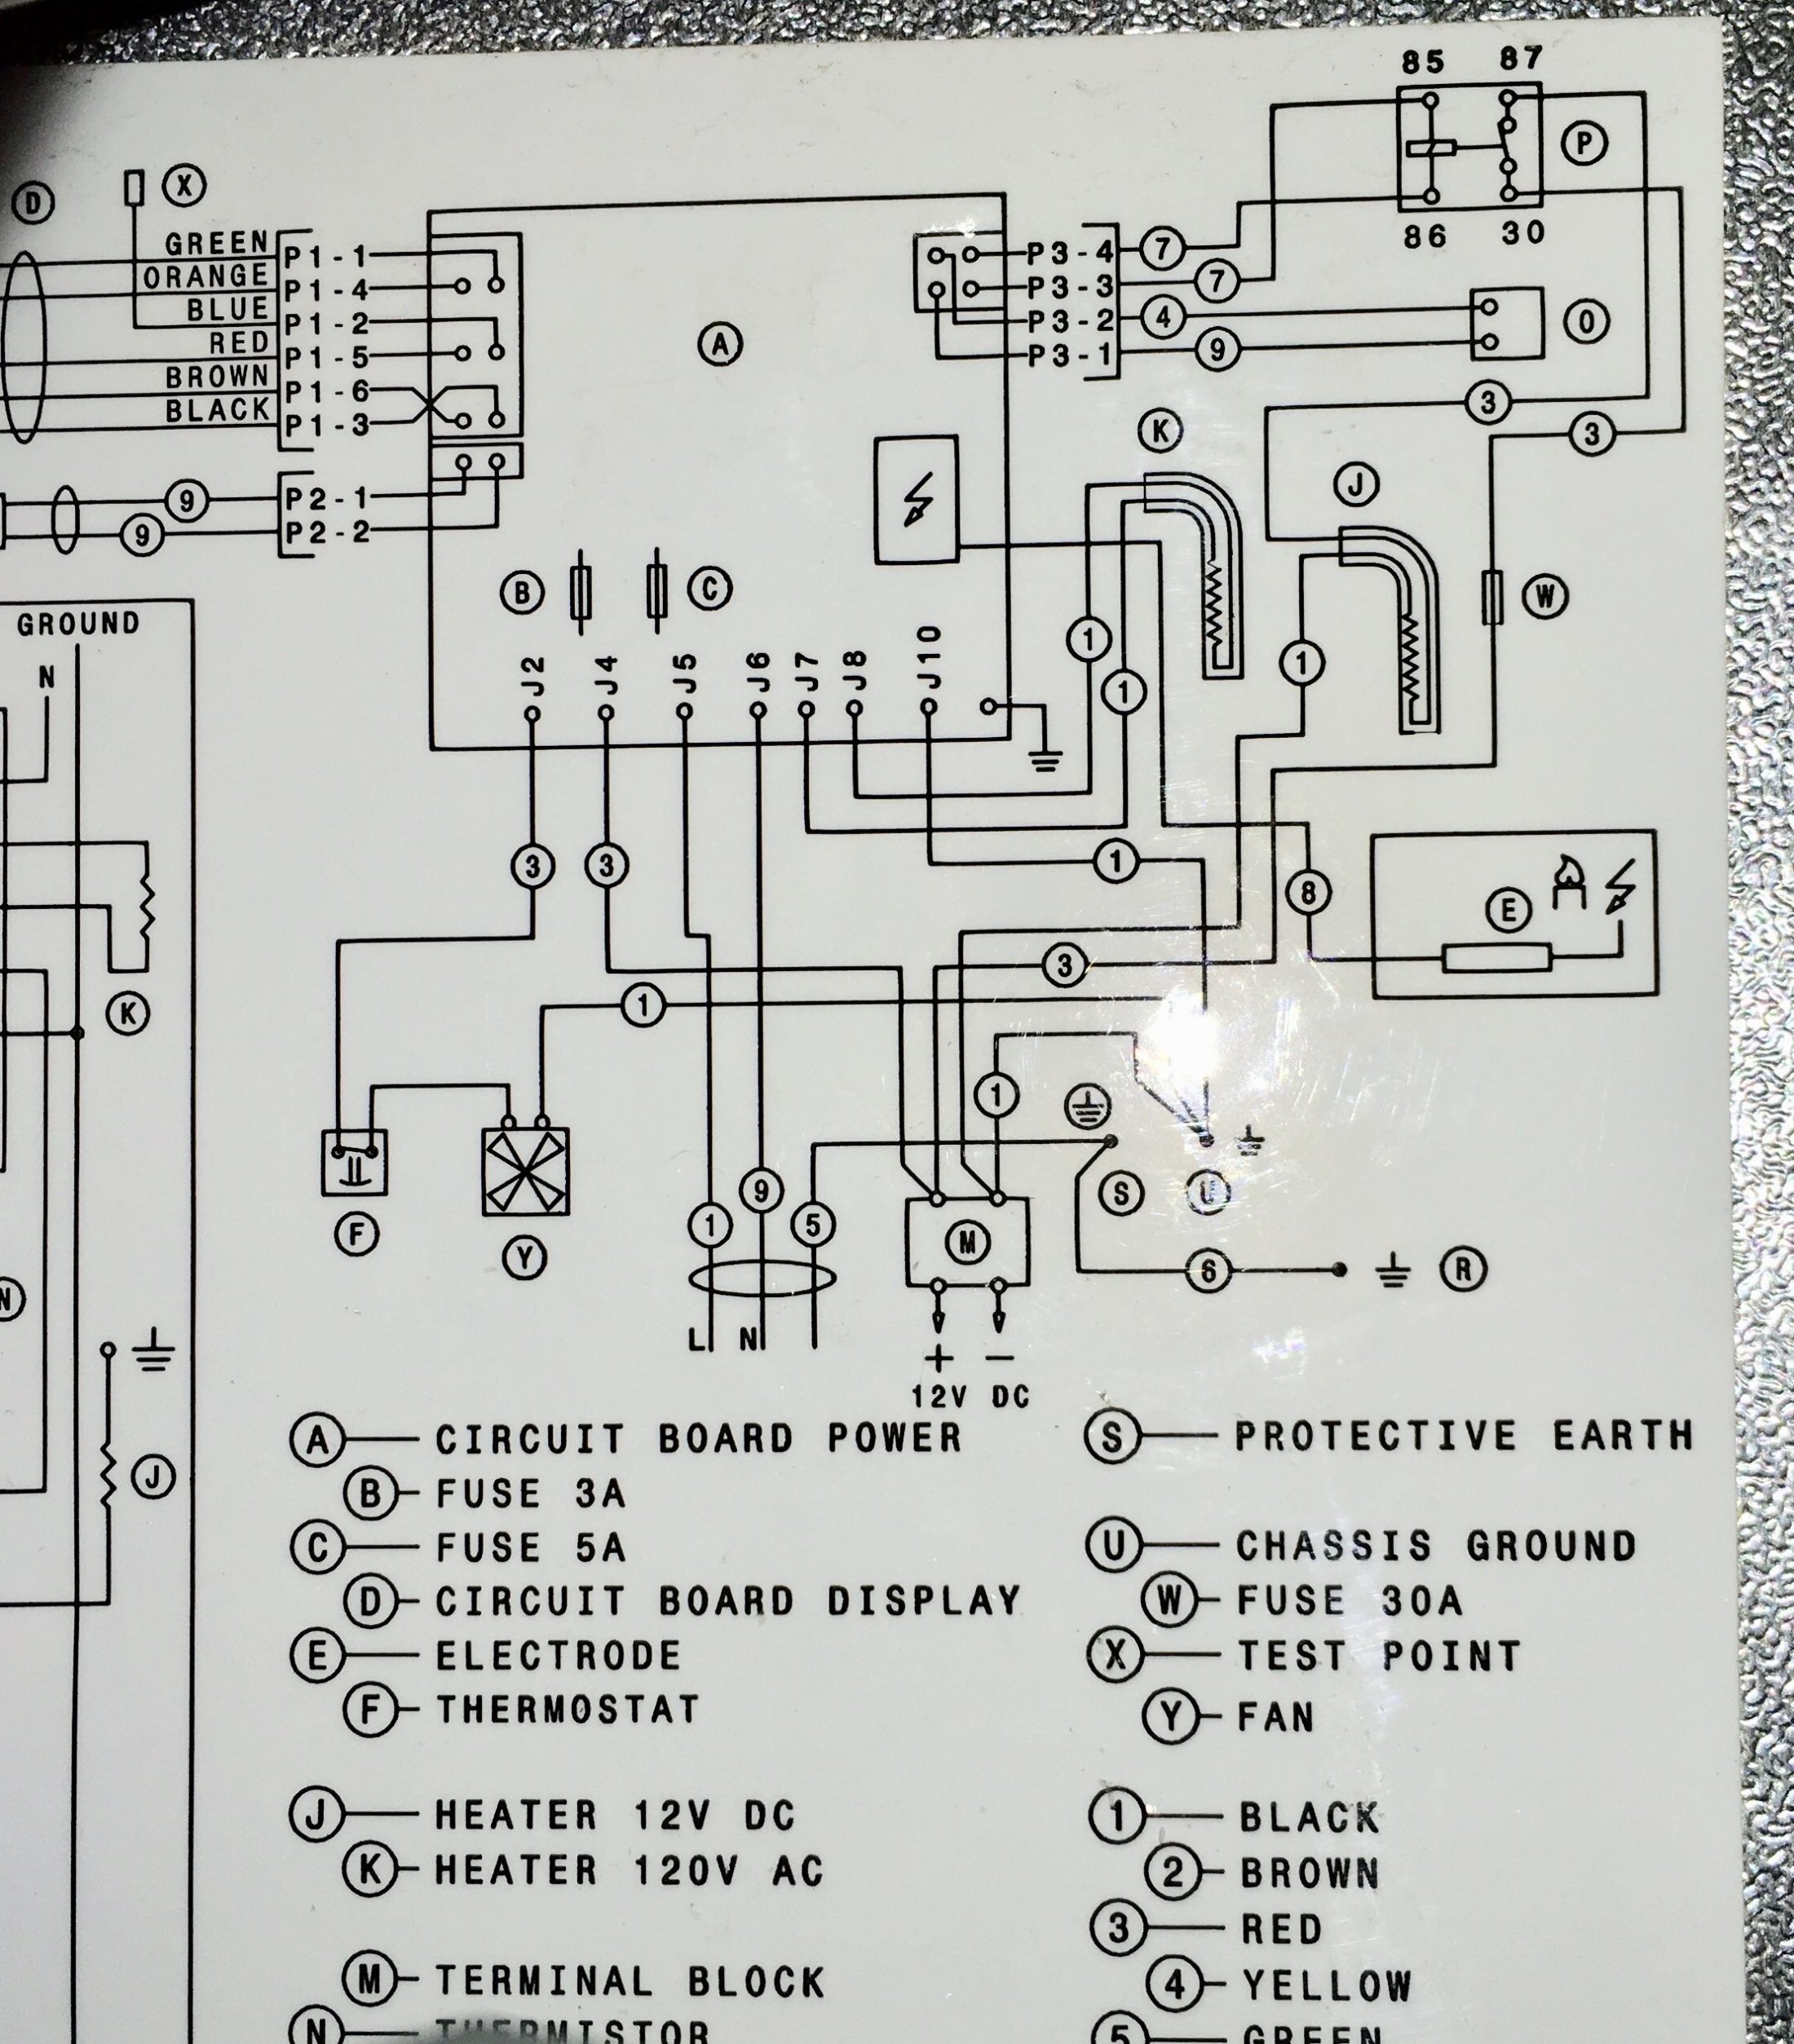
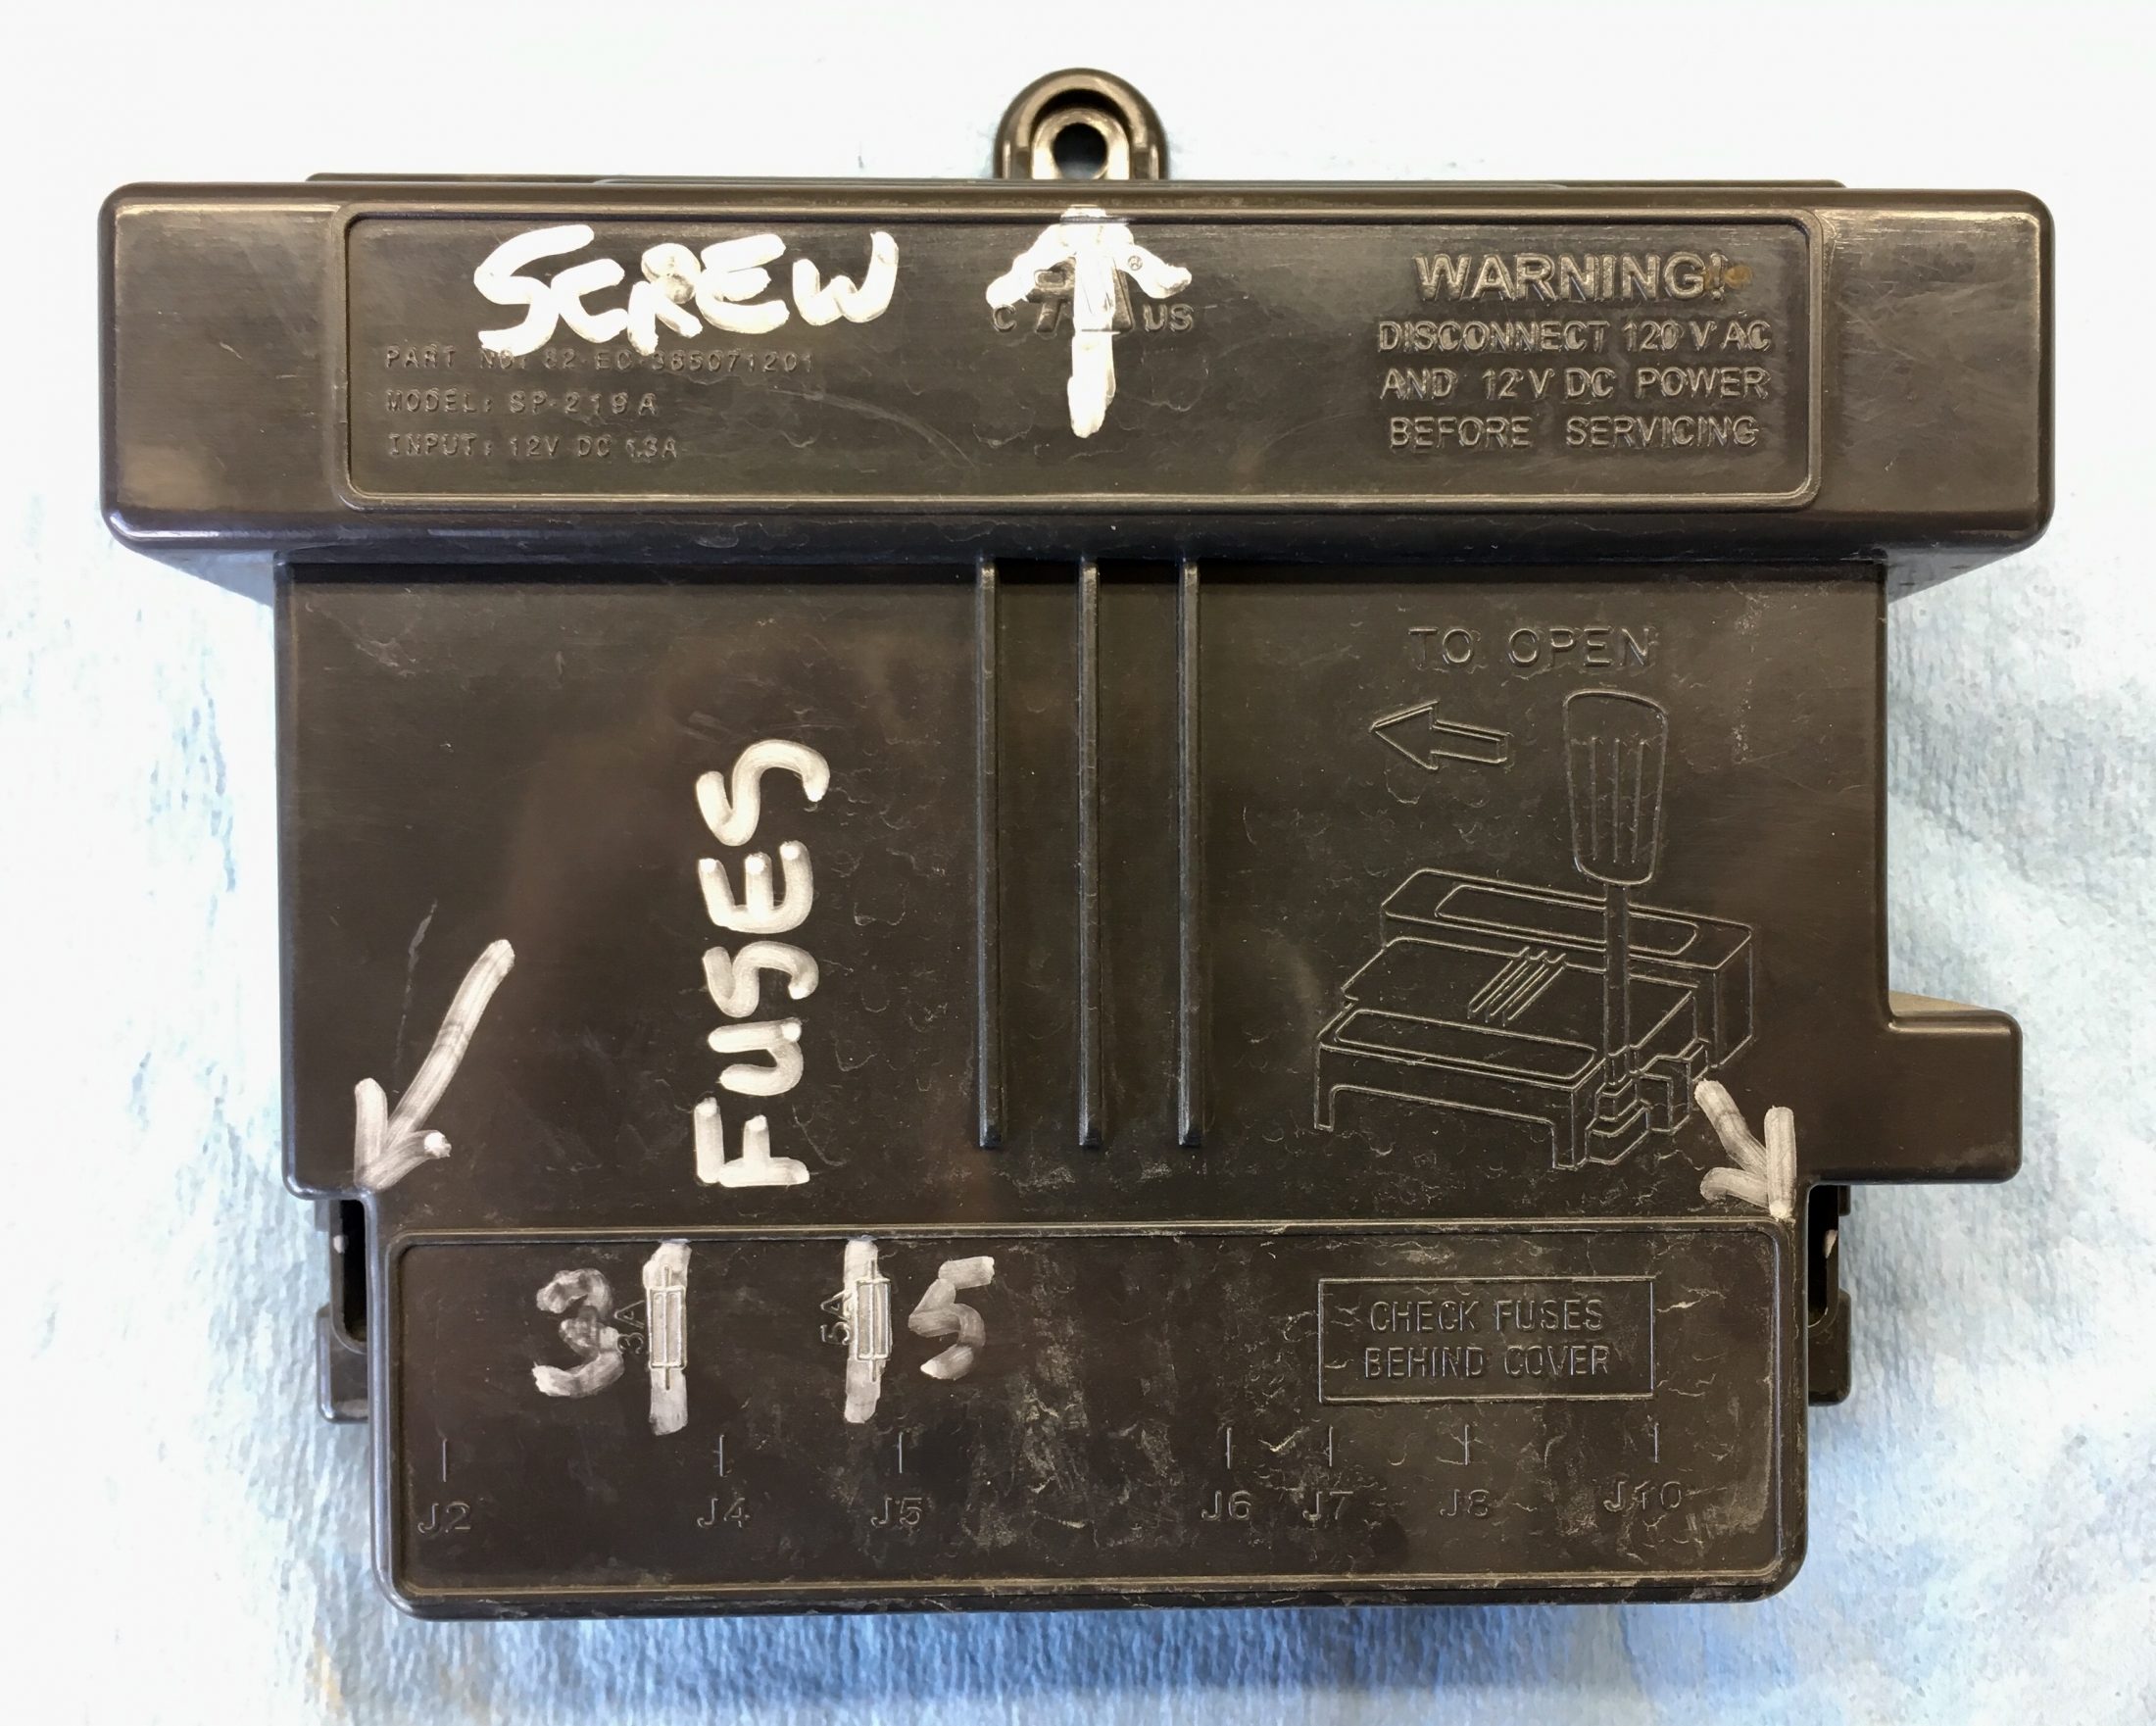
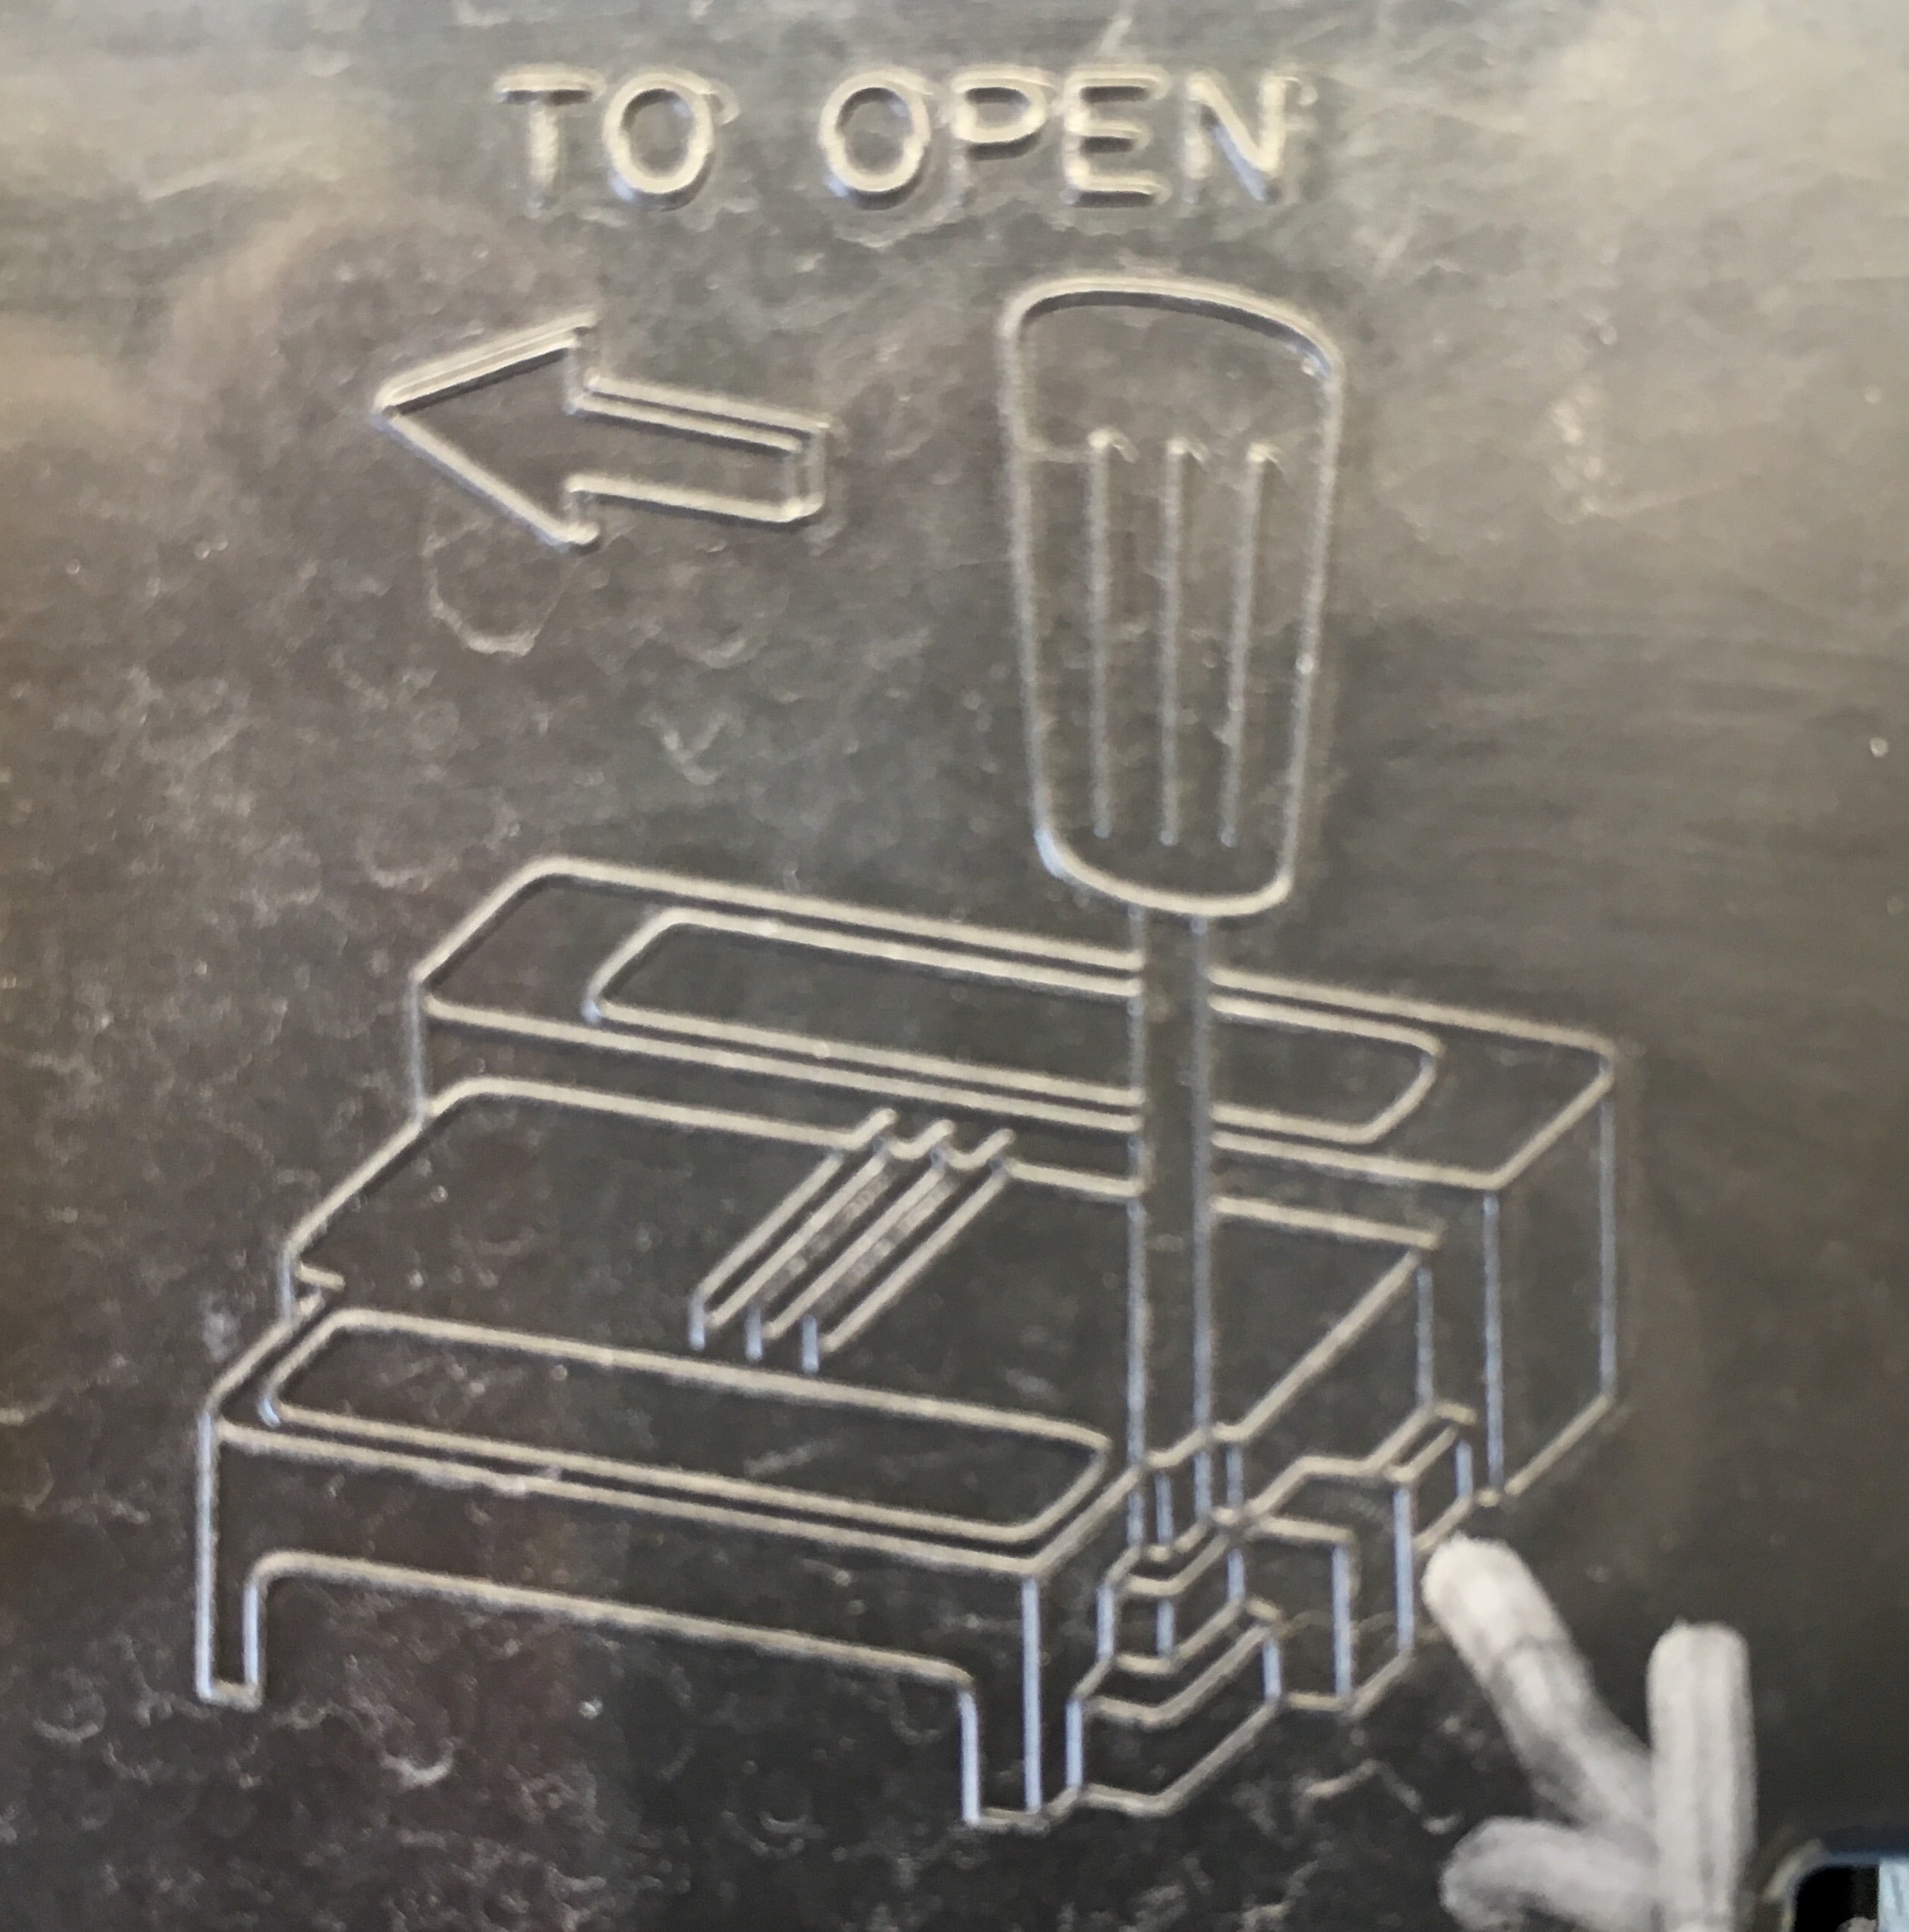
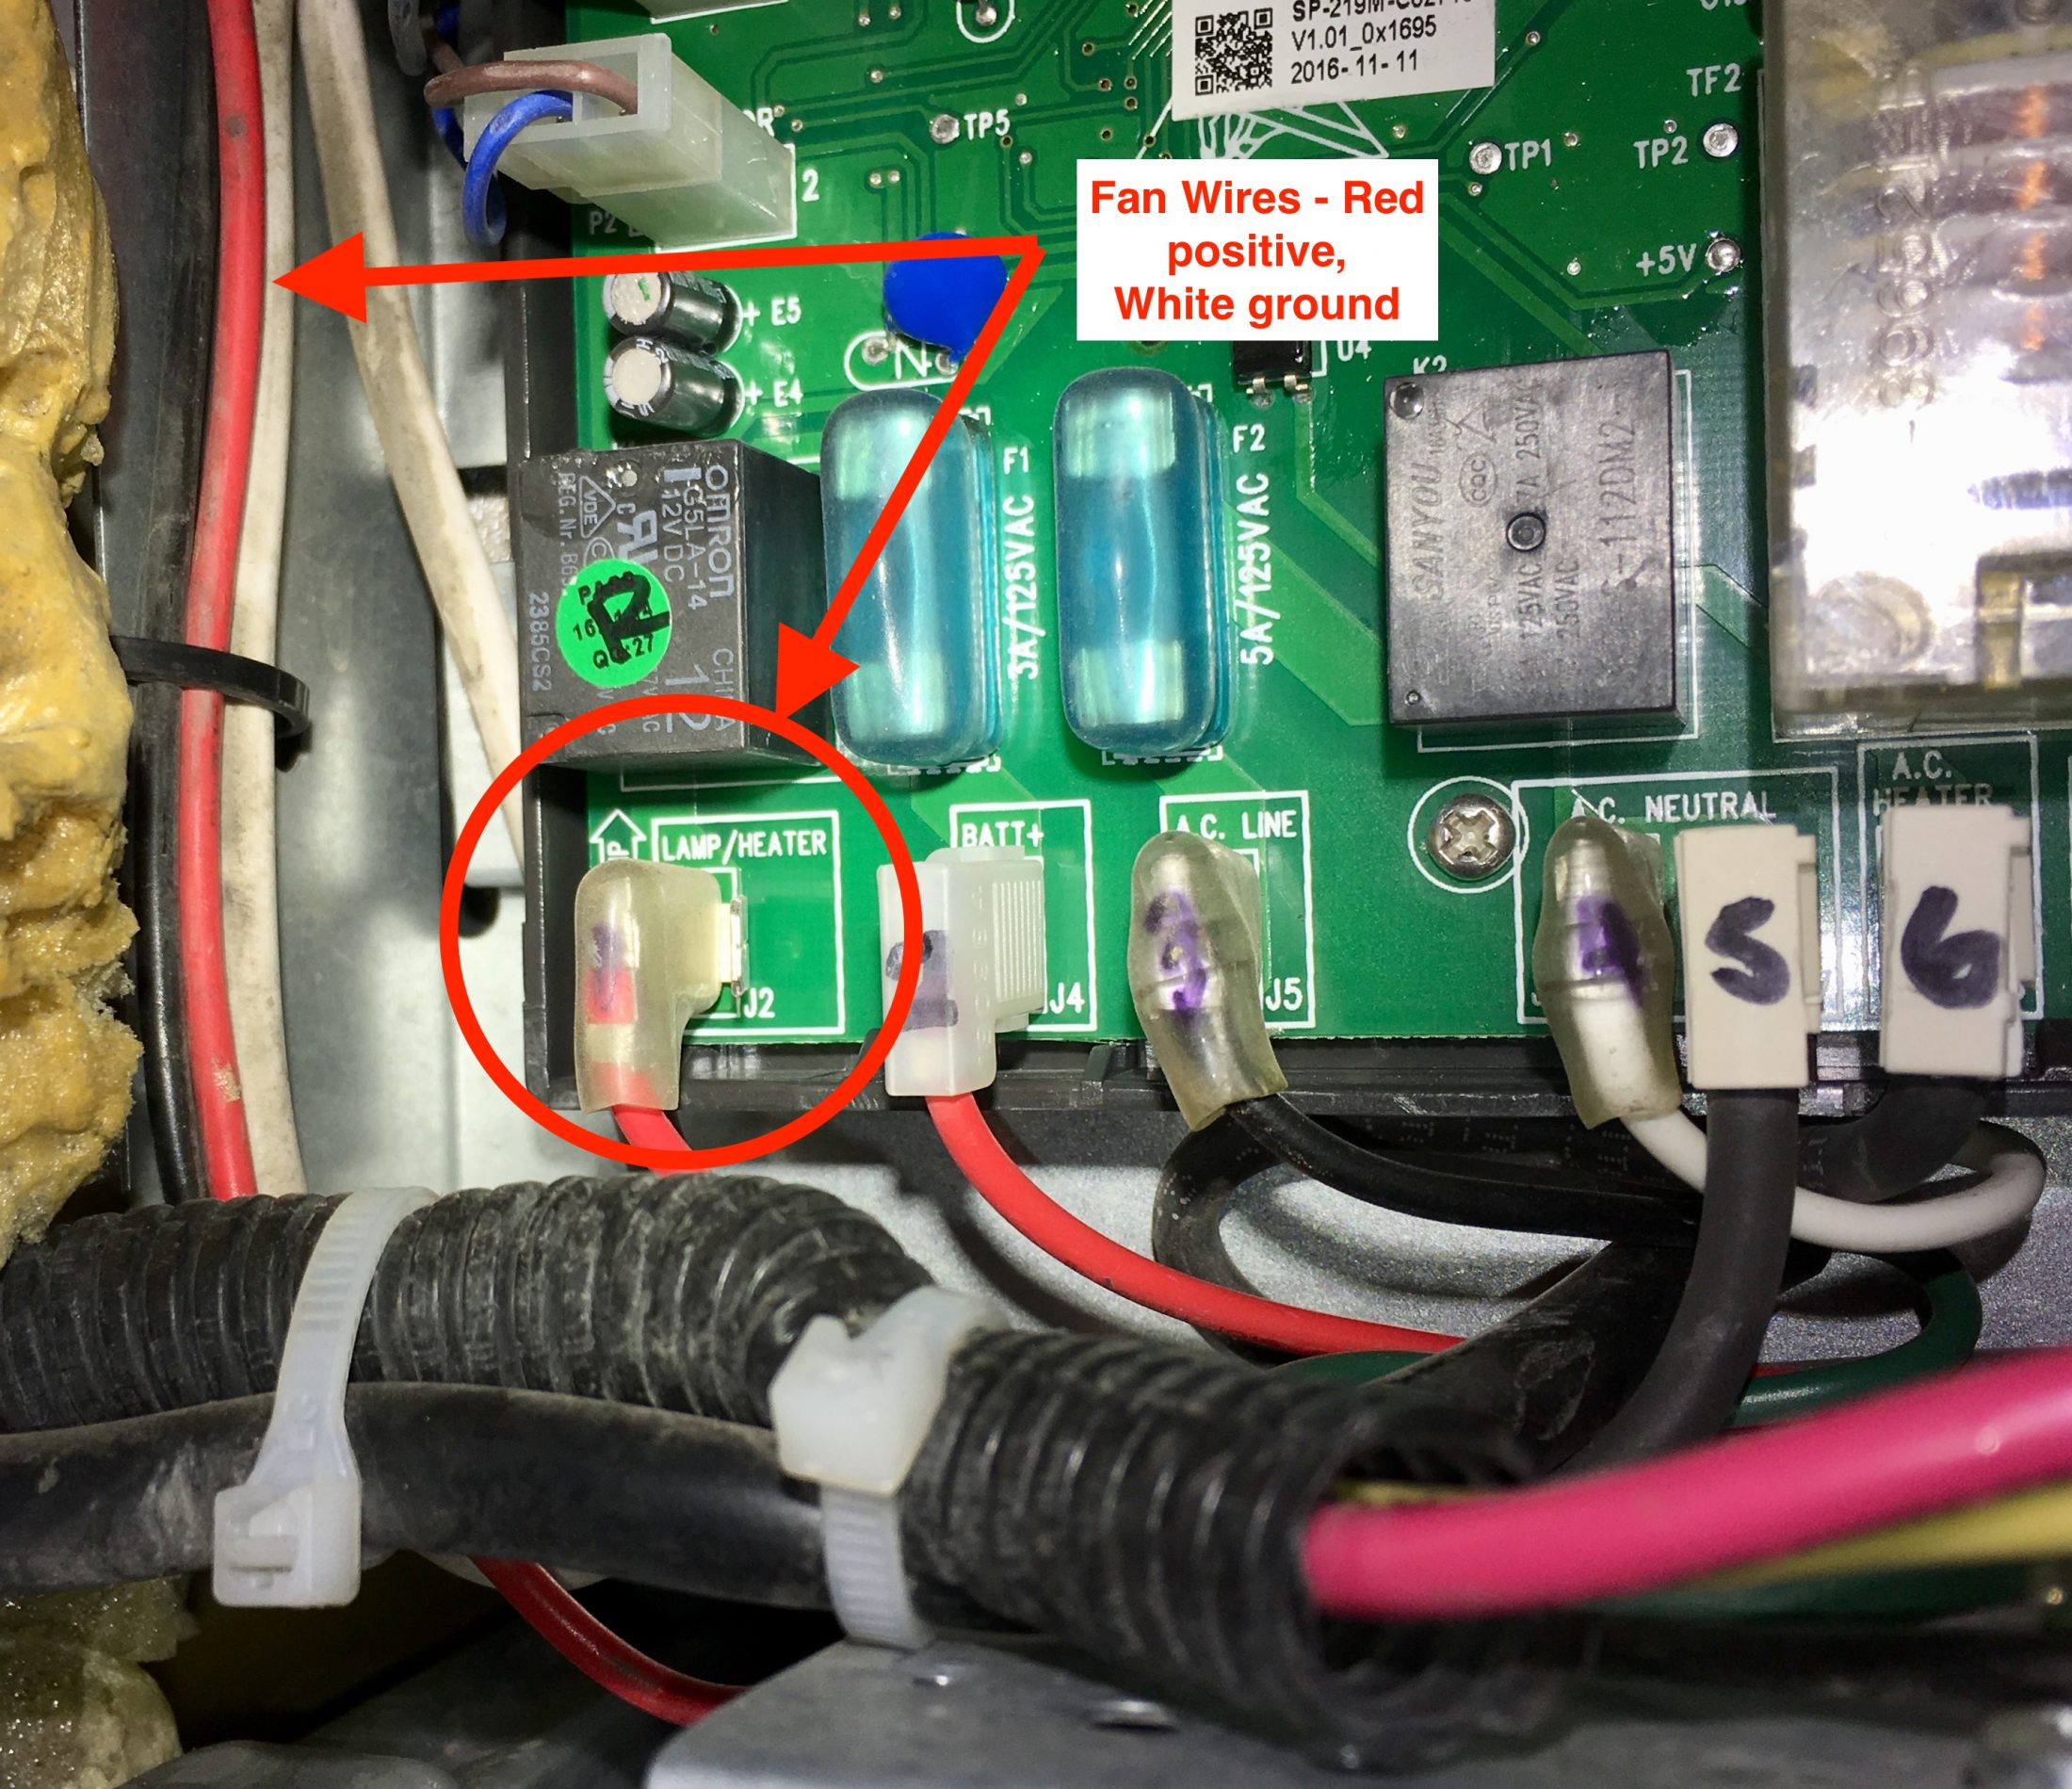
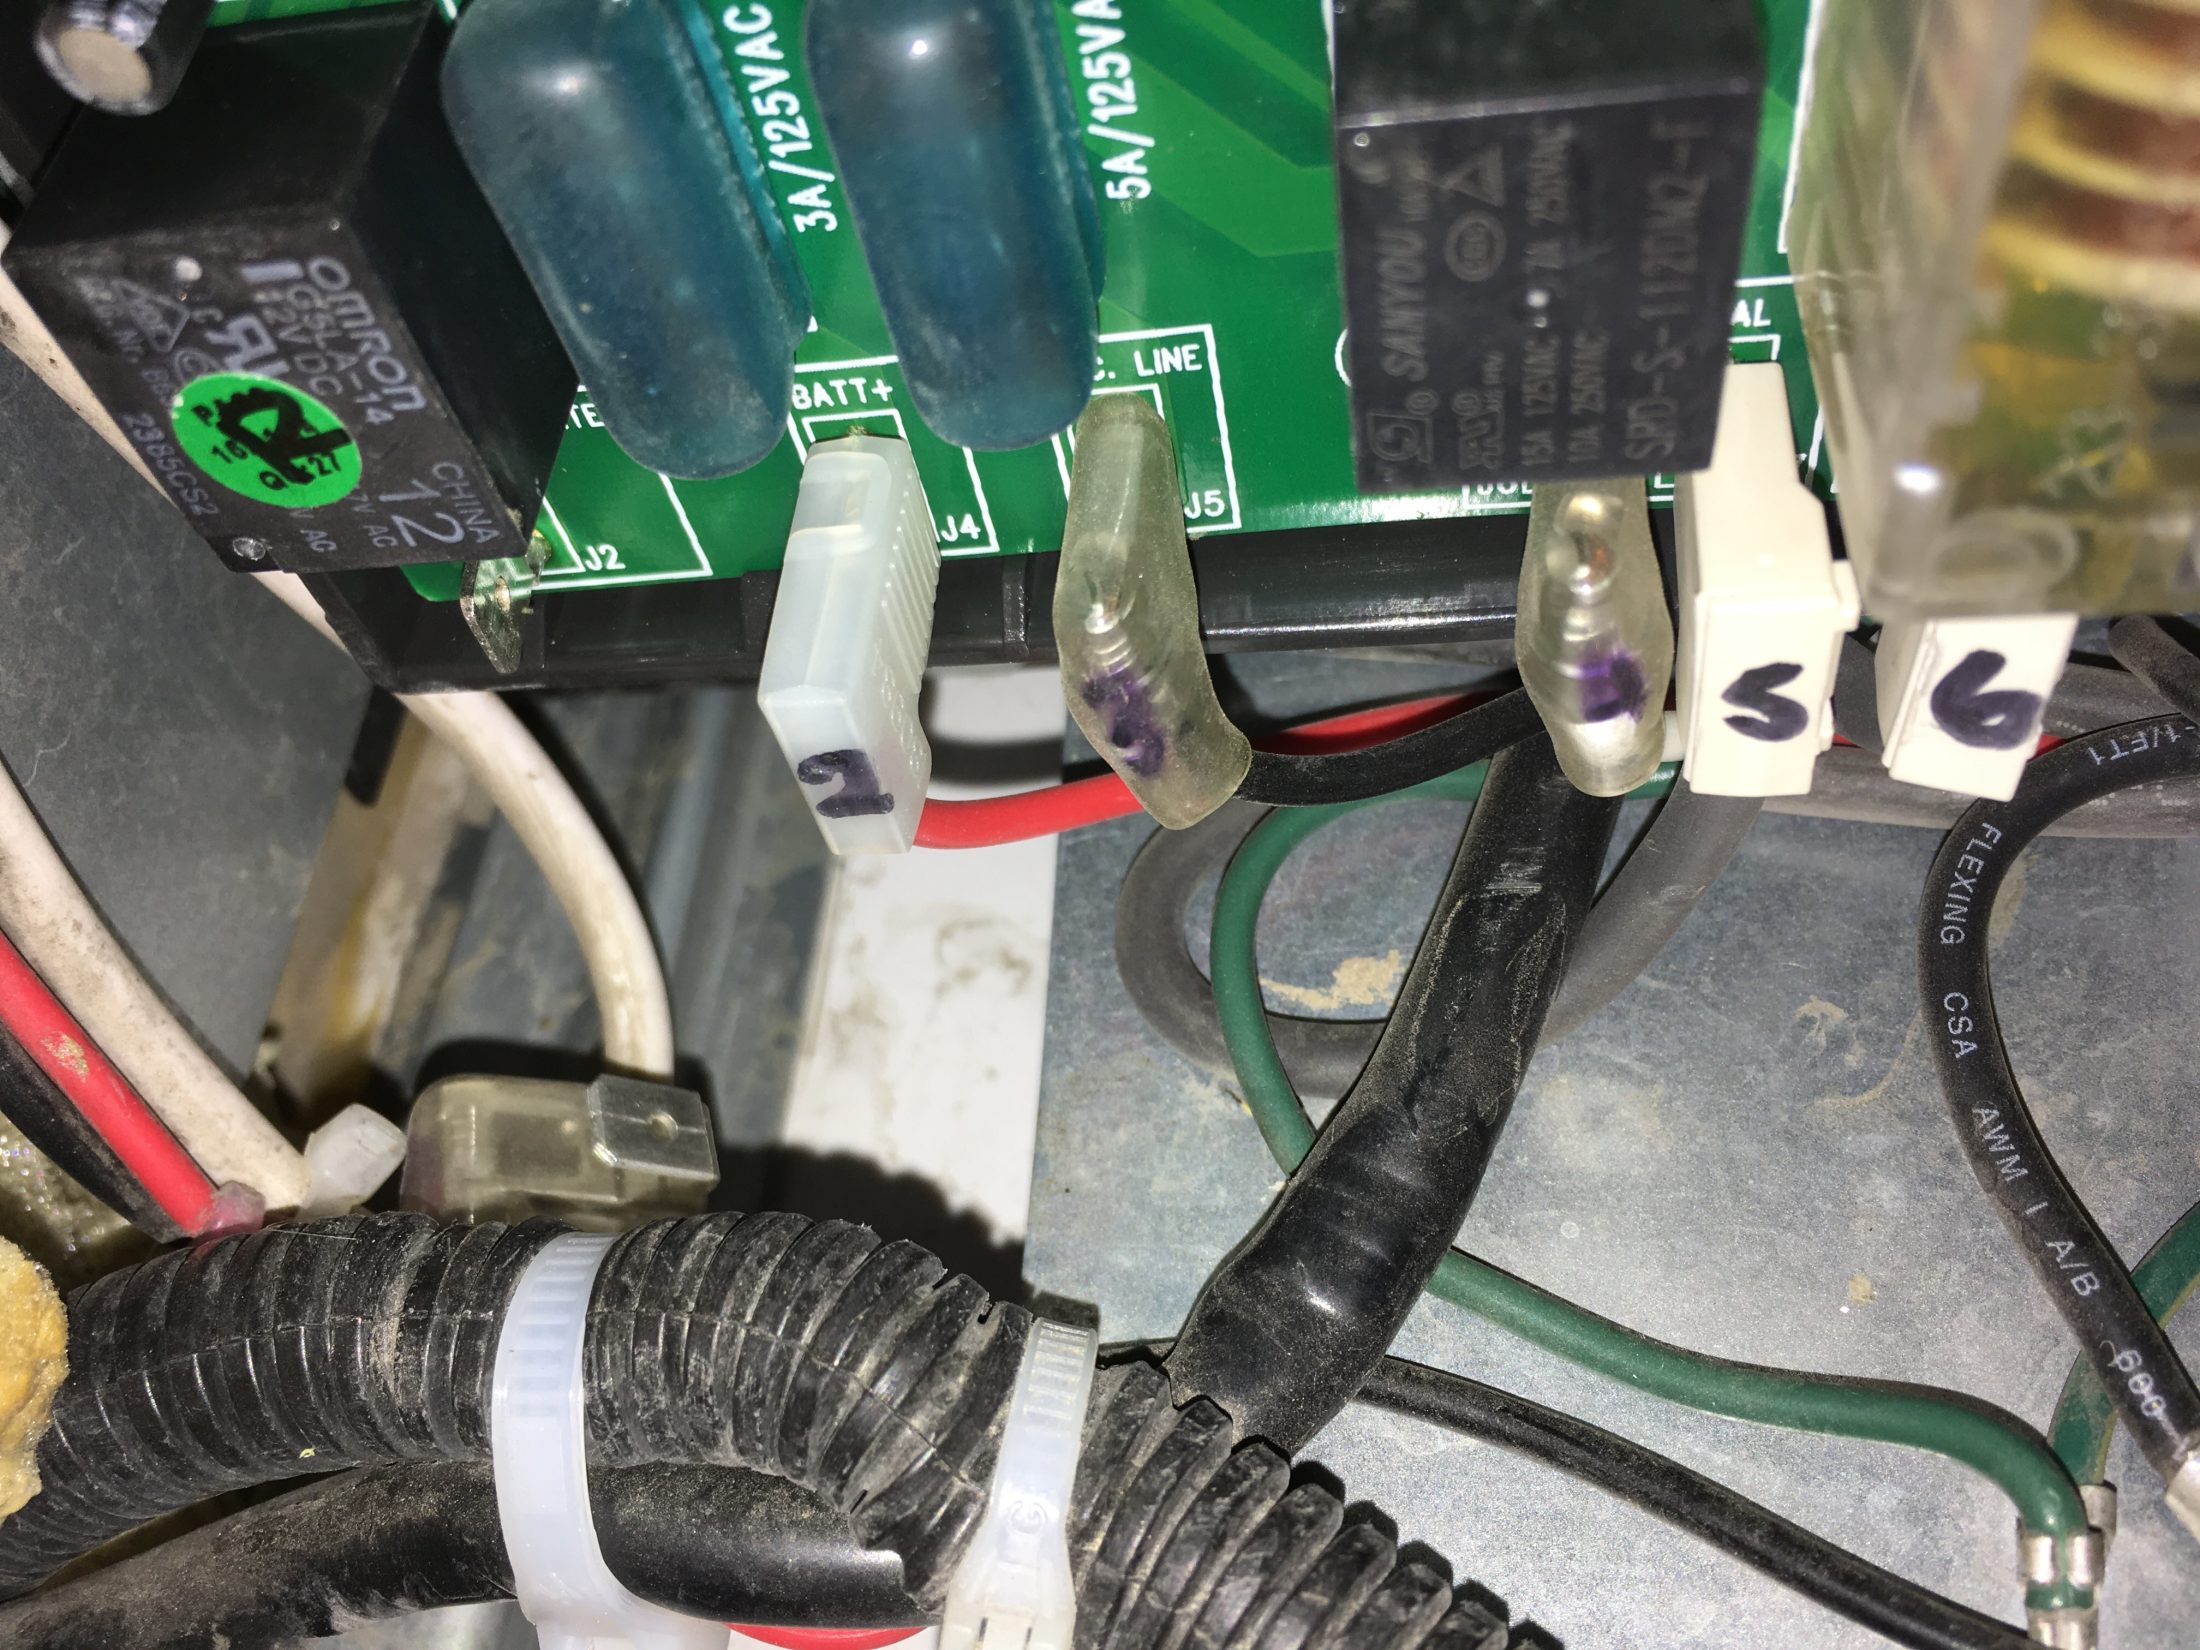
I learned that some Dometic RM2454 fridges have cooling fans located between the upper and lower coils, in an area that is completely inaccessible without removing the unit entirely. Jason in Service told me that they started receiving these units in mid-2017 (mine was delivered in May '17), and that previously there was NO Dometic fan installed. On those units Oliver added their own fan, positioned up high above the upper coils where it was easily reached, and I believe these fans also had an inside On/ Off switch. Yay! Good thinking. Last summer my fan started squealing when the outside air temperature got really high, and there was no way to shut off the nasty noise without killing power to the entire unit. It has no manual switch, rather it is activated by a an inline temp switch that is in the positive wire, near the fan itself. How very inconvenient for the owner.... The squeal went on long into darkness before the outside temp fell enough to shut it off. The Dometic Owners Manual and the Oliver Owners Manual wiring diagrams do NOT show the fan, but the diagram inside the backside of my fridge does; it is located on the far right behind the gas valve. The fan is labelled "Y". Here's how to disconnect power from the fan so you don't have to remove the whole unit. it takes about ten minutes if you are slow. If you are careful you don't need to power off the fridge, I did not bother. The electronic control box is covered by a square plastic cover. Remove the single Phillips screw at the top, use a magnetic screwdriver if you have one. Don't lose the screw. There are two spring loaded hooks at the 4:00 and 8:00 o'clock positions. Insert a thin flat bladed screwdriver into each slot, lever the handle gently away from the slot while pulling out on the cover. The hooks should release. Remove the cover. At the bottom of the circuit board you will see a row of wires. (In the pic they are numbered - that was my idea for when I disconnected them all in a previous project.) The bottom left terminal (J2) has a red 90 degree spade connector which is the fan power wire. Grab it carefully with fingers or a pair of pliers and pull it off the terminal. Secure it to the nearby harness with a nylon cable tie. You can mark the cover as I did with a silver Sharpie to help you remember how it comes off the next time. Also notice that there are TWO glass fuses (3 amp and 5 amp) which are visible in the pictures above and to the right of the J2 terminal They have translucent rubber covers to keep off moisture. It would be good idea to blow this whole area clean with compressed air if you have it. Reinstall the black cover and go get a beer. Video showing the fan wire with the fan operating. ... ... The fan noise is not too bad in this video since it isn't super hot. To get the fan to run, I opened the fridge inside door, turned the temp to Coldest, stuffed some paper towels in the upper vent and waited ten minutes. The fridge coils won't get hot enough with the electric heating element, you have to run the propane flame. Needless to say, it would be smart to keep your paper towels well AWAY from the right side of the coils where the burner exhaust comes up. Do NOT leave this unattended! Please do NOT set fire to your Ollie! You don't actually need to force the fan to run. Disconnecting the red wire will kill it, IF your circuit is like mine. Compare your wiring diagram first! If my fridge cools adequately without the fan I will leave it this way. If it struggles I will remove the two louvered covers on hot days to increase natural airflow. I will be able to test it by mid-summer. Maybe I will have to remove the fridge after all... John Davies Spokane WA
 2 points
 -
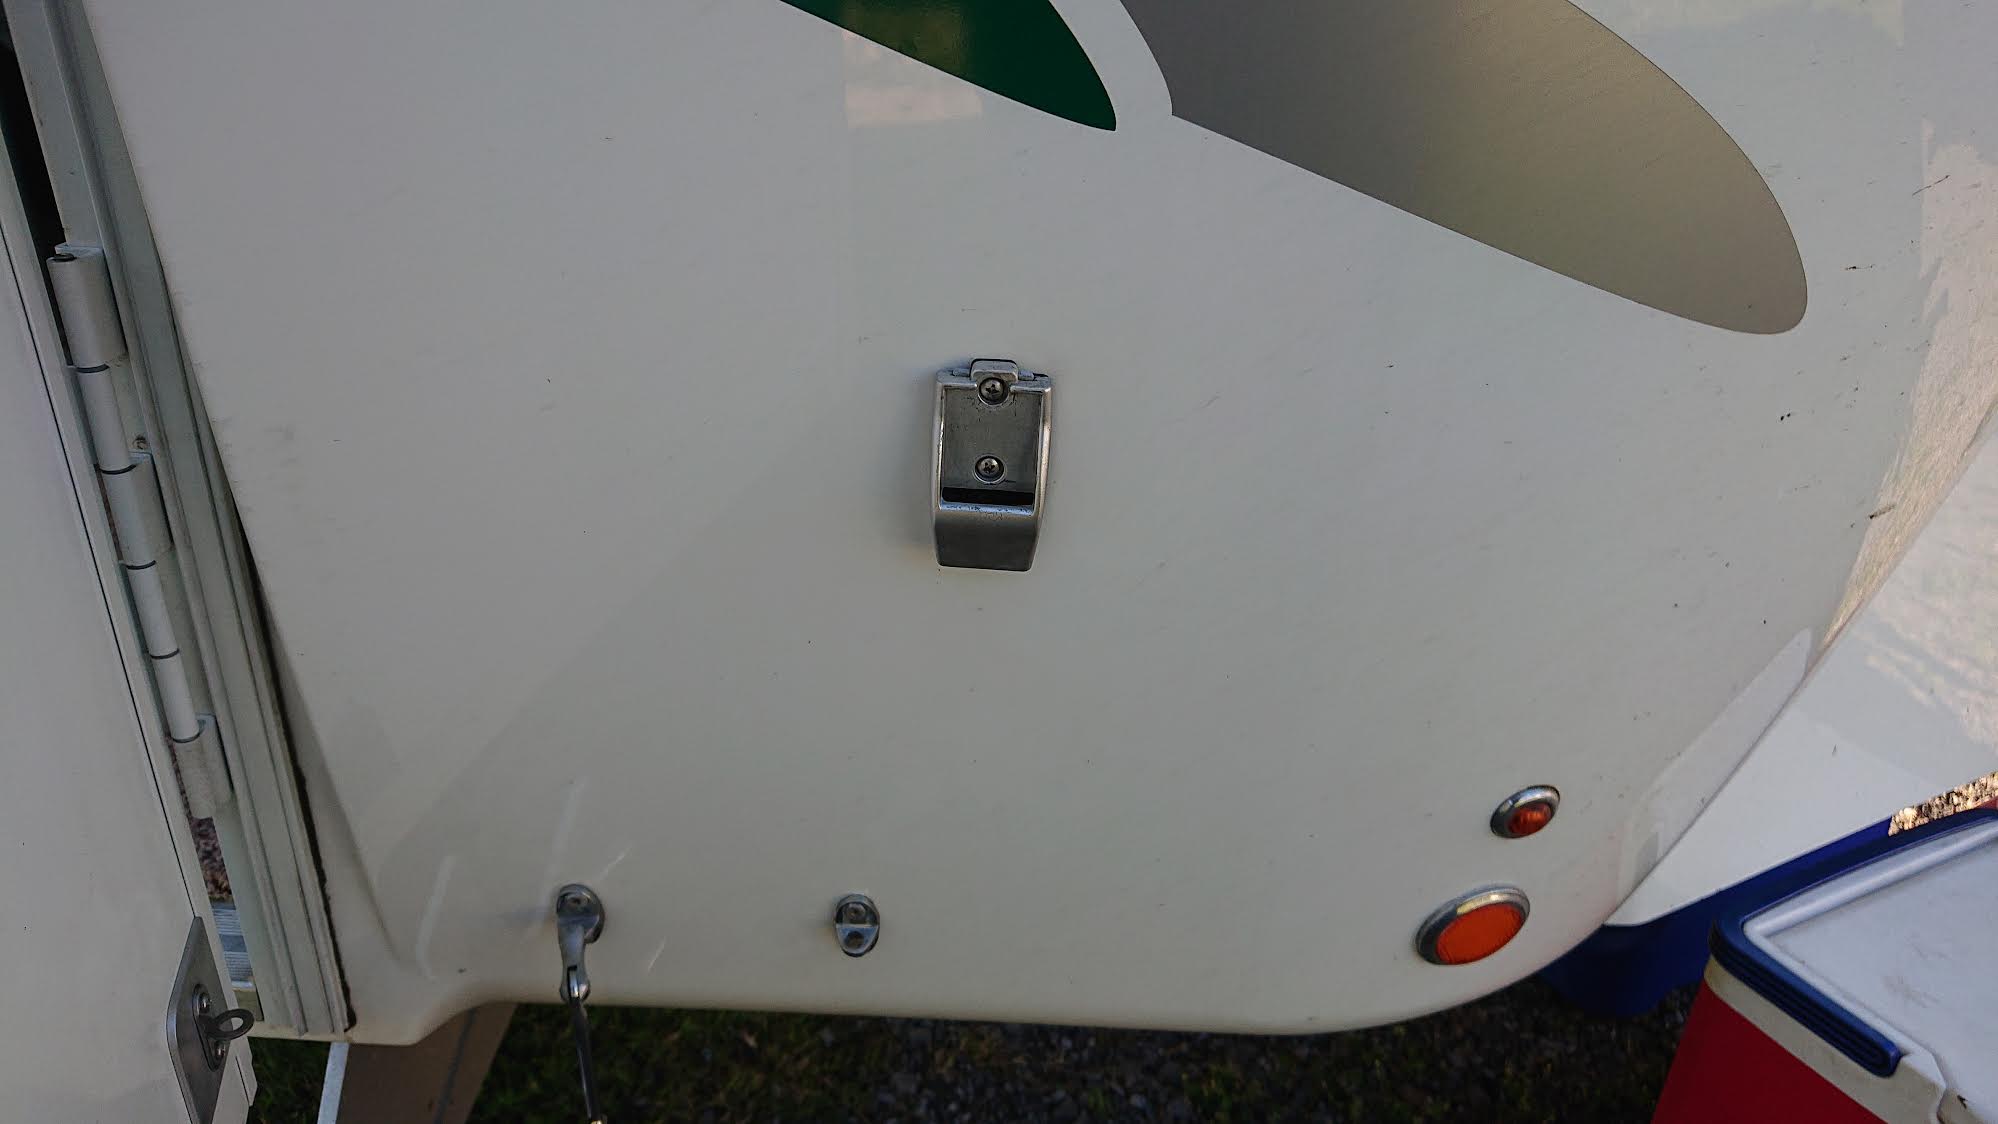
One of my Fiamma leg brackets, on the side of the trailer just fell apart in my hand. This bracket must work, or the leg can lift out in a breeze and wreck the awning. Look at this picture and see how weak they are. Just two little 1/8" wide aluminum points hold the cap that prevents the leg from coming out and dropping. Very weak. I thought it was made out of stainless until it came off in my hand. New sets are available for $45. from Oliver.
2 points
-
Nothing "theoretical" about it. Easy Peasy. Takes about 10 seconds after you find the bolt and nut. Then you'd know if the old one was accurate and you could use it with confidence. One could live in the trailer and one in the shop, for instance. Or you'd confirm the old one was way off and should not be used. Without testing the old one, and not trusting it, you might as well throw it away.2 points
-
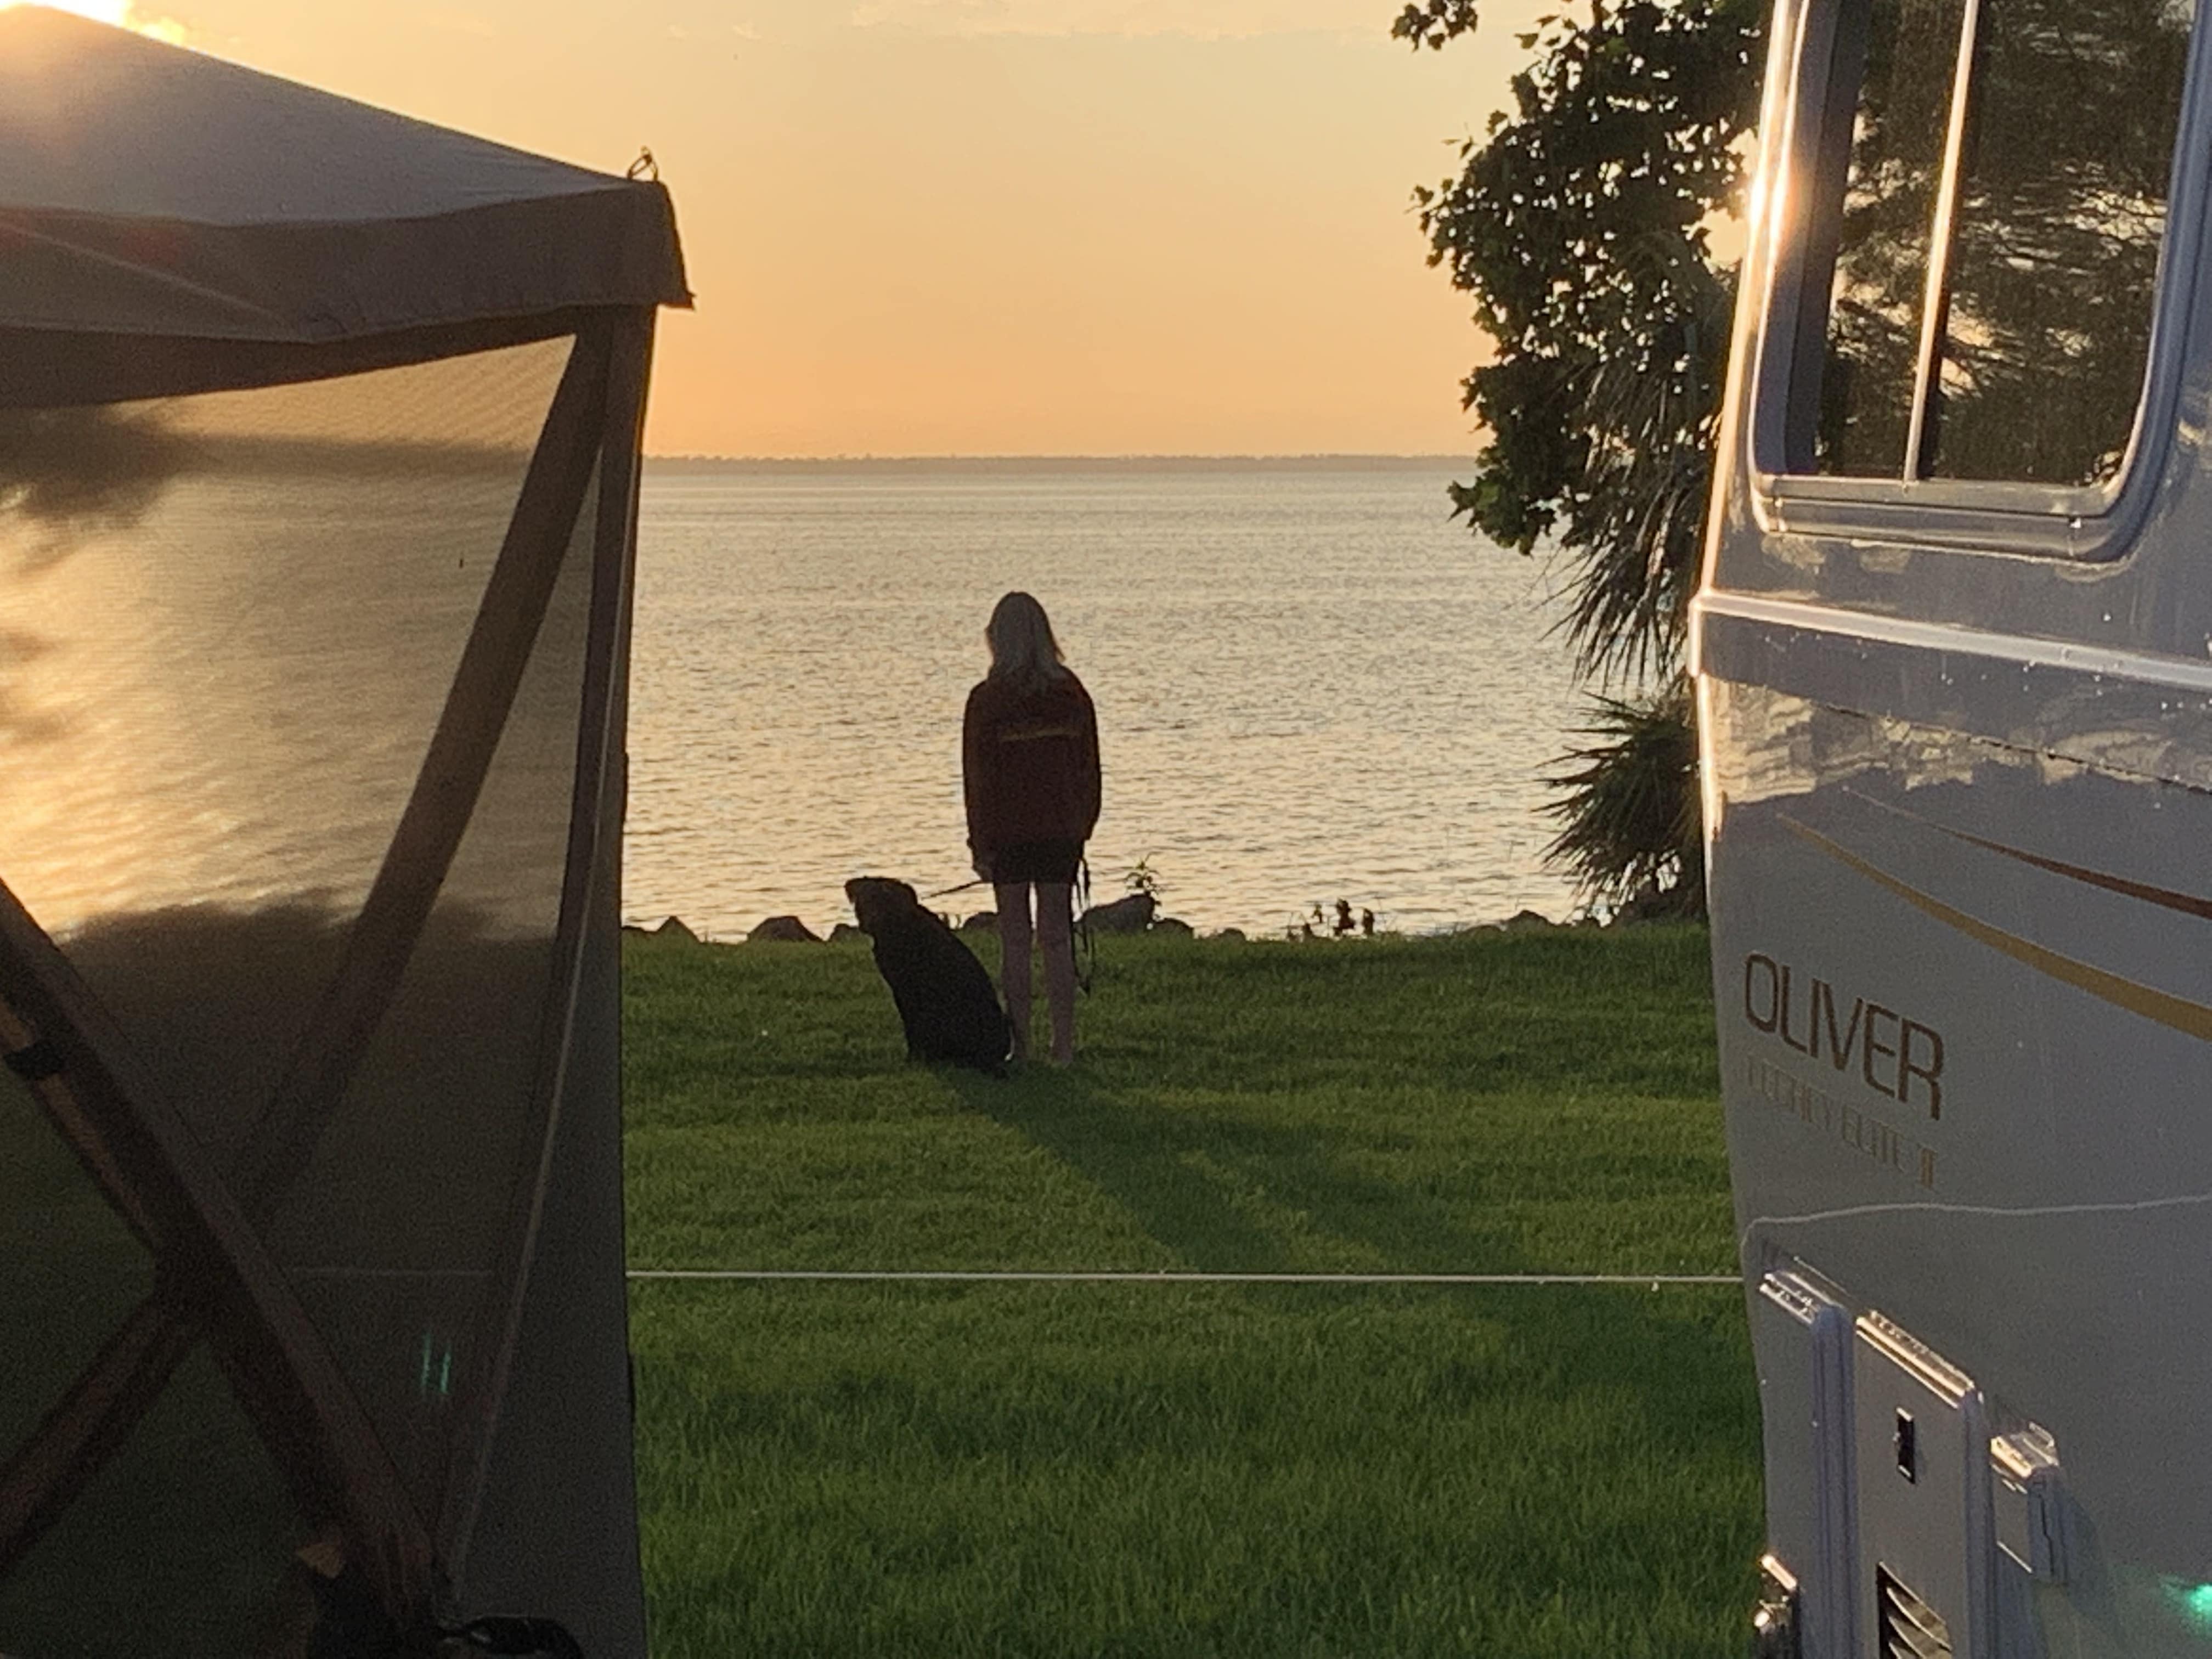
Headed to the 2019 Rally with my two favorite camping buddies - Karren and Magnum. Sunset on Lake Seminole, FL. [attachment file=Karren and Magnum.jpg]
2 points
-
UPS just delivered my $155 torque wrench an hour ago. It's still in the box. For 11 years, Ive used a cheap, non calibrated, torque wrench which was jostled and banged around and never set back to zero after using. Who knows what my torque values have been? But I have been lucky so far, knock on wood. This new fangdangled gadget does not need to be set back to zero and can be set in much more nuanced degrees than my previous cludge. The way I see it is that another ten years of be-bopping around the land for another 130,000 miles with this OMG expensive tool, will only cost me $15.50 per year. And it will be accurate! Cheap insurance as far as I am concerned. Thanks, Overland!!!2 points
-
Overland recommends a Precision Instruments torque wrench, which is probably a very good one, but at $155 it seems quite expensive to me. I have not used my torque wrench for anything but the lug nuts on my car and trailer. I ordered it off of Amazon on Sunday and got it today. I used it on the lug nuts and bulldog this afternoon. Thanks for the recommendation! It was the most expensive tool that I have ever purchased but it should last my lifetime. It worked as advertised and it is nice to use really good tool(s).2 points
-
If you want to calibrate your own torque wrench, check out. I ordered the little scale from Amazon for less than $9.00 dollars. All I've got is a cheap one from Harbor Freight and I'll be curious to see how accurate it is.2 points
-
First a disclaimer. I had never heard of a torque wrench before I started researching travel trailers. Overland recommends a Precision Instruments torque wrench, which is probably a very good one, but at $155 it seems quite expensive to me. I have not used my torque wrench for anything but the lug nuts on my car and trailer. Based on my research, before I picked up Ollie I bought a Tekton torque wrench for $38, along with the Tekton socket set for $23. They have very good reviews. I liked the fact that the Tekton torque wrench came with a hard plastic case, as I had read it is important to protect the wrench during storage (and to set it to zero before storing). The socket set comes with a 3-inch extension bar; a 6-inch extension bar, as mentioned by RnA, would probably be preferable. But this one gets the job done.2 points
-
Monday in The Valley of Fire, east of Las Vegas. On our way to Guntersville.
2 points
-
Well, we're now joining the chorus of all those singing the praises of the Oliver Service Department folks!! We dropped our Ollie off at the Mother Ship a few weeks ago for some minor warranty issues and a few other service items. At first, I thought we might be getting into a dogfight w/one of the component companies regarding a warranty matter. Of course, Jason stepped in and, suffice it to say, went ABOVE AND BEYOND the call of duty, and completely resolved the issue to our satisfaction. For all the Ollie owners out there, I know I'm preaching to the choir, but thought I should echo what many have previously said, and to publicly express our deepest appreciation for the all the great work that Jason, Ritchie, and the entire Service Department do. They truly are ROCK STARS in the customer service business!! Looking forward to meeting lots of new people at our first Rally next week!1 point
-
We have early style porch lights, not sure if this would apply to later style porch lights. Water was coming in from the porch light between shells dripping from the top of the dinette window. When we resealed the porch light over the window, fixed the problem. Saw another leak from the rear Oliver sign, leaking between shells traveling around the rear window and dripping from the bottom of the window on the curbside bed. Once we found the leaks, fixed them without further problems.1 point
-
I couuuuuld . . . . . . . theoretically . . . . . . . very theoretically . . . . . . :)1 point
-
You could connect your new and very accurate torque wrench to the old one you think might be wrong, and apply some opposing torque. A connector between the two square drives and pull one against the other. A nut screwed all the way onto a short bolt, and then a socket on each, will do it. When the new one clicks, see how far off the other one is. This will give you a reference as to how far off the old one might be. It might be 10% off, or ten ft lbs at 100 ft lbs, etc.1 point
-
On my Casita I made all the bug screens from window screening from Home Depot, I did use the metal screening and not the plastic type. I did fold and cut for each vent and when using bathroom calk I did glue each side one at a time, this is the only way I could get them in the proper place and stay there. It took about three days to do the job because each fold had to dry. I'm pretty handy so the job turned out very nice with professional looking results. I will do the same on our new Oliver when we get it in July. Do note here I have not had a problem with cooling the fridge with this type and size of screening. I do check from time to time that the screens are not getting any residue on them, so far none. Remember calking can not be used on all vents, water heater and furnace will require mounting the screen with screws, washers, and nuts, they do get hot. trainman1 point
-
There were three reasons that it didn't work - 1) they said the stability was questionable just moving it around the factory, 2) because of my hitch config, the trailer already travels nose down a bit even with a 4" rise on my hitch, and 3) it looked totally silly. I also think that a lift would make the trailer more difficult to level - not a huge deal, but you'd have to carry some extra blocks I think. Also an extra step to get in and out. That was a 4", maybe 5" lift, so obviously something lower would mitigate all of the above.
1 point
-
John, it’s been a while since I had the springs made but I believe they were around $75 a piece. No I didn’t add or modify anything else, but the boat and trl combined were under 3,000 lbs. If i remember correctly Overland had Oliver do the spring over conversion, and for whatever reason it didn’t work out, so they changed it back to stock. Steve1 point
-
I agree with Raspy on the above. I don't think you want to fiddle with the spring rate much and one of the reasons I've not looked further into the Lippert or MorRyde systems is concern over what that might do to stability. The truth is that however much gravel and dirt each of us sees, we still do 90% of our travel on the highway and safety there trumps anything else. I've read a few cases over on Expedition portal where guys who have bought Australian campers or US ones with offroad suspensions have had to go back and add big sway bars to eliminate the sway on highways. I've also noticed that most of my suspension woes come from poor paved roads and not gravel/dirt. On gravel, and especially dirt, you're traveling at slow enough speeds that the bigger bumps are taken just by the trailer tilting back and forth. I've seen no need for a long travel suspension anywhere that I'm willing to risk taking the trailer*. Same goes for clearance. I've hit the steps once, but haven't scraped the bumper yet. The primary issue off pavement for me is vibration. On the other hand, big dips, potholes and bumps on a poorly paved road often take you by surprise and you can't slow down quickly enough to make them not hurt. And wow have I had some moments of hurt, even on interstates. Much, much worse than anything I've experienced off pavement. *Frankly, while those Australian suspension systems look amazing, I've come to really question the need. Long travel suspensions are either for absorbing big high speed whoops, like a Baja truck, or for rock crawling. On a trailer you don't need a rock crawling suspension because you have no traction to gain. And if you're traveling on gravel fast enough to need a Baja suspension, you're just going way too fast.1 point
-
This could be the answer, and I can see it on a boat trailer, but I wonder if it would really improve the quality of the ride much? Our Oliver's have relatively soft springs and we need more than the 2" of travel. Plus we don't need a hard frame impact as the stop. That is very crude. The quality of the ride is really important and I find I have to just creep along on rough roads to prevent chaos inside. It just seems like trying to lift the trailer with more arch, on a spring under design, is working against yourself. Unless ride quality is not important, such as in utility trailers, for instance. The main area I would like better suspension in is the quality of the travel. If we had our 2" of travel and then a Timbren donut, it would offer a very progressive rise rate, without the hard stop. I changed the rear springs on my 1st gen Dodge Ram Cummins pickup. It had lifting blocks from the factory that allowed the stock springs to be relatively flat, or straight. The new springs had more arch and did away with the OEM lifting blocks, while giving an inch or so of added ride height. So, the springs had a much more pronounced arch to them than the stock ones. This made the truck handle terribly. The reason was the angle that the spring sat at from the front pivot back to the axle. A steeper down angle than stock, in the area in front of the axle. As the truck went around a corner and leaned, the outside spring would flatten out a bit. This moved that side of the axle back. As the spring went from a steep down angle to a more level angle, on one side, the axle was pushed toward the rear on that side. That meant the axle was not in line with the truck and was steering from the rear. It always felt like the rear end was trying to come around in a slide. Very unnerving and annoying. In a trailer setting, this affect would promote sway because as the trailer leaned, to the right, for instance, it would also steer to the right. Then lean to the left and steer to the left. It seems like it could become quite unstable as it steered back and forth with wider sway on each cycle, as it leaned more each time. Combine that with a higher center of gravity from the lift, and the problem gets worse. So, a flatter spring is better for stability. So much thought and energy goes into preventing sway, that it seems counter-productive to do anything that is known to decrease stability, even though Oliver's are very stable to begin with and may have some tolerance for change. I'd be willing to go up about 2", to allow more travel and have a Timbren donut, or to allow the tires to travel farther without contacting the wheel well interiors. But that's about it for me. And the springs will have to be as flat as possible. So that means a spring over, unless I want to modify the suspension truck, which I don't want to do. It seems it comes back to, once again, a spring over design with drop axles. Then the search for shocks will begin. I tried to do this exact thing on another trailer that I built, but the problem there was getting the right drop axles. I was not able to get axles that cleared the frame and would allow the spring perches to be where they needed to be. The forged drop piece has to clear the frame and then turn out to accept the brake flange while still allowing the wheel flange to be in the correct stock position. We can't change the axle flange-to-flange width unless we are willing to buy new special wheels with something different than zero offset.1 point
-
The best kind of Ollies have holes in their bellies.1 point
-
Good choice on the Tekton torque wrench. The possible inaccuracy of the torque wrench is much less than the acceptable variation in wheel torque. The nuts have to be tight enough to do the job without coming loose, but not so tight that the studs get over stressed. The cleanliness of the tapers and any lube on the threads will have a large affect on how much stud tension there is per ft lb of torque. Even the difference between a chrome nut against an aluminum wheel taper, vs a non-plated nut against a steel wheel taper will affect the torque vs tension ratio. And aluminum is more important to re-torque. I'm sure a low cost torque wrench is fine and much better than just guessing or making them up to as tight as you can. The need for a precision torque wrench is similar to someone saying we must have a high quality digital thermometer to measure the tire temp. When in reality, in the case of the tires, feeling the temp with our hands is all we need to know.1 point
-
We purchased our Oliver used from a couple in MO when Ollie was out of warranty. We later took Ollie in for service work and Oliver covered the work under warranty, even though Ollie was out of warranty and we were not the original owners. One of the service folks told us that it did not matter that we purchased Ollie used, when we purchased an Oliver we became part of the Oliver Family! :)1 point
-
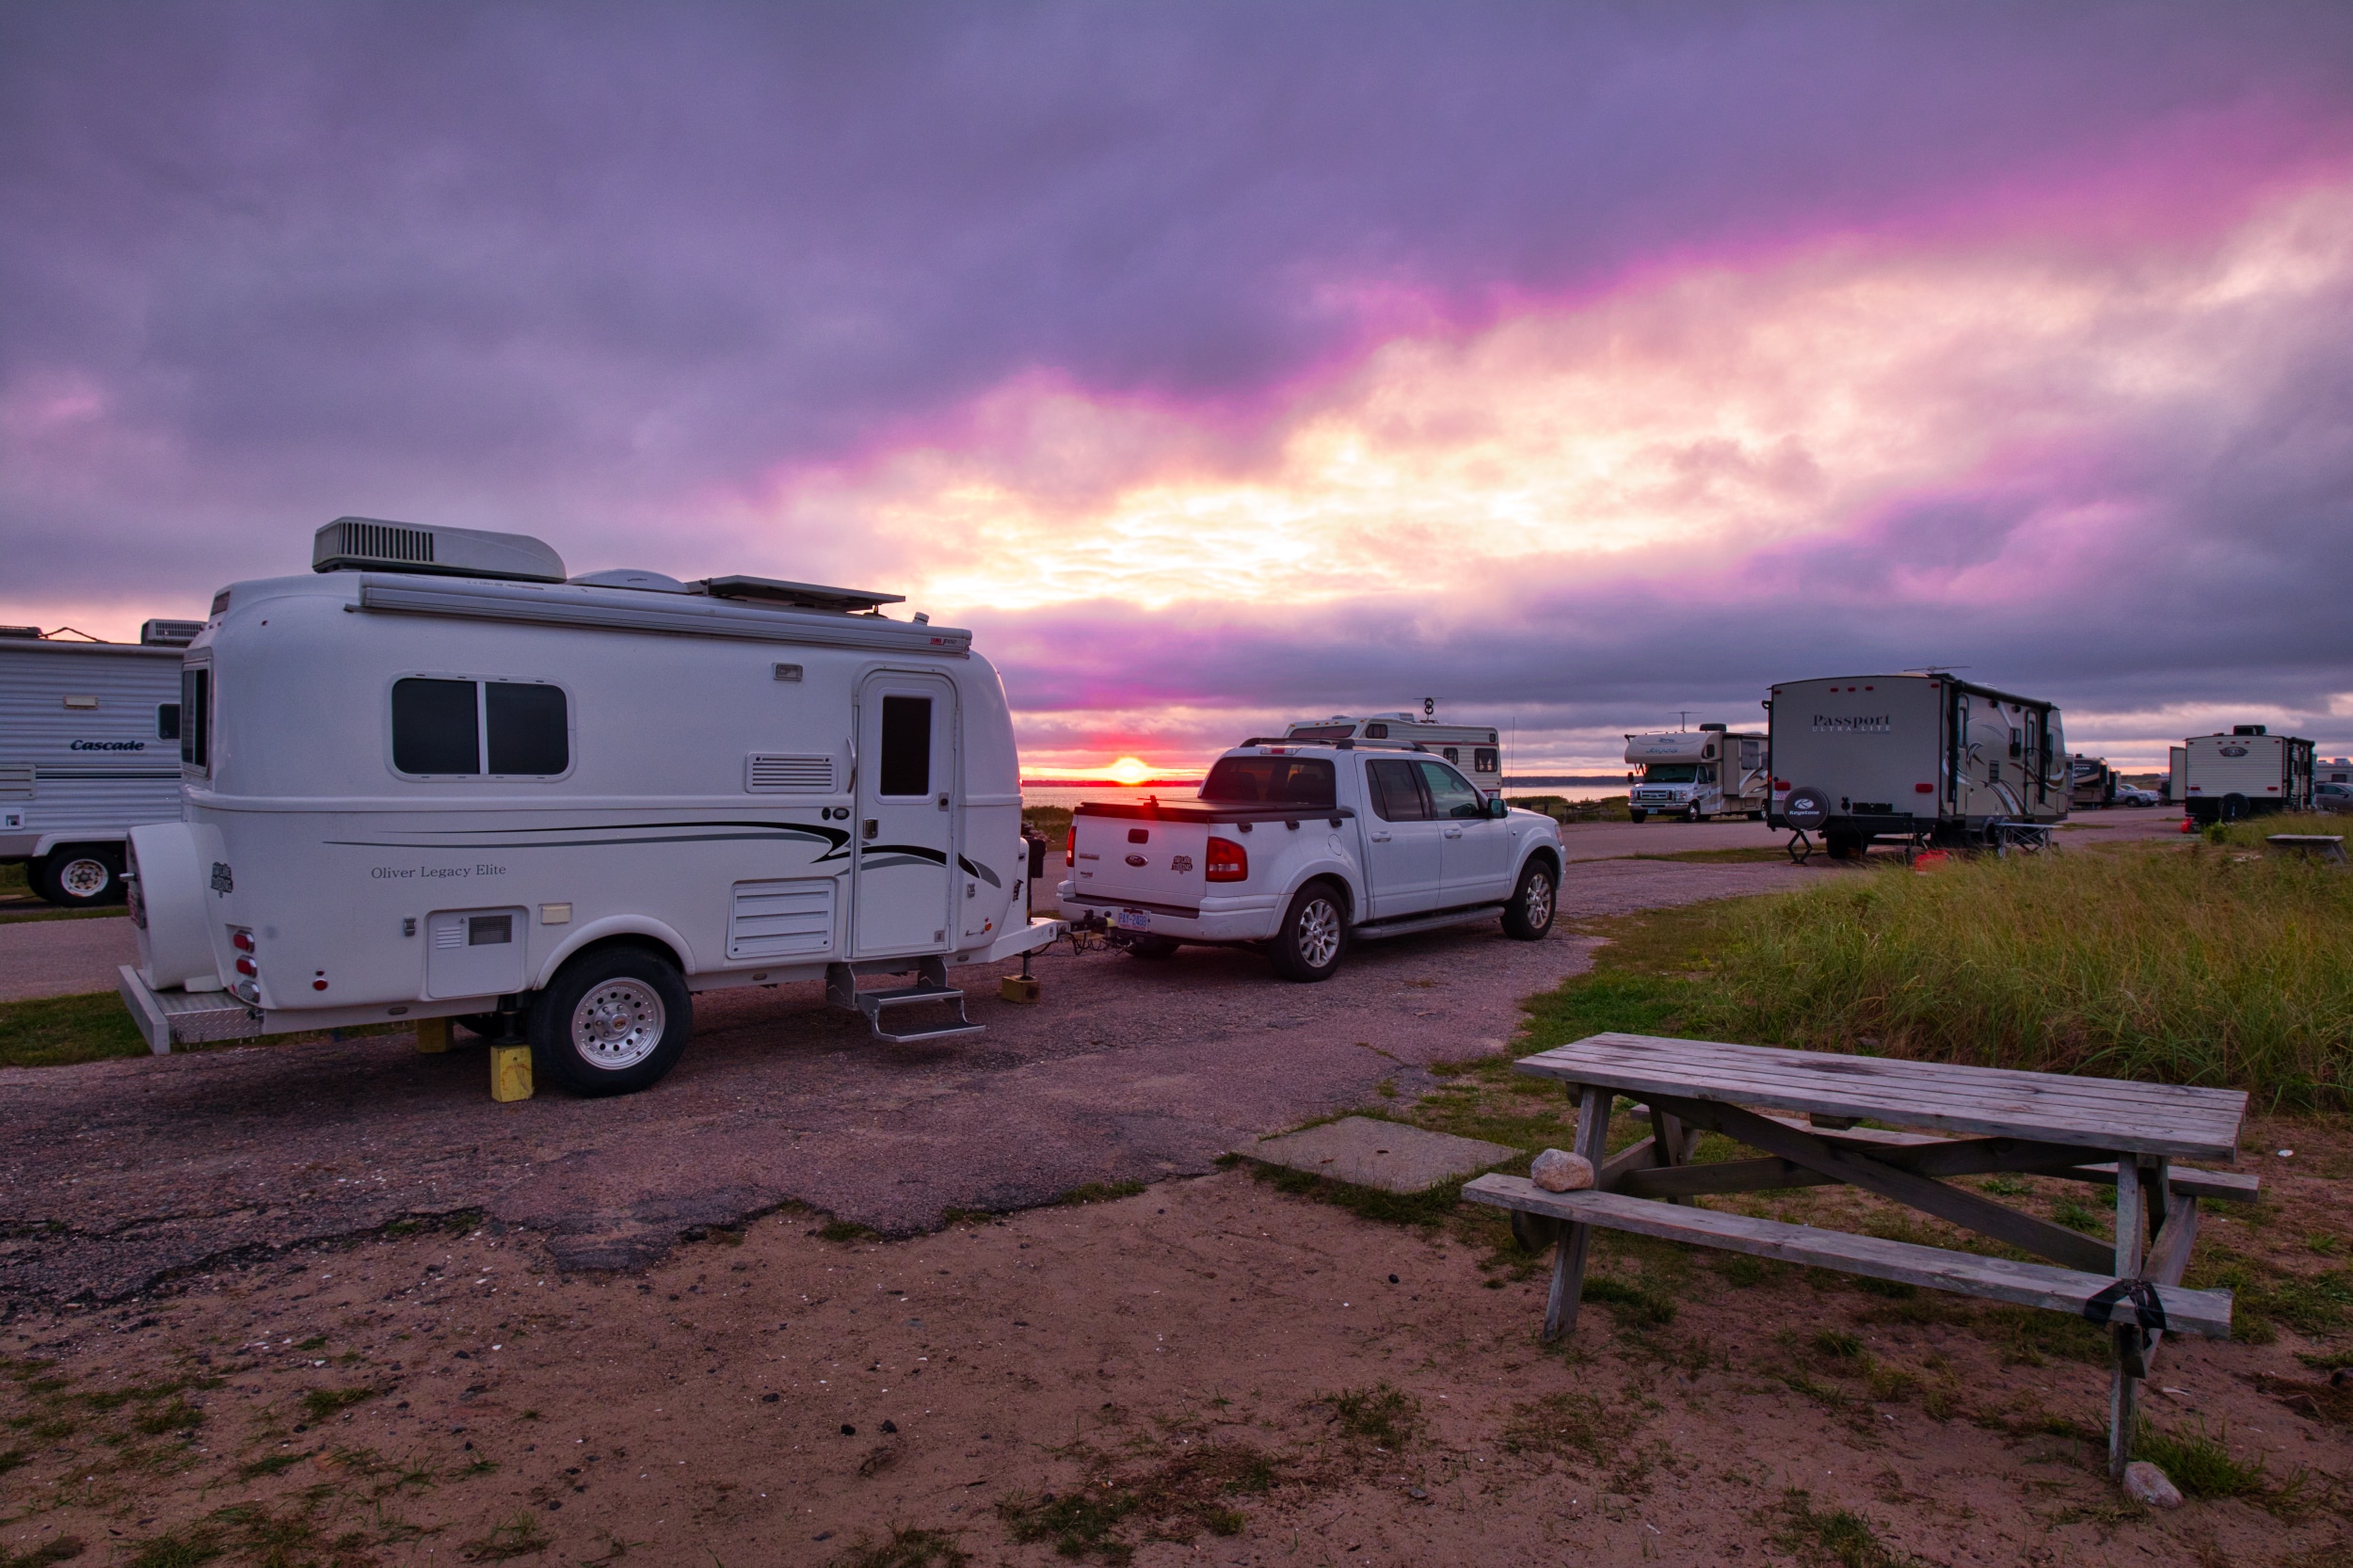
Horseneck State Park, Westport, MA This was a nice spot overlooking the ocean. We were in row two and there are no electric or water hookups. We used our generator for the first time to make coffee in the morning. Not the reason we have it but a nice perk. (Please note the hard earned pun!) The park was about $30 for the night. There were a lot of spaces but it was also pretty full - lots of fishermen. It was convenient for visiting New Bedford Whaling Historic site. The park is between RI and Cape Cod. The pretty sunset a bonus.
1 point










-
Recent Achievements
-

















