Leaderboard


Popular Content
Showing content with the highest reputation on 05/20/2026 in Posts
-
So, I had the one overnight mentioned above, where the Chill Cube made the cabin much colder than the set temp. This was a one-off, not experienced again. I had it on AUTO MODE and AUTO FAN that time. I noticed it switched itself to DRY MODE during the night. We were in the desert valley at 20% RH outside and a very comfortable 40% RH inside. When we got home, I ran the Chill Cube 24x7 for 8 days and nights unplugged, on batteries/inverter only! This time I set to COOL MODE, fan in AUTO MODE. The cabin started at 90F and it was 88F outside. I set temp on the Chill Cube at 76F and the Chill Cube kept the cabin at 76F daily for most of the week, got down to 74 on day 7 and 72 on day 8, as ambient temps got lower. I ended the test after 8 days, since it got cold again up here again (highs low 70s, lows high 40s). We're having a wonderful long spring in the AZ High Country! In the first 24 hour period, we used 60 Ah. This would be -10% SOC only for those of you with 600 Ah. Day two was about the same. Ambient temps lowered a little and on Day 3 we ONLY used net -15 Ah! These numbers include the 320W rooftop solar adding about 12 Ah every sunny hour of the day. The next few days were the same, only using about -2% SOC per day. I believe the Chill Cube will get colder than set temp ONLY when A/C is not really needed, like overnight in the desert where it gets cool outside. Next time when sleeping on a cooler night I should just turn it off. Our lovely spring temps will end soon. I'll run a similar test in 60-90 days when it gets very hot even at high elevation. Last 3 summers, I had the Oliver plugged in with the Dometic P2 set at 80F. It would run nonstop during afternoons with near 100F highs. Without A/C the Oliver could get to over 110F sitting in the sun outdoors, not good. We could hear the LOUD P2 from our deck 100 ft away. Last week while the Chill Cube was running, I thought once Chris had turned it off. I was outside walking around and behind the Oliver and I could not hear the A/C running at all! When I entered the cabin, I could hear the Chill Cube on its very lowest fan setting. In Auto FAN it will run slower than the LOW FAN setting, very low and quiet! 😎4 points
-
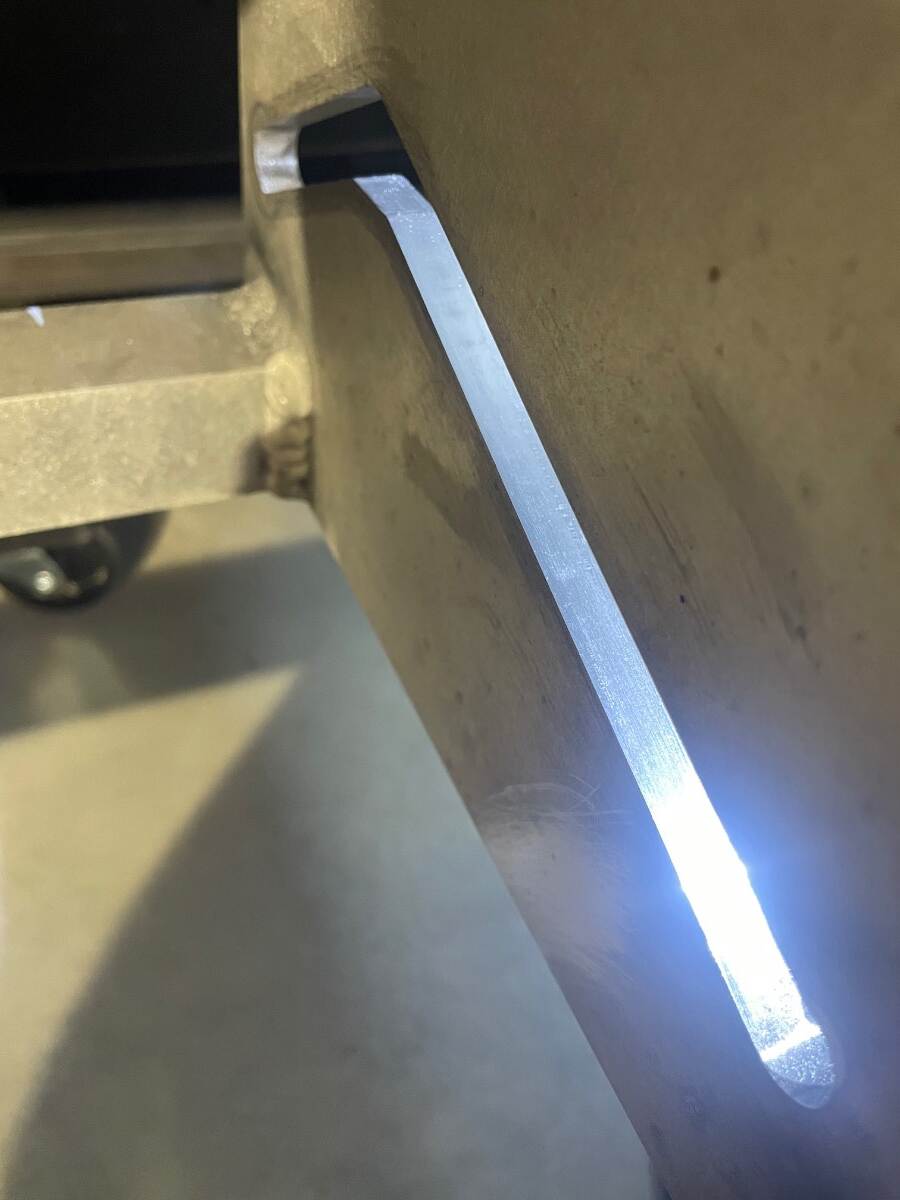
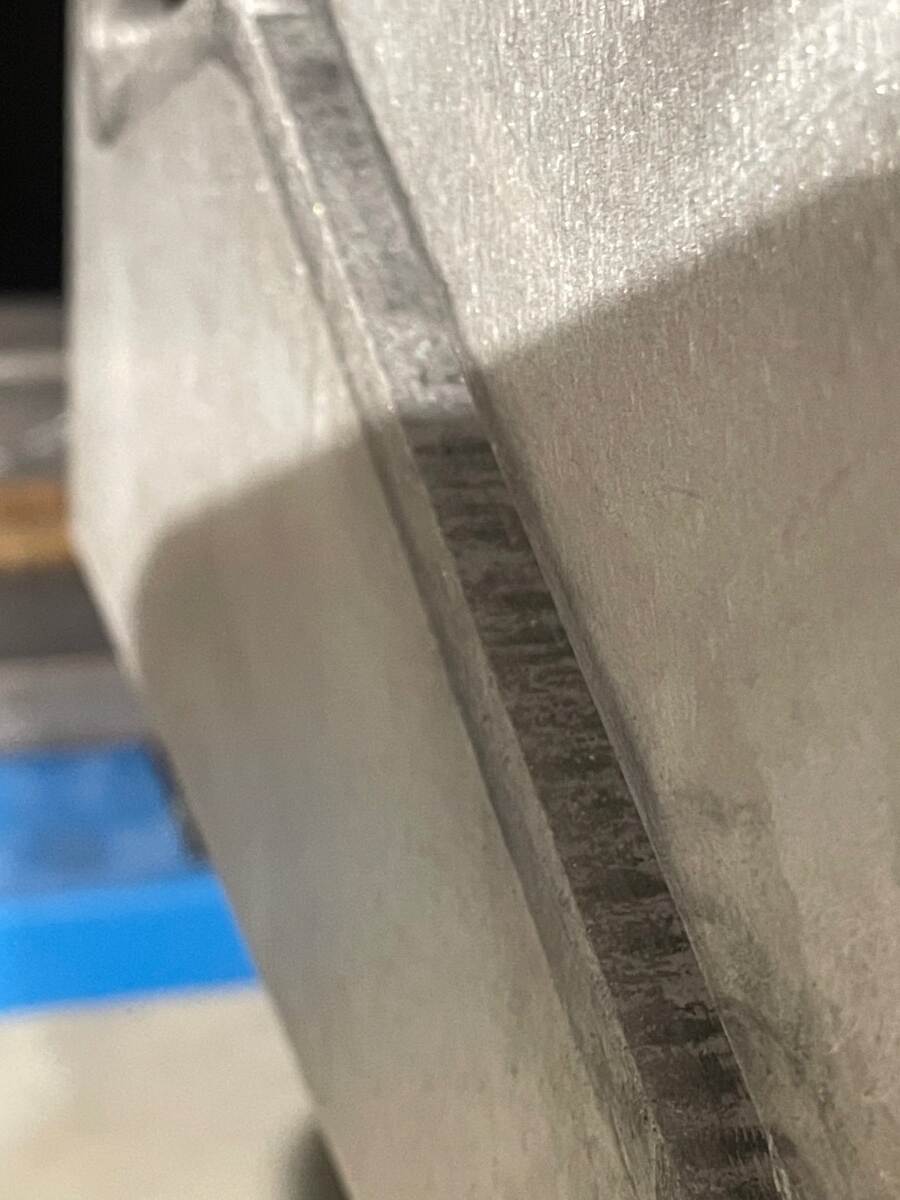
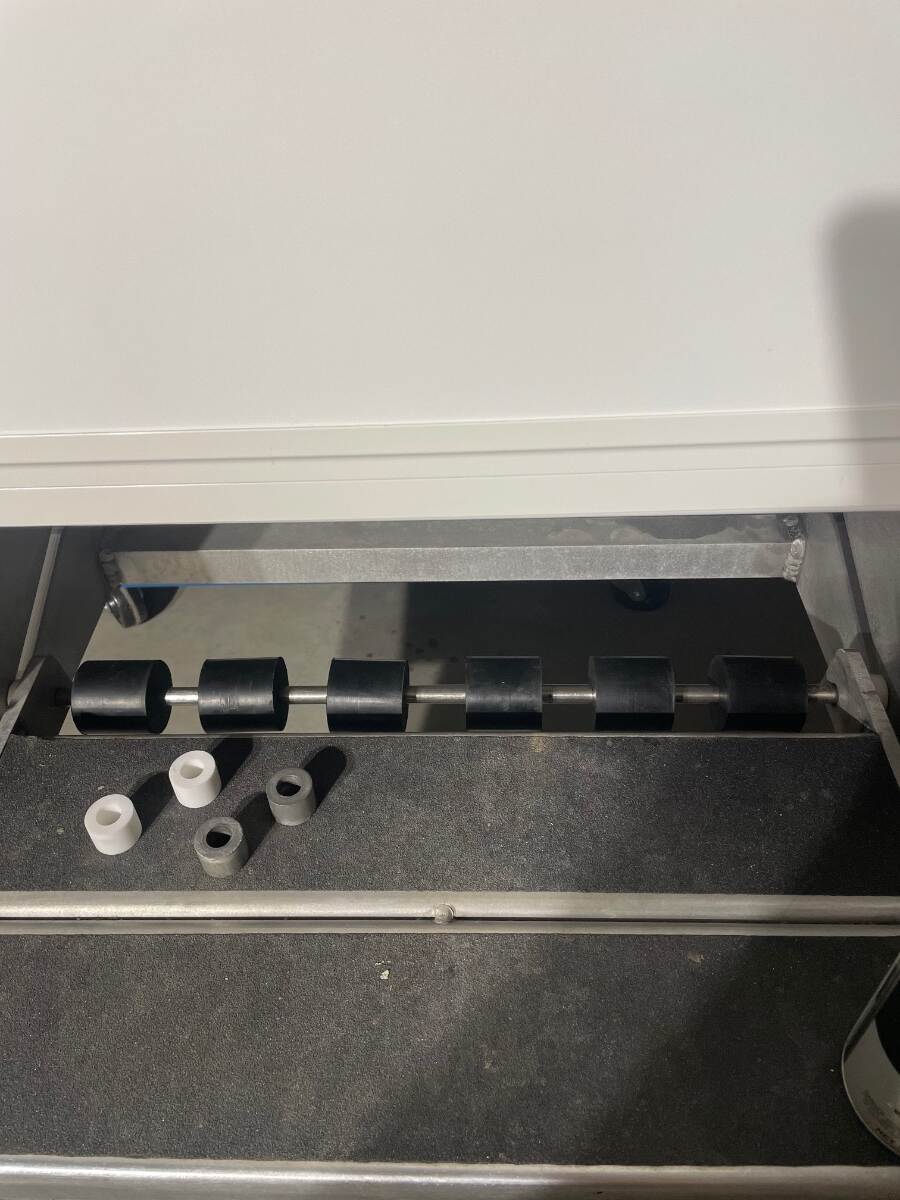
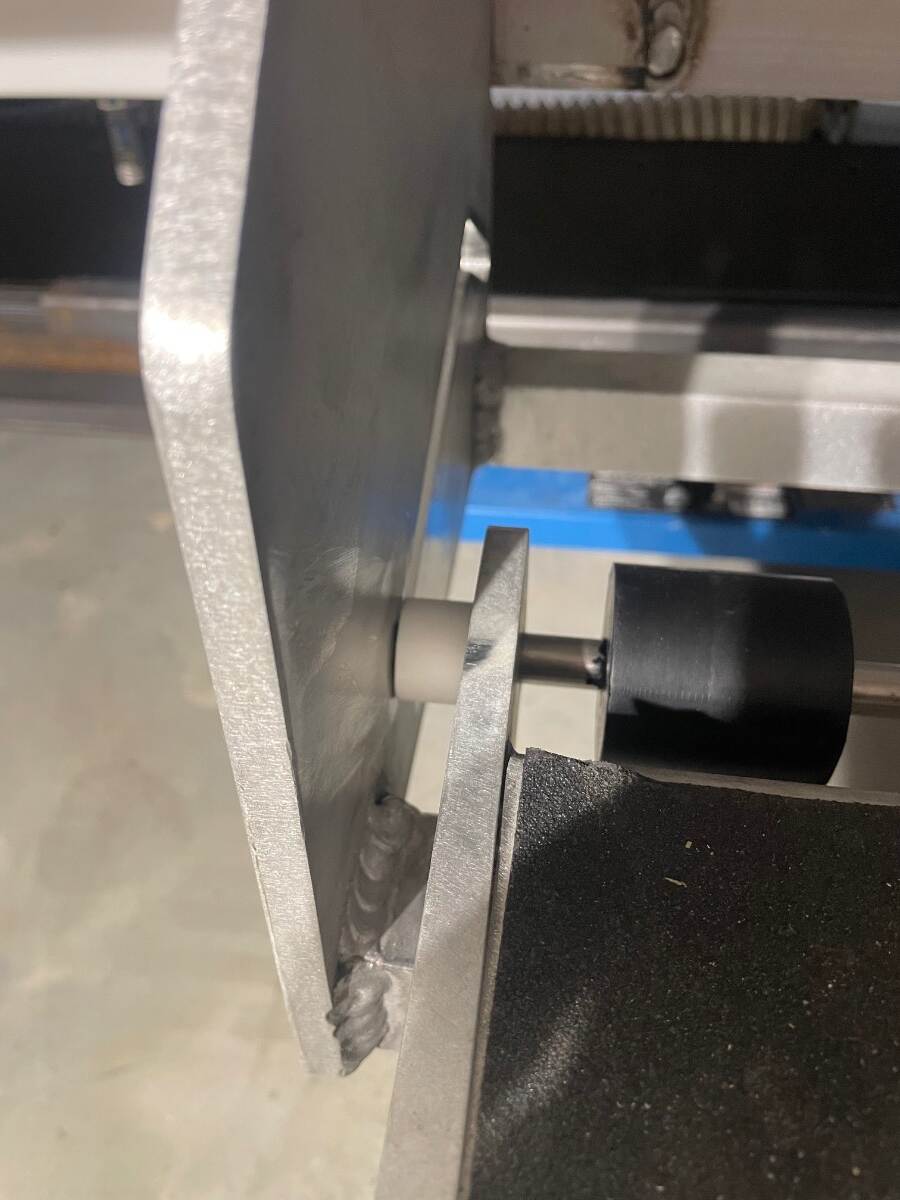
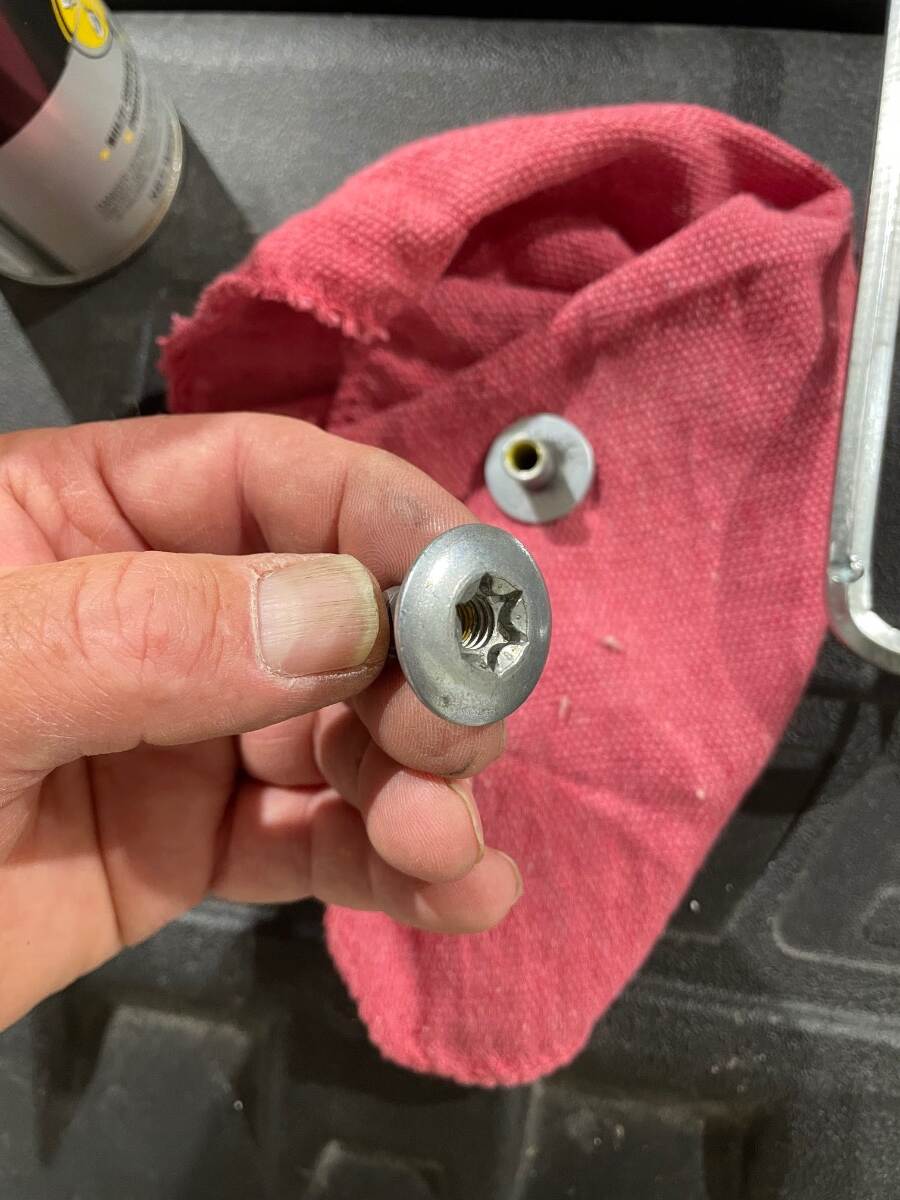
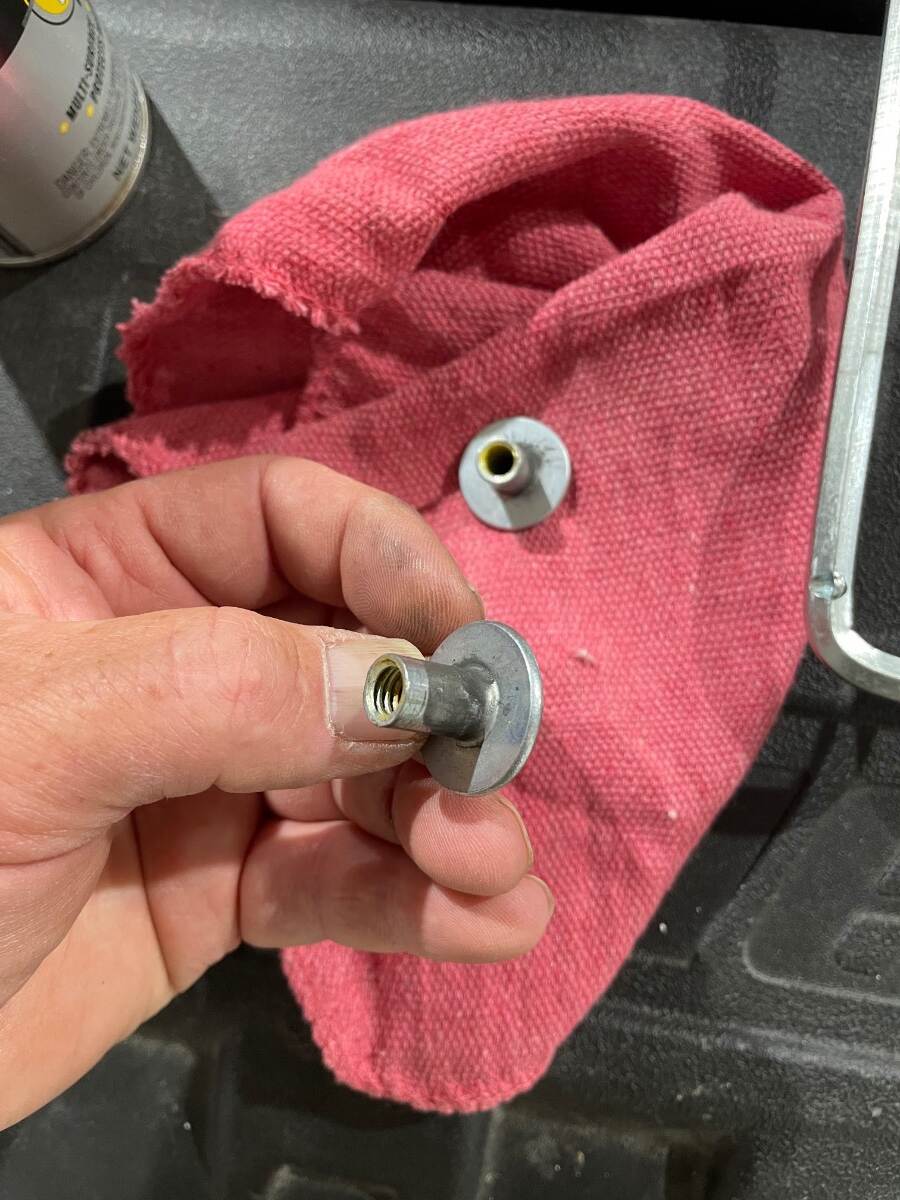
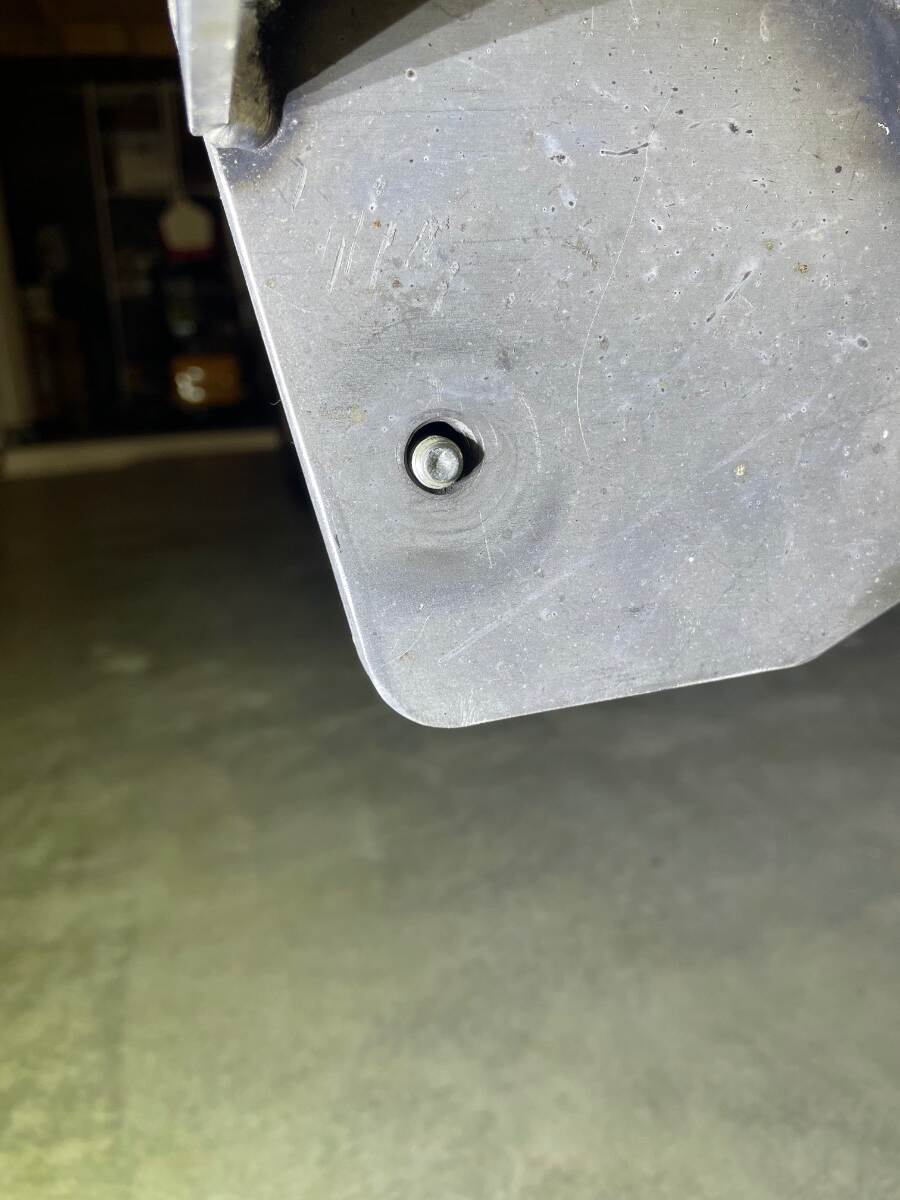
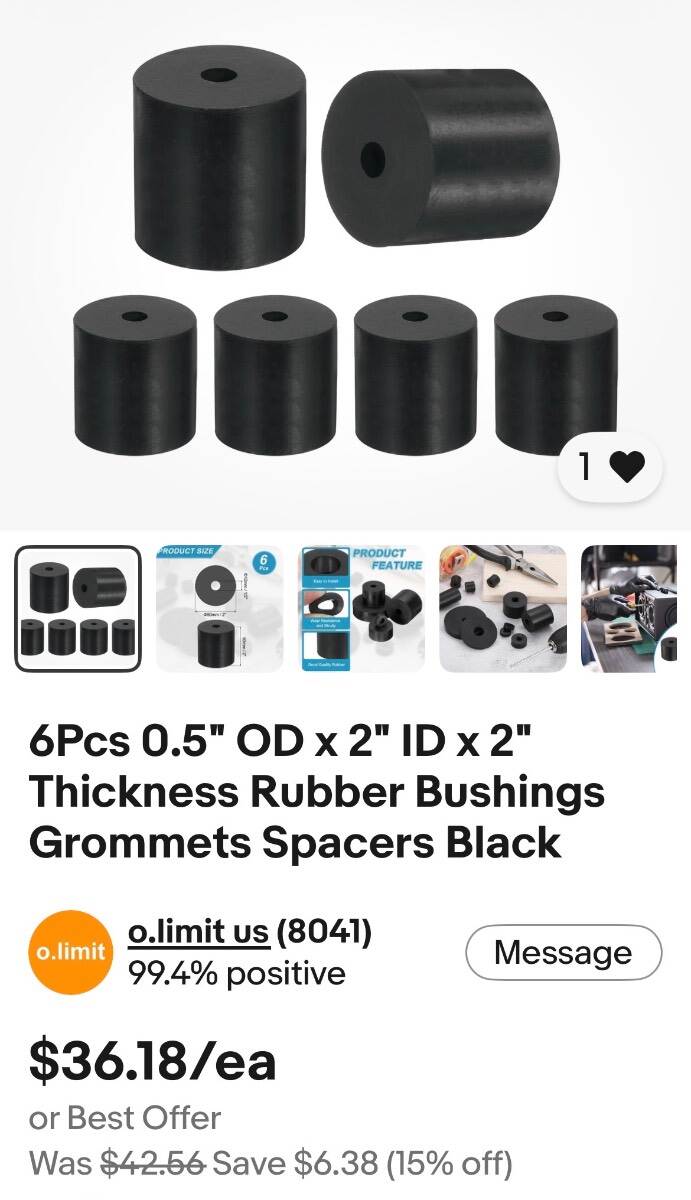
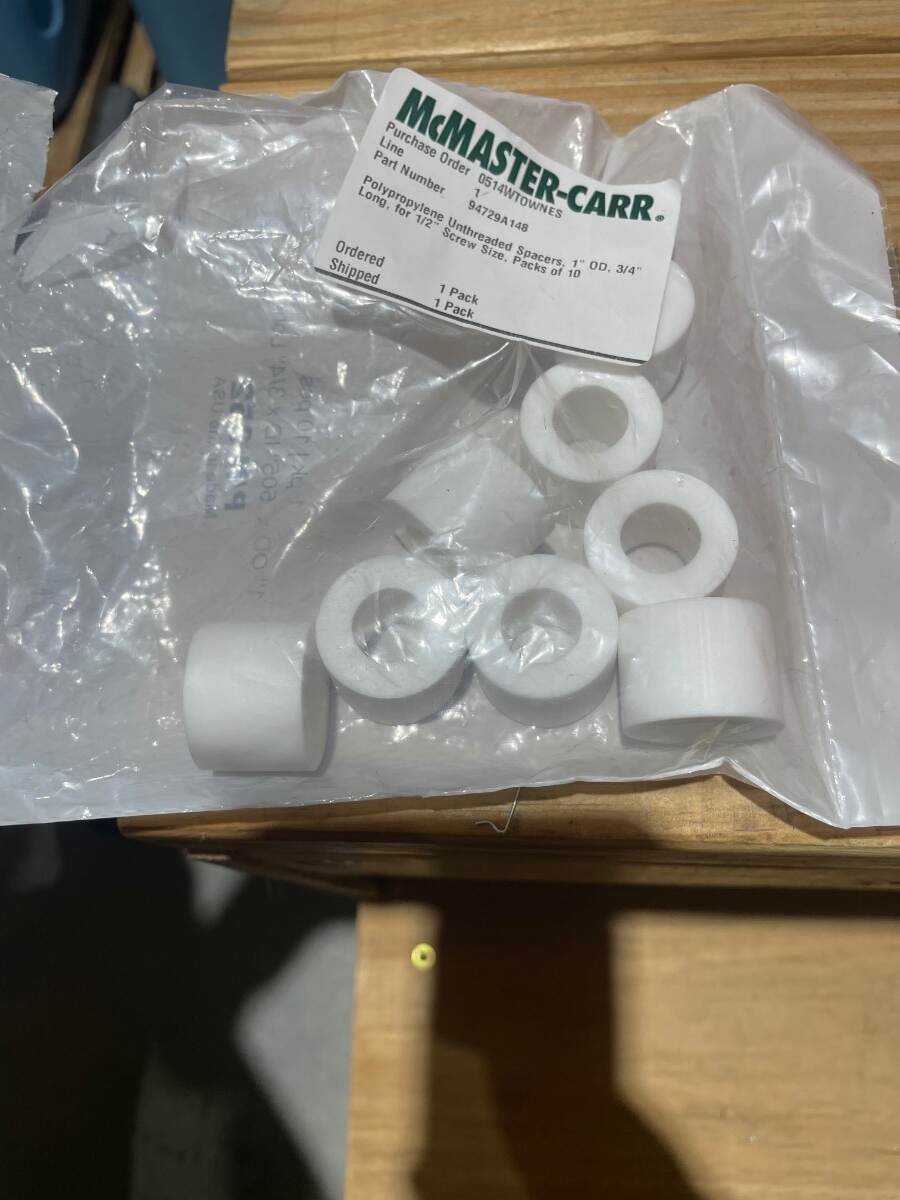
The steps on our Oliver have always been loud when being lowered or raised. I have taken some “steps” that have made them quieter. And before you ask, no, I don’t have before and after noise level analytical data. I just know that they are quieter. 1. I draw filed the top and bottom of both slots. This picture after a couple of draw passes with a file shows the roughness left by the machining process. The bright spots are the high spots of the rough surface. I suspect that one side of the slot was smoother than the other due to the direction of rotation of the cutting tool. Picture of the bottom of the right side slot after several passes using a draw file technique. Be sure to keep the swarf cleaned out of the file. There is a light shining on the surface. It is much smoother. I then applied some silicone lubricant to both sides of each slot and allowed it to dry. 2. I next reassembled the steps and placed (6) rubber bushings on the stainless steel rod to dampen the vibrations that the rod made when being drawn through the slot in the aluminum sides. 3. I also replaced the aluminum spacers on each side with polypropylene spacers. 4. I removed the female halves of the sex bolts that act as the pivot for the lower step. I used a T50 torx bit but it is actually a T55. I have the correct bit now. Never pass up the chance to buy a new tool. I applied silicone lubricant to the inside of the hole in the step side and to the outside of the binding barrel and allowed it to dry before reassembling. I will probably drill those holes out to receive Oilite bushings this winter but this will suffice for now. Material used. The rubber bushings are actually 1/2” ID x 2” OD x 2” long. The holes aren’t perfectly centered but I didn’t need for them to be. I chose 2” OD so that they would clear other parts of the step assembly. You will have to lubricate the step rod and the hole in the bushings to be able to assemble them. The polypropylene spacers came from McMaster Carr. Be sure to use a dry silicone lubricant instead of grease. The grease will retain grit picked up off the road. Bill
 3 points
 -
We were very happy with Jason at J and J Rv Repair in the Keys. I think he heads to Holland Michigan area in the summer and does RV repair there also.2 points
-
UPDATE: I scheduled time with First Responder Mobile RV Repair -- the owner is Darrel Kehne. He's retired from the Collier County Sheriff's Office and he and his wife have owned various rigs. He trained with the RV school in Texas last summer (his certifications are on his website). He was extremely nice to work with, very efficient with his time and resolved a number of outstanding items for me. He had heard of Oliver, but had not seen one before. I suggested he come to the rally in October. :) I recommend him, for anyone in this area of Southwest Florida. https://www.firstrespondermobilervrepair.com/ (note, there are a few businesses with this name, in other places...)2 points
-
If you are invested in the Milwaukee ecosystem, pretty handy tool for camping and more! Not as strong or pinpoint as canned air in some cases but handy nonetheless. https://www.milwaukeetool.com/products/details/m18-brushless-precision-blower/0887-201 point
-
About 9 years ago, on the start of my second year with my still "new" Ollie I stopped into a donut shop in Rock Springs, WY. Upon getting back to the Ollie I noticed that my fridge wasn't working. Luckily, there was an RV repair shop just down the street that agreed to help me even though they were VERY busy. Fifteen minutes later I was back on the road but not until I had a chance to ask just how they fixed the problem so fast. The tech told me that bugs, dust, and debris of all sorts can land on or "foul" several things in the burner area. The solution for this is to carry a can of compressed air in order to simply blow that stuff away even without having to remove any parts. The only warning he had for doing this was to never direct that canned air flow into the burner jet orifice. So, given the dirt roads I often use I've needed that compressed air more than once - don't leave home without it! Bill p.s. it is best to purchase a can while at home - there are several locations I've found where compressed air (if they have it) is held behind locked doors. This is apparently due to some people inhaling what comes out of these cans in order to get "high", therefore, local ordinances have restricted sales.1 point
-
It's absolutely worth having a spare fan standing by. I've received two from them as well and already had to replace the original. Couldn't be easier to due and fully understandable as to why these little fans, running 24 hours a day, would eventually burn out. I sometimes run the fan for a few days when returning from a trip if I am not replacing the medium. Have noticed that if it is dry out, the medium itself does dry and some fine coir dust is pulled through the fan and deposited into the translucent exhust tube. I'd bet tht dust does not make the fan too happy. Will hit the fan with air from my travel compressor when changing medium in the future to minimize this problem1 point
-
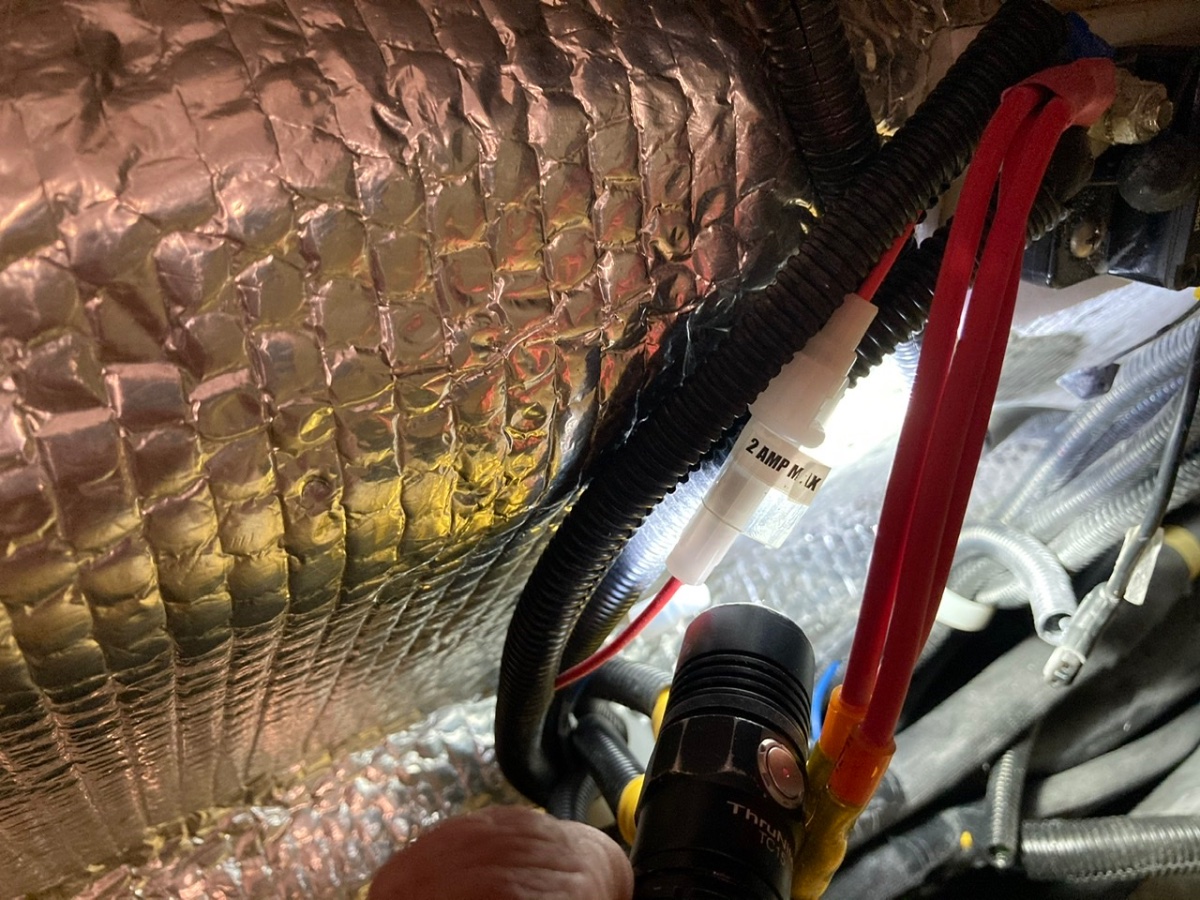
Try under the street side bed. It is a 2A slow blow glass fuse. See photo below. This post was edited due to an error in original response.
1 point


-
Recent Achievements
-


")


")


")


