
ScubaRx
-
Posts
3,327 -
Joined
-
Last visited
-
Days Won
175
Everything posted by ScubaRx
-
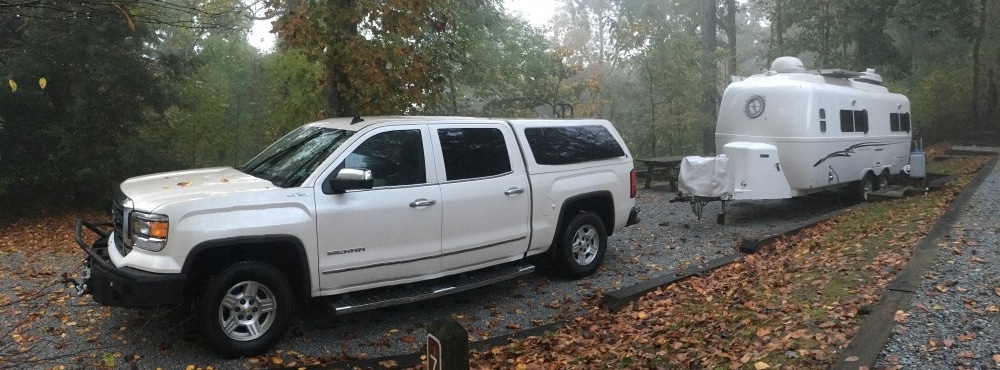
Hi Deborah, if you were in Townsend las t weekend you looked at our trailer. We are towing with a 2007 Tahoe. Its tow capacity is just over 7000 lbs. Most full size GM products today have even greater tow limits. You want something that can get you up and over the hills without struggling too badly. Surprisingly, our gas milage only fell about 1 mpg over towing our former 17 footer.
-
Hey Skip, it's good to have you join the most exclusive Fiberglass RV Owners Club in the world, the Oliver Owners. Nobody else even comes close to the quality of an Oliver. I know you are excited and the waiting is the worst. We waited a year from the time the Oliver folks decided to reopen the trailer line until a few weeks ago when we picked up the new Outlaw Oliver. Having owned (and sold) one of the original 17 footers, the anxiety was awful while we didn't have an Oliver sitting in its garage out there beside the house. We will be taking her to Townsend, TN soon for the rally there. We are loading her and getting her ready to travel. I've been through all the systems (heating, cooling, water, etc.) and everything is ship-shape. We are meeting a couple of your fellow Tucsonans (is that the correct term?) in the Smokies just after they pick up their new Oliver. I love your name "Base Camp Oliver".
-
I wish we could have crossed paths. I know you will love the new Ollie. Have you picked out a name yet?
-
I'm planning to tow ours with my completely restored 1973 Cheverolet Vega GT, the one with the RPO L11 engine and Holley 5210C progressive two-barrel carburetor. It's a sweet ride and I think the combo will look super cool going down the road.
-
Does anyone have any knowledge or opinions about camping in the Cincinnati area? We have to be there in May to take care of some family business. I prefer a State Park. I have looked at Big Bone Lick State Park across the line in Kentucky
-

Adding another Oliver 22 to the West coast!!
ScubaRx replied to pickleballone's topic in Introduce Yourself
I am basing that on the fact that the front jack is always supporting weight when it is down and it is the same jack as the other two albeit configured differently. If you wanted to take the stress off the jacks, put a jack stand at each jack and lower the trailer onto them. Viola, no weight on tires or jacks. Anyway, that's how I've done it for a long time. It's good to hear from you guys. -
Adding another Oliver 22 to the West coast!!
ScubaRx replied to pickleballone's topic in Introduce Yourself
Since we are unable to travel right now we turn on the stove and propane heater once a month, along with the refrigerator, check the batteries, and left it up and spin the tires to a new location. Pam and Allen During the off-season for us, I have always lifted the trailer completely off the tires (with the jacks) and left it that way until we were ready to use it again. It will not hurt the jacks and we don't create a "flat spot" on our tires over the winter. -
Adding another Oliver 22 to the West coast!!
ScubaRx replied to pickleballone's topic in Introduce Yourself
I would like to say hello to both Dave and Mary and to Bob and Charlotte. I am thrilled to have both couples on the New and Improved Oliver Forum. It's been so long since we had anyone new to join the forum and be active that it's hard to remember how much fun it used to be here. My wife, Tali and I purchased one of the original 17 footers back in 2008 and dubbed her the Outlaw Oliver. We loved it and managed to put over 20000 miles on it despite both of us still working full time. In March of 2012, Robert called one Sunday afternoon and asked if we would be interested in a 22 footer. Well, the rest is history. We sold the Outlaw Oliver to a nice couple in Virginia this past summer and she was re-christened the Virginia Oliver. We should be picking up the new Outlaw Oliver in the next week or so. I know the excitement all of you are feeling. Tell us about the things you selected for you new Olivers. We all love to hear what your getting. -
The inside height of the new Oliver 22 footers is 78 inches. We had one of the first generation 17 footers and are getting one of the new twin bed models. The beds are 76 inches long. How tall is your son? You can make the side dinette down into a bed for either you or your son. That way everyone would have their own bed. Our pets have always slept either with us or on the floor (depending on their size). I know you and yours would find this a VERY comfortable unit.
-
They used two different finishes on these lights back then. Bright and Nickel. They were made by ITC part # 81295. http://www.google.com/url?sa=t&rct=j&q= ... 9247,d.eW0
-
WELCOME TO OLIVER FORUMS !
ScubaRx replied to Oliver Travel Trailers1571927901's topic in Welcome to the Oliver Forums
Welcome to the forums, Aragoongori -
Yea, the new forums are up. It appears that some of the more recent posts to the old forum did not pass. Further I had posted some into the beta version of this format and I can't see where they passed either. No matter, we got the new one up and it looks good. Seems that all the older posts made it across. I suppose that Oliver now has full control. Good.
-
Steve, Removing the satellite dome should not be a big problem. It would give you enough room to mount two 100 watt panels up there. I am including a link to the AM solar web site. http://www.amsolar.com/home/amr/multili ... stems.html Under pre-configured systems you can spot the SunRunner™ Signature W/100/25/6/Pro System down near the bottom of the page. This kit contains a single 100 watt panel and contains everything you need to install it down to the last nut and electrical fitting. This is the system we are having installed on the new Oliver they are building. We added an additional 100 watt panel kit to round out our system.
-
Making Things Easier, Propane Tanks and Water Heater
ScubaRx replied to DCKiefer's topic in Ollie Modifications
Moving the water heater switch was a very good idea, it was never convenient where it was. I had to modify our propane tank setup too, for the same reasons that you stated. -
Well, The Outlaw Oliver is no more. She has been sold to a very nice couple in Virginia and re-christened The Virginia Oliver. Work has started on our new 22 foot Outlaw Oliver in Hohenwald. Hopefully we will be camping again before the first of the year. We lost our big boy, Storm several months ago. He had dilated cardiomyopathy. As you all know, we loved him very much. He was a little over nine years old. We have a new puppy in our lives now. He is a red and tan Doberman. His is a little over 12 weeks old and already over 30 pounds. He's gonna be a biggun. We named him Reacher. Tali and I hope everyone is doing fine and enjoying the summer.
-
If you are referring to the Jensen model JE1912LEDWM, it should fit just fine. This unit is 18 inches wide and 12 inches high. It is a little over 2 inches wider and about 2 inches narrower than the units currently in our Oliver's. The mount is a standard VESA 100mm x 100mm (same as ours). I went out and measured mine and I think it would look good. A quick internet search will find you the best price. Steve
-
Hidden Fuses and Electric Jack Disconnect
ScubaRx replied to DCKiefer's topic in Mechanical & Technical Tips
Nice work on the disconnect switch. That's a good idea. Don't worry about those two fuses on the converter. They will blow only if you hook it up backwards. Don't let your curiosity get the better of you and remove those fuses "just to see if they're OK" You'll probably end up dropping them down inside the converter while trying to re-install them. Then you'll have to disconnect all the wires from the converter and remove it just to get the fuses back in place. Then while re-installing it you'll realize that you should have gone out and taken the negative cable off the battery's and...well, you get the picture. If your converter quits making 12 volts it will be the converter and NOT the fuses. I replaced mine a couple of years ago in the wilds of Utah (second part of the above saga). I did send the old one back to Progressive Dynamics and they rebuilt it for me at no charge so I have an extra in case one goes out again. -
Norcold 412 Refrigerator "n" code and lockout
ScubaRx replied to SeaDawg's topic in Mechanical & Technical Tips
Has anyone had to replace their refrig yet? I've heard that you have to take part of a wall out to get it out, is that true? Pam That is true with all of our 17 footers. It will not go out the rear window. The wall between the bathroom and the closet has to be removed in order to turn the corner with the fridge and get it through the door. -
For those members that may not have gotten Robert's email: May 21, 2013 Greetings from the Oliver Travel Trailer Family! The Oliver family is excited to continue the legacy of the family’s passion for the outdoors by bringing back Oliver Travel Trailers in 2014. Oliver Travel Trailers’ innovative design, hand-crafted construction and personal attention to detail ensure each customer has the opportunity to experience a true lifetime of enjoyment and many unforgettable family memories with their travel trailer. That is why Oliver Travel Trailer owners are satisfied customers, proud supporters and considered extended members of the Oliver family. The Oliver 22’ Legacy Elite II leads off the next generation of the travel trailer family. Named to honor the late John Oliver and his passion for RV’ing, we are pleased to launch new 2014 production with the classic 22’ Legacy Elite II Oliver Travel Trailer. The 22’ Legacy Elite II base model features and specs are included in the attached brochure. The MSRP is $45,000 for the base model features and specs, plus we’re including thermal windows, Kingdome satellite and a wall mount thermostat for the AC. We are currently working on a list of special packages with pricing that we can send to you soon. We will have four 22’ Legacy Elite II models available for delivery by January 2014. Two of the four units are already reserved, which leaves two available for the January 2014 release. After that, units will be built in the order purchased and we will complete two hand-crafted units each week. As with our first run of Oliver Travel Trailers, we sell direct from our headquarters and manufacturing facility in Hohenwald, Tennessee. Selling direct, versus a dealer network, allows us to provide exceptional service, important to the Oliver family, and control our cost to each customer. Units are to be picked up in Hohenwald but alternate delivery arrangements can be made. We’d love to hear from you and stay in touch. Re-construction of several items to provide information to the Oliver Travel Trailer family is also underway, including our website and official forum. Our new website, http://www.olivertraveltrailers.com, featuring full details of the new production, is expected to launch in late August or sooner. Please check the website from time-to-time for updates. Additionally, we are working diligently to update http://www.oliverforum.com, so the forum will allow new members to join. I will send updates to you on both of these informational sites as they are available. Thank you for your interest in Oliver Travel Trailers. If you have any questions, please do not hesitate to give me a call, or drop an email message to me, I will be happy to talk with you. We look forward to growing the Oliver Travel Trailer family, and hope you will visit us in Hohenwald. Sincerely, Robert Partee Robert P. Partee Sr. Office: (931) 796-6600 Ext. 216 / Cell: (931) 306-1908 rpartee@olivertraveltrailers.com / 609 Swan Avenue, Hohenwald, TN 38462
-
Well now darn, wish I had read this earlier. I went out the other day and replaced all the grease in both hubs with freshly baked bread, thinking that it would prevent future problems. I guess I should have just had a sandwich instead.
-
Tali and I will meet up with you guys on Friday. We look forward to seeing the 22's again and will most likely be placing an order. A larger trailer will solve a lot of our travel problems that all relate to space. Three dogs and two people in our 17 is tight. Plus there are several grandkids wanting to go camping. Hoping for good weather and lots of fun. Steve
-
Welcome, The suspension is leaf springs with dual shocks on each wheel. The axle hubs do e EZ lube fittings although there are mixed feelings/reviews concerning their sole use as a means of lubrication. If we can be of further help, feel free to ask.
-
Steve, I'm convinced that the problem is just your switch. I'm pretty sure I got mine from the company that made the jack (funny I can't seem to remember.) I do know that any heavy duty DPDT (double pole, double throw) switch will do. That double terminal could be accomplished with a Y-connection for that wire as it only supplies power to the light. Steve
-
Steve, Ours too, failed after about a year of service. I knew it was the switch as it would work sometimes and other times not, depending on just how you jiggled the bat handle on the switch. I called the company and they sent me a new switch. I took this opportunity do make a mod that is ever so handy for us. Whenever our gray tank gets over half full we have to raise the front of the Oliver to make the shower drain properly. It's never a convenient time to raise the front when it becomes evident that it needs to be done (wet, cold, soapy, naked—you get the picture.) So I decided to extend the capability of operating the jack to the inside. I've enclosed some pics of the mod. I'll admit it was not the simplest thing I've done to her, but it is useful. Don't worry, probably that's all that's wrong with the jack on your Oliver. It's a simple fix. Hope yours has worked out to the good. Steve
-
Hi Sherry and Paul, Hope everything is going well for you two. We are starting to make plans for the traveling season. I don't know if Larry will see your post. The last time he was on the forum was Thu Nov 10, 2011 @ 11:01 pm. I did talk to him a month or so ago. They were ify about a Jugfest this year, siting lack of interest. Don't know if that's changed. I've talked to a few others, they said they didn't plan to go. We might go if it happens. Steve