Frank C
-
Posts
781 -
Joined
-
Last visited
-
Days Won
18
Everything posted by Frank C
-
Even if the tires are off the ground it’s technically not too much. Although Oliver no longer recommends it, there are owners (not me) who use the jacks for changing a flat tire. The weight rating of the jacks (3,000 lbs. for each jack) is sufficient.
-
I’ve found that I have to run the left and right rear stabilizer jacks down far enough to the point that it lifts the trailer a good bit (and leveling it) and takes a portion of load off of the suspension. The suspension flex is what is allowing the rocking, so you have to make the jacks carry the load a bit. I use the Andersen jack buckets so the jacks aren’t extending very far, so not much flex in the jacks themselves.
-
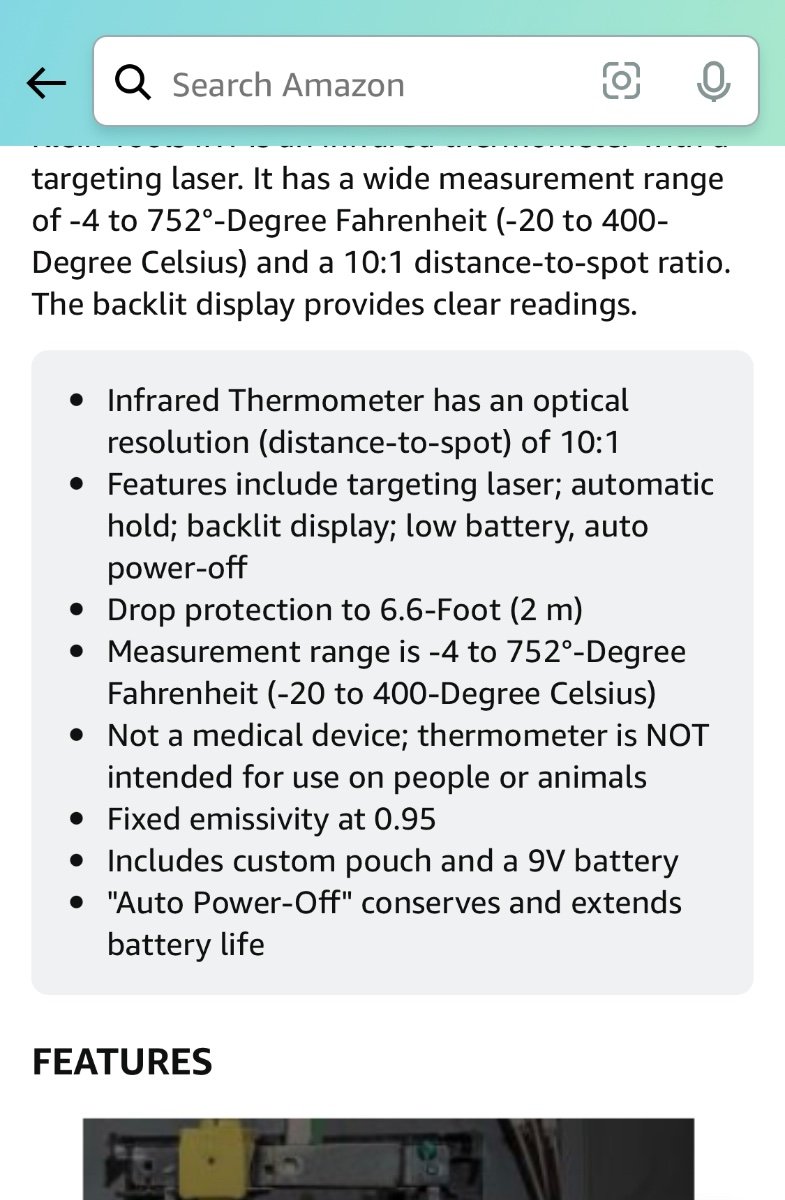
Ok, this probably isn’t likely but just considering all possibilities that could cause the difference in readings. There’s another possibility and it’s due to a feature (or lack of) on the inexpensive consumer infrared thermometers for setting an emissivity value. Are the brake drums on your passenger side a noticeably different color or texture (surface rust) than the ones on the other side? A surface will give a different apparent infrared temperature reading depending on how good of a radiator it is. A shiny silver surface (a good reflector but a bad emitter) will give a different reading than a black surface (a bad reflector but a good emitter) even though both are at the same temperature. It’s what is referred to as the emissivity value (flashback to Penn State Heat Transfer class). The low cost consumer infrared thermometers typically have a fixed emissivity value programmed into their electronics to give a reading. One IR thermometer example in the photo shows a fixed emissivity value 0.95. I’ve seen others that have a selectable value of 0.5 or 1.0, but real world surfaces can vary widely in their value. Are the brake drums on your passenger side a noticeably different color or texture (surface rust) than the ones on the other side? That’ll give a difference in readings. An old trick we used at work when checking circuit board component temperatures was to paint the entire board with flat black spray paint to give a consistent emissivity value for all the components. Here’s a basic explanation: “Emissivity is defined as the ratio of the energy radiated from a material's surface to that radiated from a perfect emitter, known as a blackbody, at the same temperature and wavelength and under the same viewing conditions. It is a dimensionless number between 0 (for a perfect reflector) and 1 (for a perfect emitter).”

-
Moonlight Mile sold her trailer not long after she took delivery (this thread is over a year old). She had many issues with the trailer and her initial camping experiences, some self inflicted, some not. Made for some interesting reading and lessons learned.
-
Does your tow vehicle have a single exhaust pipe pointing straight to the rear on the passenger side?
-
My 2019 Ollie has the Fastway breakaway switch. Replacement cable/pin assemblies are available on Amazon. But as John mentioned above, with that pin pulled/gone, that means the electric emergency brakes are activated and have been on continuously, causing them to heat up (they are an electro-magnet system) and draining the trailer battery. If you’re hooked to shore power you likely won’t see any battery drain, but the electric emergency breakaway brakes are still ON as long as that pin is out of the socket. If I were in this situation, until you can get the proper replacement cable/pin, you may want to try using a small wooden dowel rod or a piece of wooden popsicle stick CAREFULLY inserted into the switch that would at least open the switch contacts and interrupt the power so the brakes turn off while the trailer is sitting stationary now. And I’m now going to order a cable assembly to keep as a spare just in case. Fastway ZIP 6 Foot Breakaway Cable and Pin 80-01-2206 https://a.co/d/ehXNBSn
-

Best Replacement for Lifeline gpl-4ct agm battery
Frank C replied to roguebooks's topic in Mechanical & Technical Tips
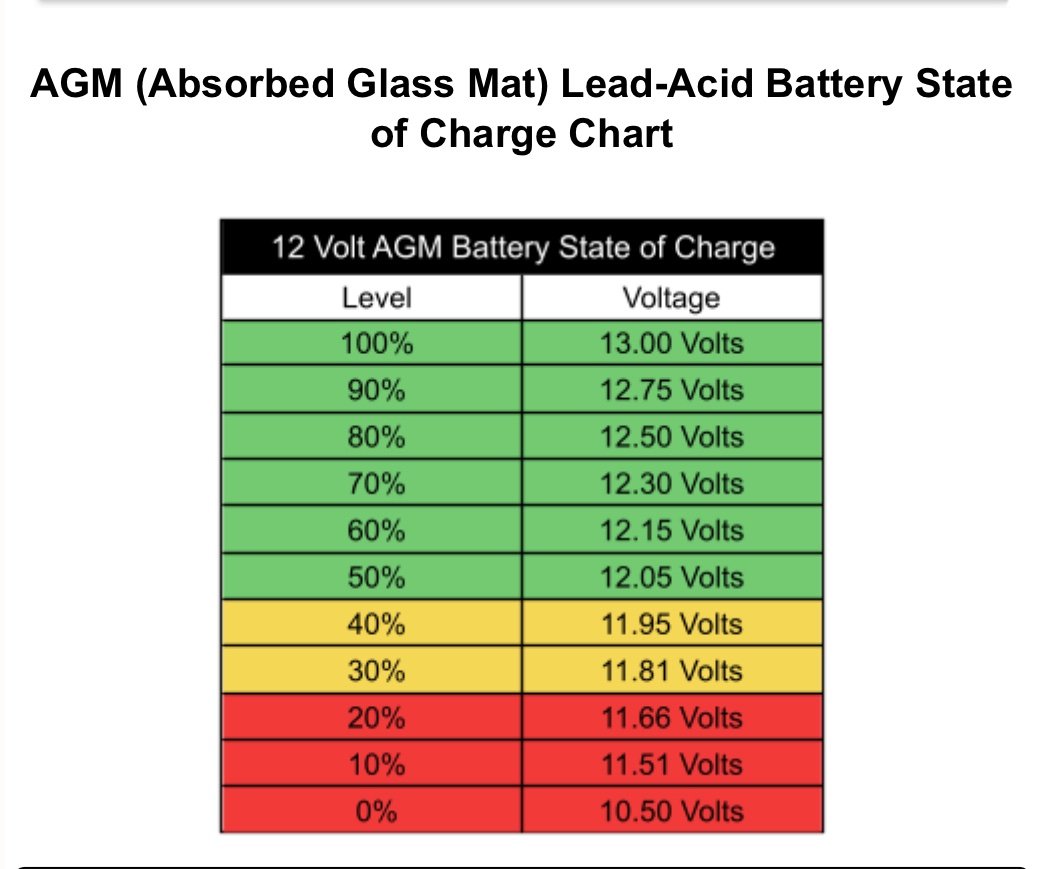
If your batteries are only getting “up to 11.1 volts”, they are not charged. 11.1 volts is a dead battery (less than 10% charged). 7 volts is really dead. Sounds like your batteries do need replaced.
-
How to Replace a Broken Bathroom Door Mirror?
Frank C replied to DonnaDuane's topic in Mechanical & Technical Tips
If/when mine breaks, I’ll probably replace it with a plexiglass sheet mirror. Kind of pricey, but lighter, and eliminates the future risk and safety hazard of glass breakage. This company will do cut to size. https://www.eplastics.com/plexiglass/acrylic-sheets/mirror -
The setting will vary based on road and trailer conditions (paved roads vs. dirt/gravel, dry vs. wet roads, trailer tanks empty or full). I’m towing our Elite II with an F-250 with the trailer brake controller gain typically set anywhere from 4.0 to 6.0 depending on road conditions and trailer loading. If it’s wet roads and the trailer tanks are empty, I’ll use a lower gain setting to prevent the trailer brakes from locking up when braking hard. If it’s dry paved roads and the trailer tanks are near full (that’s another 500 lbs. of weight) I’ll set the gain higher. There are plenty of videos on YouTube about how to adjust the trailer brake gain setting for your specific towing situation. You’ll have to experiment a bit for your truck/trailer combination, and also get comfortable using the little finger paddles on the trailer brake controller so you know how to use them when needed.
-
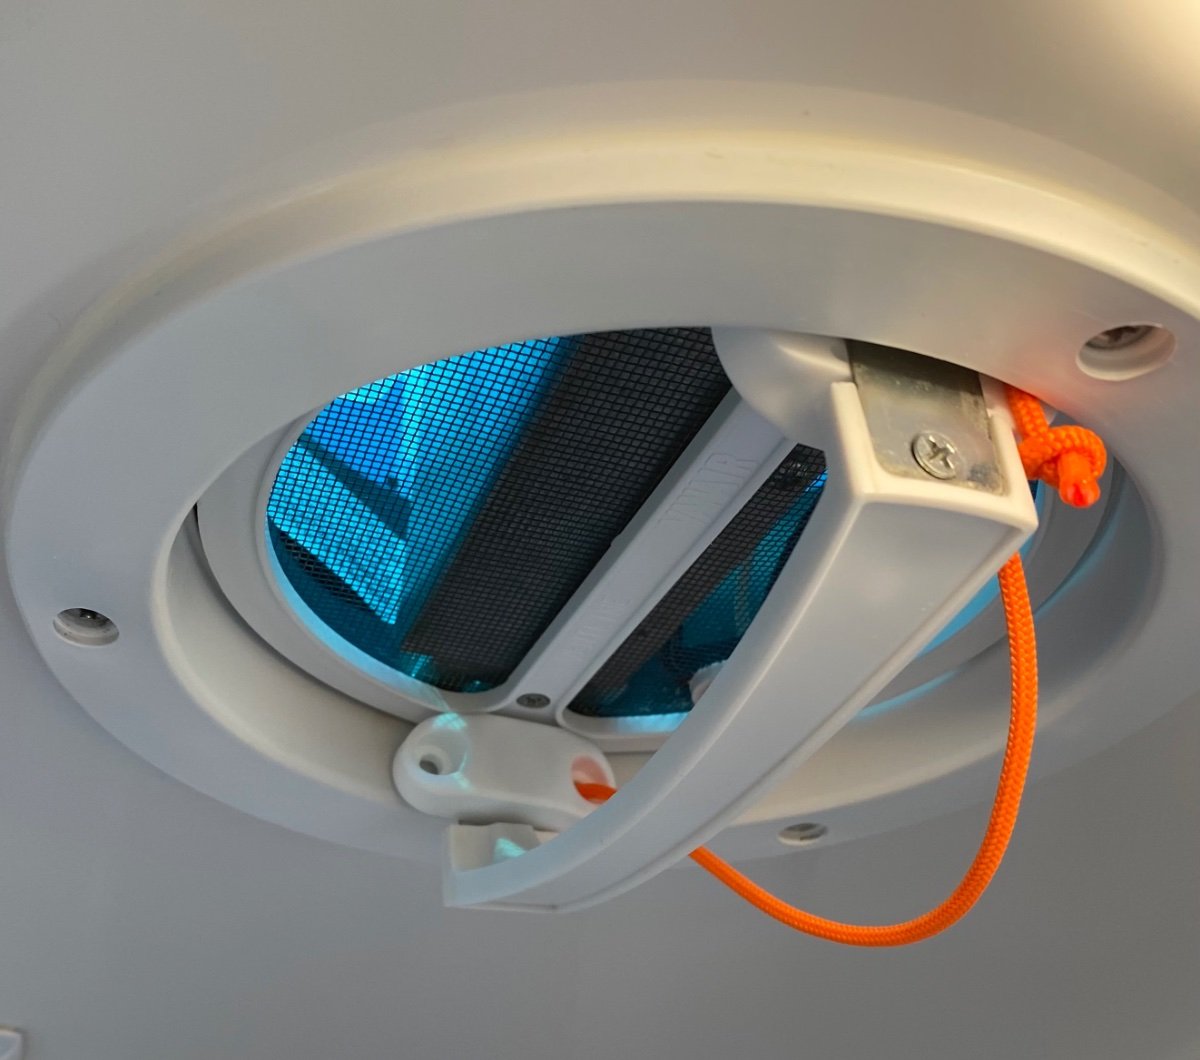
Looks like Oliver has changed suppliers for your model year Elite II bathroom fan. Is the black button on the left of the handle the fan on/off switch or is it supposed to be a latch to hold the cover in the down position?
-
Someone else had posted this magnet idea and I don’t recall who, but thank you for the idea! I’ve had an issue in the past with the bathroom ceiling fan cover popping open while traveling after Oliver had replaced the gasket on the cover during service a couple years ago. Oliver had used a thicker gasket so the cover didn’t seat fully down in the closed position. I had been stuffing a piece of foam into the handle when on the road to prevent it popping open and that worked, but I wanted something that looked a bit more professional/a bit nicer. I replaced the gasket on the cover with a thinner gasket material, so the cover seats now seats fully in the down position. But I still wanted something to secure it when down, and the previous magnet post came to mind. Two of the door latch magnets fit perfectly on the metal sides of the handle while traveling to prevent the cover popping up. Hamilton Bowes #1 Strongest - RV... https://www.amazon.com/dp/B07BWQ9MLF?ref=ppx_pop_mob_ap_share
-
Bathroom Vanity Cubby Modification
Frank C replied to Frank C's topic in Mechanical & Technical Tips
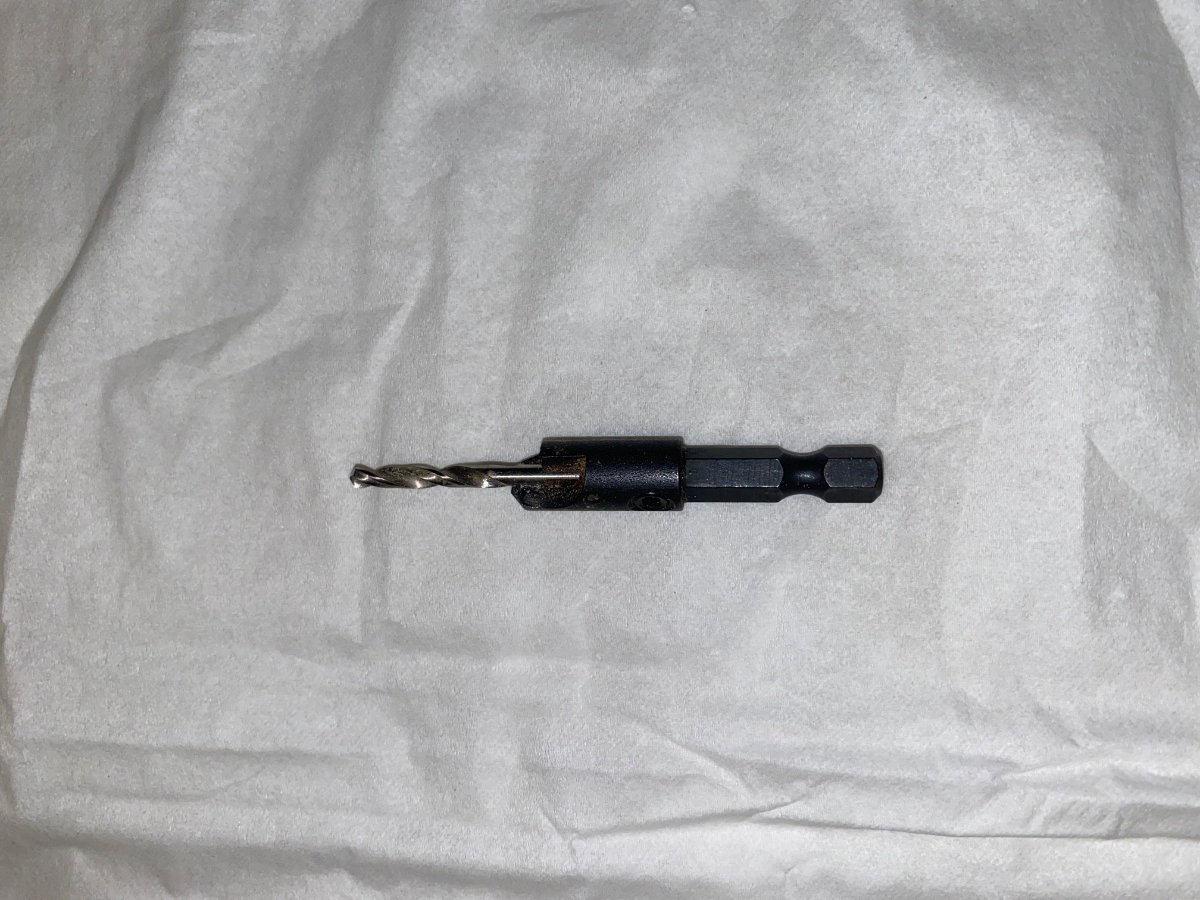
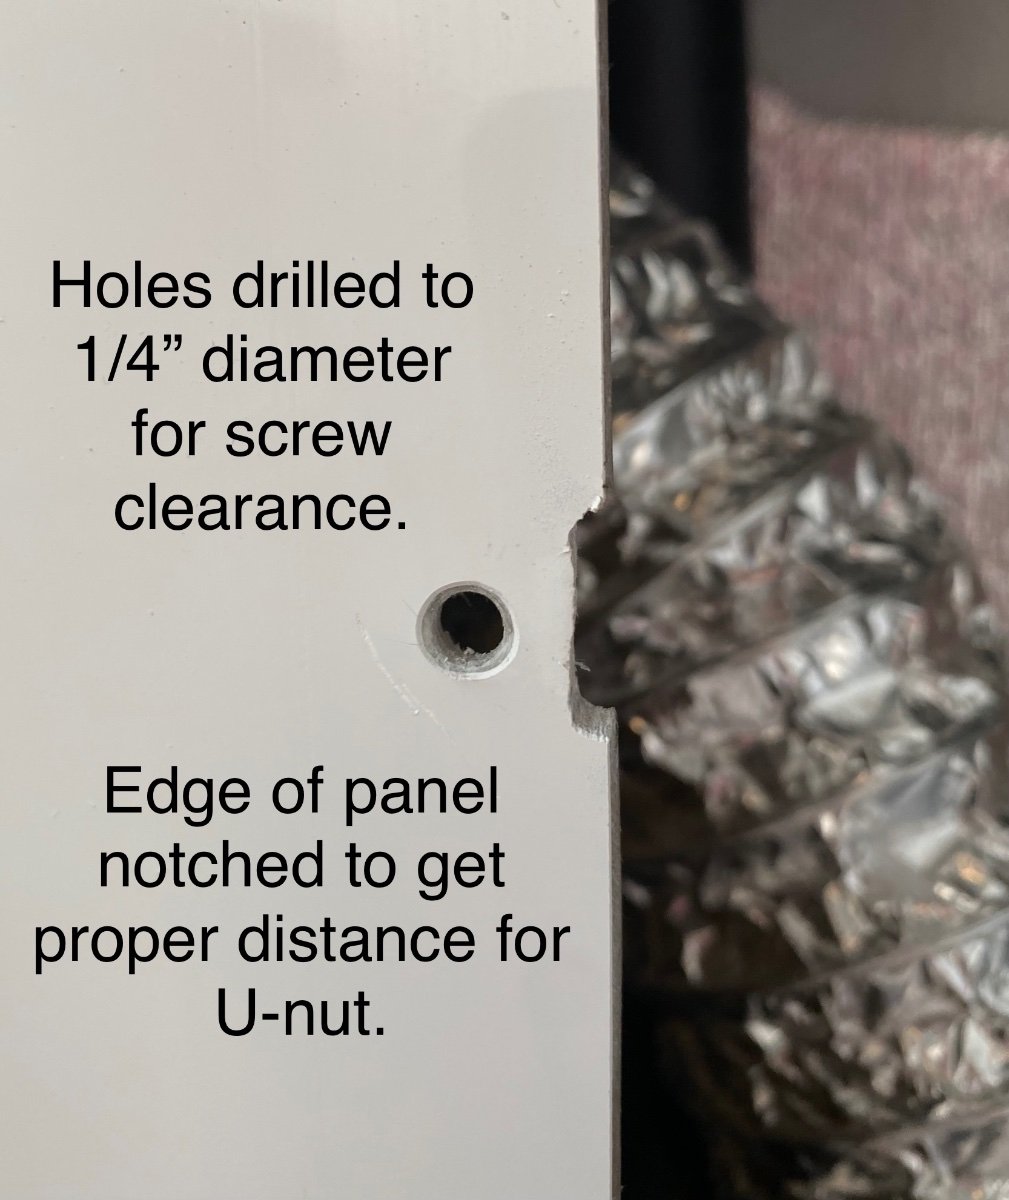
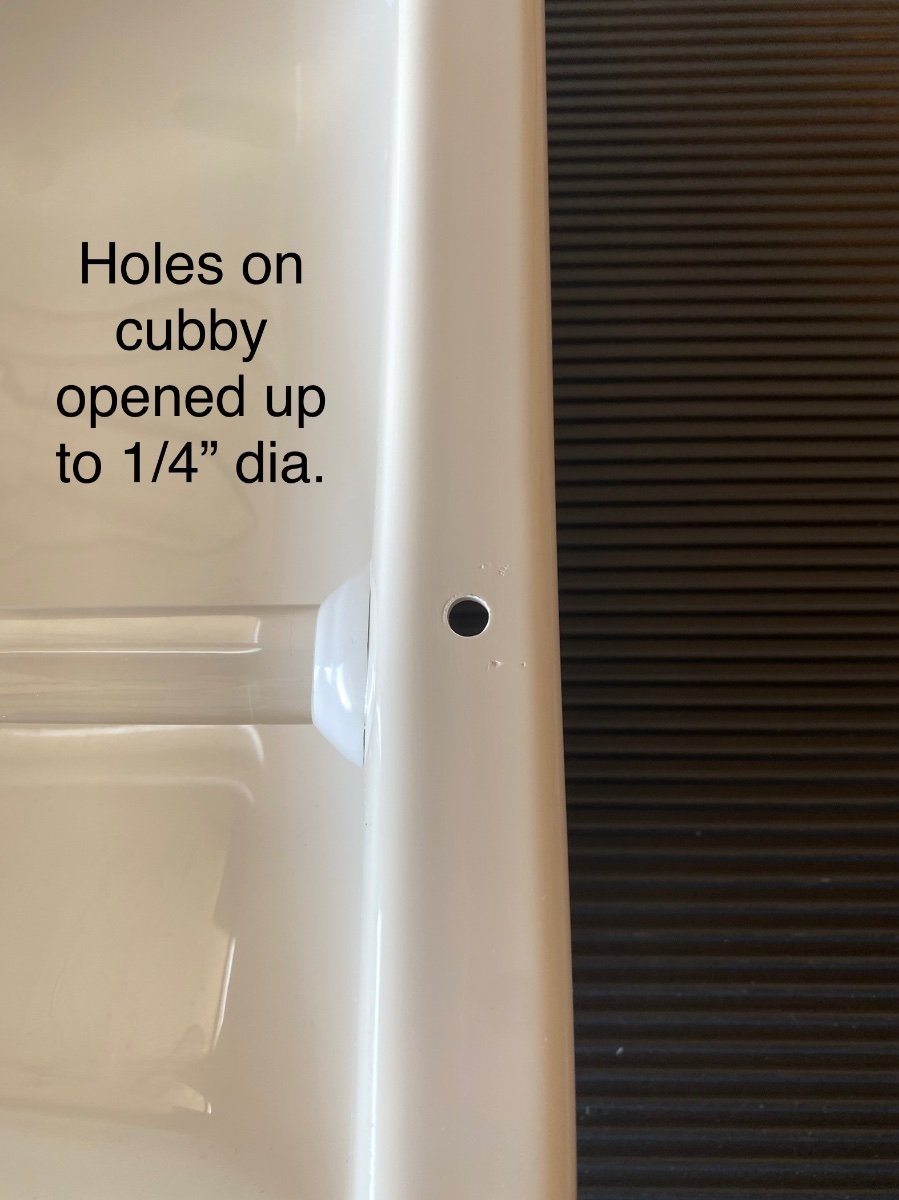
Here’s a picture of the type of countersinking bit I used first on the fiberglass to clean up/chamfer the gel coat surface. This one has a small enough diameter drill bit (1/8”) to fit through the original hole, so only the chamfered section of the bit touched the fiberglass to create the chamfered edge on the gel coat layer. Then after chamfering I used a 1/4” bit to open up the clearance hole through the fiberglass.
-
Bathroom Vanity Cubby Modification
Frank C replied to Frank C's topic in Mechanical & Technical Tips
Countersinking/chamfering drill bits are available at any hardware store (Lowe's, etc.). And yes, holes were chamfered with the countersinking bit before enlarging the hole diameter (see photos in original post for sequence of steps). -
I’m having the same issue. I may just remove the old reflectors and replace them with these DOT approved reflective stickers. No caulking needed, no place for water to enter. Available in amber and red. And they have the added benefits of less weight and lower wind resistance! 😂 3" Inch Round DOT-SAE Amber/Red High Visibility Reflective Stick-On Prism Reflector | Strong Adhesive/Weatherproof | Trailer Camper RV Flatbed Fender Property Boat Marine (Amber, Qty 4) https://a.co/d/5fPFVUT
-
There is another option that a few of us use (I learned this option from another Oliver owner on our delivery day). We have the standard flush toilet in the camper but since we took delivery of our Ollie brand new, it has absolutely only been used for #1. No solids, no toilet paper ever go into the black tank. #2 is done either at the campground restrooms, or roadside rest stop restrooms while traveling, or if absolutely necessary, using the bathroom in the camper, but then #2 and toilet paper go into disposable camp toilet bags (bag is placed in the toilet while doing your business) and then disposed of into a suitable trash receptacle. Makes life with the black tank very easy. Keeps water usage to a minimum. Takes a very long time to fill up the black tank before it needs emptying. No toilet cleanup/no scrub brush needed. No stuck/clogged drain valves, easy black tank emptying, easy black tank rinse. Trail Essentials Toilet Bags, Certified Biodegradable and Compostable; Use and Bury in Ground –Includes Convenient Water Resistant Carry Case https://a.co/d/ab7IGyb
-
Bathroom Vanity Cubby Modification
Frank C replied to Frank C's topic in Mechanical & Technical Tips
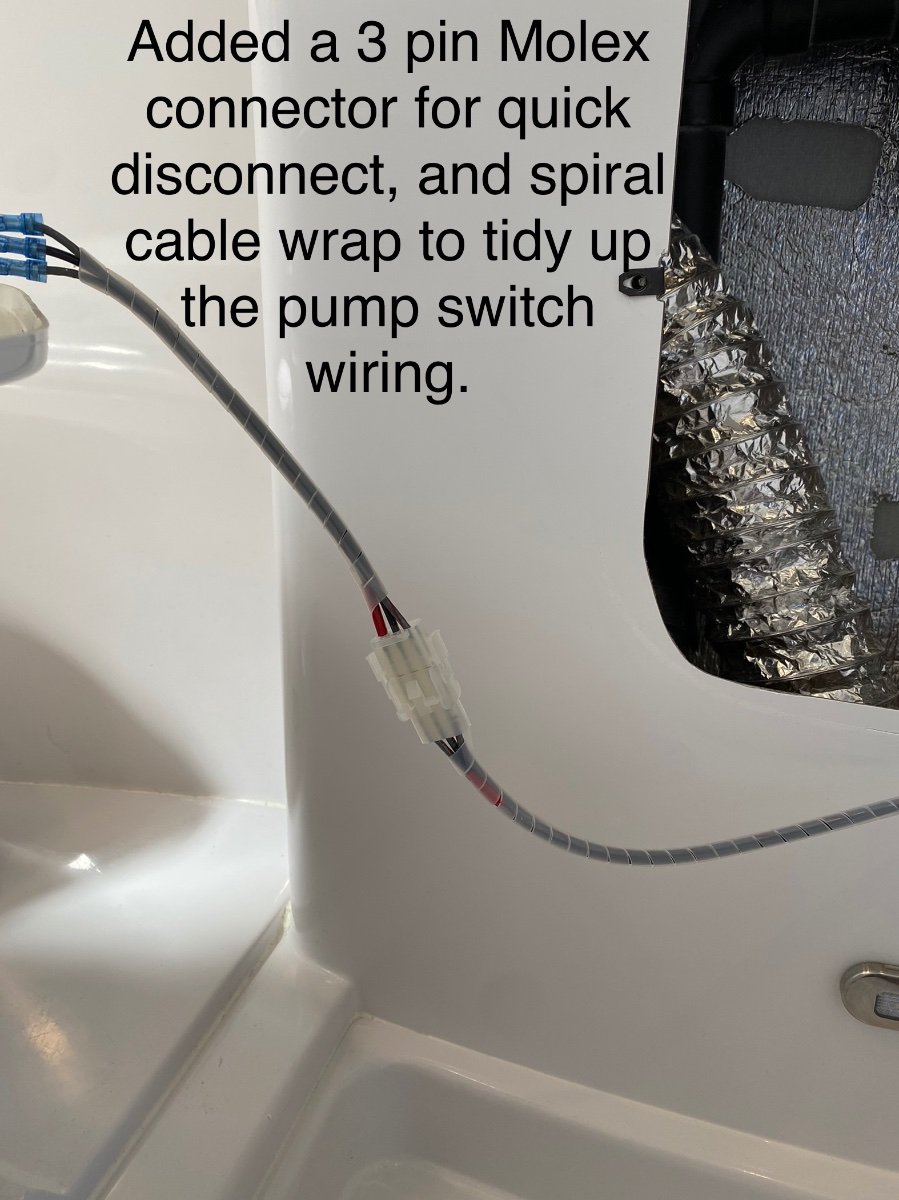
I just crimped the pins of the Molex connector onto the wires. And so far no leaks when I water tested it. -
Bathroom Vanity Cubby Modification
Frank C replied to Frank C's topic in Mechanical & Technical Tips
Link is in the original post. -
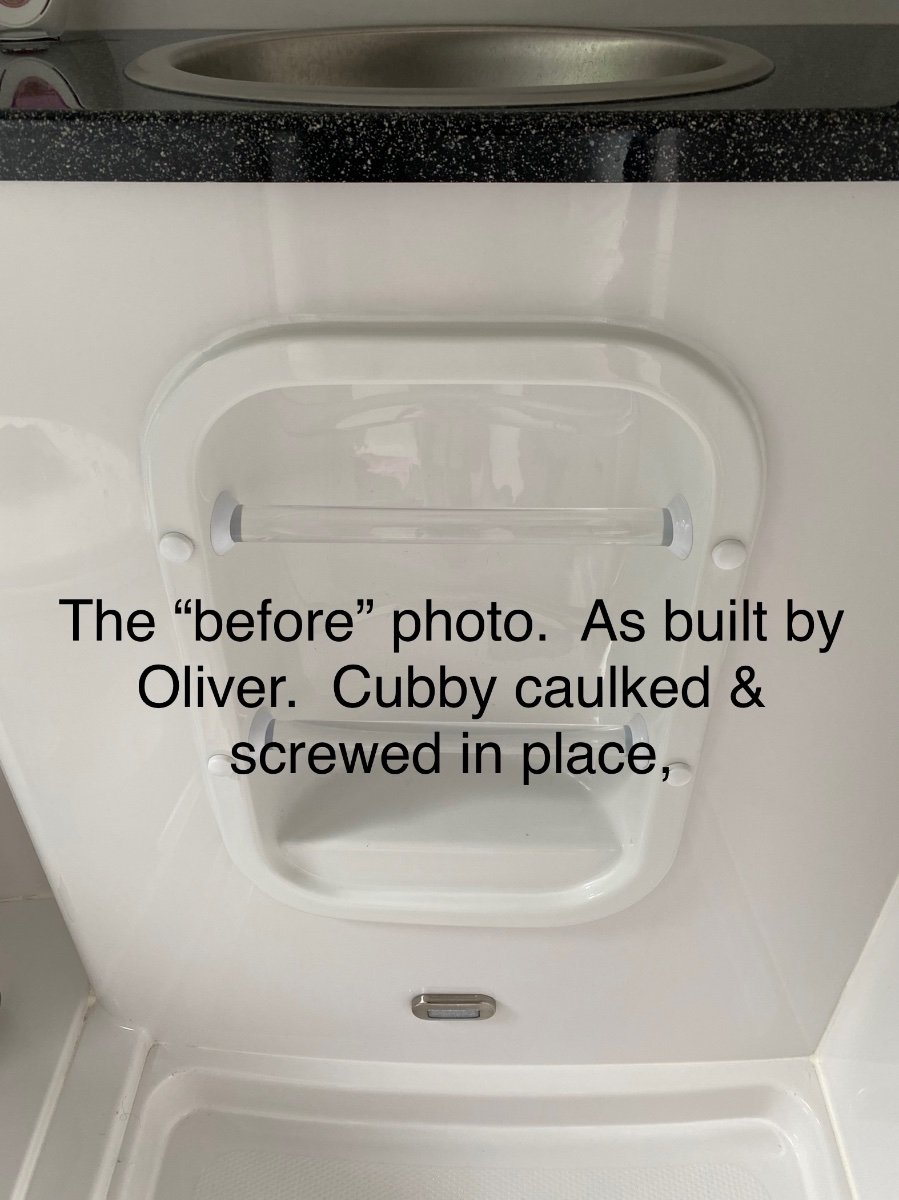
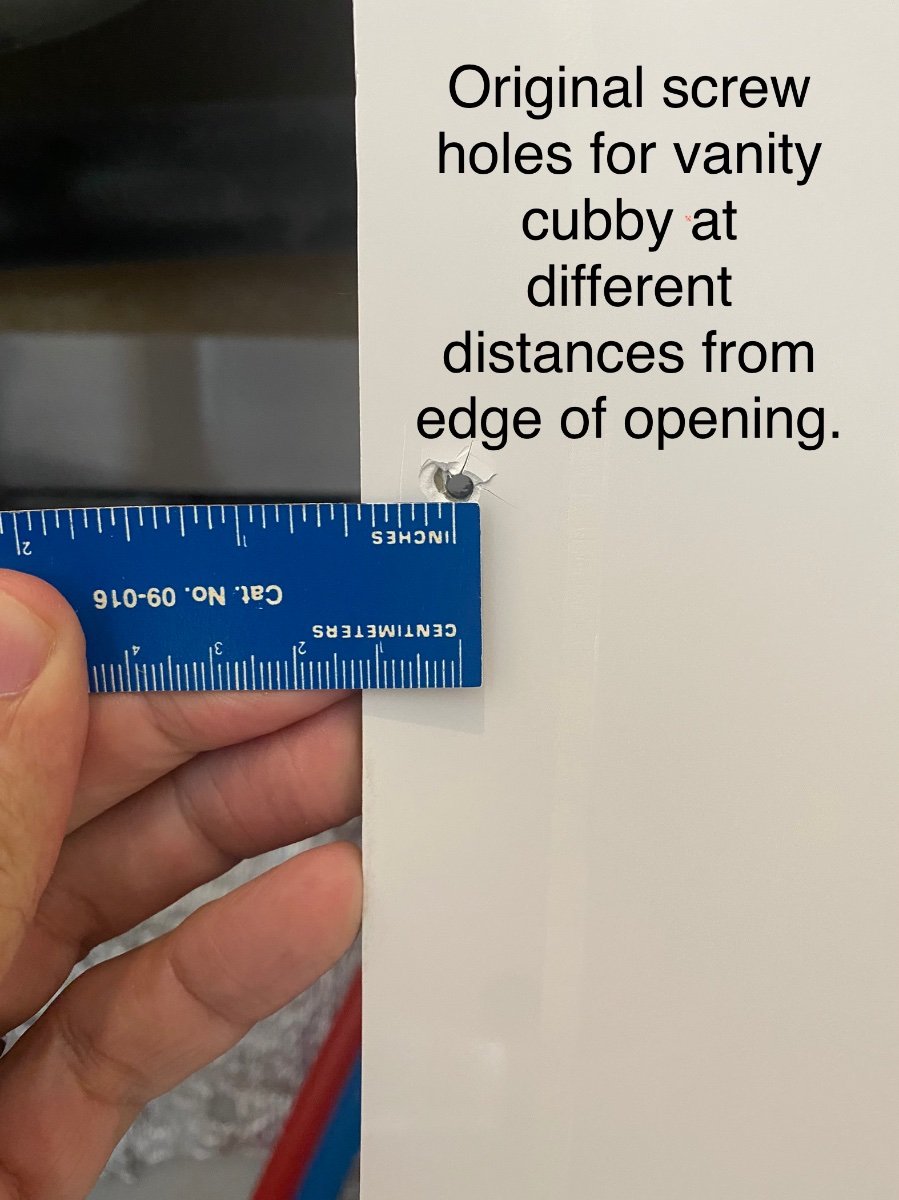
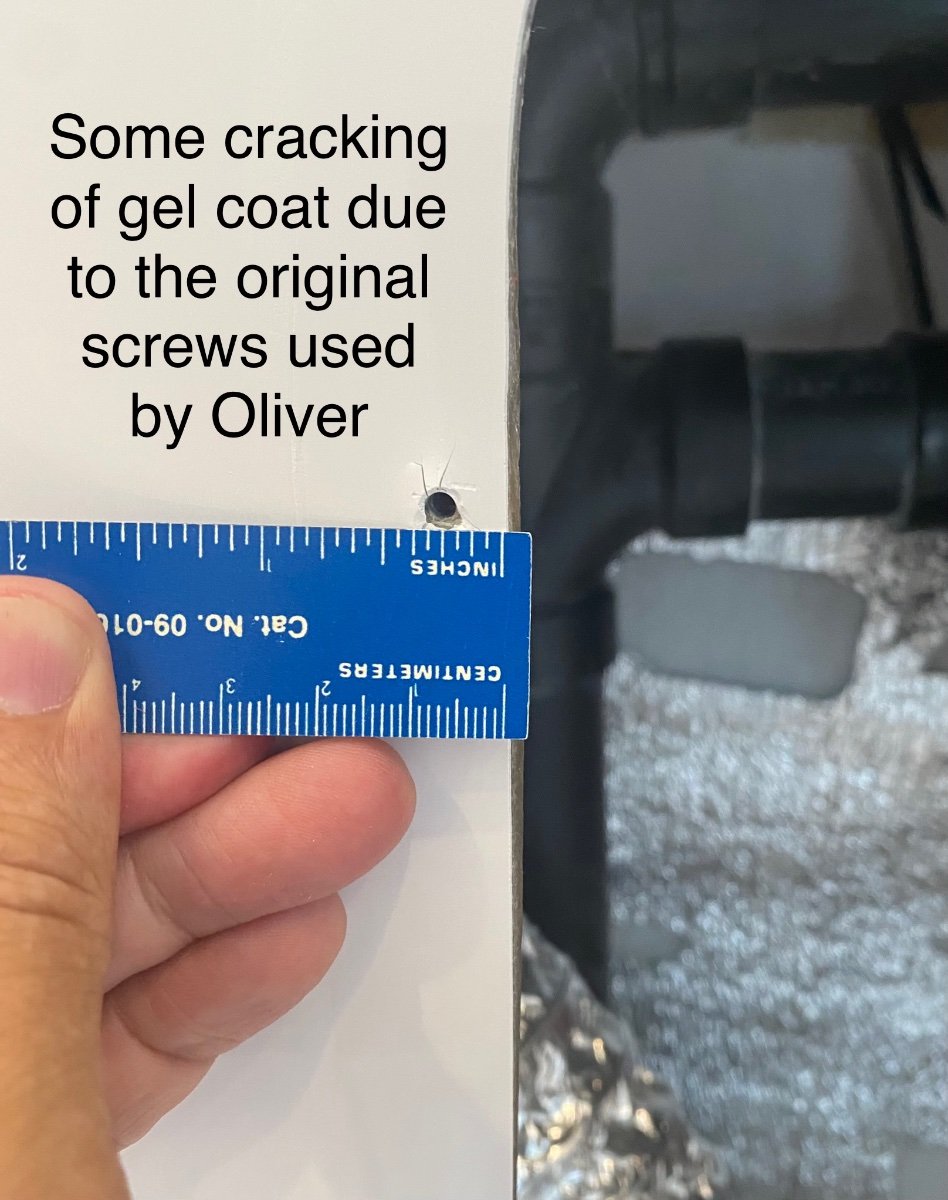
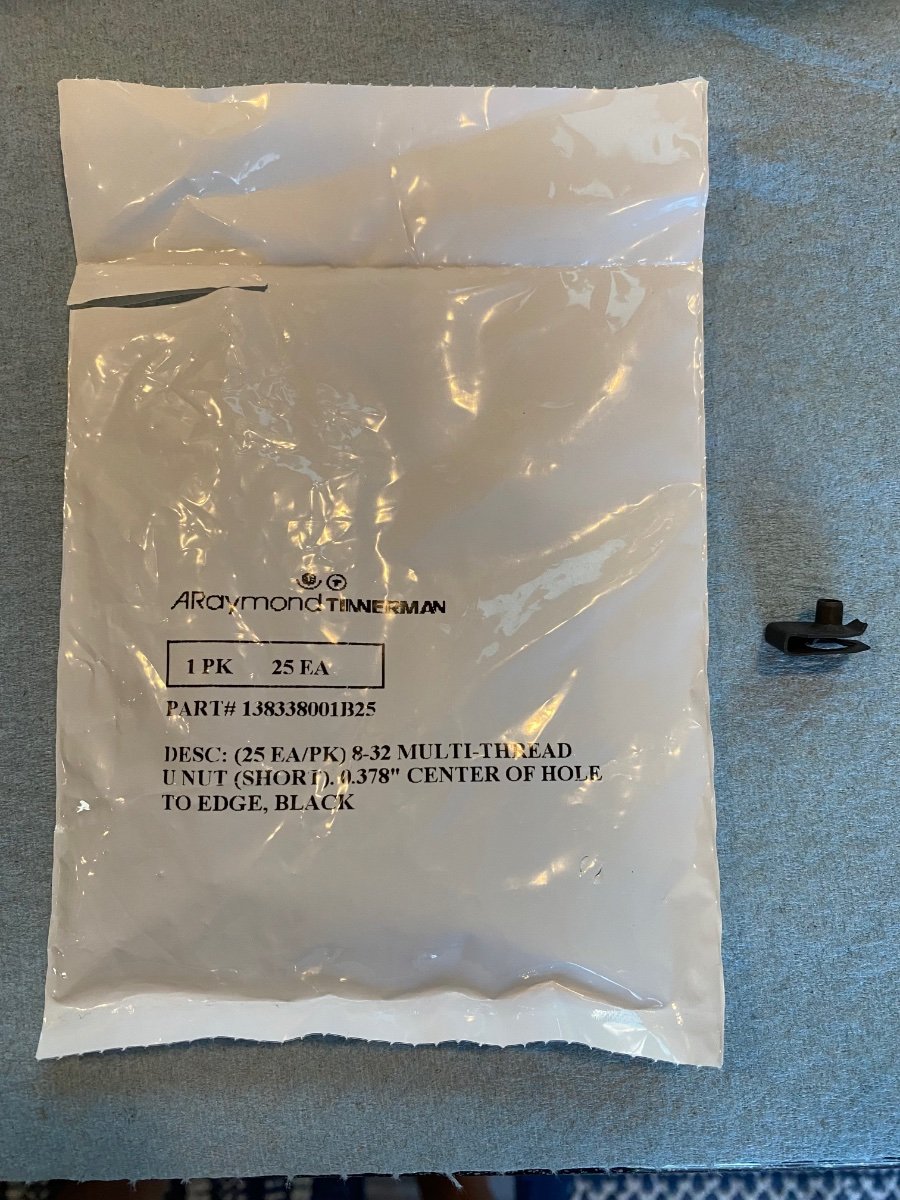
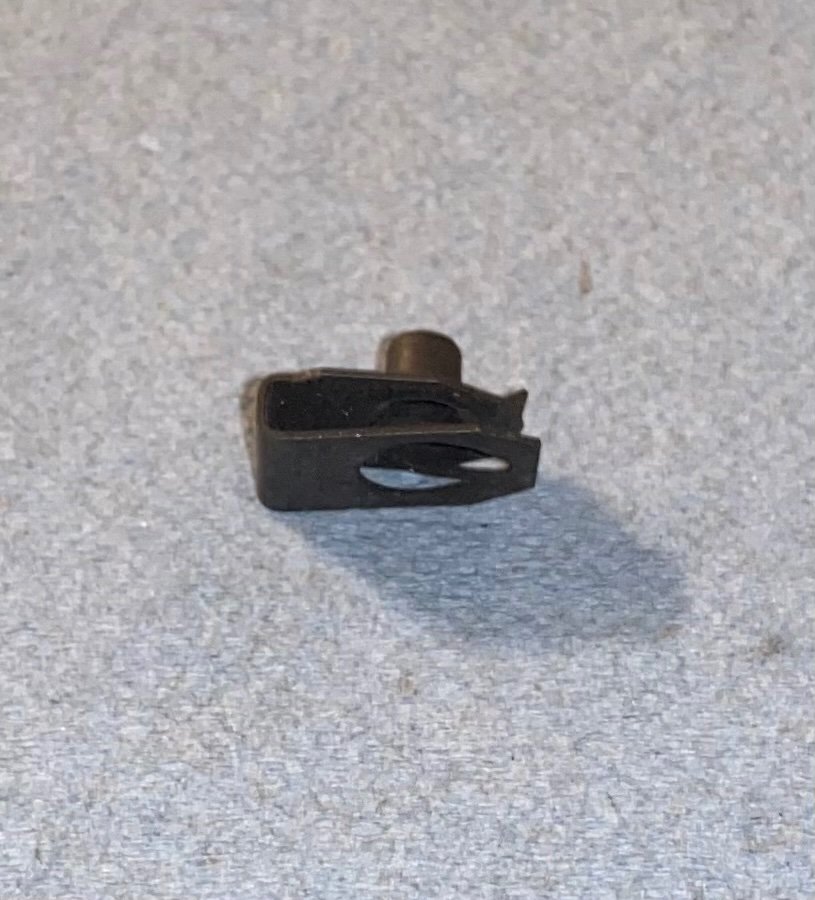
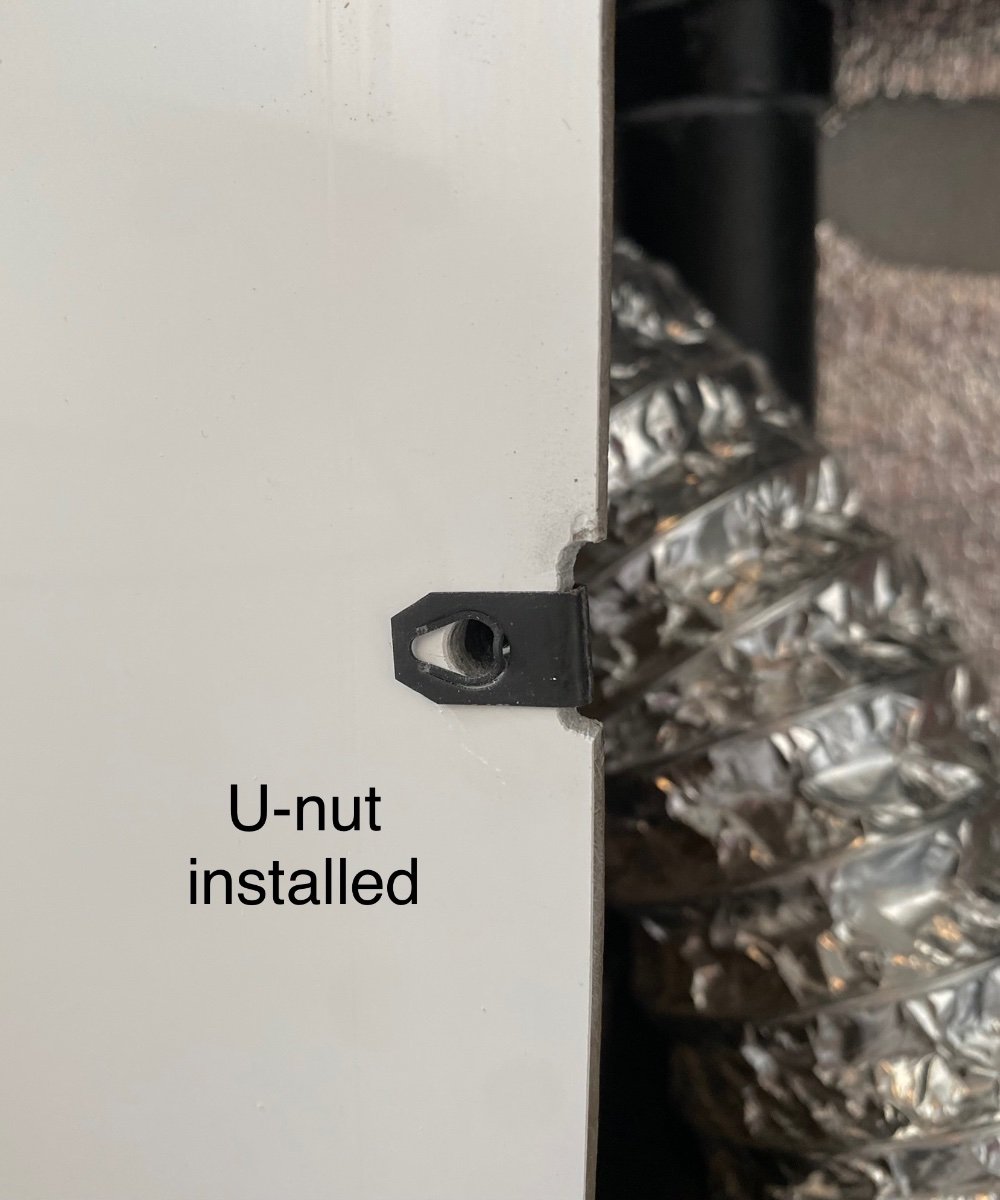
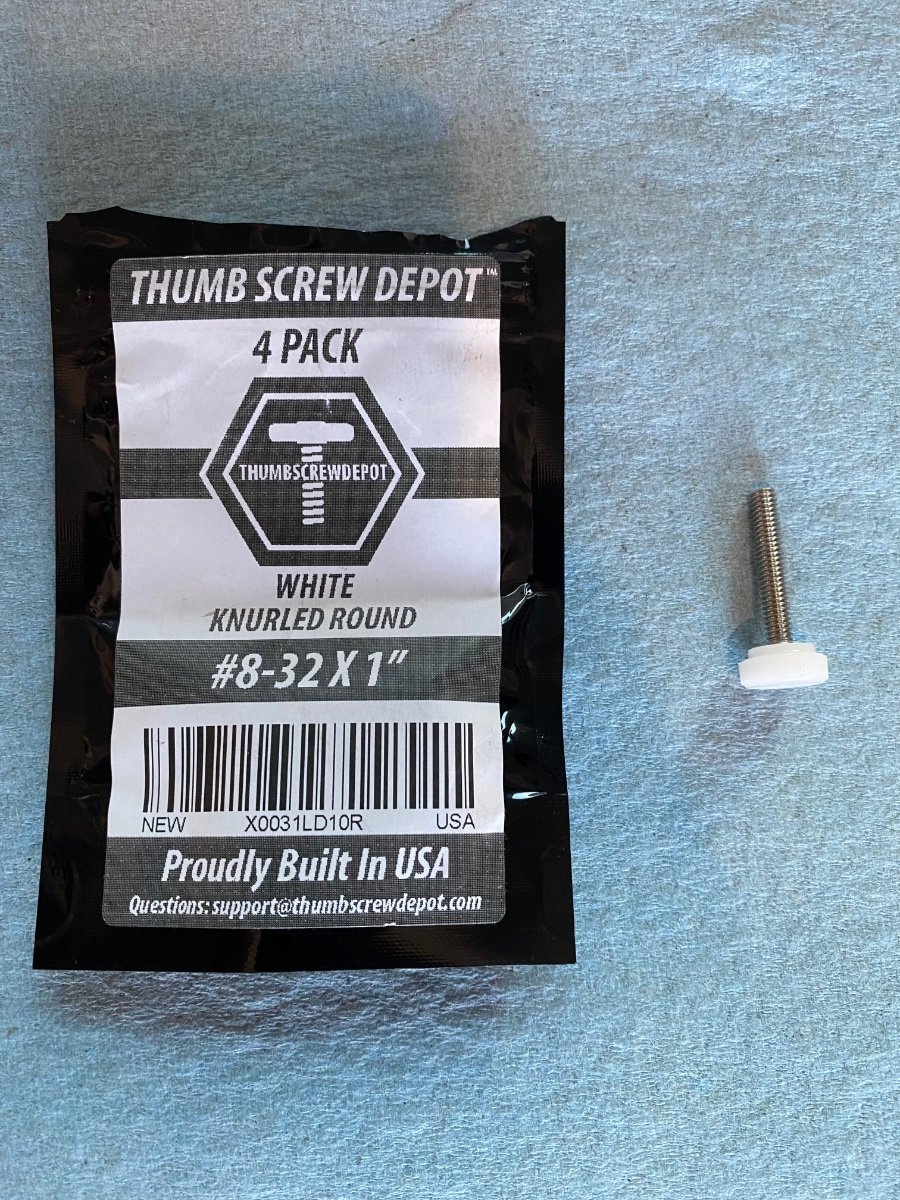
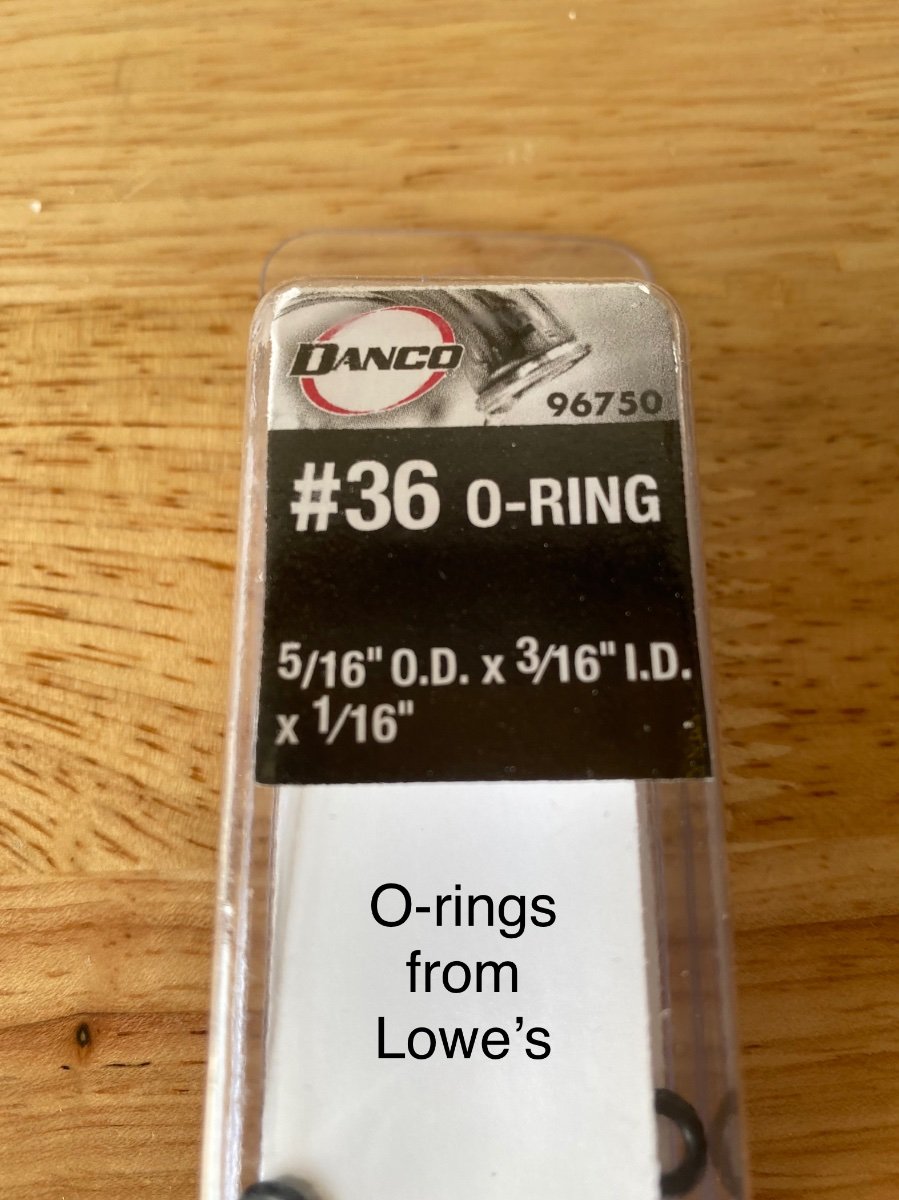
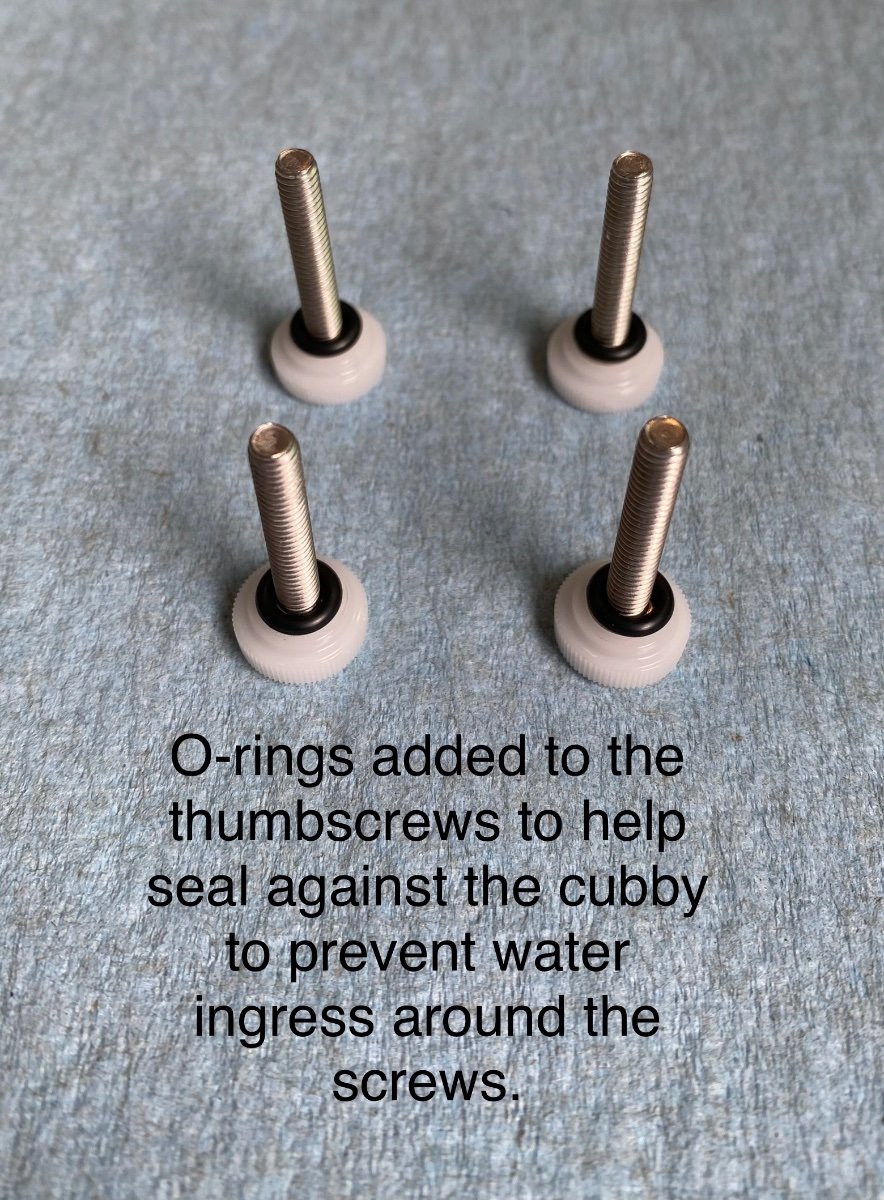
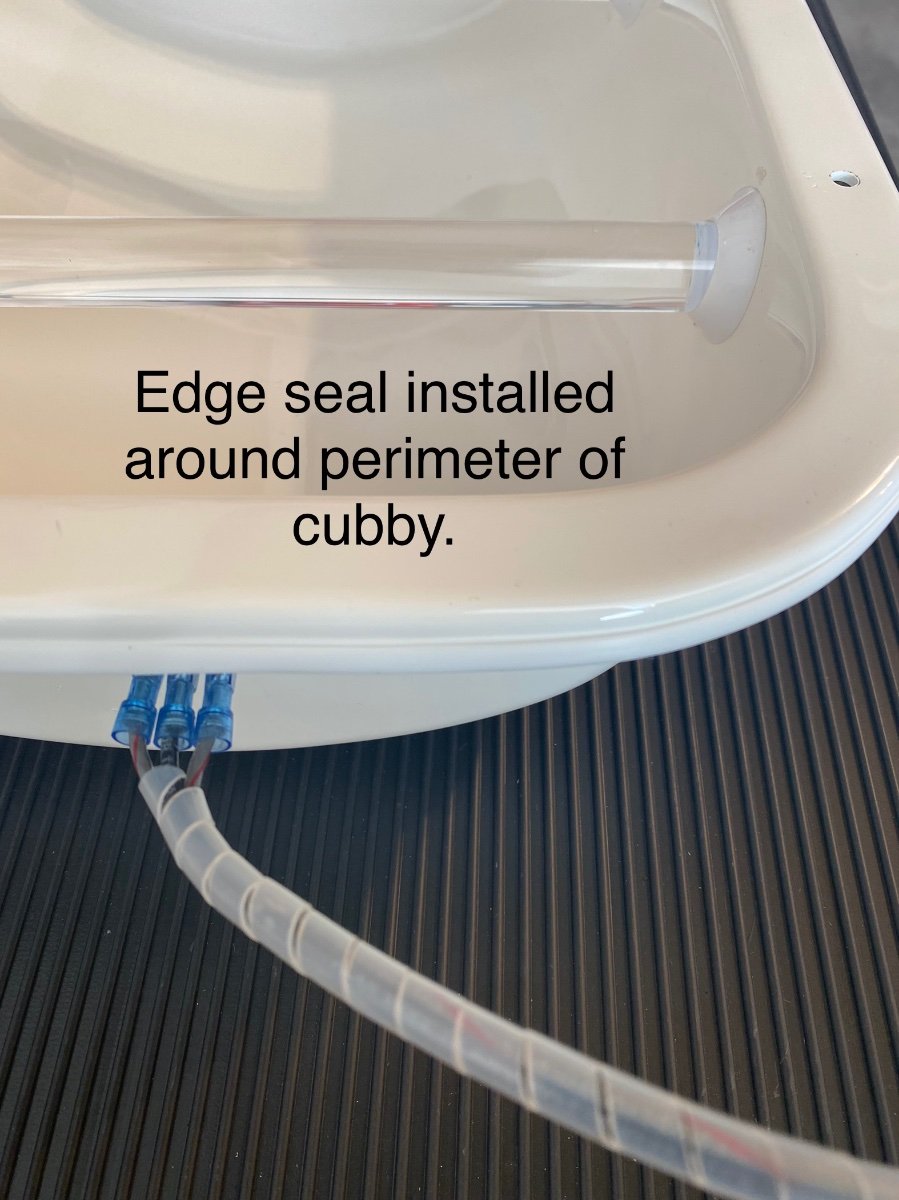
One of the great features of the Oliver trailer design is the fast and easy (no tools needed) access to ALMOST all of the plumbing, heating, and electrical systems through the hatches under the dinette seats and the beds, or by removing the kitchen cabinet drawers. One area that’s NOT readily accessible is the area under the bathroom vanity, even though there is plumbing, electrical, and furnace ductwork all tucked inside the vanity. The storage cubby in the front of the vanity is screwed AND CAULKED in place by Oliver at the factory, so access is a bit more complicated than the other areas. I recently needed to get into that vanity area for some inspection and maintenance, and after completing that I wanted to make future access easier (no tools needed and no caulking). I know some owners have replaced the storage cubby with a hinged marine access panel, but I didn’t want to lose the cubby storage. So here’s a detailed description of a simple modification I did, along with links to the parts used. Access is now fast and easy. No-Slip Clip-On Barrel Nut, for 0.025" to 0.15" Panel Thickness, 8-32 Thread Size https://www.mcmaster.com/94850A111 #8-32 x 1" Thumb Screw Stainless... https://www.amazon.com/dp/B09FZVLZKD?ref=ppx_pop_mob_ap_share uxcell Edge Trim U Seal Extrusion, Silicone White U Channel Edge Protector Sheet Fits 0.5-2.5mm Edge 3Meters/9.84Ft Length https://a.co/d/1uWUZB3 Molex -3 Match Set - (3-Pin) w/14-20 AWG, Wire Connector - 2.13mm D, Latch Lock, MLX https://a.co/d/gapvioi
- 52 replies
-
- 42
-

-

-

-

-
Hot Water Heater (Truma) Bypass Valve Issue
Frank C replied to Frank C's topic in Mechanical & Technical Tips
Thanks for the info from Truma on the mounting issue. I’ll take a look at that as well during the bypass valve repair. -
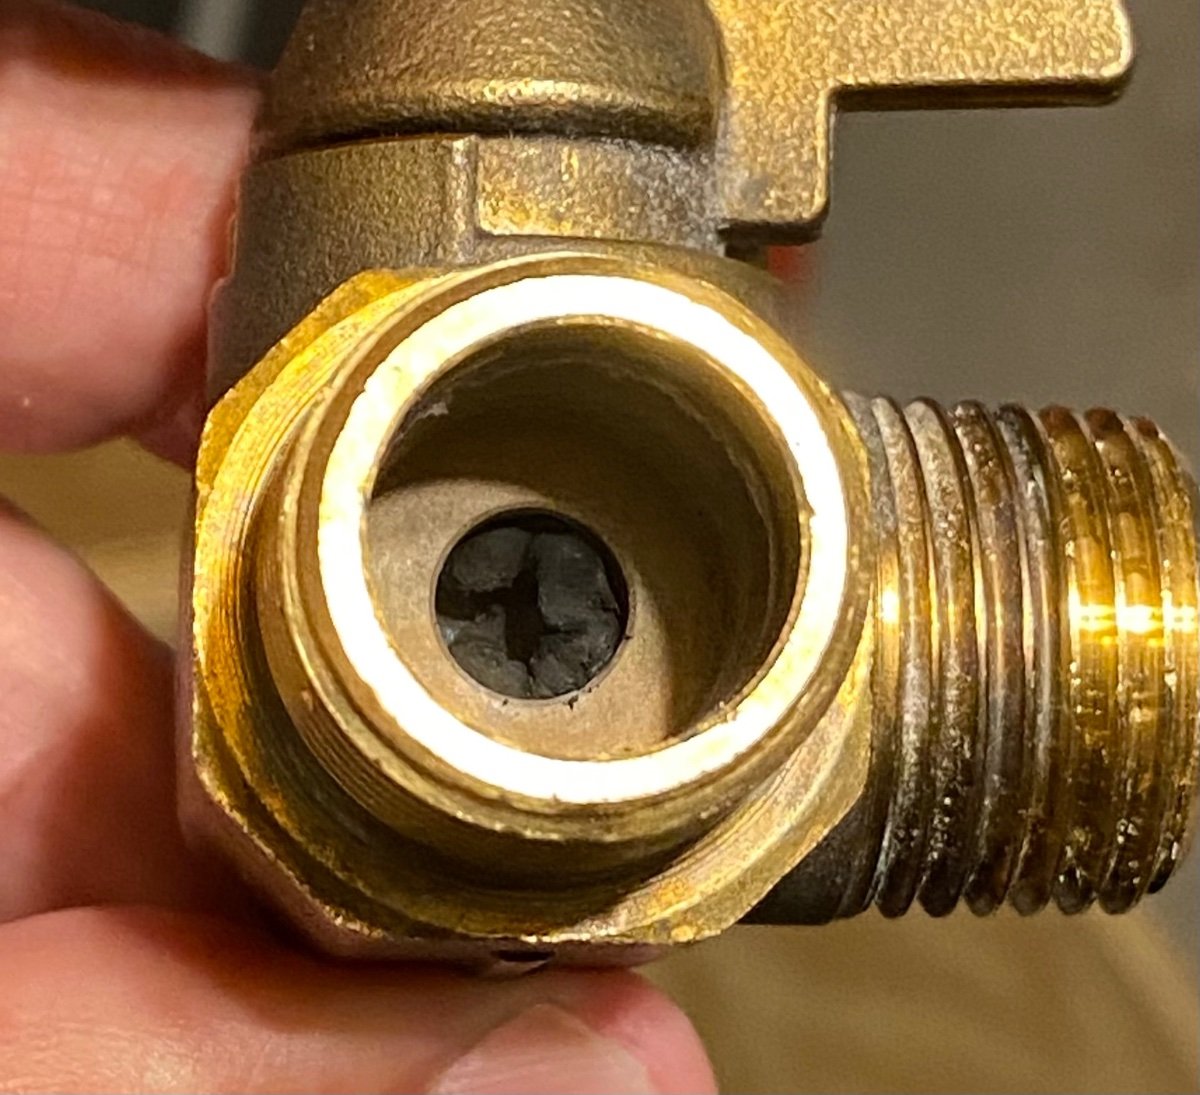
Not a Truma problem but the issue did manifest itself as very low HOT water flow at all faucets. Problem of low hot water flow was the same whether on city water or using pump & fresh tank. COLD water flow was good at all faucets. And I’ve done the decalcification/cleaning process annually. Did some troubleshooting and was initially thinking it was a Truma problem because flow to the hot side of all the faucets was good if I bypassed the Truma at the bypass valve on the Truma cold water inlet. Fearing a very expensive Truma repair, I dug a little further. Opening the Truma drain lever and removing the Truma screen filter, and turning the bypass valve back to normal operating position, and I saw very little flow emptying out of the Truma drain. There really isn’t much inside the Truma on the inlet at that point to even get clogged up, it’s just a direct port into the screen filter, so low flow draining out pointed back to a problem at the plumbing going into the Truma. I removed the bypass valve and found the rubber seal inside had degraded and swollen (see photo), restricting the flow in the normal position. Found a CAMCO replacement on Amazon that’ll be here tomorrow. Hopefully the seal on this CAMCO one holds up better than the original one (different valve manufacturer). I really think a lot of these plumbing components aren’t tested with the chemicals using for RV maintenance like the anti-freeze winterizing solution, or vinegar/water or bleach/water sanitizing solutions, leading to issues with degradation of the seals. A pretty easy replacement of the valve but I’m also going to use this opportunity to redo the cold inlet and hot outlet plumbing connections on the back of the Truma to change to stainless braided flexible supply lines. Not a fan of the rigid plastic connections used by Oliver initially in those locations. Some owners have had the plastic hot water PEX fitting break at the brass TEE on the Truma outlet. With all the bouncing down the road, and thermal expansion and contraction when using the Truma, I want flexible connections there like some of those other owners have upgraded to. Camco bypass valve link to Amazon: https://a.co/d/eGqkhrA
- 12 replies
-
- 12
-
-
-
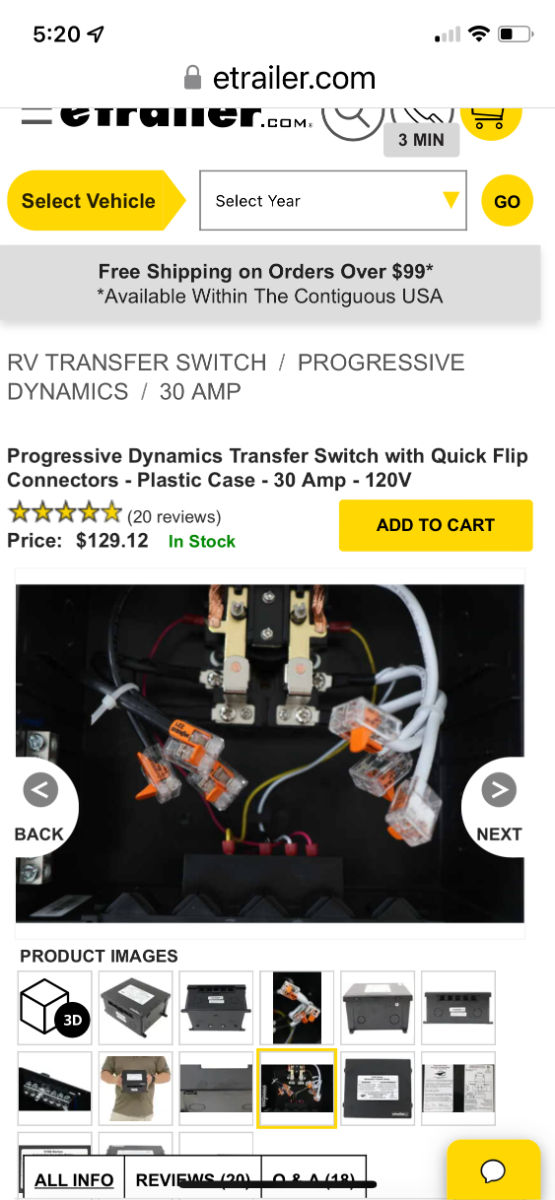
Interesting that the new version of the Progressive Dynamics transfer switch now uses the Wago lever type connectors instead of a terminal block strip.
-
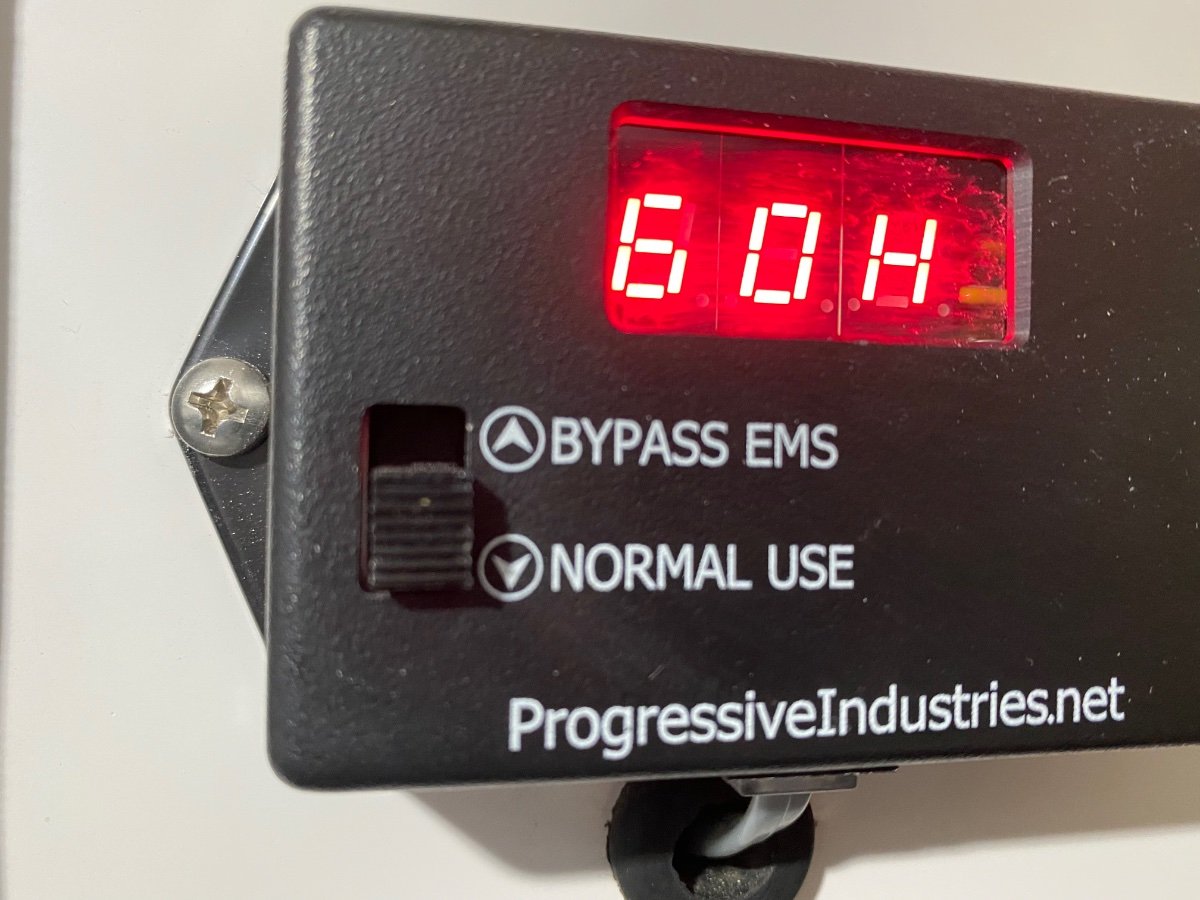
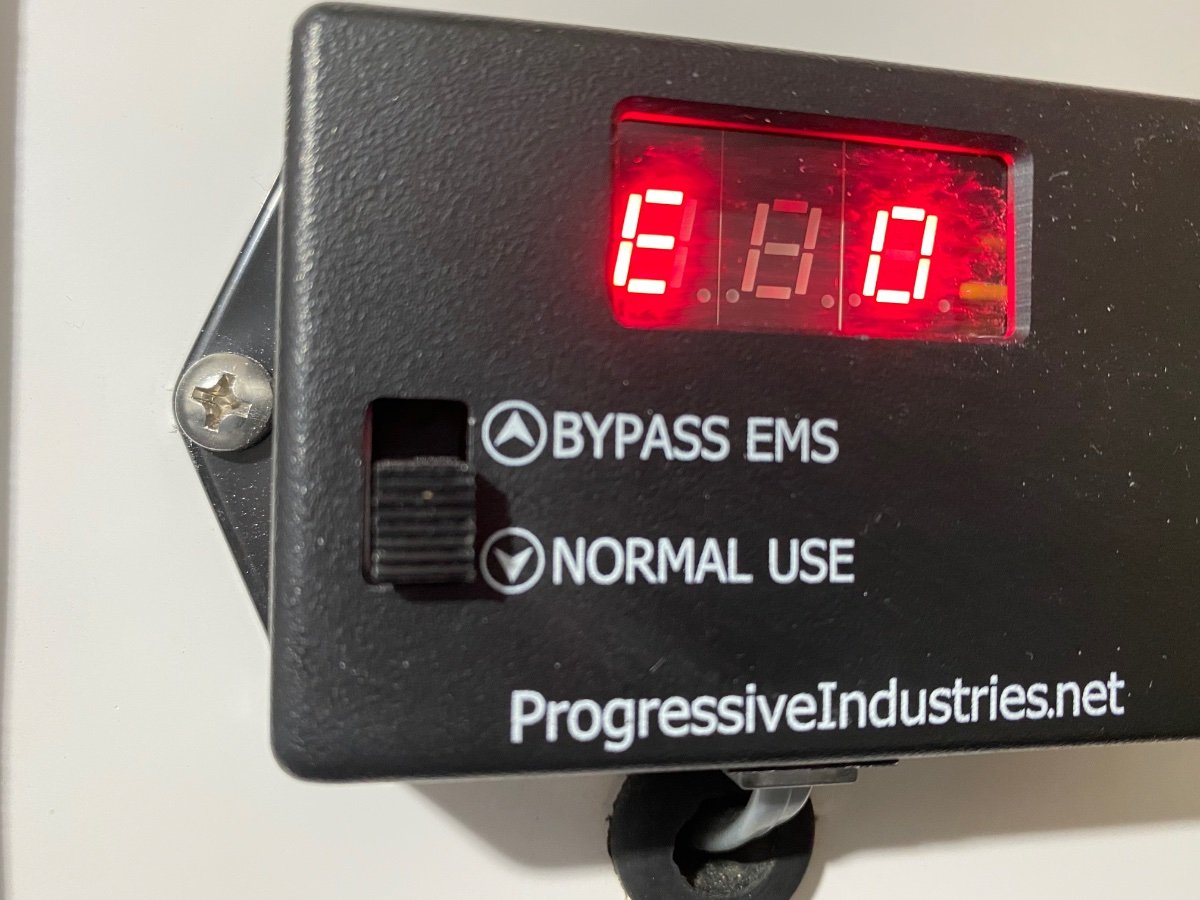
Is the switch on the EMS display in the “NORMAL USE” position? Not the “BYPASS EMS” position.
-
Ours is a 2019, but maybe in 2018 the EMS display was mounted somewhere else? Maybe in one of the compartments under the bed. According to the 2018 Elite I manual on the Oliver University, the trailer does have the Progressive EMS. Should look something like this.
-
Is there anything displayed on the surge protector readout in the attic cabinet?