Frank C
-
Posts
783 -
Joined
-
Last visited
-
Days Won
20
Everything posted by Frank C
-
Wow! A really nice professional job on that. Looks great!
-
Do you have the Truma hot water heater? If so, in normal operating mode it will cycle on and off to have hot water immediately at the ready. Not very loud but just enough to be annoying. We hated hearing that at night while trying to sleep, so putting the Truma in ECO mode stops that cycling but it takes a little longer to get hot water flowing.
-

Off-Road Vehicle Recovery Fatality
Frank C replied to Geronimo John's topic in Mechanical & Technical Tips
A very sad story. Sometimes I think I over-prepare for emergencies on the road, but then I see a story like this. I’ve been carrying a Rhino tow strap and a Curt D-ring shackle for minor towing emergency recovery situations that may never come up (stuck in snow, etc.). Haven’t had any need to use them yet, but that article is an eye opener. And even with this stuff I carry (rated to about 10,000 lbs working load) there are situations that are still best left to a professional recovery service. Prayers for that family.
-
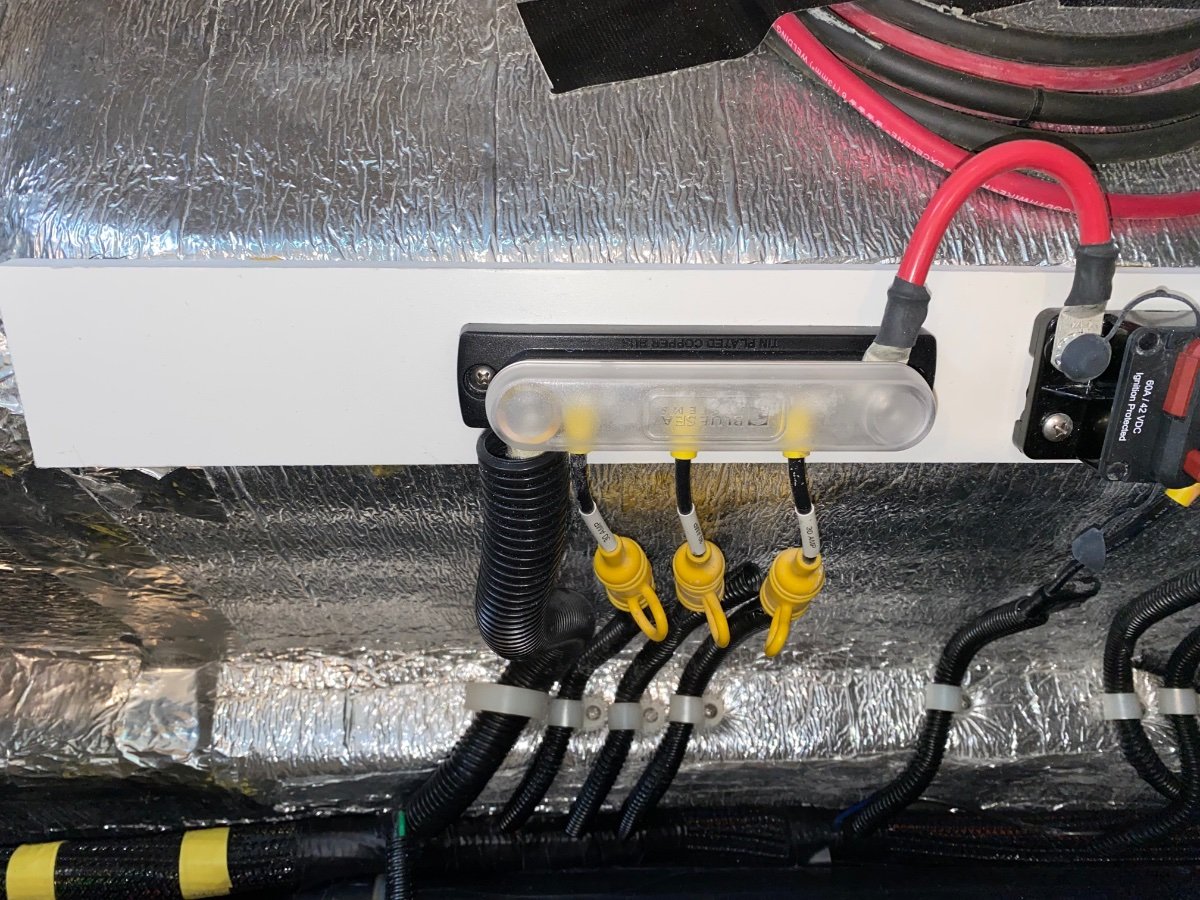
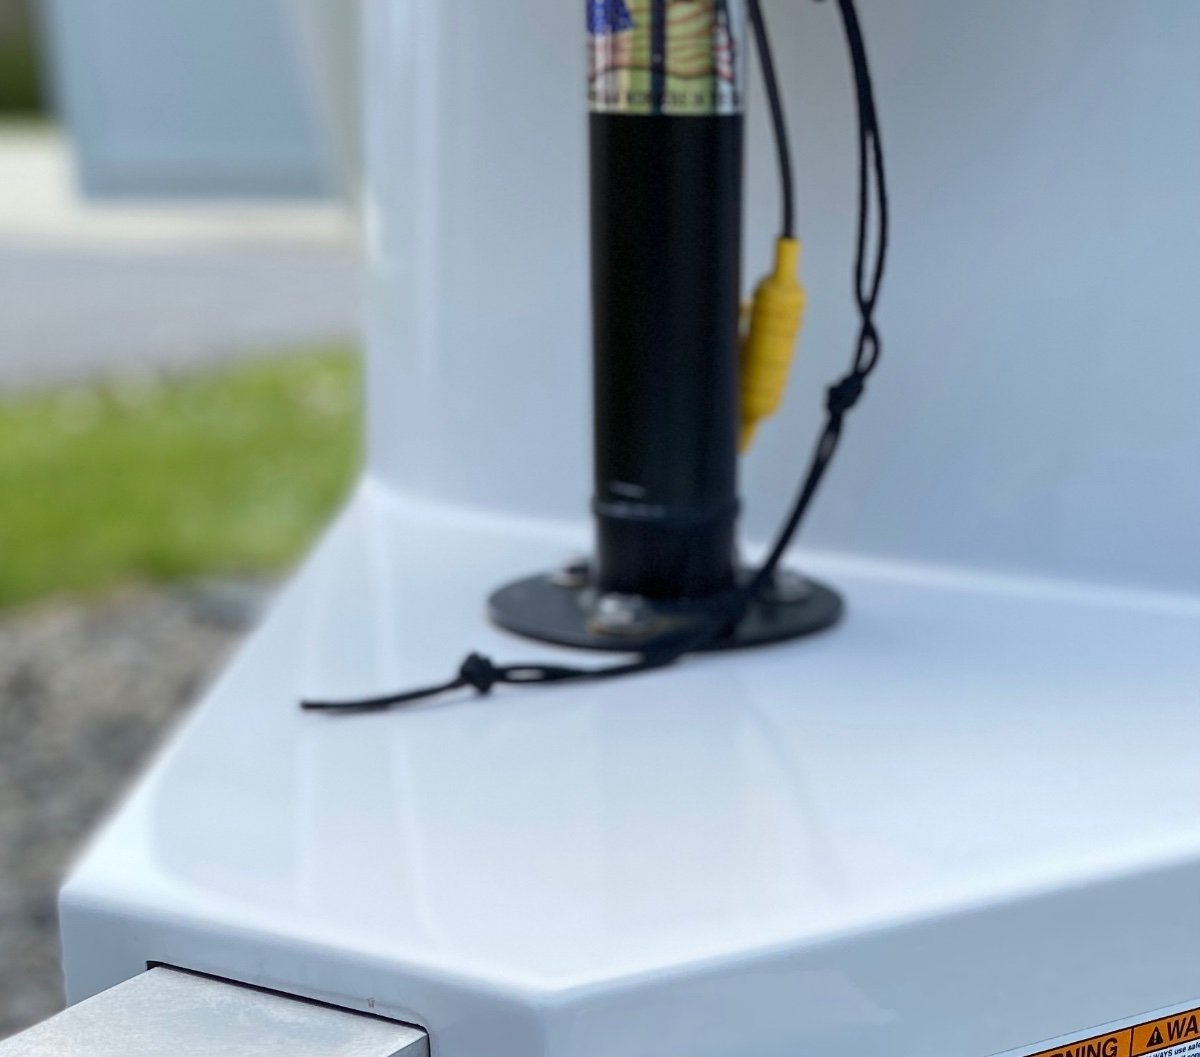
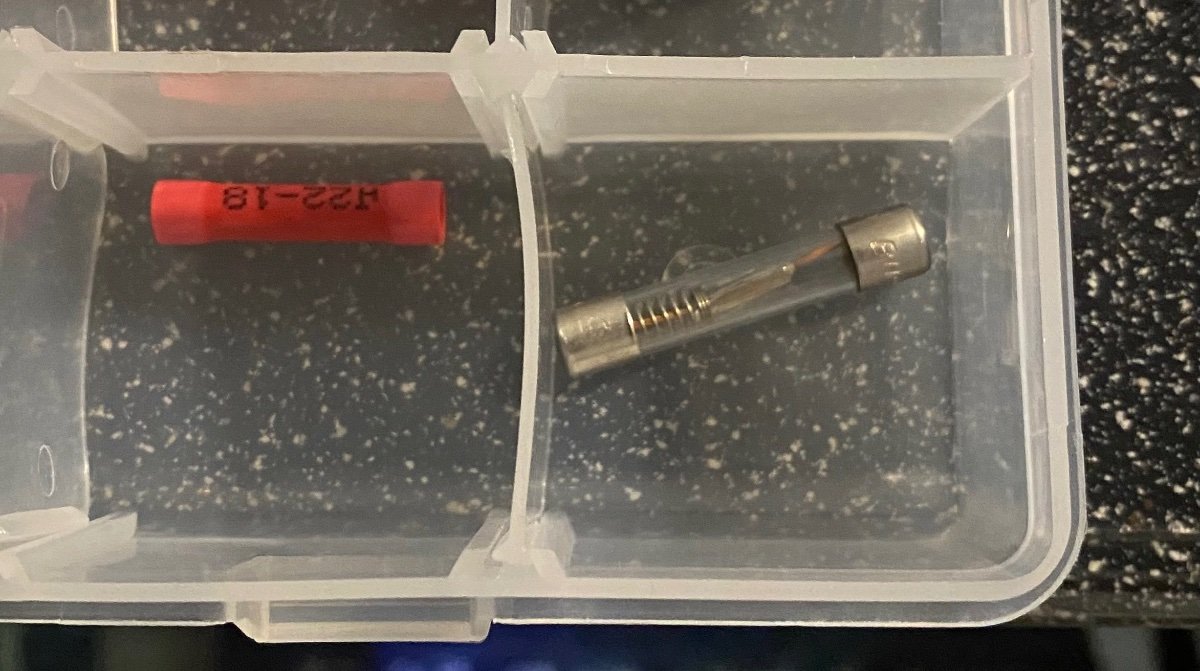
? You don’t have 3 yellow fuse holders like this photo under your street side (driver’s side) access hatch under the bed? Ours is a 2019 Elite II, Hull 461 so your 2019 should be pretty similar. These are the fuses for the 3 jacks, and the front jack also has a redundant 2nd fuse on the front jack post. And it’s a glass tube type fuse, not the blade type. Did you get a spares kit of fuses with your Oliver? (Ours came with a kit, and there’s a spare 30 amp fuse in the kit). And you can substitute a 30 amp fast blow fuse if it’s all you can find. It won’t hurt the jack, but the fast blow fuse may blow prematurely as a nuisance in a high current draw condition.
-
The blue tube exiting under the hull is your fresh water tank drain tube. The drain valve on that drain line might be open. Have you recently filled the fresh water tank? If not, it could be a bad check valve in the water pump (or very high city water pressure) that’s letting water from the city water connection leak back into the fresh water tank, and if the fresh tank drain valve is open, water from the fresh tank will exit out of that blue tube.
-
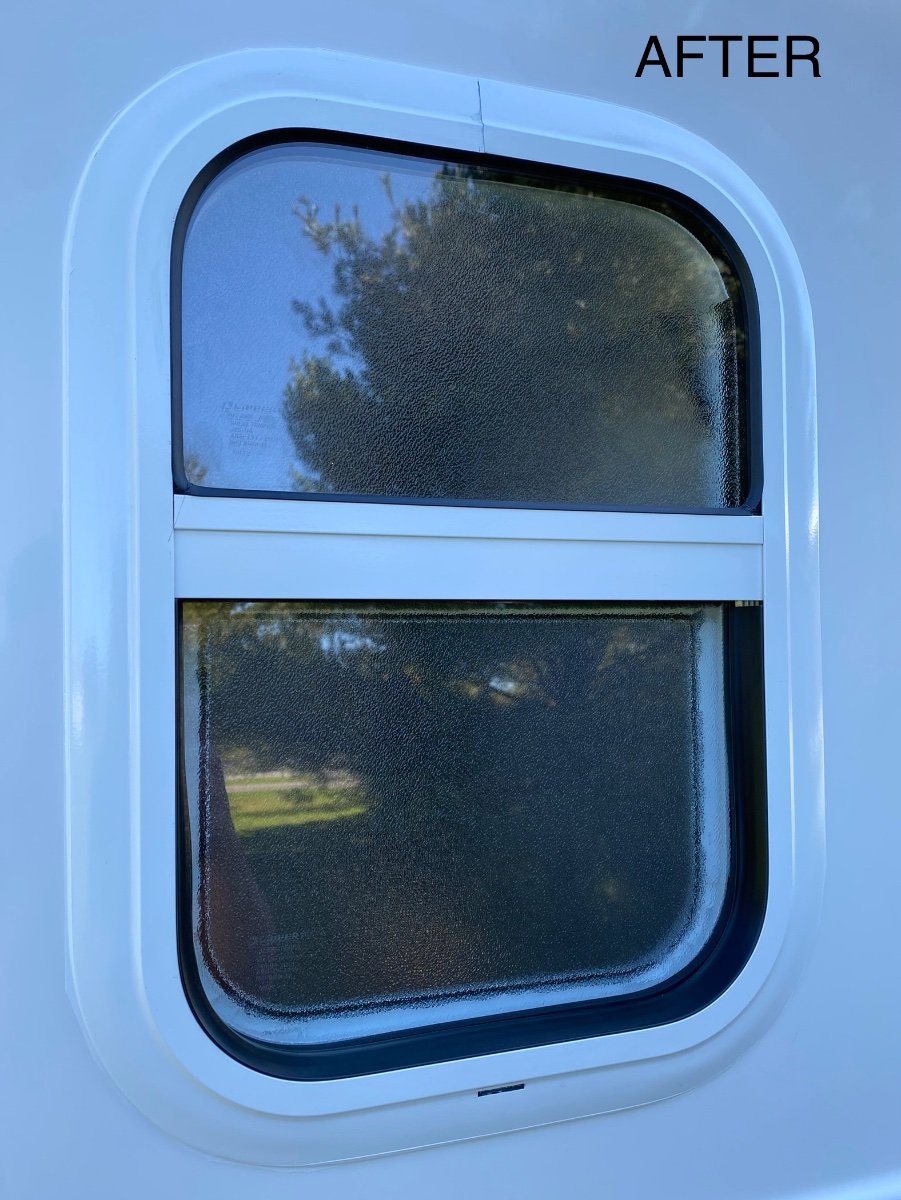
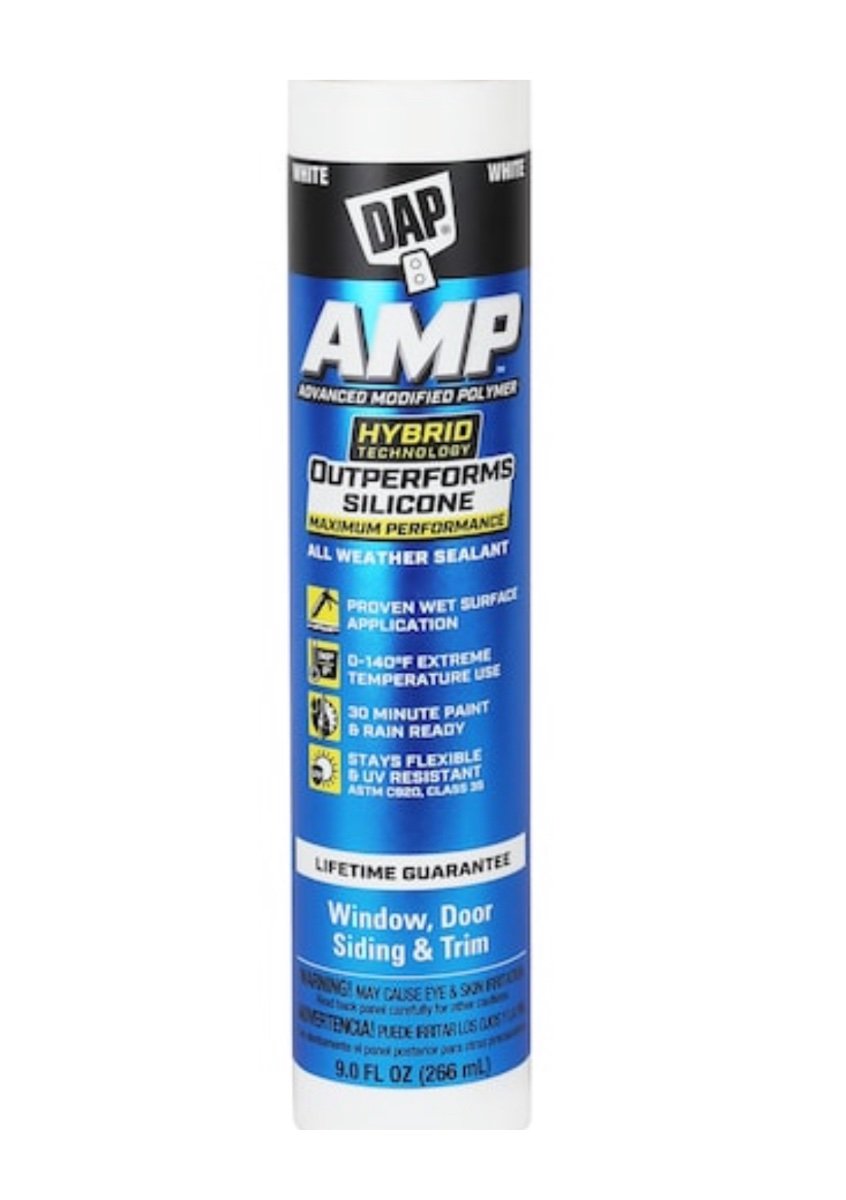
I just replaced the bathroom window in our Ollie as well due to fogging between the glass panes. The window replacement is actually pretty straightforward if you have basic handyman skills. As Andrew mentioned, removing all the old caulk to get a good clean surface is the hardest part of the job. I used Dicor Butyl foamcore tape (link below) to bed the window to the hull. Very sticky, and a round profile so it goes around the corners of the inside surface of window frame very easily without wrinkling, so it makes a very good seal. I finished it off with white DAP AMP caulking around the perimeter (UV resistant and specified for metal and fiberglass). https://dicorproducts.com/product/seal-tite-butyl-foamcore-roll/
-
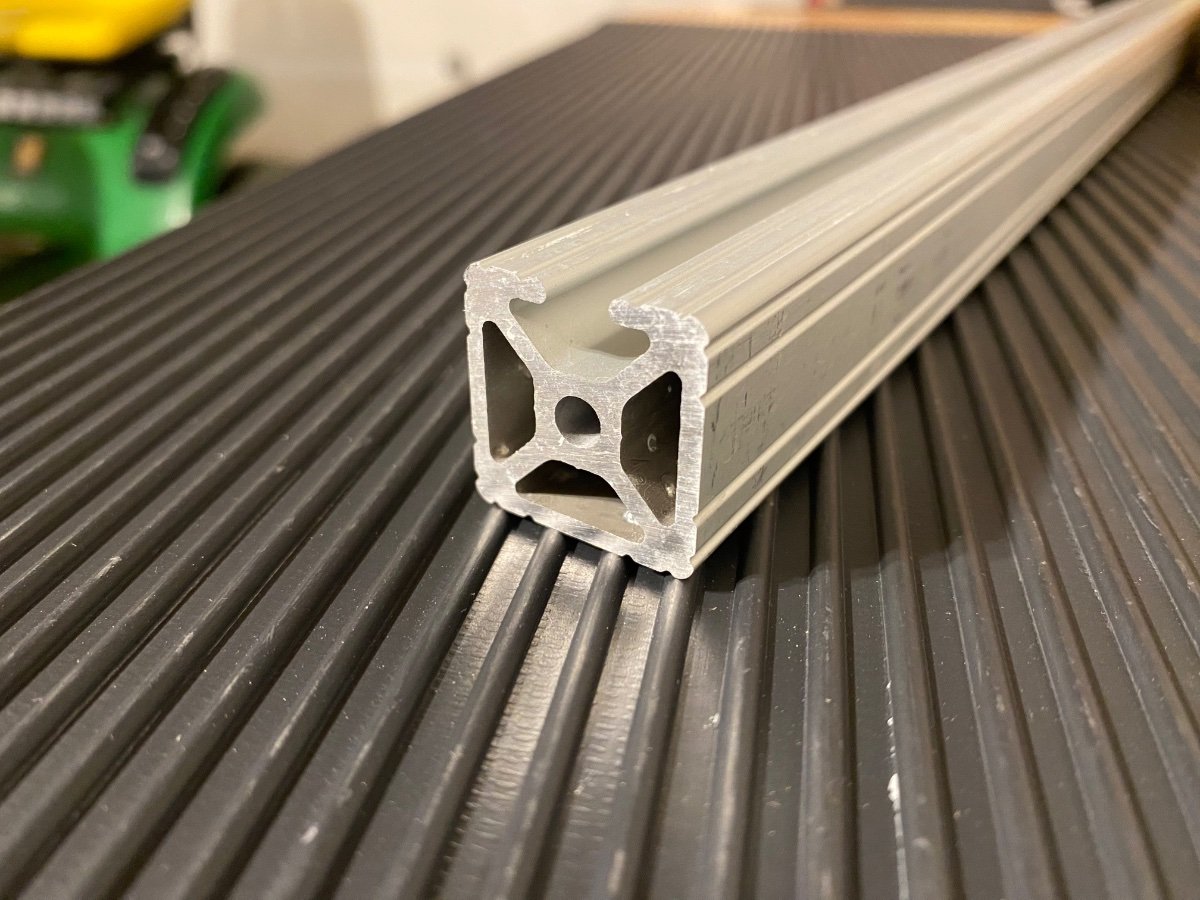
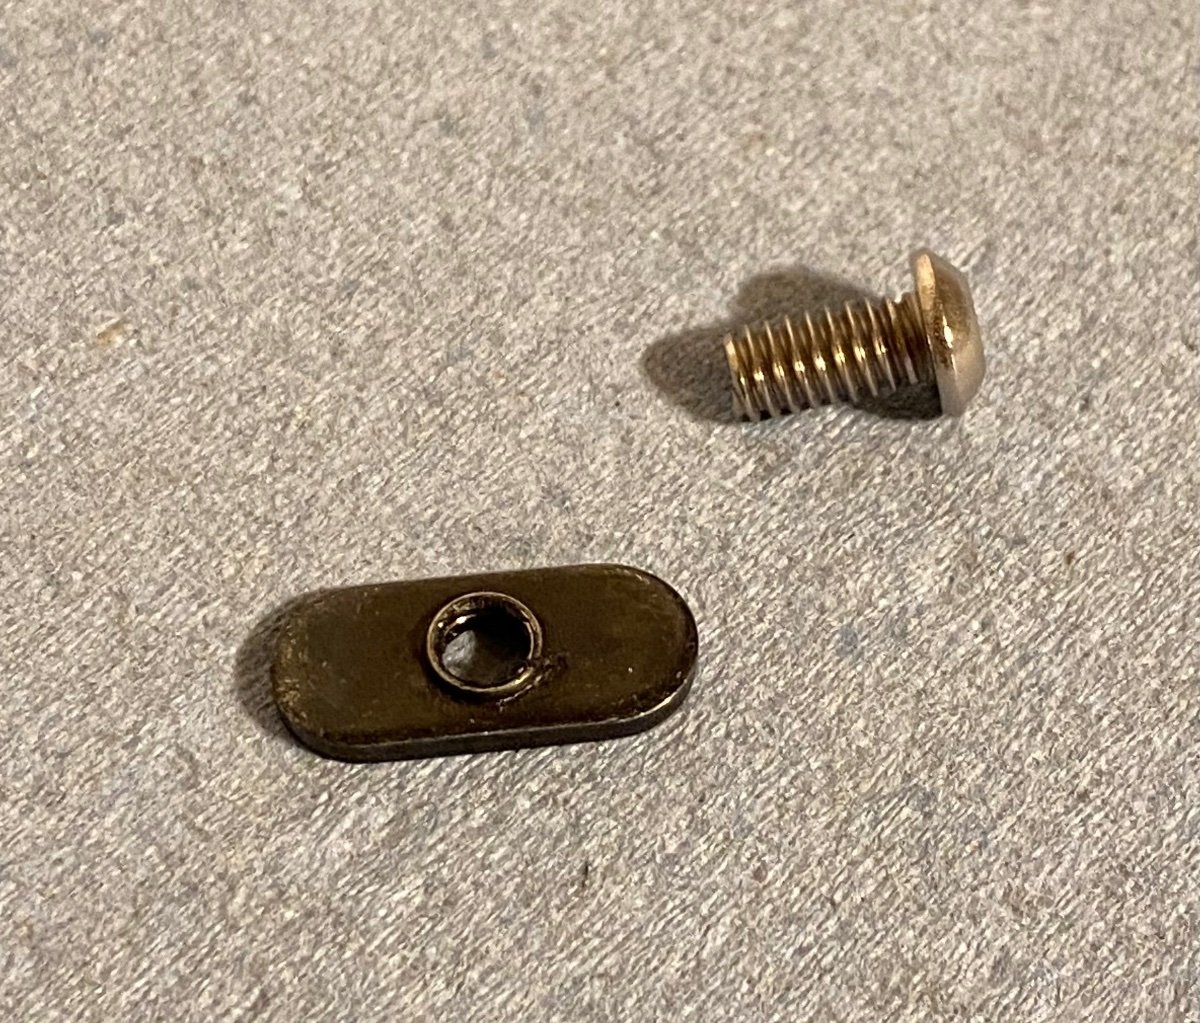
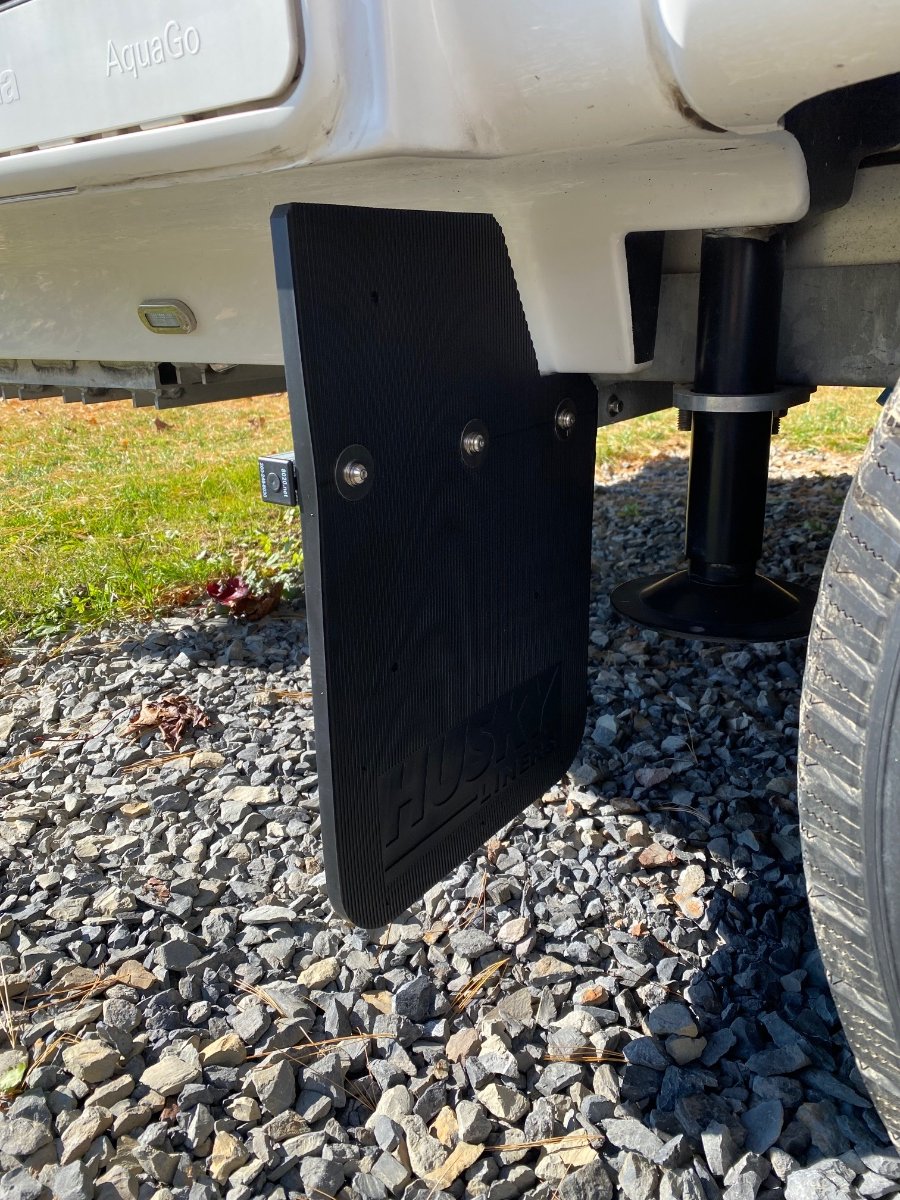
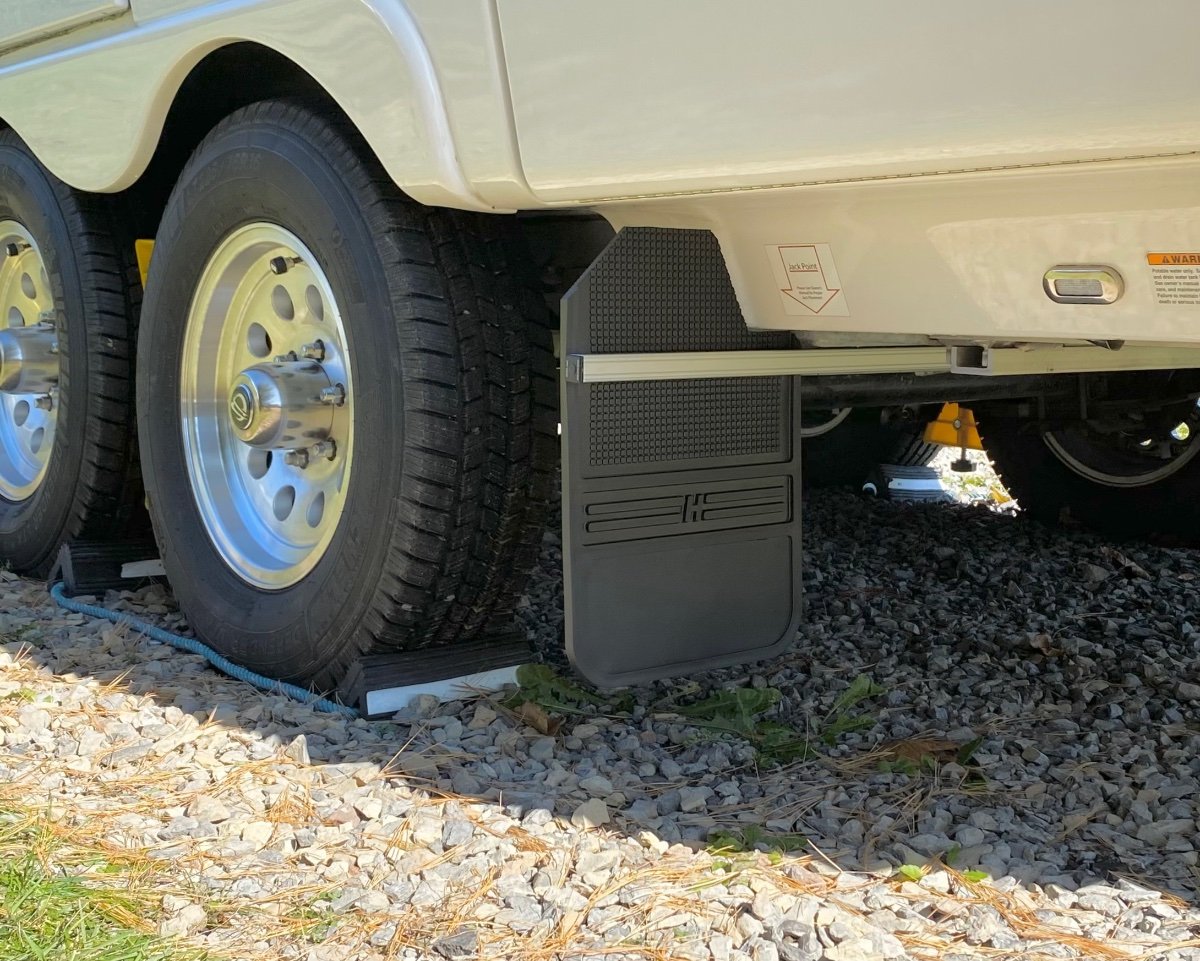
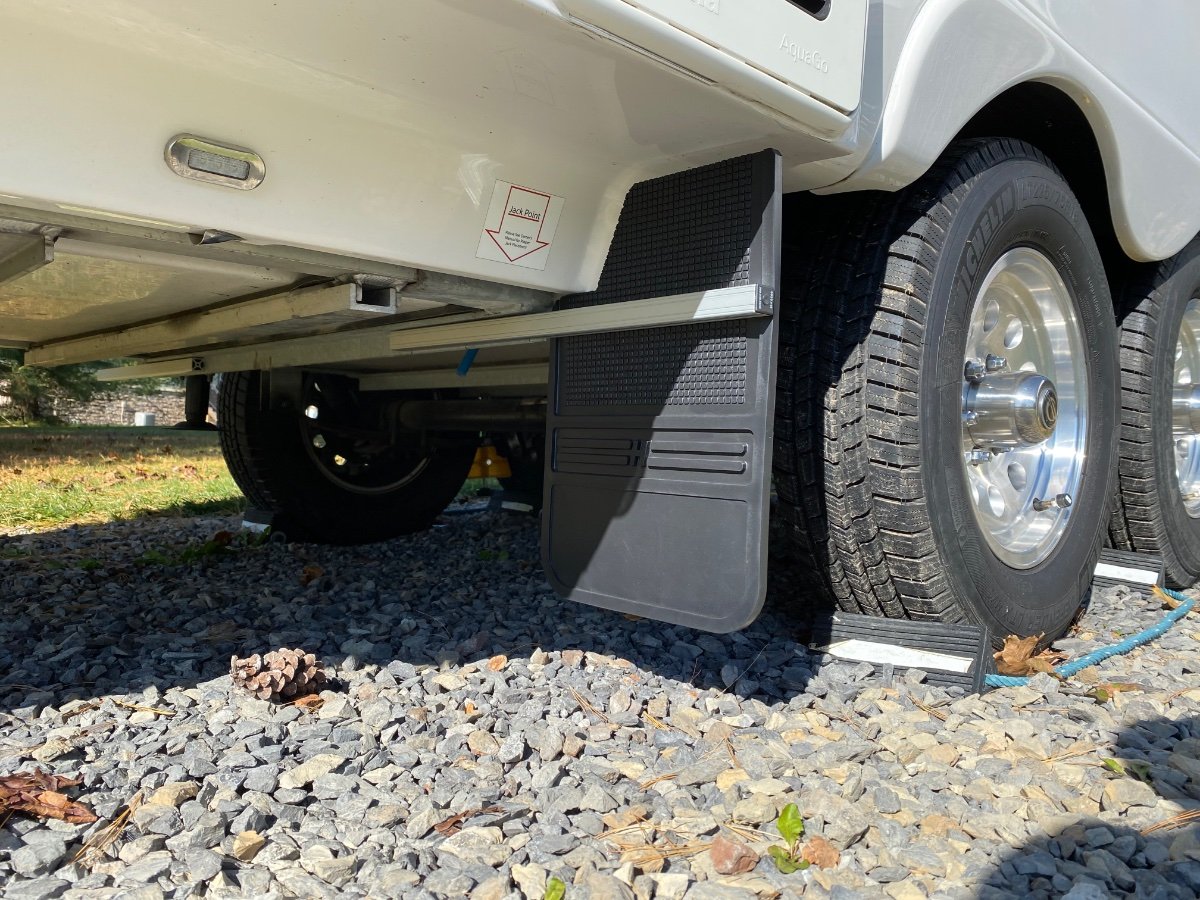
Finally got around to doing my mud flap project. I used 1” square single slot aluminum T slot rail and 1/4”-20 T slot nuts (from McMaster Carr) with 1/4”-20 stainless screws & washers. A 2’ long section of T slot rail on each side of the trailer, with 12” wide mud flaps (from Husky, very nice quality thick molded mud flaps) cut to the Oliver trailer hull profile. The T slot rails come with a hard anodized finish so no issue with galvanic corrosion when mounted in contact with the steel subframe. The T slot nuts hide a lot of the mounting hardware for a clean appearance. And the street side flap needed the upper corner cut away to allow the basement door to open fully. Thanks to John and others for the inspiration for this project.
- 43 replies
-
- 10
-

-
Unusual “Lithium” cells in this battery pack 😂
Frank C replied to Frank C's topic in General Discussion
Unlike other traditional lithium batteries, these new ones work best when stored and used at very cold temperatures. 🙂 -
This ad popped up on my computer after I had done some searches on lithium batteries. The “battery cells” look very familiar 😂. This could be a technical breakthrough since most campgrounds already have plenty of these “cells” 😂 Seriously though, some ad agency needs to do a better job of getting stock photos off of the internet.
-
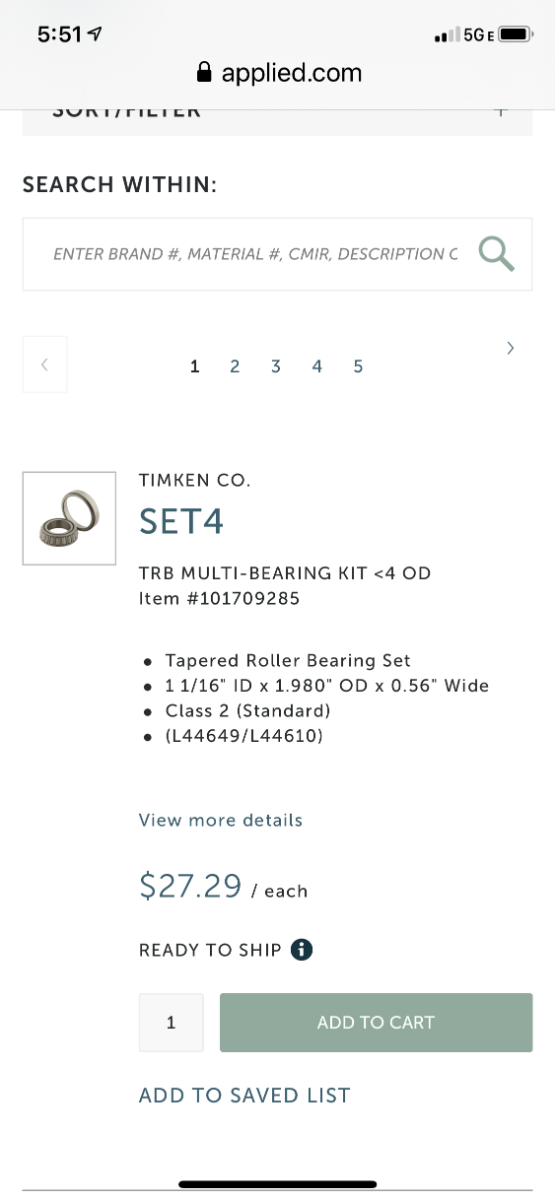
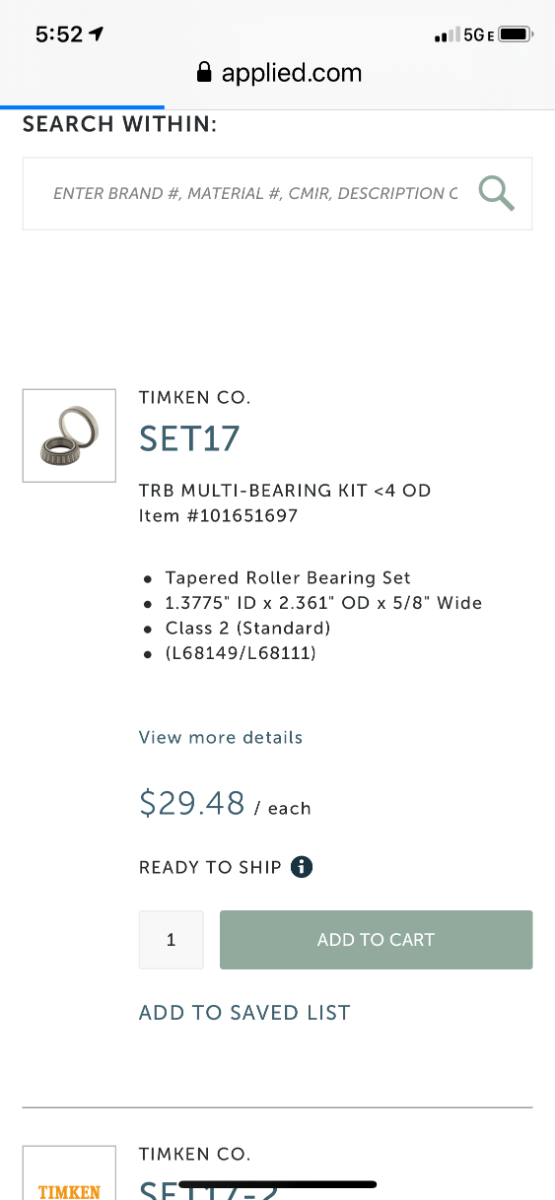
There are a lot of counterfeit “Timken” bearings out there, especially on Amazon. At that low price I’m not sure I’d even trust the ones from Summit to be genuine Timken bearings. I bought mine through an authorized Timken distributor (Applied Industrial) and it was about $60 per wheel for the two sets needed (inner and outer bearings sets) for each wheel, plus the new seal needed. And I use the WBA bearing app available for smartphones to scan the QR code on the bearing packaging to confirm they are legit.
-
What do I turn on to receive emails for my postings on the forum
Frank C replied to Trainman's topic in General Discussion
Under your account settings/notification settings.
- 1 reply
-
- 2
-
-
And here’s a very long thread on bearing maintenance that discusses the tools needed and the Timken bearings and seal part numbers: https://olivertraveltrailers.com/forums/topic/5166-dexter-axle-bearings/
-
Here’s the video from Dexter on bearing maintenance: https://youtu.be/GnH-h3W9XvI
-
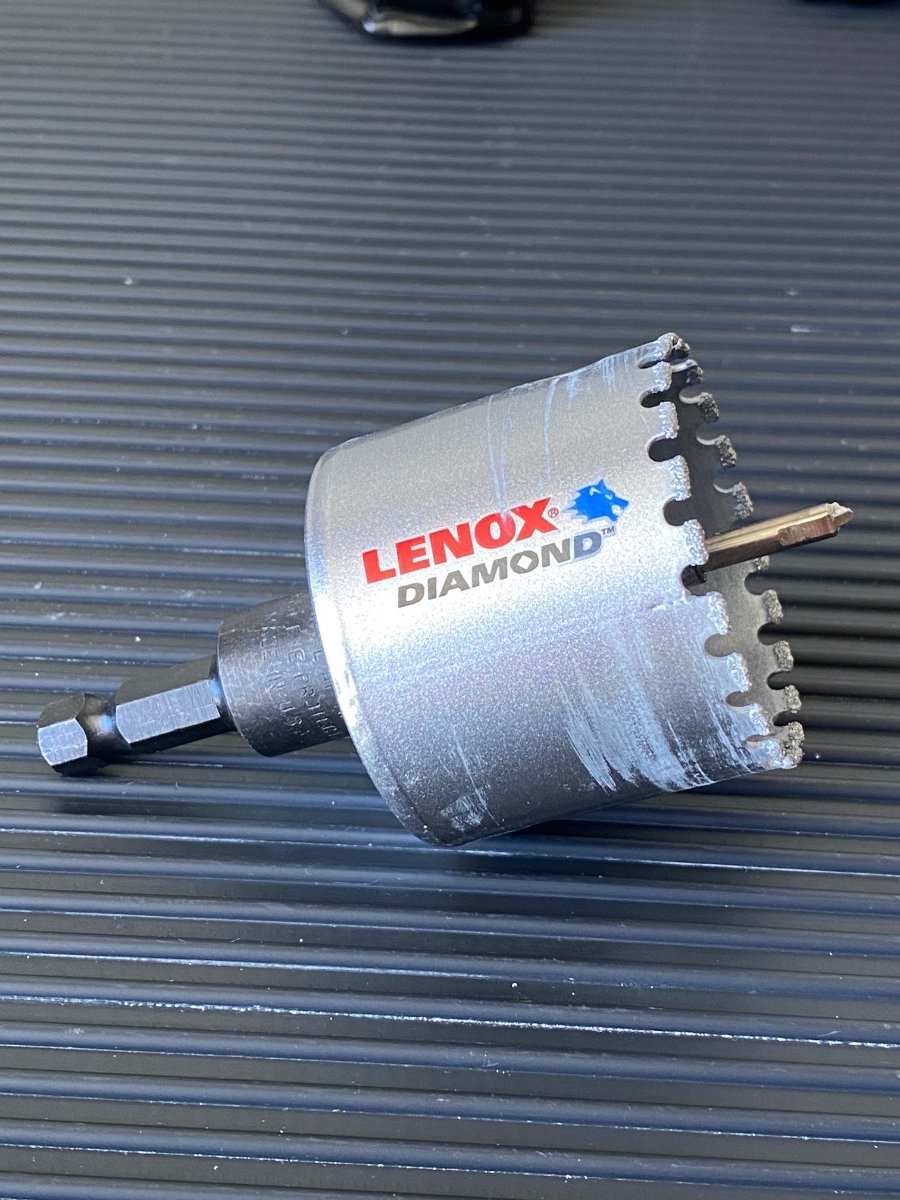
From Lowe’s, $40 for the 2” hole saw plus $18 for the pilot bit. So definitely more expensive than standard hole saws. But very nice results.
-
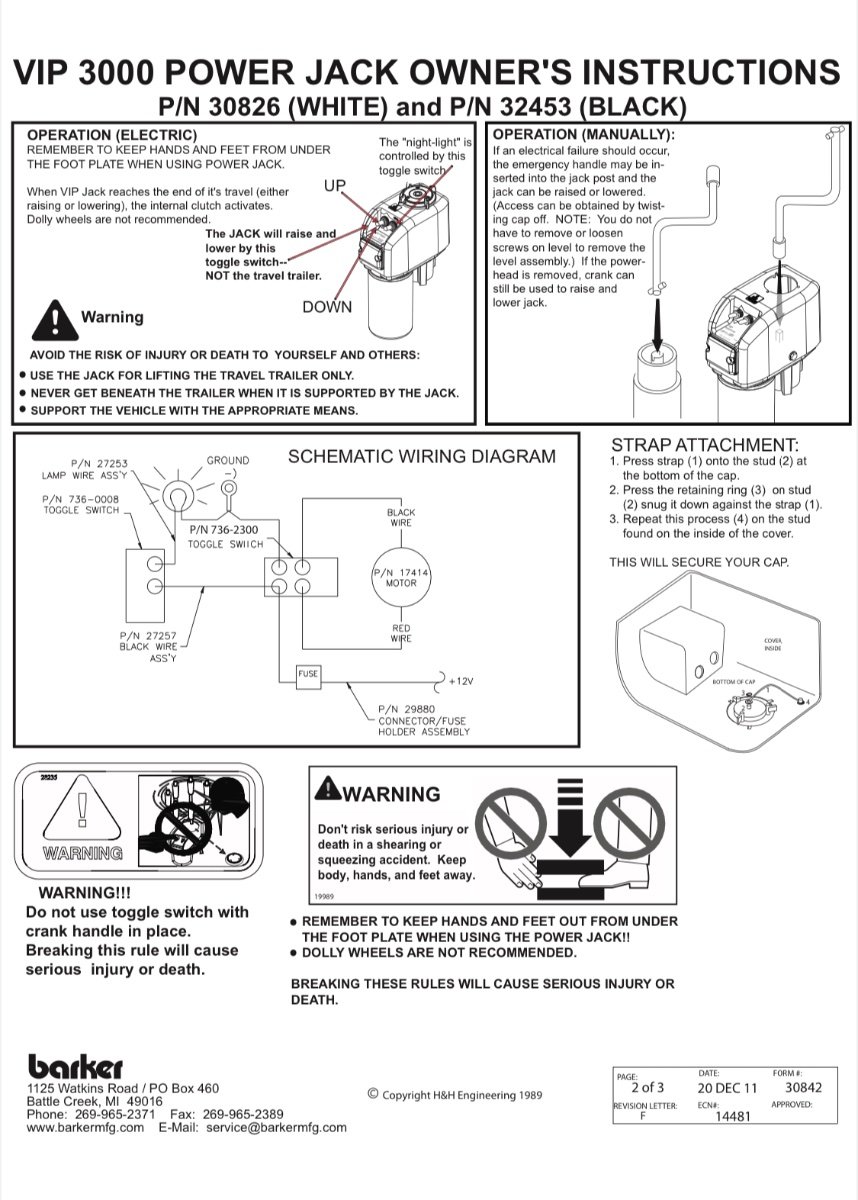
That’s a big troubleshooting clue. The light and motor are wired in parallel, and share a common ground point (see schematic in previous post), so since the light didn’t work either when this jack problem occurred, that points to a wiring connection issue with either the 12v hot lead or the ground, not a motor problem or jack screw problem.
-
It’s always a bit tense when cutting or drilling into the nice pristine glossy surface of the Ollie, you just have to make sure that the drill bit or hole saw doesn’t go skidding across the surface and create a big ugly scar, and also taking care not to crack or chip the gel coat layer. But I’ve had very good success using diamond grit hole saws on the Ollie for making holes. The diamond grit hole saw makes a very nice clean cut, and doesn’t cause any chipping or cracking of the top gel coat layer. The center pilot bit creates a nice starter hole to keep the hole saw from shifting while drilling.
-
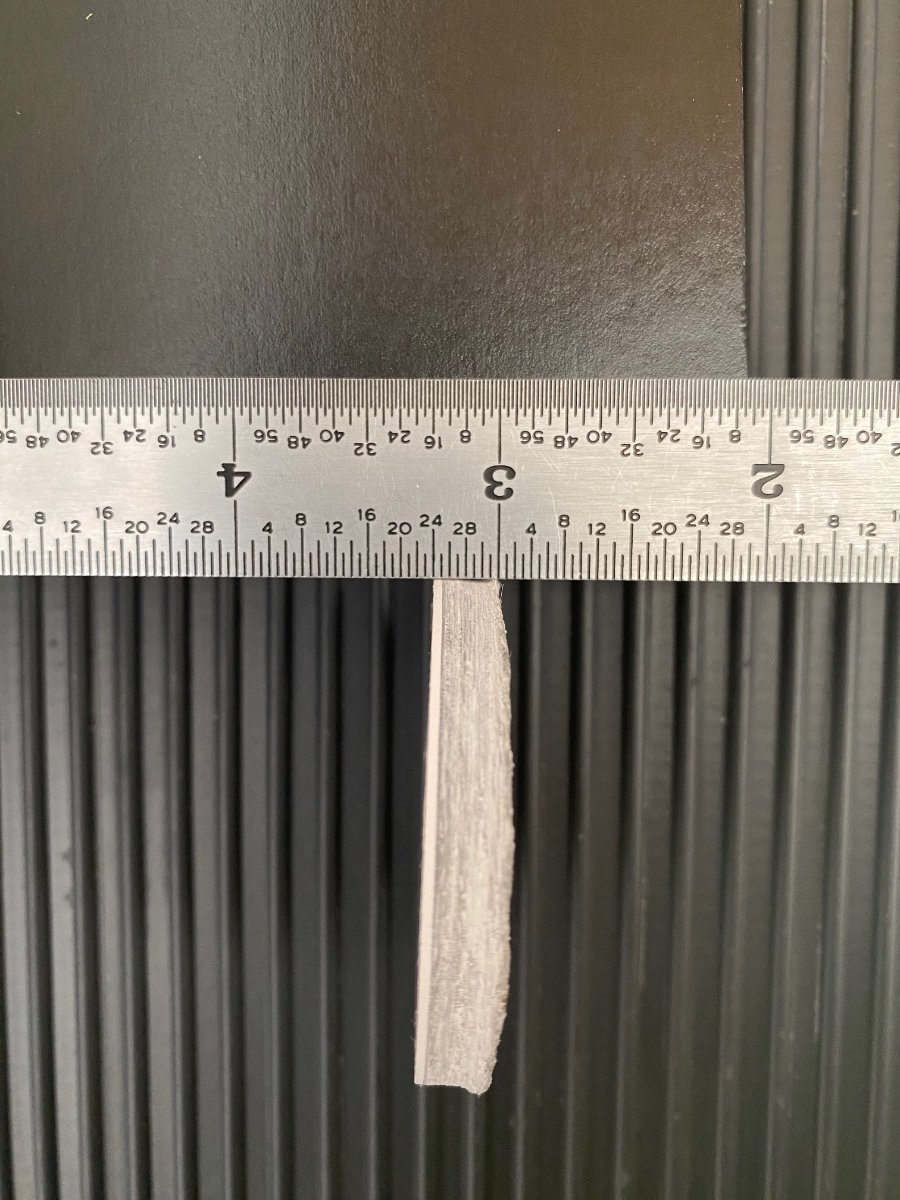
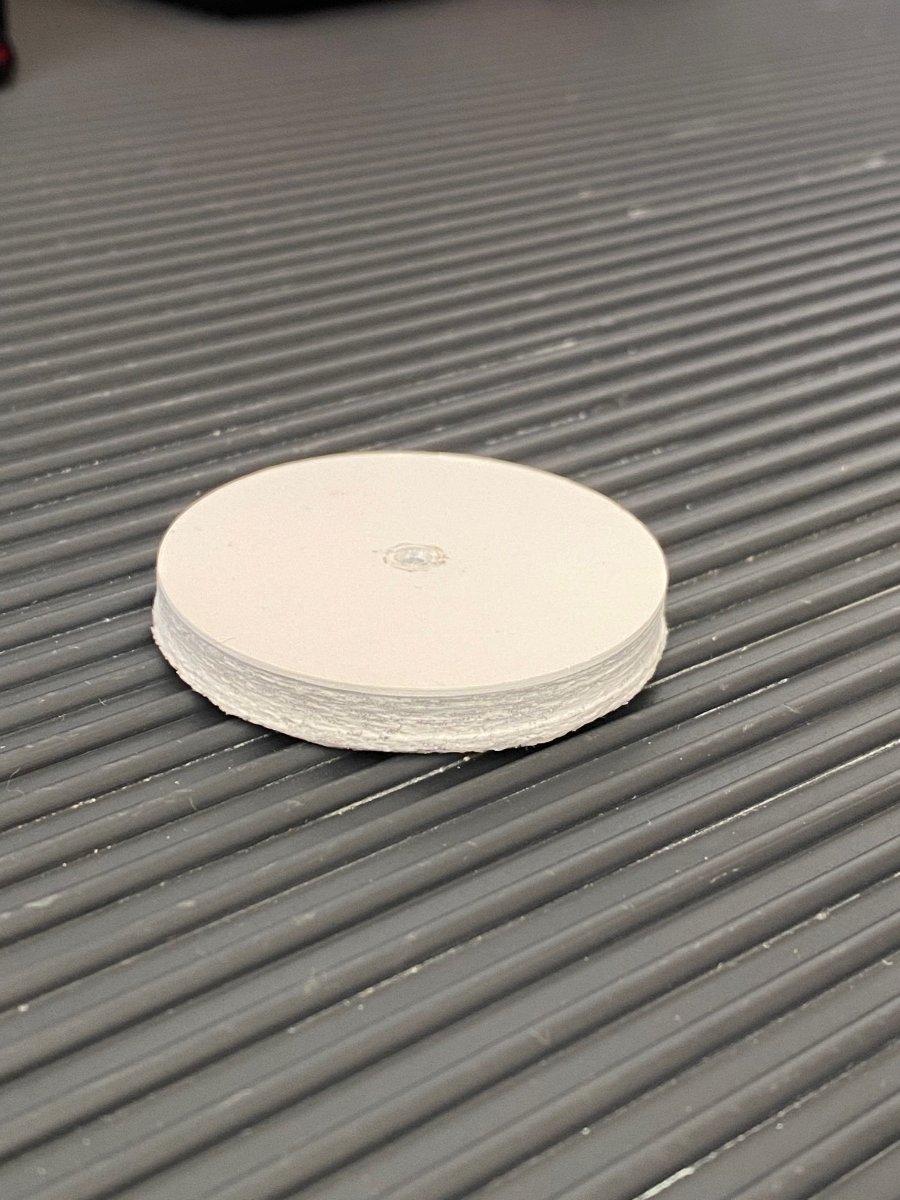
For reference, here’s a couple pics of what the outer Oliver hull fiberglass construction is like. I have this piece from a 2” diameter hole I cut in the lower hull for a modification I did. The total thickness in the area I cut through is about 1/4”. Some high stress areas are thicker with additional reinforcement in the fiberglass. The outer white gel coat layer is about 1/32” thick. A small pin head size ding is not a problem for an Ollie 🙂.
-
Have I killed our Blue Sky Energy MPPT PV charge controller?
Frank C replied to MAG's topic in Mechanical & Technical Tips
The Progressive “LI” (Lithium) setting is the wrong voltage and charging profile for AGM batteries. Why are you leaving it set in the wrong position instead of fixing it? That is very likely the cause of your battery problems. -
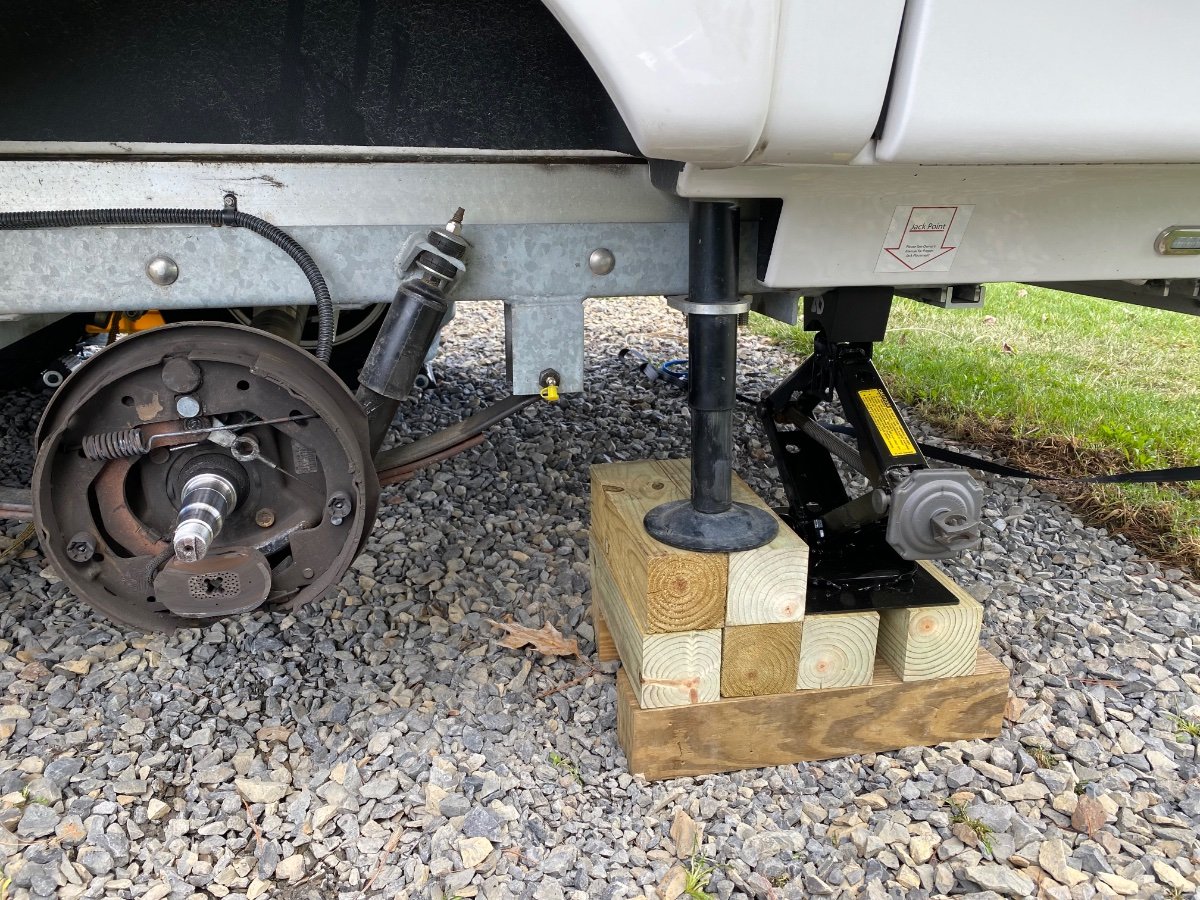
I carry a large scissor jack (a military surplus HUMVEE jack with frame adapter, referenced in the other thread link that John posted above) and some pieces of 4”x4” lumber for raising the trailer for tire changes and wheel bearing maintenance. I lift the trailer with the scissor jack and then put the stabilizer down as a safety backup just in case. Tire chocks on the trailer wheels on the opposite side, and the trailer still hitched to my truck, so the trailer won’t shift at all while lifting. This setup has worked well and is very stable and safe when I have to work on the trailer. I prefer overkill when it comes to safety 🙂. And I don’t trust just using the stabilizers only to lift the trailer for tire changes after seeing how small the welds are on the stabilizer mounting brackets.
-
No sensor in the wiring (see attached schematic) or mentioned in the manual anywhere. You either have a blown fuse, a faulty wire connection somewhere, or else the jack screw is binding up because of the trailer shifting. The motor may have a built in TCO (thermal cutout, often built into motor windings) to protect the motor from overheating, but no mention of that in the jack manual.
-
Top of the ball should be about 24” +/- 1/2” from the ground to calculate your hitch drop needed. And for locking the Bulldog coupler while towing, most of us use this collar with a padlock. "The Collar" Trailer Hitch Lock... https://www.amazon.com/dp/B00HL2NM0K?ref=ppx_pop_mob_ap_share
-
Truma control constant flashing - no hot water
Frank C replied to Dave and Kimberly's topic in Mechanical & Technical Tips
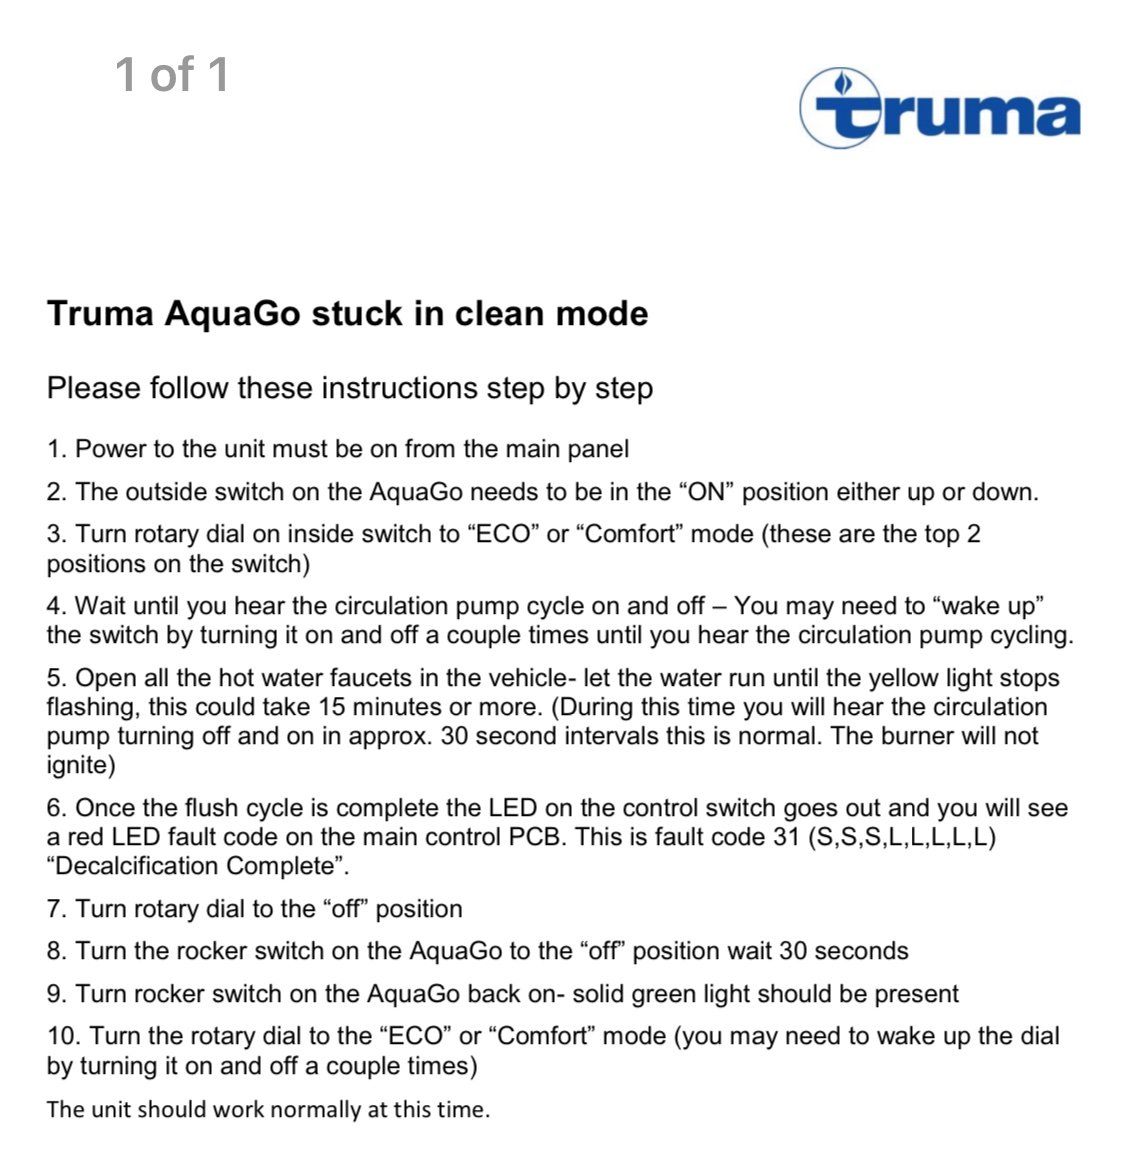
Here’s a link to the Truma site for a PDF copy. https://www.truma.net/sites/default/files/inline-files/AquaGo%20stuck%20in%20clean%20mode.pdf -
Truma control constant flashing - no hot water
Frank C replied to Dave and Kimberly's topic in Mechanical & Technical Tips
Did you accidentally put the Truma into Cleaning Mode? If so there’s a procedure to follow to get it out of that mode. Here’s what Truma sent me to get the unit out of cleaning mode. And note that propane should be ON when doing this process.
-
Not sure which lithium batteries you have. I’ve been considering upgrading my lead acid wet cell batteries to lithium and have been looking at manufacturers specs. The BattleBorn lithiums state a 100% usable depth of discharge (see data sheet). The battery has its own built in battery management system to protect it from damage. I’d probably never go that low, all the way to 0%, but nice to know it’s not a problem if it ever does happen.
-
Gray water tank handle/cable disconnected
Frank C replied to Gliddenwoods's topic in Mechanical & Technical Tips
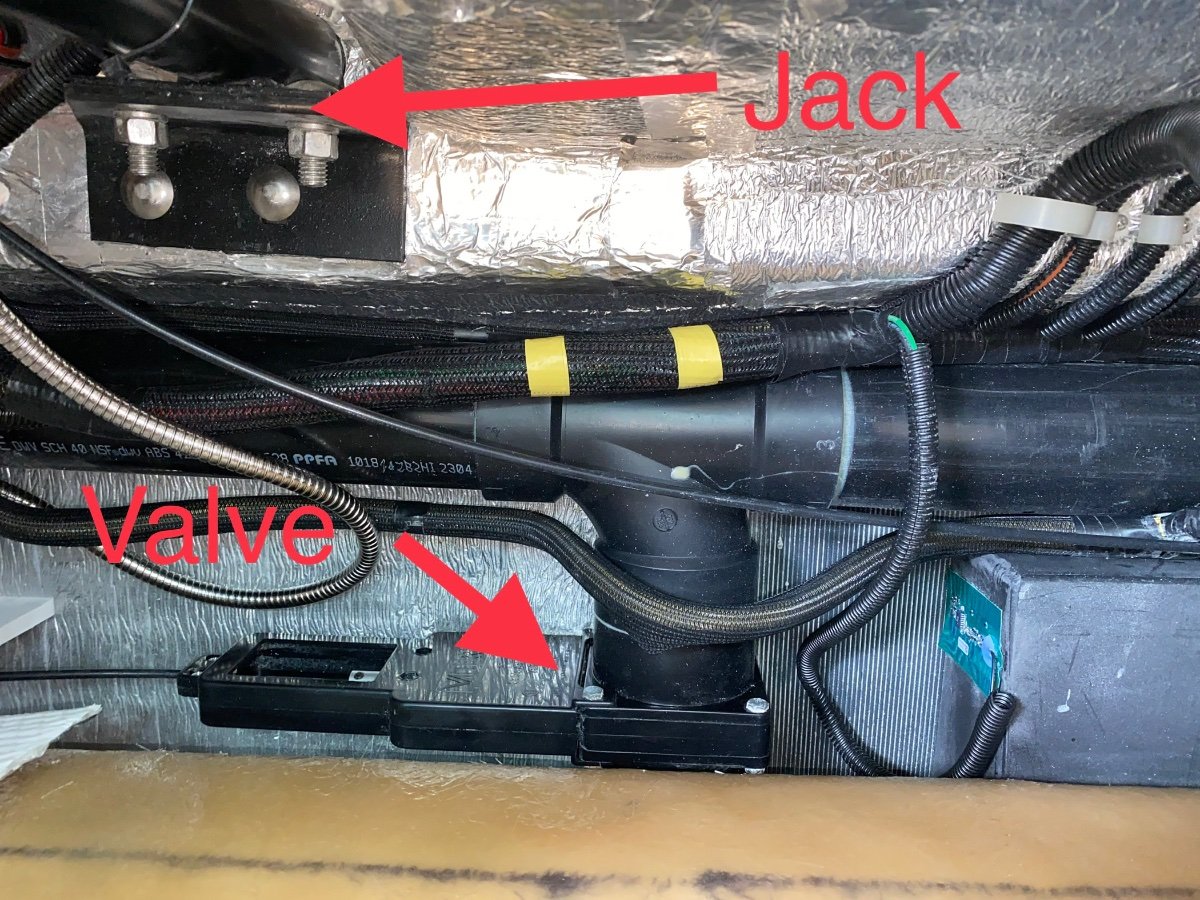
Sorry to hear you might be having trouble with your new Ollie. Since you are a new owner, first let’s make sure you are looking at the right valve when you say it appears the handle cable isn’t connected. The gray tank DRAIN valve is under the access hatch under the street side (driver side) bed near the rear of the trailer (see photo below). It is NOT under the dinette seat. The two valves under the dinette seat closest to the bathroom are the black tank drain valve and the gray tank anti-backflow valve (prevents gray water from sloshing back up into the shower pan when traveling, activated by the pull handle near the floor by the toilet, or by the switch in the closet if you have the optional electric valve). Some owners have pulled gray tank drain handle but then looked at the valve under the dinette and wonder why the valve didn’t move. Once you confirm you are looking at the correct valve when pulling the drain handle, then it’s a pretty simple matter to see where the problem is. The cable is held into that aluminum cylinder (circled in John’s photo) by a set screw. The set screw may be loose or even missing. If missing you should be able to get a replacement at any hardware store.