Hokieman
-
Posts
344 -
Joined
-
Last visited
-
Days Won
5
Everything posted by Hokieman
-

Vizio TV not connecting to campground WIFI
Hokieman replied to Kraig's topic in Mechanical & Technical Tips
Glad it worked out. Had a bit of trouble with our Vizio in our 2021, but Vizio Tech Support helped. It was all related to outdated software. Suggest you run the updates from Settings when connected to good WiFi. -
I’m getting some good ideas. We keep it simple, and use a compact camping percolator on the gas stove, just like the ones Road2Trails and Frank-n-Val show in their pics. We like our coffee strong and a little bitter, so that’ll do it. Don’t stray too far from stove, or risk burning the coffee, but it’s easy. Regarding Cowboy Coffee, this guy is an expert. I haven’t used his technique yet (no egg), but I want to try it soon. https://youtu.be/7UAoT21eqXI
-
If you want to carry fewer tools, the wheel lug wrench that OTT provided me is also a 1/2” breaker bar. I just carry an inexpensive 1 1/16” socket to remove the drain plug.
-
It is installed on the positive wire between the panels and the input of the controller.
-
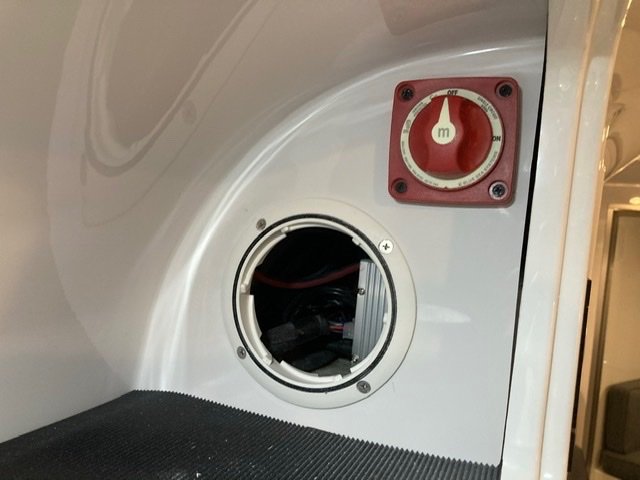
My 2021, #797 had a BlueSeas disconnect installed as standard. Upper cabinet, street side, with access port to get behind it.

-
Delivery Day Dilemma- Winterized or De-winterized?
Hokieman replied to dhaig's topic in Towing an Oliver
I don’t think it matters either, but I assume the tanks are still grounded to the frame through the hold down clamp. -
On our wish list is to add an RTT so our children & grandchildren can join us on adventures. Some of them are not comfortable with night critters.
-
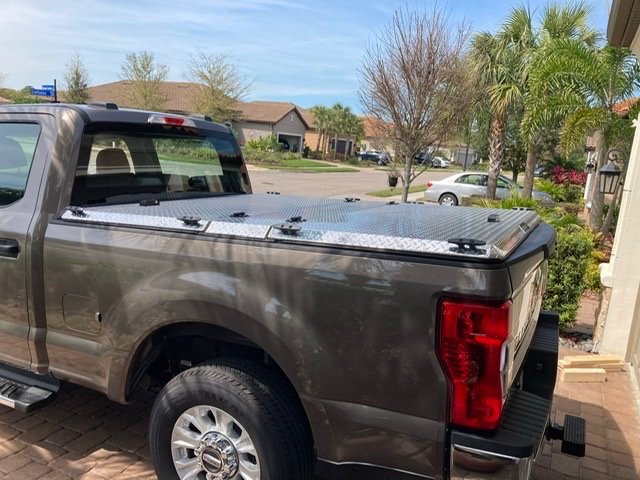
We have a Diamondback also. We have the optional toolbox under the forward compartment for all the small stuff. Not difficult for me to reach in and get what I need, but my wife cannot without a stool. Pros: Ease of removal by myself (~ 15 minutes), very secure from theft, does not leak, strong enough to stand on or load gear on top. I carry a dual sport motorcycle on trips occasionally so I take the cover off and store in my garage. Cons: It’s very expensive, but same logic as Oliver vs SOB. I had a black coated one on my previous truck. I liked the way it looked, but it got too hot to touch (~140F) in the hot sun. This one is the shiny aluminum which matches the rear decking on the Oliver, reflects the heat well, costs several $ hundred less. Next mod is to mount a bike & solo canoe rack.
-
Mike D, 2021, Hull 797 Dometic 11k BTU I have run my unit many times in mid 90’s temps, high humidity, under mostly direct sunlight. It cools very well. I think the cooling capacity is adequate at 11k. The unit does cycle frequently, but we run the fan on Low, not Auto, so it is satisfactory. If I replaced it, I would consider a smaller capacity unit.
-
Legacy Elite for a 6'02" individual?
Hokieman replied to Ghostrider10-32's topic in General Discussion
Ghostrider…..I’ve owned an LE1 and now have an LE2. I’m 6’1 barefoot. I had to sleep a bit diagonal on the LE1 bed, but it was OK. My wife thought it was too tight. I had headroom in the trailer everywhere except the bath, my head would hit the vent fan, but really no problem. On the LE2, I fit the twin bed with little room to spare. That being said, the hassle factor seems way too high to modify your garage. Have you looked at a Lil Snoozy? They seem well built, 6’3” headroom, 96-97” exterior height, the AC is on rear, not the roof. https://snoozy2.com/. A quick search shows a few on the used market. -
Hull #928 Left the Factory on Oct 12th.
Hokieman replied to fairmontrvpark's topic in Delivery Day Photos
See this link for a discussion on how a few of us modified coupler to 2 5/16”. OTT changes their policies over time, so may be best to check with your sales rep. -
Upgrade To Lithium's Request For Info
Hokieman replied to Geronimo John's topic in Ollie Modifications
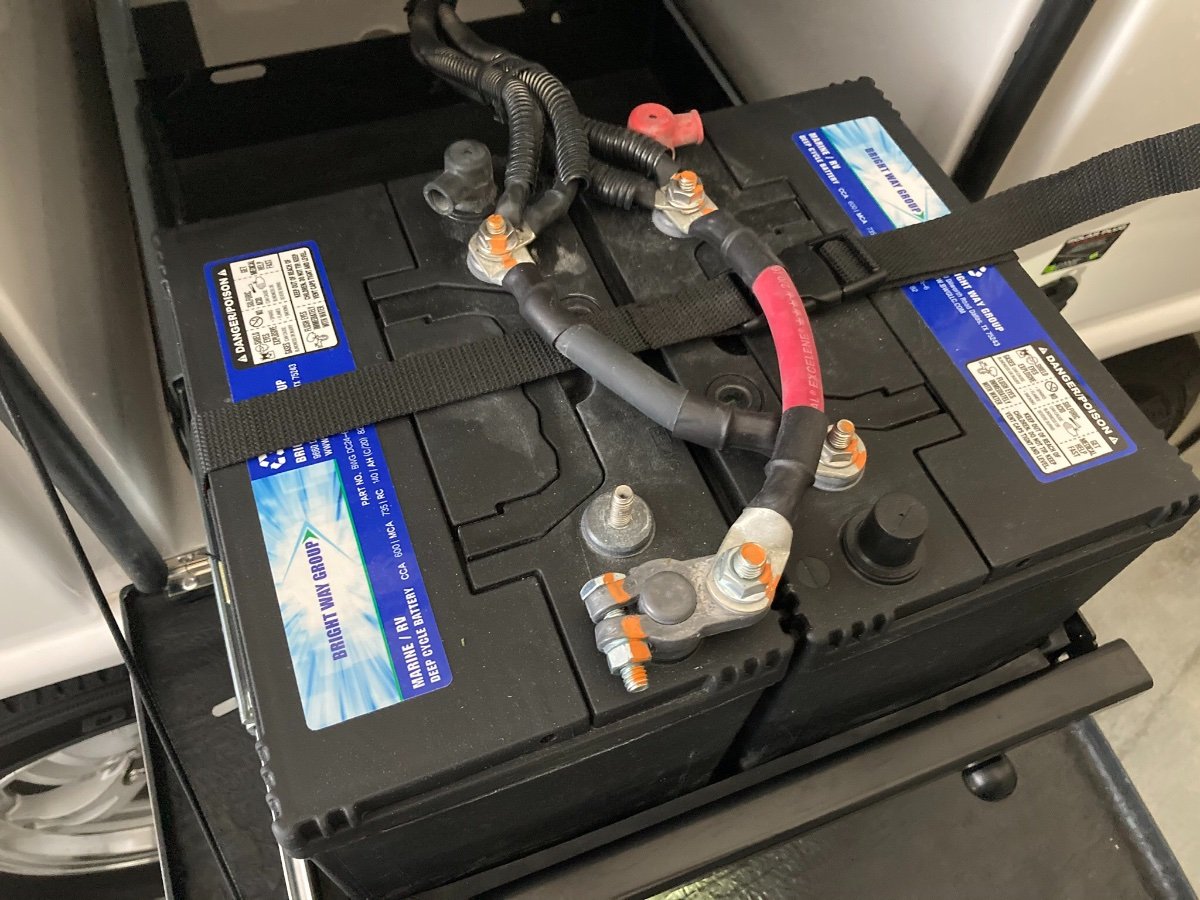
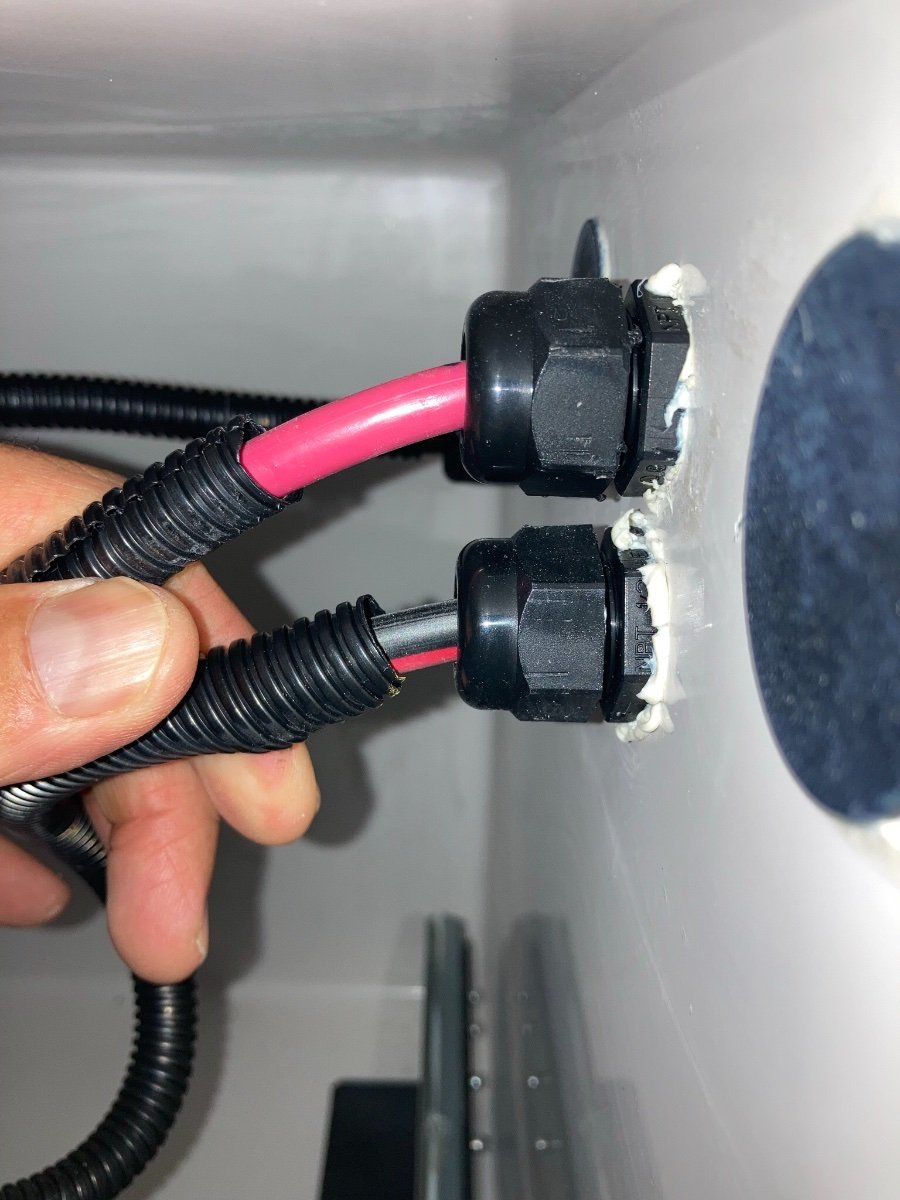
I made an error.....The black wire on the right side of the battery box wall does not go the the converter/charger. I think it is the negative wire that goes to the Zamp Controller, and then on up to the solar panels. Apologies for the confusion. I could do better if I had a wiring diagram instead of going by memory! -
Good suggestion, I’ll turn in a ticket and make a recommendation. My shock bushings are relatively new, so not cracked yet, but just a matter of time. For those replacing their shocks, you can re-use 2 dished washers from each of the old shocks and install between the bushings and the flat bracket surface. In the meantime, I’m going to install some heavy 3/8” fender washers.
-
Upgrade To Lithium's Request For Info
Hokieman replied to Geronimo John's topic in Ollie Modifications
I found a pic of my negative buss. I also saved a pic I found on the forum of someone else’s trailer positive buss bar, I cannot remember who. This is not the setup I have. What I see in that pic, which is kinda fuzzy, is (from far to near): 1. Auto reset breaker from Zamp panels to battery 2. Auto reset breaker with 7 pin charge wire and breakaway switch 3. OptiFuse 60A breaker 4. Positive buss with Jack wires, etc. That’s just a guess on my part, others may be of more help here.
-
Upgrade To Lithium's Request For Info
Hokieman replied to Geronimo John's topic in Ollie Modifications
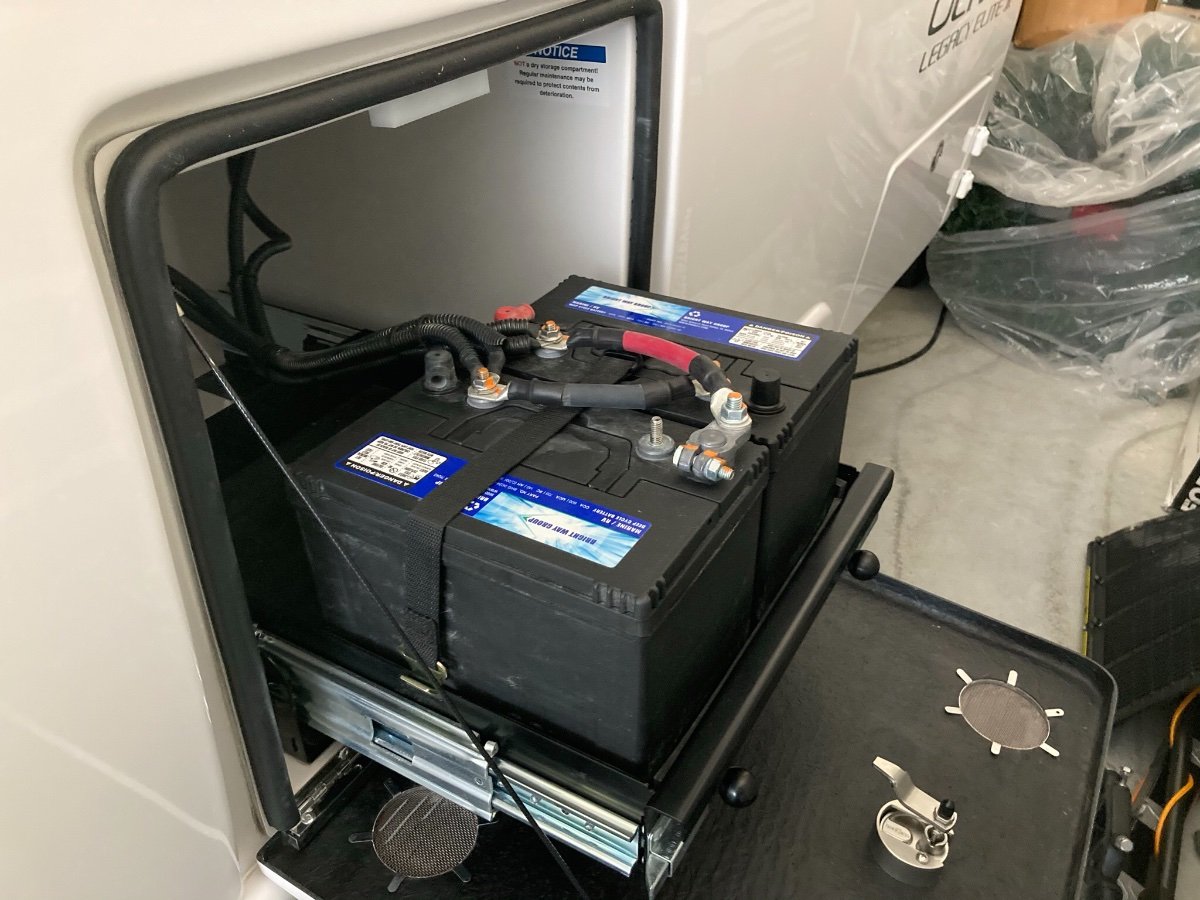
My 2021 #797 came with 2 Brightway Group Marine/RV batteries as standard. I ordered the Zamp 340W solar panels with Zamp 30A PWM controller as an option, which included the battery disconnect switch in the upper street side cabinet. No inverter, Progressive Dynamics PD9260C converter/charger. My trailer is parked about 500 miles away right now, so can’t get you all the pics you need of the buss bars etc. I have several pics on hand I took before replacing them with 2 BattleBorn 100’s. The 1/0 parallel jumpers were too short for me to use, so I ordered 12” 1/0 jumper wires from Battleborn. Wires from battery going inside to positive and negative busses are 4/0. Right Side Battery Box: Upper red + wire goes to 60A OptiFuse breaker Lower red/black + wire goes to solar panels Black wire - goes to converter/charger Left Side Battery Box Yellow - wire goes to negative buss Ive no idea how the 2022 models are configured. From what I can tell in this forum, there are many variations based on age and electrical equipment, especially inverters. For example, the PD9260C converter does not have a lithium setting, but a $25 plug in pendent converts it. There is no positive buss on mine, all + wires are bolted into the OptiFuse breaker. Frankly, that section is a mess I intend to modify soon, I was waiting for my warranty period to expire. It all works great however. If you PM me your email, I can send higher resolution pics you can zoom in on.
-
Heat Management of Lithium/Solar/Charging Upgrades
Hokieman replied to Geronimo John's topic in Ollie Modifications
Thank YOU for confirming with Zamp! I wasn’t 100% sure I was reading those specs correctly. That’s good info for anyone looking to do a simple swap out of their older conventional batteries for lithium. -
Heat Management of Lithium/Solar/Charging Upgrades
Hokieman replied to Geronimo John's topic in Ollie Modifications
This may have been correct for older Zamp solar controllers in our trailers, but if I am not mistaken the current Zamp ZS30A PWM controller charges to 14.4V in Absorption mode, 13.6v in Float. That’s the way I interpret the specs (link below), someone please let me know if I have misunderstood these important details. Converting from PWM to an MPPT is a worthwhile modification, and it’s on my future mods list. In my case, the Zamp PWM is working fine for us with 2 Battleborn 100A LiFePO4. I don’t want to change it out now because of the cutout hole in the wall panel. I’m hoping Zamp will offer an MPPT in a year or so that will be a panel mount and can fill that hole in the wall. By the way, Battleborn recommends charging their batteries up to 14.4V periodically for optimum performance, so they seem to be similar to Lithionics in their protocol. https://olivertraveltrailers.com/wp-content/uploads/oliver-university/Component_Manuals/Solar/Zamp_Charge_Controller_Manual-revised.pdf -
Greetings from Michigan - upgrading to 2 5/16 coupler?
Hokieman replied to Mark and Lorraine's topic in Introduce Yourself
We’re using the 2 5/16” ball to tow our 2021 LE2 with 2020 Ford F250. Like Fritz said, it’s probably overkill but I thought it worth the extra cost. We are not using WDH, tows very easy. I called Service well before production date and set it up. They installed it during manufacturing, not after the fact. Upon delivery, I had to pay an additional Service fee, can’t recall how much, but reasonable. -
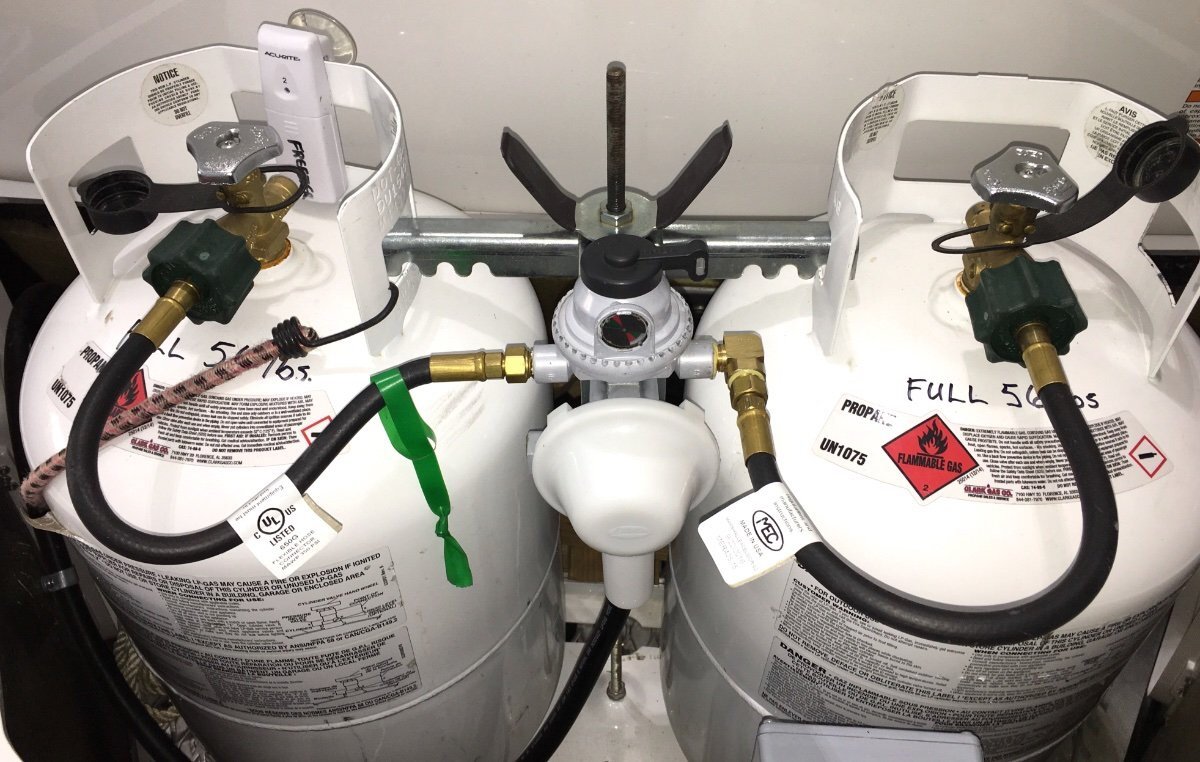
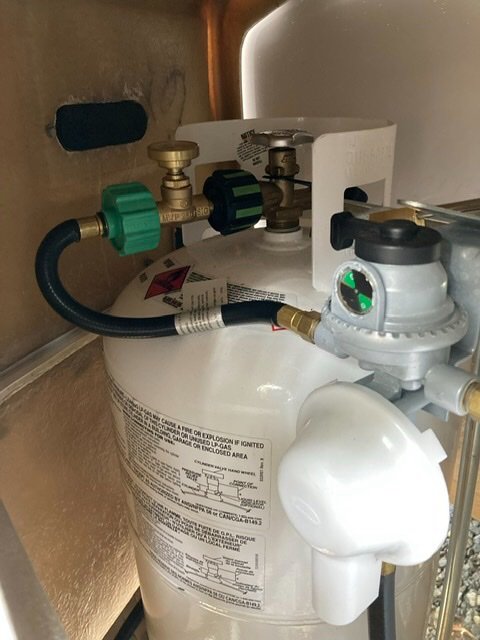
I went back and researched previous posts. I think I’m going to use JD’s method and add 90 degree els with my almost new hoses to get a nice single bend like that one shown on the right tank.
-
Battery Box Support Bolts Missing
Hokieman replied to Ralph Mawyer's topic in Mechanical & Technical Tips
After I turned in my service ticket on 797, Jason got back to me with a next day response, referred it to Engineering. They attributed the problem to an installation error. He said he had been checking other trailers in for service, had not found any loose. The only other similar problem he knew about was from Ralph, Hull 625. Just a reminder I also had 2 loose doghouse bolts, details in a previous post. -
Thank you for suggestions, I’ll use them.
-
Same situation with my 2021 model. I was greasing the chassis this week and took one of the nuts off. Only the top of the shock has this problem, the lower end is fine. No serious cracks in the rubber yet. Perhaps some heavy duty fender washers between the rubber and the brackets would improve the rubber life.
-
Slight misunderstanding on my post. The threaded portion of the bolt is inside the vanity.
-
I changed my mind on this. Initially I intended to make it easy for a future owner to convert it back to a flush toilet. But I didnt like it so I eliminated the tee and put in a straight coupler instead.