

Ronbrink
-
Posts
495 -
Joined
-
Last visited
-
Days Won
5
Posts posted by Ronbrink
-
-
14 hours ago, Steve Morris said:
Yes, thank you!
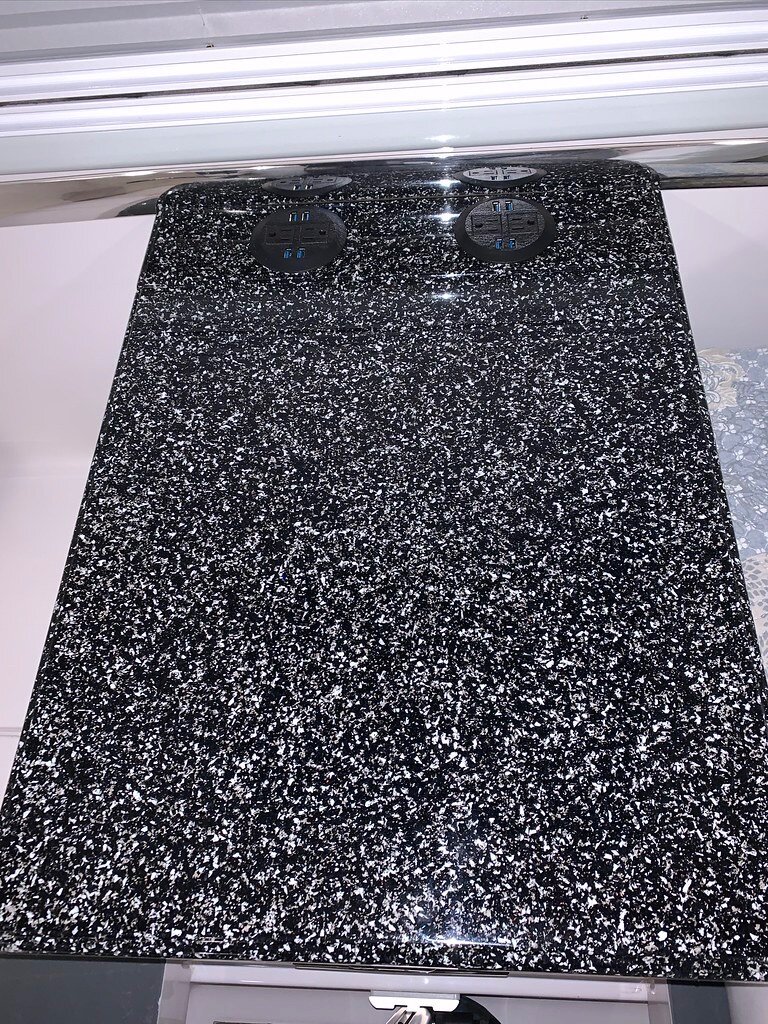
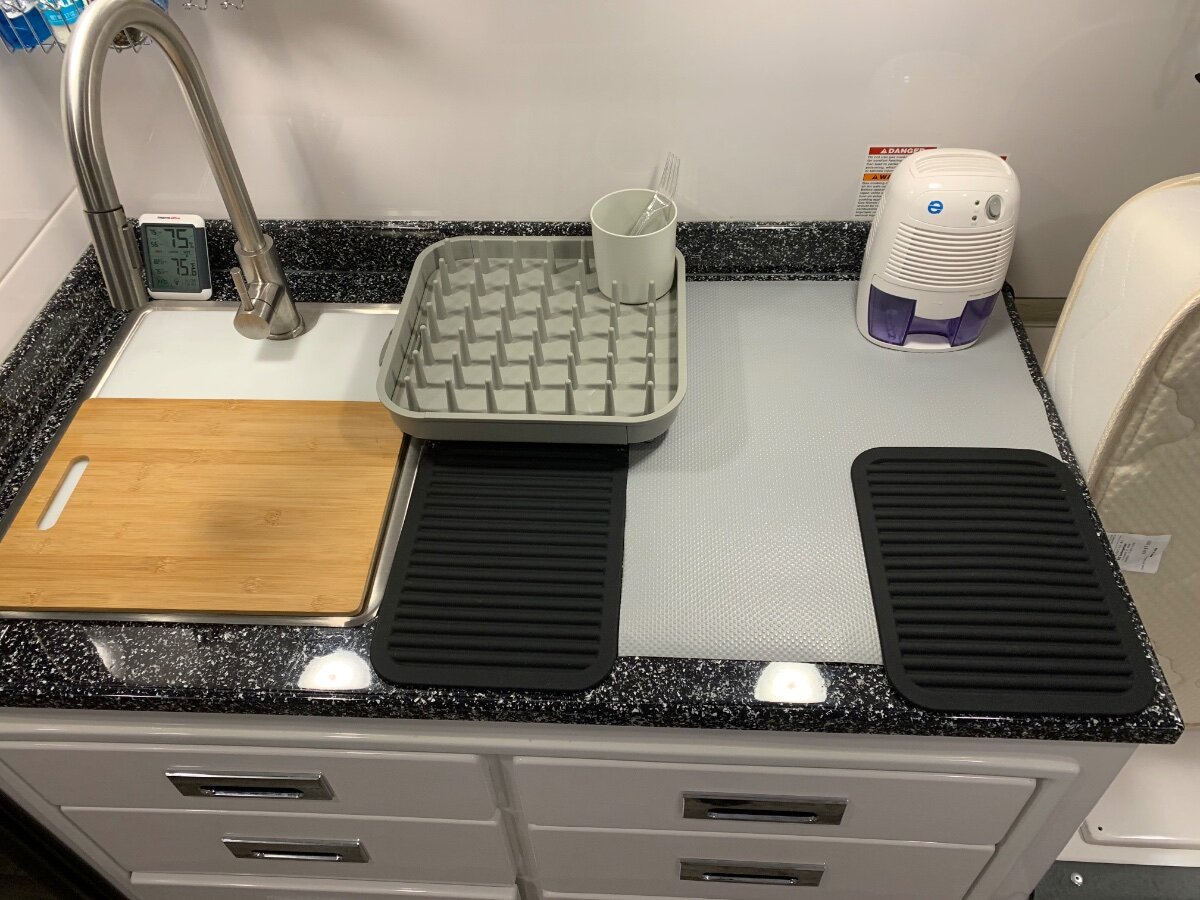
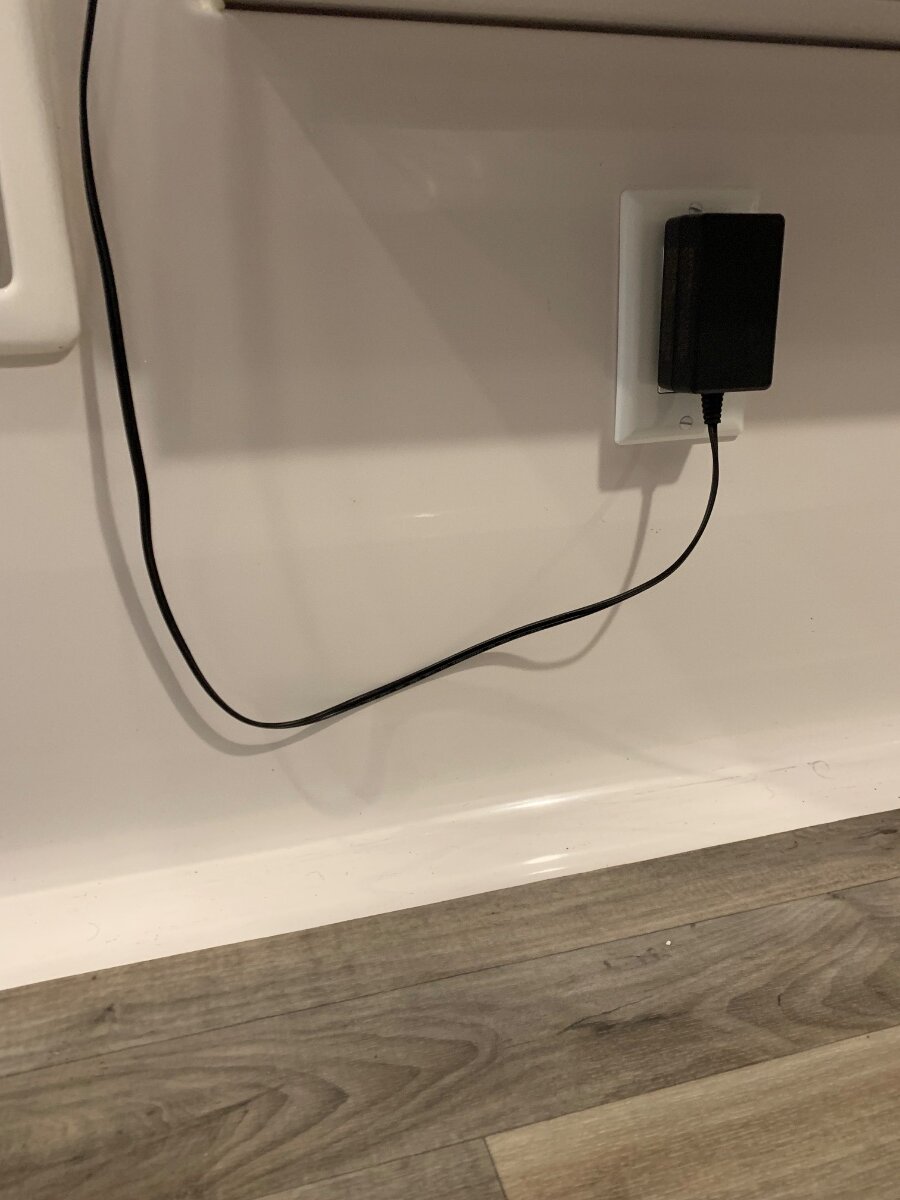
Please be advised, the breaker installed was a 20A not the 30A as mentioned in my reply. At the same time a second 20A breaker was also installed in the panel and wire routed to the nightstand where two desktop receptacles with USB ports were mounted atop that table, then further routed under the curbside bed to the receptacle shown in my January 15 post above, A dozen simple mods!, Additional USB ports. I stage a small dehumidifier in the galley on the stovetop cover and its’ wire can now be run down the wall and along the mattress for power. A third 20A breaker installed provides an auxiliary receptacle inside the rear seat hatch for miscellaneous use; light, fan, etc.
Nightstand AC/USB outlets very handy for staging/charging electronics.

Dehumidifier cord off counter as opposed to leading upward to the under cabinet outlet; makes for a cleaner look.
Dehumidifier cord/plug below curbside twin bed.
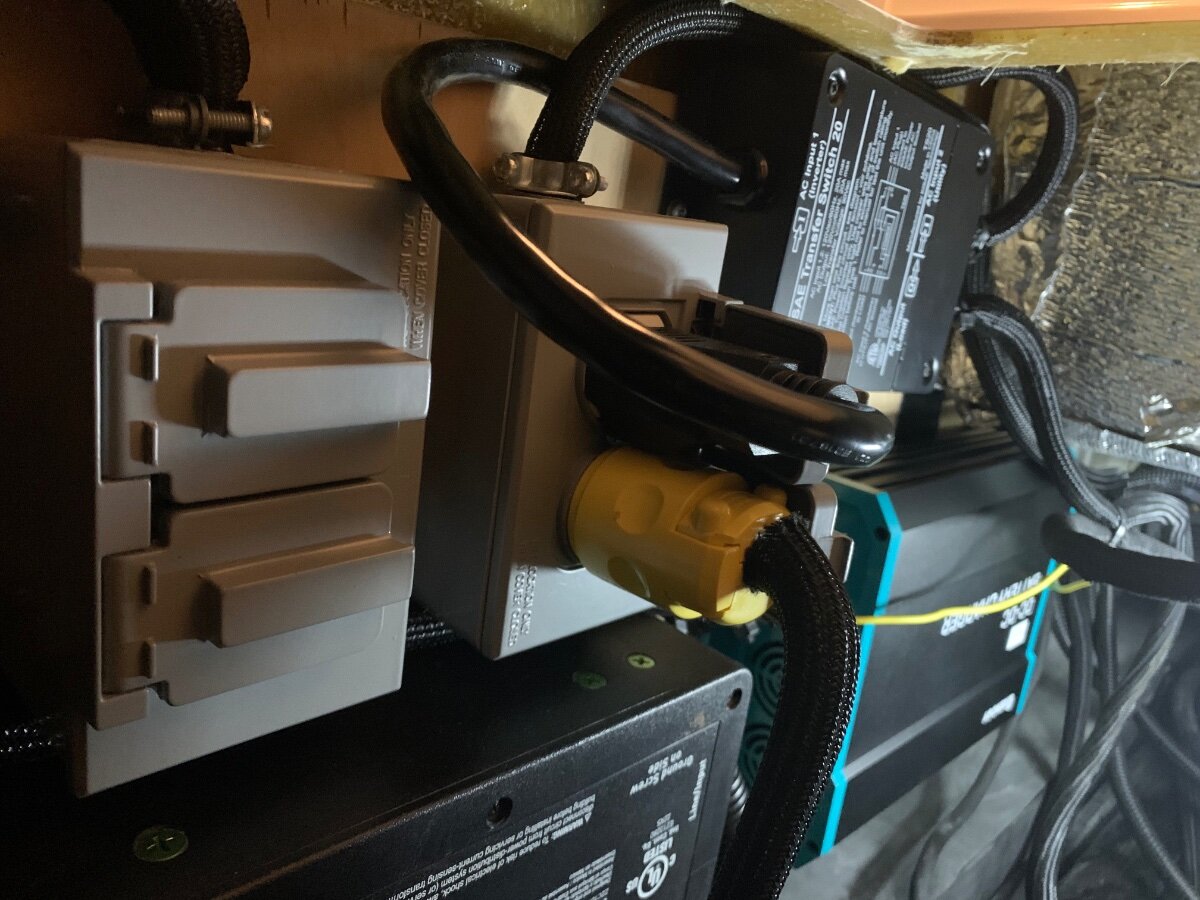
Miscellaneous duplex outlet inside dinette hatch on left. The receptacle box to the right is an expansion of the Xantrex setup to enable use of the LFPs to power the Dometic a/c.
-
 1
1
-
 1
1
-
-
8 minutes ago, Steve Morris said:
Ron, where did you grab the AC supply for this modification? I’ve got two matching outlet covers, one for the front like yours and one in/near the basement. Thanks!
I did the tether last year when I almost left the cover behind…
My 2020 OLEll had three blank breaker spots in the electrical panel. I installed a 30A breaker in said panel to power the forward exterior outlet, as well as an interior outlet at the rear dinette seat next to the panel. The interior outlet also has USB ports. Does this answer your question?
-
1
-
-
Very pleased with the final outcome and usefulness of our dual Lagun tables; throughly field tested for durability and functionality. My wife adapted well to her own table after a few years of me ‘hogging’ the single original table. The fabricated components of the dynamic system developed remain to be powder coated ‘white’ to better blend in with the Oliver’s interior; perhaps next seasonal camping lull. A cup of Joe and dose of @Geronimo John’s ‘words of wisdom’ to start this day. Life is good!
-
3
-
 1
1
-
-
I credited the idea to another Oliver owner (name unknown) in a response made to a post by @Wandering Sagebrush entitled ‘Inexpensive Helpful Modifications’, September 15, 2023, Ollie Modifications. This was one of ten mods I featured, some my own and others credited. May be worth another a look-see!
-
3
-
-
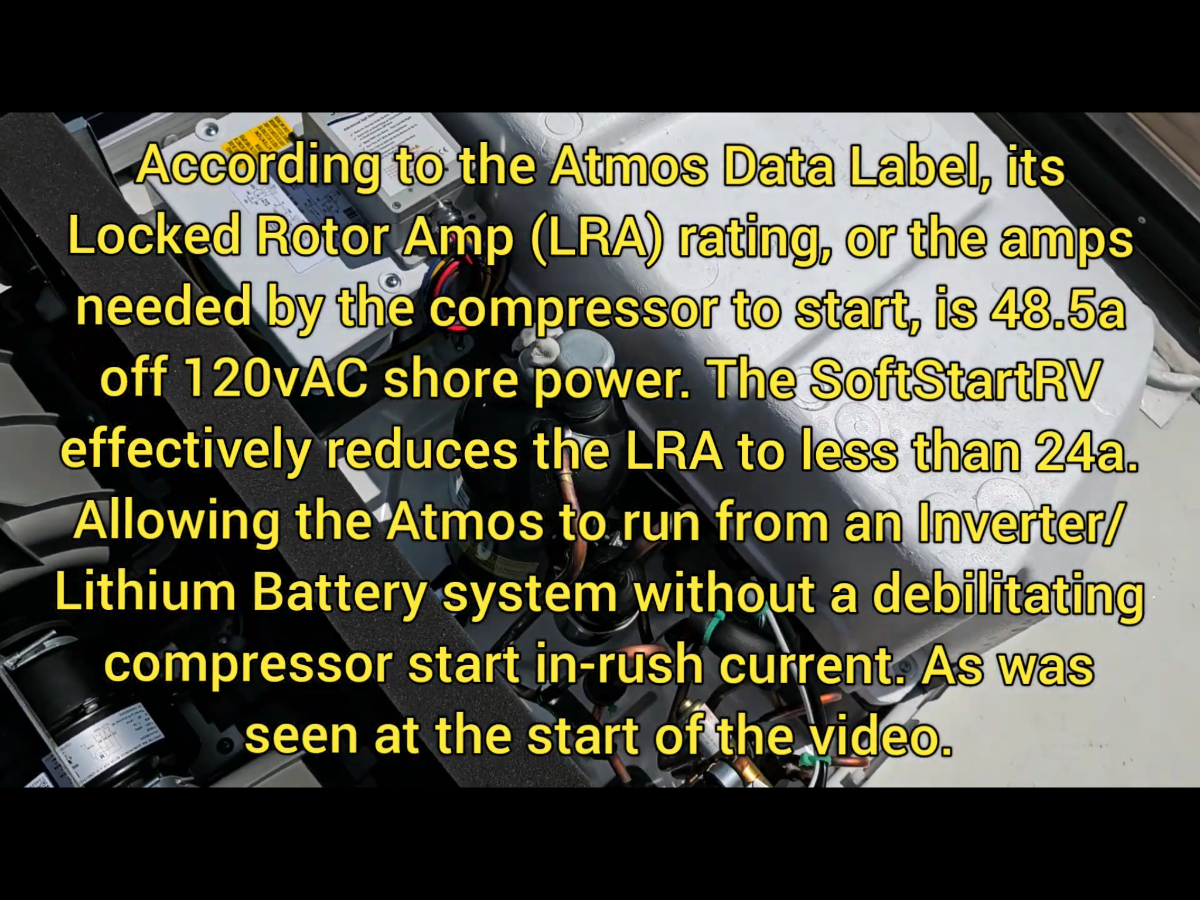
Just watched a video on installation of a SoftStart on an Atmos 4.4, necessary to resolve an inherent issue regarding LRA.
Also, a screenshot of the dual squirrel cage fan blower in the Atmos for higher airflow, and sound reduction both from outside and inside the RV; 4 fan speeds, including Sleep mode.
A few other notes on the Atmos 4.4: (1) condensate drains on the rooftop, (2) the R32 refrigerant requires a lower pressure, thus more energy efficient, and (3) 12,000 BTU heat pump.
-
2
-
-
2 hours ago, CRM said:
Haven't been at a high altitude or in temps much over 100 degrees with our LE2 yet
Understood, but everything is bigger in Texas, including the heat and humidity! Waiting to hear from current installers about unit size in a few Sprinter Class B motorhomes, which appear to have comparable interior space as an Oliver, as well as other performance measures.
-
3
-
-
I went back and read where the aforementioned FB owner understood the dehumidifier to function only in Low cool mode per his conversation with SDG. I reached out to him for an update on his purchase and pending install.
Also read where SDG is testing soft start type devices on the Atmos 4.4, and independent others claim the new Micro-Air ‘Breeze’ is actually a better choice over the SoftStart brand. I will follow this closely, but my thought of reinstalling my Micro-Air 364 currently on my Penguin ll was nicked due to issues of memory and rebooting; however, not a problem reusing SoftStart devices on the Atmos. Later
-
1
-
-
2 hours ago, Geronimo John said:
Ronbrink: The following does not apply for your Houston location.
But for others they need to be aware that most Lithium's per the MFG's must not be stored at full SOC for locations where there is any possibility of them freezing.
GJ
Very good point, thanks for stating!
@Geronimo John, I failed to emphasize that the Cerbo can be set to disable charging of my LiFePO4s at low temperatures, thus eliminating any concerns of damage during freezing conditions. The SOC can also be set to maintain a partial charge (40-60% range) for LFPs being stored for more than a month.
-
1
-
-
26 minutes ago, CRM said:
Has anyone here installed the Atmos 4.4 yet and used it similar conditions? Looks promising since it has a de-humidification / sleep mode, but it looks like it also operates with the fan always on too.
There is an owner on the Oliver FB that received an order from SDG, but no report yet on the install. The Atmos 4.4 is a 15K unit, and there are claims that it is much quieter and more energy efficient than the standard Penguin ll Oliver currently installs. I have talked to the company owner and following reports by a couple of SOB owners. Although preliminary reports are promising, there have been some discrepancies in the marketing of these units; specifically, (1) a claim that soft start was built into the unit, but found not to be the case and (2) it has an inverter compressor. The heat pump is a good feature, as well as the dehumidifier which may operate separate from cooling. I have read where the Atmos 4.4 is same as the Gree A/C with the only difference in type of refrigerant. I will pass on further information as made available.
-
3
-
-
3 hours ago, rideadeuce said:
Thinking about running hot ORION OUT to main pos bus in trailer instead of the rear one and taking neg directly to main chassis ground from TV battery and Orion instead of using neg busbar.
Running a dedicated 4 AWG ground wire directly from the TV’s battery to the rear bumper Anderson port, then continue the run of same size cable directly to the DC-DC would likely solve your problem.
-
1
-
2
-
-
On 6/6/2024 at 3:36 PM, SeaDawg said:
The bigger question is: how well will one new lead acid battery play with three older batteries?
On 6/6/2024 at 5:35 PM, topgun2 said:That's 5 or 6 batteries replaced within 4 years - all due to the same type of issue? Even if the batteries were bouncing around in the compartment this seems a bit much to me.
On 6/6/2024 at 8:52 PM, Geronimo John said:Bill's spot on. The odds are that you have an overcharging issue. Combine that with SeaDawg's statement I think applies to your situation.
Conventional wisdom is when one goes bad, replace them all.
On 6/6/2024 at 10:41 PM, jd1923 said:Yes, it would have been better to but a pair or four,
23 hours ago, ChrisMI said:if I was leaving on a long trip I’d drive to Costco or similar and buy an identical interstate battery and ditch the three brightway units.
@SNY SD UP, take heed to these words of wisdom; oftentimes cost saving measures are our demise! Safe travels!
-
 1
1
-
-
16 hours ago, Fritz said:
Thus, if you have shore power connected but everything else turned off (including solar), the inverter/converter could be drawing enough to contribute to a 3% SOC drop per day.
That was exactly my point in a previous comment! Since my OTT is always on shore power when in storage, I have a Victron Cerbo and NOCO 10A charger ready to install in unison, which will be programmed to kick on said charger when the LFPs’ SOC drops to a set level. This will eliminate my worries of a depleted battery bank over an extended period in storage.
-
9 hours ago, rideadeuce said:
Everything went as planned but the Orion is only reading 7-10 amps with Tundra parked.
My DC-DC only puts out a partial charge when idling. Revving the engine should show an increase in output.
-
1
-
-
9 hours ago, jd1923 said:
@Geronimo John, I'm not sure how this occurs, but 2-3 times now it appears like you are quoting me, be instead quoting a post that I had previously commented.
This has happened with me a few times, as well; guess ‘things’ get discombobulated when crossing the Pacific! Better to invoke understanding rather than provoke Crazy Horse!
-
1
-
-
I experienced much the same issue, and will share what I found out and truly believe what may, in part, be going on. When on shore power, take a look at the Progressive Industries EMS digital display. I noticed a 1A draw and could not figure out why, despite the fact that everything was shutdown to the best of my knowledge. I would have to make a weekly trip to the storage facility to activate the ‘initial’ charging aspect of the Xantrex to bring my battery bank up; this involved tripping the 30A main breaker Off then On again. Upon researching, I learned that the Xantrex has a 1A draw even when turned Off. To remedy, I now trip the surface mounted circuit breakers for the Xantrex and DC located under the street side bed. Problem solved, at least for now; zero draw on the batteries! I plan to install a Victron Cerbo and dedicated charger to maintain the battery bank since the Xantrex ‘maintenance’ charge feature is not working.
-
1
-
1
-
-
35 minutes ago, topgun2 said:
Moo!
That is one sexy cow, as is my OLEll, often referred to as my ‘Condo-on-Wheels’!
-
3
-
1
-
-
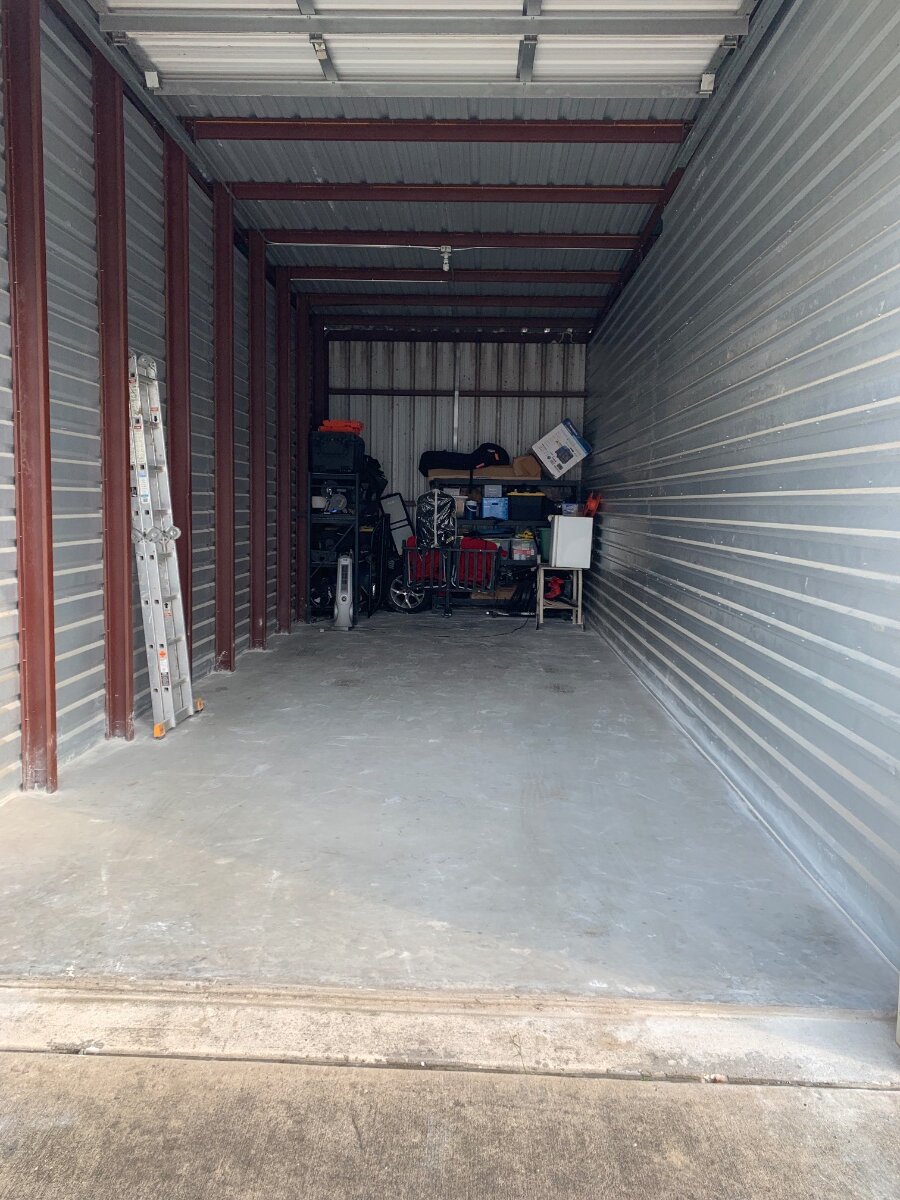
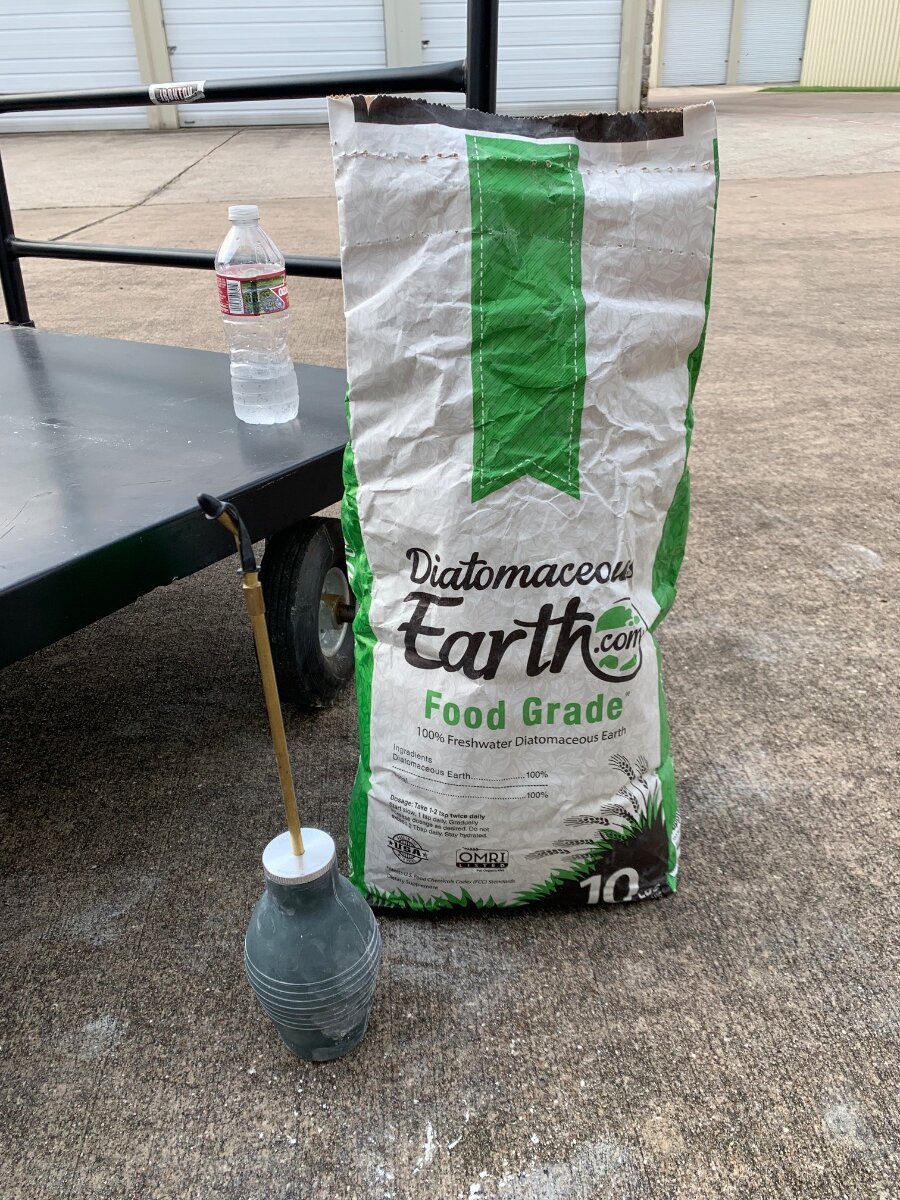
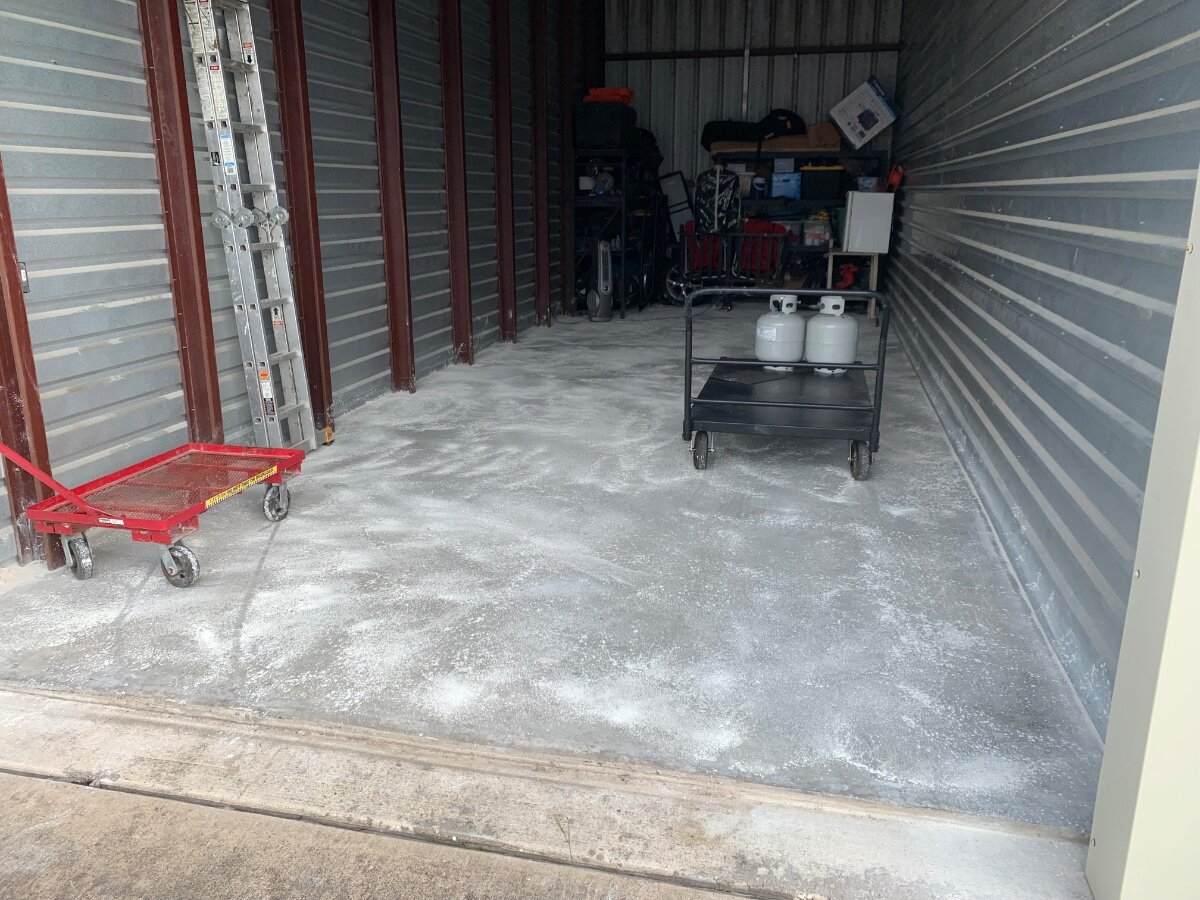
Twice a year, prior to turning my ‘COW’ out to pasture, the COW Barn gets a good cleaning, aside from the frequent use of a leaf blower throughout the year, as necessary. Although fortunate to be able to stow indoors, pests must be kept at bay; specifically insects and spiders. It has been my practice to clean and treat using diatomaceous earth (DE), rather than harmful chemical pesticide and insecticide formulations on a more frequent basis. The proper DE for this use is food grade, not the type used in swimming pool filter systems. Here is the simple, but very effective process:
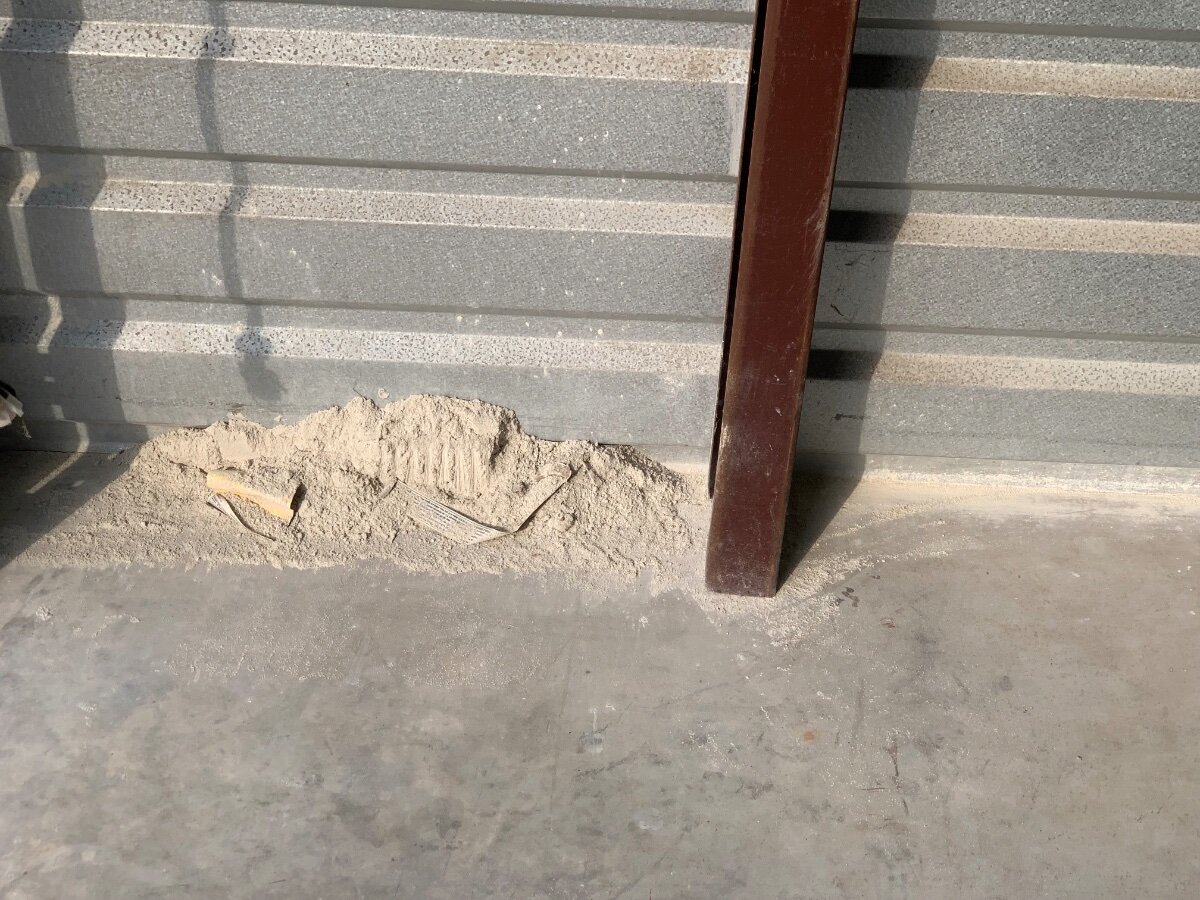
The floor is swept clean with a push broom. At the time of this cleaning, previously applied DE is mostly piled along the walls as an intrusion barrier. Any critters crawling over is destined for death!
The old DE is swept to a pile for disposal.
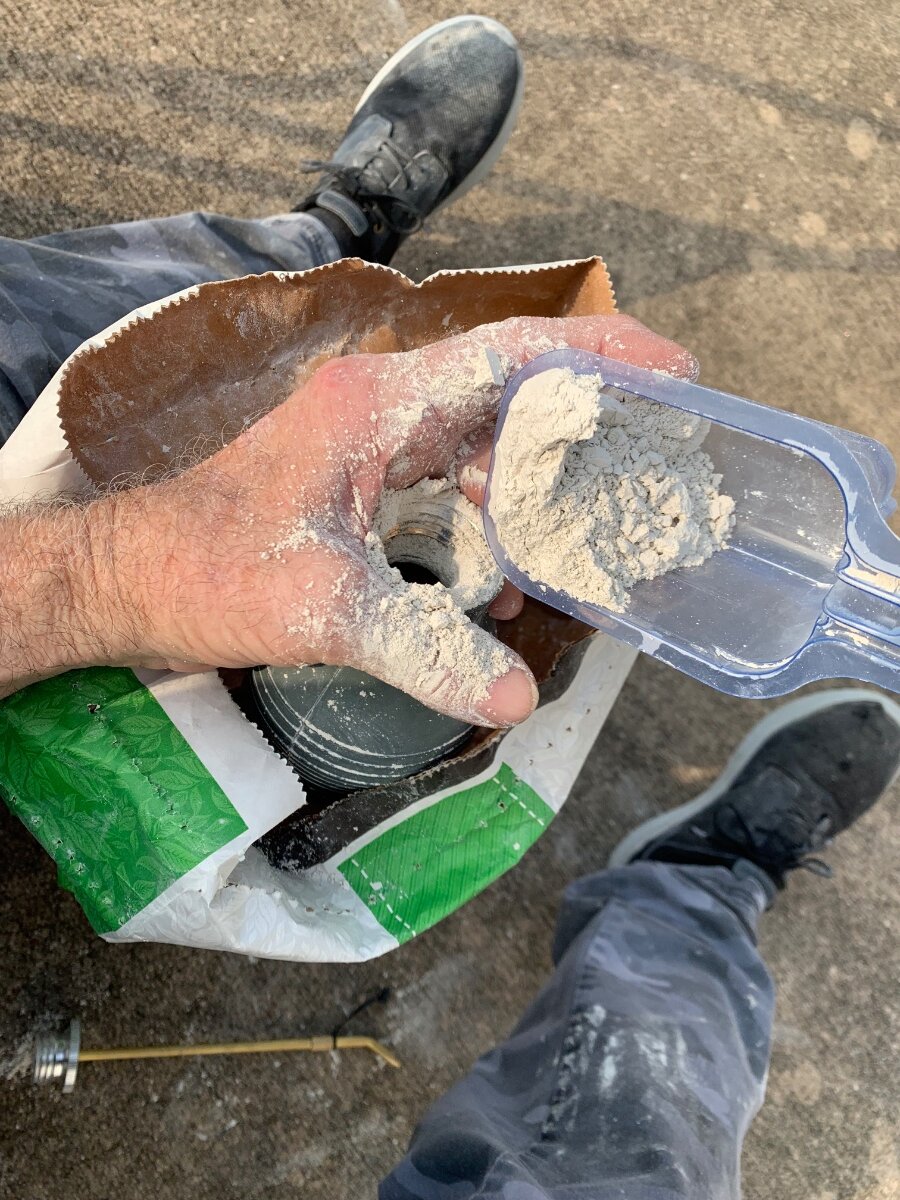
A bulb applicator and bag of DE are readied. A scoop is used the fill the bulb.
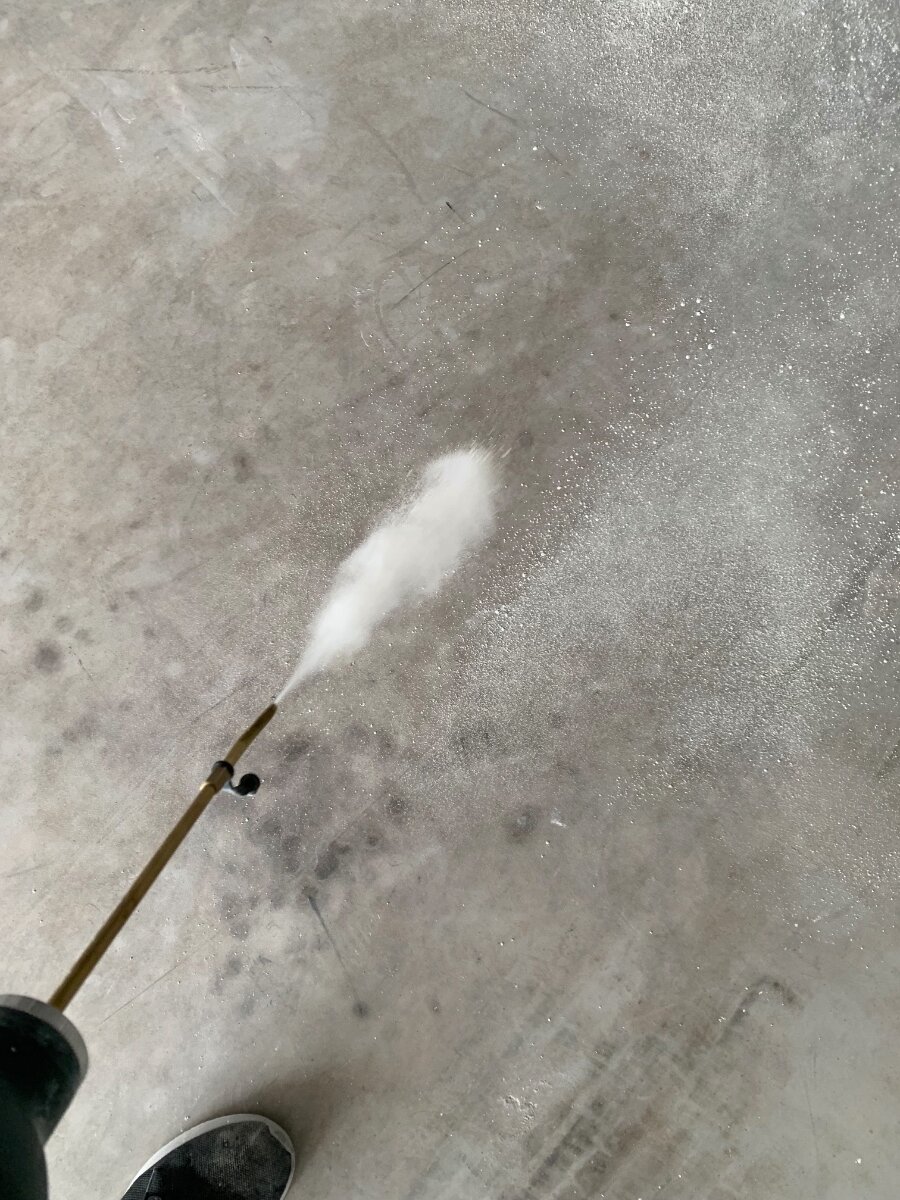
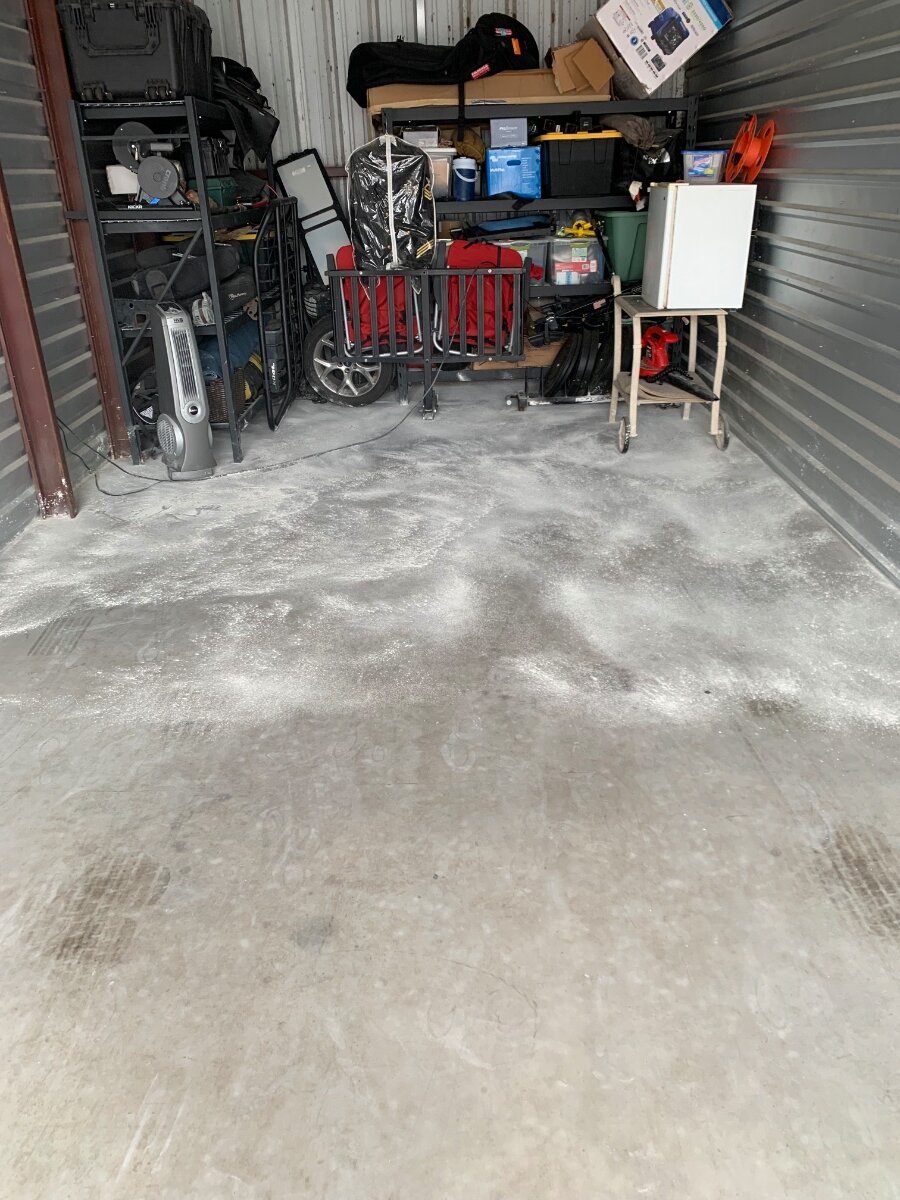
A liberal amount of DE is broadcast on the floor. It’s seemingly a lot, but this initial coverage will be swept to the side walls when the ‘COW’ comes home for prolonged effectiveness.
When about three-quarters done, my equipment carts are rolled in and the remainder of the floor is treated.
The COW Barn is then closed up for the duration of our trip. Prior to herding the ‘COW’ back into the Barn, the push broom is used to sweep the DE to the walls where is continues to effectively kill targeted pests. Since DE is commonly used to treat pests on outdoor plants, one could dust under and around their OTT sitting outside to reap benefit.
-
3
-
5
-
-
2 hours ago, rideadeuce said:
Looks like to me you cut away more of the fiberglass propane housing to make a better fit?
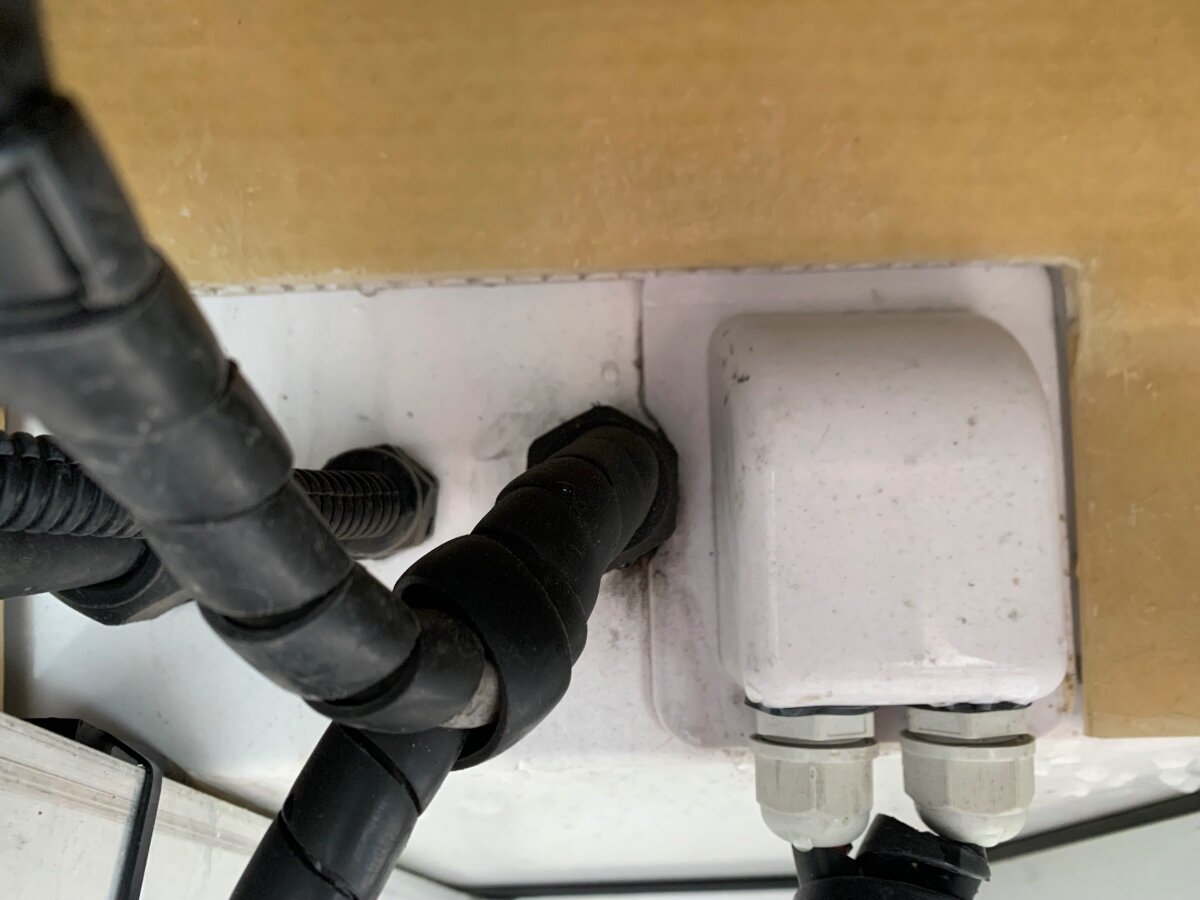
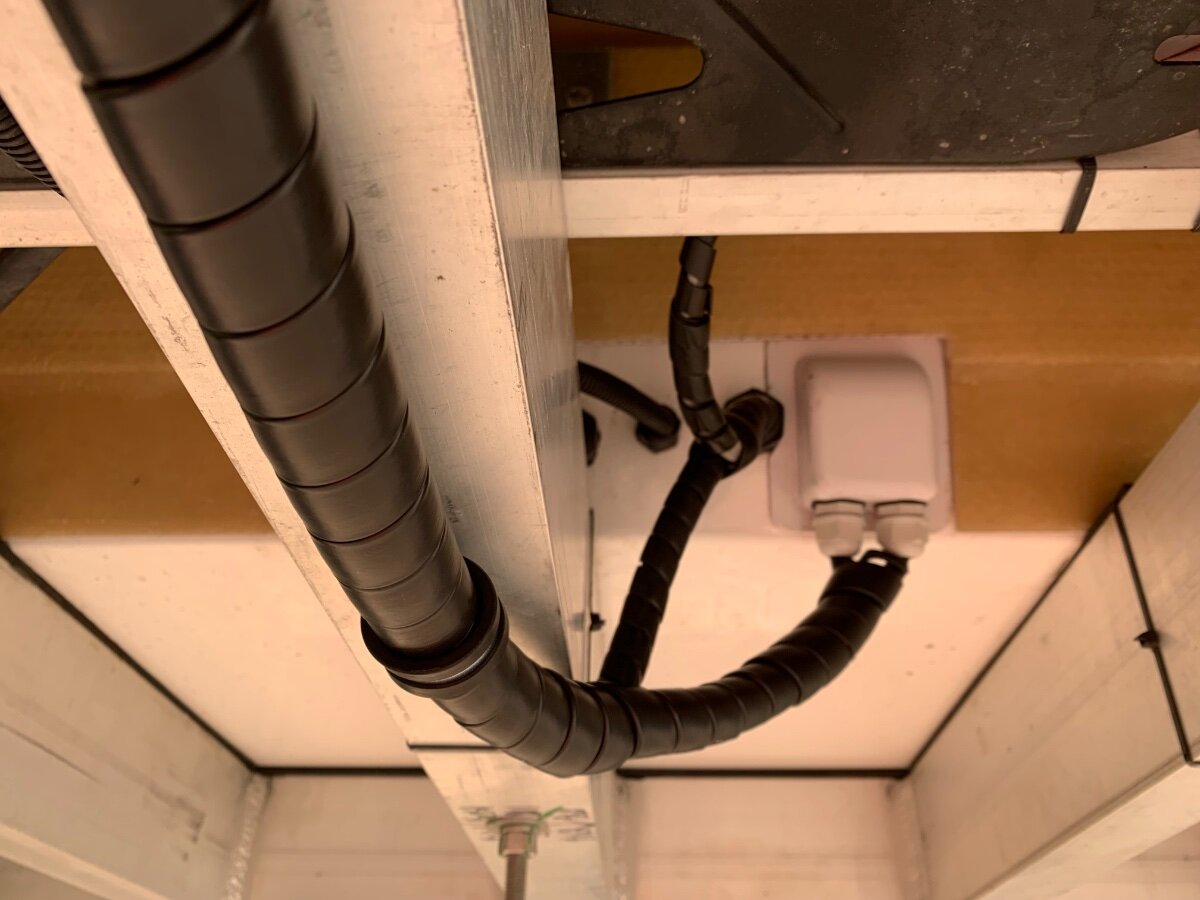
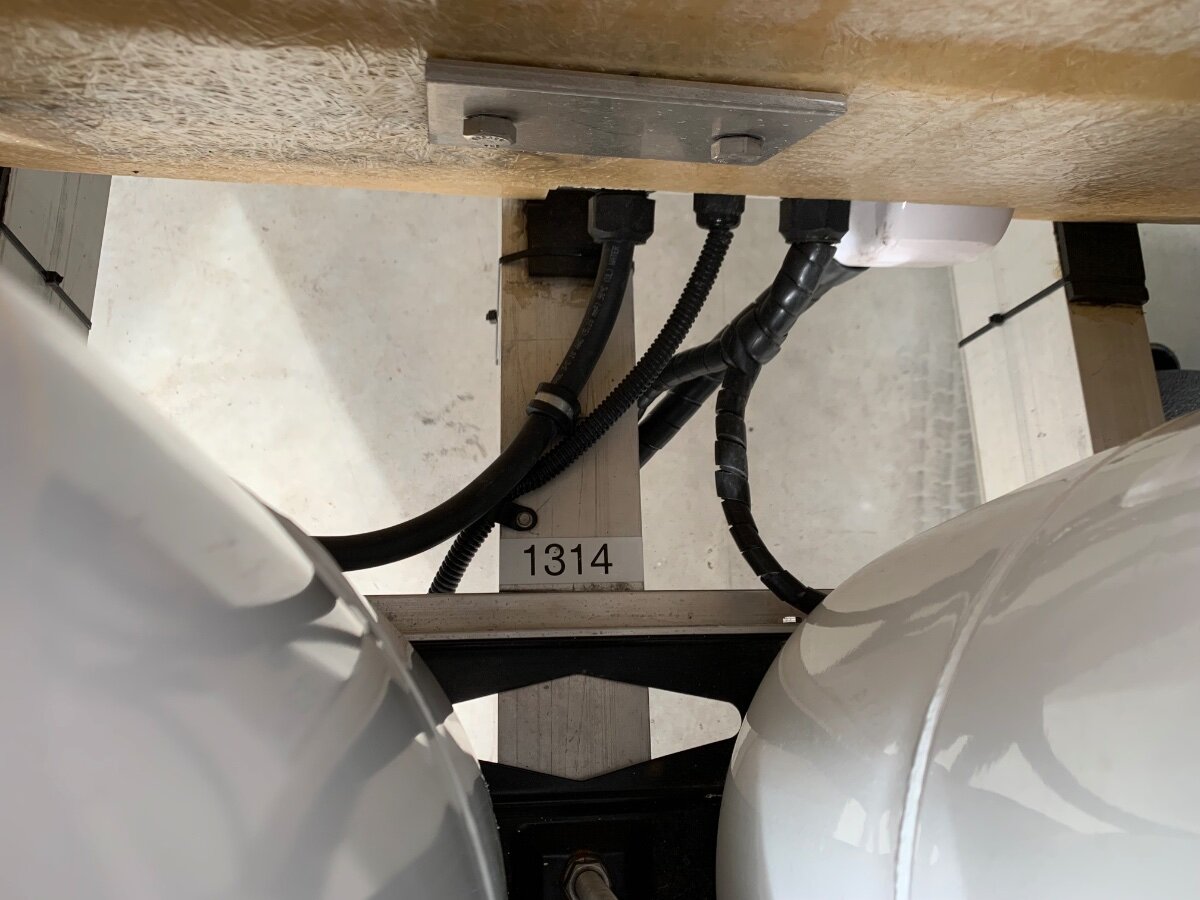
No cutting of the propane housing involved, but did notch the gland for it to fit (see pic); it is slightly under the propane housing at the top. As I recall, I made a single 3/4” hole behind the gland through the hull to route both cables under the bath flooring and forward dinette seat hatch to the aft dinette seat hatch where the charger is staged. The fishing tool should suffice, but in my case the two cables had to be hand-fed by my Son as I pulled from inside forward hatch.
-
1
-
-
5 hours ago, rideadeuce said:
... now for the Ollie install.
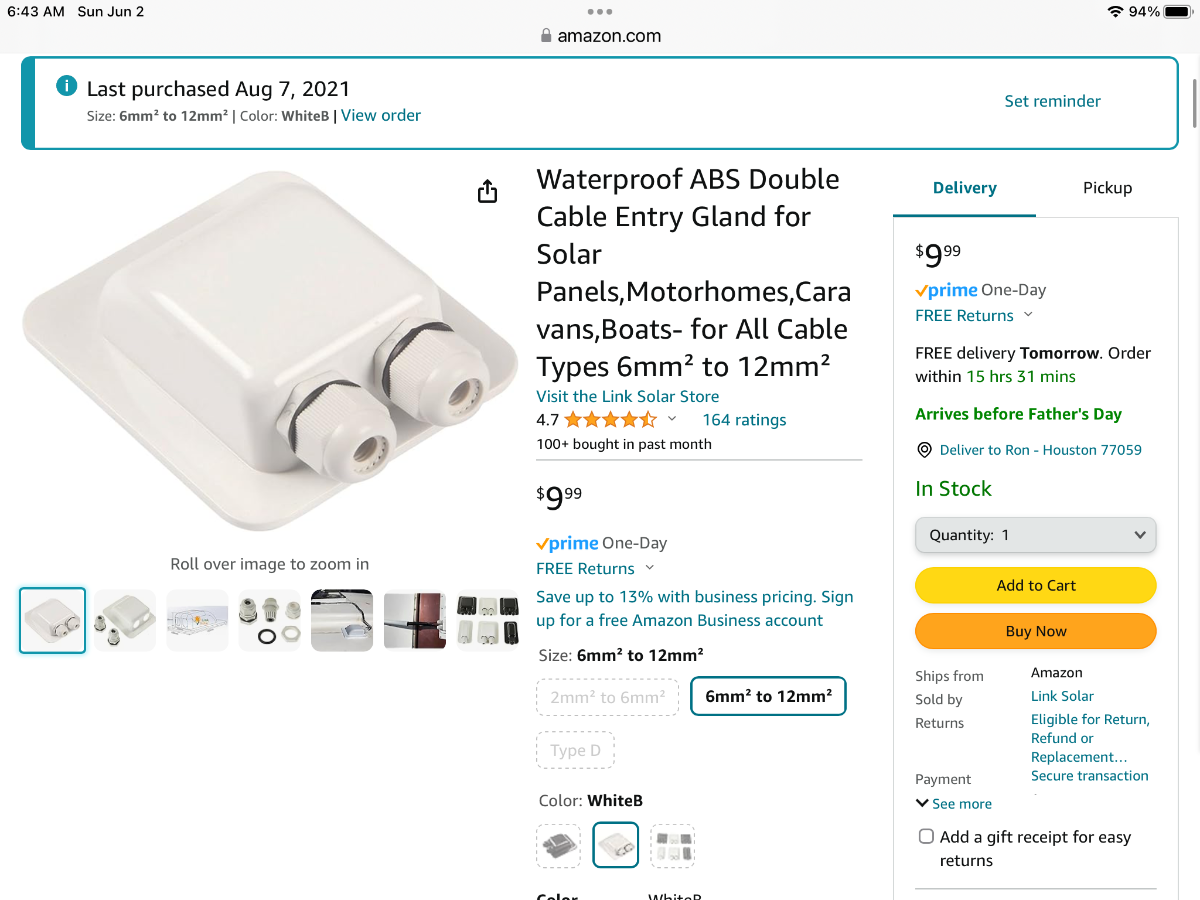
The hull passthrough was the most challenging part of my DC-DC install. I used this double cable gland to ensure a waterproof installation.
Here’s a couple of views.
-
1
-
3
-
-
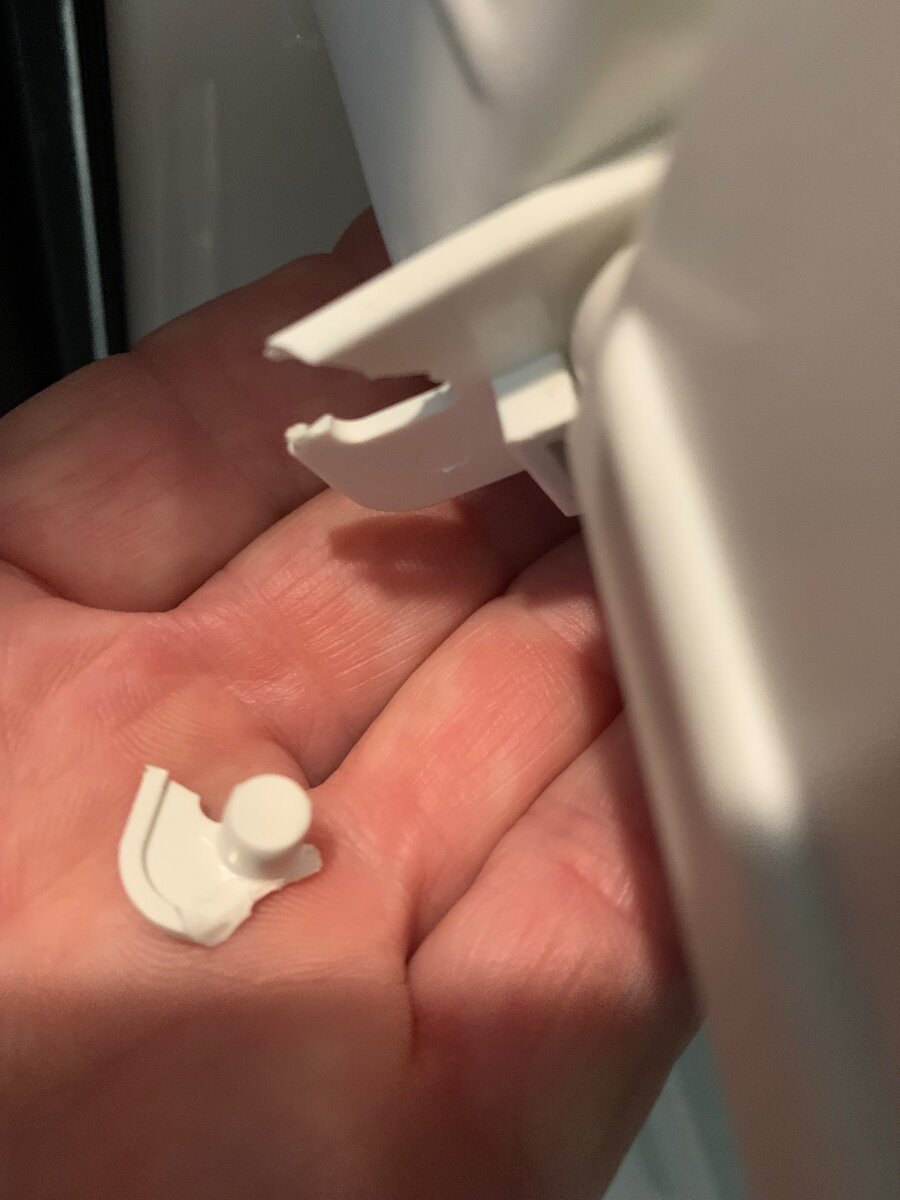
Had a similar hinge break on my Norcold three-way. Thinking a fix with Super Glue or similar product.
-
I haven’t read any mention as to whether or not the Houghton needs a soft start or similar unit, especially if running on a battery bank/inverter.
-
1
-
-
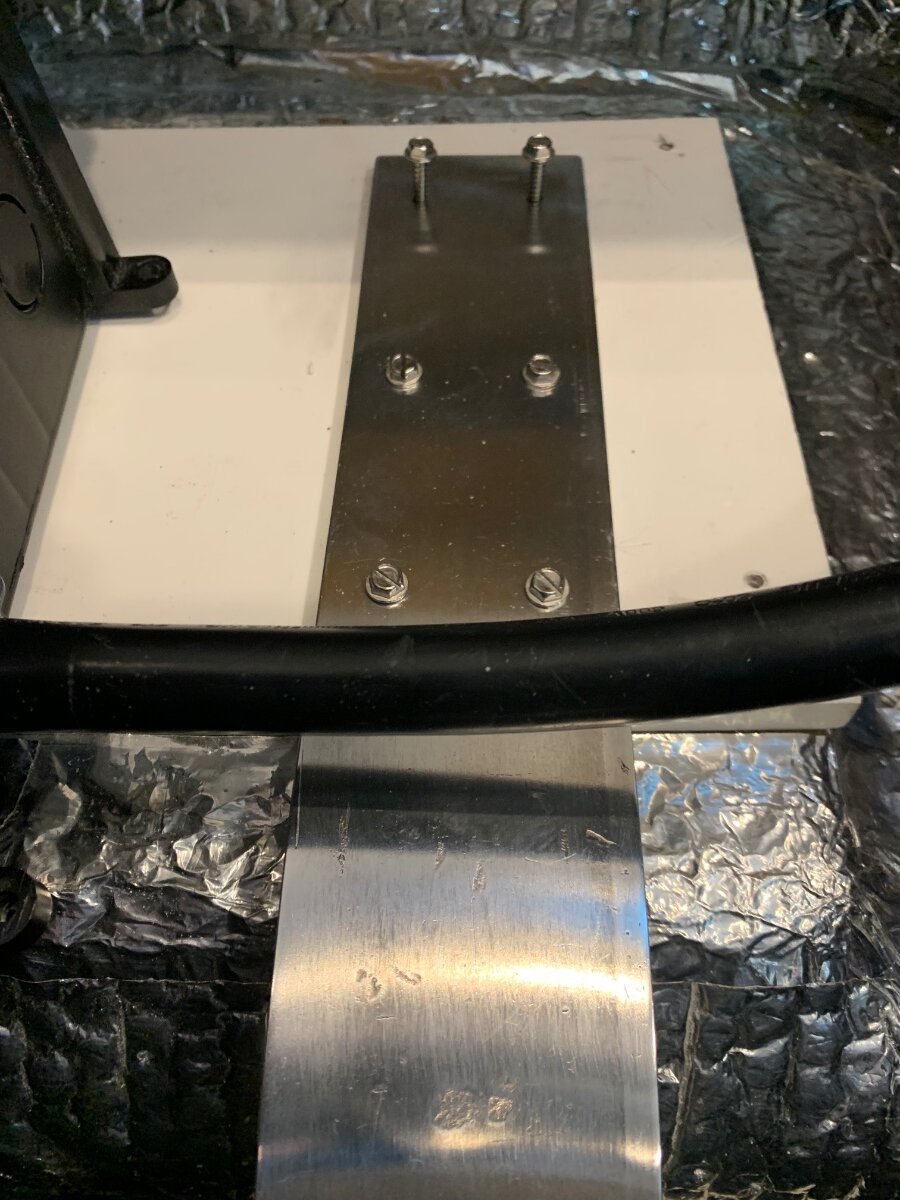
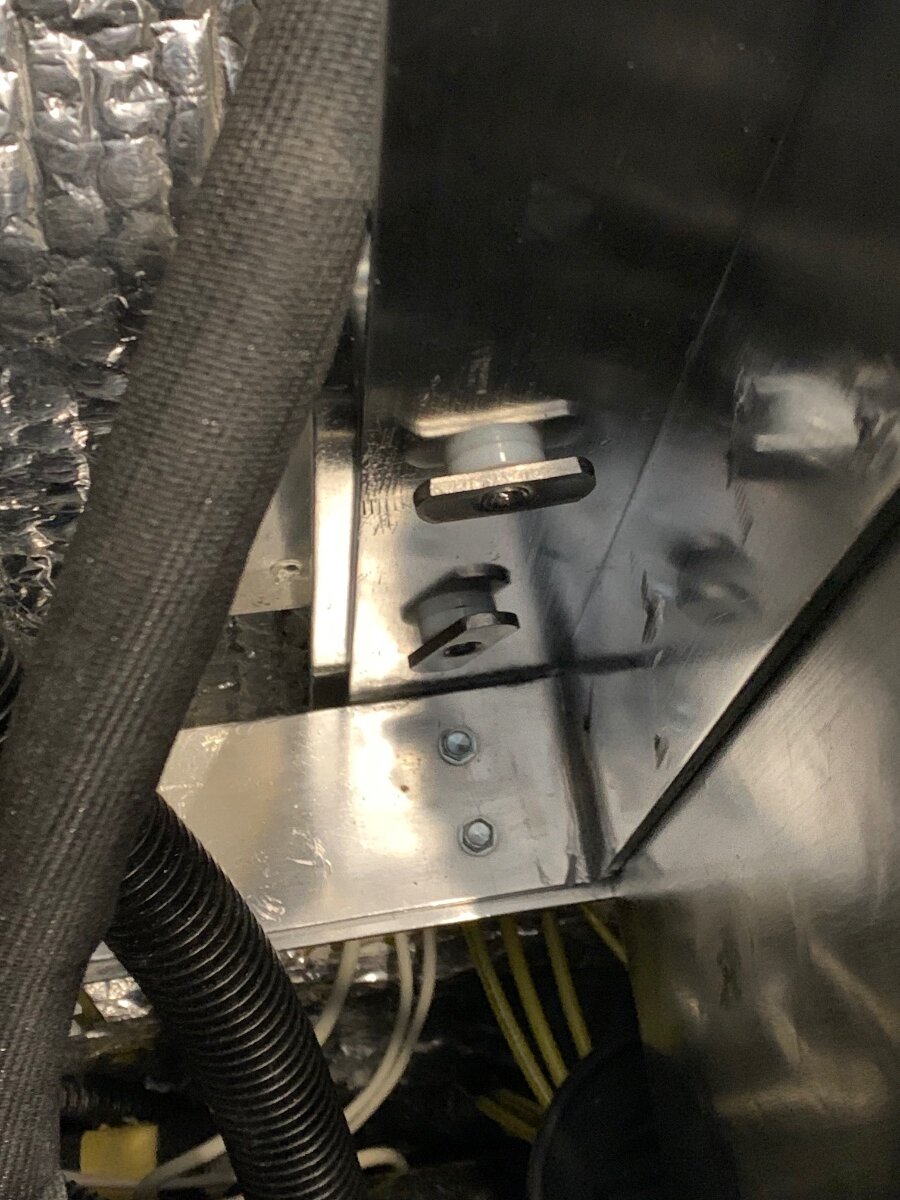
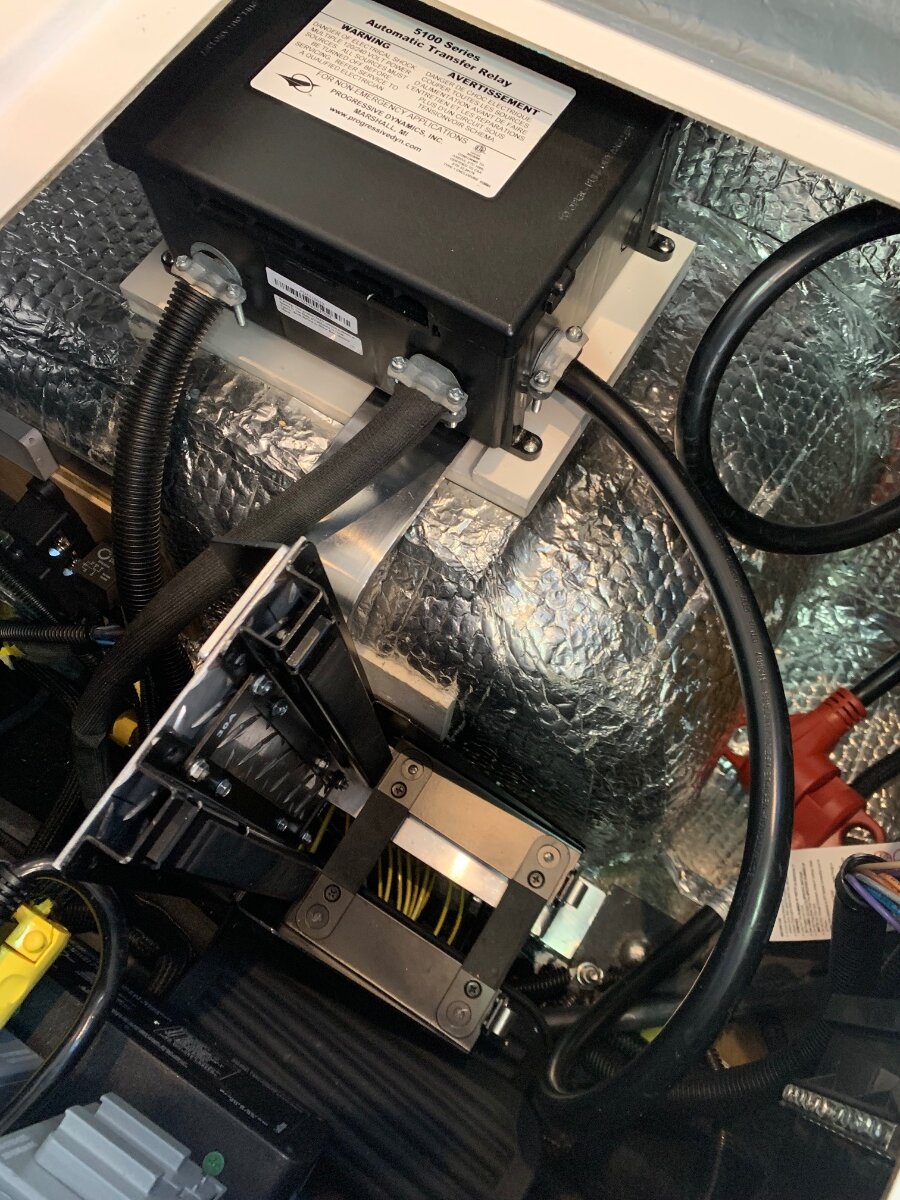
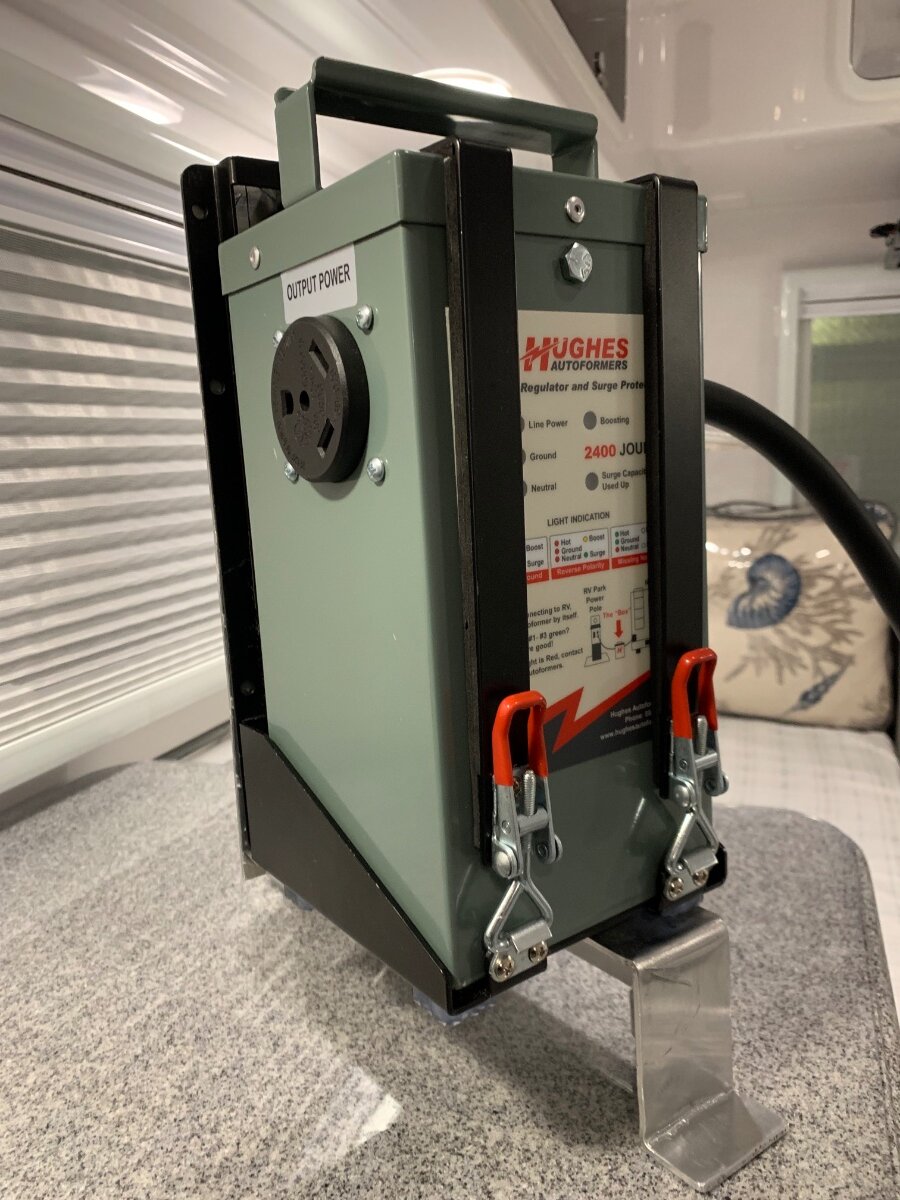
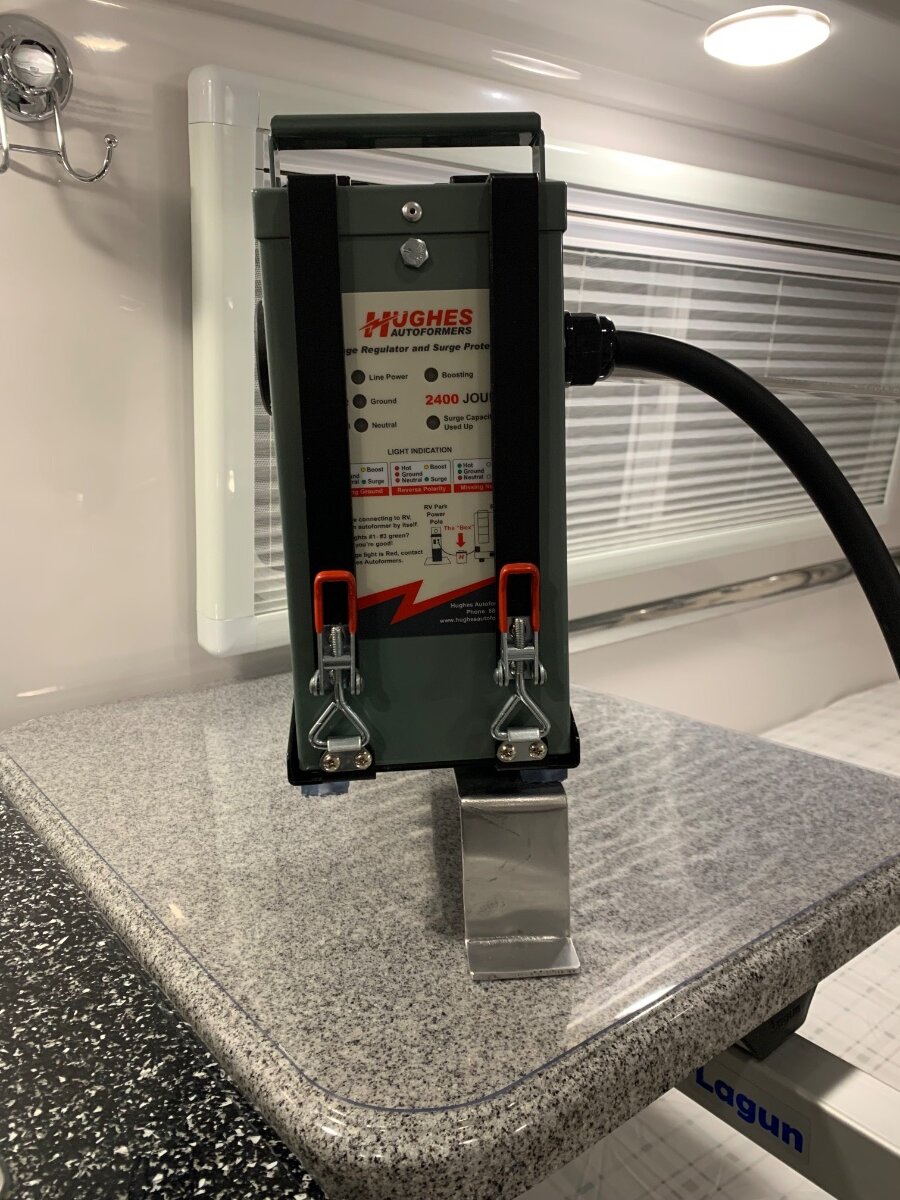
Final install of Autoformer.
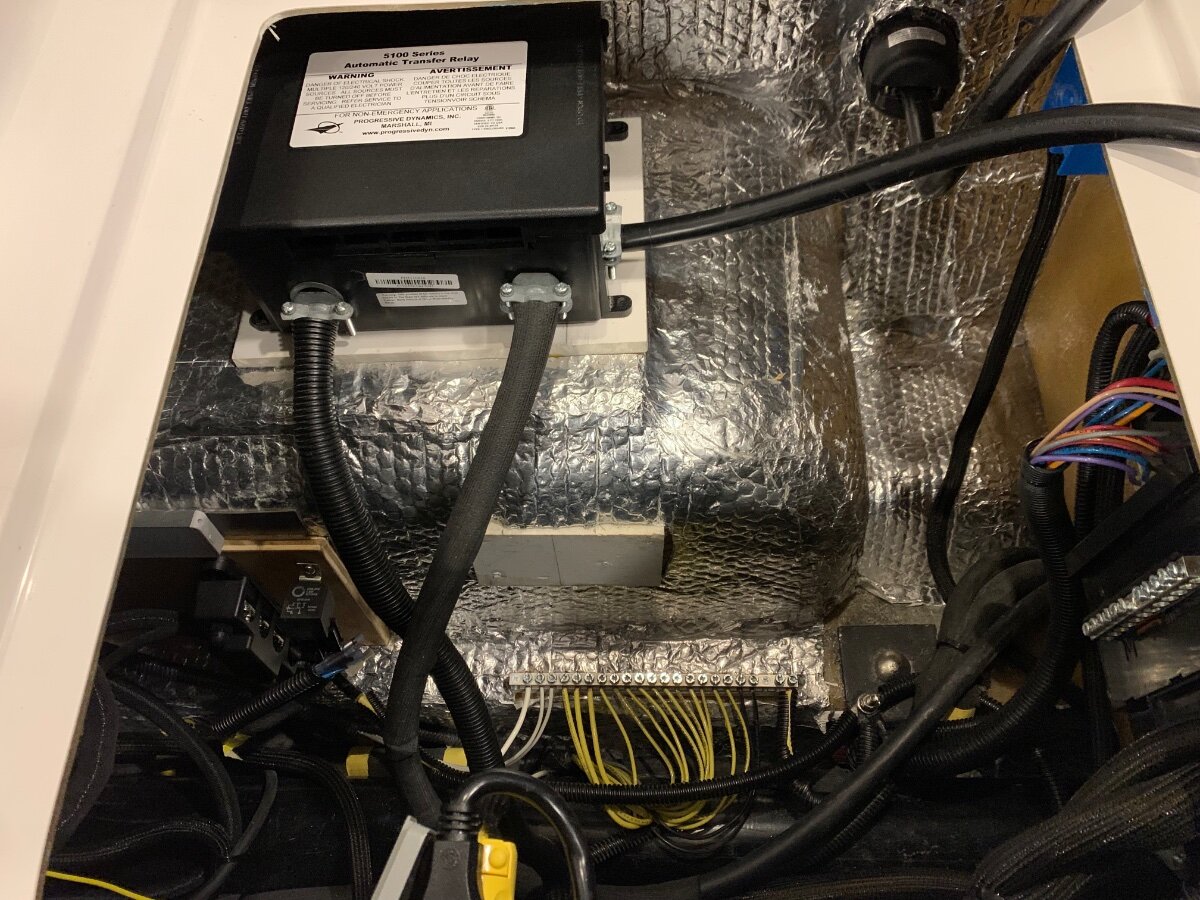
Ell extension fastened to white board as primary stabilizer for the support/bracket assembly.
Spacers added to raise relay to span over the ell extension.
Makeshift thumb screws used to secure support/bracket assembly in place; serves for easy removal, as necessary.
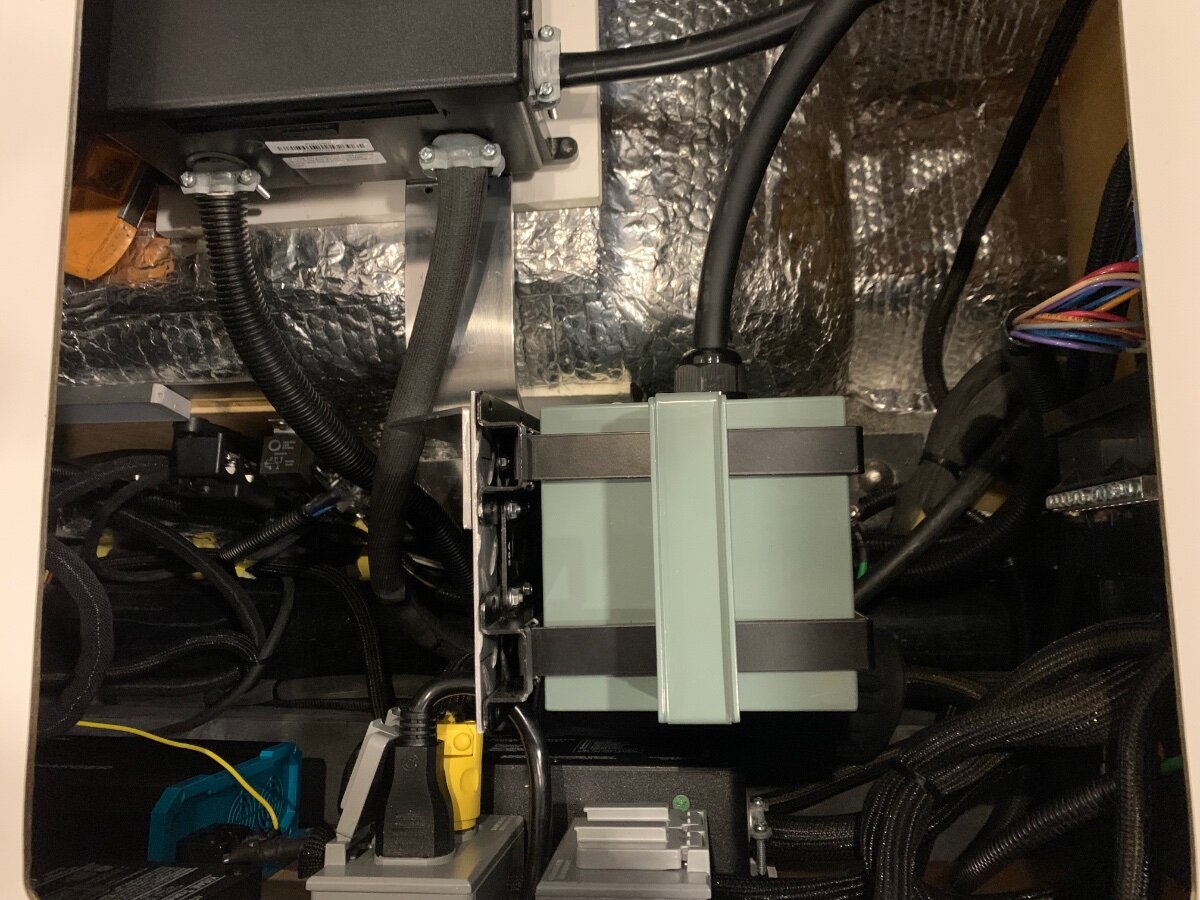
View of support/bracket assembly readied for Autoformer install.
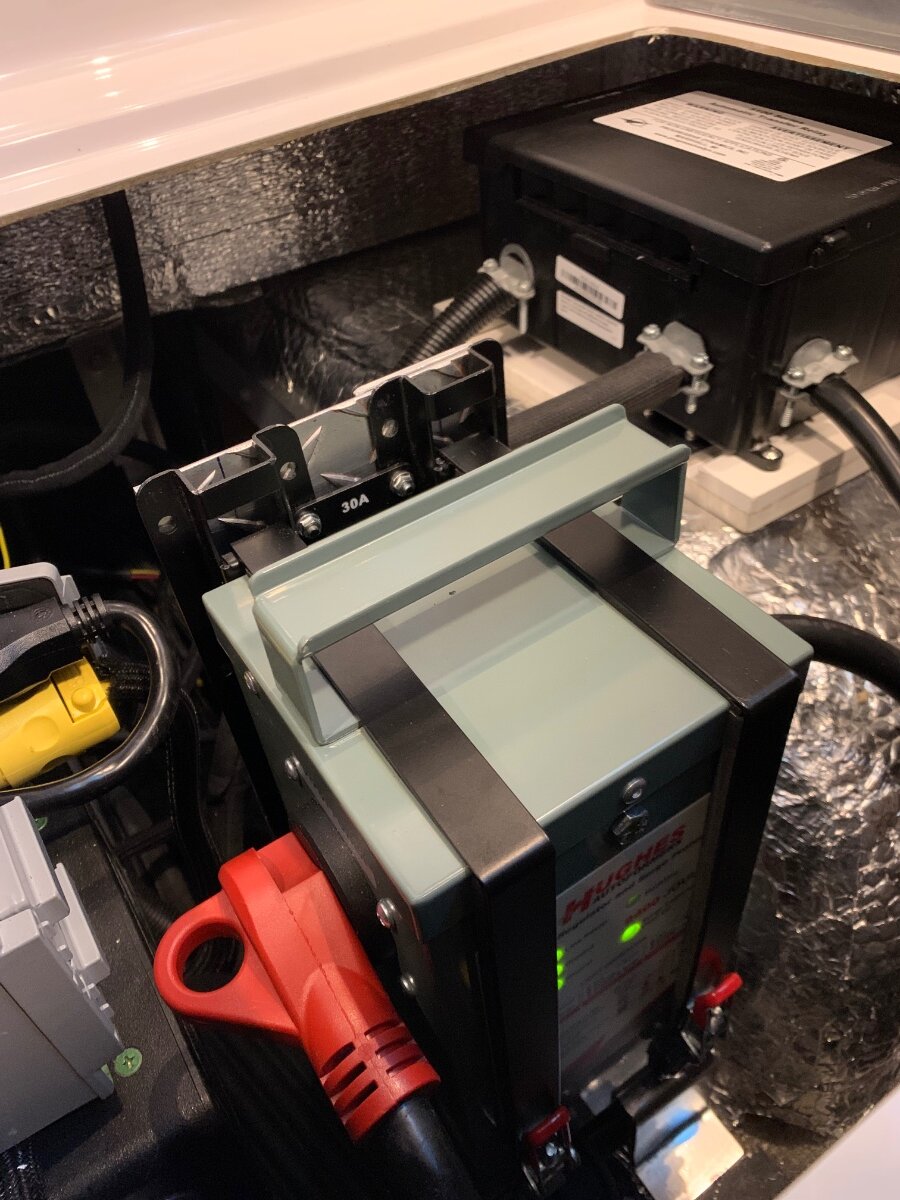
Autoformer secured and energized!
-
3
-
-
On 2/19/2024 at 8:30 AM, Ronbrink said:
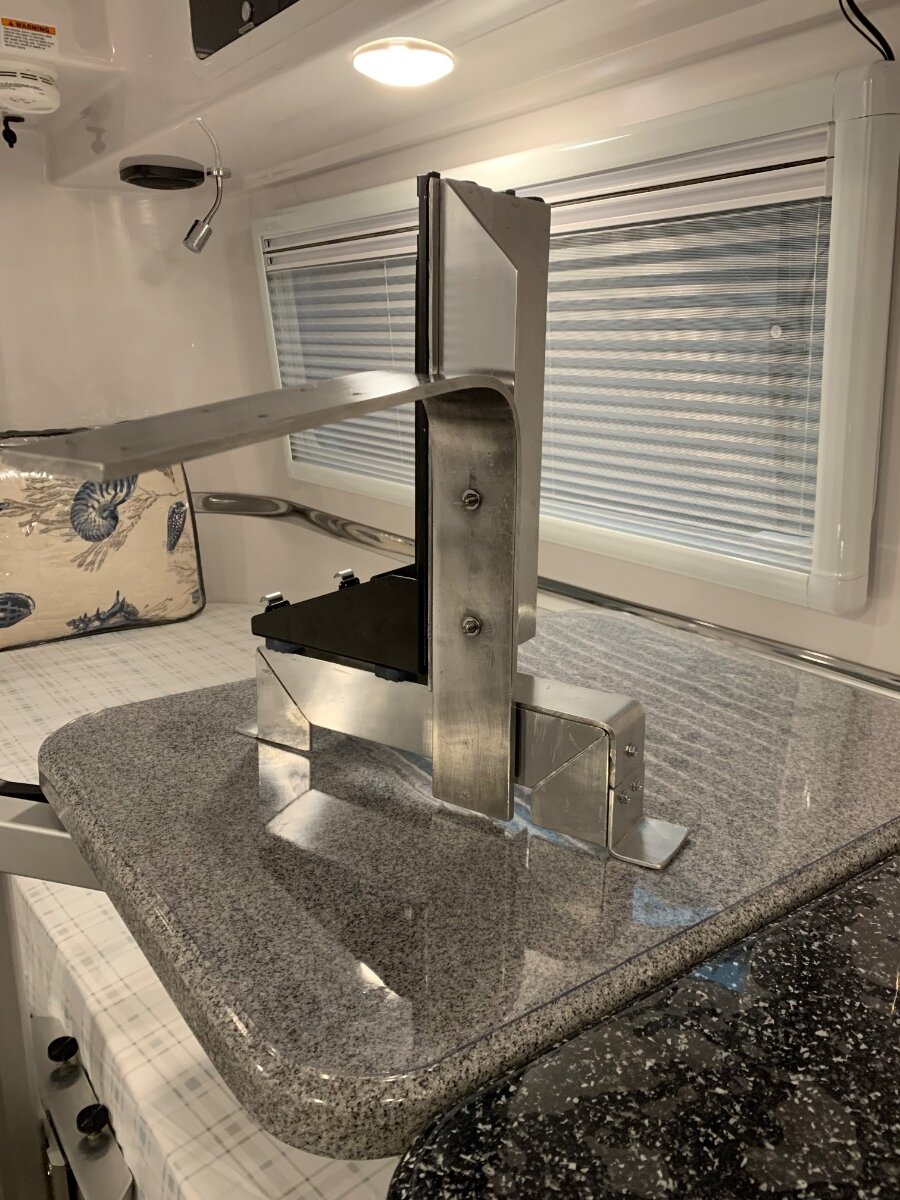
I plan to install a couple pieces of aluminum angle for horizontal and vertical support, and mounting of the securement bracket. I will detail that process with a pending update to my post.
In followup, I have completed the fabrication of the aluminum support for the Hughes Autoformers mounting bracket. I will provide further details upon final installation.
The ell extension protruding out on the left of the support/bracket assembly will be permanently installed within the aft dinette seat hatch, affixed under the Automatic Transfer Relay mounted on top of the wheel well. Two rivet nuts in the vertical ell will enable removal of the support/bracket assembly, via thumb screws, once the Autoformer is removed from its’ bracket for maintenance/repair of any underlying or surrounding electrical components.
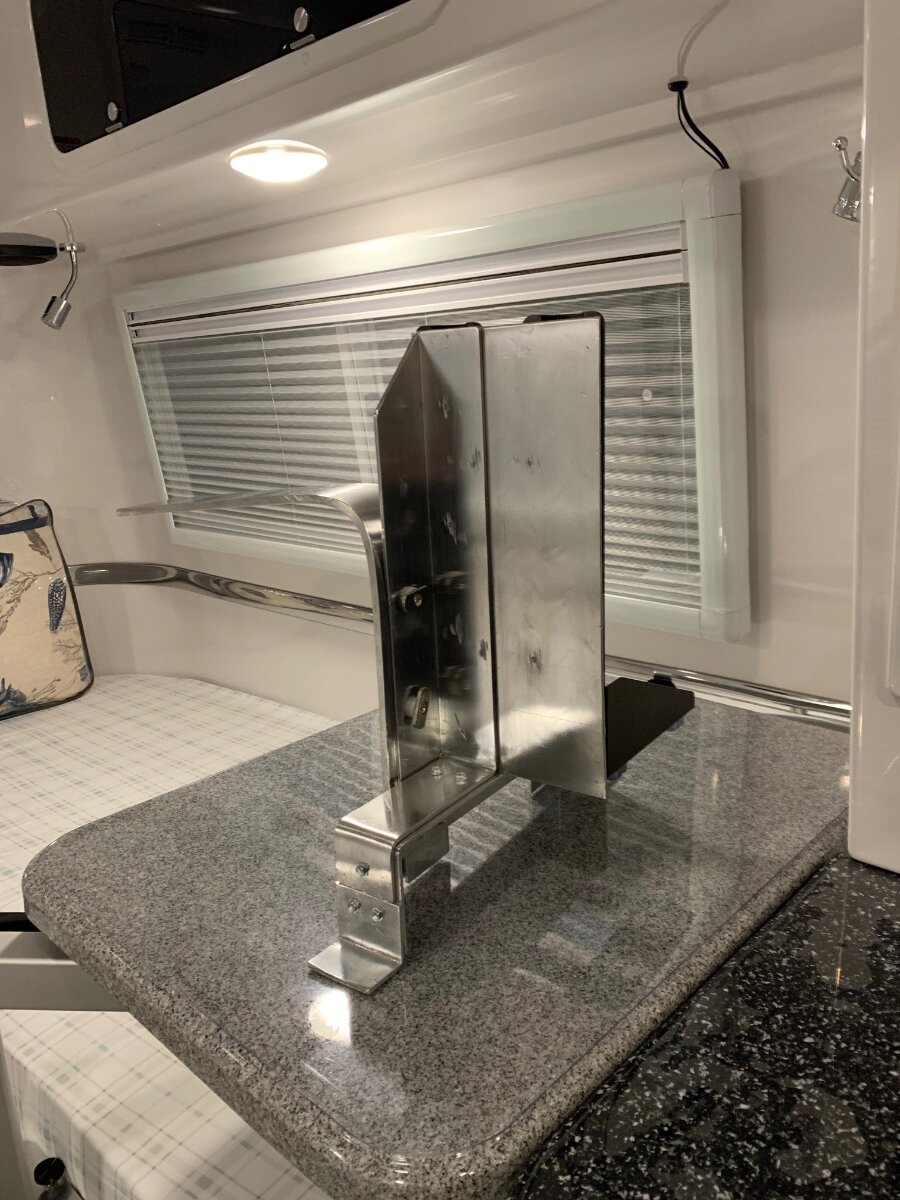
Back view.
Front view.
Autoformer mount views.
Area cleared for installation of support/bracket assembly and Autoformer over the grounding bus bar.
Support/bracket assembly and mounted Autoformer view. Pending final installation will involve placement of spacers under the relay’s mounting tabs to raise it up and over the ell extension, which will be secured with screws to the existing white mounting board.
-
1
-
-
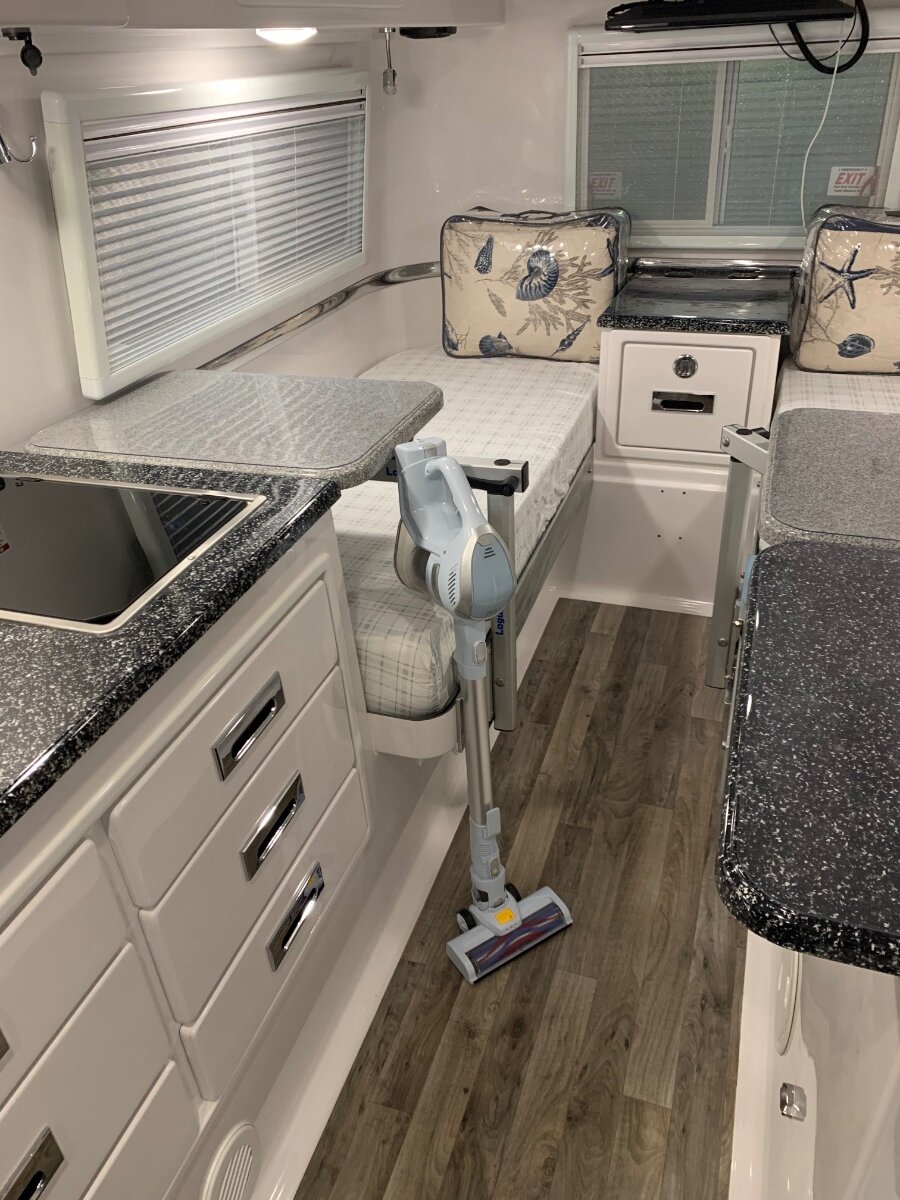
My wife bought a couple of these TMA vacuums a year ago and have been very pleased considering the cost, less than $40 each at the time (promotional deal). Although we have a Dyson in the house, I often grab this cheapo for a quick sweep of things. The other is dedicated to the OTT, stows in the closet standing on end and is lightweight. It’s simple but very effective in a daily clean of the floor; also has a few attachments for cleaning cushions and window seals.
-
4
-


Black Tank Will Not Drain
in Mechanical & Technical Tips
Posted
I do recall an owner or two having issue with the hole cutout being left in the black tank and causing a blockage and/or preventing the gate valve from closing.