Minnesota Oli
-
Posts
108 -
Joined
-
Last visited
-
Days Won
4
Everything posted by Minnesota Oli
-

Humidity Spikes - Cielo Testament
Minnesota Oli replied to Ronbrink's topic in Mechanical & Technical Tips
I have a Houghton that I installed and experienced the problem with the humidity. At the time I had not heard about the Cielo workaround but I did read on this forum about installing a relay to control the fan and the need to disconnect the existing temperature sensor and add a new one with a longer lead. I mounted that by the factory installed thermostat. This cured all my problems. I know this doesn't answer your question about the Cielo workaround with a Houghton but since I'm part of the Oliver Universe and own a Houghton AC I wanted to reply. -
I added 2 vents, one in the bath above the mirror in to the closet and one at the base of the closet out to main room. I went up near the ceiling for the vent because I wanted the warmest air to be vented and to avoid water from shower entering vent to closet. I did this because back when I added heat runs to the street side and tested various spots in Oliver for temperatures during 10 and 12 below zero out side temps I found that the closet was the only place that came close to freezing. So now the bath no longer pressurizes when the furnace is running and the warm air is forced into the closet and then out the bottom vent and into the living space. Also takes care of the problem of when running the ceiling fan having to open bathroom window.
-
Two Inch Hitch-Mount Bike Rack Receiver
Minnesota Oli replied to TimD's topic in Ollie Modifications
The license plate mod was one of those that I wanted to keep for myself but I guess it's out in the open now. We had a total of 12" in two days, I live on 13 acres of land that you would call river bottom. Over the years that I have lived here I have built a half dozen water structures that deal with the large watershed that comes my way. My land is very soggy but no wash outs, thank God. Rapidan Dam is not that far from me it's on the Blue Earth River, so far it is still holding but a huge mess. I have the Lesueur River going right by my property and it has crested today. There are a lot of people in my area who were badly affected by this weather so prayers are appreciated. -
Two Inch Hitch-Mount Bike Rack Receiver
Minnesota Oli replied to TimD's topic in Ollie Modifications
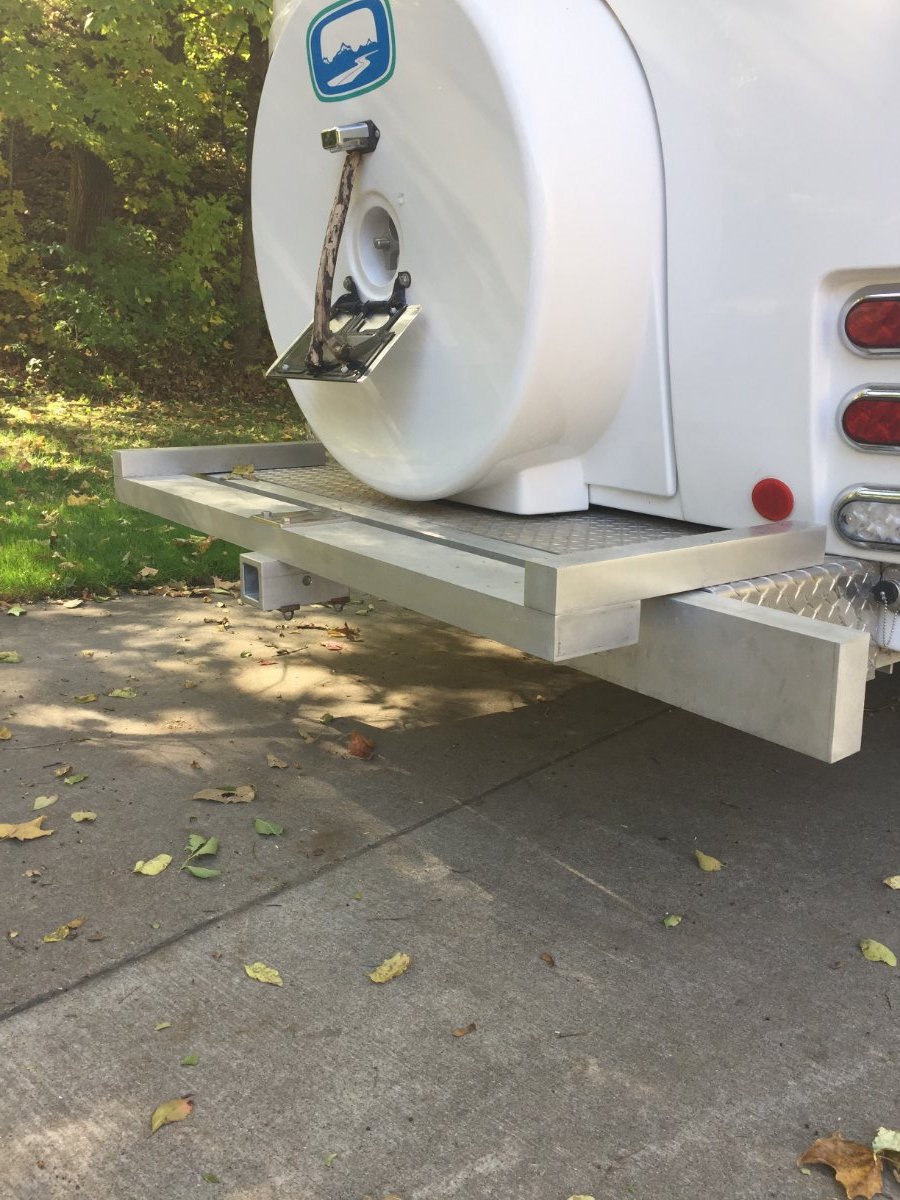
This does work as far as bumper clearing the receiver and now you have easy access to the spare.
-
Made in USA leaf springs
Minnesota Oli replied to Mountainman198's topic in Mechanical & Technical Tips
This is what keeps me interested in the Oliver forum. I was tipped off to a problem in the making which had the potential of turning into a uncomfortable situation where I would not have had the control over time or place of the inevitable outcome. Then I am able to access multiple perspectives from fellow Oliver owners on research and solutions to the problem. This greatly speeds up the processes and helps illuminates the possibility of over looking a flaw in ones thinking. One thing we have to keep in mind is that there are always multiple ways to resolve a problem and we may not always agree with each others solution. Thanks to all who contribute to this forum.- 922 replies
-
- 12
-

-

-
Made in USA leaf springs
Minnesota Oli replied to Mountainman198's topic in Mechanical & Technical Tips
I just want to make clear to Oliver owners that are researching information about replacement leaf springs. I have received a PM about my earlier post and and they were understanding that the Alcan leaf springs were rated at 2000# when they are actually rated at 2750 pounds. I want forum members to have the right information so they can make the best choice for there needs. -
Made in USA leaf springs
Minnesota Oli replied to Mountainman198's topic in Mechanical & Technical Tips
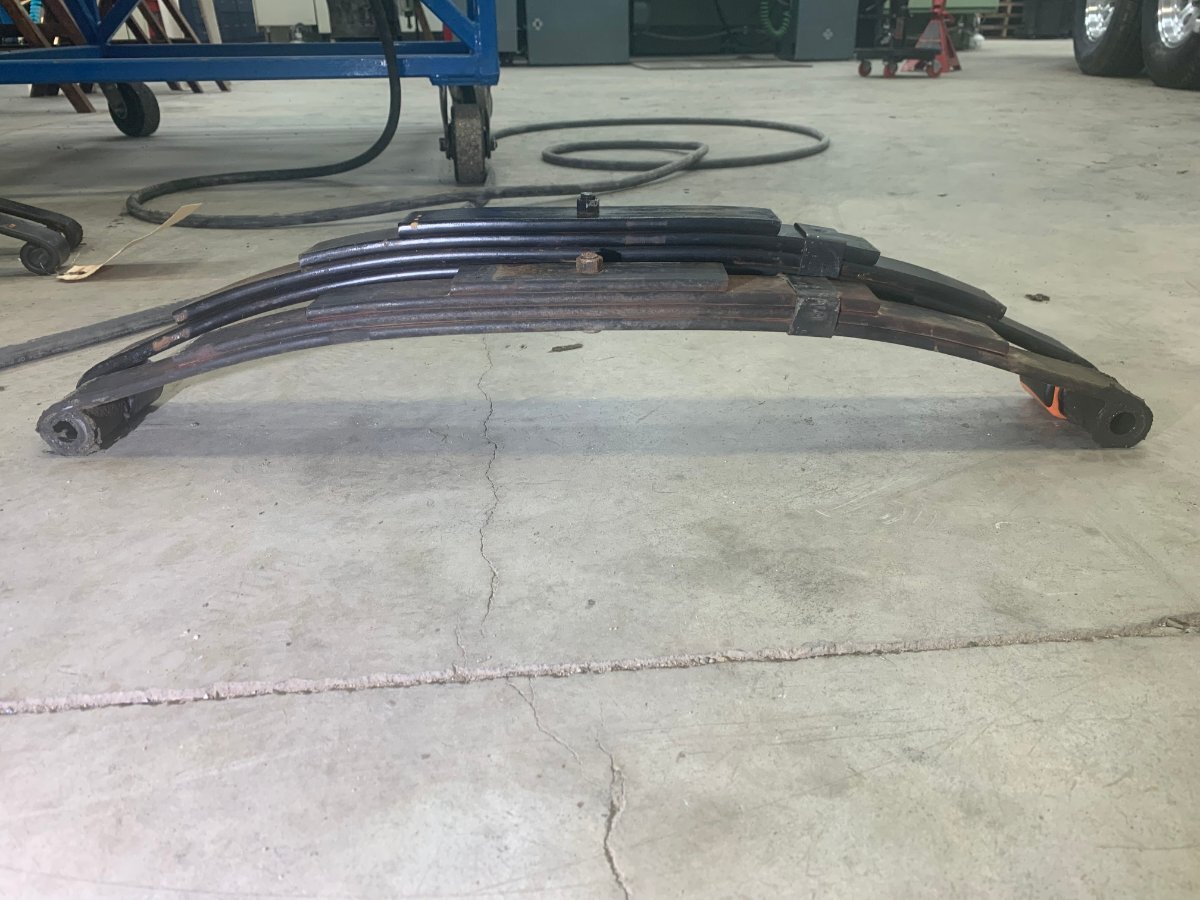
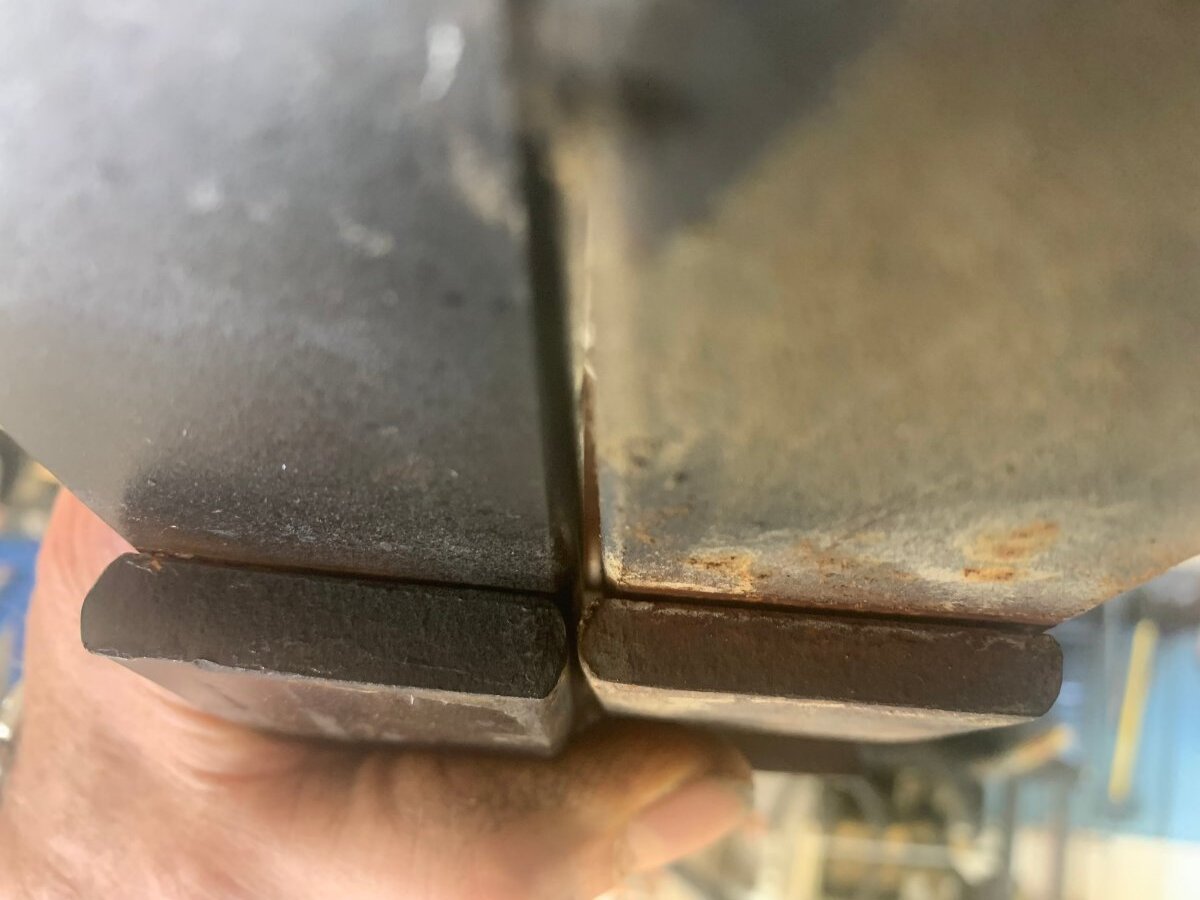
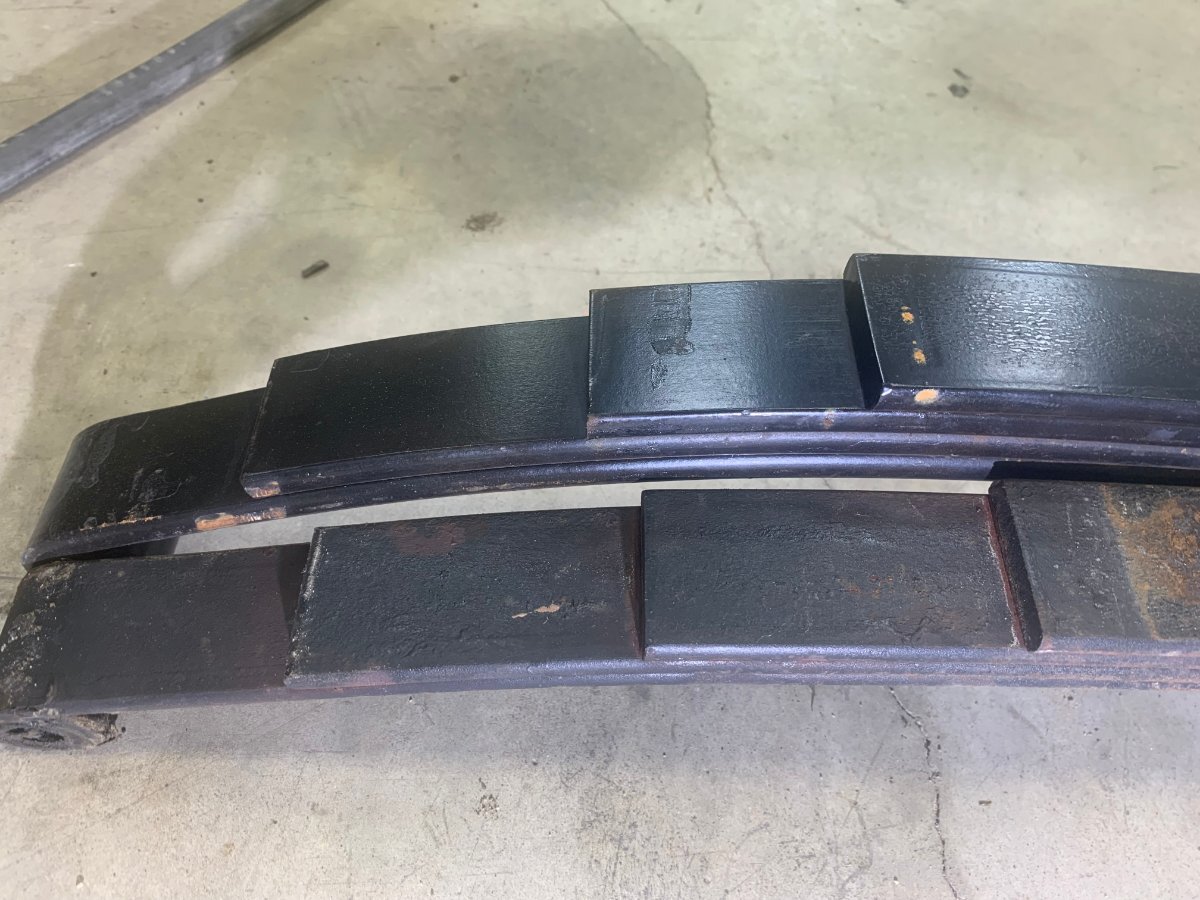
I been following this topic and it got me to look at my springs and sure enough 1,750 pound four leaf springs were failing. I was leaning to ALCAN five leaf for replacement but when Geromimo John came up with the Dexter 2400 pound rated 4-leaf I decided that would be a better fit. My thinking is keep the ride as soft as I can but have springs strong enough not to distort them from the load that the Oliver puts on them. So this bumps the 7000 pound rating to 9600 pound rating and I think this should be sufficient for them to carry the load with out distorting the springs. I included a pic of the 2400# spring next to the worst 1750# spring. This is the differences in thickness of the leafs. The individual leafs are longer. I didn't think to measure the height before I started the job but when I had one side installed I measured from side to side and there was 1-1/2 inches difference at the wheel wells.
-
Low water pressure in bathroom
Minnesota Oli replied to Lisa Rae's topic in Mechanical & Technical Tips
This makes me think of the plastic that would plug the screen on the suction side of the pump, now if the screen could be installed wrong and let it get by that I don't know. The fact that both toilet and sink run slow I would think the problem is some where before the pipes split to feed those two areas. -
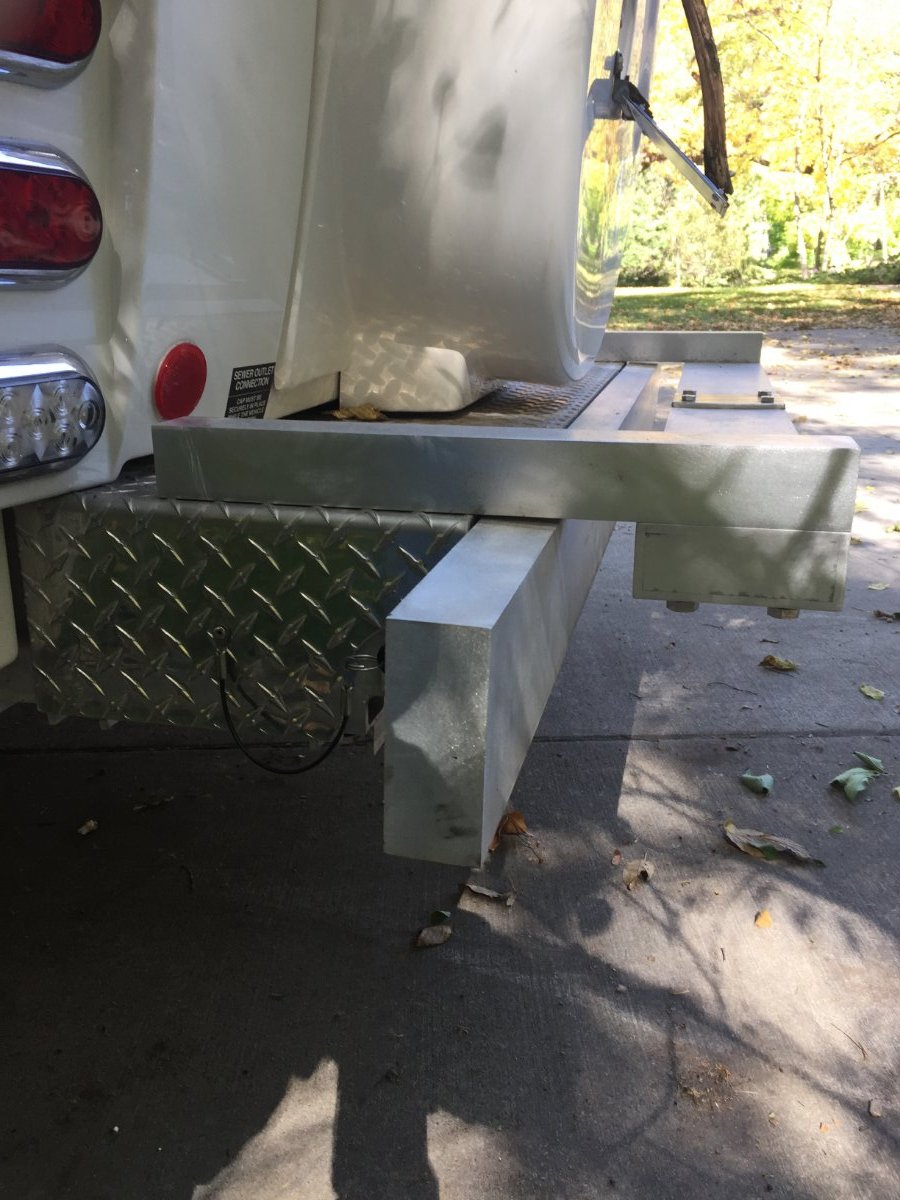
Looking at the second picture the tear in the side of the hitch shows a rusty fracture except for the last half inch. This tells me it was disaster in the making for awhile and it's another area to pay attention to in our walk around inspection. Will be interesting to hear the official analysis of the cause of the failure. I believe you have guardian angels looking out for you and your family for it could have been a much worse outcome then just a breakdown in the middle of a camping trip.
-
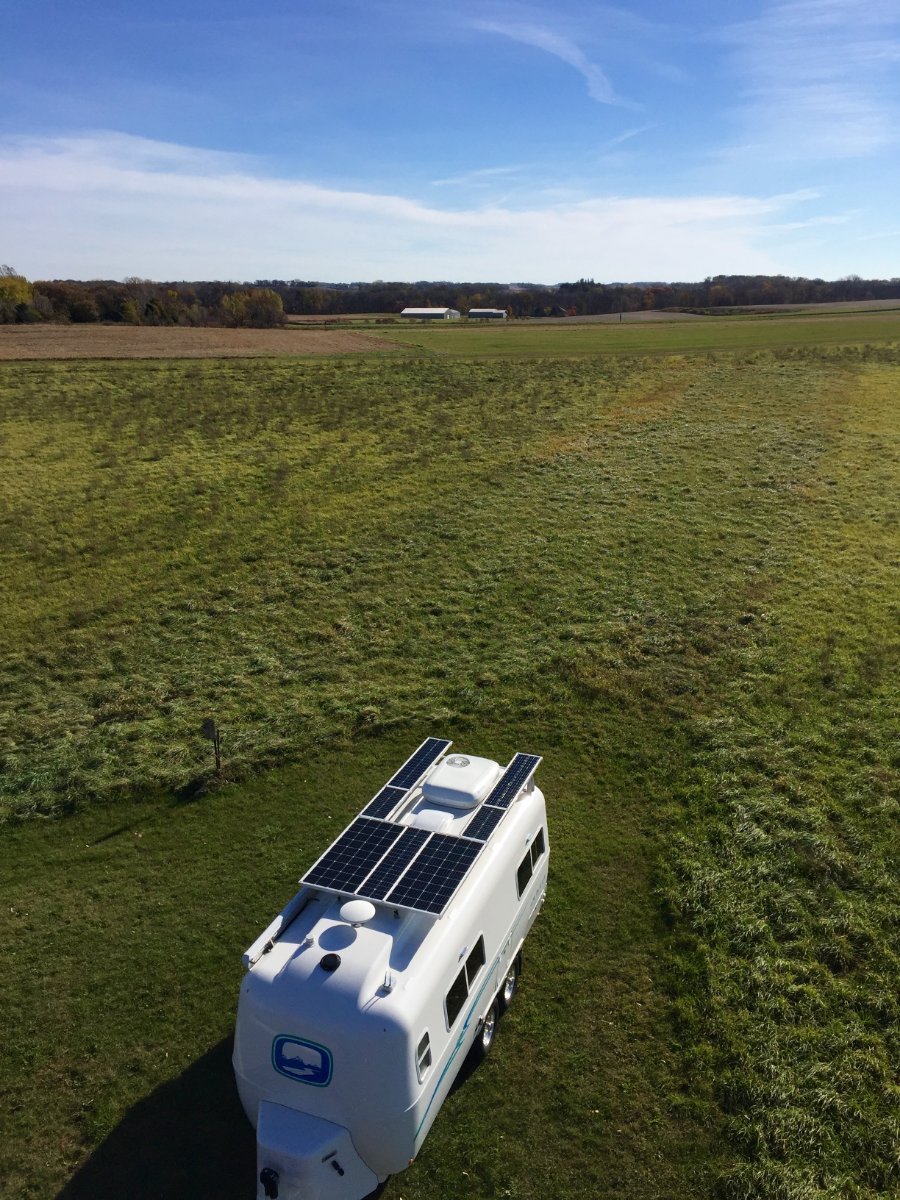
I wanted to add more capacity to my factory 340 watts because you have to remember those are rated watts not what you actually get to use, and the amount you actually get to use depends on where you are located and weather conditions. What I ended up with was additional Zamp panels, three 90 watts and two 45 watts equaling 360 watts. I went this route because it was the easiest way to fit them on the roof and merge them with the existing panels. Another consideration is when parked in partial shade the individual 12 volt panels wired in parallel that is shaded is the only one that is affected by that shading unlike when you have panels wired in series. So I have a total of 700 rated watts on the roof and in prime conditions here in Minnesota I can harvest a little over 500 watts. With that said it makes it harder for me to justify a dc to dc charger for when traveling for it has no problem keeping my 400 amps of Battleborns charged up. So far I'm happy with the outcome of the upgrade.
-
We payed for Hot spot on our phone plan, so I found that placing the phone on top of the blind next to the indoor antenna made a difference of weather our devices would work or not in poor reception areas.
-
BATHROOM VENT OPENING WHEN ON THE ROAD
Minnesota Oli replied to Minnesota Oli's topic in Ollie Modifications
When I repaired my fan cover I had to replace my old gasket. I used a adhesive backed foam molding that comes in a roll from the hardware store. I match the thickness of the old gasket which was thin about 1/8 of a inch, so far that has been working. -
I had this issue with my 2019 Oliver. What I found was the two screws that attach the handle to the plastic cover over time had deformed the outer cover around the screw head. When pulling the handle down to close vent the plastic around the screw head made contact with the sealing surface and the rest had a small air gap which allowed air to get under and lift the cover up. The link shows what I did to remedy the problem and I'm happy to report that I no longer have that problem.
-
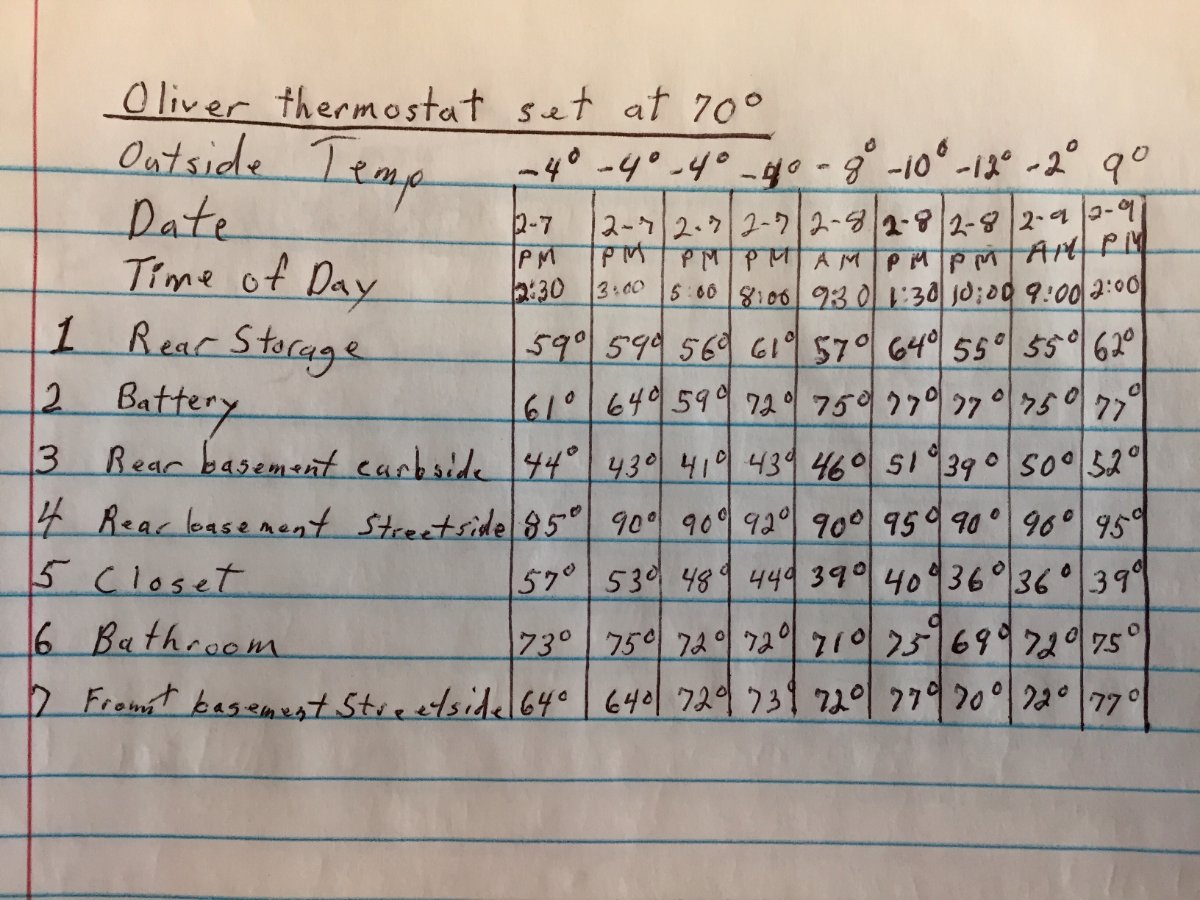
I have been following the discussion on this topic and just want to restate that with a mod done to the furnace duct system and zero changes to the water piping and adding no extra insulation I have tested in sub zero temperatures for two and half days with water system not winterized and experience no adverse affects. I have read about many different mods to accomplish the goals of a four season camper and the troubles to hit that goal. I will admit that I have not had the opportunity to do further testing such as how it would do traveling with the furnace on, or if parked and experiencing very windy conditions. I think the initial test show very promising results and the mods to the duct system were not that difficult to do. I know this is relying on the heating system functioning but even a house up in Minnesota relies on the furnace working to avoid plumbing freeze ups. I did my mods not so much to camp in the winter but to have a bench mark of what it could withstand if I got caught in a cold snap while out camping. Here is a link to a how to for anybody that is trying to get the Oliver ready for winter camping. Here are some temperatures in different locations in the camper during testing.
- 83 replies
-
- 10
-
-
-
Has this been a issue from day one. The reason I ask is on my 2019 the mount brackets are not aligned and my awning has a visible twist in it from front to back, is it possible the middle mount is not in line with the two outside ones. Maybe pulling a string on the back side of the awing mounts would verify alignment. Just a thought of a possible explanation. Paul
-
That would be water in the plug. When wet inside power from wire that leads to battery shorts to wire going to the lights.
-
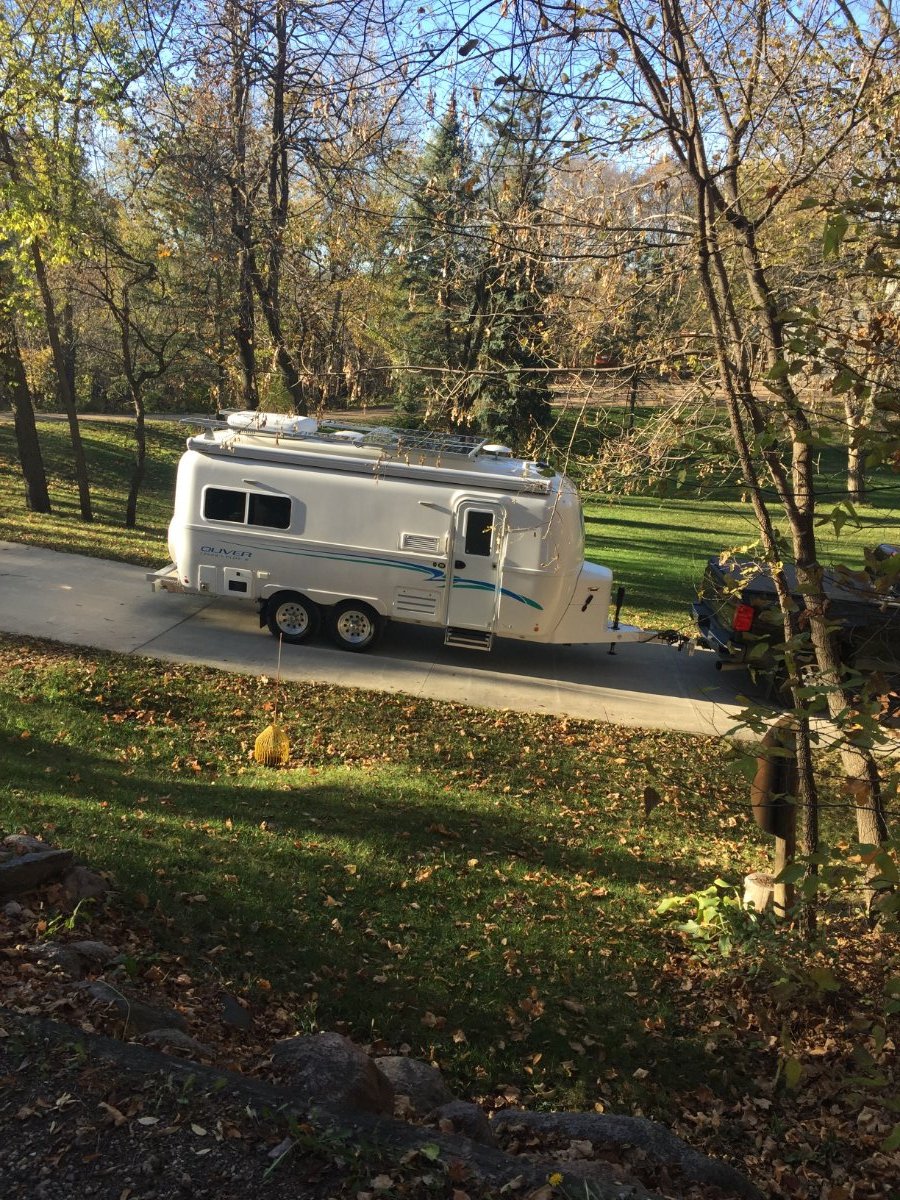
This is a interesting topic. My first trip with the new to me Oliver was in October in my home state of MN along the north shore. The temp at night was in the teens and just below freezing during the day. I was nervous about the conditions because I found my AGM batteries were in a low sate of charge just from running the furnace over night. It was decided right then that I was going to come up with some solutions so I could enjoy camping without worrying about freeze ups and low batteries. I made some modifications to the heating system simply by adding two extra runs of heat ducts. I identified the weak points in the water system and targeted those areas. I tested my modifications by spending three days in sub zero temperature with water on board. I added no extra heat sources other then the furnace and left no compartment doors open on the interior. Now I have no plans on doing sub zero camping but now I know what the Oliver can handle and can just enjoy camping without worrying. The issue with the AMG batteries was addressed by switching to lithium. Here are a couple of links that explain my modifications.
-
Bathroom Vanity Cubby Modification
Minnesota Oli replied to Frank C's topic in Mechanical & Technical Tips
Frank I think you hit a home run with this mod and also in the write up. Thanks for sharing. Paul -
The only place I added insulation was behind the battery compartment door and that was a piece of 1-1/2 inch open cell foam and I probably didn't need it. To answer question though I did not do anything to the windows.
-
I was impressed with the Olivers ability to hold heat. I did a modification to the heating system by simply adding ducting to the street side. With full fresh water tank and pump turned on I spent two days in sub zero weather, negative four down to negative twelve. I had the thermostat set at seventy degrees and was burning .274 gallons per hour but was toasty warm inside including the bathroom.
-
Finally! My Batteries and Inverter Now Run My AC!
Minnesota Oli replied to Spike's topic in Ollie Modifications
I believe the sold blue wire heads to your relay board on the furnace. I believe the blue with the white stripe is 12 volts hot. Check with a voltmeter to verify with fuse for furnace in place. If you touch those two wires together it will start the furnace, you will have to let the furnace time out before it will shut back down. If that checks out then you will splice one unused thermostat wire to blue and another unused thermostat wire to the blue with white stripe. Then back at where the thermostat wires come out of the wall you will use those two newly allocated thermostat wires to hook up the new single mode thermostat. Hope that helps. Paul -
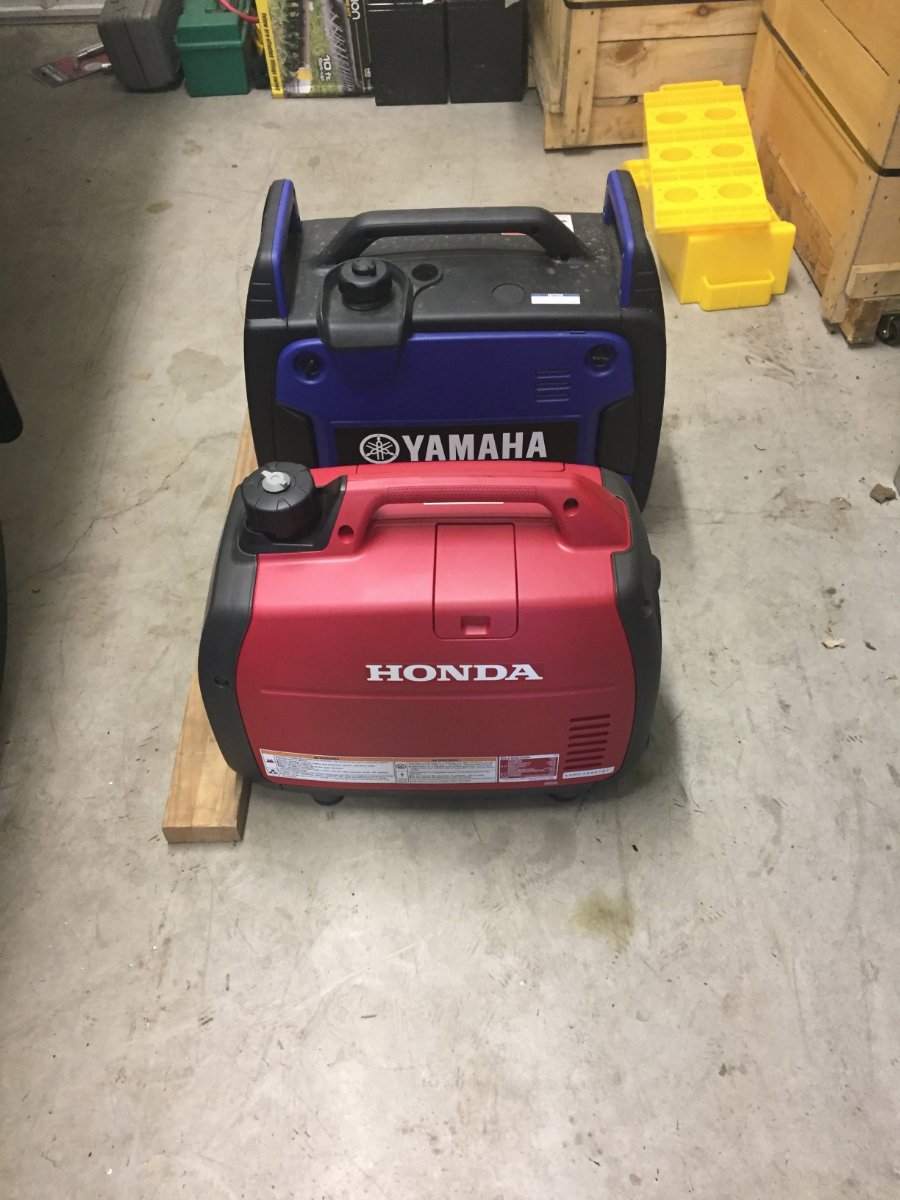
I have also bought the Yamaha 2200 and was profoundly disappointed, after a lot of back and forth between Yamaha representatives I found no fix for there design flaw of trying to achieve fuel economy by using a under powered engine. It is incapable of handling the load of the AC from eco-mode. I ended up buying a Honda 2200 that utilizes a larger engine, this was my solution to my problem. This was a costly solution and I had done my research but did not find any indication that there was issues in that regard. Here is a post I made back in February of 2021 to try to warn people about the Yamaha 2200. Minnesota Oli Members 86 Posted February 3, 2021 Good Morning Yes it does require a neutral ground plug, with the adapter I use it is workable. I thought the fuel gauge and the lit front instrument panel were nice features also, but if it is not capable of running it's claimed max load from eco mode with out suffering a temporary low voltage it neglect's the purpose of a inverter style generator. I tried to politely tell Yamaha that in the long run they were going to lose a lot of costumers in the RV market by enticing them with the RV receptacle and then fail on performance. That is the problem when the bean counters have more input then the engineering and R&D departments in product development. I also included pictures to show the difference in physical size. Paul Ray and Susan Huff 1 Quote
-
I also installed the Micro Air EasyStart on my Houghton AC. I wanted to ensure that my Honda 2200 which is set up with propane conversion would be able to start the AC from eco-mode. In my mind it defeats the purpose of the the inverter generator if it can not function from eco-mode. I also think it's make or break when running off batteries with the 2000 watt inverter. The captured inrush amps before installation was 67.1 and 48.9 after install. Paul
-
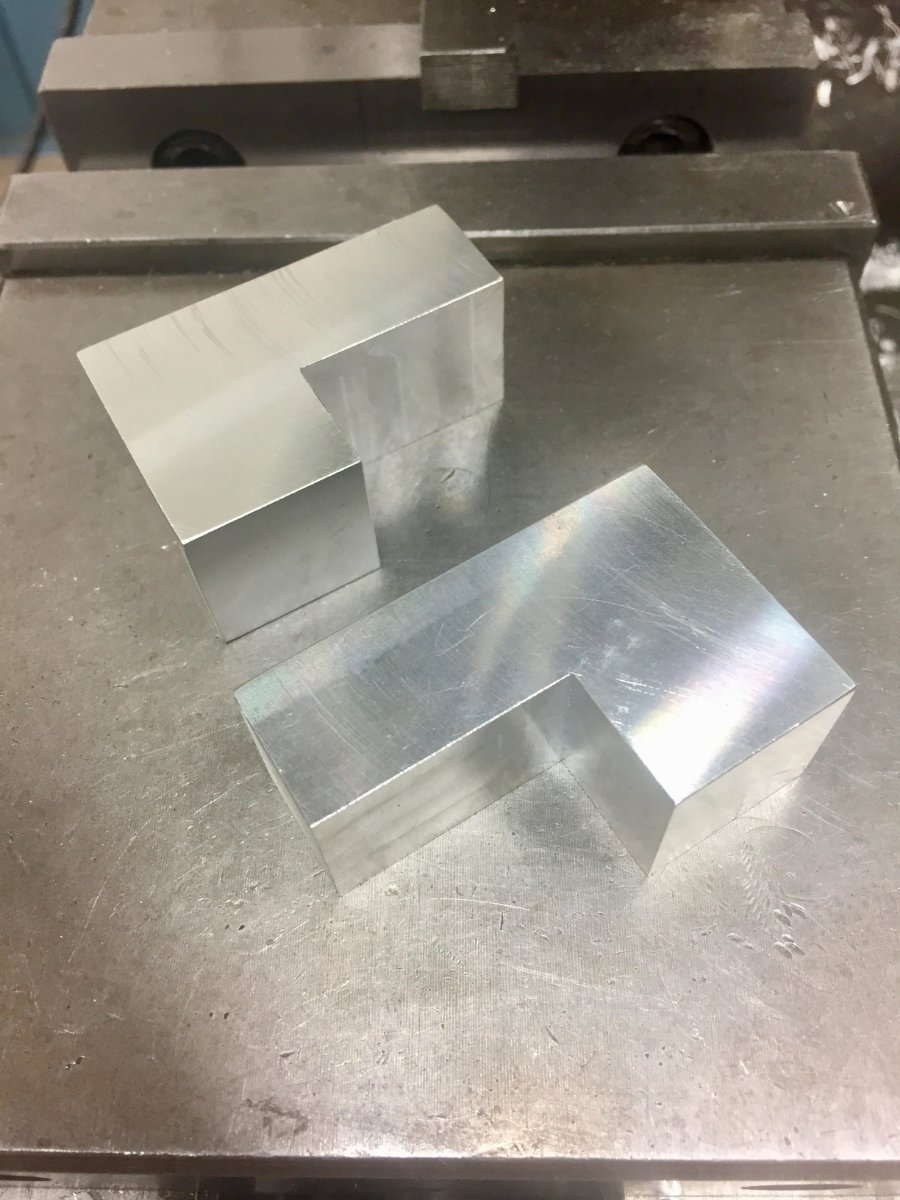
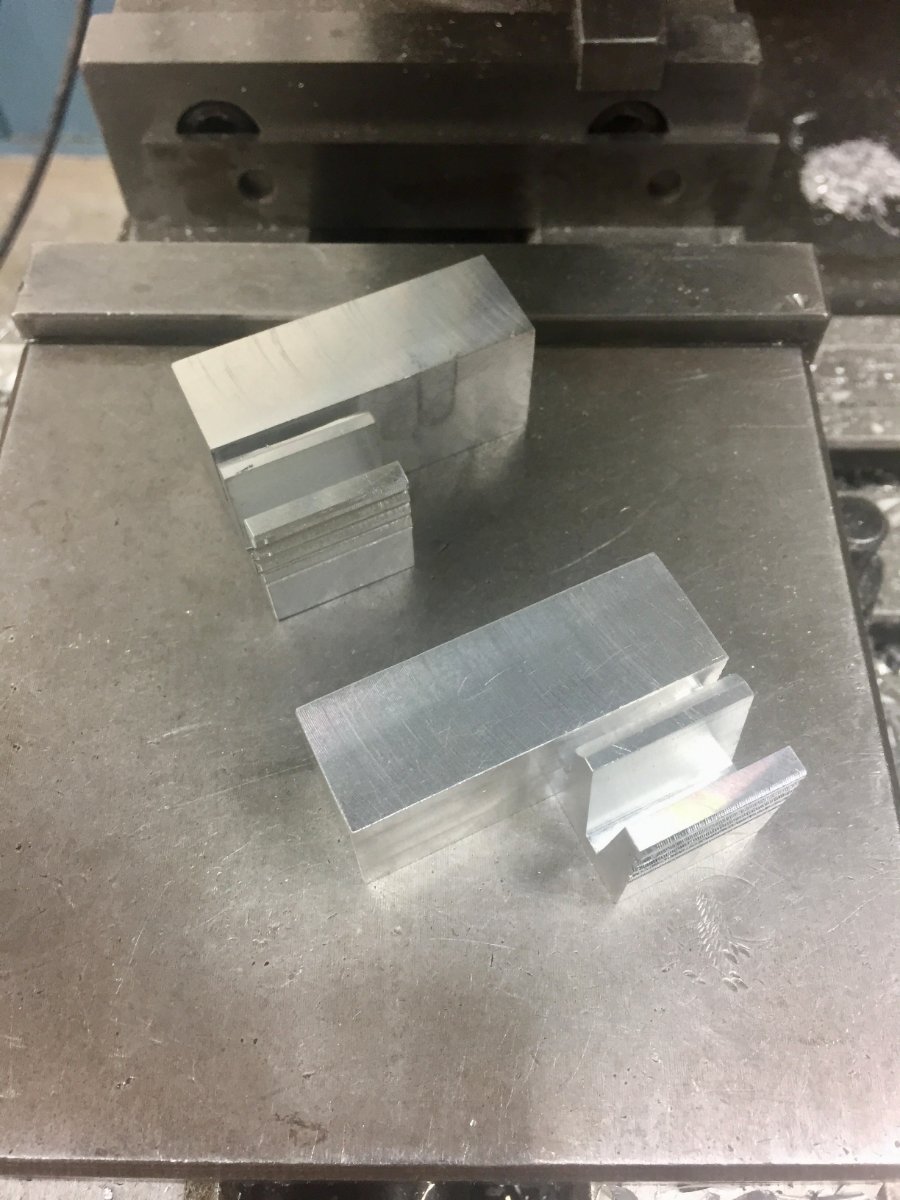
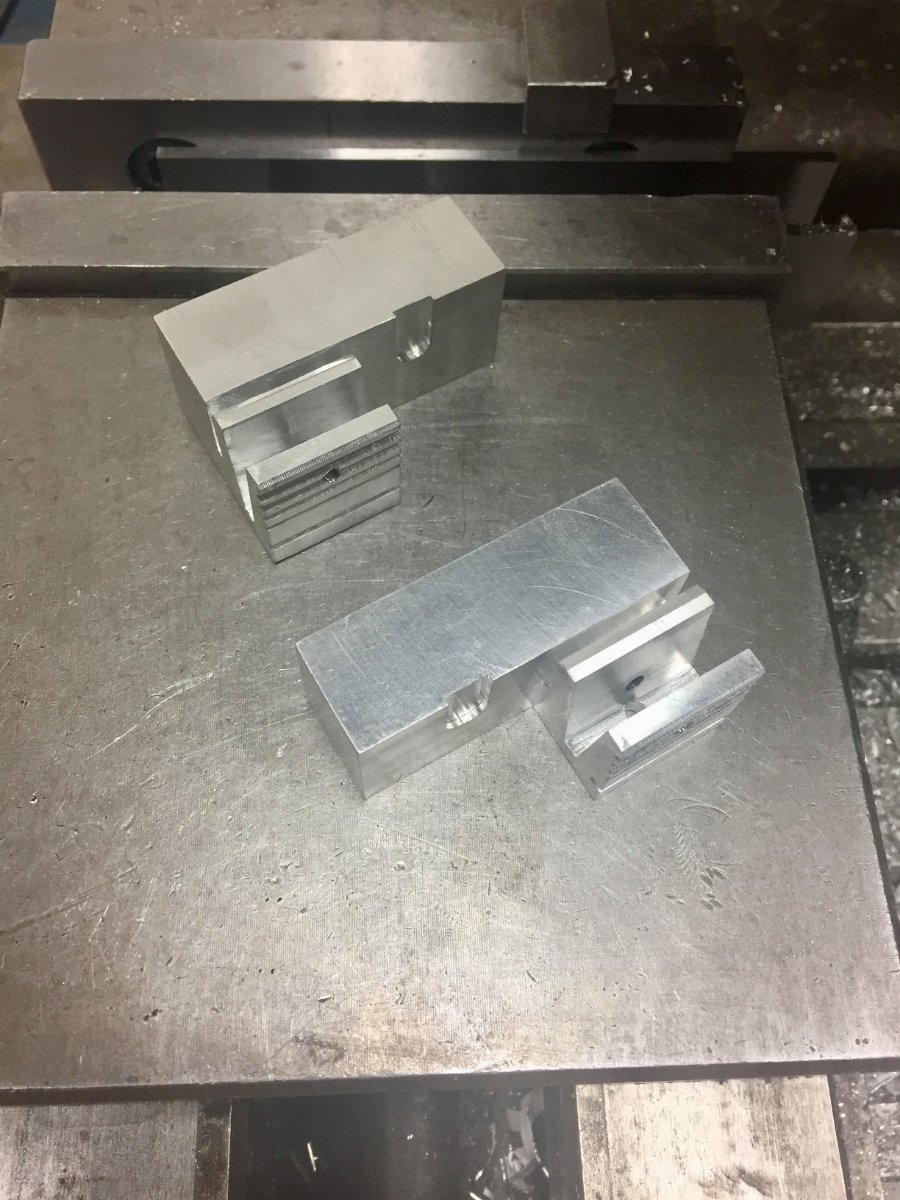
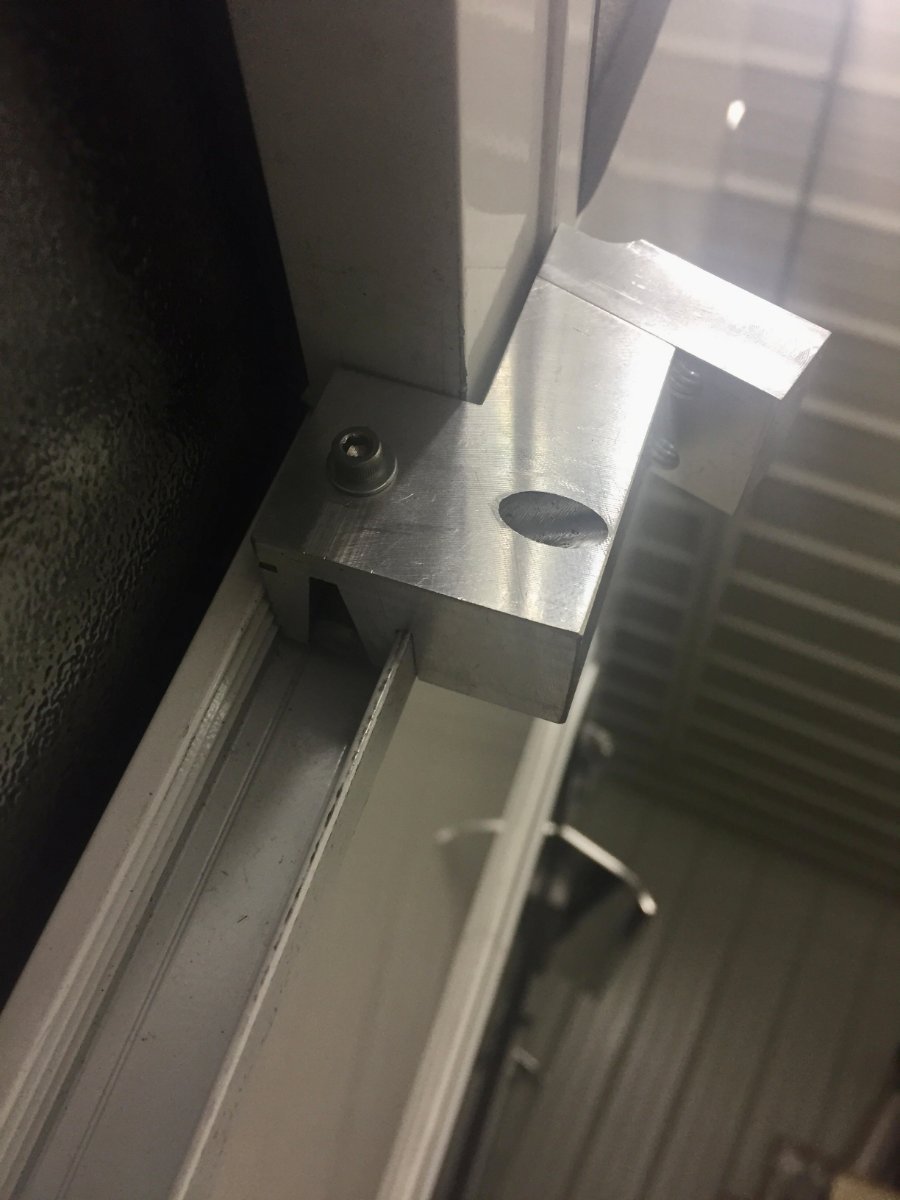
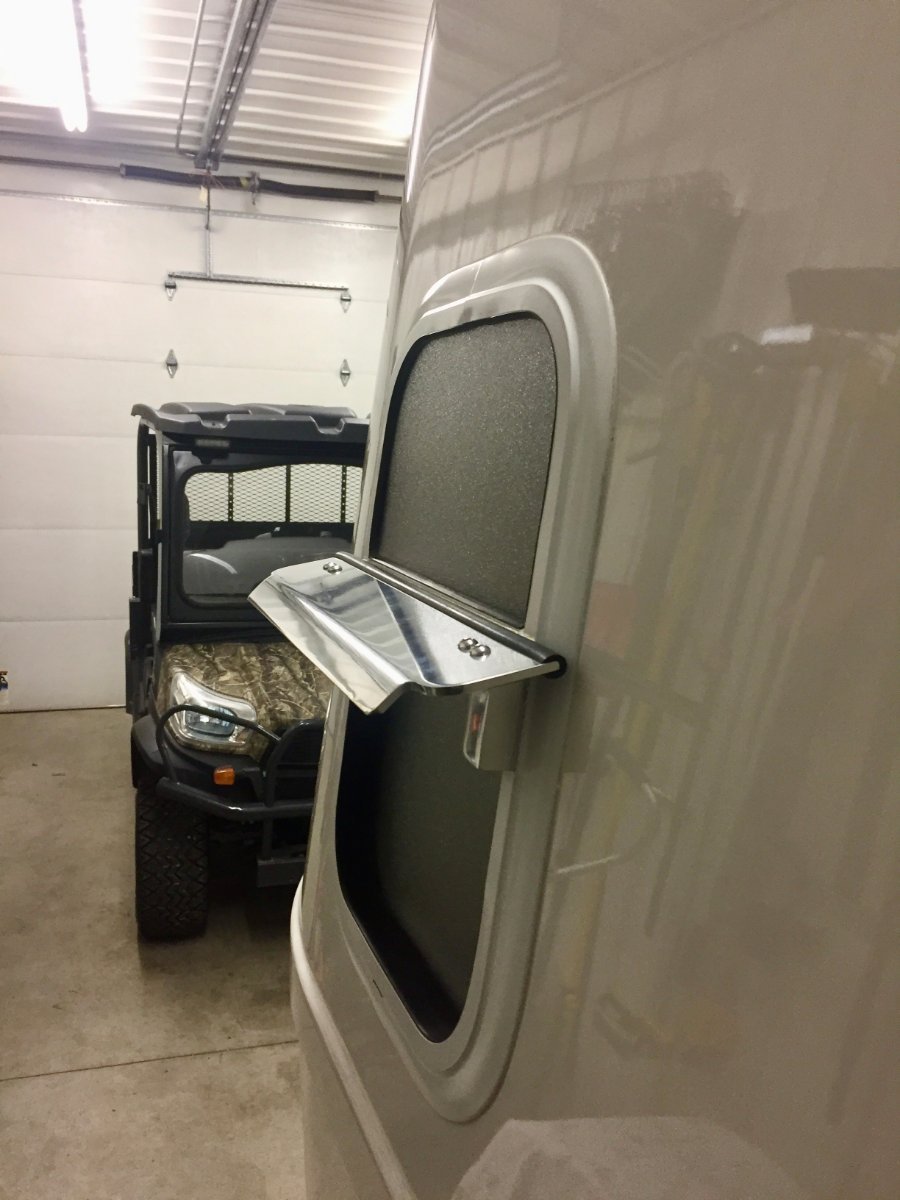
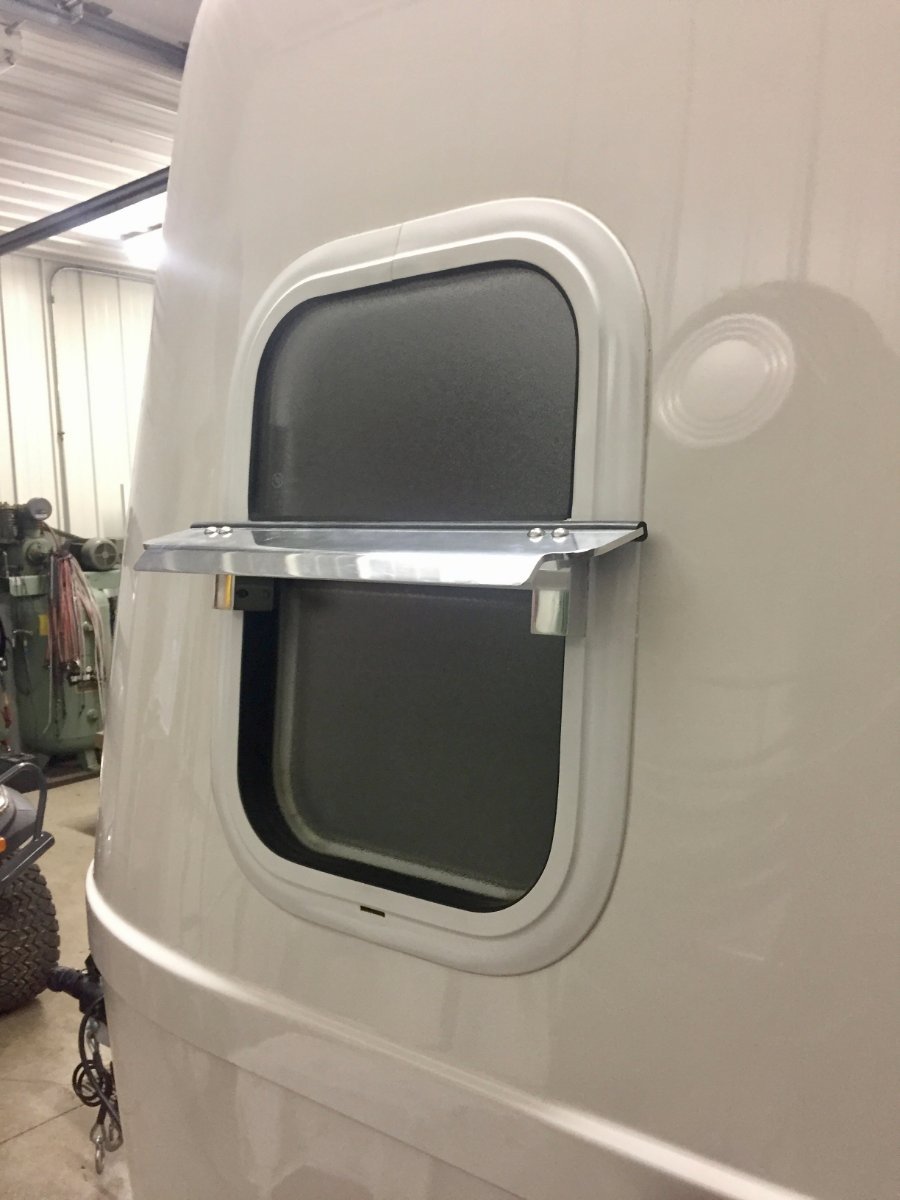
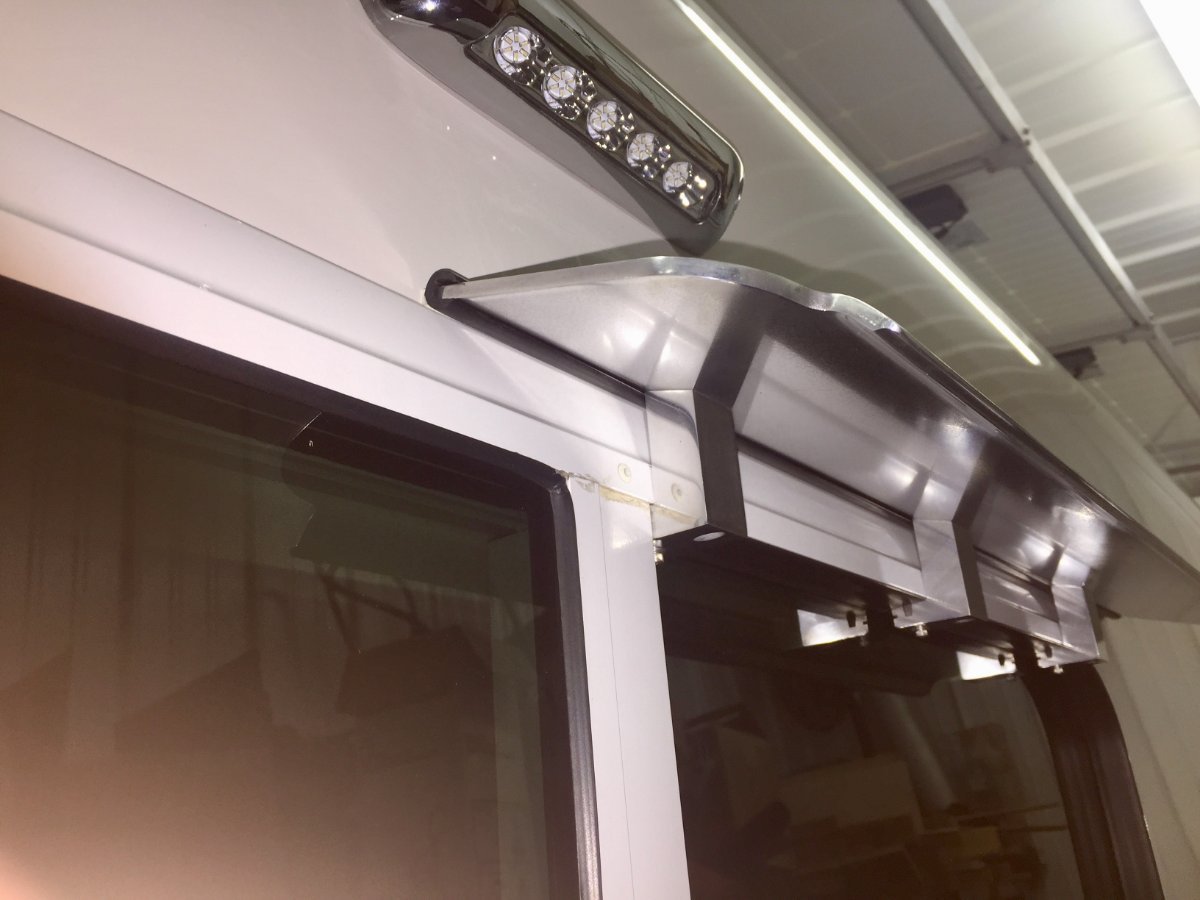
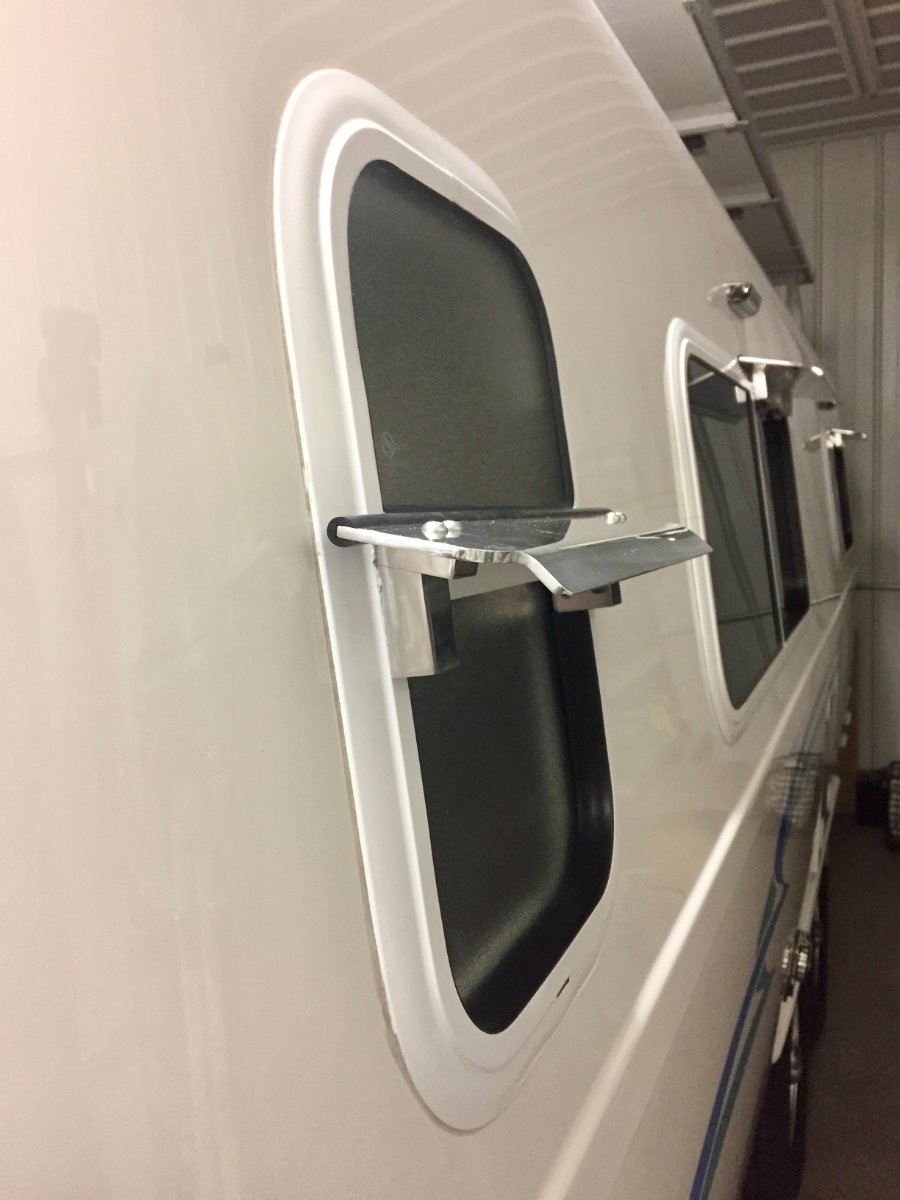
Eyebrow For Bathroom Window Well to finish off this project short of the testing, I had to design a eyebrow for the bathroom window. Since this window frame is mounted vertical it required a different approach. I thought it might interest some of the readers to see some pictures of the machining processes. Also I changed the finish on the mounts for all the eyebrows to a polished finish, I think its a better look.
-
TPMS sensors and valve stem failures
Minnesota Oli replied to Frank C's topic in Mechanical & Technical Tips
What if you slip on a rubber grommet to help support the valve stem from the centrifugal force of the spinning tire. Just a thought.