
Wayfinder
-
Posts
553 -
Joined
-
Last visited
-
Days Won
12
Everything posted by Wayfinder
-

Gas Regulator Spare Part - Available GR-9994XF
Wayfinder replied to Galway Girl's topic in Mechanical & Technical Tips
Well, as I'm using my trailer more now, and my regulator is likely original (2016), it's likely time for it to fail. Since I've used eTrailer before, I just went with them. Slow web pages, but reliable parts in my experience. https://www.etrailer.com/p-37207-30395.html Thanks @Galway Girl (Craig) and everyone for the detail info. I think I've seen more yellow flames on the stove lately. Will monitor it. -
Thanks Frank. I did not stress that in my video but I should have. I think I know more about lug nuts than I expected, and much more to learn for sure. Such a simple part, but one which keeps the foundation of a vehicle connected properly. Forum contributors are the best.
-
Pricey but high quality.
-
Hey folks, I did a "quick'ish" video regarding upgrading our lug nuts to solid chrome versions. I hope it's helpful to someone. I try to make fun of myself and any mistakes I made. Hopefully others will learn from them. LOL. I'm till learning how I should present. Much more to learn. Please let me know if I said anything too terribly wrong!
-
- 3
-

-

-
@PatriotI already replaced most of them. I didn't realized until I started putting them on that I only ordered a 20 piece set, but needed 24 nuts. I'll get more a my local auto store tomorrow. Shop around for some better quality than I got, but here is the size. 24 count 1.38 inch Chrome 1/2-20 Closed End Bulge Acorn Lug Nuts - Cone Seat - 19mm Hex Wheel Lug Nut How about these: https://www.amazon.com/Chrome-Closed-Bulge-Acorn-Wheel/dp/B07SLDRL14
-
@csevel Hope you're doing well. I'm not sure if you made it to the Guntersville rally or not. I was there, but way too many new names to keep track of. I replaced my lug nuts tonight and also discovered SIX cracked lug nut shields on the Oliver-provided lug nuts from 2016, only five pictured. I found this info out at the rally. I should have seen your posting first though. LOL

-
Because of this thread I had repacked my bearings over a year ago, wow, over 1.5 years. Oy! Time flies. Anywho, when putting on my tire I had got checked out at the tire shop I noticed not one, but two wheel bearings needed to be snugged up a tad bit. It was a good find and a quick tweak. All-in-all, a good night for minor repairs and improvements. Maybe a step closer to a super long trip. I still prefer these forums over Facebook. 🙂
-
I love that pad. My truck has a similar one I always carry as well.
-
Facebook accounts hacked or duplicated - Steven Cobb
Wayfinder replied to Wayfinder's topic in General Discussion
I just contacted the CORRECT Steven Cobb on FB and let him know to be careful and to warn his friends. I confirmed it was me by providing info that only he and I together would know.- 1 reply
-
- 3
-
-
I'm not sure how to get hold of Steve, but some jerk is portraying him on Facebook. I've posted a message on the Oliver Owners group, but that all I can do. That account only has 4 friends and just a few pictures. Be careful. I tried to confirm it was him by immediately asking what we did last week and where we met. The jerk on the other end kept repeating BS about some great site or organization. Big clue! Facebook is getting crappier everyday.
- 1 reply
-
- 3
-
-

-
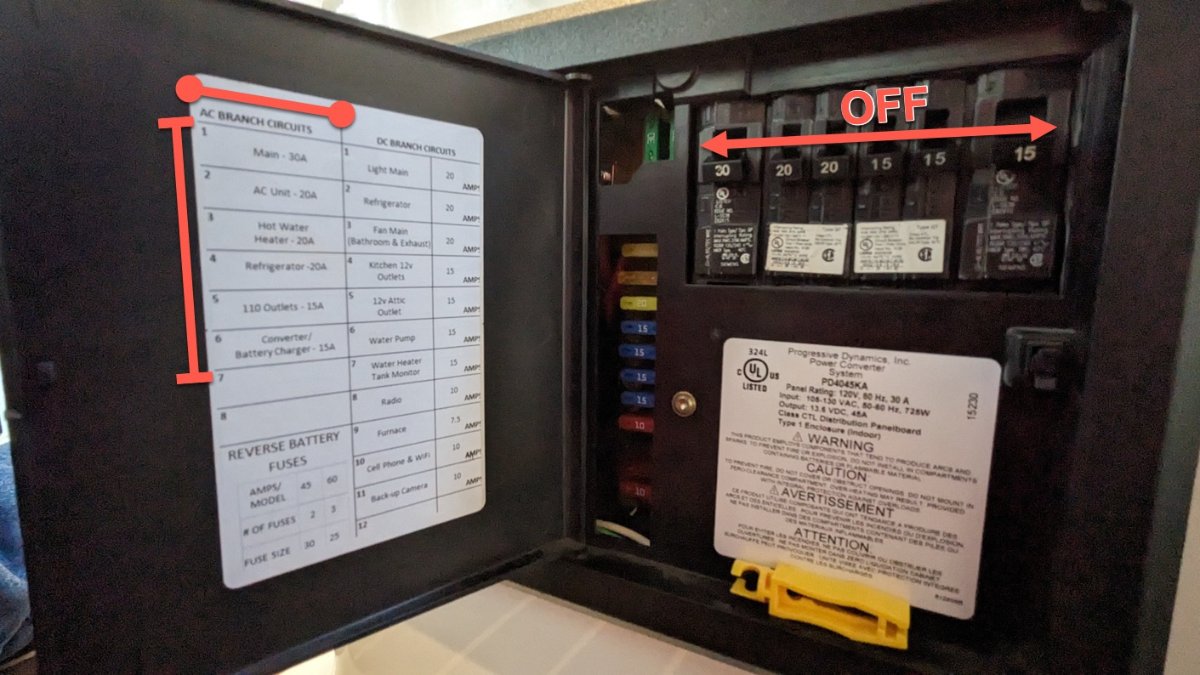
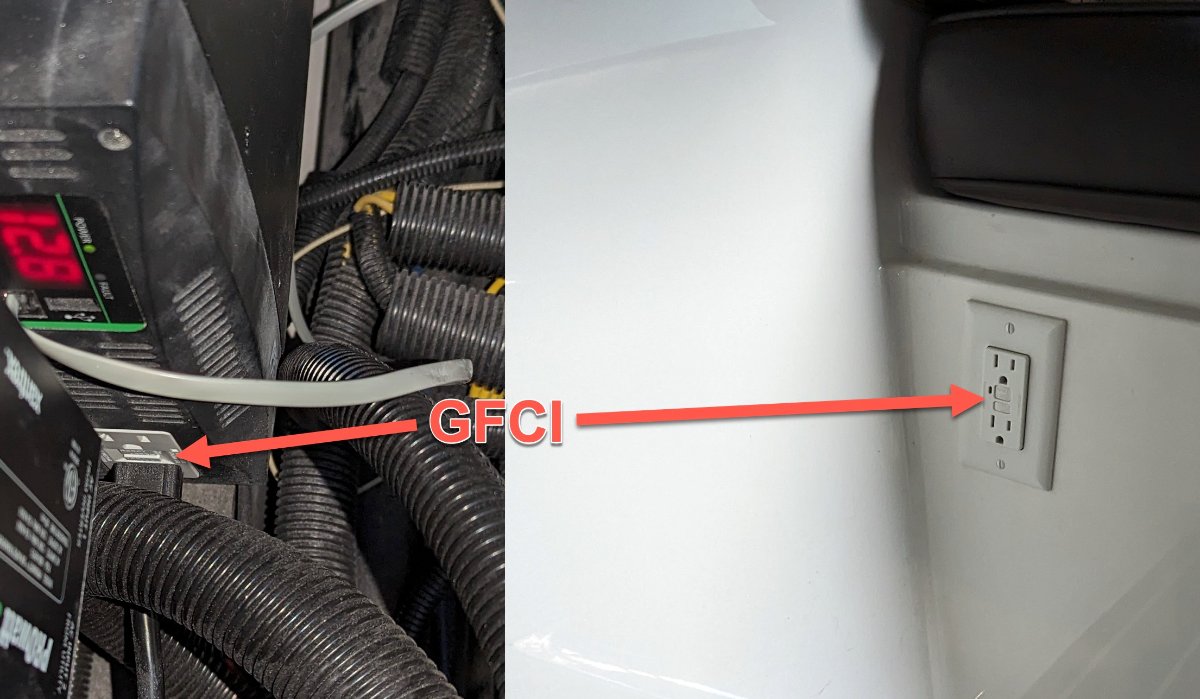
I also posted on FB, but I like the forums best. I did search the forums, but didn't see the exact configuration complaint. Who has this AC outlets setup in their Oliver and what year is your TT? I have a 2016 Elite II and I just discovered that in the breaker panel there is no dedicated breaker for the 15 amp outlets around the trailer. I discovered this while replacing the outlet by the drivers side twin bed, inside the rear drawer cabinet. This new outlet has built-in USB-A & USB-C receptacles as well, for AC plugs. I have two GFCIs which protect all the 15 amp outlets in the trailer, including the microwave. The GFCI on the Xantrex inverter itself AND a GFCI under the dinette, across from the breaker box. This is fine, but I first searched the breaker panel like any sane person might do. #5 "110 outlets - 15A" SHOULD be the breaker, but it does not seem to do anything. "Now I know."
-
I'm using that Tuxtop that @Ollie-Haus posted a pic of. I think it's much better than the cheaper version with the edge around it. The fan noice is better and I like the controls.
-
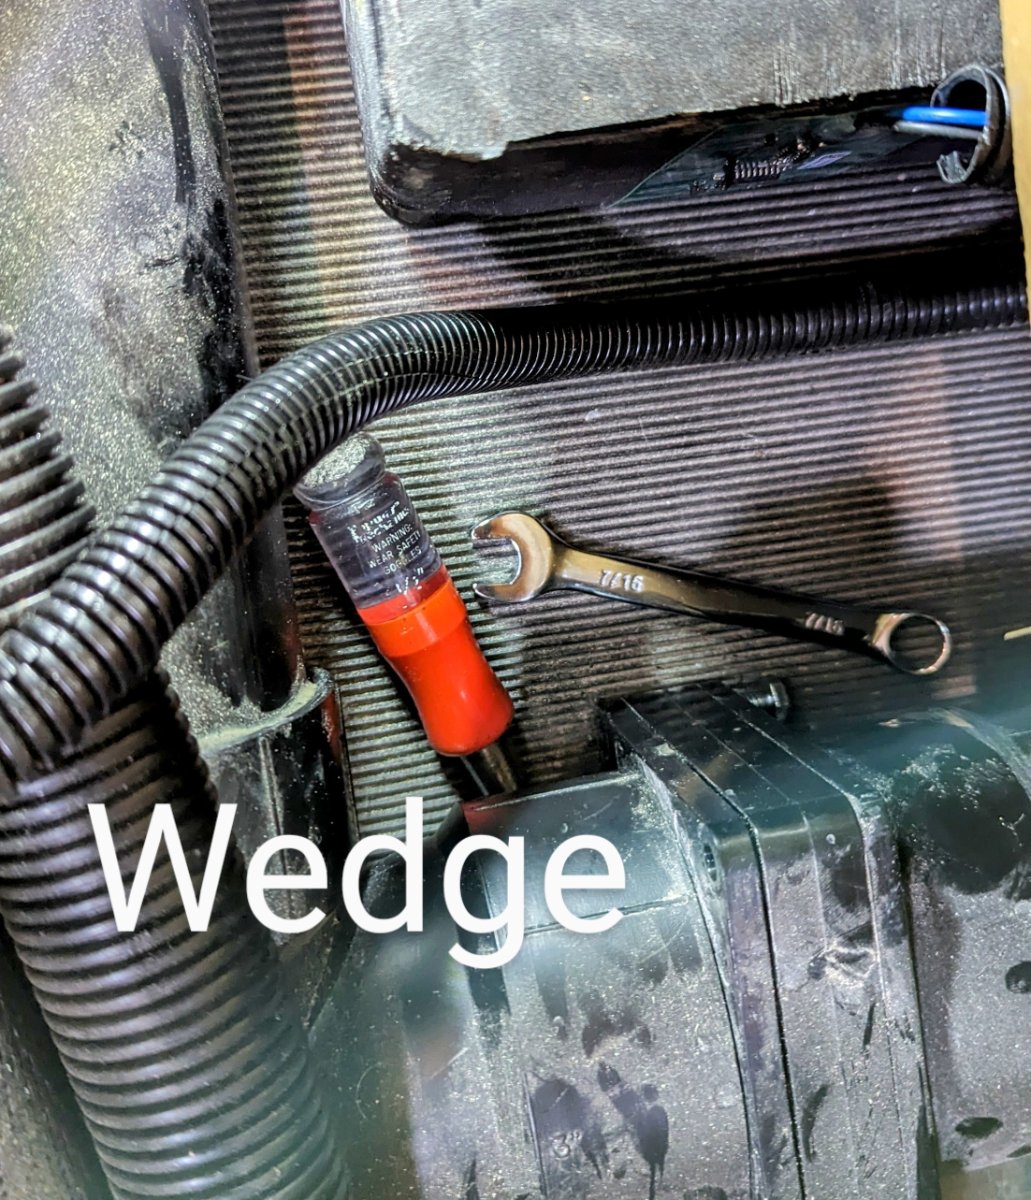
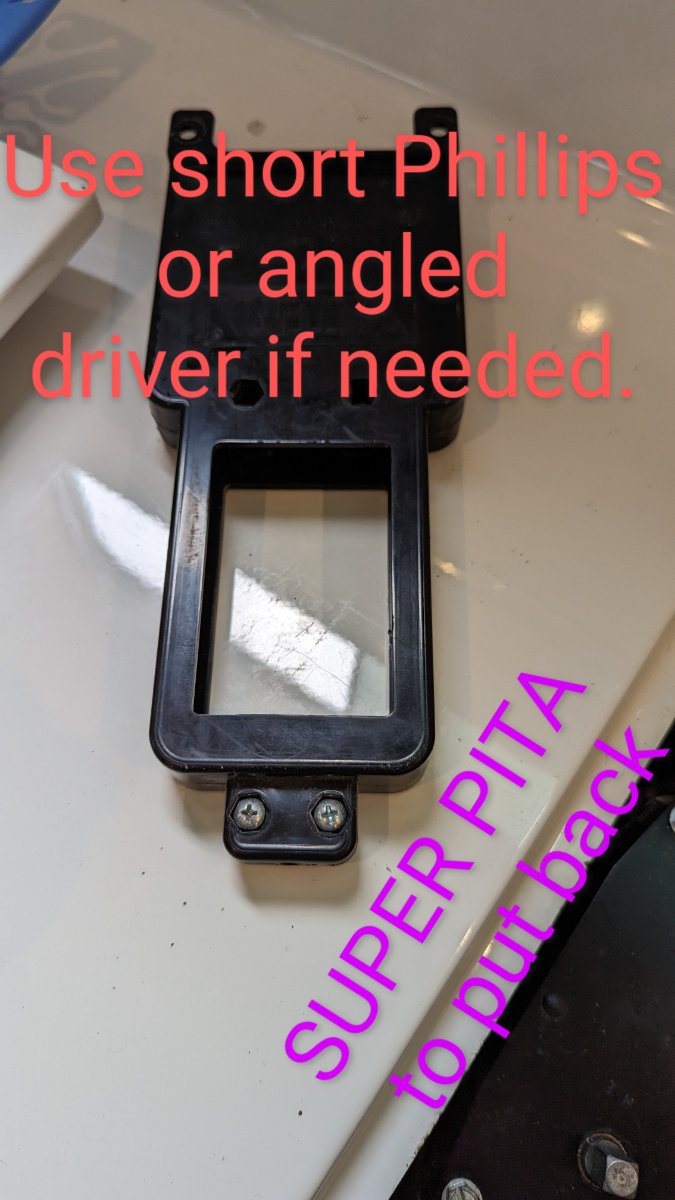
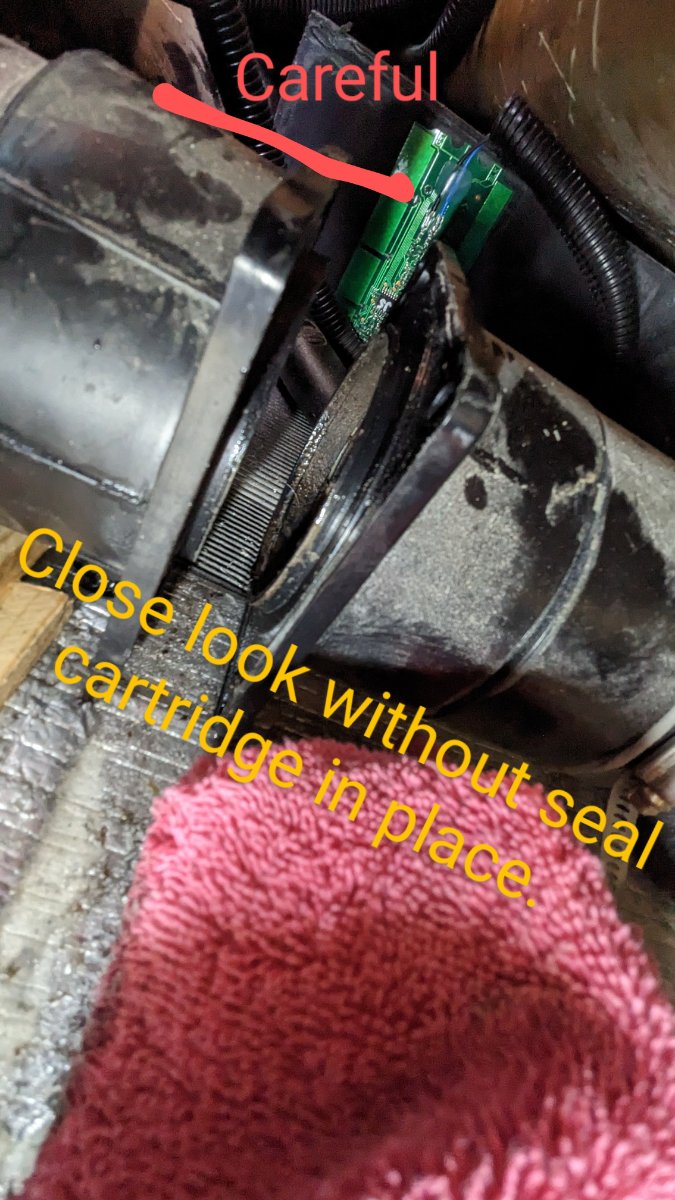
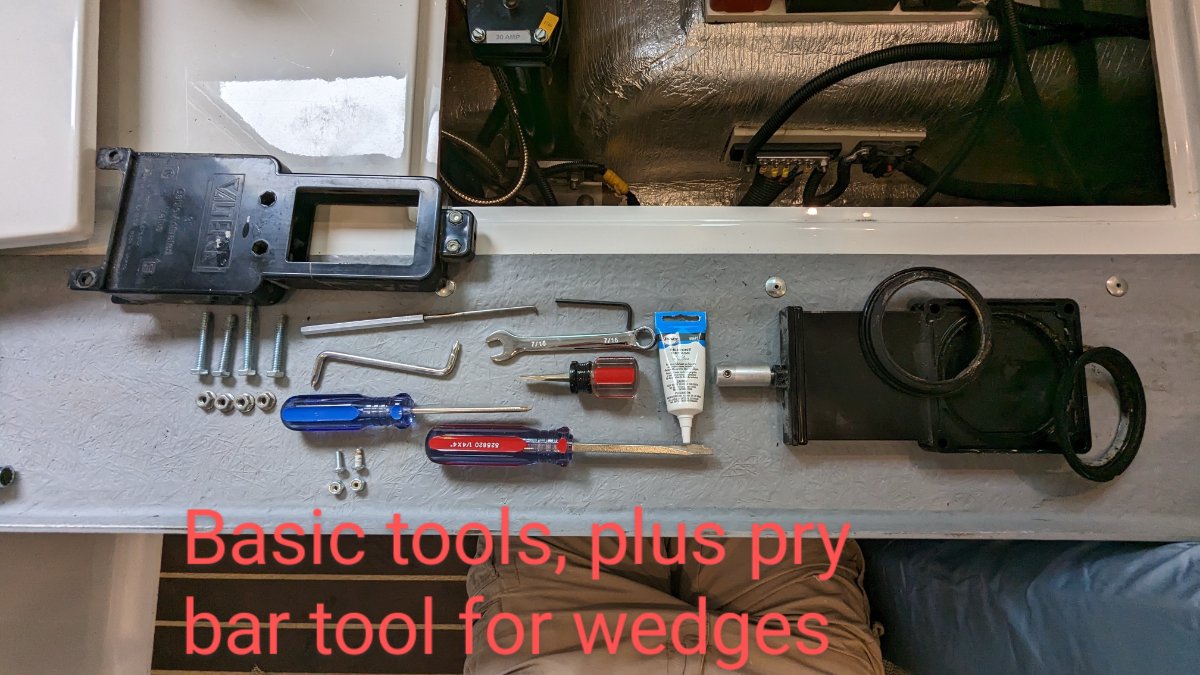
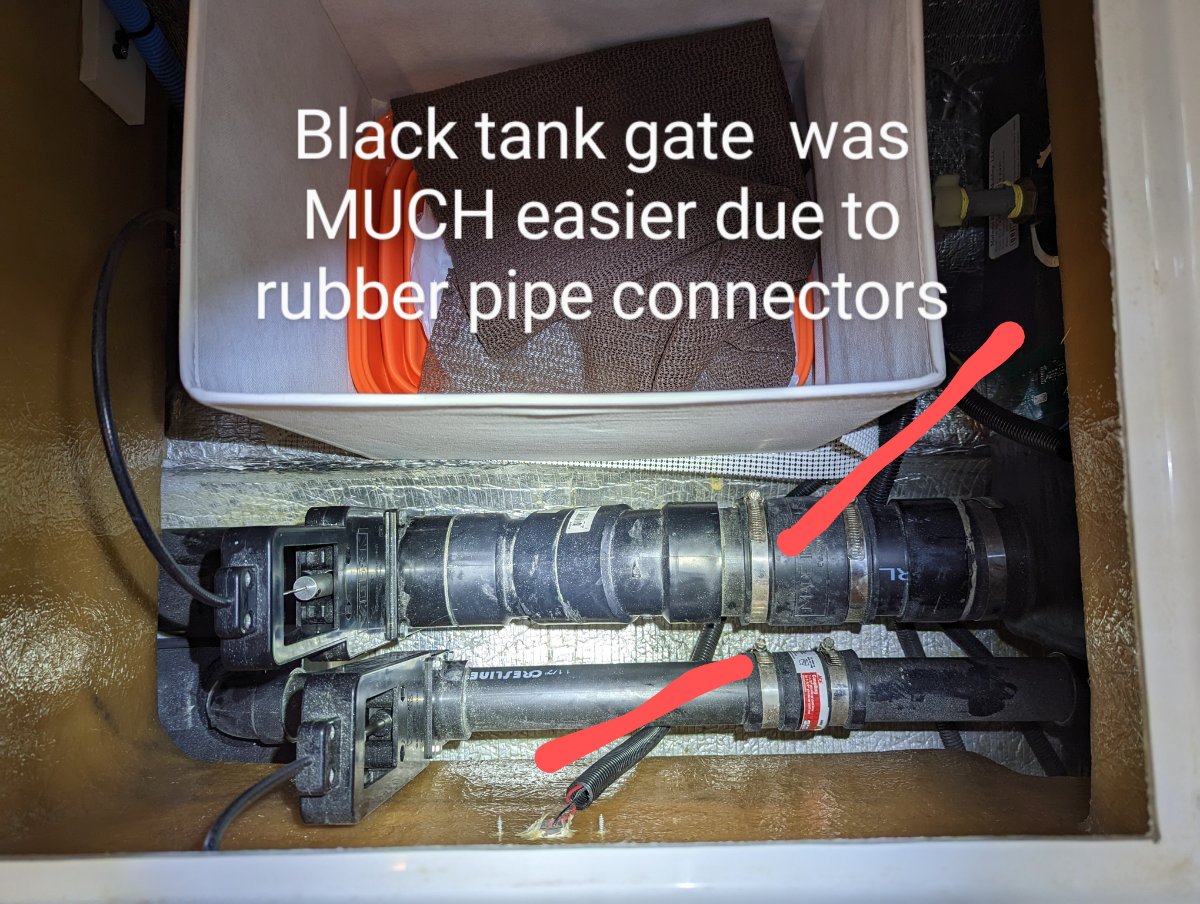
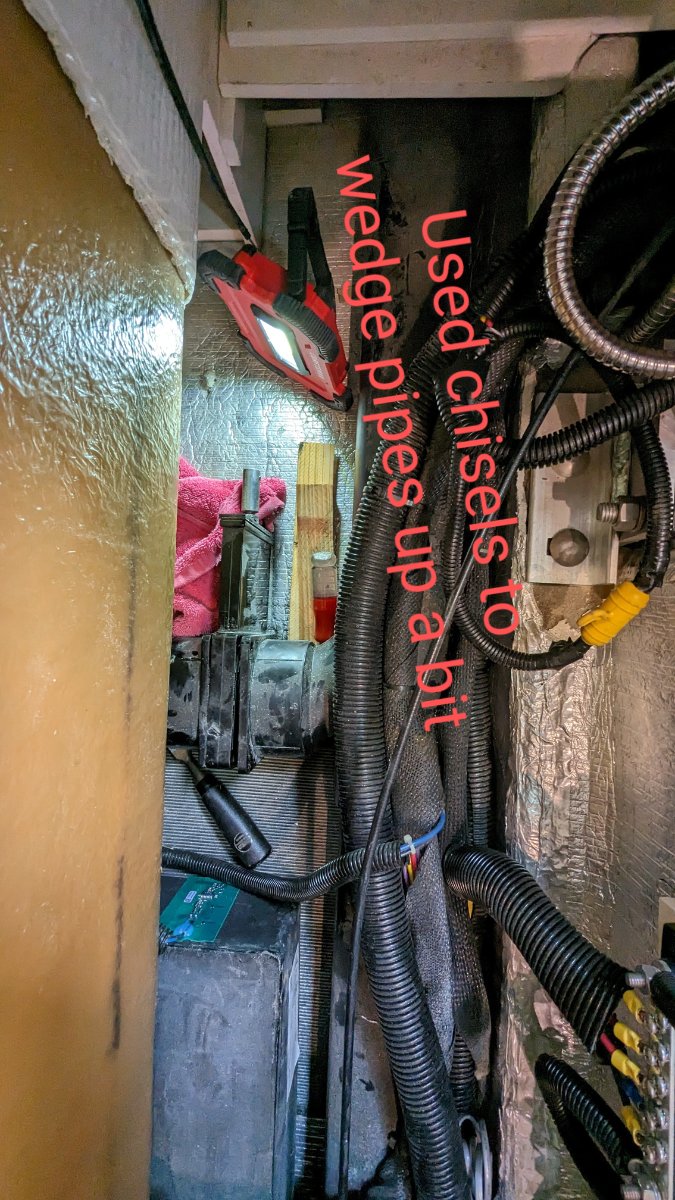
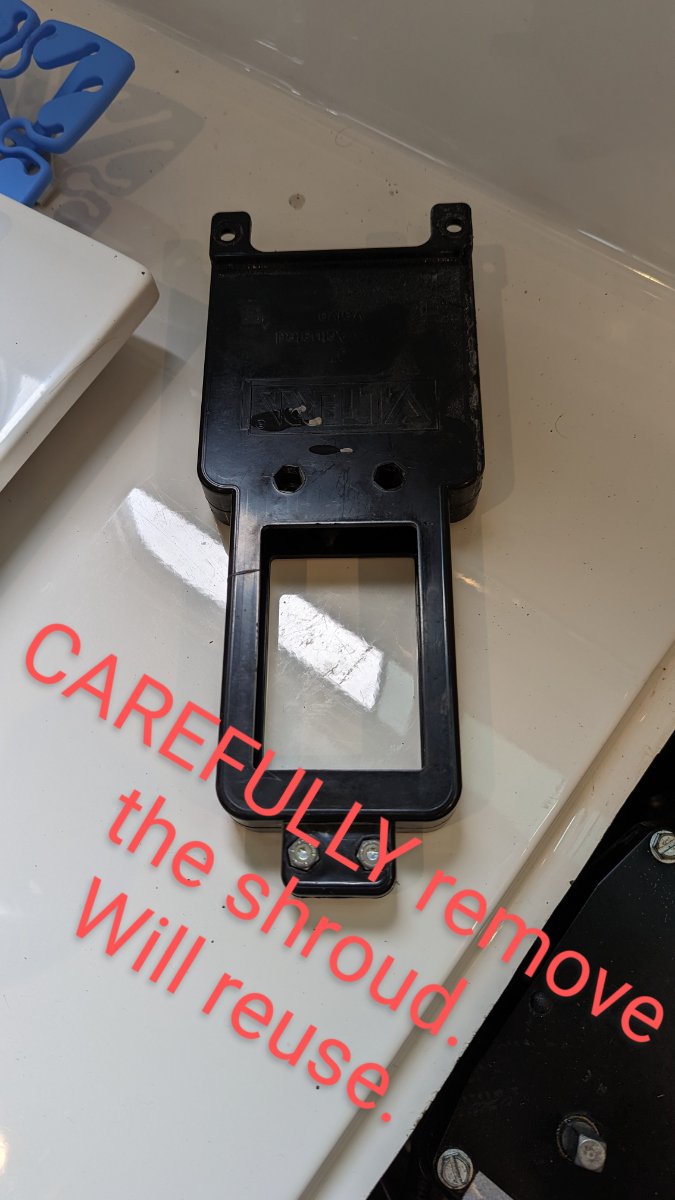
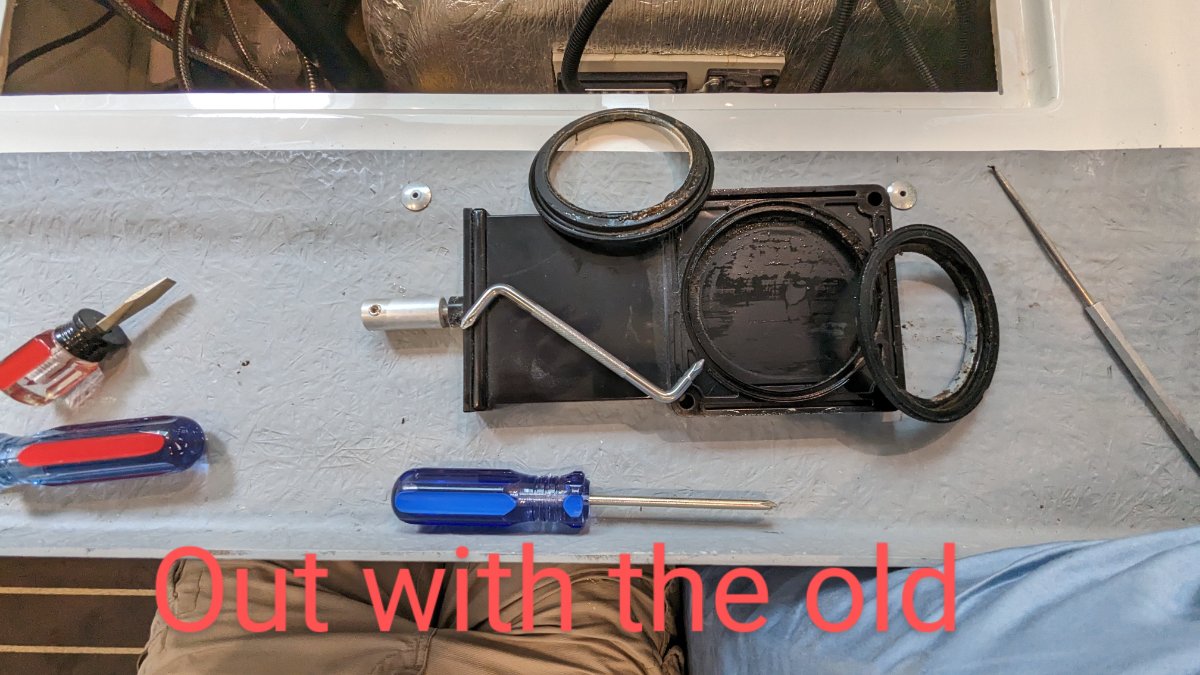
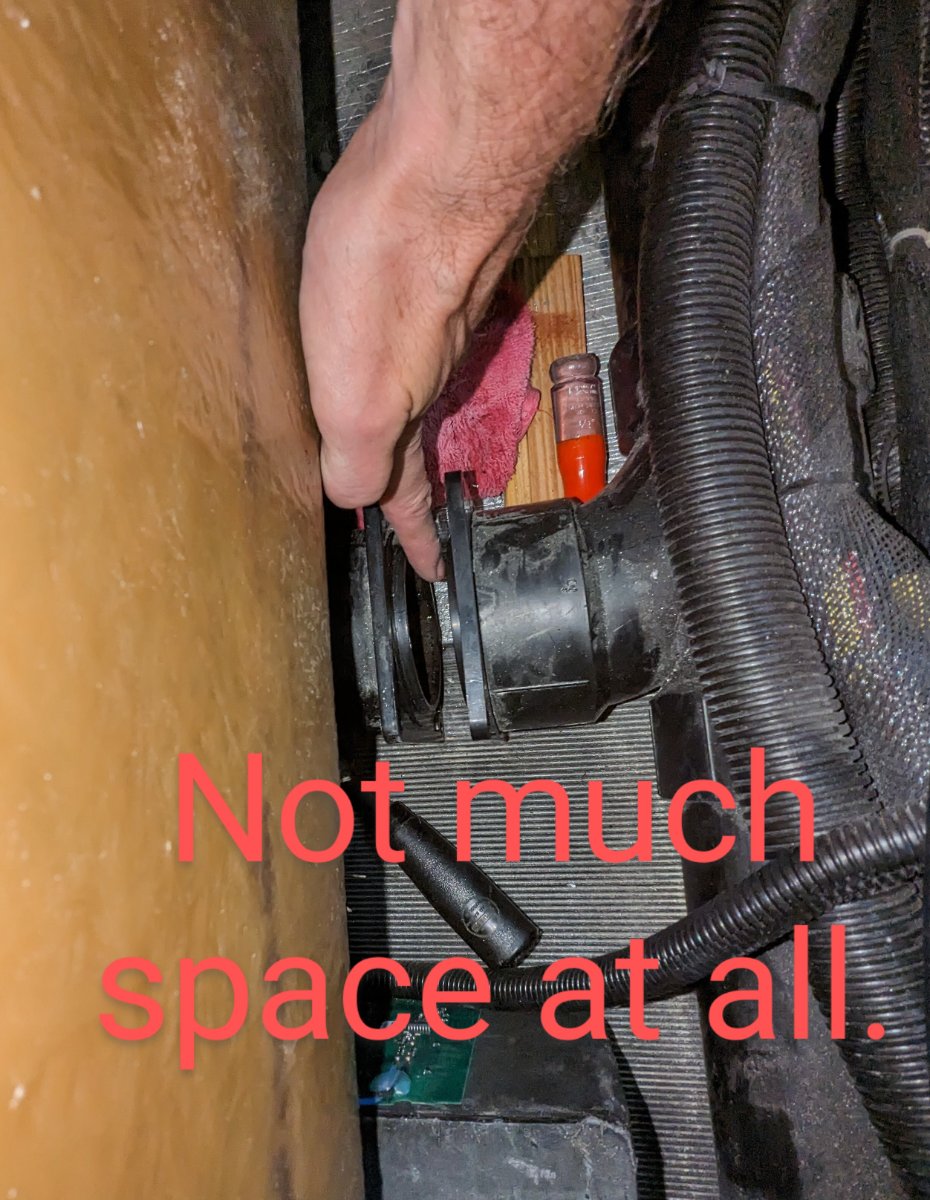
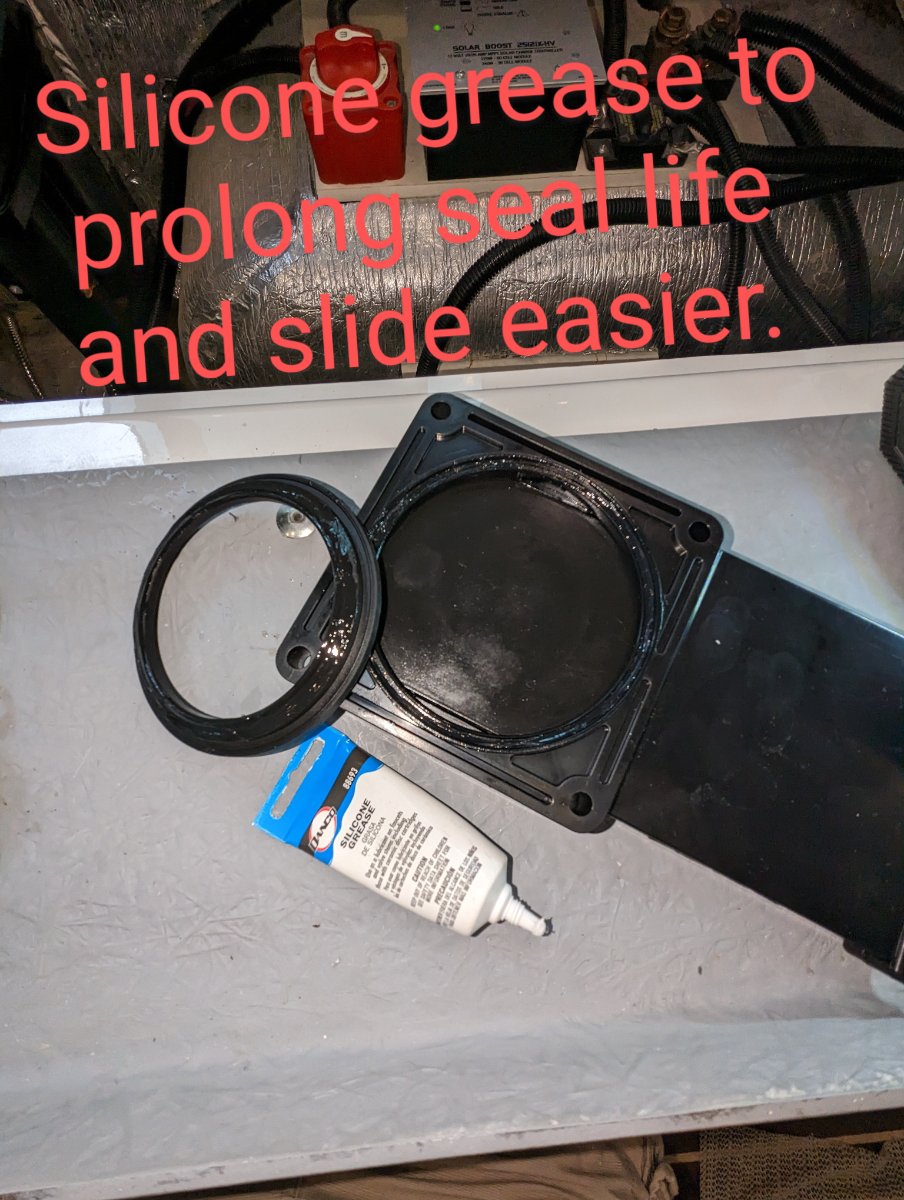
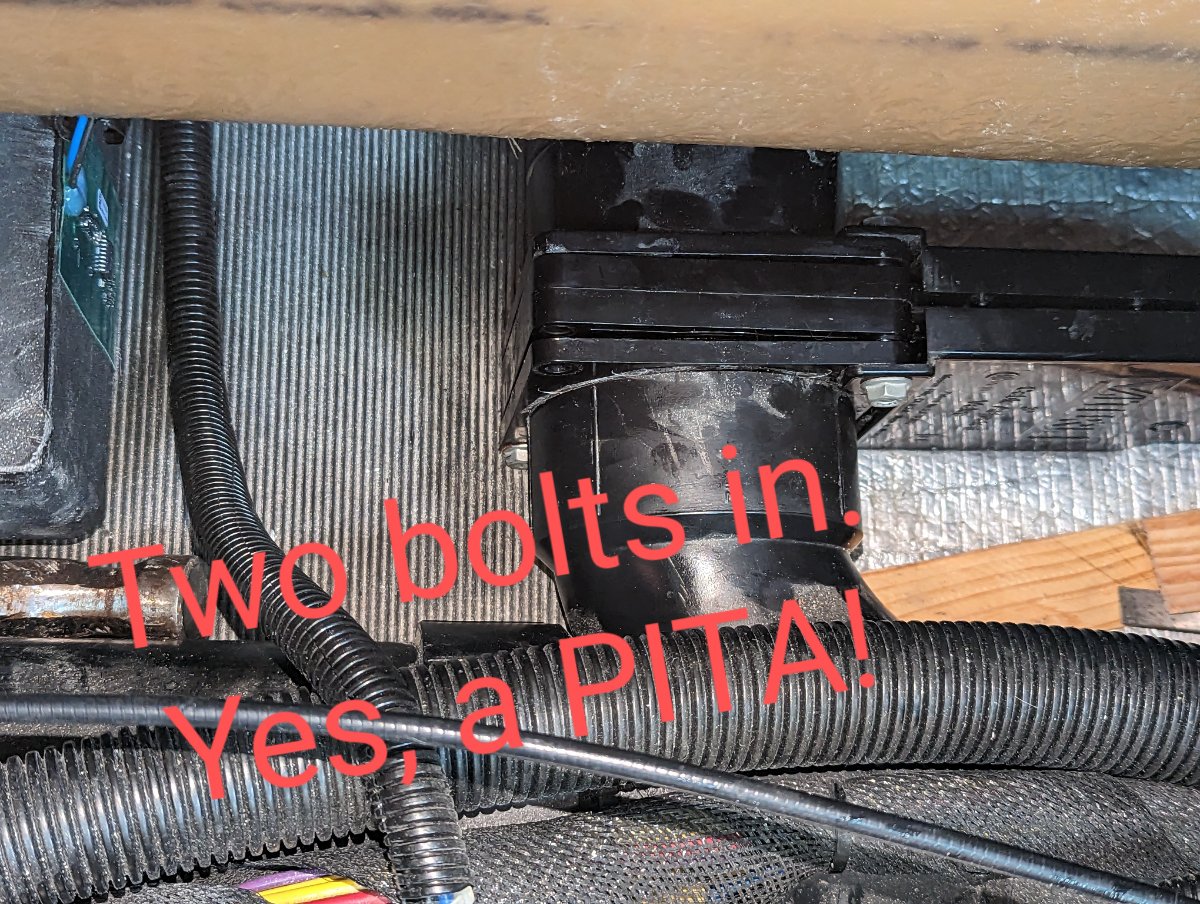
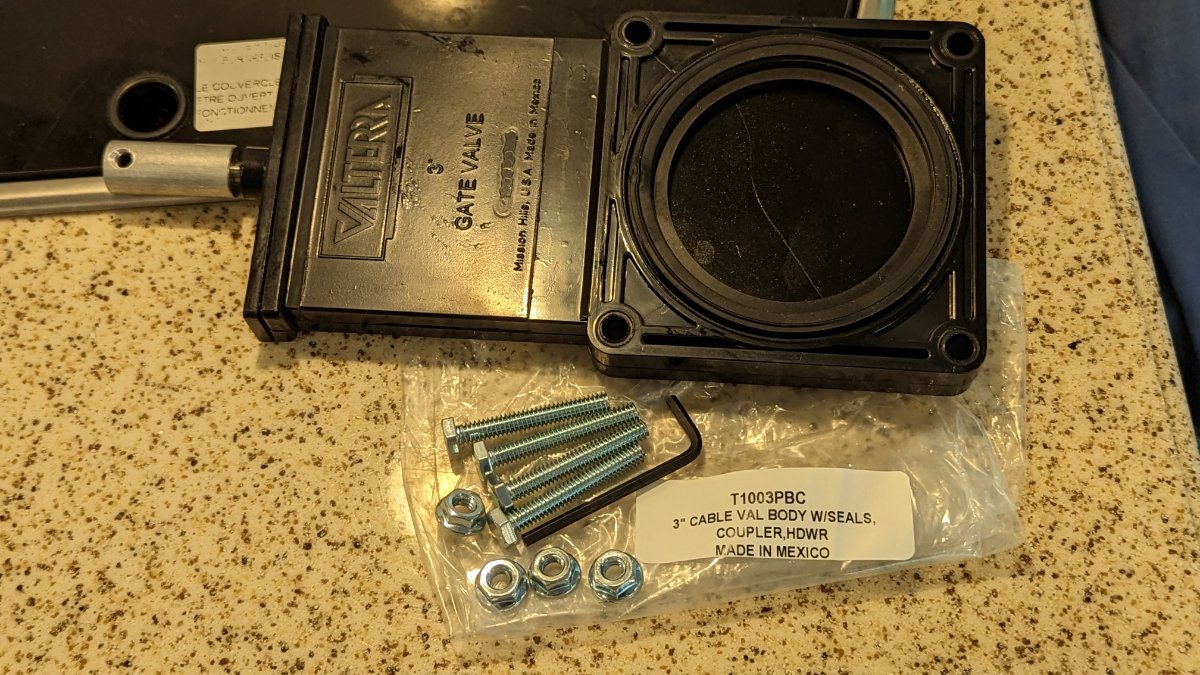
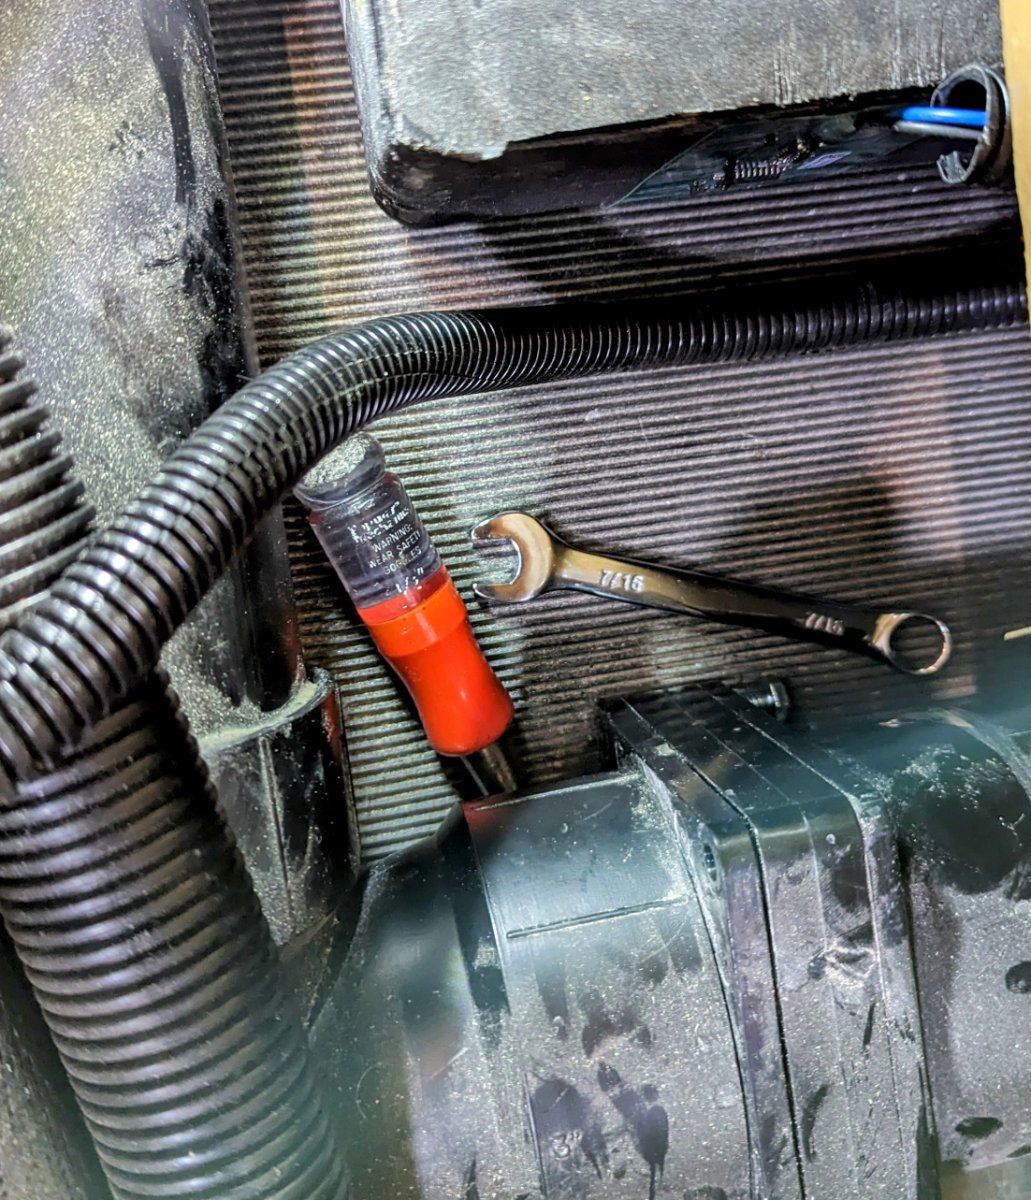
NOOOOOOOO, no it was not easy. LoL OMG that was two hours I'll never get back. It's done and with no leaks. I filled up the grey tank to 100%, and then some. I let it sit for over an hour, checking for leaks very carefully and with a very bright light and white glove test. I also opened and closed the gate valve a few times and checked for leaks. The grey tank valve in this 2016 model is extremely difficult to do. Unlike the black tank valve that has rubber pipe connectors to loosen up for wiggle room. Next time, I drive to Tennessee and let Oliver curse through that grey tank valve. Errrgggggg. If you have a bad back, are over weight, or have arthritis in the hands I would think twice before attempting this. I hope the newer models have improved this part replacement. I had to rest my head on the jack motor several times. Oh, long arms are required. I've annotated some pictures. No certain order. Hopefully the plumbers grease will add an extra two years of life. I think the job could have been substantially easier if the gate valve could have been 1/8 to 1/4 inches off the basement floor. It would have at least saved time getting the two lower nuts off and on again. It's tricky for sure. I'm considering doing a short video with the pics and doing a voice-over to describe the challenges. In some of the pictures you can see what I believe is the grey tank sensor board in the background. Be careful with tools around the sensor, it could be damaged and work even less affective than it already does. I used a hammer as leverage to separate the grey tank side of the valve with the main black tank pipe. On my TT many of the electrical wire bundles were between the hull and the main drain pipe, preventing movement. I was however able to lift the bundles up to relieve some of the pressure on the drain pipe.
- 12 replies
-
- 10
-
-
-
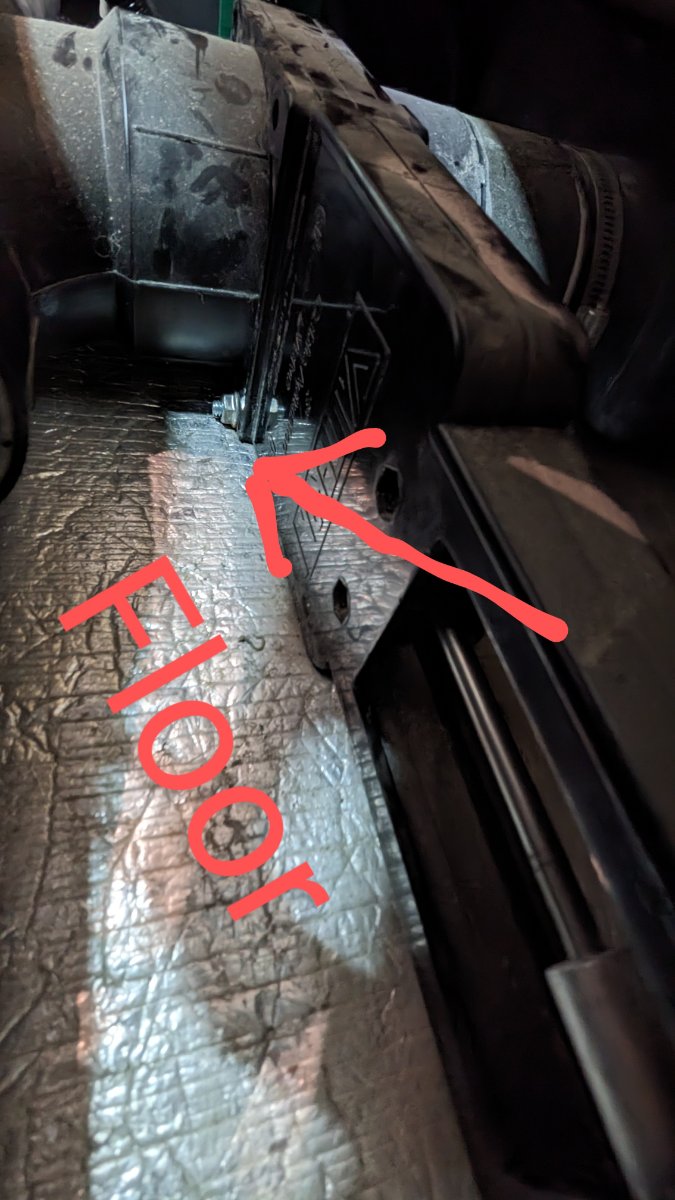
A small chisel helped to wedge it up a tad bit.
-
I hope Oliver lifts this up off the floor even 1/4". He'll, I'd be happy with 1/8".
-
Funny you should ask. Still trying. The bottom bolts are right on the basement floor. TIGHT, very! No curse words yet, but no promises. I tried to shim under the pipe, but man it would budge. So, slow going with big man fingers.
-
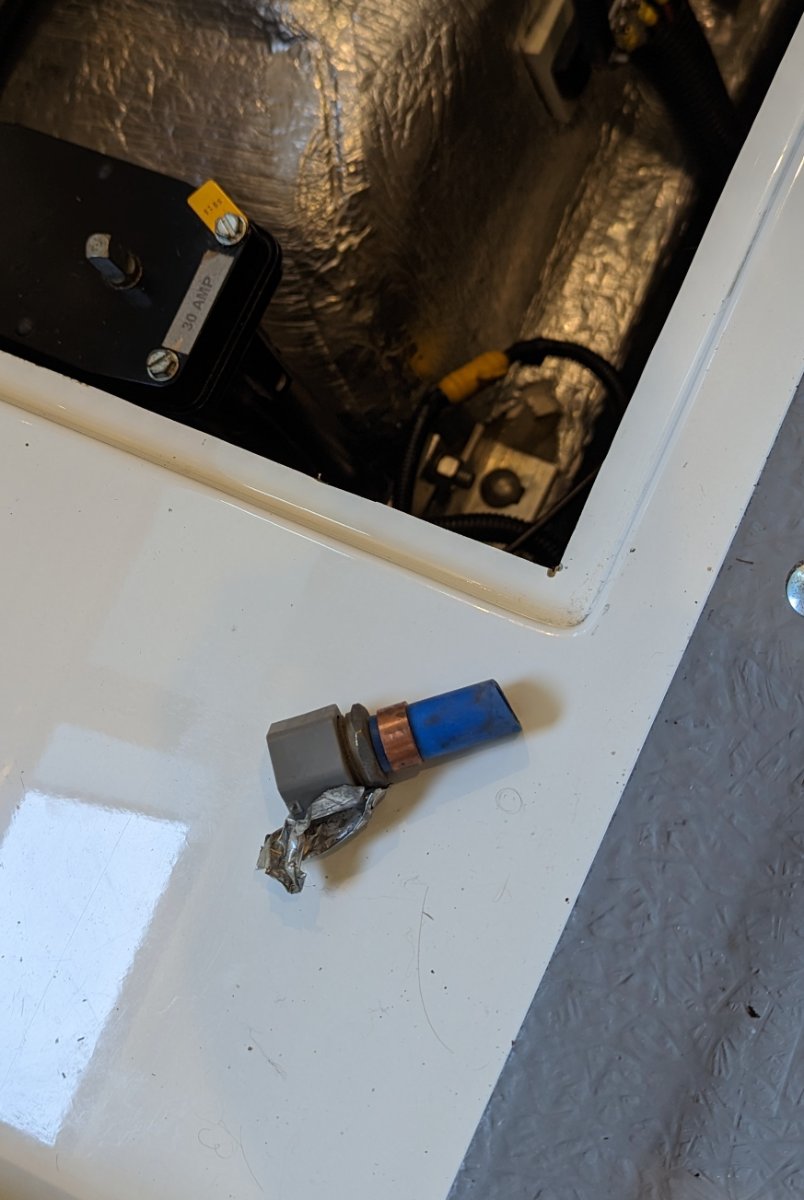
While considering to replace my grey tank seal, I found a lose spare part, a pex fitting end/stop. LOL. Been there's likely since 2016. Not something I want rolling around with electrical connections. Does have a brass crimper and the brass connector. Also finger-checked all my electrical connections under the driver's side bed to ensure everything is still snug.
-
My how-to video for cleaning the weep holes and tracks
Wayfinder replied to Wayfinder's topic in Mechanical & Technical Tips
Do you think the newer windows are a better design than the old? I know you may not have touched the old ones before, as I have not seen the new. But I will need new windows eventually and I'm sure they'll be a different design. -
My how-to video for cleaning the weep holes and tracks
Wayfinder replied to Wayfinder's topic in Mechanical & Technical Tips
Great tips, thanks. I also have used the silicone spray before just to allow windows to slide nicely. -
My tire shop did say these stems are rated for the 90 PSI Michelins. But I'm not an expert in stems... and will never be close to 90 PSI on an Oliver.
-
Thanks. I also posted the entire lineup of these tires a few posts back in this thread. I had the tires inflated to 50 lbs. But even that seems high for these tires and my Oliver. https://olivertraveltrailers.com/forums/applications/core/interface/file/attachment.php?id=26016&key=7584a7c5c8aa611b54b4492d5c7eddeb
-
Well, here are the Michelin Agilis CrossClimate tires. They look like tires. 😂 No shine on them yet. And I lost my metal stems. Darn it. They were out. These are longer too. I don't like it.
-
Although my quickie front jack stand box looks like crap (version 1.0), I'm going to do something to it that I have not seen any of you mention in the forums. So, you'll have to stop by camp site G28 to see it. I did sand it down some and stained. Oh, the suspense of it all.
-
Too bad they're upside down in the pic!
-
Unfortunately we were not on level ground, otherwise I would have done at least one side at a time. But, it worked out. New shoes are on Wayfinder.