-
Posts
423 -
Joined
-
Last visited
-
Days Won
2
Everything posted by Wayfinder
-

Problem with city water connection
Wayfinder replied to Ospreybob's topic in Mechanical & Technical Tips
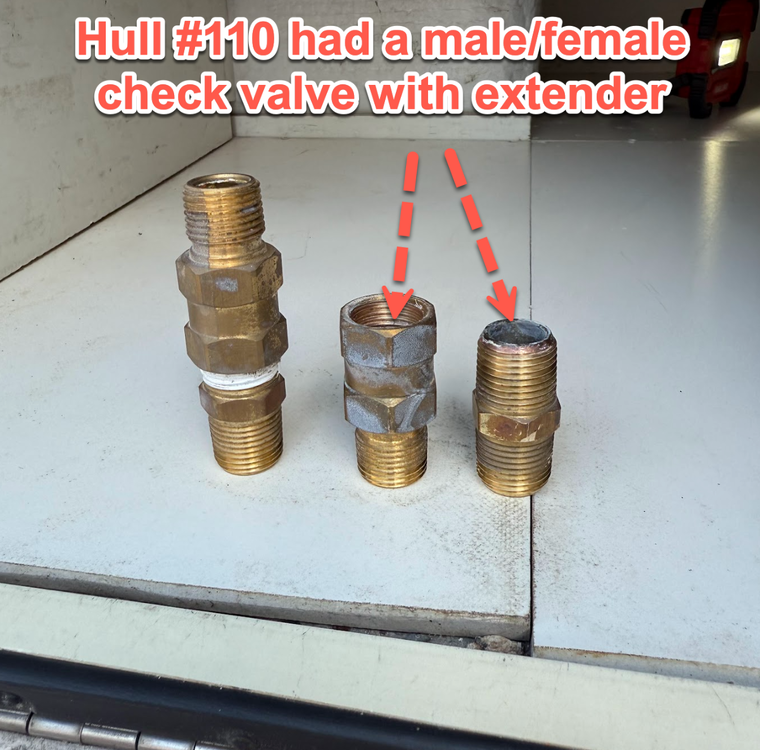
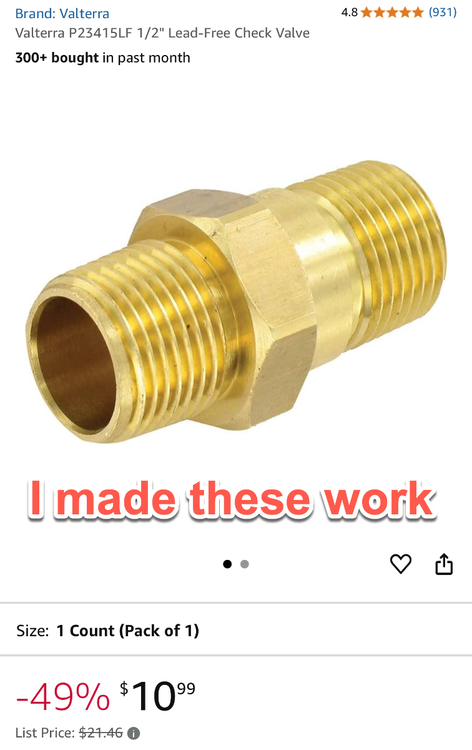
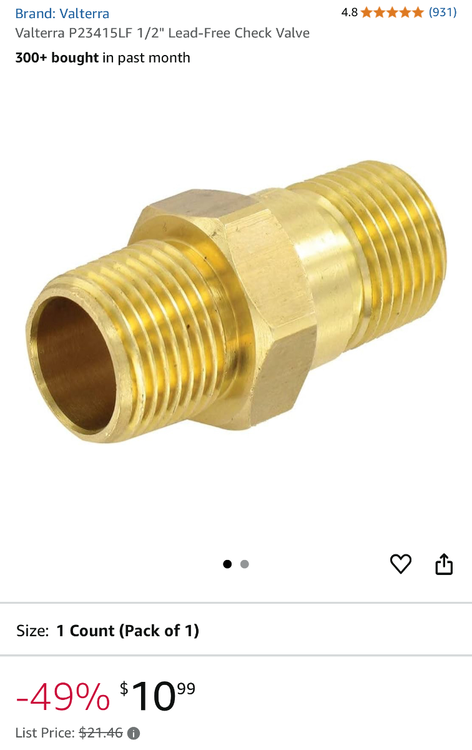
My #110 had different check valves than suggested by Lee on FB. But I was easily able to make them work without issue. The camper originally had Valterra P23402LF 1/2" (with male & female threads), with a male-to-male extender. This was a super quick job and tested for leaks with 65-70 PSI on the newly connected valves. I used the ones I ordered anyways (Valterra P23415LF 1/2"), which were shorter without an extender. The pipes had plenty of "play" to have the ends come closer together to make the P23415LF work just fine. Some trailers are naturally (and always) a bit different. There was no "gunk" whatsoever inside either of the old check valves, but I'm sure the old rubber seals inside dried up. So, maybe change these too every eight years or so. And the parts list grows. Some pics as always. -

Problem with city water connection
Wayfinder replied to Ospreybob's topic in Mechanical & Technical Tips
@jd1923 I will take pics of my check valves. Will be interesting to see if it's "gunk" or failed plastic. -

Problem with city water connection
Wayfinder replied to Ospreybob's topic in Mechanical & Technical Tips
yeah, it won't be fun in the heat for sure. I'm 6'2" at 183 lbs. I can do it, but will need to think what I need before I crawl inside.... to reduce the cursing at Oliver. LOL -

Problem with city water connection
Wayfinder replied to Ospreybob's topic in Mechanical & Technical Tips
This is likely fixed after a year after posting, but I did notice there is no rubber seal inside the inlet. That would certainly leak like crazy with a host hooked up. -

Problem with city water connection
Wayfinder replied to Ospreybob's topic in Mechanical & Technical Tips
Lee on FB showed pointed me at the check valves. I was looking right at them, but didn't know for sure if those were the check valves. Updated pick. I ordered three of them to keep a spare when someone at a rally needs one. It's going into my parts list/log. -

Problem with city water connection
Wayfinder replied to Ospreybob's topic in Mechanical & Technical Tips
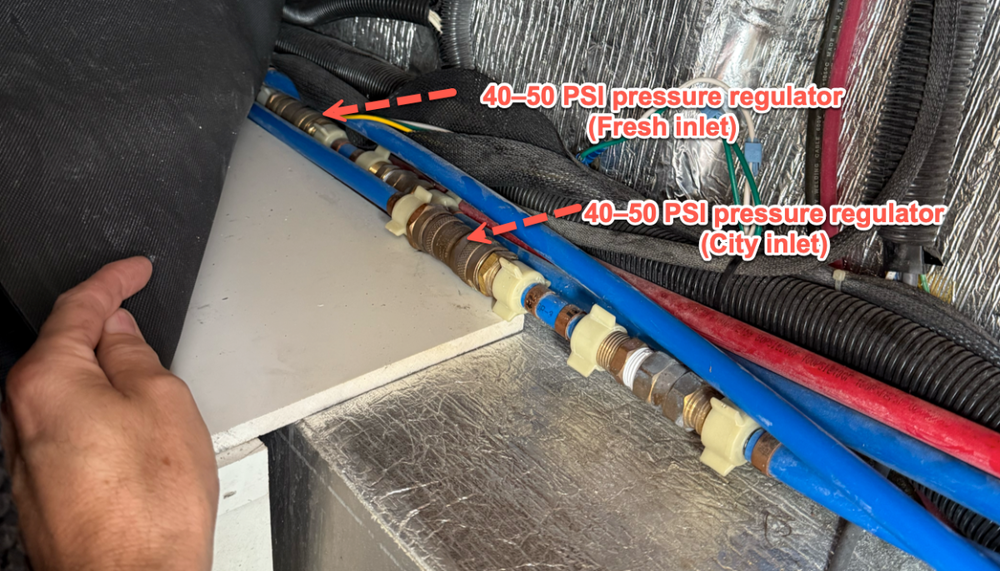
@jd1923 I also have a 2016 (#110). I think my check valve to the city water inlet has gone bad. I have not truly identified the check valve itself, but I am surprised to see both City and Fresh inlets have 40-50 lb pressure regulators in the basement. Good to know. At least we have less of a chance of plowing a line from the inlet to the pressure regulator. Would these also contain a check valve within? I don't want to undo anything unnecessarily. I'll check the hex nut/screw inside the intlets too, but they don't seem large enough for an actual check valve. If the dirt cover is not screwed onto the city inlet, and the water pump is turned on, water does come out of the city inlet. Just discovered by accident this weekend. -

New axles may not fit all older sub-frames
Wayfinder replied to Wayfinder's topic in Mechanical & Technical Tips
yeah, I'm not really up for all that. My full-time job is keeping me busy enough. The old body doesn't like it either. -

New axles may not fit all older sub-frames
Wayfinder replied to Wayfinder's topic in Mechanical & Technical Tips
Huh, I submitted a ticket to OTT service but never heard anything back. I’ll need to give them a call about the 50” axles. -
Not too far from home, but had a great time in Appling, GA with a beach-side camp site at one of the few parks open this season, after last October's hurricane. Lots of paddle boarding, cycling, and swimming was done this week. Not bad for $25/day at Wildwood Park.
- 799 replies
-
- 11
-

-

New axles may not fit all older sub-frames
Wayfinder replied to Wayfinder's topic in Mechanical & Technical Tips
Well, I know I dropped off for a year. It's been busy. I can't wait to retire. I just opened a ticket with OTT to see if they can custom order the axles with the SC=50" measurement. I will triple check tomorrow as I'll get under the trailer again. We'll see what they say. Thanks to all for all the great information. Priceless. Chris -

My how-to video for cleaning the weep holes and tracks
Wayfinder replied to Wayfinder's topic in Mechanical & Technical Tips
Great tip @Snackchaser. I'll try to remember as I am asked often about them. I gave my new white strips to another Oliver owner when I received the new windows. I had Oliver put on the black weather stripping. I'm afraid to see if it's a separate line item on my invoice. No, I will not look. No. @Ollie-Haus add that to our list of "to-does". “30 Second Outdoor Cleaner” (ACE) LOL Chris -

My how-to video for cleaning the weep holes and tracks
Wayfinder replied to Wayfinder's topic in Mechanical & Technical Tips
I do really dislike these windows overall. Waiting for the better windows. We'll see what gets announced soon. -
I did. It's deader than a door nail. Would likely need to pull the fridge out to find the break or re-wire to alternate location. Motivation low.
-

My how-to video for cleaning the weep holes and tracks
Wayfinder replied to Wayfinder's topic in Mechanical & Technical Tips
GJ, I was also recently thinking the same thing while washing on my last trip. I also now have the newer windows (replaced last year, 2024) which do not have that flexible & removable rubber track around the windows. I do think though that the newer windows drain a bit easier. I think I need to update the video for the newer windows. I'm thinking to recommend to use a mini-vacuum attachment to suck out any dry debris. That might make it easier to clean out when it does get wet. I'll do more videos when I'm retired, since I'm on the computer ALL DAY LONG for work, for 35 years. I'm done with them. LOL -
Being directed to Jason Essary now, on hold.
-
I also forgot to register, as did Steve C., who also forgot when. Oh well. I'll wing-it. Too much life stuff this year to keep up.
-

Replacing corroded tail light bezels.
Wayfinder replied to KenB's topic in Mechanical & Technical Tips
Dang it, I had not ordered the lights yet, and refreshed the page this morning and they went up in price a bit. Now $35.66. Ordering now. LOL -

Replacing corroded tail light bezels.
Wayfinder replied to KenB's topic in Mechanical & Technical Tips
Thanks @KenB. Your info on the Bezel replacement lead me straight to the entire light replacement part on my 2016 Elite-II. I think I will order two lights, and three extra Bezels in order to replace all the bezels and have one spare light on-hand. There's other great hints in this thread for removing the Bezel. Thanks @Corvus Ordering from E-Trailer: Piranha LED Trailer Tail Light w/ Chrome Bezel - Stop, Tail, Turn - Red Lens https://www.etrailer.com/Trailer-Lights/Peterson/PE76XV.html Part Number: PE76XV $34.02 (as of January 2025) Peterson Trailer Lights - PE76XV Tail Lights Oval LED Light 7-1/2L x 3-1/4W Inch Surface Mount Stop/Turn/Tail Non-Submersible Lights Peterson Specs: Overall dimensions: 7-1/2" wide x 3-1/4" tall Light dimensions: 7" wide x 2-3/4" tall Diodes: 10 Operating range: 9V - 32V Limited lifetime warranty -
I'm the only one I know of who has removed the door to reseal it. Super easy job. My door frame on my older 2016, #110 did have Olivers name on the Lippert factory sticker, so that might mean they're custom for Oliver's, or used to be. Would be an easy job to put on new door frame. Just have good quality butyl tape and double up the thickness of the butyl tape near the center areas of the door frame on both left and right sides. I have posted pictures on this thread .
-

Walk-in Lippert Door Seal/Putty Replaced
Wayfinder replied to Wayfinder's topic in Mechanical & Technical Tips
Sorry, I've been off the grid for a while. Please check with Oliver about "replacing the door". I think it's a custom order just for the Oliver. When I removed my door, the sticker on the outer frame, from Lippart, even had Oliver's name within the part information, if I recall correctly. I could be wrong, but best be safe and verify. My door frame was super easy to remove, okay fine, WAY TOO EASY. Most of the screw holes were too large for the screws. I think mostly held on with puddly. LOL. I added a few extra self-tapping screws just to be sure. -
Lots of opinions. I'm an extra-simple man. Carry extras at all times! I have 2 to 4 extra connectors just for the Andersen links. Two of the four are heavier duty. But, since I've been carrying all that extra stuff for three years, have I had an issue? Nope! Go figure. But I inspect ALL connection points every time I get out for a break. I have 13-points of interest to put my hands on, just for the hitch area. Andersen, Oliver, and any traitor maintenance company is simply going to out-source that part, and hope they're buying a high-end product. Damned if we can tell which Chinese part is good at the big-box-stores here in America. All we can do is bight it, lick it, and try to bend it with our barehands. "Yup, looks good." Many don't even have a strength indicator on them. Very annoying.
-

Victron Smart Shunt - alternative to the BMV-712
Wayfinder replied to Overland's topic in Ollie Modifications
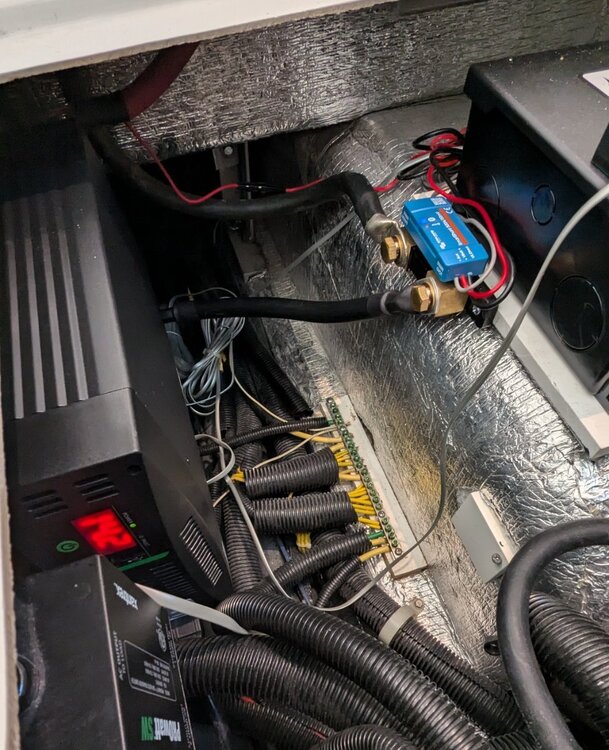
Thanks JD! That makes good sense to me now. I do have at least two negs going to the batteries directly. And everything you said about the 6 AWG yellow wire is correct. I tried to note that in the overlayed pic. I'll see what I can do about moving those wires. -

Victron Smart Shunt - alternative to the BMV-712
Wayfinder replied to Overland's topic in Ollie Modifications
Hey all, if I understand @GraniteStaters initial mistake, by-passing the DC side of the negative connections, I think I did what he did. I only hooked up the AC (inverter) side to be monitored by the Inverter. I think I need another busbar like he installed (purple box in my pic). I've tried to figure out the solution from his pics, but I want to be clear about it. Here's what I have so far. Here's a clean pic without overlayed graphics and one with overlay. Not sure how clear this is to understand. The Victron Smartshunt is working fine, except I do not see any DC loads on monitor. I now understand why, just want to clarify the solution. Any detailed diagrams are welcome. Thanks! -
Not entirely related to the question, but I too, for the second time since 2021, emailed Ryan at Sun Forge to verify settings on my new LIFELINE 6 volt GPL-4CT AGMs (x4). Ryan not only sent me his suggestions in one day (over the weekend), but also suggested, from his (and their) many years of experience, to set these up for equalization. So I did. He said many or enable the equalization on these particular AGMs are getting 10-12 years of life out of the batteries. He has one customer who equalizes daily, only for a short time (.05H/100AH) who is now on year 13. Wow. The #4 DIP switch is a bit challenging to get to, but I managed to flip it to "ON". I don't expect to have this same trailer that long, and if I do, I will "likely", and eventually move up to Lithium. But, for now, my lifestyle in the camper does not require that much power, but it might some day. OTT had changed out my batteries when I was there in July for other service. My crappy ones died and did not want to rush into Lithiums by myself. Cudos to Ryan!!!

