
Wayfinder
-
Posts
519 -
Joined
-
Last visited
-
Days Won
8
Everything posted by Wayfinder
-
I think my spare on #110 is smaller than my current, and original Michelins. Not sure I can get one of the main tires into the spare cover. I've kinda tried once. Seemed like it would be too tight. Anyone else seen that before?
-
@SeaDawg again, thanks for all the good advice. @topgun2 I'm starting a clean thread on this as not to drive SeaDawg crazier. LOL I was hoping to do a systems upgrade in pieces, if possible. First converter (in the mail), then batteries, etc - if that makes sense. Right now with hull #110 (2016), I have all original equipment, except batteries. Currently Flooded lead-acid. I have the Xantrex 2000W inverter with the BlueSky Solar controller and ProRemote. I did just pick up a new Victron Smartshunt, but holding off installing it until I choose new batteries. I'm an IT guy of 30 years, so not a complete dumb monkey, but maybe a bit slow at first. LOL. I'm always scared to try new things by myself, failing with someone else is not that bad. Also just ordered the new Progressive Industries converter (PD4045CSV) to allow for Lithium charging. Great threads on these forums for all that stuff! I was wondering if the Bluesky Solar controller can be configured to properly charge most Lithiums. I can always call Ryan, if he's still at BlueSky. He showed me how to configure the controller using the ProRemote panel. I'm okay with it. Naturally, I'd love all Victron stuff, if it would fit nicely. And again, I want some hand-holding by a qualified person. Maybe I'll seek out a pro who would allow me to work with them to learn. Some do, especially in the Van community. I'm not yet looking at running the A/C off of batteries. That'll take a newer A/C unit. Not a priority at the moment and keeping it as simple as possible. Realizing I'm just learning and dreaming, and there are MANY paths from which to choose, here's just one idea I was recently considering, due to battery form-factor in the current battery box & tray area. I'm sure there are negatives I'm not thinking about yet. Can I, or should I, do this in stages? Naturally money will be a factor, and I'm a working stiff, so time can be an issue. One thought is to install two 320AH Dakota DL+ batteries to make for a simple and clean wiring setup with redundancy built-in. I was briefly considering a single 320AH battery from Dakota, or any good battery, however, that does not give me any redundancy if one battery fails on a long trip. I'm okay with Battleborns, 12v 100AH, but I'd want very clean connections, maybe a custom bus bar to connect all the batteries with shrink tubing and covers to protect connector bars. At best, I currently only have 160 Ah useable in my old crappy lead-acids. Likely less due to age. Pics are not to scale. I am subject to all the things I have not yet considered, that you will teach me. LOL Thanks!

-

Cricket noises from the lights
Wayfinder replied to Going Coastal's topic in Mechanical & Technical Tips
Thank you @SeaDawg and others for the assist. As i'm still honing my skills in Solar, electrical, etc. I'm nervous about venturing too deep by myself, and all at once. -
Cricket noises from the lights
Wayfinder replied to Going Coastal's topic in Mechanical & Technical Tips
-
Cricket noises from the lights
Wayfinder replied to Going Coastal's topic in Mechanical & Technical Tips
Thanks Bill. I thought I found it on Amazon the other day, but when I just looked, I could only find the 60 amp. Oh well. I just got it from eTrailer for now. I'll love to pick your brain about if you moved to Lithium on your own, and what pieces you ended up changing out. Thanks Much. I can call you if it makes things easier/quicker, whenever is convenient. No rush. -
Okay! It's time to get serious about ensuring all my electrical connections are tight enough. Over the years I've found quite a few lose connections in the old #110. Including nearly burned out connections inside the auto-switch box, very brown plastic bus bar. I don't know what is good or what is crap out there in terms of a "good-enough" torque screwdriver (or wrench). I've seen some reviews saying some are difficult to hold over a certain torque spec. Any experienced owners out there who could recommend something? Just enough to support anything in an Oliver. I don't need to get crazy with it. Thanks!
-
Cricket noises from the lights
Wayfinder replied to Going Coastal's topic in Mechanical & Technical Tips
And here I was just researching upgrading the converter from an old PD4045 (lead acid only) to the newer lithium-capable PD4045CSV. Since I have tinnitus, it does not bother me to hear those "crickets", but it sounds like, no pun intended, that upgrading the controller in preparation for a Lithium upgrade will kill two birds with one stone. Since I don't trust purchasing the parts like this on Amazon anymore. I'll get it from Etrailer. I've used them before with great success. https://www.etrailer.com/Accessories-and-Parts/Progressive-Dynamics/PD4045CSV.html -
I must be miss-reading this, with my old brain. But "Agilis" CrossClimates are Michelin. They're awesome so far. But time will tell.
-
I'll carry a pressure gauge when I'm at the factory. That won't look suspicious at all. LOL. I'll wear my Oliver hat I got at the rally. hehe
-
Has anyone had success re-sticking the tank sensors to the tanks? In my case the fresh water tank, and likely the grey tank, sensors are starting to peel up from the bottom. They still work, as well as ever, but eventually they will peel off completely.
-
Congratz on the new tires @csevel. I'm too late to this thread, but I also went with new Michelin Agilis Cross Climate - LT225/75 R16. I love 'em, but I'd love any good reliable tire that is round and black. Many folks love those coopers. Keep them covered when not in use! I'm still a bit confused though. After all these years of many forum threads mentioning pressure from the factory, why are they still putting 80psi in them? I understand if one blows that will place more "pressure" on the others, but 80psi is one hell of a hard ride. I also keep mine at just under 50psi, but I travel extremely light too. No much extra in the way of toys, yet. I'll be at the factory in July getting the new suspension upgrade and windows on the old #110. I'll ask that question there. I forgot to open up that can of worms at the Alabama rally. LOL
-
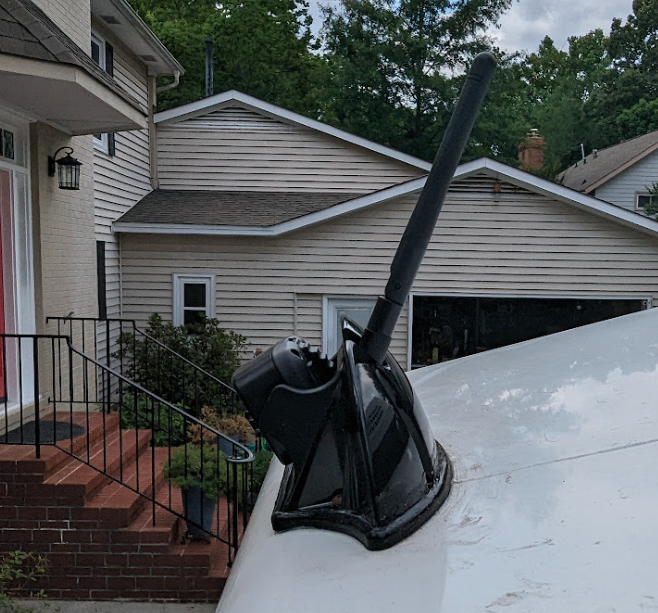
The Furrion S cameras may be a bit of a challenge, but I may try a molded plastic cover with 3M adhesive tape, or, I have some friends into 3D printing. If that did not void any warranty, a 3D printed white cover could be added to every Ollie with that Camera. I'm thinking the 3D printed cover could potentially look quite nice, if done well. It could also have screw holes used by the camera's provided screws.
-
Outdoor Shower faucet is cracked
Wayfinder replied to Wayfinder's topic in Mechanical & Technical Tips
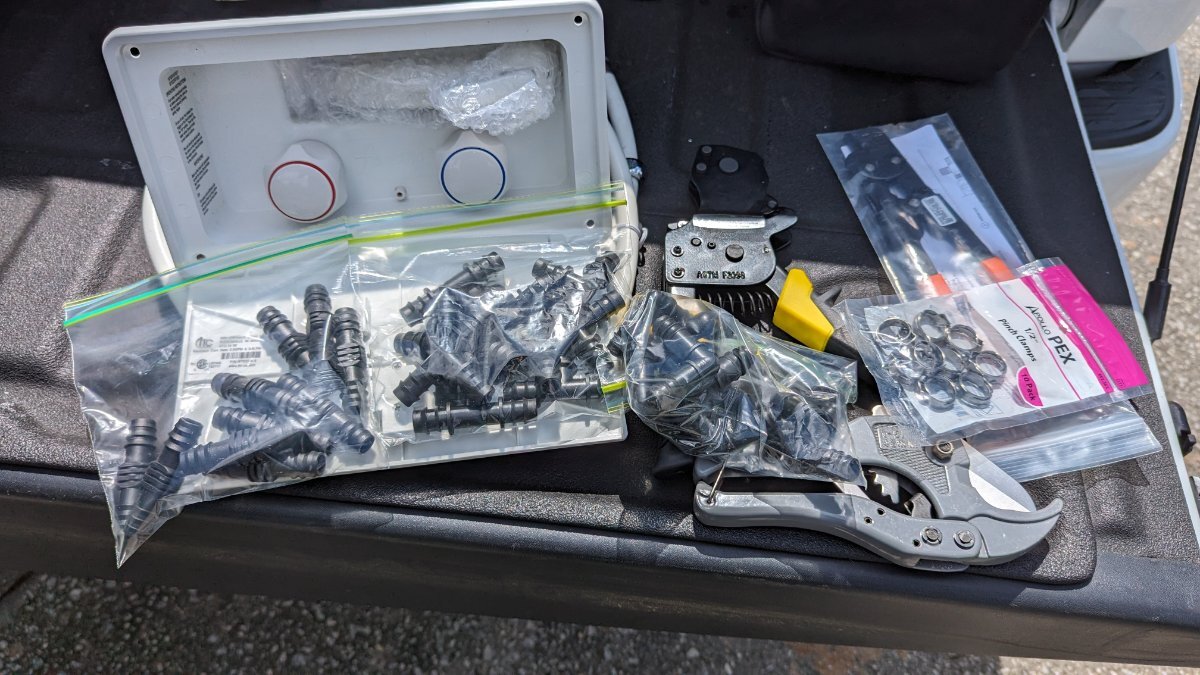
I'm looking forward to replacing the outdoor shower, but it will have to wait until I get to the rally. Part just arrived. Q: Can you make a deck chair from PEX piping, like all the things you can make with PVC? LOL. Just kidding!
-
Outdoor Shower faucet is cracked
Wayfinder replied to Wayfinder's topic in Mechanical & Technical Tips
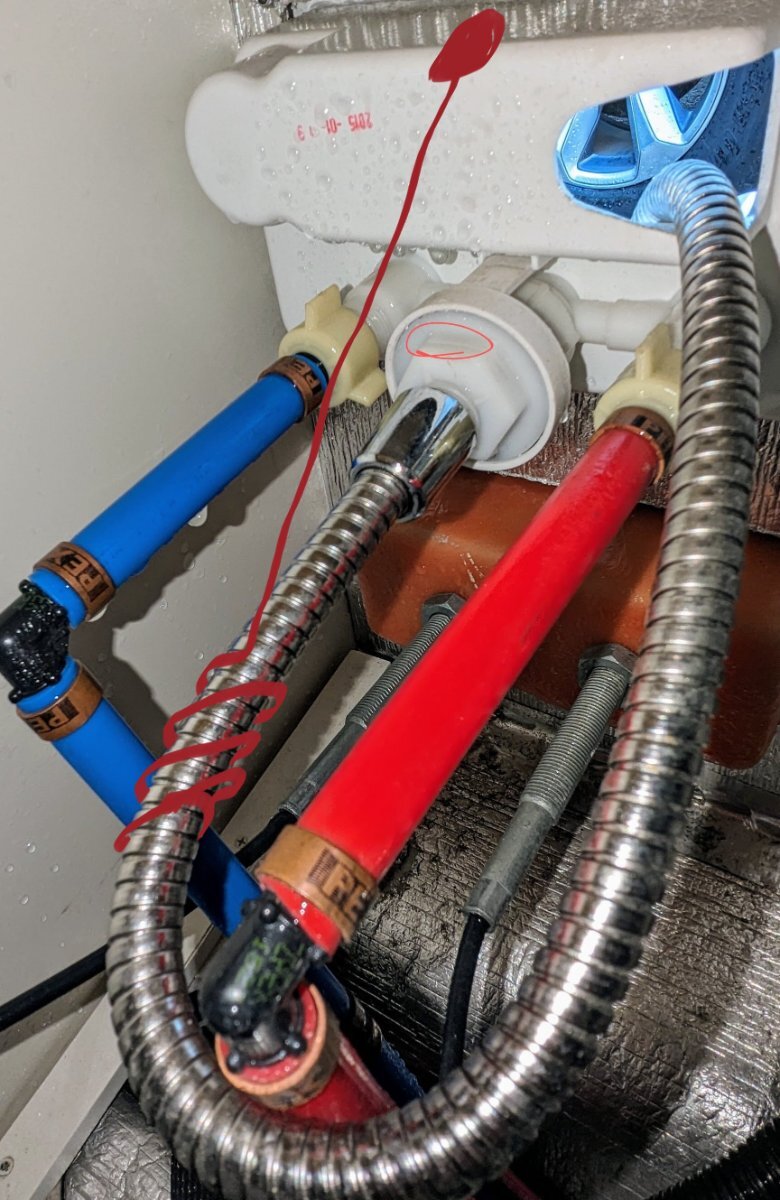
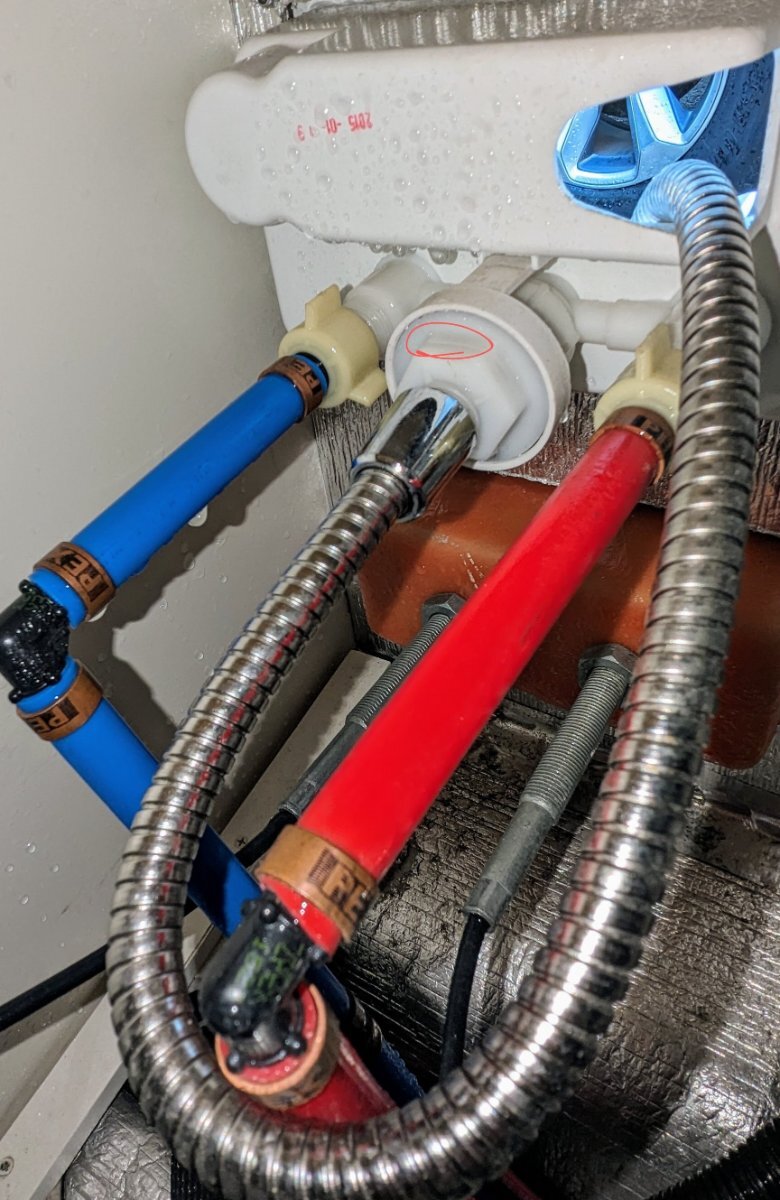
I considered that, but then I could hear someone, rightfully so, say it would put too much stress on those Pex pipes. If those leak, there's no stopping the leak without killing the water and pressure in the lines. If the faucet likes as it has, it only leaks when using the outside shower. Not a bad compromise. The part is actually suppose to arrive this afternoon, so I might be replacing it at the rally. Something fun to to do. -
Outdoor Shower faucet is cracked
Wayfinder replied to Wayfinder's topic in Mechanical & Technical Tips
After looking at my picture of the faucet, I think I'll try some support using the faucet housing itself. Something like this I suppose.
-
Outdoor Shower faucet is cracked
Wayfinder replied to Wayfinder's topic in Mechanical & Technical Tips
I also thought something like that, however there's WAY too much to catch on in that area of a hull, unless the hose was pushed back into a "baggie" like pouch, but still, it's Chinese plastic I'm sure. It won't last long no matter what. -
Outdoor Shower faucet is cracked
Wayfinder replied to Wayfinder's topic in Mechanical & Technical Tips
Yeah, I don't seem to deal with those extra charges. Or maybe they're so hidden that ignorance is bliss. That's how I make it thru life. -
Website and Forums Migration 4/27/2024 - Completed: 4/29/2024
Wayfinder replied to JWalmsley's topic in General Announcements
I had to look at the page source to see who makes this forum software. Hopefully they do good by Oliver. I've been... "out of touch" for a while (no comments please), and the web pages looks nearly the same as I remember. Good job in the upgrade/migration. It appears to be "seamless", unlike much of the gov't IT work I've had to support in my career, which was "seems like less". Very similar, but different. 🙂 Great job. I'd rather use these forums over using "the facebooks". Seems more personal in these forums. -
Outdoor Shower faucet is cracked
Wayfinder replied to Wayfinder's topic in Mechanical & Technical Tips
I Amazon'd it. Thanks! I have little faith in what I can find in my town of Augusta, GA. -
Outdoor Shower faucet is cracked
Wayfinder replied to Wayfinder's topic in Mechanical & Technical Tips
I was also thinking of Jerry Rigging cloth strip of something to better support that silver show hose, to take a bit of pressure of that plastic fitting. Also, I will likely add line marks or colored electrical tape (yellow, then red) as the... "do not pull any farther out" warning markers. Will work for me. I will likely add a bit more silver insulator material on the walls around that shower faucet area. Just to help a tad bit more keeping things warming in lightly cold weather. I always keep extra insulator inside the faucet box, inside the door, just to "attempt" to improve thermals. The new part is on order from the dreaded Amazon. Camping world did not have the exact part, and I wanted exact if I can get it. -
Well, of course I had no time to conduct a proper PMCS (Army maintenance check) on the Ollie until 6 days before departure. Retirement can't come soon enough. Now I see the outdoor shower faucet assembly is cracked inside the hull. I noticed it while bleeding air out of the lines. Water was poring out of the weep holes in the hull and water dripping over the wall into the basement compartment. Oh well, not a show shopper. Only leaks if outdoor shower is turned on, which I seldom use. Hopefully Camping World (yuck) will have the part on hand. If not, oh well. After the the rally. Maintenance, maintenance. #110 is showing her age. Maybe I will do a YouTube of it, we'll see.
-
Using Google and the forum search, I cannot find any info about pulling out the large windows to properly reseal them. I tend to find my own maintenance posts, not helpful. LOL. I pulled off the walk-in door last year and that's been perfect ever since. Naturally the minor leak in my rear side window is getting worse, and now only a week before I leave for my trip to the Alabama rally. I'm considering pulling the window out tomorrow, but that seems risky with the rally so close. Yes, my tracks are very clean! I have a how-to video on the subject on YouTube. The black removable seals are as tight as can be to the lower vertical window frame (middle). I have rain gutter guards. I've placed plastic over the window, but NOT the exterior light above the window, and there were no leaks, so, it's the window or frame. The good news is, there's no water in the hull, only on the kitchen-side bunk, pooling. I'm a solo traveler, so I'm thinking of traveling this time without that side's mattress, just in case, but that's usually my excess storage area. At least it's on the awning side of the camper. Helpful when not driving. The leaking is in the direct CENTER of the window, under the center support frame. Useful info? My slider window does NOT remove, from what I can tell. I wanted to inspect that area, but cannot. Other's mentioned that their slider window does remove. Mine does not have enough up/down space to remove. Again, it's a 2016 demo model. I thought someone mentioned replacing or resealing windows in the past on this forum? Does anyone know where that thread is? My search results stink. Thanks much. Dry or wet, I'll see you at the rally.
-
I guess I'll check my springs tomorrow when it's dry out. I'm not sure how "good" my 2016 #110 springs are. I still need to install my EZ-Flex suspension kit I have sitting in the box. Need to pick up a new grease gun too. Great info on this thread. Thanks for sharing.
-
awesome! Jenna King on FB also gave me the idea of creating a cover from recycled plastic. I might do that too.
-
Thanks Bill