-
Posts
65 -
Joined
-
Last visited
My Info
-
Gender or Couple
Male
-
Location
Louisville, KY
My RV or Travel Trailer
-
Do you own an Oliver Travel Trailer, other travel trailer or none?
I own an Oliver Travel Trailer
-
Hull #
1420
-
Year
2023
-
Make
Oliver
-
Model
Legacy Elite II
-
Floor Plan
Twin Bed Floor Plan
Recent Profile Visitors
582 profile views
Boilermaker Chemist's Achievements
-
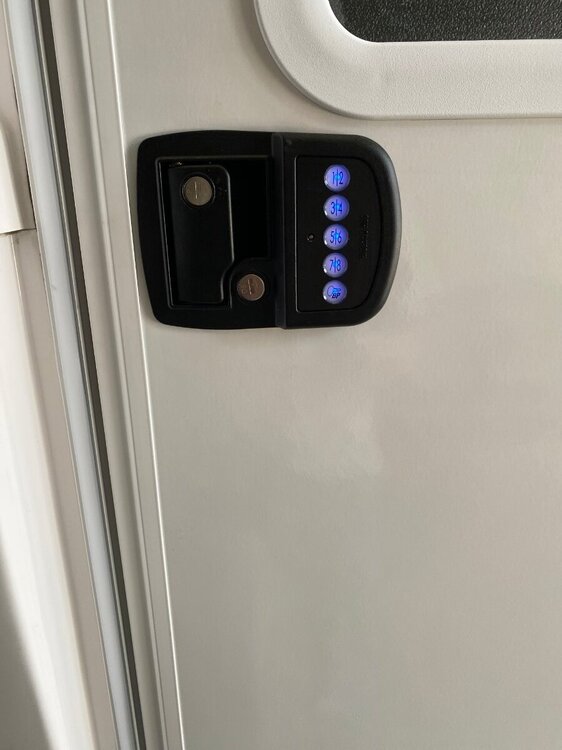
I get that. On the other hand, I had to replace the lock anyway, so keeping in mind resale, I decided to upgrade to the keyless entry lock which many people like. When I sold my previous camper, the buyer told me that all the accessories that I had added was a key factor in their purchase. Plus the lighted keypad looks really cool! 😂
-
@Patriot thanks for the suggestion, here you go: https://www.campingworld.com/bauer-bluetooth-keyless-rv-entry-door-lock-124590.html?objectID=124590&queryID=46bc1a32228c9fdf516d0676ebf18aca&indexName=production_na01_campingworld_demandware_net__CampingWorld__products__default Also, E-trailer has a nice video review here: https://www.etrailer.com/RV-Door-Locks/Bauer-Products/BA53UR.html E-trailer also has spare keys for the lock too.
-
Boilermaker Chemist started following Haloview BT7 Touch Rear Camera installation on 2022 LEII , New Keyless Door Locks , Micro-Air EasyStart Installation on Truma A/C and 7 others
-
I just installed a Bauer Bluetooth Keyless Entry Door Lock. Currently on sale at Camping World for $217.
-
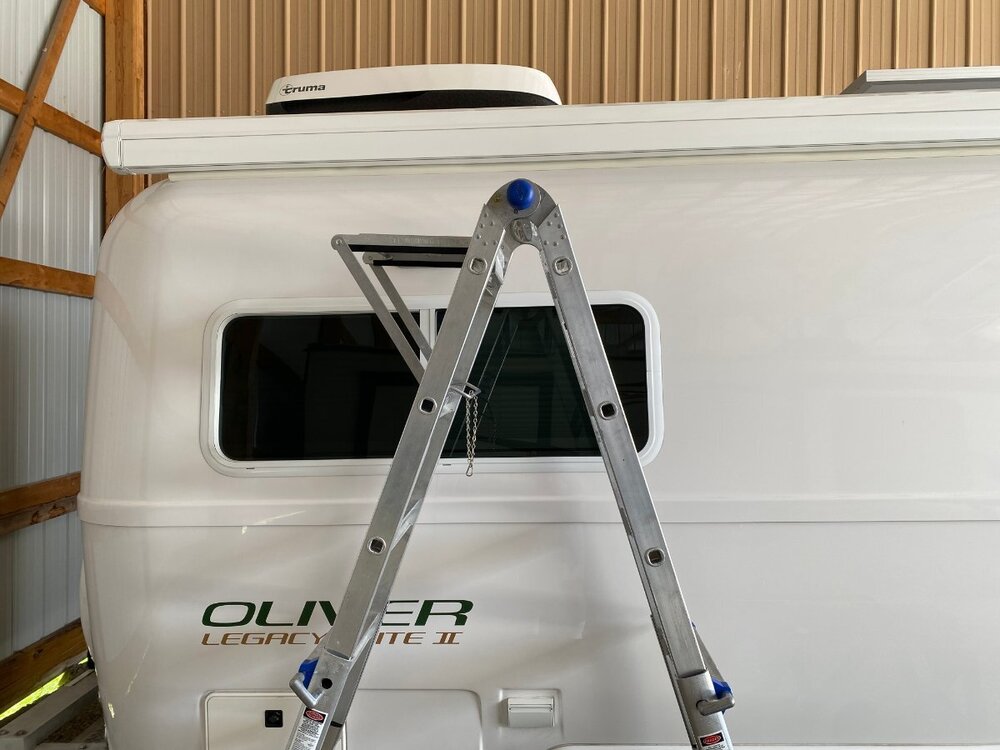
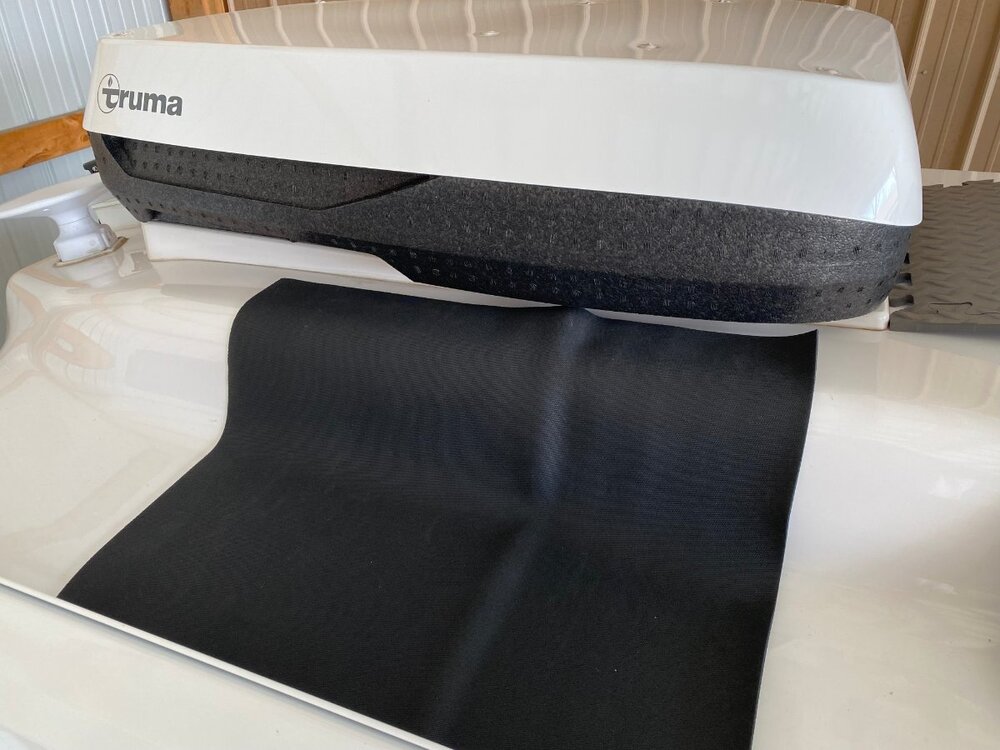
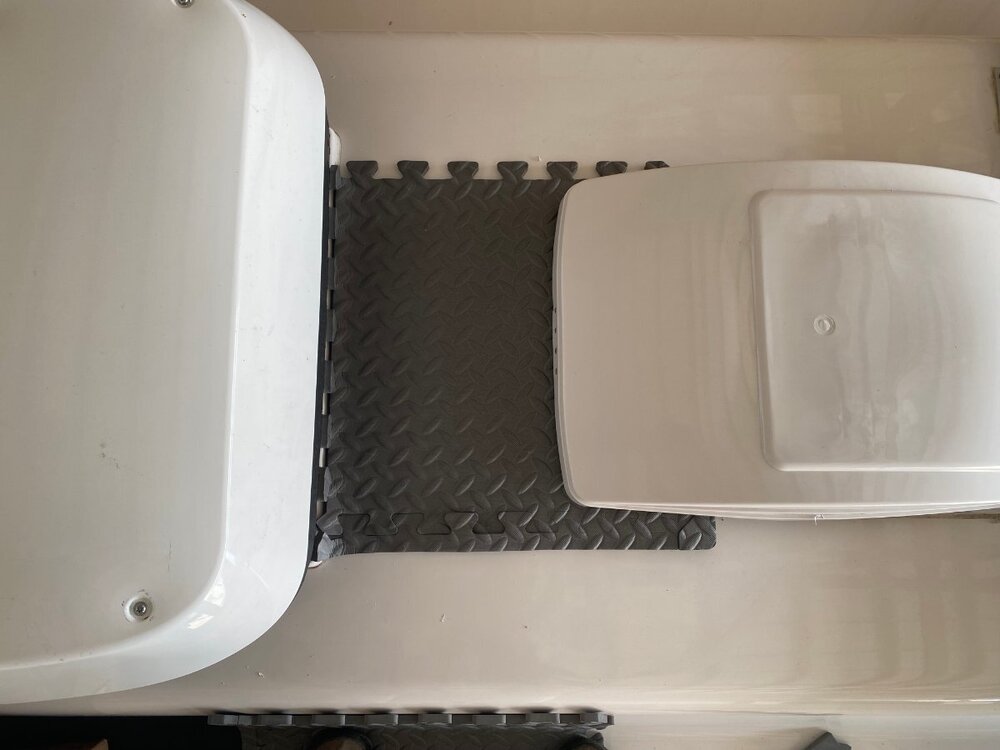
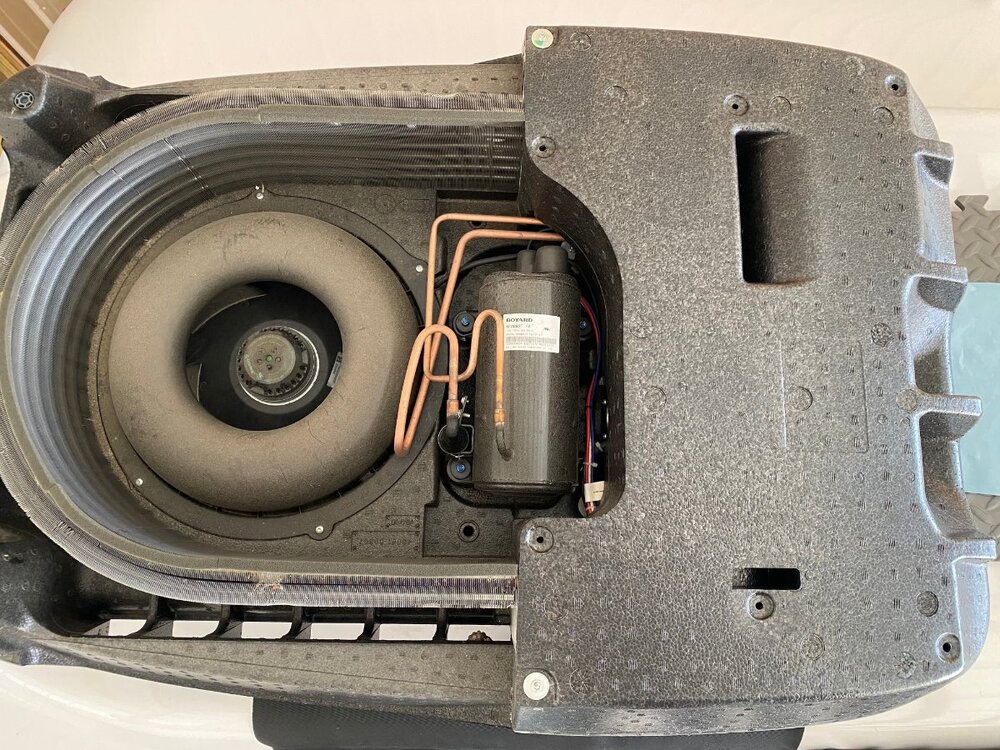
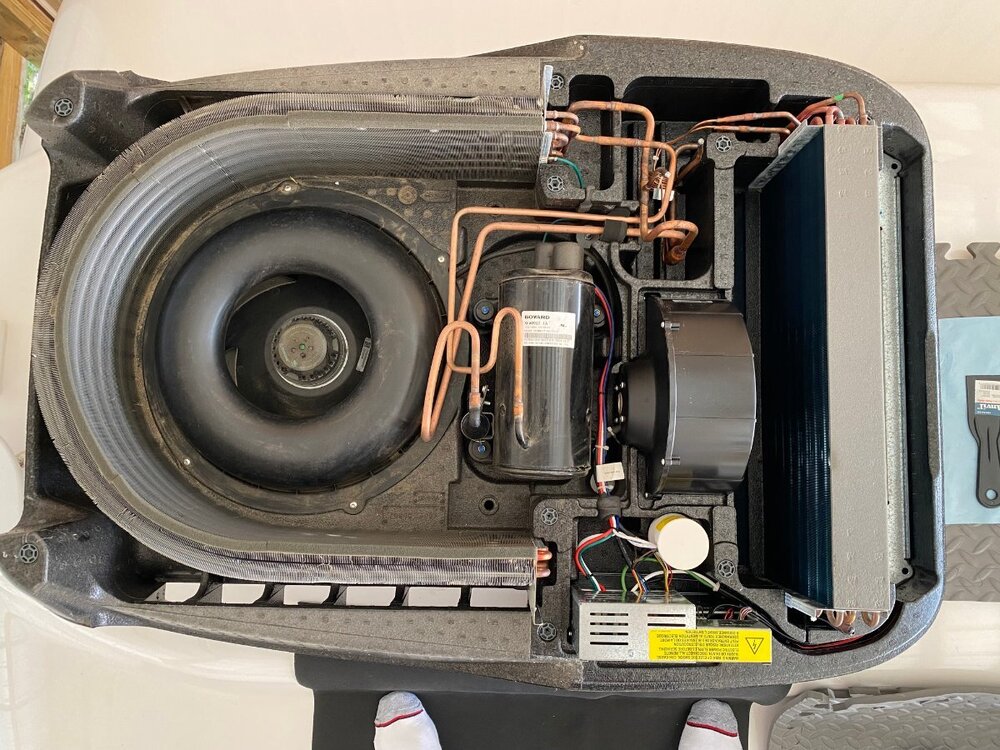
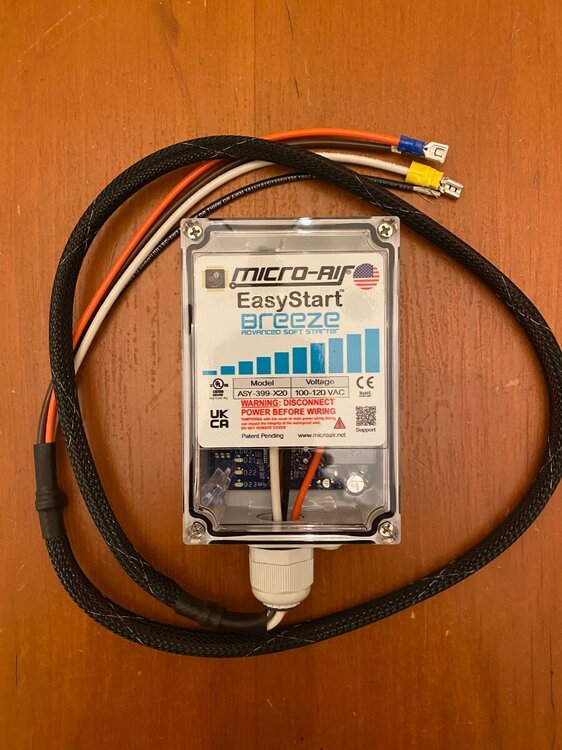
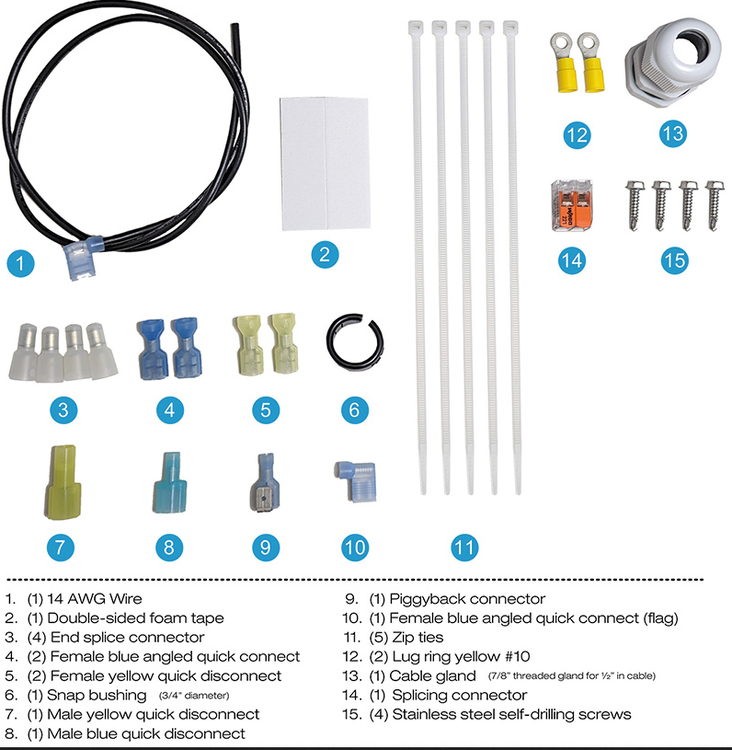
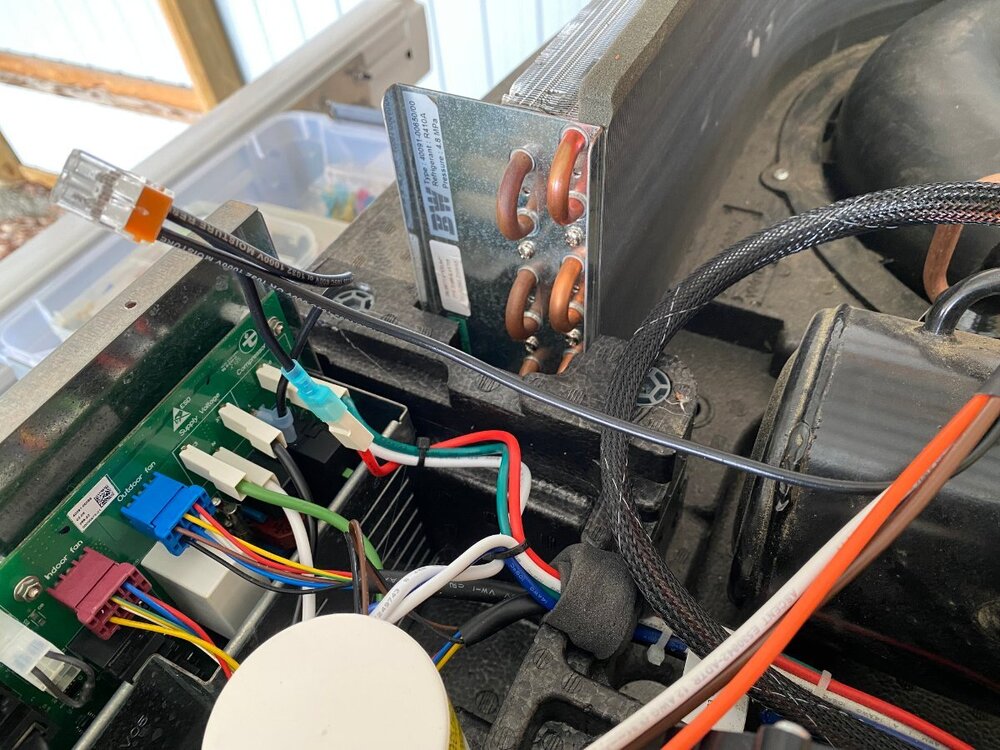
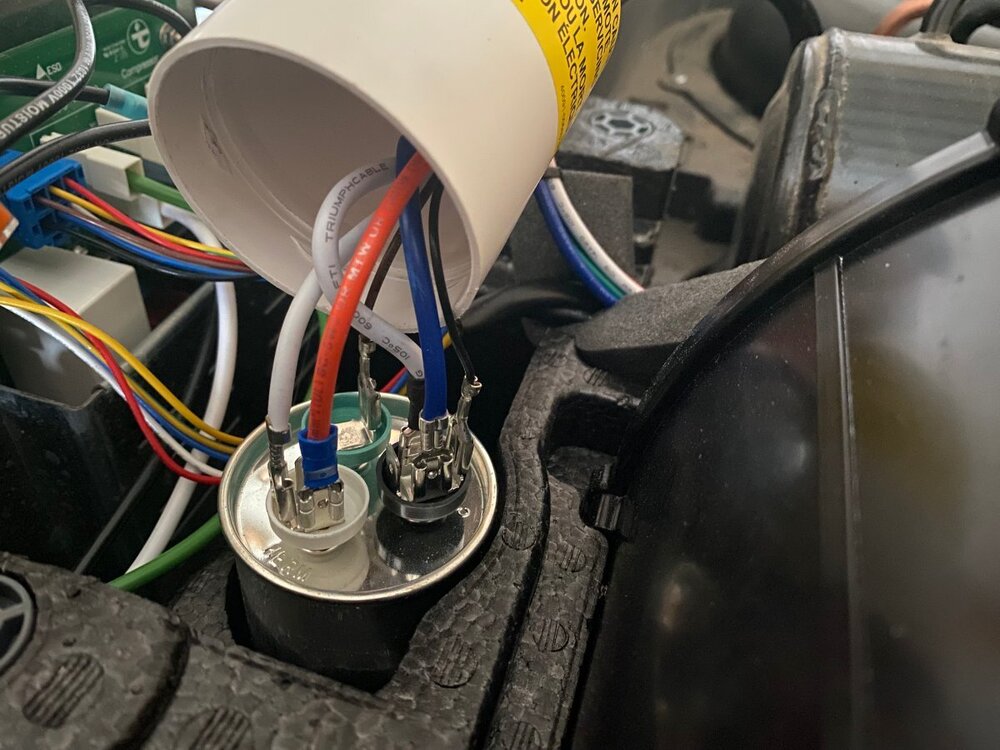
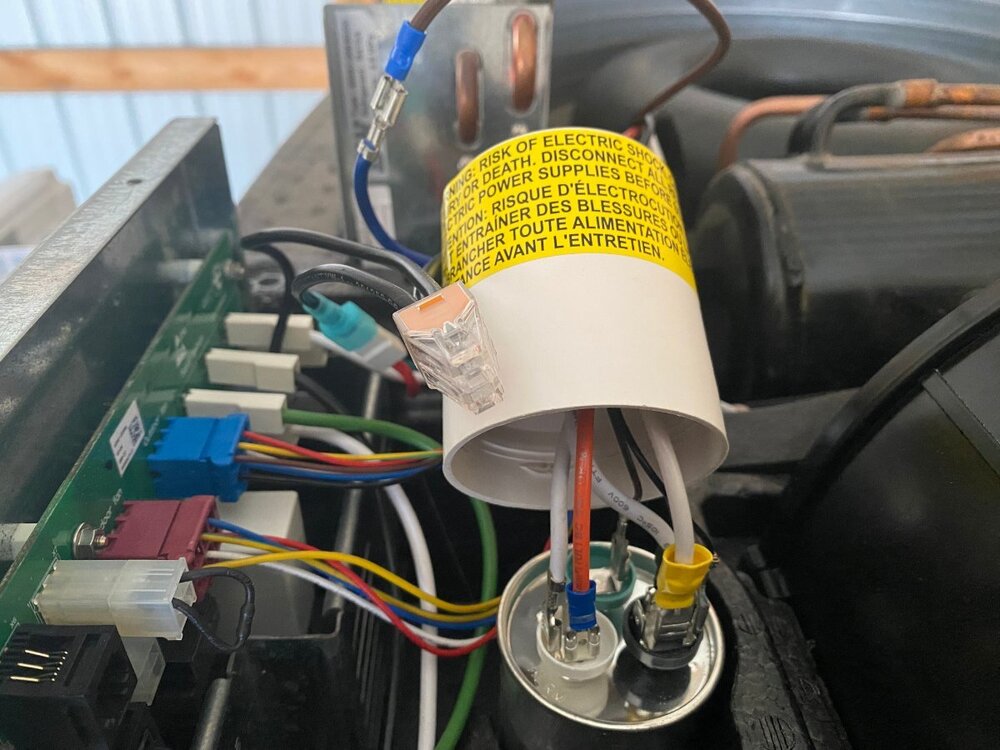
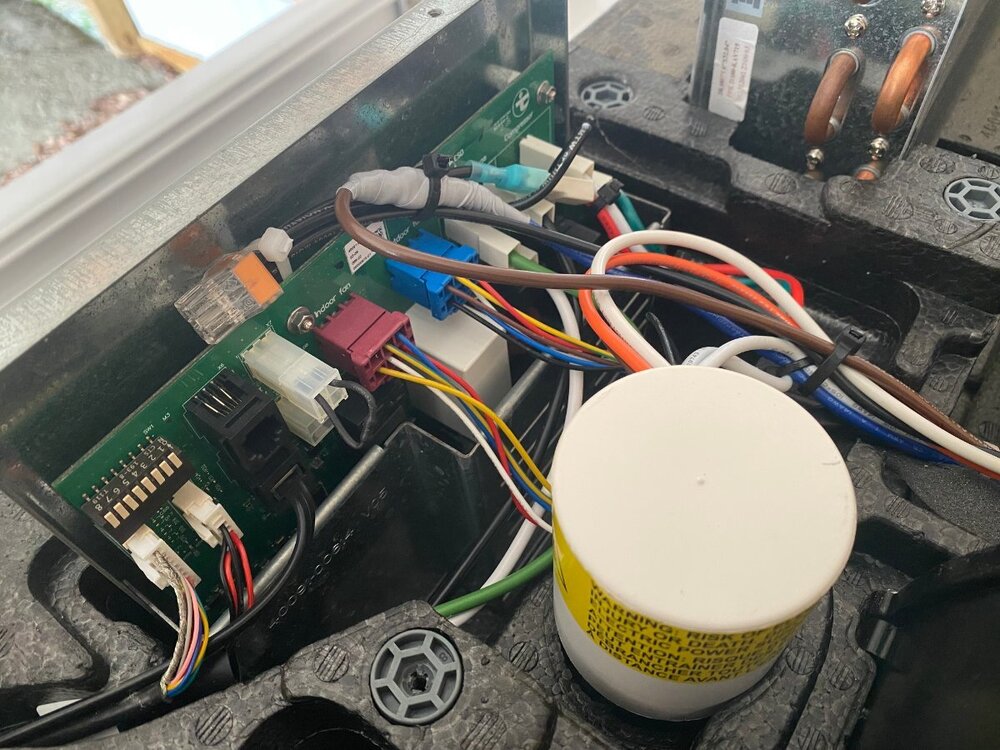
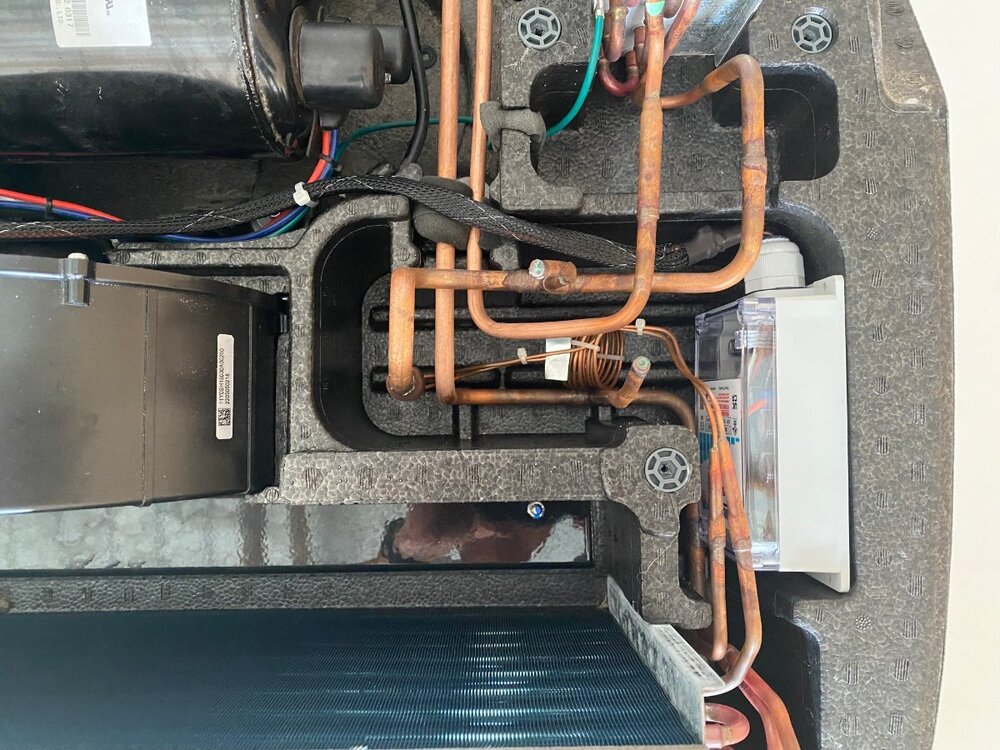
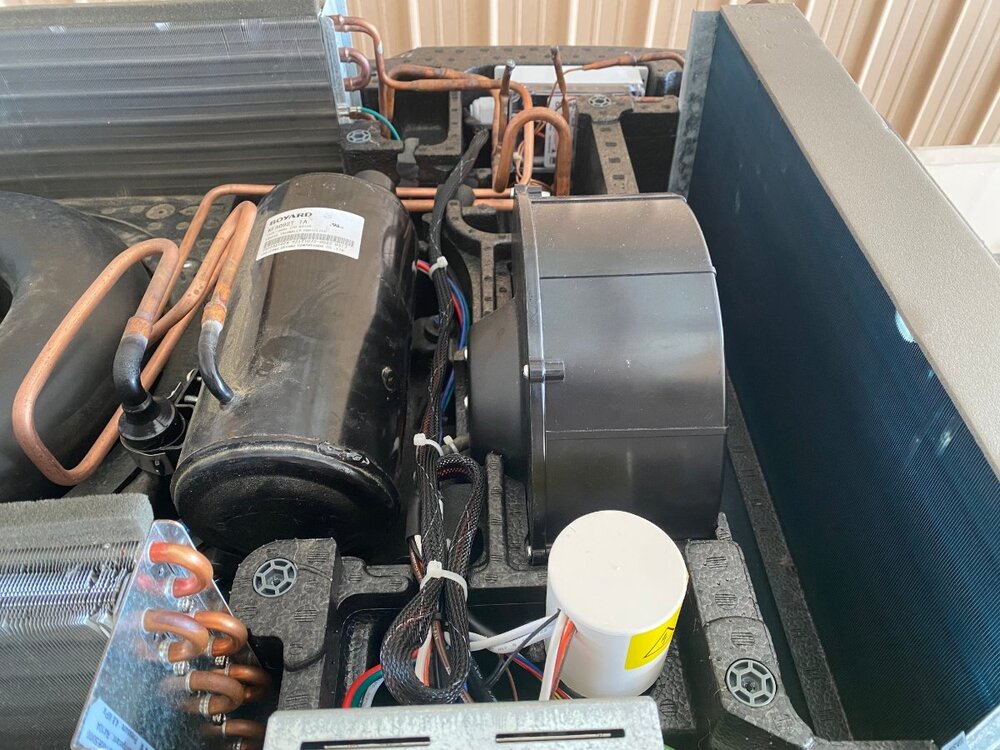
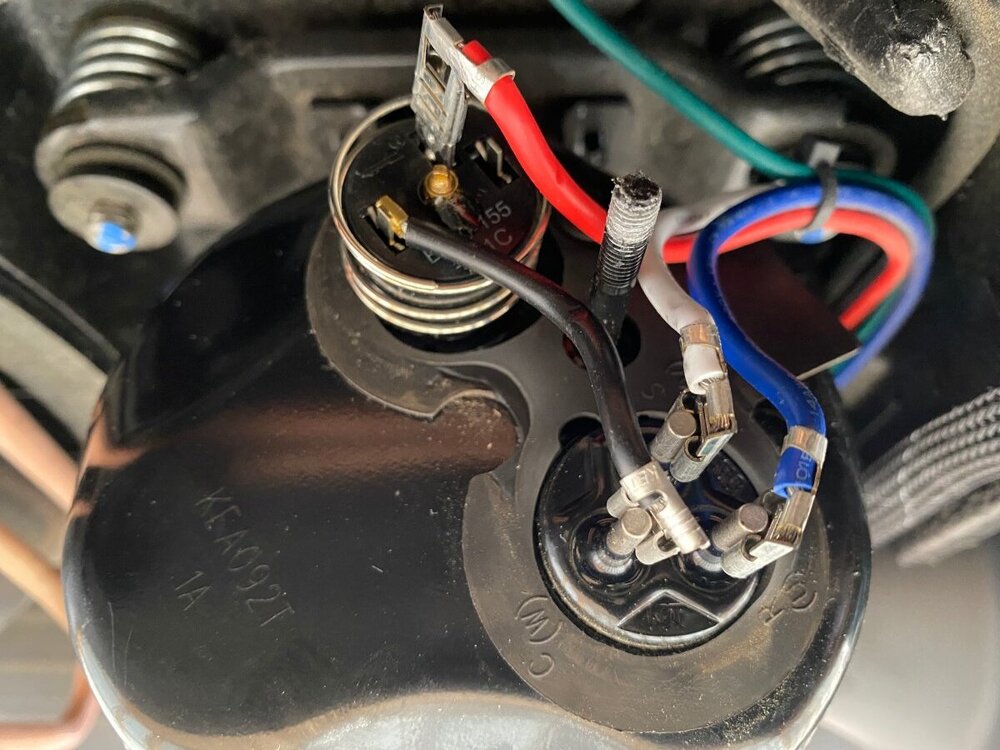
Since purchase of my OTT last year, I had been thinking of installing a MicroAir EasyStart on my Truma A/C. However, I wasn’t sure if it would allow my Truma A/C to run off my Champion 2000W generator, especially since I run it on propane and often camp at elevation. Fortunately for me I met @mossemi at the Oliver Rally last May and it turns out that he has the same generator and like me, runs it on propane. He told me that with the EasyStart, his A/C ran fine off his generator even at elevation. Thanks to Mike for that info. So now you can imagine my excitement when they announced that there were going to be ten EasyStarts given away at the Rally! But alas, I was not one of the winners. However, I met a nice couple from Oklahoma who did win one. And as luck would have it, they had decided not to use it, so they graciously gave it to me! Although I made several attempts, they refused any compensation. So I owe them a big thanks. Below are the details of my installation. First, thanks to @Patriot for previously posting this video: SoftStart Install on Truma A/C I found it to be very helpful for understanding how to remove the A/C covers, where to mount the EasyStart, how to run the wiring, how to get access to the control board and for making connections to the capacitor. However, DO NOT follow the detailed wiring instructions because the video is for a SoftStart not an EasyStart. Next, a couple of thoughts on safety. After I removed the A/C cover I found an old mud dauber’s nest. Fortunately it was not inhabited at the time. But they seem to like that area, so beware. Second, the video doesn’t mention it but you should make sure that the capacitor has been discharged before working around it. Since I’m not a qualified electrician, I won’t comment any further. Finally, I used my 17’ Werner ladder to get access to the roof. The optional Werner platform made this much easier. Also, accessing the roof from the curb side felt safer since the awning acts as a short railing. I used a sheet of rubber tool box liner and a piece of interlocking foam utility mat to protect the fiberglass and provide slip protection. With those additions, I felt safe enough to work in my stocking feet. As shown in the video, the white cover can be taken off by removing the eight screws (covered with lap sealant) with a T30 Torx driver (note that the two screws at the back are shorter than the others). Following that, removal of two additional T30 screws allows the foam cover to be lifted off. Be careful as you work with the cover off because the exchanger fins are easy to dent. Access to the silver electrical box is achieved by removing three T15 screws (one on top, and one on each side). Here’s the EasyStart device that I installed and the universal installation kit that comes with it: In general, I followed the wiring instructions provided by Micro-Air. I will say that I found the generic wiring instructions to be a little confusing (did I mention that I’m not a qualified electrician?). However, I was able to find specific wiring instructions for the Truma (that even I could understand) here: EasyStart Wiring Instructions for Truma A/C Although not necessary, I first removed the cap covering the wiring connections to the compressor motor with an 8 mm socket to confirm the wiring colors at the R, C and S terminals. (I don't know why but this photo is upside down and I couldn't figure out how to change it). I did deviate slightly from the installation instructions in one aspect, as I chose not to cut any wires but instead use terminal connections. That way, if I ever decide to remove the EasyStart, I can put everything back exactly the way it was. So instead of cutting the Red wire coming from the control board, I removed it and installed the provided 14 gauge Black wire with female terminal in its place. I then cut the Black wire and crimped on a male terminal to the portion not used and connected it to the female terminal on the Red wire that I had just removed. Finally, I used a WAGO push-in wire connector to tie these two to the black wire on the EasyStart. Next, after removing the white cap from the run capacitor, I installed the Orange wire from the EasyStart onto the Herm terminal next to the White wire. Then, I removed the Blue wire from the capacitor terminal and replaced it with the White wire from the EasyStart. Finally, I connected the Blue wire that I had just removed to the Brown wire from the EasyStart. Here’s a look at the wiring after everything was tidied up with zip ties: Overall, I’m pretty happy with the installation. However, looking back there is one thing that I wished I would have done and that is to add a bit of HVAC tape to the top of the EasyStart to give some additional support. I’m not sure how well the double sided tape will hold to the foam, especially given the conditions that some of our roads are in. I’ll probably go back and do that at a later time. BOTTOM LINE: After the install of the EasyStart, I noticed a very gradual ramp up of the compressor, as expected. More importantly, I can report that my Truma A/C runs very well with my 2000W Champion generator running on propane, even at 6000’ elevation. Added bonus: Unlike before, I can now run the A/C off my 15 A circuit at home. If you have any questions about this install, feel free to comment below.
-
- 11
-

-

-

2026 YM Oliver awning style windows and other changes
Boilermaker Chemist replied to Patriot's topic in Ollie Modifications
Considering the mixed reviews on the changes for 2026, I wonder if Oliver does any consumer research before deciding what to change. For example, has this forum ever been used by Oliver for customer feedback by way of polling the changes they are considering ? -
I would guess it’s the Dometic NRX 130C. I believe the door has to be removed to take out the freezer. Not sure how difficult that would be.
-

Truck Charging Wire location inside OTT
Boilermaker Chemist replied to dewdev's topic in Ollie Modifications
I would think code would require a fuse on that wire. -

Battery and Solar Disconnect Install Questions
Boilermaker Chemist replied to Tony and Rhonda's topic in Ollie Modifications
I’m curious, has anyone that has installed a battery disconnect switch addressed the potential issue of “inadvertently de-energizing the emergency breakaway brakes? I wonder where the power for that switch comes from. -
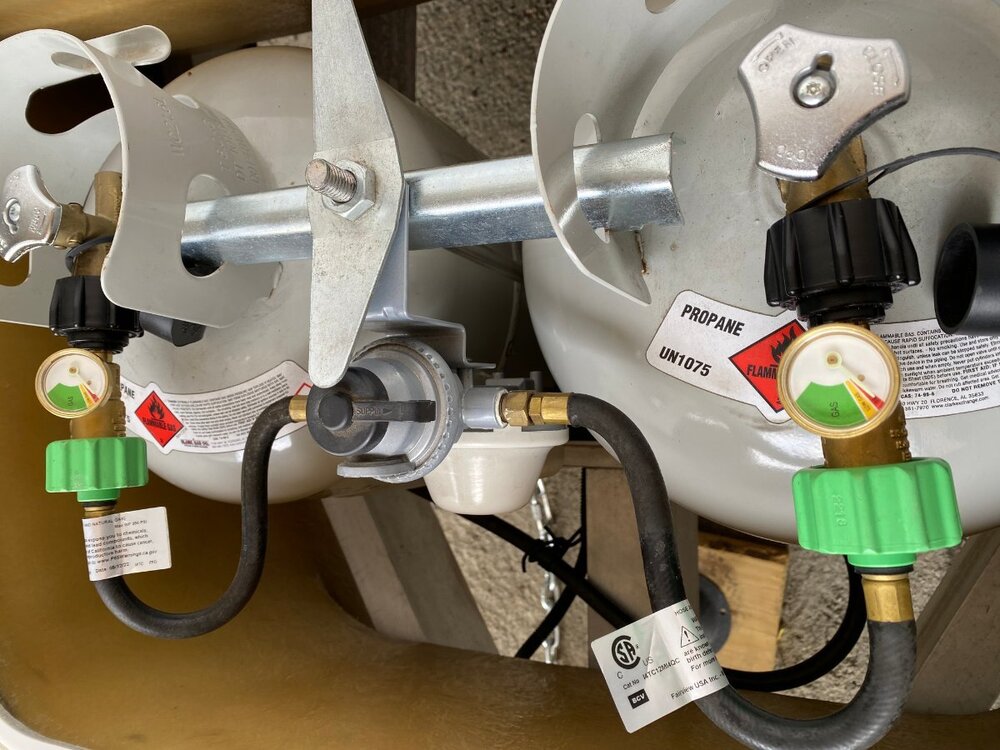
Well, it’s only been a few months, but so far they work great. I will say that the gauges appear to be much “beefier” than the tiny indicator on the manifold so my guess is that this will be a lasting solution. If not, I will repost any issues that I have. But for the minimal cost, I’m not too worried about it. Also, if one of them fails, I still have a backup.
-
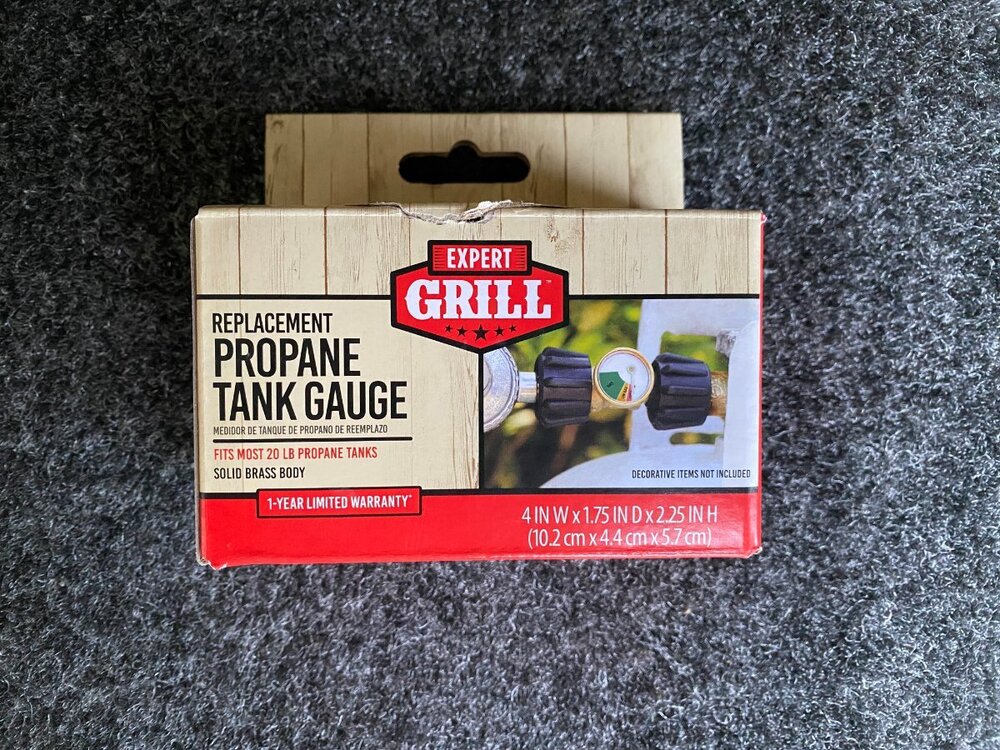
I came up with an equally inexpensive yet much simpler approach that also avoids the use of batteries. I thought about buying the tanks with integrated gauge from Costco that @routlaw mentioned but I didn't like the thought of getting rid of two perfectly good LP tanks. Then I saw these gauges at my local Wal-Mart for about $15. They simply screw right onto the tank. Just open the porthole access and peek inside to see if your tank is empty.
-

Haloview MC7108 Rear View Camera Install
Boilermaker Chemist replied to Boilermaker Chemist's topic in Ollie Modifications
@Steve Morris sorry to hear about your issues. Knock on wood I haven't had any issues to date. On my Winnie Minnie I purchased the external antenna and attached it on top of the air conditioner shroud. You might try that. But mine works fine on the Ollie without it. -

Haloview BT7 Touch Rear Camera installation on 2022 LEII
Boilermaker Chemist replied to dhaig's topic in Ollie Modifications
@Steve Morris, sorry to hear about your issues. Knock on wood I haven't had any issues to date and just posted my install to this forum. On my Winnie Minnie I purchased the external antenna and attached it on top of the air conditioner shroud. You might try that. But mine works fine on the Ollie without it.


