Search the Community
Showing results for tags 'elite 2'.
-
I’m hull 1139, Vic Shumate, purchased generator 2 days to help with running appliances etc,.,,,generator works great but Oliver says I need to change AC input settings from 25 to 15 on the Xantrex inverter remote panel while using generator as power source…..,,how do I change this setting on the xantrex?! I’m suppose to change it back when plugged into AC 30 for power! So I need to know how to set it!? Can’t seem to get batteries back to 12.5 -14 volts?! I turned the xantrex off! Will that help or hurt while running generator? I’m at a bluegrass festival in Okeechobee Florida through Sunday morning…….. my batteries dropped to 9.6 volts in 2 days while boon docking with roof solar panel, wanted to use generator to bring batteries back up but I’m not doing something right! Help! Got batteries back to 11.6 V today but do t know if it was solar panel or generator doing it!? Refrigerator says code C and Ice melting…not good! thanks
-
With the number of "bandito posts" on other's A/C topics (Such as the Truma threads), I figured that a separate post for those retrofitting their Domestic's to the Houghton A/C units would be in order. That way the Truma Team won't have to listen to all our interruptions on their threads. 🙂 It would be wonderful if our moderator(s) could relocated the many bandito posts (such as mine and others) to this thread. And God bless our moderators. Mahalo, GJ
-
 We winterized yesterday but we ran into trouble with the city water port. The hand pump could not pump antifreeze into the port. It was as if it were pumping into a closed valve. The pump worked fine on everything else but that port would not accept any antifreeze. It seemed to work fine last year. Rich & Yvette LE2 Hull 721 TV 2002 Chevy Silverado
 -
 Does anyone use a single or dual unit instead of using the propane stove?
 -
Our view this morning from Algonac State Park, Michigan on the Saint Clair River. The MS Hamburg cruise ship sailing from Milwaukee to Windsor. 400 passenger ship. Also caught a shot of this freighter earlier. Algonac State Park is a great park for watching freighters. IMG_8028.MOV

-
We are preparing for our last trip of the season then it will be time to put our Ollie into hibernation for the Winter😢! When do you winterize?
-
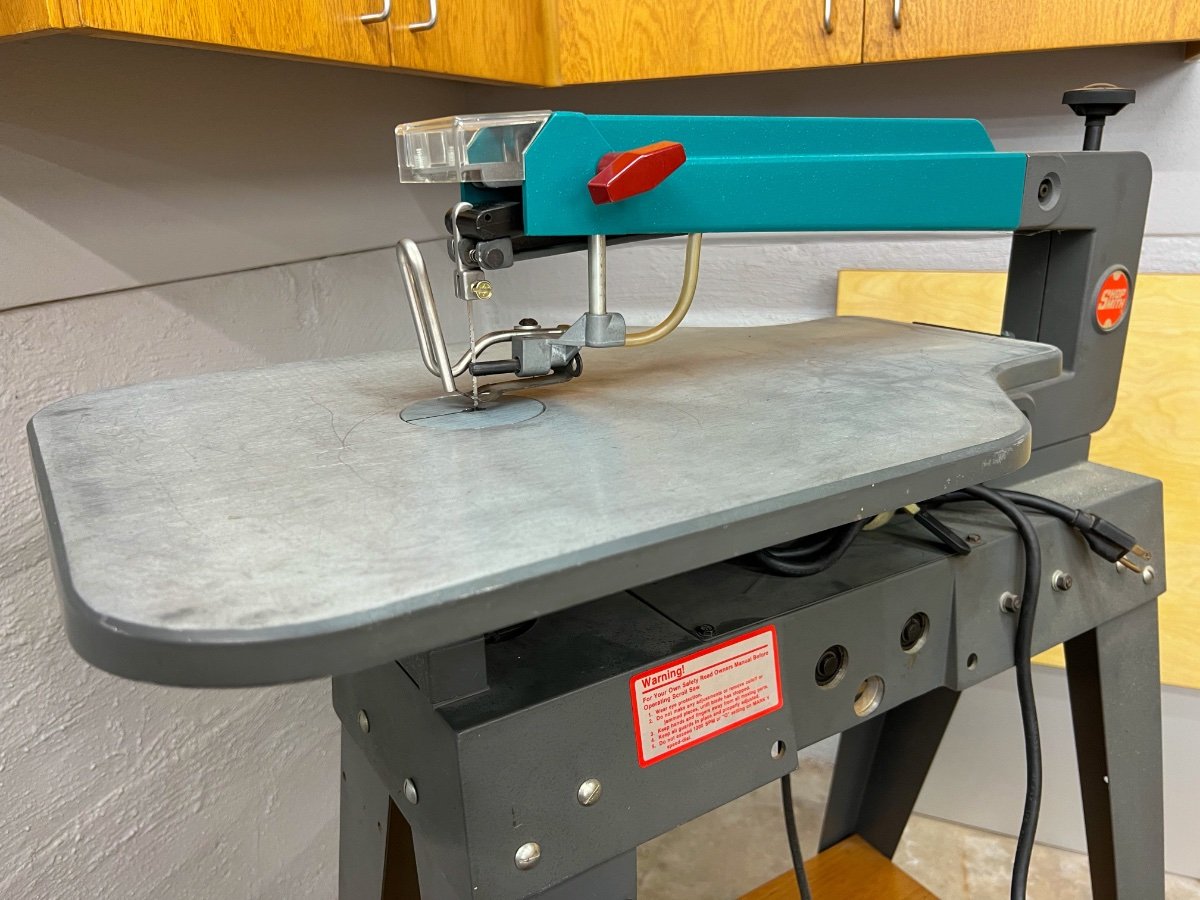
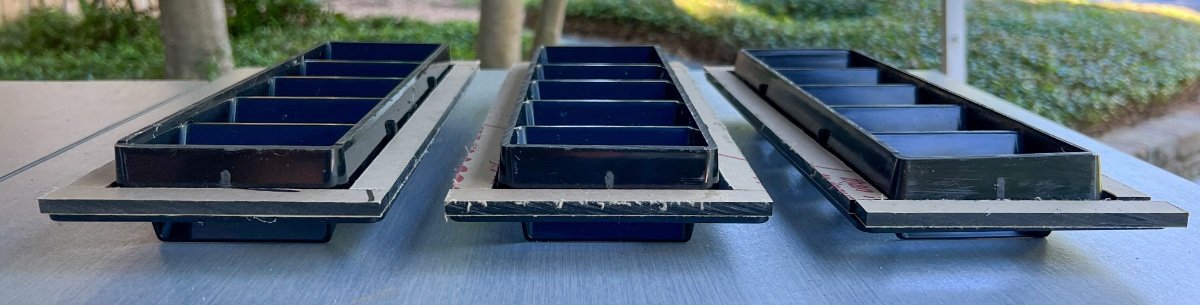
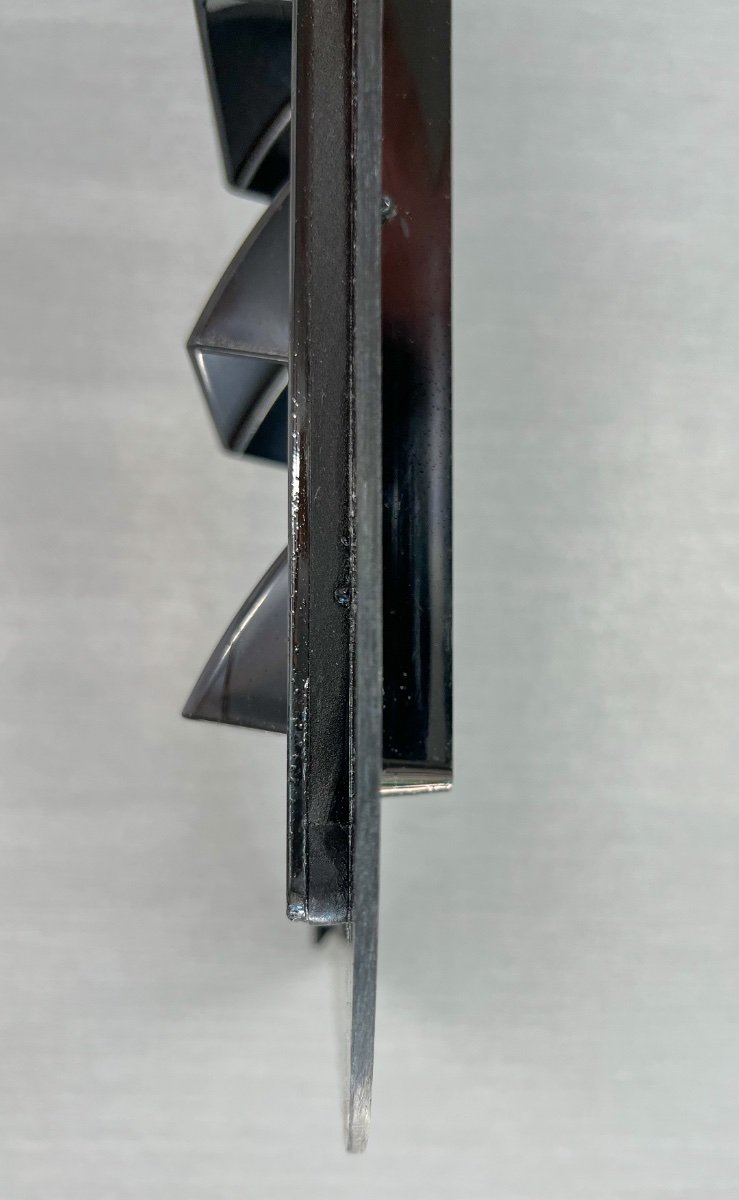
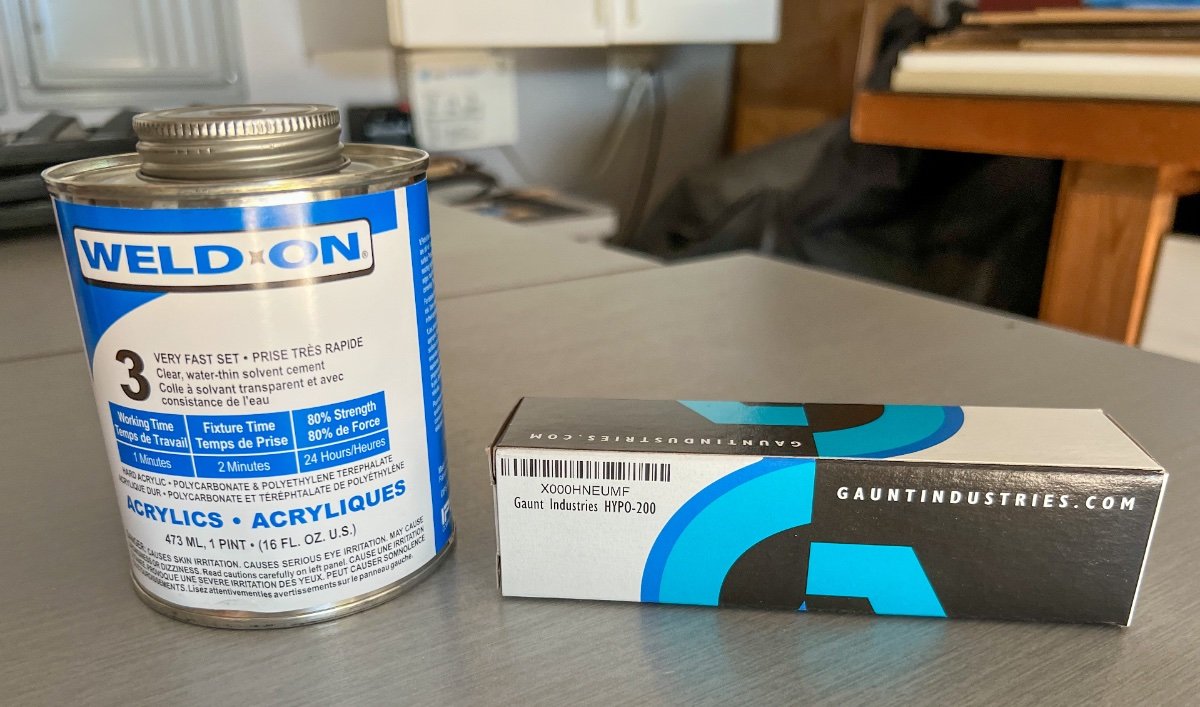
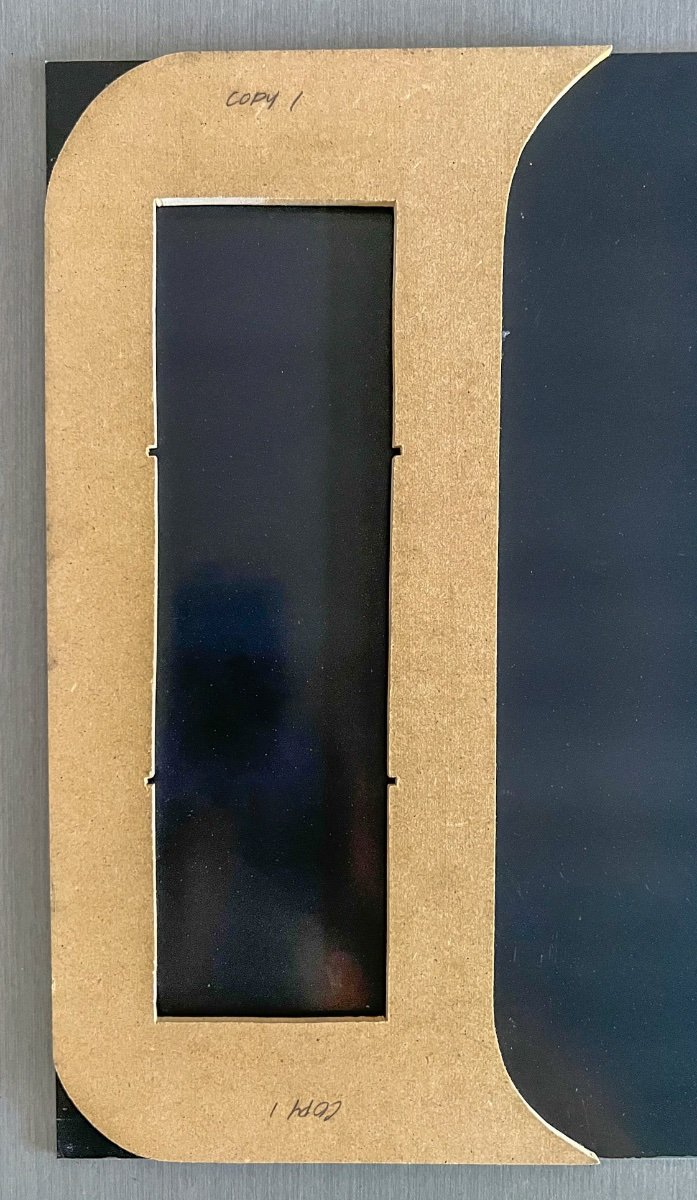
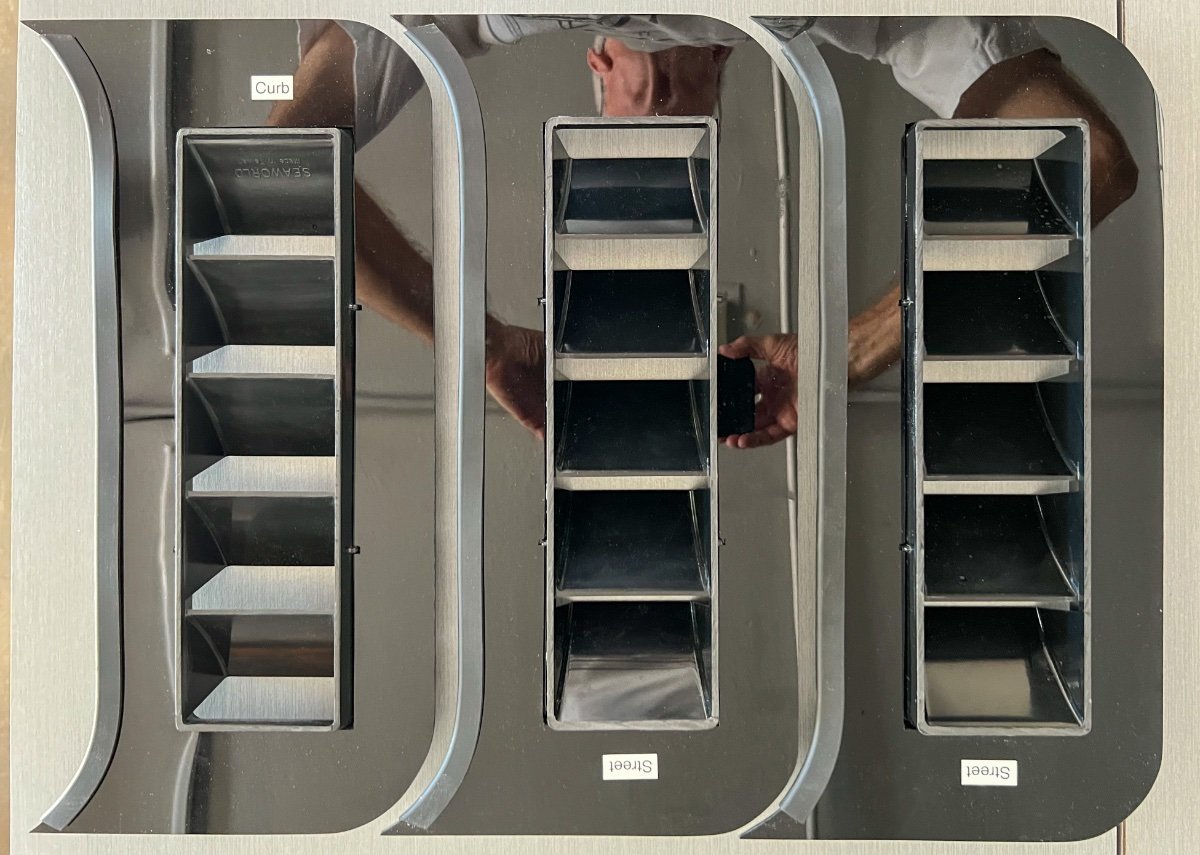
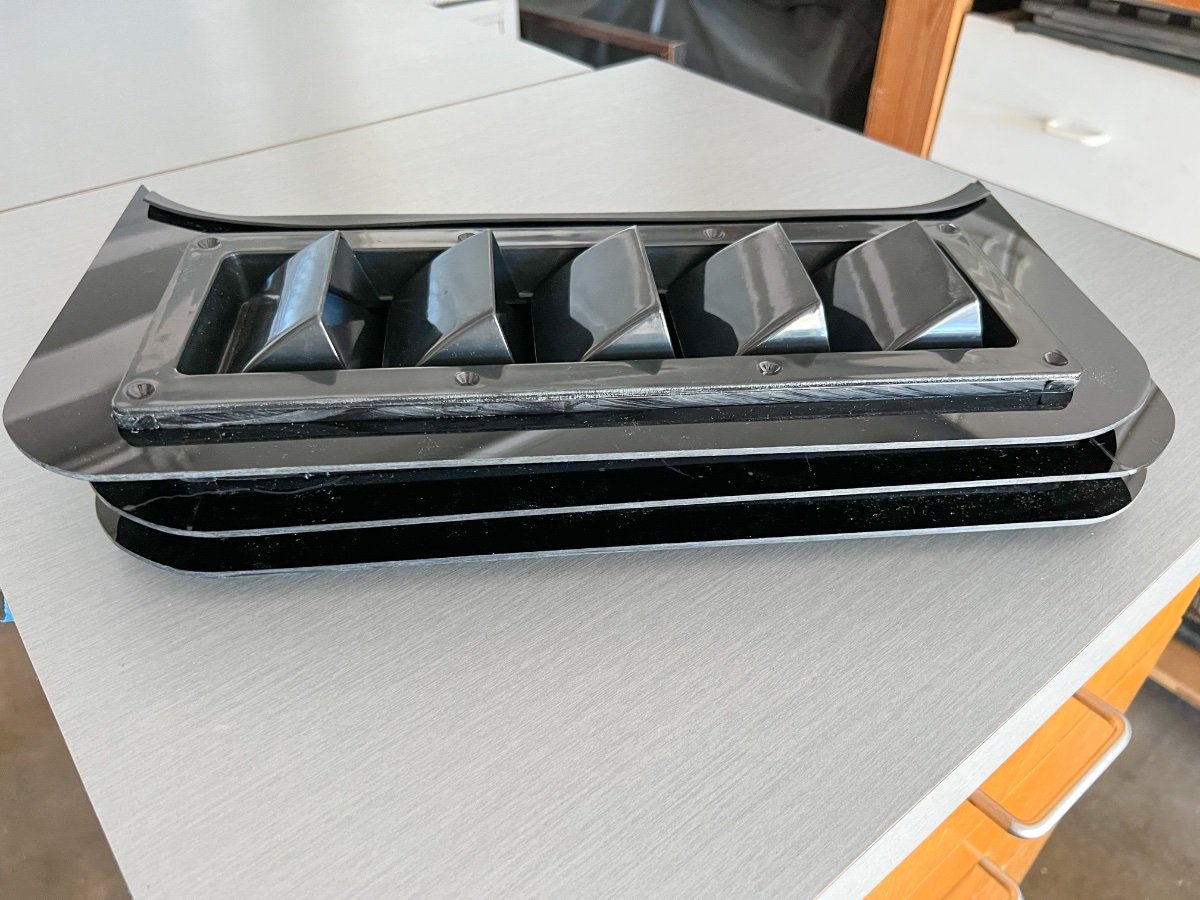
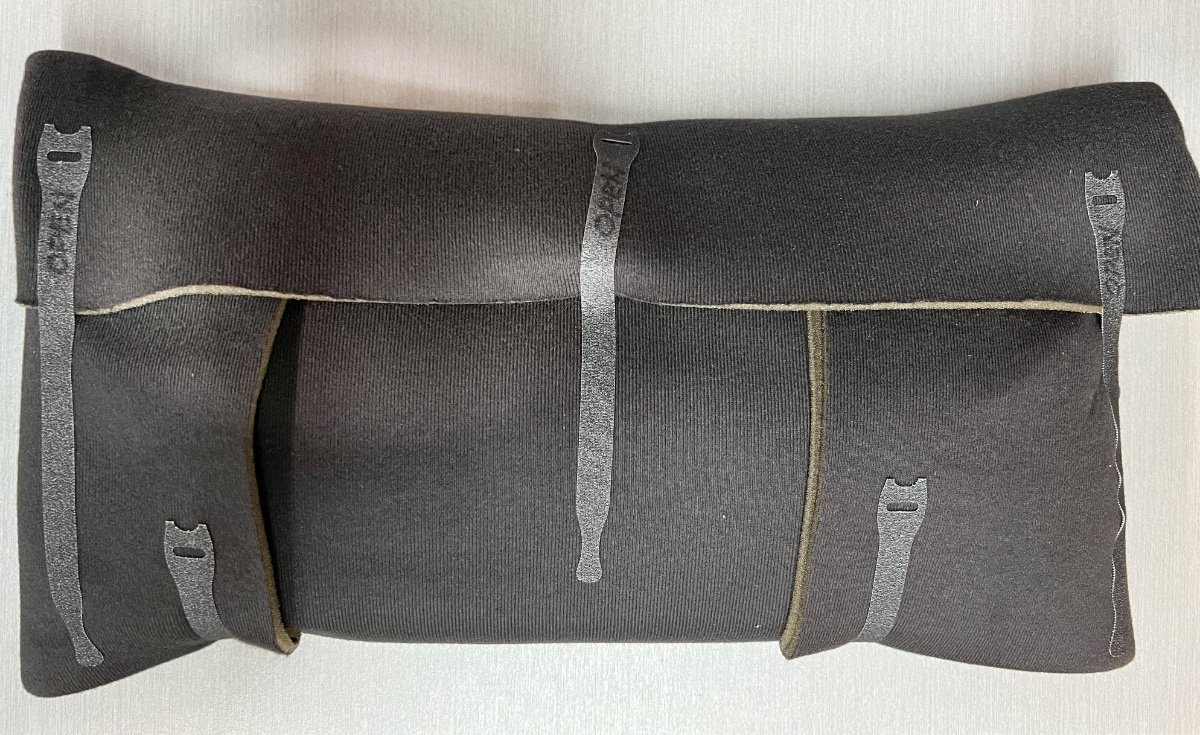
 I recently undertook fabrication of a set of louvered ventilators for the three side windows of our LEII, following the excellent design posted by @csevel. I want to share some lessons learned for others who may want to fabricate a set for their Ollies. The window vent consists of two main parts, a purchased louver ventilator and a custom made acrylic mounting plate, shaped to fit a partial window opening, into which the louver is mounted. I executed the fabrication a bit differently from @csevel. Since I wanted to produce a set of three louvered ventilators, I made a template using 1/4" medium density fiberboard (MDF) for the mounting plate. I, too, used one of the window screens as a guide for the edge contours of the template to match the sliding windows and frames. The final mounting plate template is 16-3/8" tall and 6-5/8" wide at the midpoint. The rectangular opening is 3-½" wide x 12-1/16" tall. After tracing the screen contour for the vertical edges of the template, I clamped the window screen to the MDF and used the screen as a template for my router to follow, to cut the shape. Cutting external edges of MDF template I had purchased the White Water Plastic 5-Slotted Louvered Ventilators from Amazon, although they are now shown as unavailable. I recommend searching for other sources, such as West Marine. It appears the same product is sold under multiple brand names. I used one of the purchased louvered ventilators to determine the size of the rectangular opening required in my MDF template and centered the outline for the opening. Note the rear of the louvered ventilator is tapered, so the opening needs to be large enough to accept the entire rear projection through the MDF mounting plate template, with the flange of the louver meeting the mounting plate. The rear projection also has two reinforcing ribs on each of the long sides and one each on top and bottom, which require notching the sides of the opening for clearance. To cut out the rectangular opening in the MDF template, I first tried to use my router, but found it very difficult to control the router and tried various guides, unsuccessfully. Achieving accurate cuts freehand with the router was also very difficult. In retrospect, using a router table to cut the opening rectangle would not be too difficult if done with straight outer edges, prior to cutting the outer edge curves. Frustrated by my lack of skill with the router, I switched to using a scroll saw to cut the rectangular opening in the mounting plate. This requires drilling a starter hole inside the rectangle, then inserting the scroll saw blade. The scroll saw proved very useful in making accurate cuts to make the MDF template. I tried to cut the rectangular opening as accurately as possible, which was relatively easy to do. If a scroll saw is not available, I recommend using a high quality hand held jigsaw as another option. After cutting the outer curved edges and rectangular opening in the template, I sanded the edges smooth and inserted one of the louvers into the template to test for fit. I used blue painter's tape to hold the louver in the template while testing the fit in the window opening. Test fitting the MDF template and louver I inserted the MDF template and louver into the window opening to verify the curved side abutting the window fit closely, with as small a gap as possible. I made slight adjustments to the template with a belt sander mounted upside down on a work table. I also verified the template could be inserted into the window track while inside the trailer, without requiring removal of the window shades or screen. While inside the trailer, position the mounting plate and louver through the window opening and tilt the top topward the upper screen track. The mounting plate is first inserted into the upper track of the screen, then placing the bottom of the plate into the lower window track, then moving the top of the mounting plate from the screen track into the window track. Sounds confusing, but works easily after a few tries. When the mounting plate template is inserted into the window track and pressed against the window edge, there is space above and below the plate and the window track. Once the mounting plate template is in the window track, it should be lifted slightly as the window is moved to shut against the plate. This should result in the curved edges of the mounting plate mating closely with the curved outer edge of the window, top and bottom. Closing the window against the mounting plate secures it in place, seated against the vertical edge of the track and the edge of the window. After several trial fittings and minor adjustments to the template, I was satisfied the template mounting plate would fit snugly to minimize the chance of water leaking in at the junction with the window. I did all of the trial fittings on the street side window above the bed. Only then did I test the template in the other two similar windows, which is when noticed the edges of the three windows are not uniform. The street side aft window had some black sealant projecting from between the two panes of glass. On the other windows, the sealant material does not extend from the edge of the two panes of glass. When fitted against the outer pane of glass in each of the three windows, the mounting plate template proved to be a snug fit, when carefully inserted. As a final test of the fitment of the mounting plate template, I tested to verify each of the window screens would close. Initially, they would not. The rear of the louver ventilator projects one inch from the rear of the front flange, causing interference with the screen and preventing its closure. Since the louvers do not have any screen built in to prevent entry of insects, operation of the standard window screens is essential. @csevel indicated her screens would close with the louver in place. I suspect my louvers and hers may not be exactly the same depth. Or, since our trailers are five model years apart, there may be differences in our windows. My solution to resolve the screen interference issue was to reduce the rear projection of the louver ventilator 3/8" by: Removing 1/8" off the rear projection of the louver ventilators using a table saw; Fabricating spacers from 1/4" thick acrylic sheet to insert between the mounting plate and the front flange of the louver ventilators. Removal of 1/8" of depth from louver ventilator 1/4" Spacers dry fitted to rear of front flange of louvered ventilators In the photo above, all three louvered ventilators have had their depth reduced by 1/8" and 1/4" spacers dry fitted prior to cementing in place. The spacers are 9/16" wide, surrounding the rear projection of the louver ventilators. (The protective paper coating is still in place on the spacers in the photo.) Side view of spacers bonded to rear of the flange of a louver ventilator The spacers were bonded to the rear of the flange using acrylic cement applied using a small application bottle with a needle applicator (from small box in photo below). After dry fitting, I cemented the spacers to the louvers, starting with the top and bottom, while the side spacers were in place loose, without cement. After the top and bottom spacers were firmly cemented, I cemented the side pieces. I found using spring clamps to hold the spacer pieces in place worked well while the cement set. I test fitted the louver ventilators inserted into the template mounting plate to verify the interference problem with the screen was resolved. The screens cleared with very little space to spare. Fabrication of Mounting Plates Having completed the mounting plate template, I next made a copy of the template, also from 1/4" MDF, as a backup in the event I damaged the master template. Making a copy also served as a dry run for routing the acrylic sheet. Using double sided woodworking tape. I fastened the template copy to a sheet of 1/8" black acrylic sheet, in preparation for cutting the first mounting plate. (Use the woodworking tape sparingly- 6 pieces 1 inch in length is sufficient. Otherwise, it can be difficult to remove, with adhesive left behind.) MDF template on acrylic for routing From experimentation cutting scrap acrylic sheet with the router, I had found the router bit would quickly melt the acrylic sheet. To avoid melting the acrylic sheet, I removed the excess acrylic material from around the template and the rectangular cutout, leaving only 1/16" to 1/8" of material to be removed by the router bit. I was then able to obtain smooth edges following the template for final trimming with the router. With the template attached by woodworkers tape to the 1/8" acrylic sheet, I used the scroll saw to cut the acrylic, keeping the saw kerf 1/16" to 1/8" away from the template. This freed the first piece of acrylic from the larger sheet and removed excess acrylic material from around the template. I mounted my router, with a 1/2" flush trimming bit, to a small router table. I then proceeded to trim the remaining acrylic sheet from around the template, both the outside edges and the rectangular cutout. After routing the first mounting plate, I repeated the same steps two more times, attaching the template to the acrylic sheet, trimming away the excess material using the scroll saw, then making the finish trimming using the router mounting in the table. When I had routed all three mounting plates, I lightly sanded the edges of the acrylic mounting plates to remove the sharp edges. Assembly of louver ventilators to mounting plates The louver ventilators with spacers attached are dry fitted to the mounting plates. Once satisfactory fit is verified, the parts are ready to be cemented using the acrylic cement. NOTE: The louver ventilators for the Street side windows are oriented opposite those for use on the Curb side. Position the mounting plates properly to abut the windows and insert the louver ventilators with their louvers on the outside and the louver openings facing down. I found it easiest to start by cementing one of the short ends of the louver ventilators to the mounting plate, using a couple of spring clamps to hold the parts together until the cement formed a firm bond, which takes about 5 minutes. Proceed to cement successive sides of the louver ventilator to the mounting plate, one side at a time, applying spring clamps until the cement cures. Use the needle applicator to apply cement at the intersections of the parts. Allow the cemented parts to cure overnight. The acrylic cement is very effective at welding the acrylic parts together, producing a very rigid assembly. Completed set of louvered ventilators and mounting plates After assembly, I added the same rubber edge trim recommended by @csevel to the edge of the mounting plate which meets the window edge. This trim seems to conform well to close any gaps between the windows and the mounting plates. The completed units are quite rigid and nest reasonably well. I set the width at 6-5/8" for two reasons: To yield three mounting plates from a 24" x 24" sheet of acrylic To keep the mounting plates and louvers as small as possible to facilitate storage in the trailer. I made a pouch to contain the louver ventilators to make it easier to store them without concern for damage to them or to other parts of the trailer. I had leftover car headliner material, which is relatively thin, with a foam backing, to which Velcro straps readily attach. Summary This project, which I first thought rather simple, provided several challenges. I spent much more time than expected to achieve an acceptable result. Given the extended drought and high temperatures in Texas, I have not had an opportunity to test the effectiveness of the vents, nor how well they keep rain out. In a week we depart for a two and a half week trip to Colorado to photograph fall color. I expect we will encounter some test conditions in the mountains. I hope this information is useful. Please feel free to contact me with questions. Regards, Don
-
I’m curious what setting you set your brake controller to? I know it varies, just looking for an average of what number most set on. We just had our brakes checked today because we had a skidding noise a few times upon braking on our last trip home. Our brakes checkout good so we guessed it’s our brake controller setting. We were set at 6 and the RV specialist recommended 2-3. The odd thing is it didn’t skid every time. Is this something you just have to play with?
-
 Hi I have a 2021 EL The outside rubber gasket around the window is getting spotted discoloring. Is there a way to clean it?
 -
Yesterday, I retrieved our 2022 LEII from storage to prepare for a trip. When I placed the trailer in storage, two months ago, I turned OFF the three Lithium batteries, but neglected to turn OFF the Zamp Charge Controller. With the batteries OFF, the charge controller flashes code 601, indicating battery disconnected or less than 3.0V. I reviewed the 2022 Oliver Optional Features Manual, Abnormal Operation Mode table, page 402. Page 399 of the same manual shows the wiring connection, with two large gauge wires connecting to the batteries. The trailer was in a fully enclosed storage unit with no windows, during which time the Zamp Charge Controller display apparently flashed the code "601" the entire time. I completed the Proper Lithionics Restart/Reboot sequence specified in a Technical Service Bulletin issued 3/3/22 by Oliver, which does not involve any changes to the charge controller. Once the three Lithionics batteries were ON, the charge controller displayed the battery condition as nearly fully charged, essentially at the same level as when placed into storage. Cabin lights, brake and signal lights, stabilizer jacks and electric brakes all appeared to be operating normally, so I proceeded home with the trailer in tow. From this experience I conclude the Lithionics batteries must not fully turn OFF when their ON/OFF buttons are pressed, even though the indicators show the batteries to be OFF. The charge controller does not appear to have any other source of power, nor do I see any mention of an internal battery. Also, the solar panels were receiving no sun light and could not produce voltage to power the charge controller. I had not disconnected the solar panels from the charge controller. Thus, I assume the battery management system must continue to supply power to the charge controller, but NOT provide any charge to the batteries when they are in the OFF state. The charge controller also must have very low power consumption to display the "601" error code, with no significant consumption of power from the batteries over two months. Has anyone else made a similar observation? Can anyone provide details on how the charge controller and the Lithionics batteries interact when the batteries are OFF? I am still learning the characteristics of the Lithium Pro solar power system in our trailer. Thanks, Don
-
What is the optimum summer tire pressure for an E-2 with cooper tires? I’ve been maintaining 80 cold
-
Hello. My husband and I toured the plant and are very interested in possibly purchasing an elite 2 once I retire. Our one disagreement is on a composting toilet vs a conventional toilet. What do you all think of the composting toilet? I would love to here the pros and cons. Thank you.
-
 We hit a deer on our return from camping. The front we are having addressed. A mystery remains. Upon attempting to re-hitch trailer to our truck, the Anderson Sway Control will not 'fit' like it use to. I have loosened the nuts at the ends of the chains to their maximum. The chains are very tight. What adjustments must I do?
 -
I have a few question for those that have experience with the Calmark cover. We are considering purchasing one but I wonder how difficult is it to put on? We have the solar panels, does that make it trickier to pull the cover over them? With our previous fiberglass camper (AS Nest) we were advised by AS not to cover it as the covers can scratch the gel coat. Has anyone had any issues with the finish on the Oliver marring from having the cover on? Any other pros and cons/advice about it would be appreciated. Thank you
-
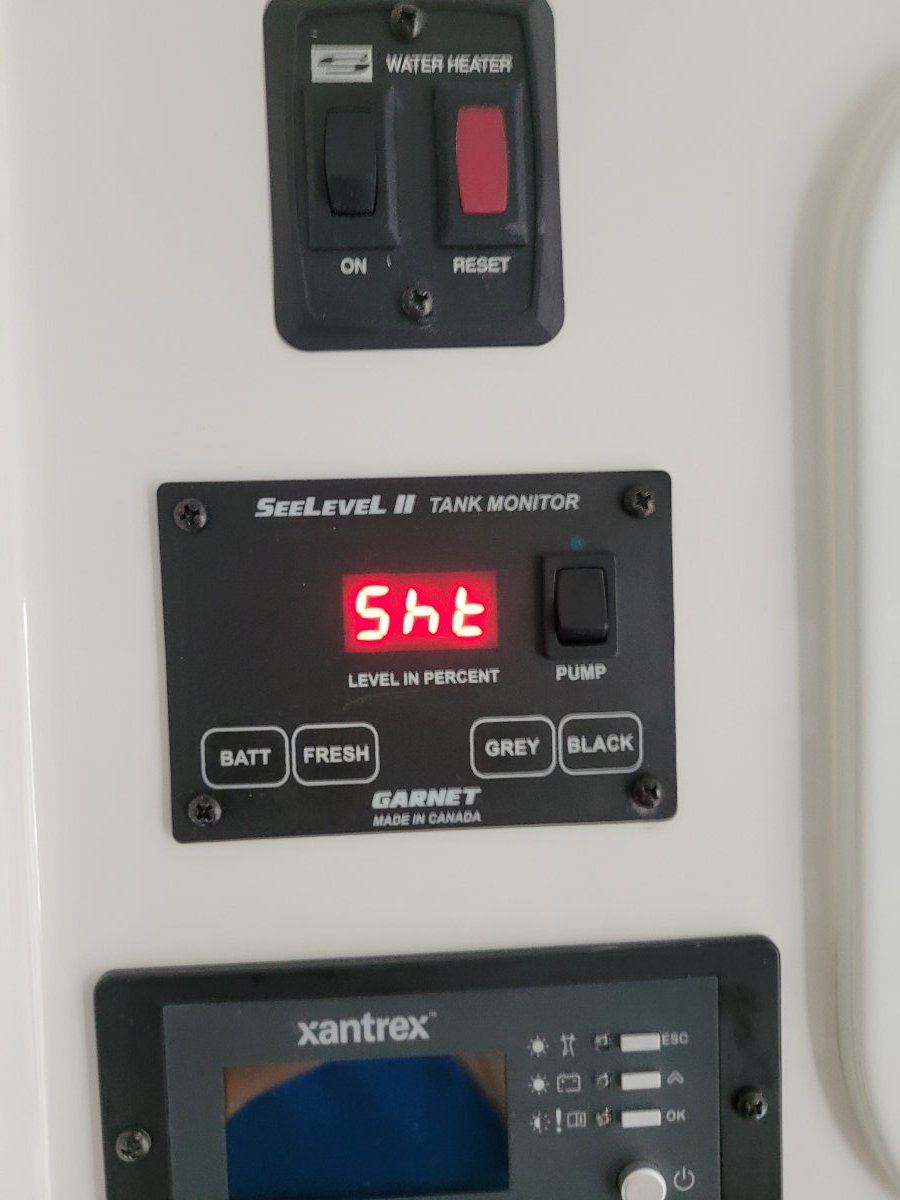
just unplugged from shore power. Herd some beeping alarms. Lots of weird numbers flashing on the sea-level ll tank monitor. xantrix is blank. We assumed our lithium batteries were fully charged after being on shore power for 2 days. I think this whole inverter etc is just too complicated for me. there is no reason any owner should have to ynderstand this. I assumed this syst was idiot proof. It is not.
-
My standard issue hot water tank pressure relief valve leaks, only one year old. Can this be replaced with a standard pressure relief valve from the hardware store or is it special RV issue? thank you
-
I would like the thoughts of the collective wisdom of this group. 2019 Elite II, no solar. Camping at a KOA in Salina, KS on the way home to Colorado. Plugged into the 30A outlet and everything was working fine. Some time in the night the AC quit. Not sure how long, but my wife woke me because the trailer was getting warm. I could tell there was electricity on in the campground. Checked my EMS display and it was blank as if the trailer was not getting any shore power. 30 amp breaker under the dinette was ok but reset it anyway with no change. At the pedestal my external surge protector was all green lights showing power with no problem indicated. The power cord green light was on, showing power was on there. Using the breaker, turned the power off and back on at the pedestal, no change. Unplugged and used my 50 amp adapter to change the power source at the pedestal. Still no change. In the morning we packed up and went home. Read the manual and checked the forum. Saw two threads about a circuit board and a whole unit needing to be replaced. With heartburn over how hard it would be to replace the Progressive Industries EMS, I plugged the trailer into my house circuit to do a double check and maybe some trouble shooting. Everything is fine! Display shows E0 and no PE codes showing a previous error! AC works and 110 outlets show power. What was not working is now working just fine 24 hours later. According to the manual if the EMS shut itself down there should be a PE code the next time you turn it on. But I have no PE displayed. Do I write this off as a one time glitch? Gremlins in the trailer? Was there something I missed in the trouble shooting at the campground?
-
I have read several threads on this forum regarding various measures current Ollie owners have taken to protect their trailers while towing. Those include installing mud flaps on TV and TT; installing Stone Stompers, Rock Tamers, Bow Buddies, etc. Some of you have the ability and creativity to develop some pretty cool custom products and/or make modifications to existing products. I have neither the ability or the creativity, so out-of-the-box solutions are what I seek. We are scheduled to pick up our Legacy Elite II on August 22, 2022. Between now and then we will be out of the country for about five weeks. We need to get on the stick and get some stuff ordered so that we have it with us when we get to Hohenwald. We are not new to camping, but we are new to trailer camping. So, my questions are: 1. Do Stone Stompers work well right out of the box on the Legacy Elite II, or do they need to be modified (like John and others have done) to be effective? 2. If one has a Stone Stomper installed, is it still important to have mud flaps on the TV? If so, can any of you recommend an especially effective out-of-the-box mudflap that you are happy with that would work in conjunction with a Stone Stomper (we have a 2021 GMC 2500 crew cab)? 3. Am I right in assuming a Rock Tamer type of mud flap would not work with a Stone Stomper because there wouldn't be enough real estate on the stinger of a typical trailer hitch ball mount? 4. I take it from past threads that the only way to mud-flap an Oliver is to individually fabricate the product. Is that right? Are any of you making them for sale to others? 5. What other exterior protective measures should we be prioritizing for the maiden voyage? The maiden voyage will be several weeks, and a few thousand miles, long. Thanks, Marv
-
Picked up our OTT (named TT after my wife’s nickname) in March (hull # 1056) and enjoyed several Tennessee State Parks before heading away from the nest to Williamsburg VA where, sadly, TT sits idly ‘til our travels to PA & NY State Parks this summer. Really love TT’s solid build & clean lines (the Ollie that is), and the folks at Oliver were/are extremely helpful, responsive and professional…think we made the right choice for our mode of retirement traveling. I’m also quite impressed with the useful information provided by contributors to this forum. Lots of talent & experience out there. Looking forward to giving back when I can. We sailed the Chesapeake Bay for many years so traveling light & messing about with shore power, etc, is familiar but, as novice land yachters, hitching and backing will take quite some time to master. So far, no real hitches in the hitching, except I feel that I’m fighting the air suspension on my new (and new to me) Ram 1500 when I raise the tongue with the front jack to attach the Andersen wt distribution whale tail to the hitch. Maybe I should place the truck in “jack” mode” while lifting to attach the whale tail? Any advice from seasoned veteran OTT travelers would be greatly appreciated. Only other challenge is the noticeable hum when on shore power. No hum when disconnected, and the inverter fan isn’t the culprit…the fan noise actually provides some relief because it drowns out the annoying hum. According to folks at the Oliver Service Dept, it’s either the transfer relay or surge protector. They’re waiting for me to inspect more closely to ID the noisy bugger. Hoping it’s not a “normal” hum and an easy fix. Looking forward to exploring this lovely country in TT, and reading more comments on the forum. Paul & Santina
-
Returned a few weeks ago from a trip into Utah again, this time hitting a few places that have been on my bucket list for years. Weather was not ideal but we made the best of it, great hikes and adventures with some photos. Thanks for looking. Boondocking in the San Rafael Reef Formation known as the Temple Mount, San Rafael Reef View looking southwest to the Henry Mountains and San Rafael Swell & Reef Trudi peeking out of Oliver Hike in Wild Horse Canyon, San Rafael Reef Head of Sinbad Pictograph panel, San Rafael Swell Another view of the same panel above San Rafael Reef canyon wall, land of the tortured stone More tortured stone from San Rafael The textures in some of these rock walls is amazing from centuries of weathered torture 😂 via hike in the Little Horse Canyon More rock walls from Little Horse Canyon Trudi hiking through the slot canyon section of Little Horse Canyon More slot canyon views from Little Horse Canyon A geologist dream scape I suppose, most slot canyon of the Little Horse The Rochester Panel Detail from the Rochester Panel
-
Group ... I own Hull# 069 ... a 2015 Elite II ... the bathroom faucet has developed a drip ... not a leak or trickle, but a steady drip. The drip is confined to the bathroom (all other faucets seem to be fine). The drip stops when I close the valve to the bathroom (under the curbside bed) and resumes when I open the valve again. Even with the pump turned off the drip continues, though I'm guessing that's due to the latent water pressure remaining in the lines. With faucet knobs open, both hot and cold flows are good ... it's only when turned off that it continues to drip. I can't imagine trying to sleep at night with that going on! So ... any suggestions? I believe it to be the original Scandvik setup and have not ever had the issue before. Hoping to avoid a full faucet set replacement, is there a cartridge that may need replacing? An "O" ring to replace? If so, has anyone actually done this? Stop the insanity!
-
Reed and Karen Lukens have posted their LEII for sale on Fiberglass RV. Mossey
-
 Can the Oughton RecPro 13,500 BTU ac unit be started with a Honda 2200u generator without a micro air easy start?
 -
Looking for advice on how to safely travel in cold temps with an Oliver. If de-winterizing prior to travel, how do you safely travel in sub freezing weather without causing damage or ending up with frozen components?


.thumb.jpg.d1e64da9ec47f47b2c8b33f158c40f73.jpg)