All Activity
- Today
-
About an hour ago 2:15pm EDT I spied an Oliver LE 2 headed south/east on Interstate 26 near the Blue Ridge Parkway bridge. The TV was a black Ford (Super Duty I think) and both the Ollie and TV had Florida plates. Looking good over in the slow lane just tooling along. Bill
-
Rare situation that hot & cold water flows through the kitchen sink and outside shower but not in the bathroom, with the same issue at the toilet! Did you do any work inside the bathroom vanity recently? I would start by removing the bathroom faucet/shower head and the toilet filter (again). Either these endpoints are the issue or somehow you have two internal obstructions on hot & cold lines somewhere past the water pump and hot water heater. It' won't hurt blowing air but what would cause these two obstructions at the same time? 1700 miles one-way to Hohenwald from AZ. Today this roundtrip would cost over $1,500 in diesel fuel. It's never an option for us.
-

Buffing and Waxing my Trailer
Mountainman198 replied to Trainman's topic in Mechanical & Technical Tips
Reviving this thread for those who are not interested in the ceramic path for what ever reason. Thanks Trainman! It works! My gelcoat was beginning to chalk and shadows were present where the Oliver logo was removed in the lower rear. Using a 120v makita rotary buffer, a white Presta wool pad and Meguiars One Step polish, the gel coat is again glossy and shadows have been eliminated. Took about 2 hrs to do the entire lower half of the trailer. Will finish buffing the upper half using scaffolding then apply 3M Marine paste wax by hand. While I wax the entire trailer each year, this is the first time the lower half of trailer has had to be buffed since new (upper half was buffed 2years ago for the first time). Trailer lives outdoors 24x7x365.
-
Looks like they are opening a new state park in Hohenwald, Dry Branch State Park. Not open yet, info at the link below. Mike Dry Branch State Park
-
- 2
-

-
Right but I mention it hoping somebody would notice the difference; TV’s provide traction, TT’s are just rollers. Which gets to the core of what I think here - it doesn’t really matter tire wise. Tire performance is more critical in a traction vehicle, but here you can probably do what you want and the tire won’t care. Yeah that’s more internet FUD. I’ve replaced two Bolt tires in 8 years. In both cases it depends on how you drive - ICE guys who do donuts and track racing wear them out too. While EV’s provide instant torque the pedal algorithms have hysteresis and if you watch EV drivers (plenty of Teslas around) nobody is ripping the line, it’s lost its appeal with this much power/torque. Plus they design EV tires differently to account for this and efficiency. … Anyhow should have suspected you’d air down your TV! 😅 Well at any rate my argument isn’t that airing down the TT tires is bad but that its probably counterproductive. The Ez-Flex, Alcan are doing the heavy lifting on the low end of the frequency band and you want higher pressures on the top band. Haven’t heard any good refutation of this argument so that’s my story and I’m sticking to it! 😅 Good discussion ,..
-
Great! Thanks. I had just come to your exact conclusion. I was going to try vinegar first, but now I think it's better to blow the lines. And yes, both the hot and cold lines are plugged. I think I already have an adapter that fits the female thread with air on the other end. I appreciate your help. Winter coming on and time is running out before we leave for the Philippines. And the diesel would cost about $325 to go 380 miles each way to Hohenwald.
-
Right you are! Mossey
- Yesterday
-

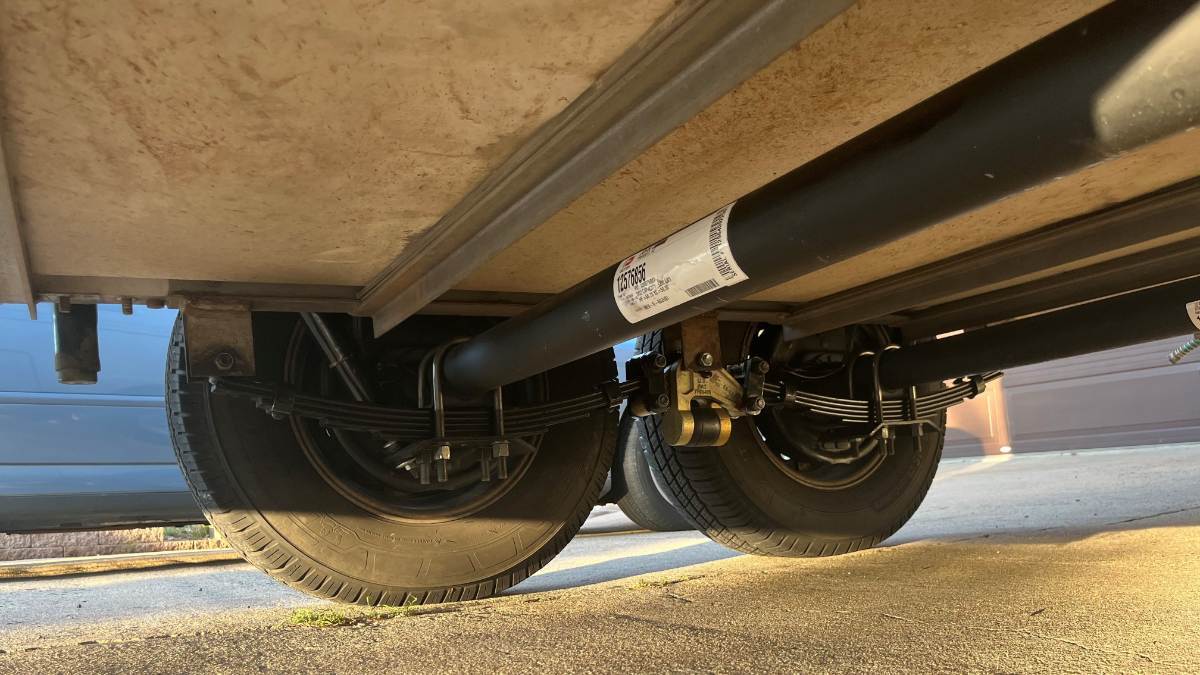
Made in USA leaf springs
DanielBoondock replied to Mountainman198's topic in Mechanical & Technical Tips
Got it done. Turned out to be a nothing burger, at these torques the bolt just kind of flows into place. They warn us about the need to re-torque due to bolt stretch after all. Anyhow I’m not going to touch it after this. On torque I was thinking about a conversation I had, how the spring torque wrenches quickly become uncalibrated, 2%-15% in a year apparently just from sitting in your truck getting bumped around. You can get fancy non spring based ones for a rich $500 or something. Or do a simple re-calibration using a weight and a bench vice. -
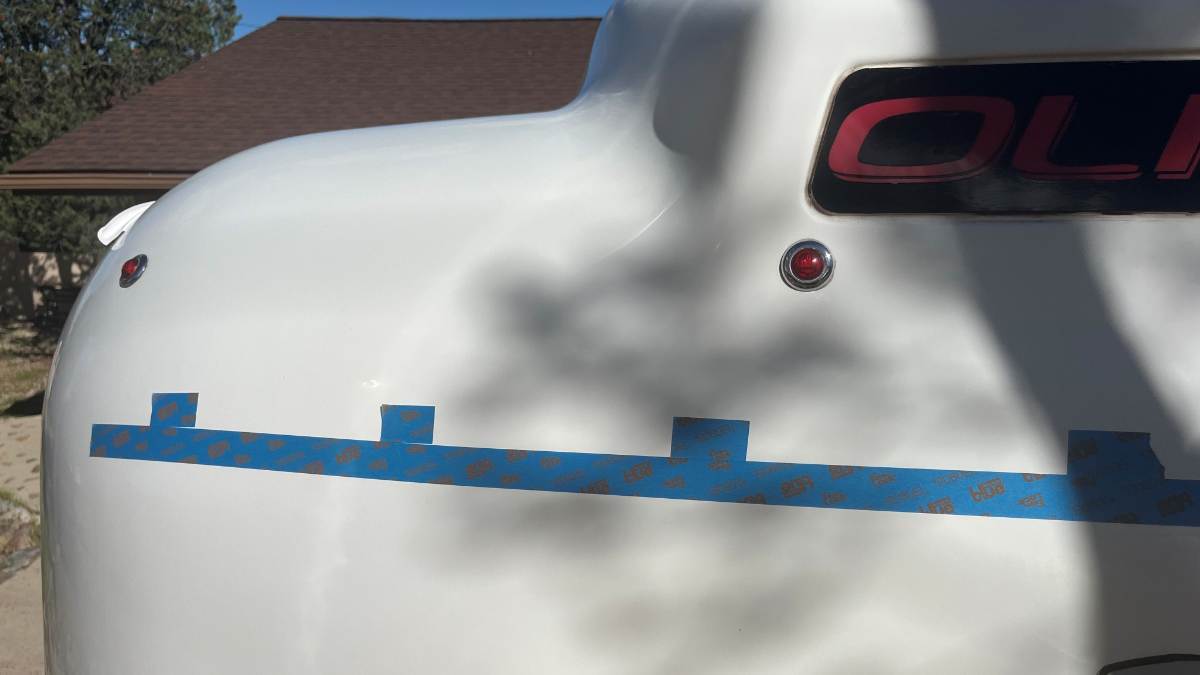
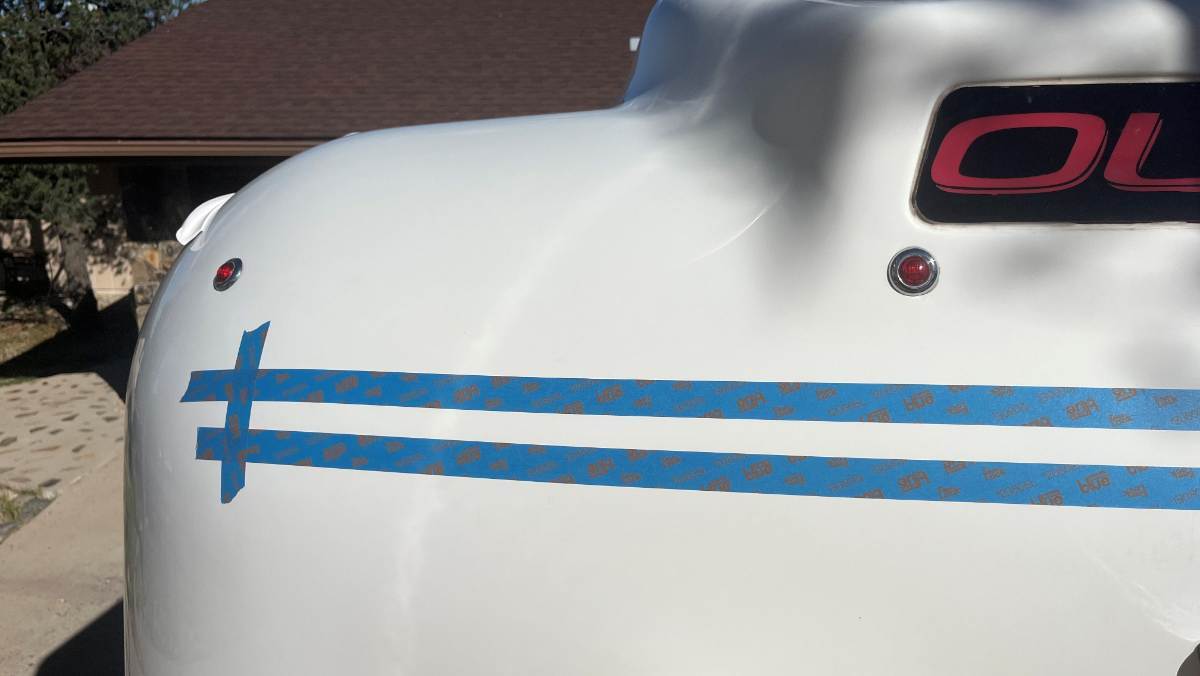
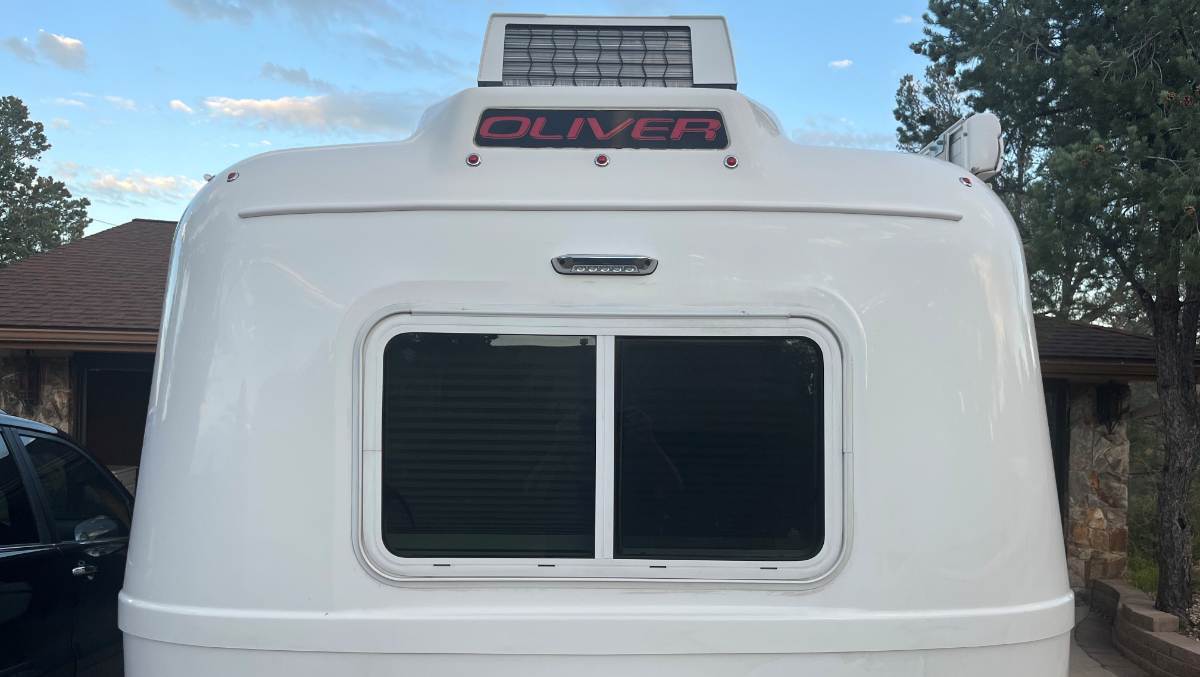
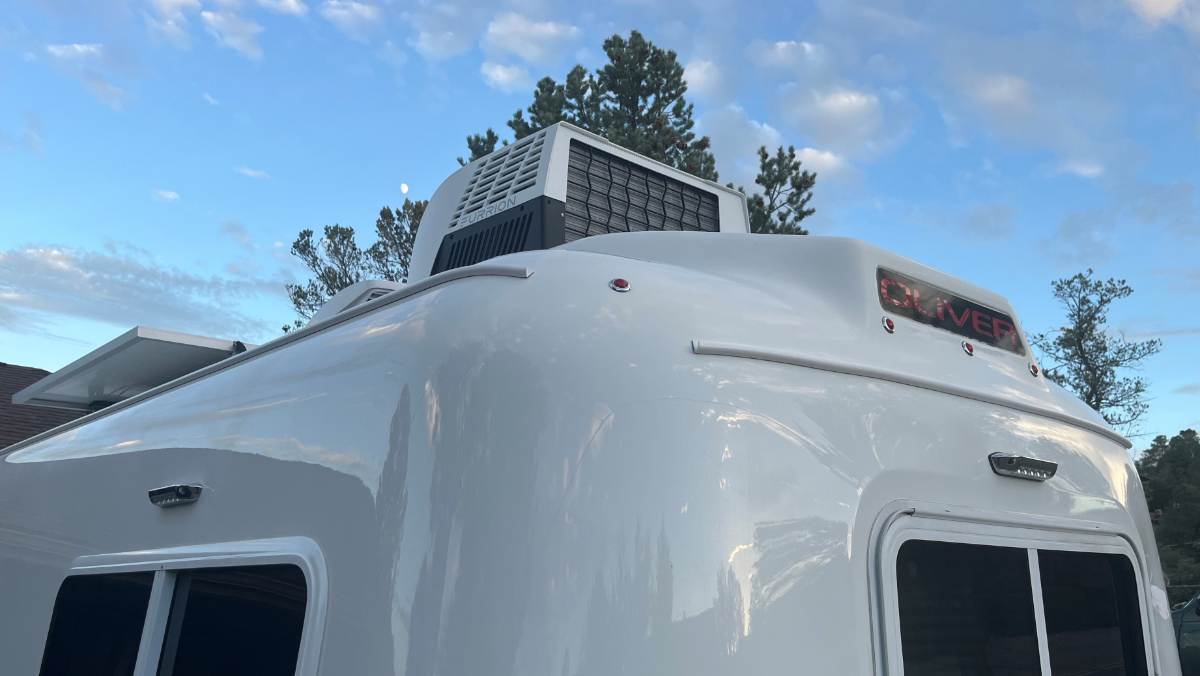
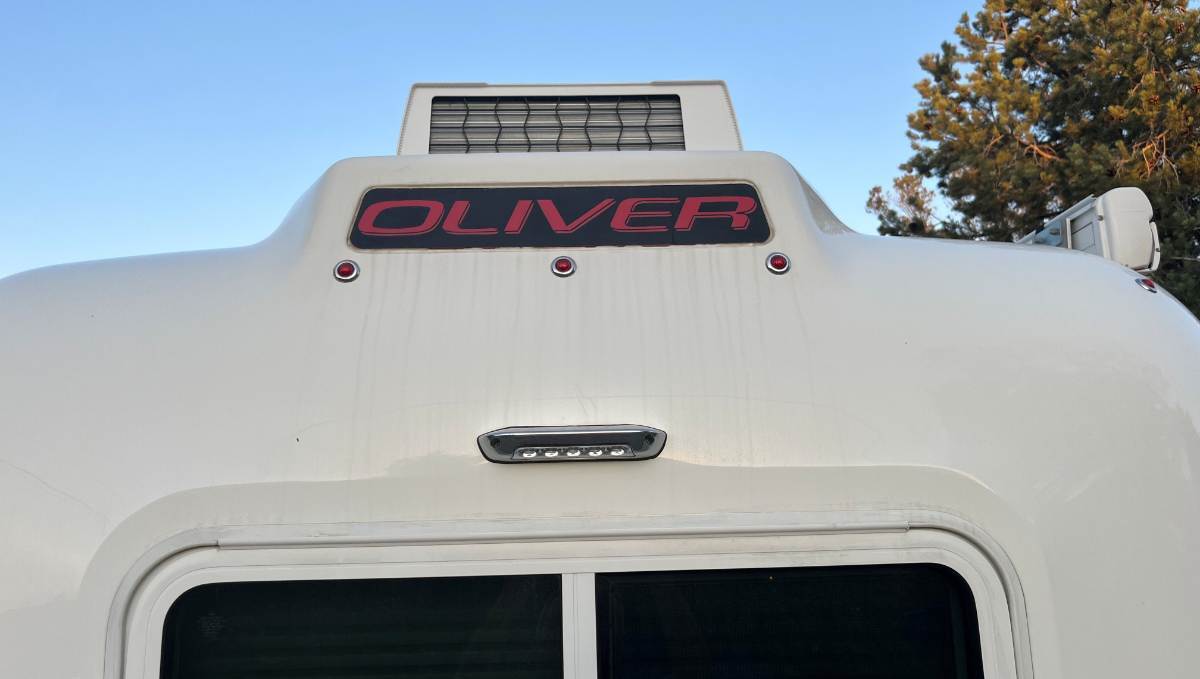
Next was to create a roofline drip rail to eliminate the streaking down the rear. This time I took pictures of my early steps. First thing to assure the drip rail will be straight and parallel to the hull is to measure heights. I use the hull seam, the belly bar or hull waistband so to speak. It protrudes quite a bit and holds the tape measure nicely. I used 39" on the side rail (bending it around the top curve) and 33" for the rear. I cut a bunch of 1" pieces of blue tape and stuck them to the scaffolding to have ready. On the side rail, I placed them about every 16" and about every 10" on the rear. You place these at the height you want the drip rail. Then you place one STRAIGHT long length of masking tape which becomes the lower edge of the rail. Then measure 7/8" spacing to place a second line of tape. I marked the center using the Oliver sign and the 3 little marker lights and taped the end points 28" each way, 56" of drip rail for the rear. I made both drip rails 1/4" lower on the ends. Then sand the gap smooth, use acetone to remove the ceramic residue. Then remove the top line of tape and use rubbing alcohol to clean the area. Now it's time to place the Trim-Lok drip rail. After Bill's mention above, I read some of the "Window Gutter" threads. There was talk about installing on a hot day and maybe a heat gun, but none of that is necessary with the Trim-Lok product today. This product is great. It was 76F when I finished yesterday and the product is very flexible, keeping the straight line is the deal. BTW, our Furrion Chill Cube has never overflowed condensate since it is designed to use it in cooling the condenser fins, but if we are to camp in a hot humid location, you can see where the condensate would now be channeled. Our nose is always up a little higher and lift the curbside jack 1/2" taller than the streetside and any dripping will go down the corner area pictured. The massive Pinion Pine on the edge of our property makes the Chill Cube look even taller! 🤣 If you're on the highway one day, following an Oliver that has a rear drip rail and a matching rear porch light, that would be us in Hull #113! I like how the two drip rails come together in both rear corners. The back corner surfaces will get dirtier but an easy area to clean. And the old girl still looks nice and shiny now 10 months after ceramic coating! 😎
-
I always dread a dump station that aims my rig nose down.
-
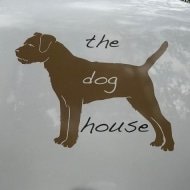
In prior conversation a few years ago with Jason Essary at Oliver Service, I learned that Oliver Service would have to physically see your Oliver to match your paint and gelcoat in order to properly match/repair chips. Oliver no longer maintains any history paint colors. I think @taylor.coyote has offered the best remedy. I would also suggest calling a local fiberglass boat/yacht club as they can be a great resource for mobile fiberglass touch ups if you want it done professionally. DYI touch ups more often than not end up looking like DYI touch ups 😕 and will highlight your chip repairs vs make them disappear. I had 8 mil XPEL PPF (paint protection film) installed on the front blast zones of our 2020 Oliver LE2 and am glad I did. It really has helped preserve the gelcoat especially on the front corners, dog house aka propane tank storage. I also had it installed under the quarter panels front to back.
-
good point: I should have been more specific that the touch up area on my trailer is the fender/wheel covers and not the gelcoat sides of the trailer. I discovered when sanding the fender area where some chips were that it's not gelcoated. I think it's a fiberglass part or perhaps plastic. Anyway, light sanding of the chip area showed thin outer paint. I've now primed and sanded that area (it's rather small part of the fender) and just need to repaint the section.
-

Installing Trim-Lok Drip Rail on the Oliver
ScottyGS replied to jd1923's topic in Ollie Modifications
I put trim lok over the lighted Oliver sign. Thought it would be good insurance against leaks from the seals aging on the sign. Many folks have had that problem. Scotty - Last week
-
What JD said. I'll have to try lifting the curbside of the trailer next dump. But I will say that because of all the afore mentioned design characteristics of the Gray tank, it is very slow to drain! Aren't the gray tanks also "L" shaped?? Which is why a curbside lift is a great idea to help things along. One thing I do is to open the back flow valve in the bathroom to help let more air in the tank when draining, I don't think there is a trap on that drain, seems to help. Dave
-
Craig, I would caution you about using paint to touch up your Oliver. Paint and Gelcoat are two entirely different coatings. I would suggest a quick google search or a visit to some boating forums to learn about the process of repairing damaged gelcoat. You didn't specify your issues, but if they are rock dings and such, I would not paint them. Paint will not age well, doesn't have the build of gelcoat, and cannot be polished with the rest of the trailer when that time comes (and it will). You will need to apply your 2 part gelcoat (it can be tinted and is a catalyzed product) to a properly prepared surface. Overfill slightly, wet sand flush, then polish out. Yes, it's a lot more labor than spraying on a coat of paint, but will give you far superior and much longer lasting results. My 2 cents. Dave
-
Thanks for the idea; hadn't thought to take the LP tank cover into a paint shop. Sounds like a good idea. Cheers, Craig
-
I asked the factory about my paint / gel coat color 6 months ago. They did not have the information for my trailer (hull # 124). I solved the problem by taking the trailer's propane cover to a good automotive paint store. they had tools to shoot images of the gel coat and were able to match the color precisely. they can give you a code to mix the color needed.
-
Craig - Your best bet is to call or email Oliver Service. Let them know what your hull number is and they can tell you which Gel Coat color was used on it. Note that over the years there have been different colors of white used. Bill
-

Installing Trim-Lok Drip Rail on the Oliver
topgun2 replied to jd1923's topic in Ollie Modifications
Yep - Twist was treated to the window gutters a number of years ago. There are numerous threads here on the Forum concerning these window gutters - from installation to length of gutter for each window. Bill -
 OliverTheCountry joined the community
 -
You're welcome, Tony and thank you! 😂 Yes, anything to be VHB taped must be done before ceramic coating or go through the steps I've listed above. Anything new to be screwed mounted, do afterwards. I removed a lot of exterior trim to get an overall better ceramic coating job. As-is you may still need a light scuffing of the gelcoat, acetone to remove residue and rubbing alcohol to clean prior to taping. If in the future any portion of the drip rail comes lose the whole job would need to be reworked! Don't want to do all this work? Ask your detailer if they would install the roofline drip rail when you get your ceramic coating work done. Covering the individual windows is a much easier job, no scaffolding required. The roofline drip edge should eliminate streaking if you have what I have. This could be regional or climate dependent. A lot of rain in your travel climates, perhaps covering the separate windows makes more sense. It's a choice. If I remember a picture of Bill's "Twist" correctly, it has drip rails over the windows. @topgun2? The 25 ft roll I received was 2" short. My roofline installation is 15 1/2 ft long and I have 112" leftover. The main windows are 4 ft. At most you would need 52" for each window. One roll will cover all windows or do one roofline drip rail and cover 2 windows. Two rolls will cover both rooflines and all windows. I'm going to use some of what's left over to create a roofline drip rail under the OLIVER taillight in the rear. You can see all the streaking we have there in the picture below. I'll show this installation soon.
-
Hello Wondering if someone could please help me to identify the right color match name or code for the white that Oliver EII has on the exterior? I have a 2020 EII Hull 612 and would like to do a bit of touch up to a few small areas on the outside with a spray gun. I'm hoping there might be a specific type of white that's used perhaps using a color chart number that I could take to a paint store and have a quart mixed up for my touch-up spray gun. Thanks Craig
-
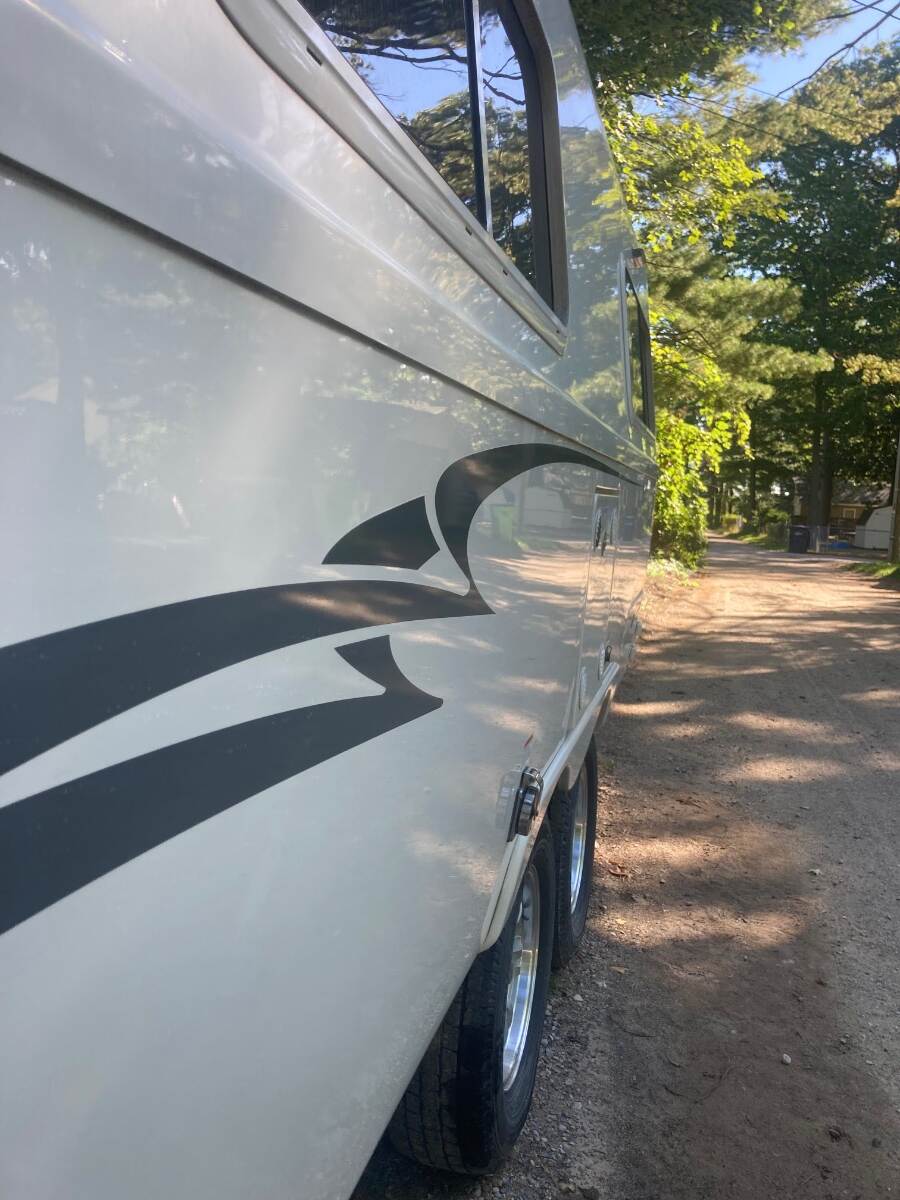
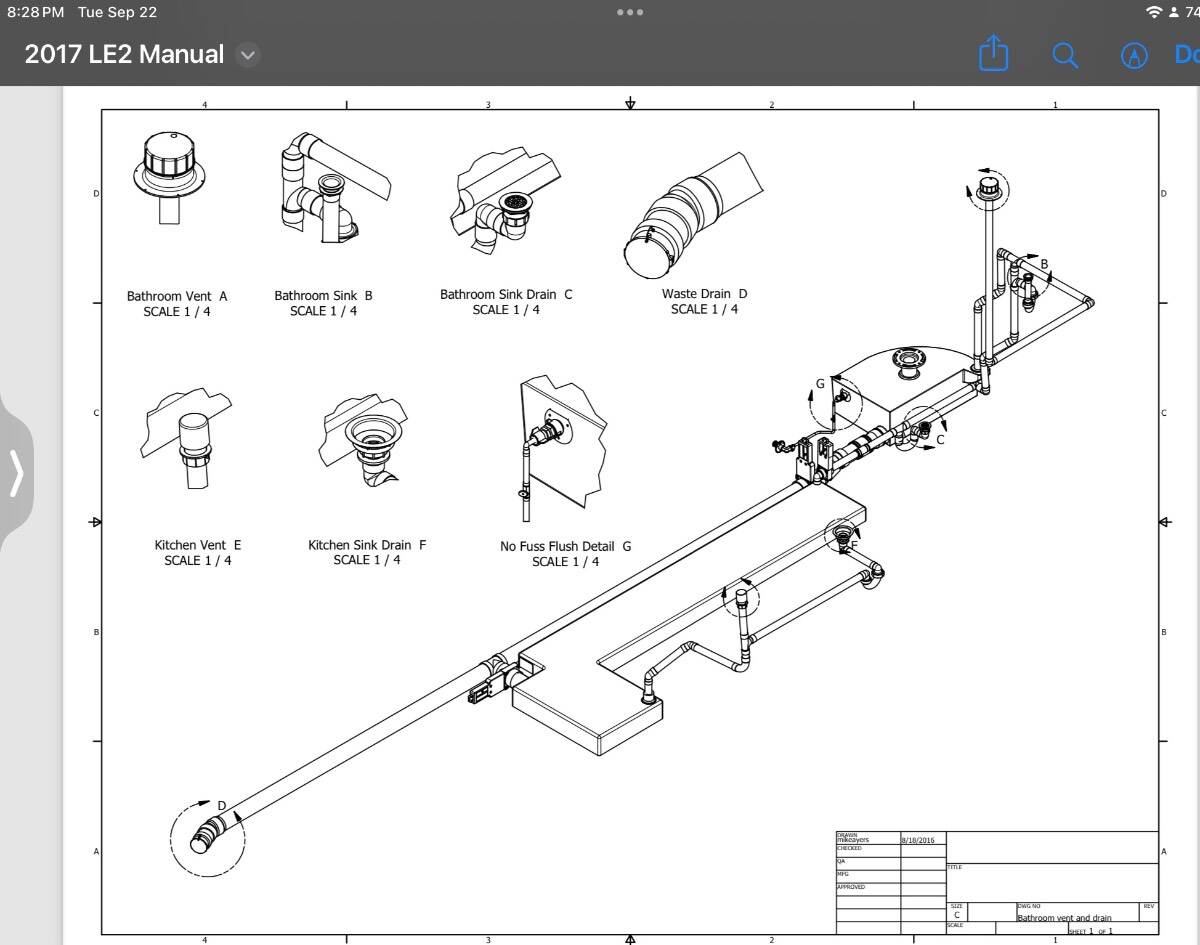
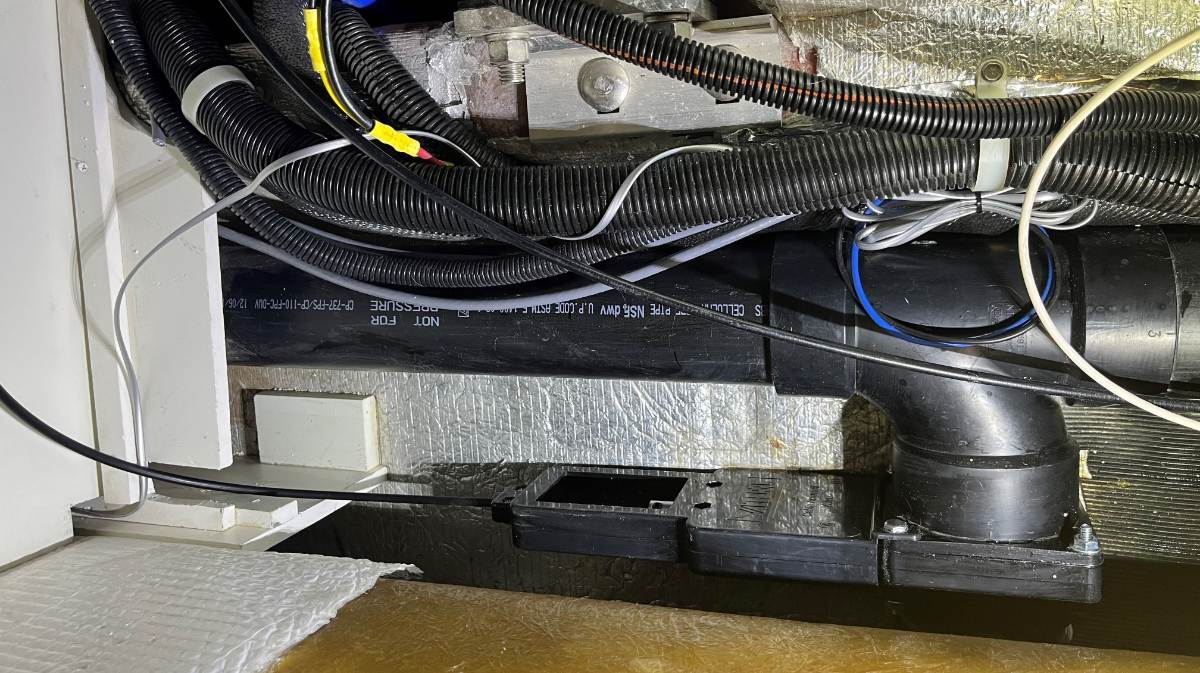
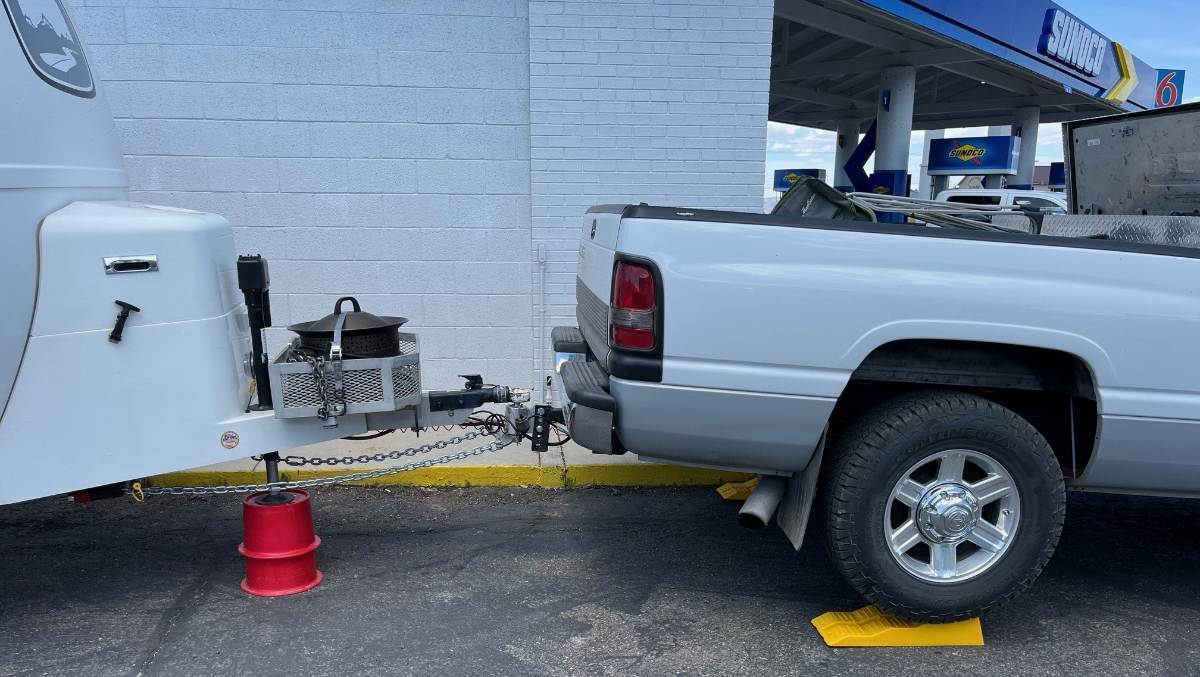
Lifting the front jack is a MUST at least 2-3" high. We read the LevelMatePRO app to know. If there are two ways you can pull into a dump station, enter to be driving uphill whenever possible. This should get the black tank 98% empty. The black tank is a taller tank and if nose up it should empty fully. The grey tank is another story. Besides nose up the grey will only fully empty when the curbside is also up 1-2". This is because the 4" waste line exiting the grey tank heads out from the rear of the tank towards the streetside (pic1). If the curbside is very low, the grey tank could be half full and not able to empty. Every time we dump, I'm taking our two 8" Andersen Blocks out of the truck bed, one under the front jack and one under the curbside jack, often lifting the curbside wheels up in the air. I lift the front up first and then pull the black valve, then I raise the curbside and pull the grey valve in this same order every time! Lift before you open the valves so that the waste water runs out most quickly. We had an extreme situation at the Sunoco in Cedar City UT. You had to back into the dump station which was uphill. It took all this lifting to dump effectively! 😎 (pic2)
-
Made in USA leaf springs
DanielBoondock replied to Mountainman198's topic in Mechanical & Technical Tips
I had to tread carefully on this one 😅 It was all fine probably because I didn’t replace the axels and kept it all aligned. It’s just unexpectedly 1.5 of the outer side U-bolts, with the bit oval hole on the tie plate, that are troublemakers. I’ve got enough to cut the high spots on a few others, but these need another 1/16 taken out or something. Anyhow with all that torque the underside bolt straightened out, this steel stretches, so it just adapted to the environment and certainly the slightly canted U portion won’t move. Anyhow I’m beat! I got an Oliver because I didn’t want to DIY, boy was I wrong 😅 Someone here warned me about that … anyhow we’re going to get a big El Nino this winter and will be traveling a lot right after so I’m in a race to pull it all together, but am at the end of my rope. I practically kissed the phone when he said “Yeah it’s fine …” 😅 I’ve got a couple minor more projects to do, small SiO2 ones and bypass the black washout for direct transfer, but that’ll do it -
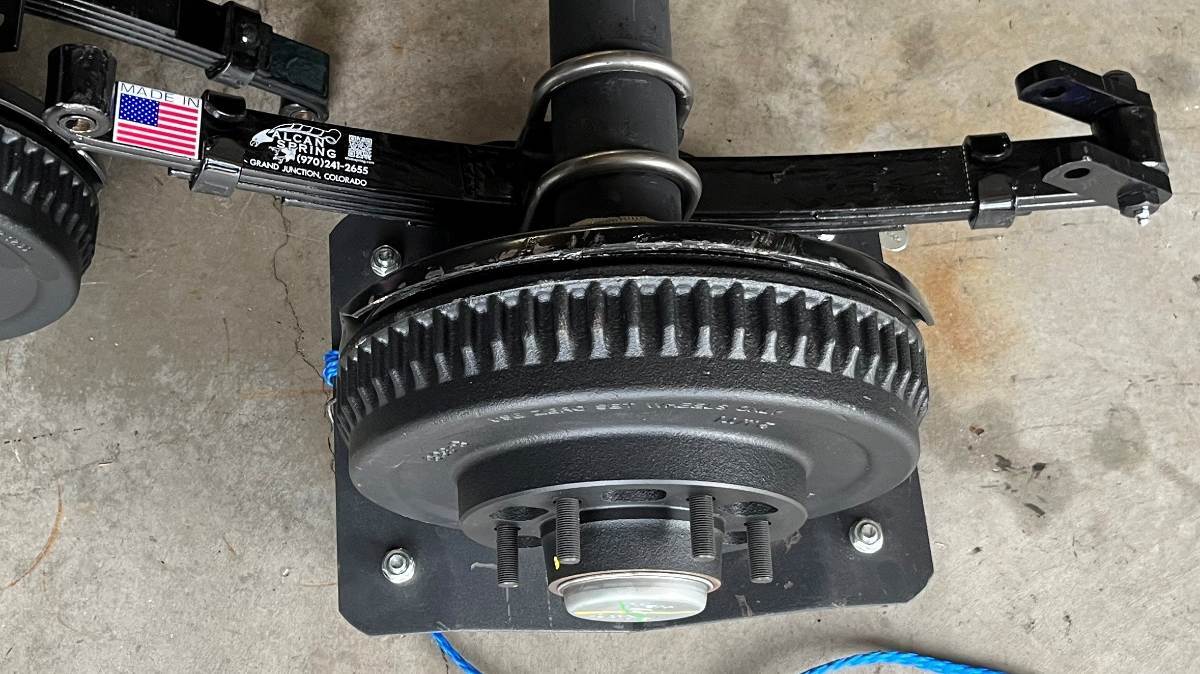
Dan, I quoted most of your message, beginning and ending with the best parts! I really like the start, "my good buddy jd1923." Back at you my friend, and your ending is perfect, "John you’re absolutely right." 🤣 It appears you're working 30 miles from home, without all your tools. I would think when replacing the U-bolts the leaf tie plates would be off where you can drill on a vise. If they're canted it must be the space between the holes is to narrow. I don't believe the cradles are actually wider since I got mine square. What I did since I was installing axles and springs at the same time was to get the U-bolts set with the parts on my garage floor (pic1). I tightened the U-bolts to the axles before installing the axles. I spent a bit of time measuring the distance from each brake baking plate to the leaf springs, and using 90-degree squares, the goal is to assure the leaf springs are as close to perpendicular to the axles as possible and the U-bolts perpendicular to the ground. I still cannot believe OTT is installing 1/2" U-bolts now, when on older hulls they installed 9/16"! So at some OTT Management Meeting a senior staff member came up with, "Let's upgrade our customers with D52 axles but save money on down-sizing the U-bolts." When I finished, you can see some light between the threaded portion of the U-bolts and each each leaf (pic2). But zoom into the front wheel picture and notice each bead of light is equal to or perhaps even slightly smaller in size at the top. This shows how close the U-bolts are to the leaf springs.
-
Made in USA leaf springs
DanielBoondock replied to Mountainman198's topic in Mechanical & Technical Tips
Final stretch, wrapping up the torquing which is taking a lot of arm strength Now, NSFW, I know my good buddy @jd1923 is not going to be happy with this but you’ve been warned 😅 … I’ve got a couple U-bolts that aren’t straight up aligned. They’re canted out a bit. I need my right angle drill which I don’t have to hog those holes out. Was thinking of various options and called Alcan. They said it’ll be fine if it’s not too much. Later if I want I can remove the plates and make it look pretty, but they didn’t think it critical. I will get this ‘done right’ but for now need to wrap it up so I can drive home (30 miles) Otherwise even with the aligned ones there’s gap to the springs, because the top cradle is slightly wider than the springs. There’s small gaps everywhere, it isn’t precision manufacturing. Anyhow John you’re absolutely right, it is bending the hanger in. Surprised we don’t use washers on these hanger wet bolts.