All Activity
- Past hour
-

MaxxFan Mod to Add a Fan Motor Switch and Deep Cleaning
jd1923 replied to jd1923's topic in Ollie Modifications
Of course, but the goal is to turn the fan OFF leaving the vent door OPEN. This doesn't work well. The noise starts with the first action and often ours doesn't respond quickly enough to start re-opening. Rubbing alcohol is one of the lightest solvents. I rub it on the gelcoat or ANY other surface to prep for 3M VHB tape. The fan is crystal clear after several applications. Yeah, basically to clean it thoroughly you must remove disassemble all parts. Yes, very strange and reason I contacted the manufacturer first. On our unit, the FAN OFF control closes the vent door too. -
 I actually think the OEM ones are pretty nice - and unlike some RV fabrics out of the later 20th century - they won’t look “dated” in 10 or 20 years. Ours are the slightly darker shade of brown - I forget what they called the color scheme. They’re wearing well after 5 years of multi-month trips. The biggest issue is keeping the cat hair cleaned off of the fabric. Right now, we’re experimenting with removing all of the “extra” main seating area cushions as that area stays set up as a king bed. One long one and 4 small ones. If keeps the bed less cluttered and doesn’t push up against the window shades and collect dust.
 -
Original window frames, alternate window treatments?
Galileo replied to Galileo's topic in Ollie Modifications
Was the 2026 model so terrible we need a moment of silence? So they went a totally different thought for one model year with a window shave without a big, clunky frame - then went BACK to the big clunky frame for 2027?! If I make a change, it will -definitely- be away from the big, clunky frame. - Today
-
MaxxFan Mod to Add a Fan Motor Switch and Deep Cleaning
Galileo replied to jd1923's topic in Ollie Modifications
I mentioned on another thread that if you press the “power” and “open/close” button is rapid succession, you can turn the fan off but leave the vent open…. The detail cleaning sounds like my description from last year. I found that using a spray cleaner like “Fantastic” or “409” and a chip brush is very effective at removing greasy buildup in nooks and crannies. Just rinse with water when clean. I’d be hesitant to use alcohol for fear of crazing or attacking the plastic. Ours is starting to get dirty again - and I do my best not to cook anything remotely like bacon inside. Still, between cats and human life - with running the fan on exhaust 80% of the time - it still gets grimy. -
Yes @Boudicca908, we enjoyed the mosquitoes in the Everglades when we camped there a couple of years ago. They had a cute little sign with a movable arrow like you see telling what the fire danger is. Except this one was about mosquitoes. It was about mid-scale “moderate”. We had to RUN from the truck to the trailer to keep bites to less than about ten - and all intentions of a campfire or sitting outside were immediately scrapped. We did the “mountains” thing on the trip we’re wrapping up. Camped up to about 8,000 feet. There, it was wondering why you get out of breath on easy hikes. If memory of aviation planning holds, you get about 3 degrees Fahrenheit for each 1,000 of elevation. Too bad we’re not there now, as it was, in April and May we were getting into the 20’s and high teens at night. Heater hose is on my wish list for 2027!
-

Upgrading from a Bulldog 2” coupler to 2 5/16 BD coupler
Steph and Dud B replied to Patriot's topic in Ollie Modifications
@Patriot, thanks for bringing this up. Prompted me to get a repair kit as well. -

MaxxFan Mod to Add a Fan Motor Switch and Deep Cleaning
skalywag replied to jd1923's topic in Ollie Modifications
I simply crank the black knob to open when fan is off. I ventilate the trailer in storage doing this. -

Upgrading from a Bulldog 2” coupler to 2 5/16 BD coupler
Geronimo John replied to Patriot's topic in Ollie Modifications
Good point JD. When I leave our Ollie in a location where it could be at risk, I lower the tongue (via the jack) closer to the ground and remove the fuse. If not in use (think power to the frig.) I kill the master switch. The thief would need to pick up the 560 pound tongue or haul it away using the safety cables. Doing so makes our Ollie more of a PITA to relocate. A collar lock and other means is gravy to boot. GJ -
.thumb.jpg.e34bf01ef7f7d5e99ad31856d45afbeb.jpg)
MaxxFan Mod to Add a Fan Motor Switch and Deep Cleaning
CRM replied to jd1923's topic in Ollie Modifications
It's kind of strange they didn't design it to have that option to begin with... Not sure what make/model I have but it has separate controls so I can turn the fan off while the vent door is open. -

Upgrading from a Bulldog 2” coupler to 2 5/16 BD coupler
Tony and Rhonda replied to Patriot's topic in Ollie Modifications
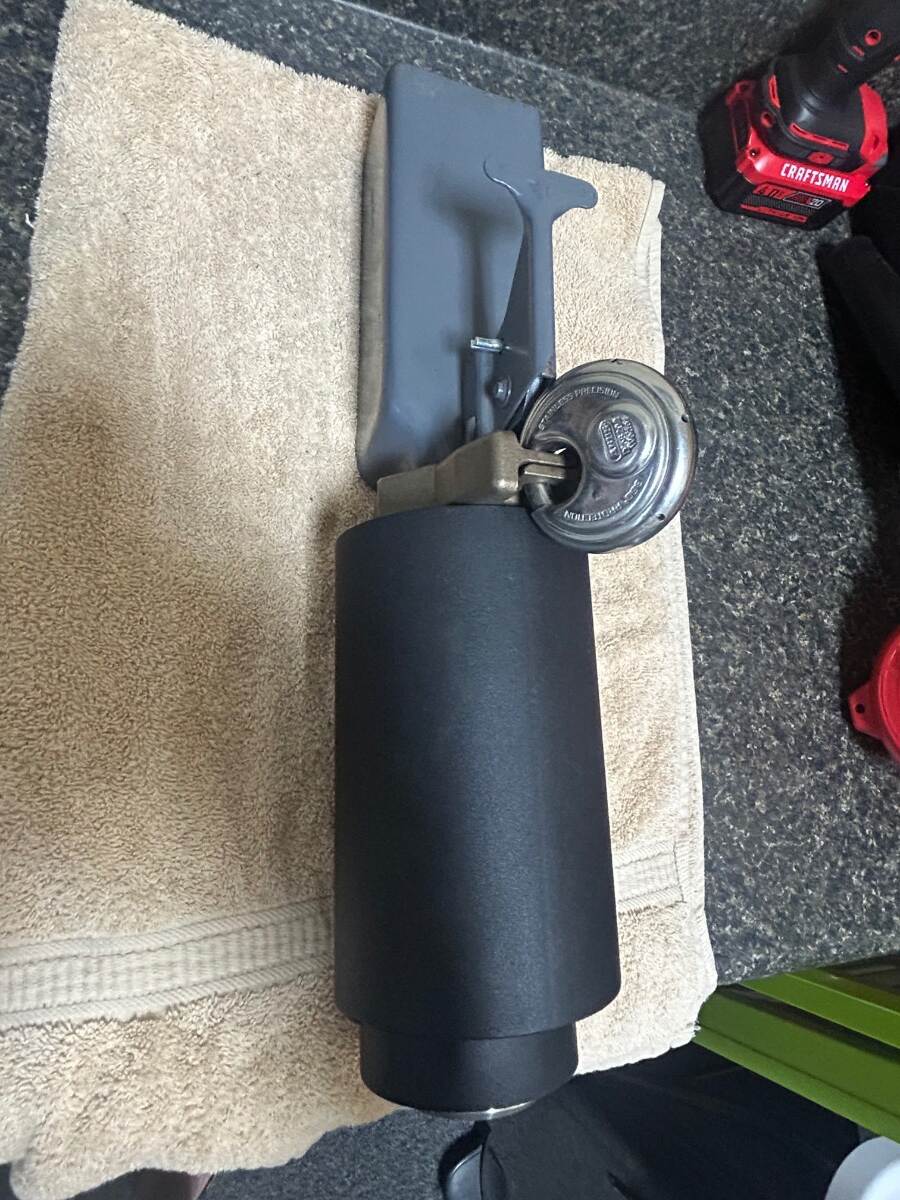
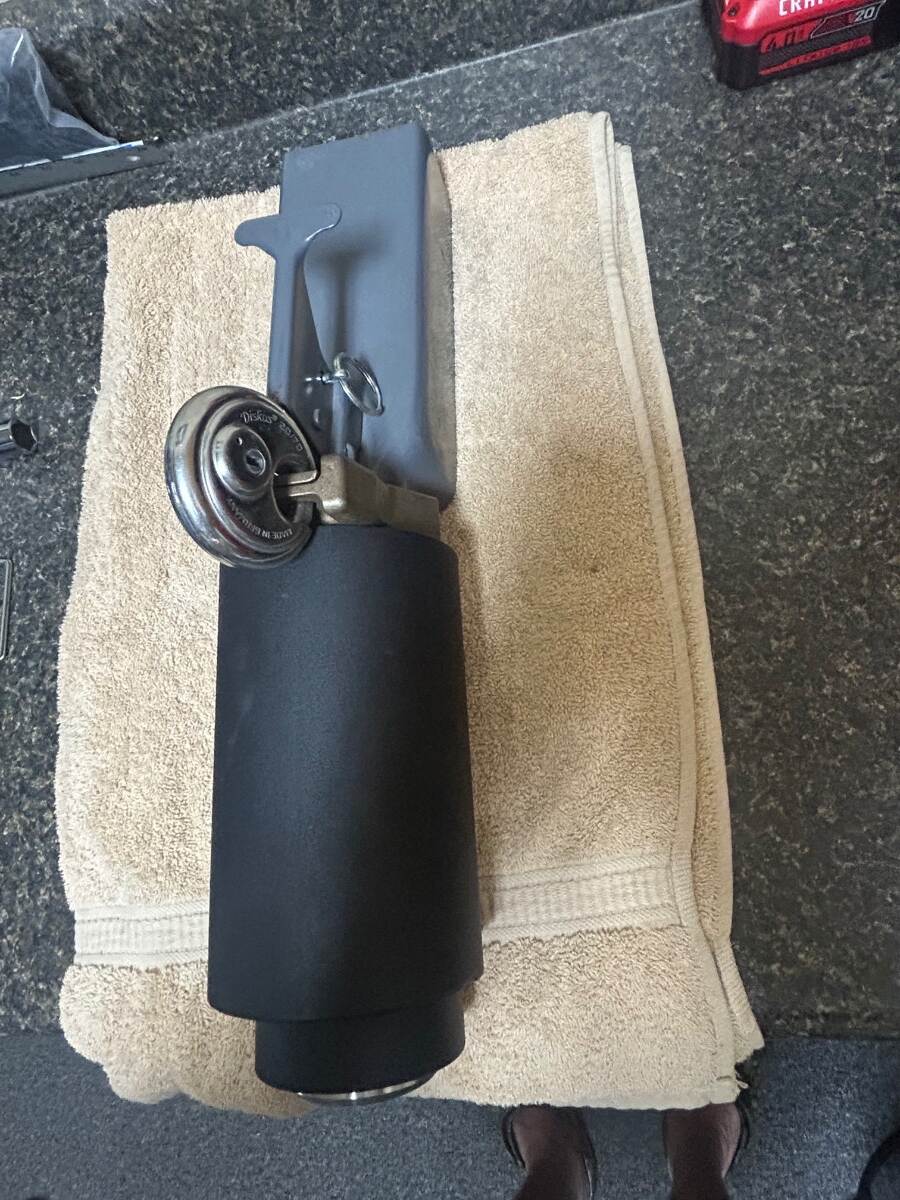
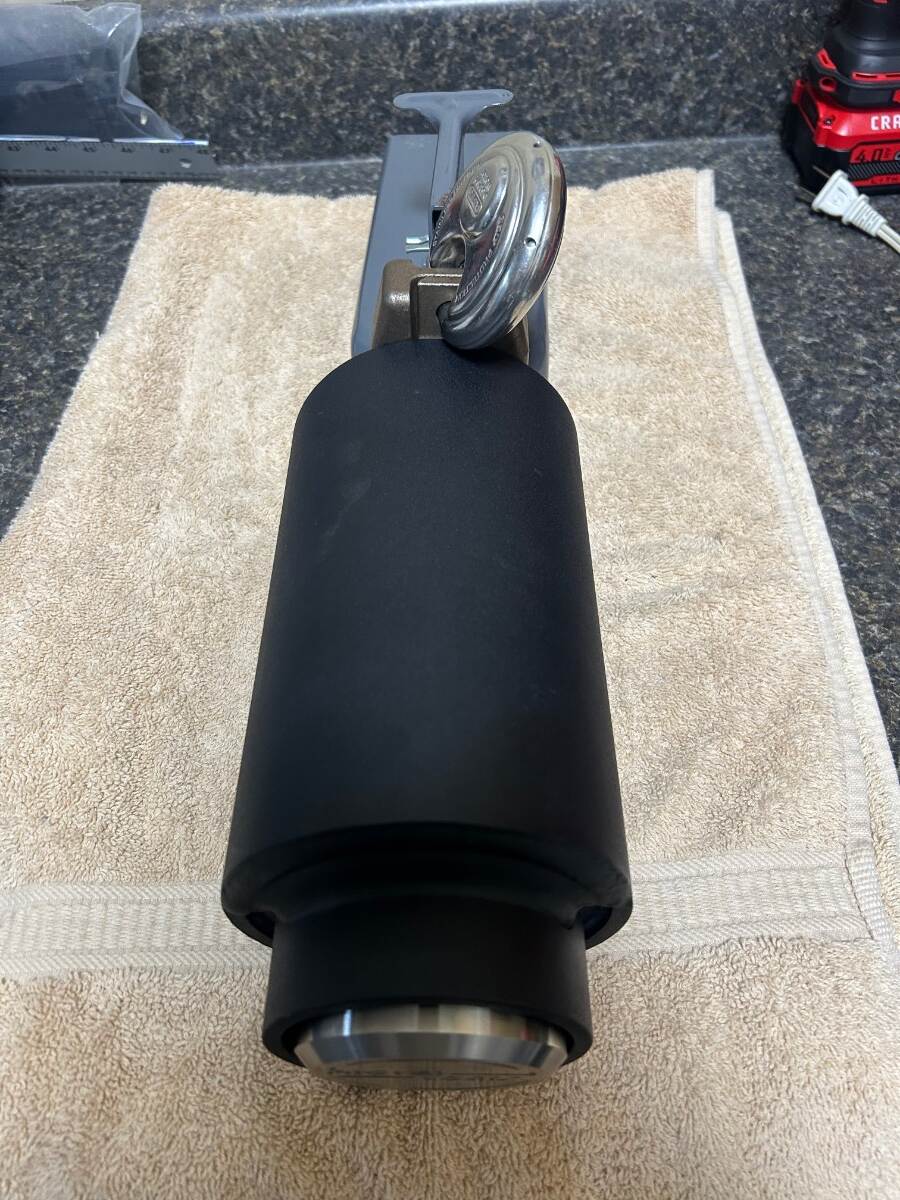
This thread caused me to do a little googling on the 2 5/16' coupler. Didn't find any in a quick search, but that made me think of a question about future Olivers (and Oliver upgrades). Bulldog may or may not survive and 2 5/16' couplers are very scarce. What happens if Oliver runs out of the 2" couplers? Does anyone know of alternatives that fit an Oliver? @Patriot Is the small plastic bag in the photo above the coupler repair kit? Are the kits ball size dependent? Part #024200? Thanks. @Patriot and @Townesw We use a Paclock lock (similar to the Proven) and, with the lock in place, the bulldog collar may slide back (never tried) but the coupler arm doesn't open enough to remove the ball cavity insert. I was considering a more robust lever lock (Paclock keyed the same) but I do like the collar lock. I use an Abus 20/70 on our storage unit, does anyone know if they can be keyed to match an existing lock? Thanks, Tony -

Upgrading from a Bulldog 2” coupler to 2 5/16 BD coupler
John Dorrer replied to Patriot's topic in Ollie Modifications
That's Awesome -

Upgrading from a Bulldog 2” coupler to 2 5/16 BD coupler
Patriot replied to Patriot's topic in Ollie Modifications
When parked at camp, I use a Proven Industries coupler lock with the optional S/S puck and Medco lock which is extremely robust. It’s just about bomb proof. **** A note to any owners upgrading to the 2 5/16 BD coupler and IF you presently use a Proven coupler lock for with a 2” ball, no need to purchase a new Proven Industries lock. Your current 2” coupler lock will work. I mocked mine up this morning on the new BD 2/16 coupler and its fits perfectly. Do not loose the keys, as I cannot imagine trying to remove either of these this locks.
-
 Oh my -- the biting insects. Sometimes I do forget about them -- haha -- thinking that I have escaped by leaving southwest Florida for the summer, but ooohhh no. They nailed me last year in eastern Wyoming at a low-lying campground. Also, @Galileo I find that it's not necessarily how far North you go, but how high in elevation. The mountains can really make a difference for beating the heat. Thanks @jd1923 that looks great. It might be the ticket.
 -
 Vancelot joined the community
 -
Detail-Cleaning the MaxxFan Ventilator
jd1923 replied to Galileo's topic in Mechanical & Technical Tips
Here it is, switch mod and cleaning instructions WITH pictures! 🤣 -
MaxxFan Mod to Add a Fan Motor Switch and Deep Cleaning
jd1923 posted a topic in Ollie Modifications
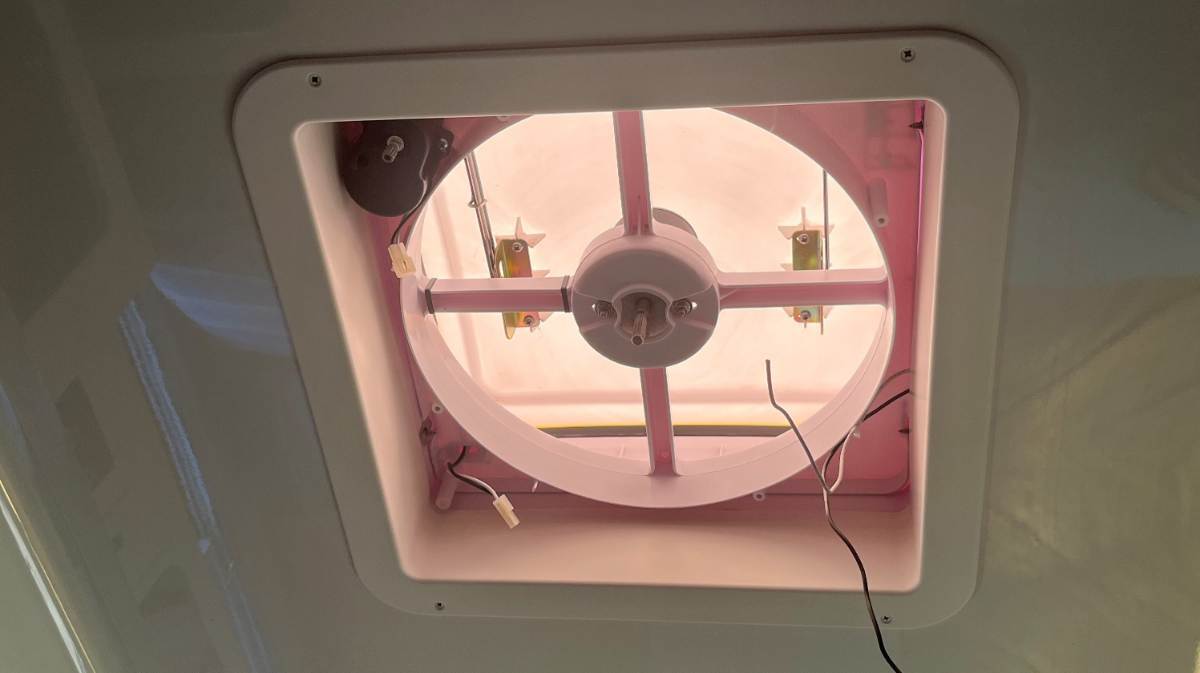
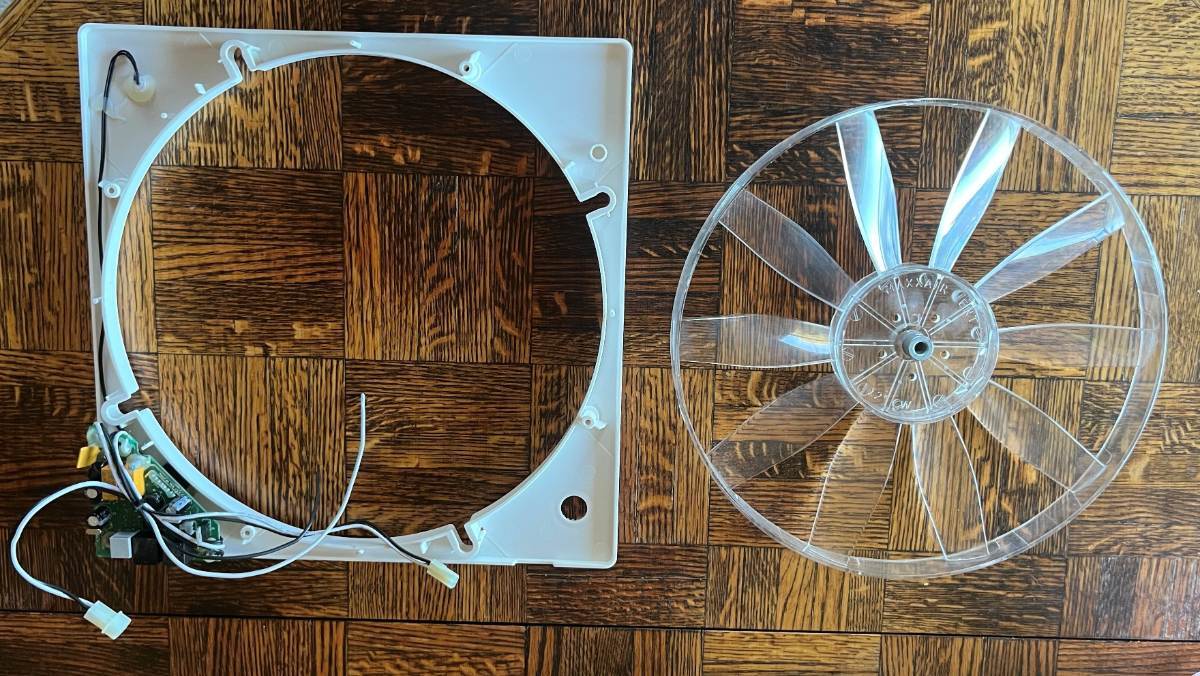
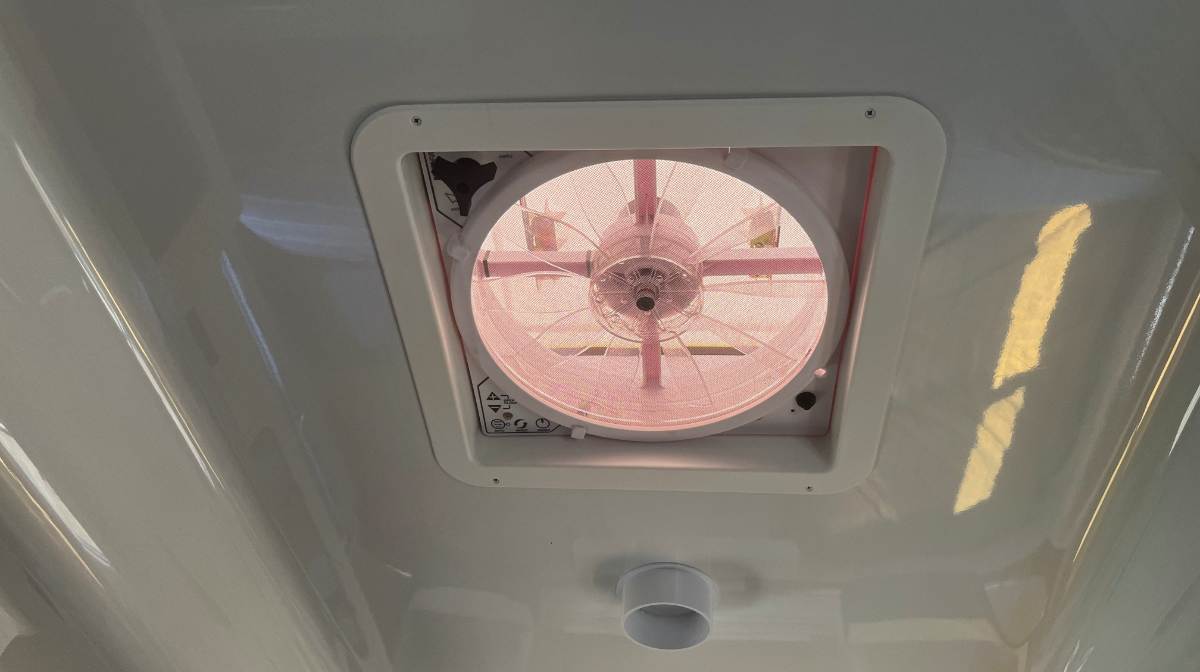
The goal was to add a simple toggle switch to the fan motor so that when the fan is ON, the fan motor can be turned OFF while leaving the vent door OPEN! I contacted MaxxAir CS to see if there is a better way to do this, but they really had difficulty understanding my use case and after asking 3 times in 3 emails, as they cc:d 3 more staff persons, I gave up to "Do It My Way!" (as usual) 🤣 Often during evenings, we have the fan on low to exhaust heat from the Oliver ceiling. Later when going to bed, I want to turn OFF the fan but leave the fan door open as a vent. The fan open/close mechanism is very NOISY! Often Chris had drifted off to sleep, and I hardly wanted to CLOSE/OPEN the vent door twice to double this annoying sound! I used to place a pillow over the opening to cut down on the noise. First thing I noticed was how dirty the fan parts were which was not as noticeable when camping day-to-day. Certainly, much more worked was involved in a detailed cleaning than the 20 minutes it would take to split a wire and crimp in a toggle switch. We mainly cook breakfast indoors, always with the fan exhausting. The screen and other parts had a layer of bacon grease and whatever else. I had to scrub the screen with Dawn for quite a while to get it completely clean. In fact, so much scrubbing removed the shine (coating) on the screen. (I found an open box replacement on eBay for $20). Please keep in mind this fan is 10 years old! The fan blades too! They were so dirty after sponging with Dawn, I had to wipe each blade several times with rubbing alcohol on paper towels to finally achieve clean/clear plastic! At this point, I figured I would disassemble and clean it completely. Adam is my "Second Story Man" so he grabbed the ladder and I handed him the Phillips. The complete exterior unit is held on with only 4 screws. With everything removeable out, I stood on a milk crate under the opening and cleaned it inside and out. To start there are 4 swivel clips to hold the screen (I'm going to start cleaning the screen every 1-2 weeks). Under the edge of the screen are 4 screws holding the lower plastic assembly in place which contains the electronics and wiring. Every screw on the MaxxFan is a Phillips so all you need is one screwdriver and wire tools if you're wanting the toggle switch. MaxxFan uses terminals to connect power to the fan motor and opening mechanism, but OTT did not add a terminal for power to the unit, so I cut the black and white wires and used butt connectors upon reassembly (adding a terminal disconnect would be nice). I'll show a picture of the internal wiring later, as I forgot to take one, but I have to open it again next week when I get a new swivel pin for the screen. One of 4 had a broken tab which would occur as somebody tried to pry off the pin vs. turning it. The outdoor assembly comes apart into pieces by removing 5 + 3 + 6 more screws (see pics). When I reassembled this section, after cleaning all, I put a matchhead sized dab of clear silicone grease on the white wheel-shaped bushings on the ends of the lift levers. What is really amazing is it's now so CLEAN that it allows twice as much light to enter the cabin. We might now need a cover for sleeping, LOL! It's hard to photograph it all clean and installed due to lighting contrast (last picture). Love the simple switch! The video should get the point across. We can now turn off the fan at night without making more than the click sound on the toggle! 😎 Fan Power Off Button.MOV
-

Upgrading from a Bulldog 2” coupler to 2 5/16 BD coupler
rideandfly replied to Patriot's topic in Ollie Modifications
Good discussion! Just measured the Bulldog 2 5/16" coupler and 1 7/8" ball mount/ball and discovered the following. With the 2 5/16" coupler with collar lock installed, a thief can easily back up to a trailer with 2 5/16" coupler, lower it on a 1 7/8" ball and drive away (not sure how far the 1 7/8" hitch would make it). My current 2" Bulldog coupler is still on Ollie stored at the airport, doubt it will slip over a 1 7/8" ball if locked with a collar lock like the Bulldog 2 5/16" coupler, but will check. At the most narrow inside portion of the 2 5/16" coupler with collar locked measures 1.91" A 1 7/8" ball measures 1.87" outside diameter A theft deterrent for the Bulldog 2 5/16" coupler needs to have the ball opening covered or filled to prevent this type of theft. I like using the Bulldog coupler latch locked with a long shank padlock while in transit and for storing the chains with the emergency brake cable snap-hook. Also use an inexpensive Universal Coupler Ball Lock that Fits 1-7/8", 2" and 2-5/16" couplers. Previous Bulldog hitch discussion: - Yesterday
-
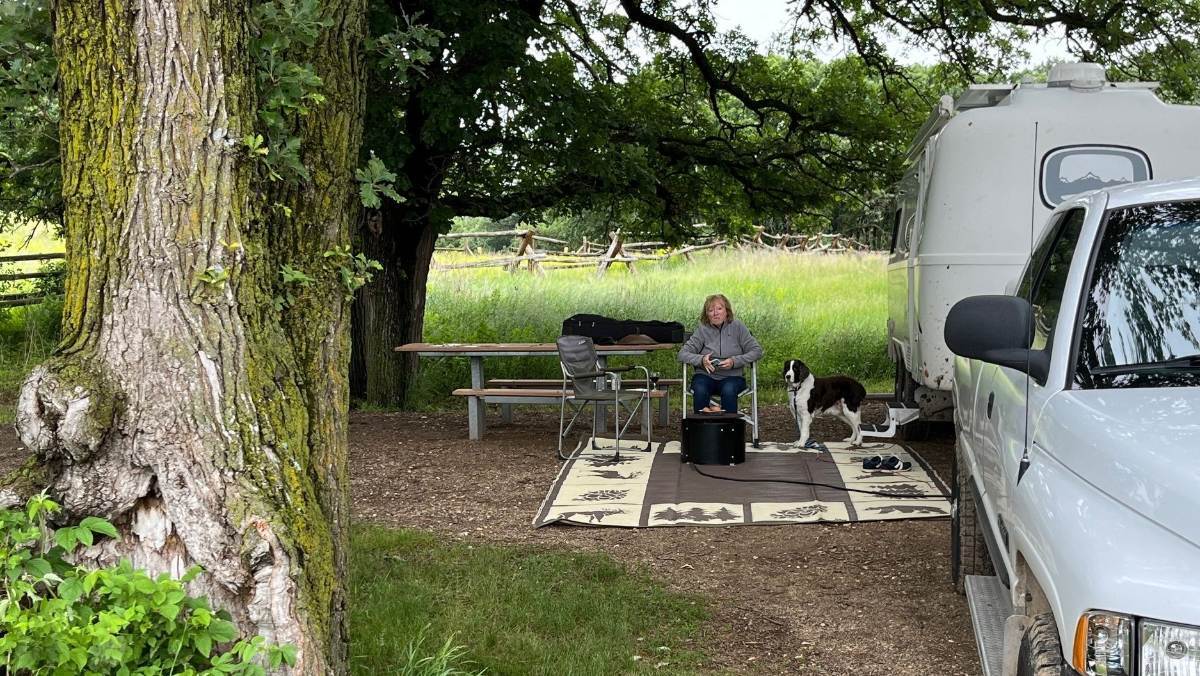
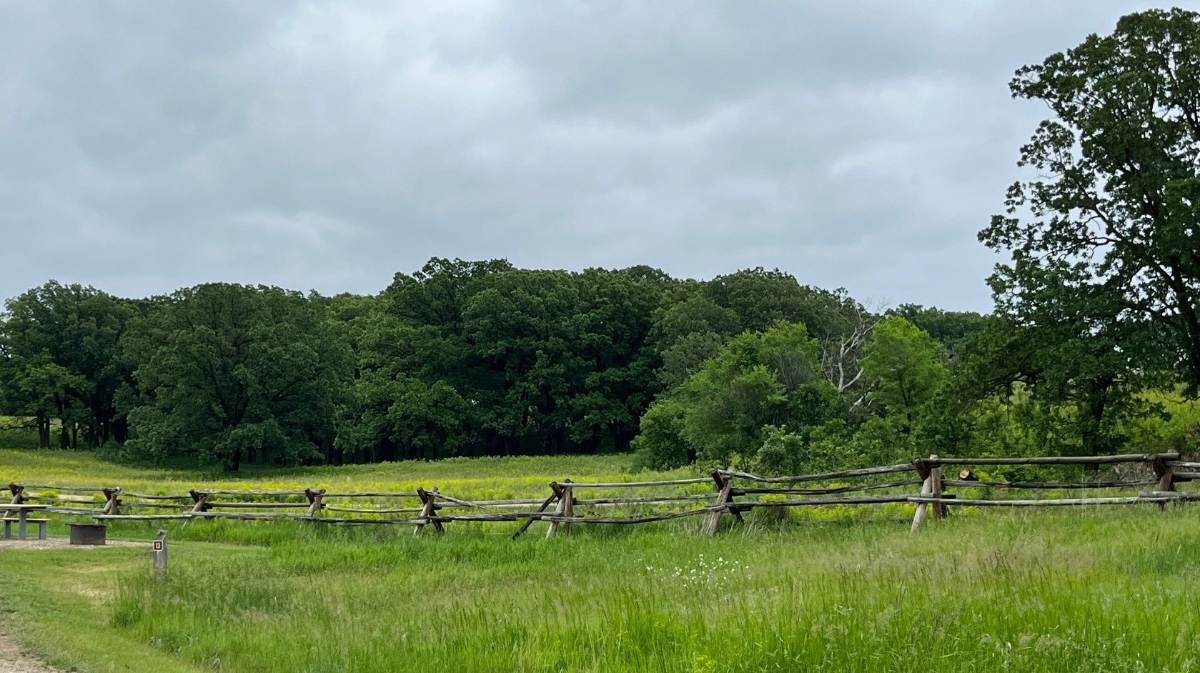
I highly recommend this campground (unless there's thunderstorms). Quiet and beautiful in the Sheyenne National Grassland, just one hour S-SW of Fargo. It's also very inexpensive accepting the National Senior Pass too! We spent a night there last summer. Wanted to stay longer but we got a little muddy on the way in and feared storms coming in the next afternoon. But it's dry most of the time with nicely graded dirt roads the last few miles. We met some girls who brought their horses out for the weekend! Just gorgeous! Dakota Prairie Grasslands | Hankinson Hills Campground | Forest Service
-
Original window frames, alternate window treatments?
jd1923 replied to Galileo's topic in Ollie Modifications
Impulse All-In-One Roller Shades for RVs - MCD Innovations -

Original window frames, alternate window treatments?
ScottyGS replied to Galileo's topic in Ollie Modifications
Not the ones you see on the virtual tour. Those are the 2026 shades. <moment of silence for those that bought in 26'> The new 2027 shades have a white frame around the window.
-
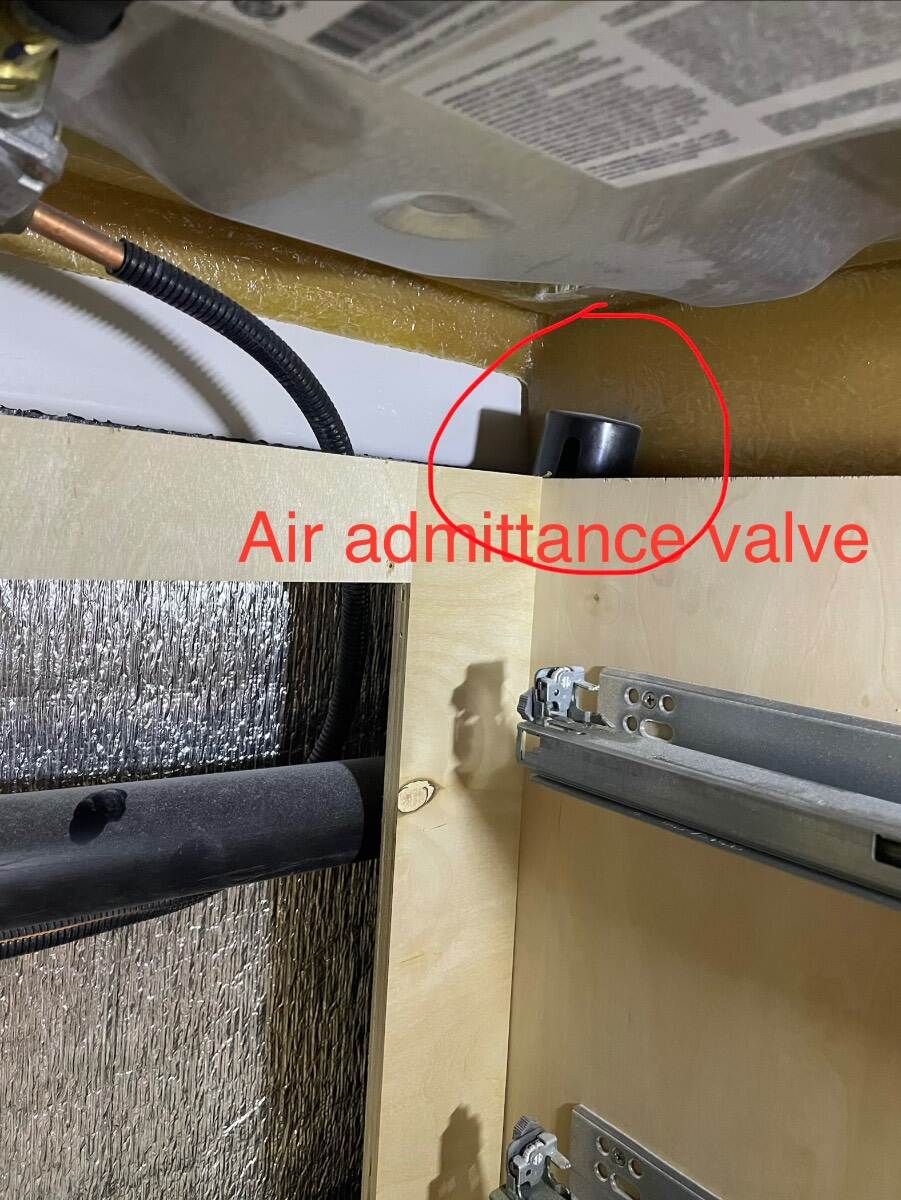
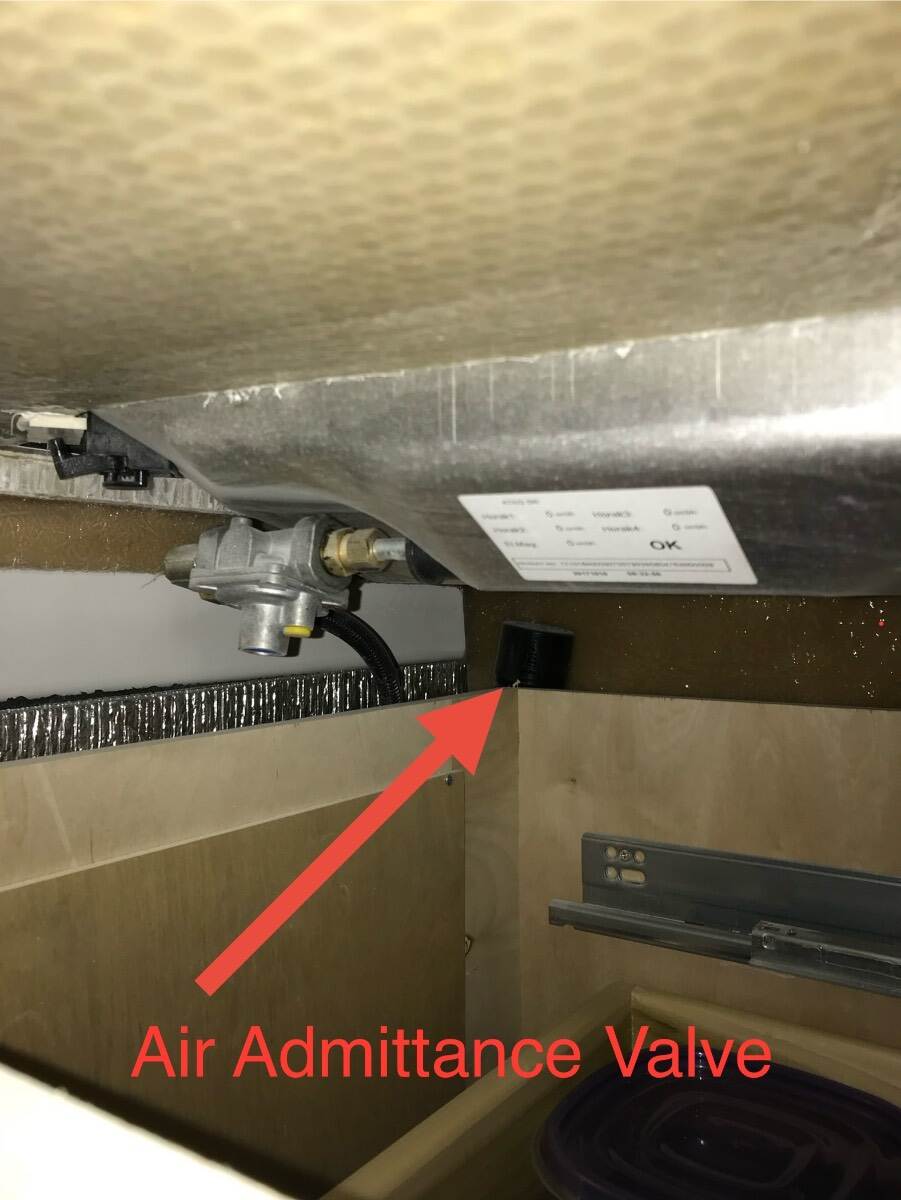
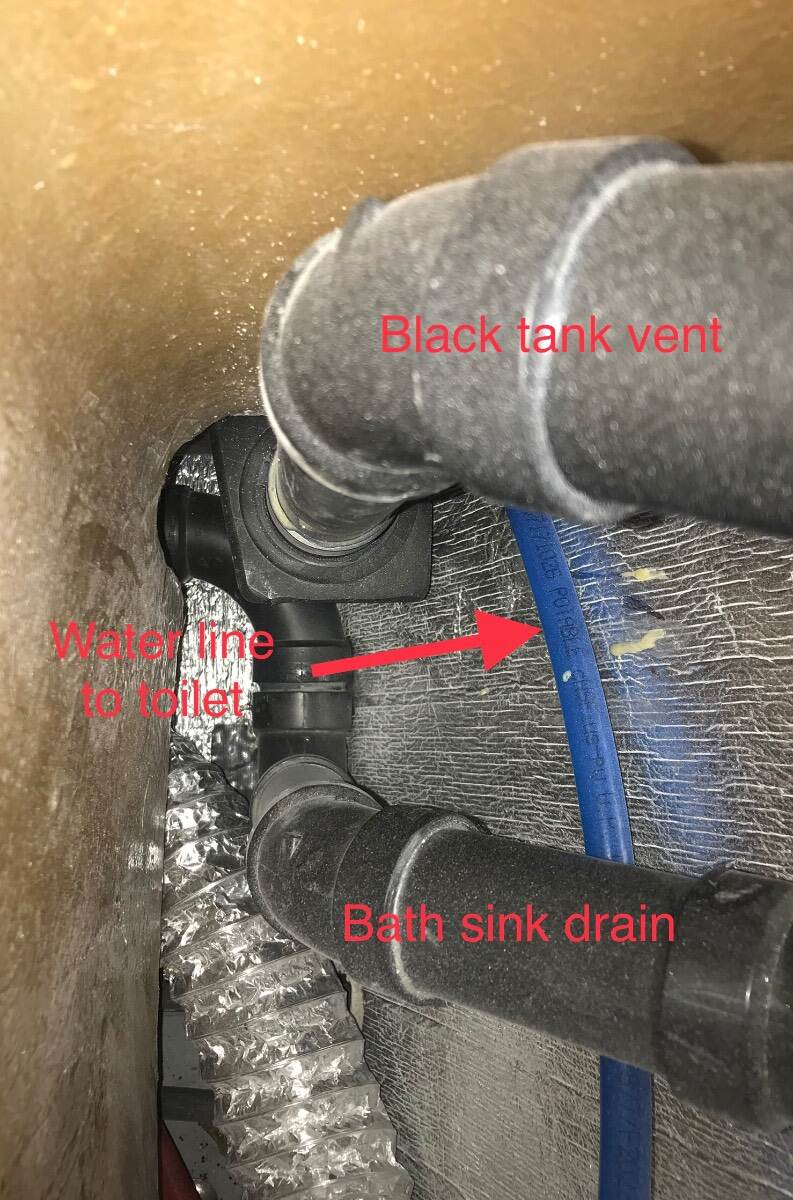
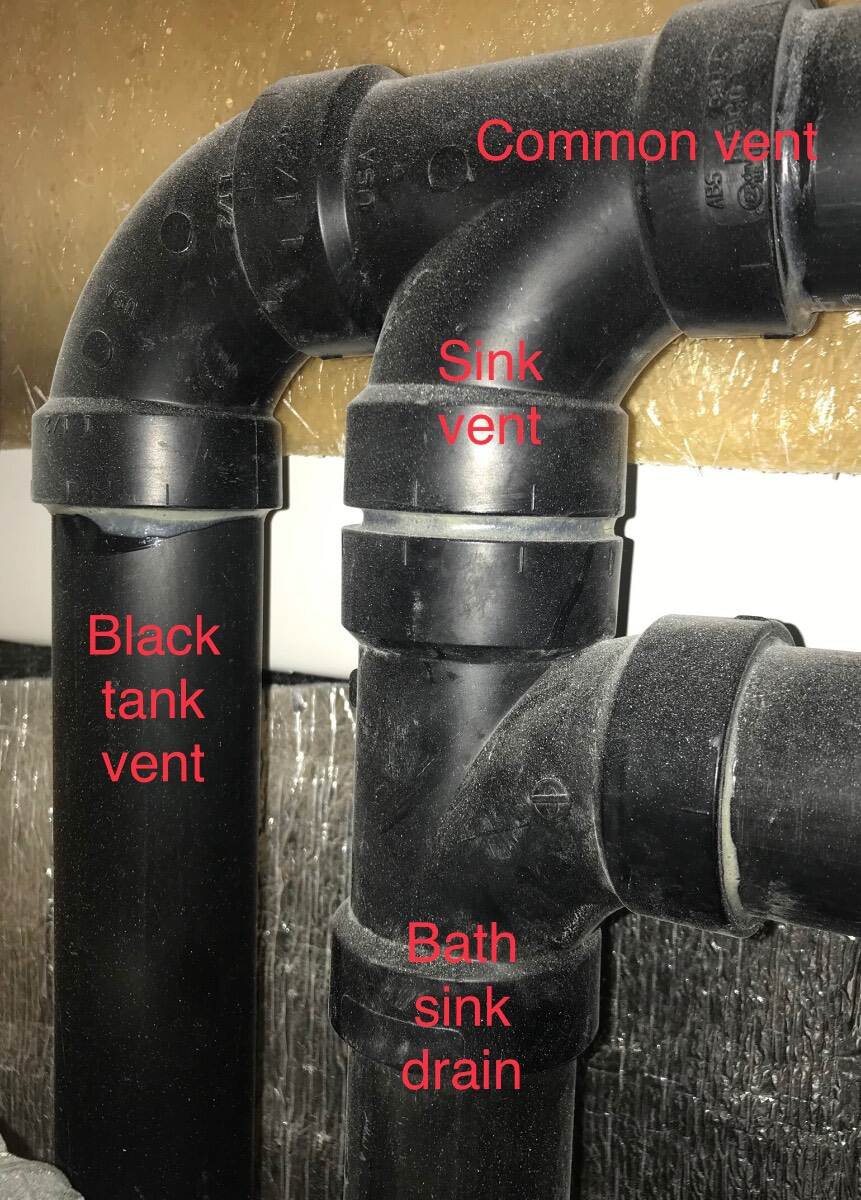
That roof vent vents the black tank all the time and the gray tank only when the shower valve is open. There is an AAV - air admittance valve - under the kitchen counter in the back right corner of the kitchen drawers that should allow air into the gray tank when draining even if the shower valve is closed once the water level drops below the place where the kitchen sink drain enters the gray tank. The bath sink drain and shower drain flow through the open shower valve to the gray tank. Bill
-
Doesn’t the vent on the roof vent both the black and the grey tanks, or just the black?
-
Original window frames, alternate window treatments?
Galileo replied to Galileo's topic in Ollie Modifications
https://mcdinnovations.com/products/day-night-roller-shades/ -
Original window frames, alternate window treatments?
Galileo replied to Galileo's topic in Ollie Modifications
From what I could see on the “virtual tour” the window frames look similar - even though the windows are swing-out instead of sliders. From what I could see, it looks like the pull-down shades mount above the window - not on the frame. So I’d bet would could scrap your old shades and adapt the new ones - if you were willing to drill into your inner shell above the window. I -think- I saw “MCD” logo on the window shade. Could likely track them down. -
It helps to open the shower drain valve (either manual or automatic) to allow some air into the (forward/high/uphill) end of the gray tank... making it somewhat easier for the liquid to pour out of the rear/low/downhill end of the tank. Don't forget to close this valve when moving the camper or parking extremely nose-down or the gray tank fluid may burble up into the shower floor pan from the long & shallow gray tank, which may not be pleasant. This valve must be open when using either the shower or the bathroom vanity sink.. otherwise these will not drain into the gray tank as expected and the fluid will either stay in or flow into the shower floor plan.
-
Upgrading from a Bulldog 2” coupler to 2 5/16 BD coupler
Patriot replied to Patriot's topic in Ollie Modifications
Yes sir Bill, another big plus to the S/S collar. 👍🏻