Leaderboard


Popular Content
Showing content with the highest reputation on 08/21/2018 in all areas
-
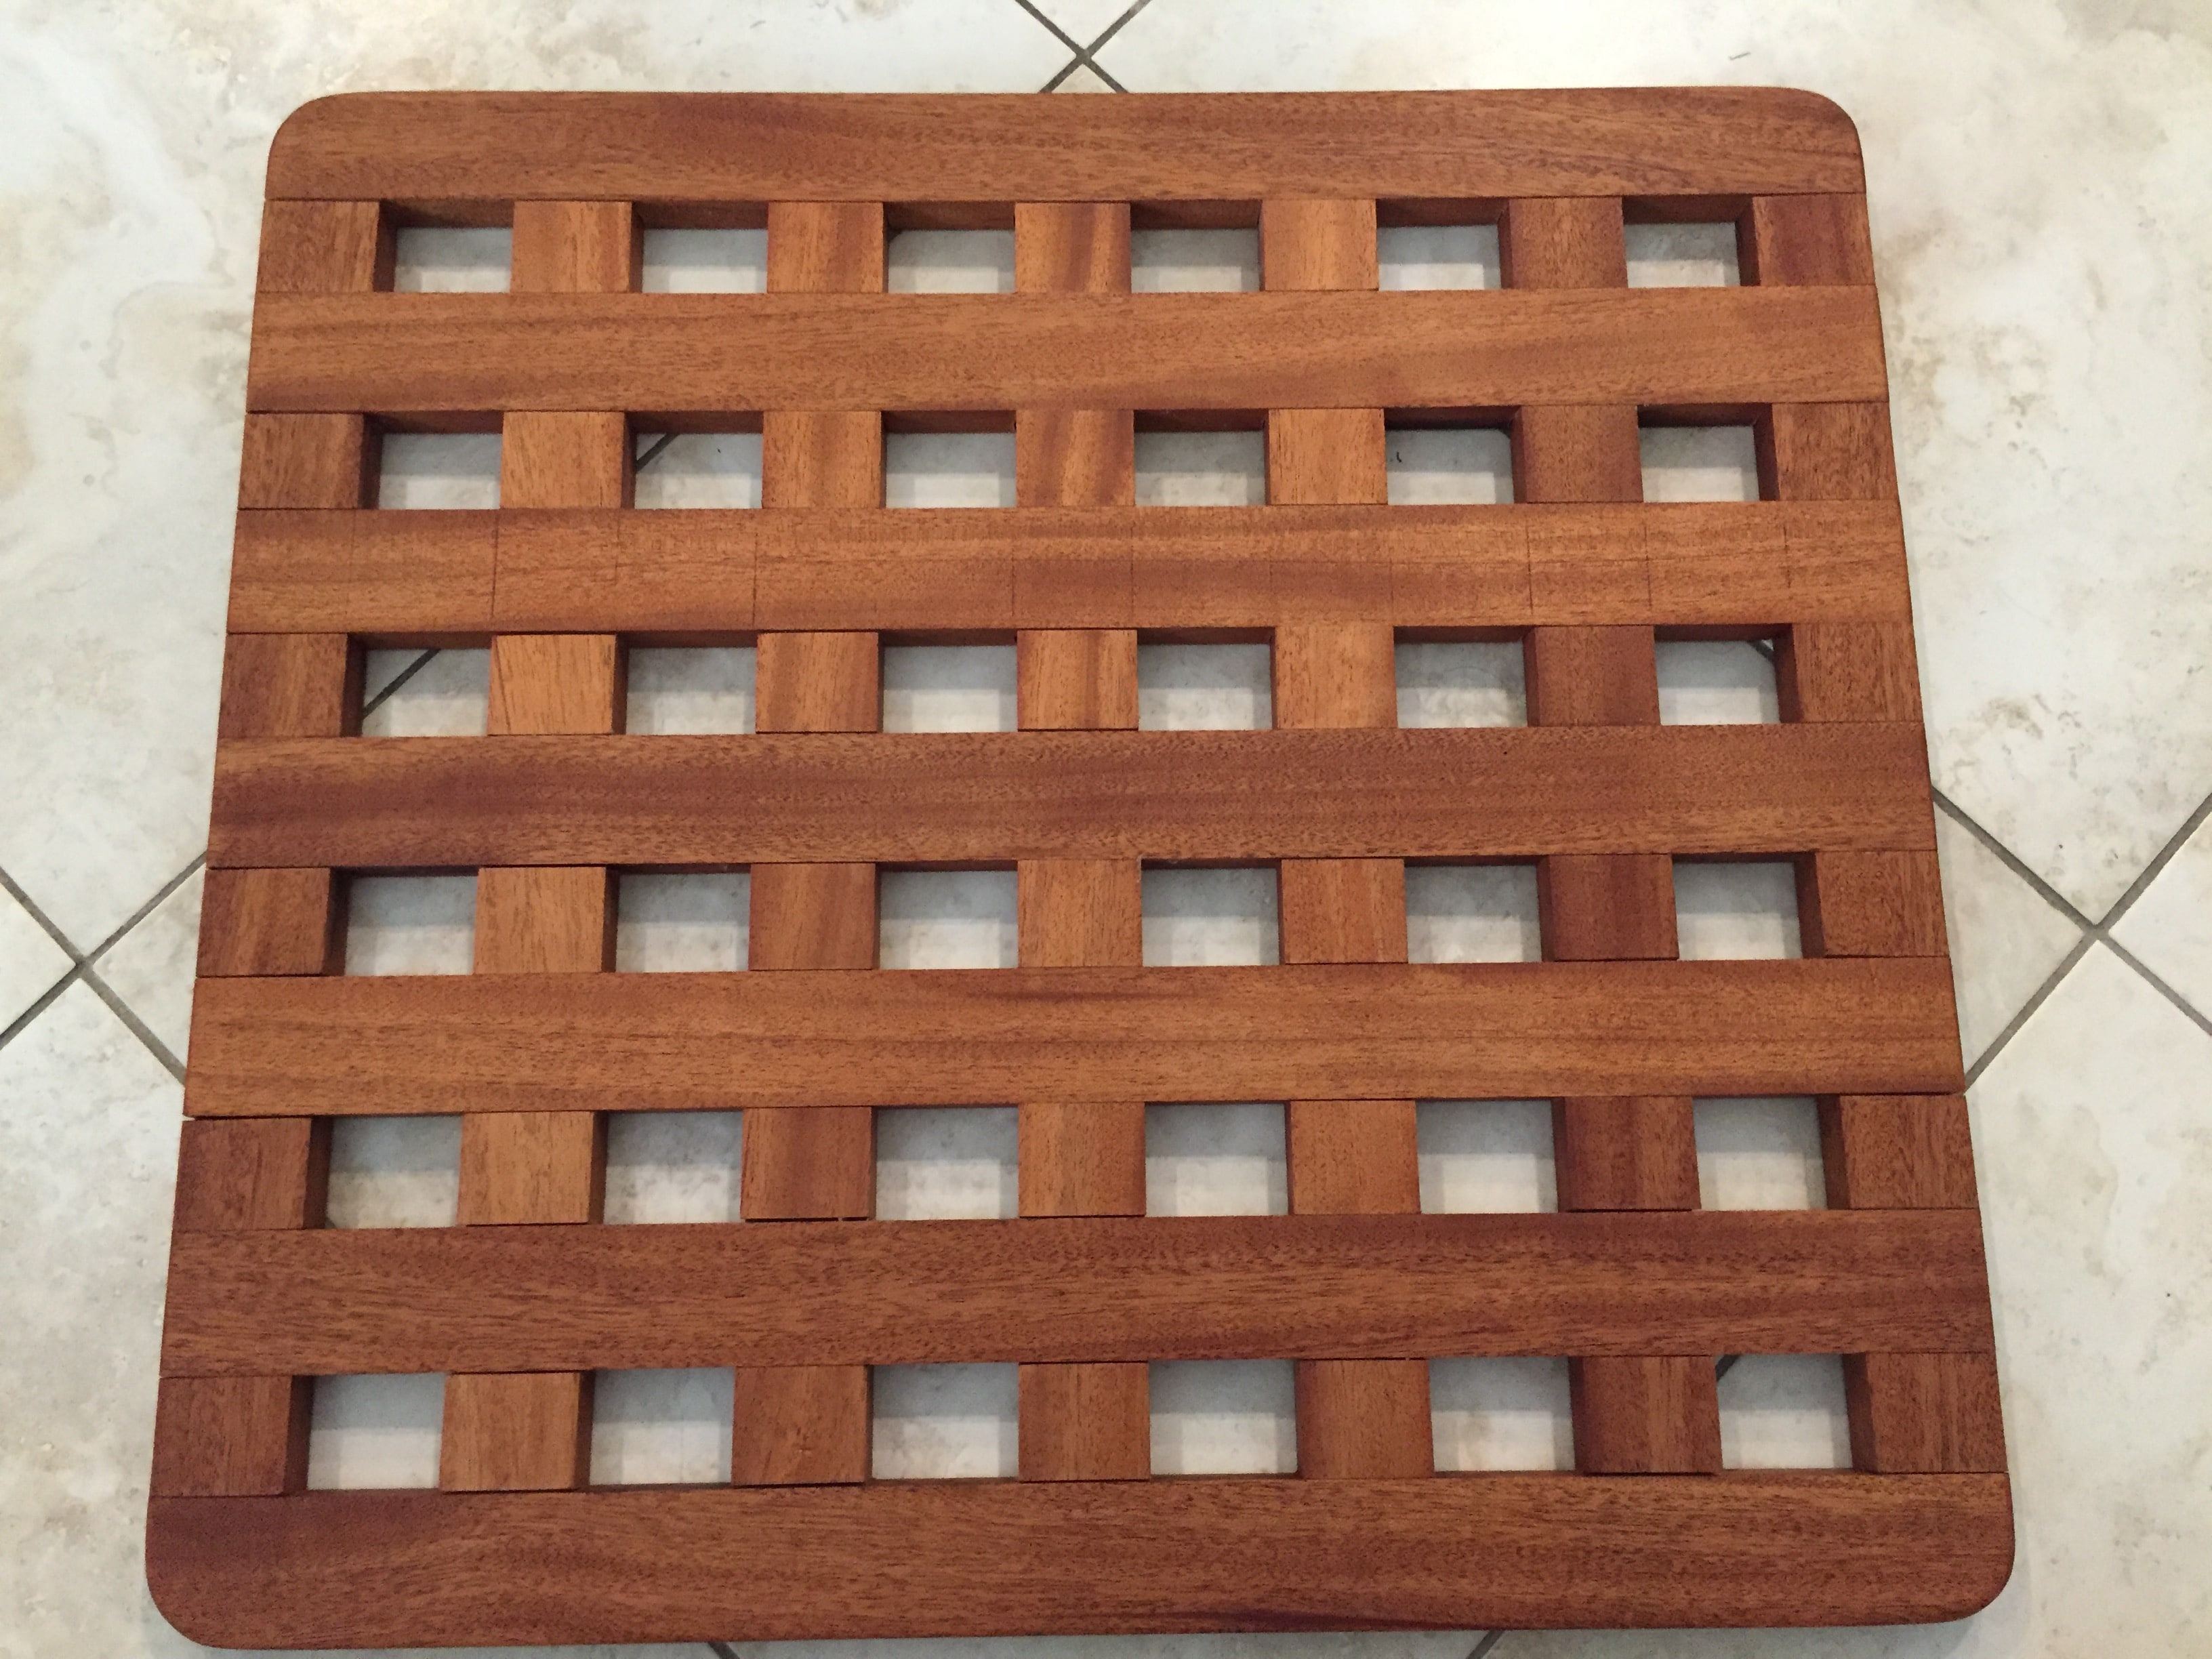
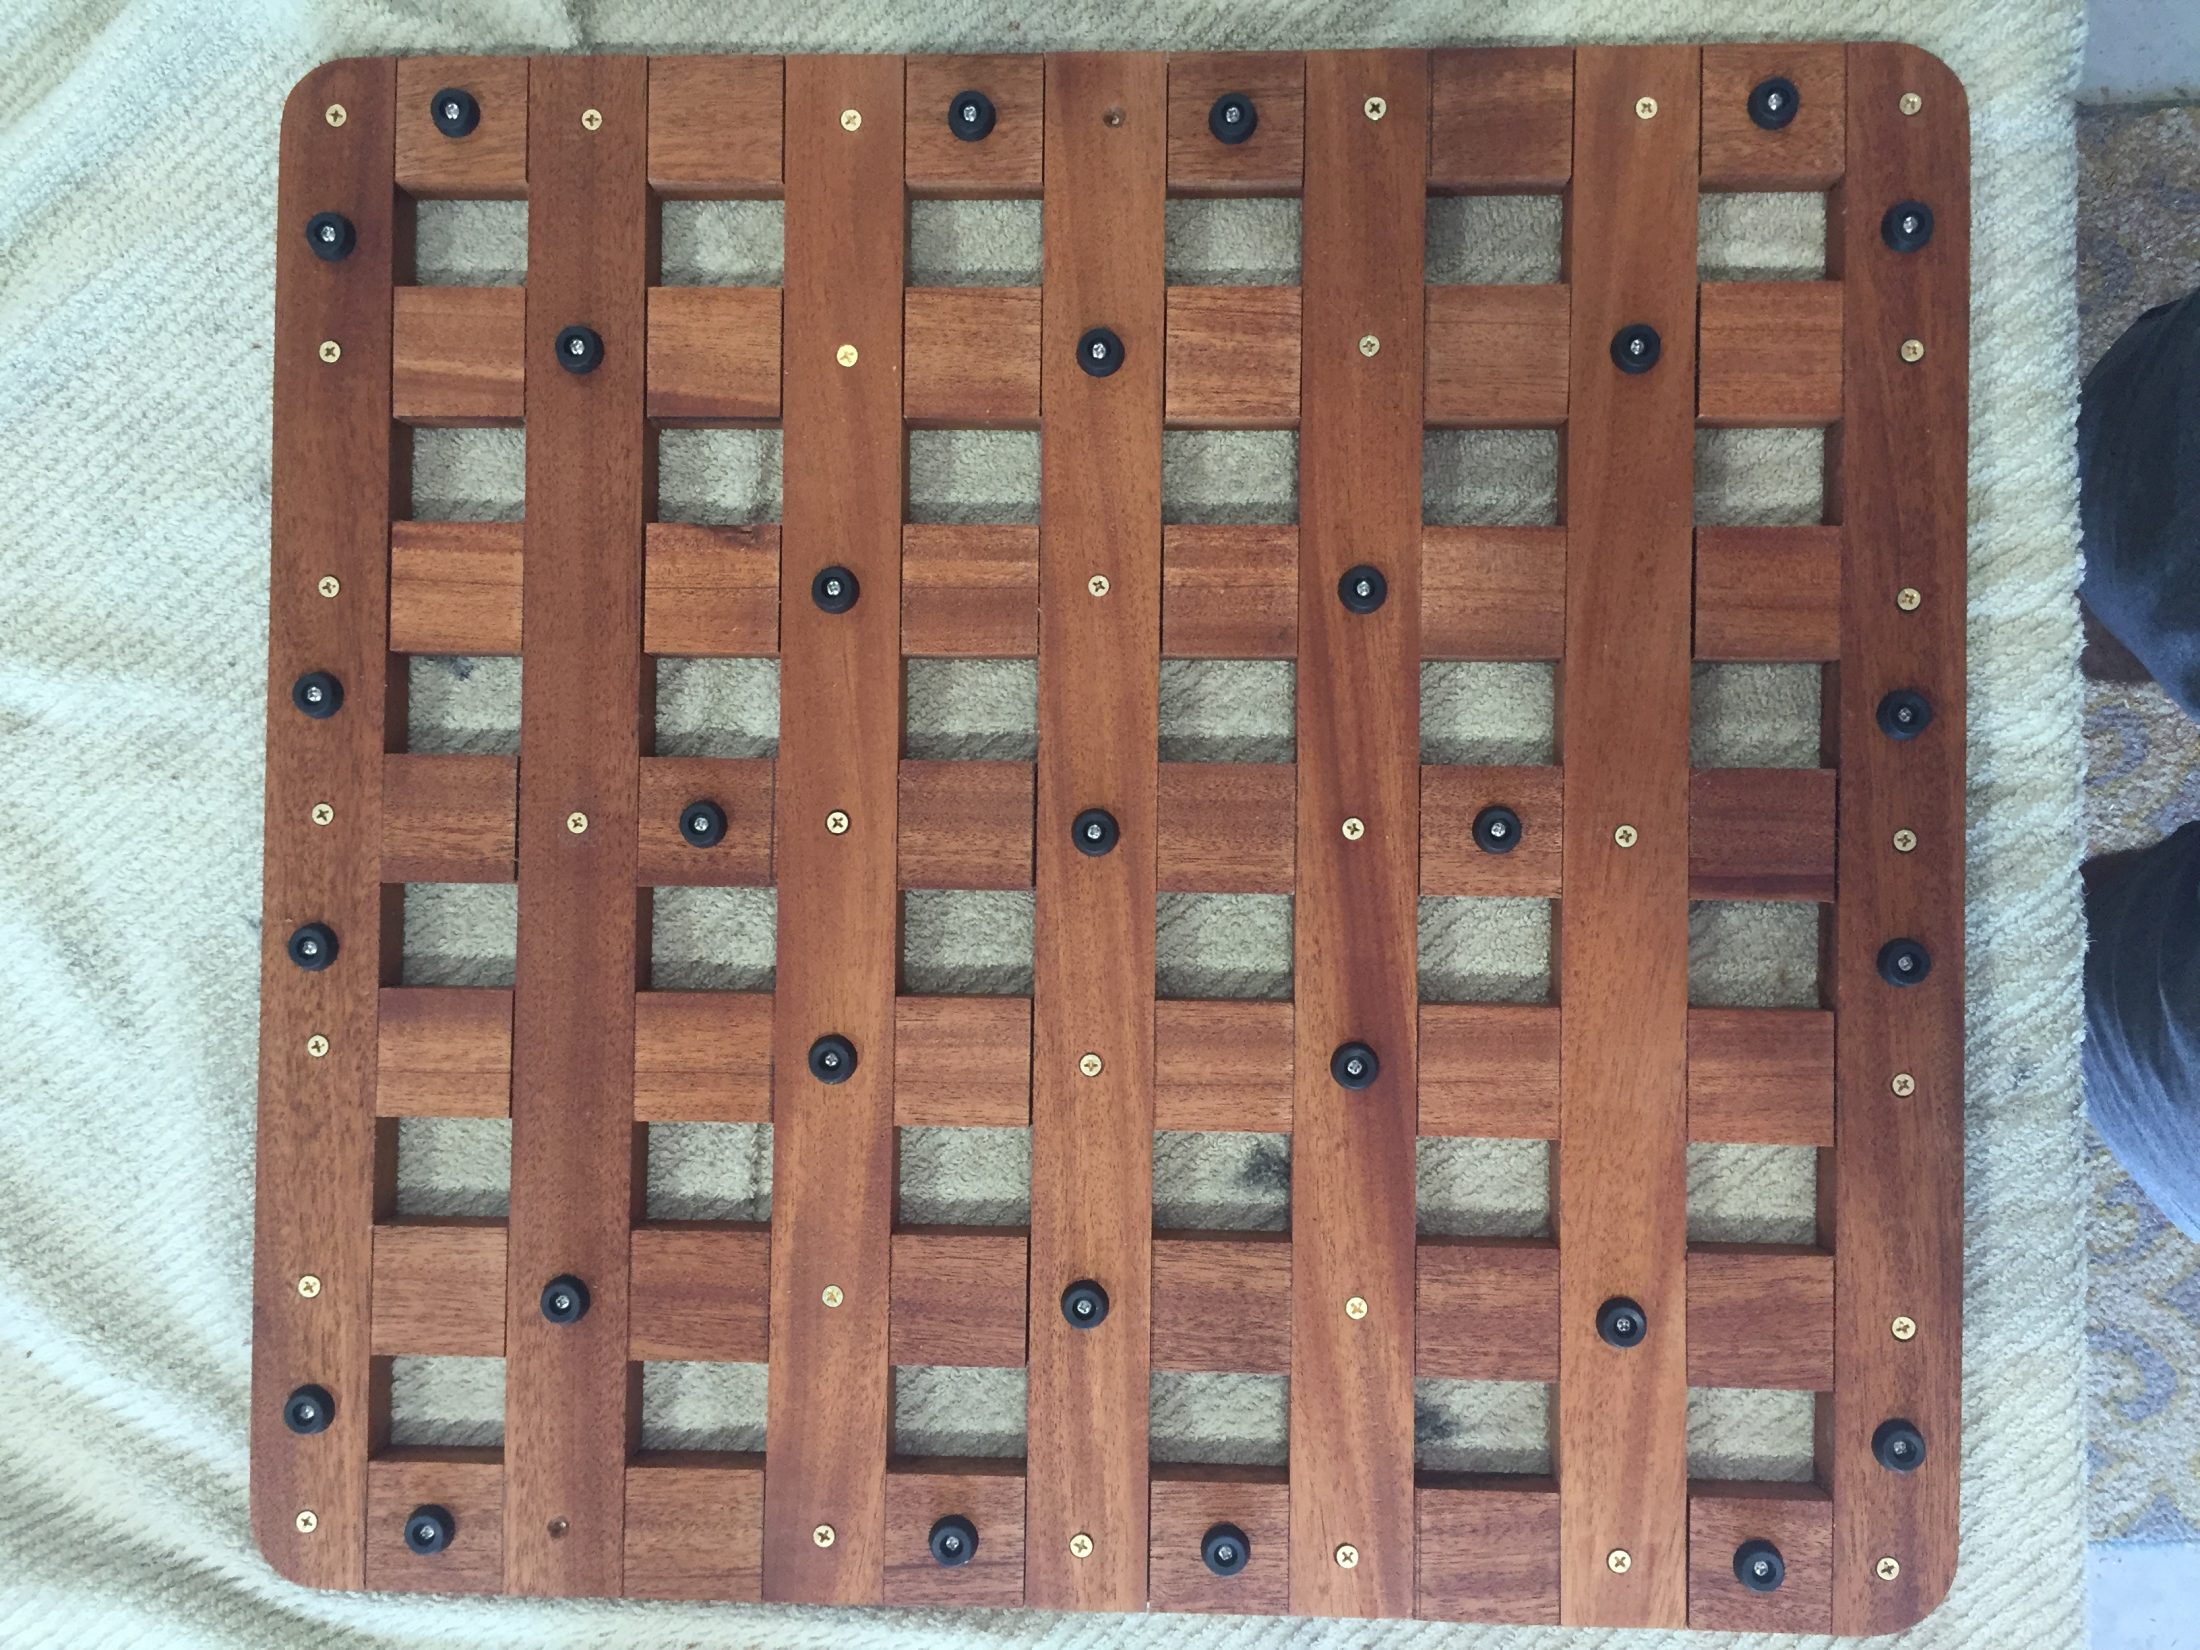
I have a number of owners who have asked me to craft shower mats for them therefore, I going to open this up for everyone. My shower mats are made from Honduran mahogany in a crosshatch pattern. Designed and assembled using over 40 precision shiplap joints with brass screws and no glue, making them lightweight and very strong. They fit your Oliver shower floor perfectly, stay put during travel and will last for year to come. The crosshatch pattern drains away water quickly and keeps you from standing in water. Their rubber feet protect your shower pan and provide a non-slip grip. Cost $185 plus UPS charges to ship to your address. If you would like one, please contact me at cell 516 635-5656 or email 48ocean@gmail.com Please note: These are wood and as such will need a little care from time to time. After each shower, simply tilt the mat up toward your closet wall and let it dry. Every few months scrub them with a soft bristle brush let dry complete and apply a light coat of mineral oil.
 2 points
 -
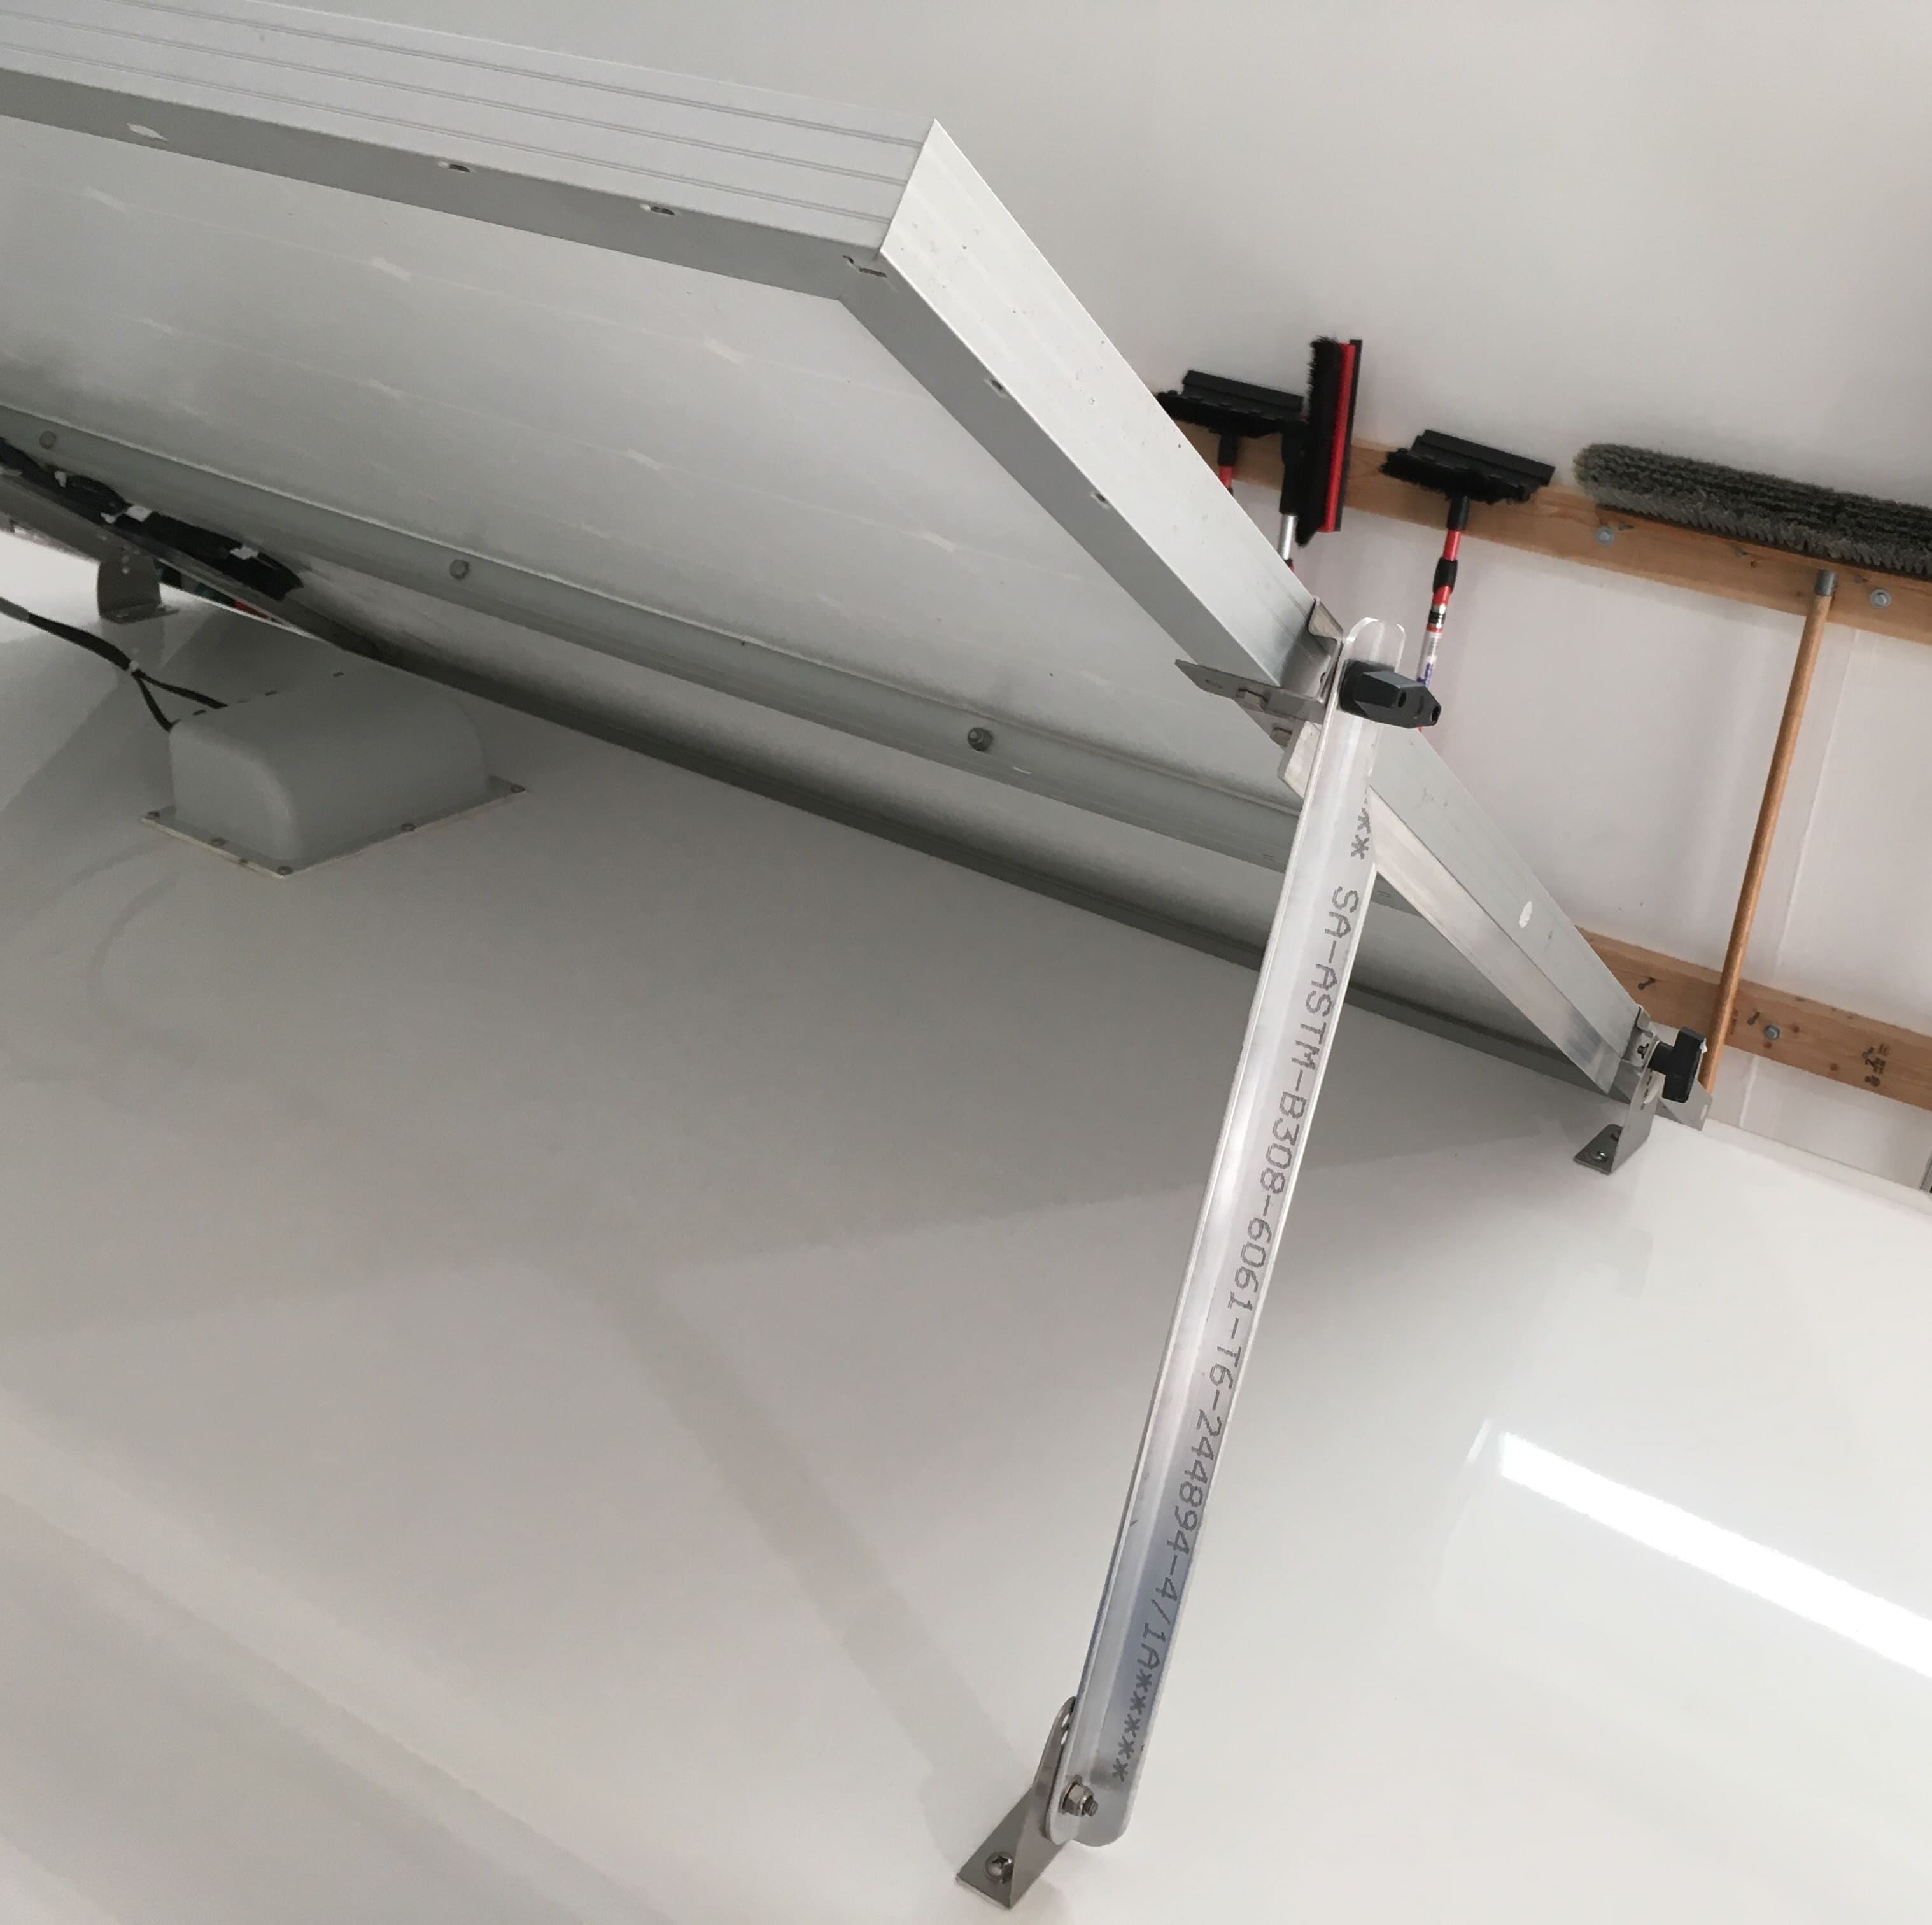
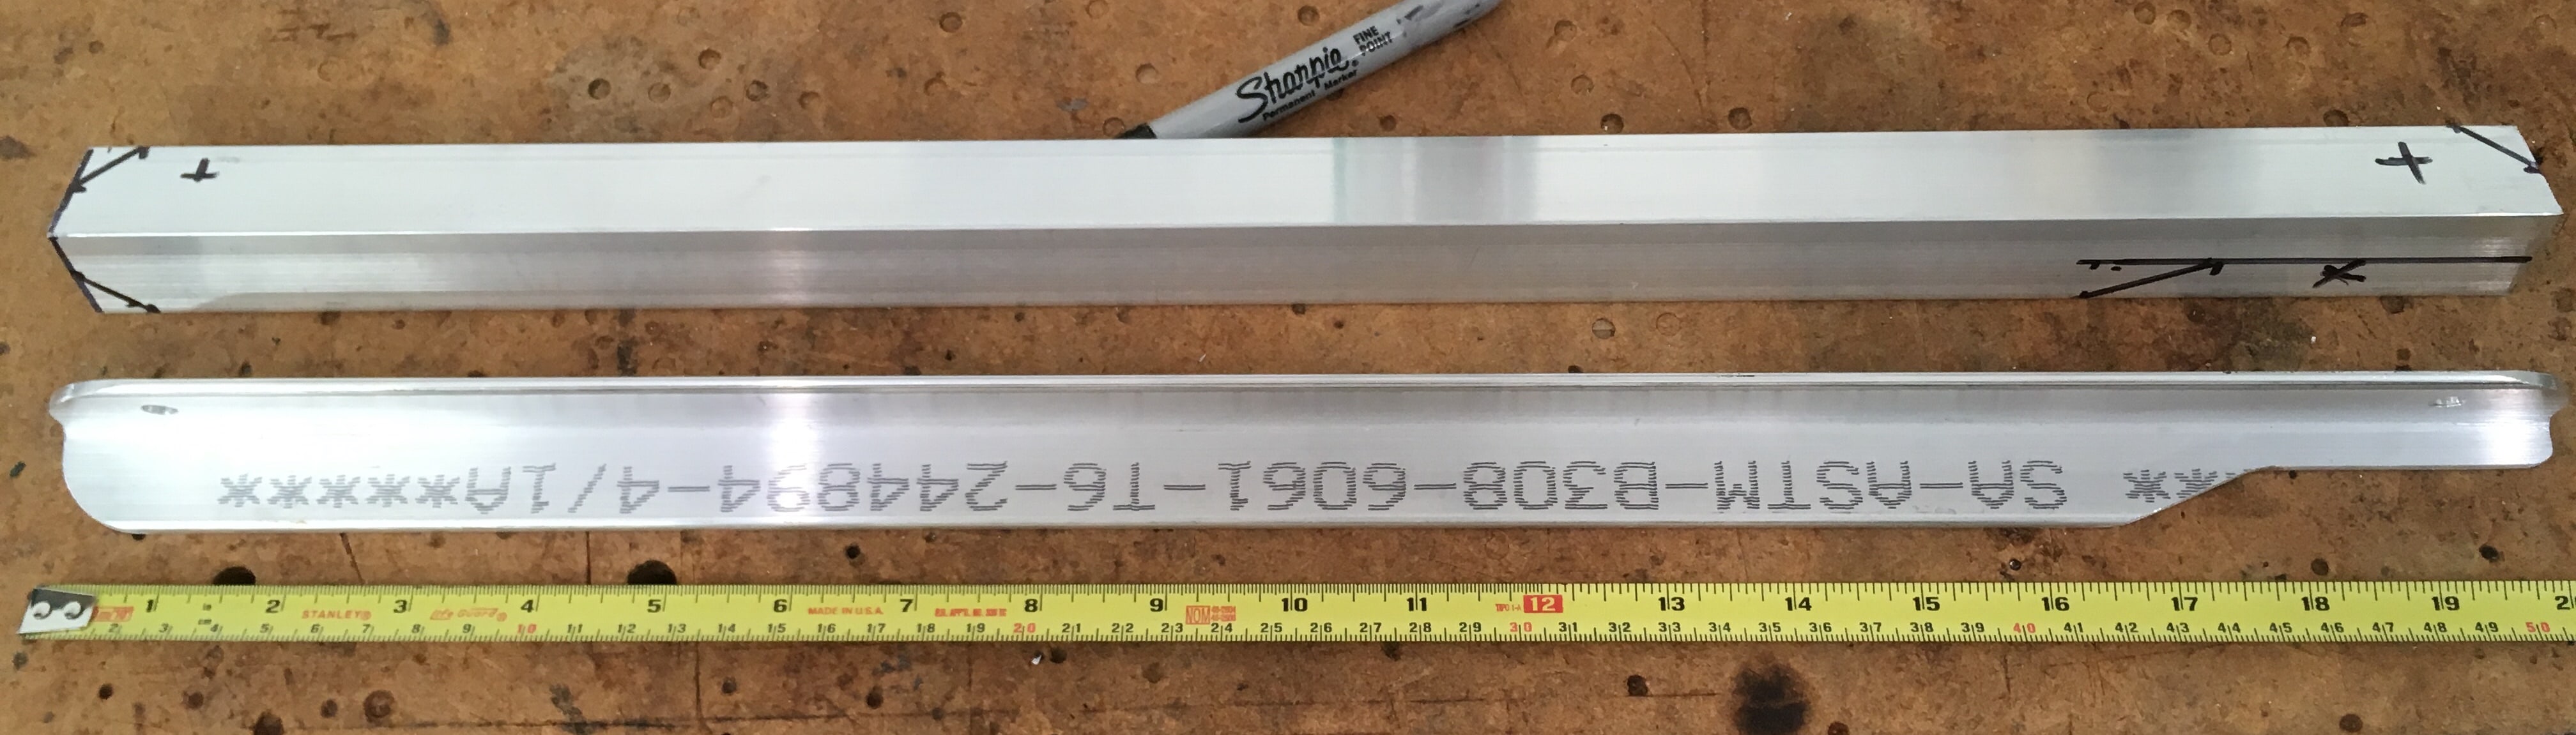
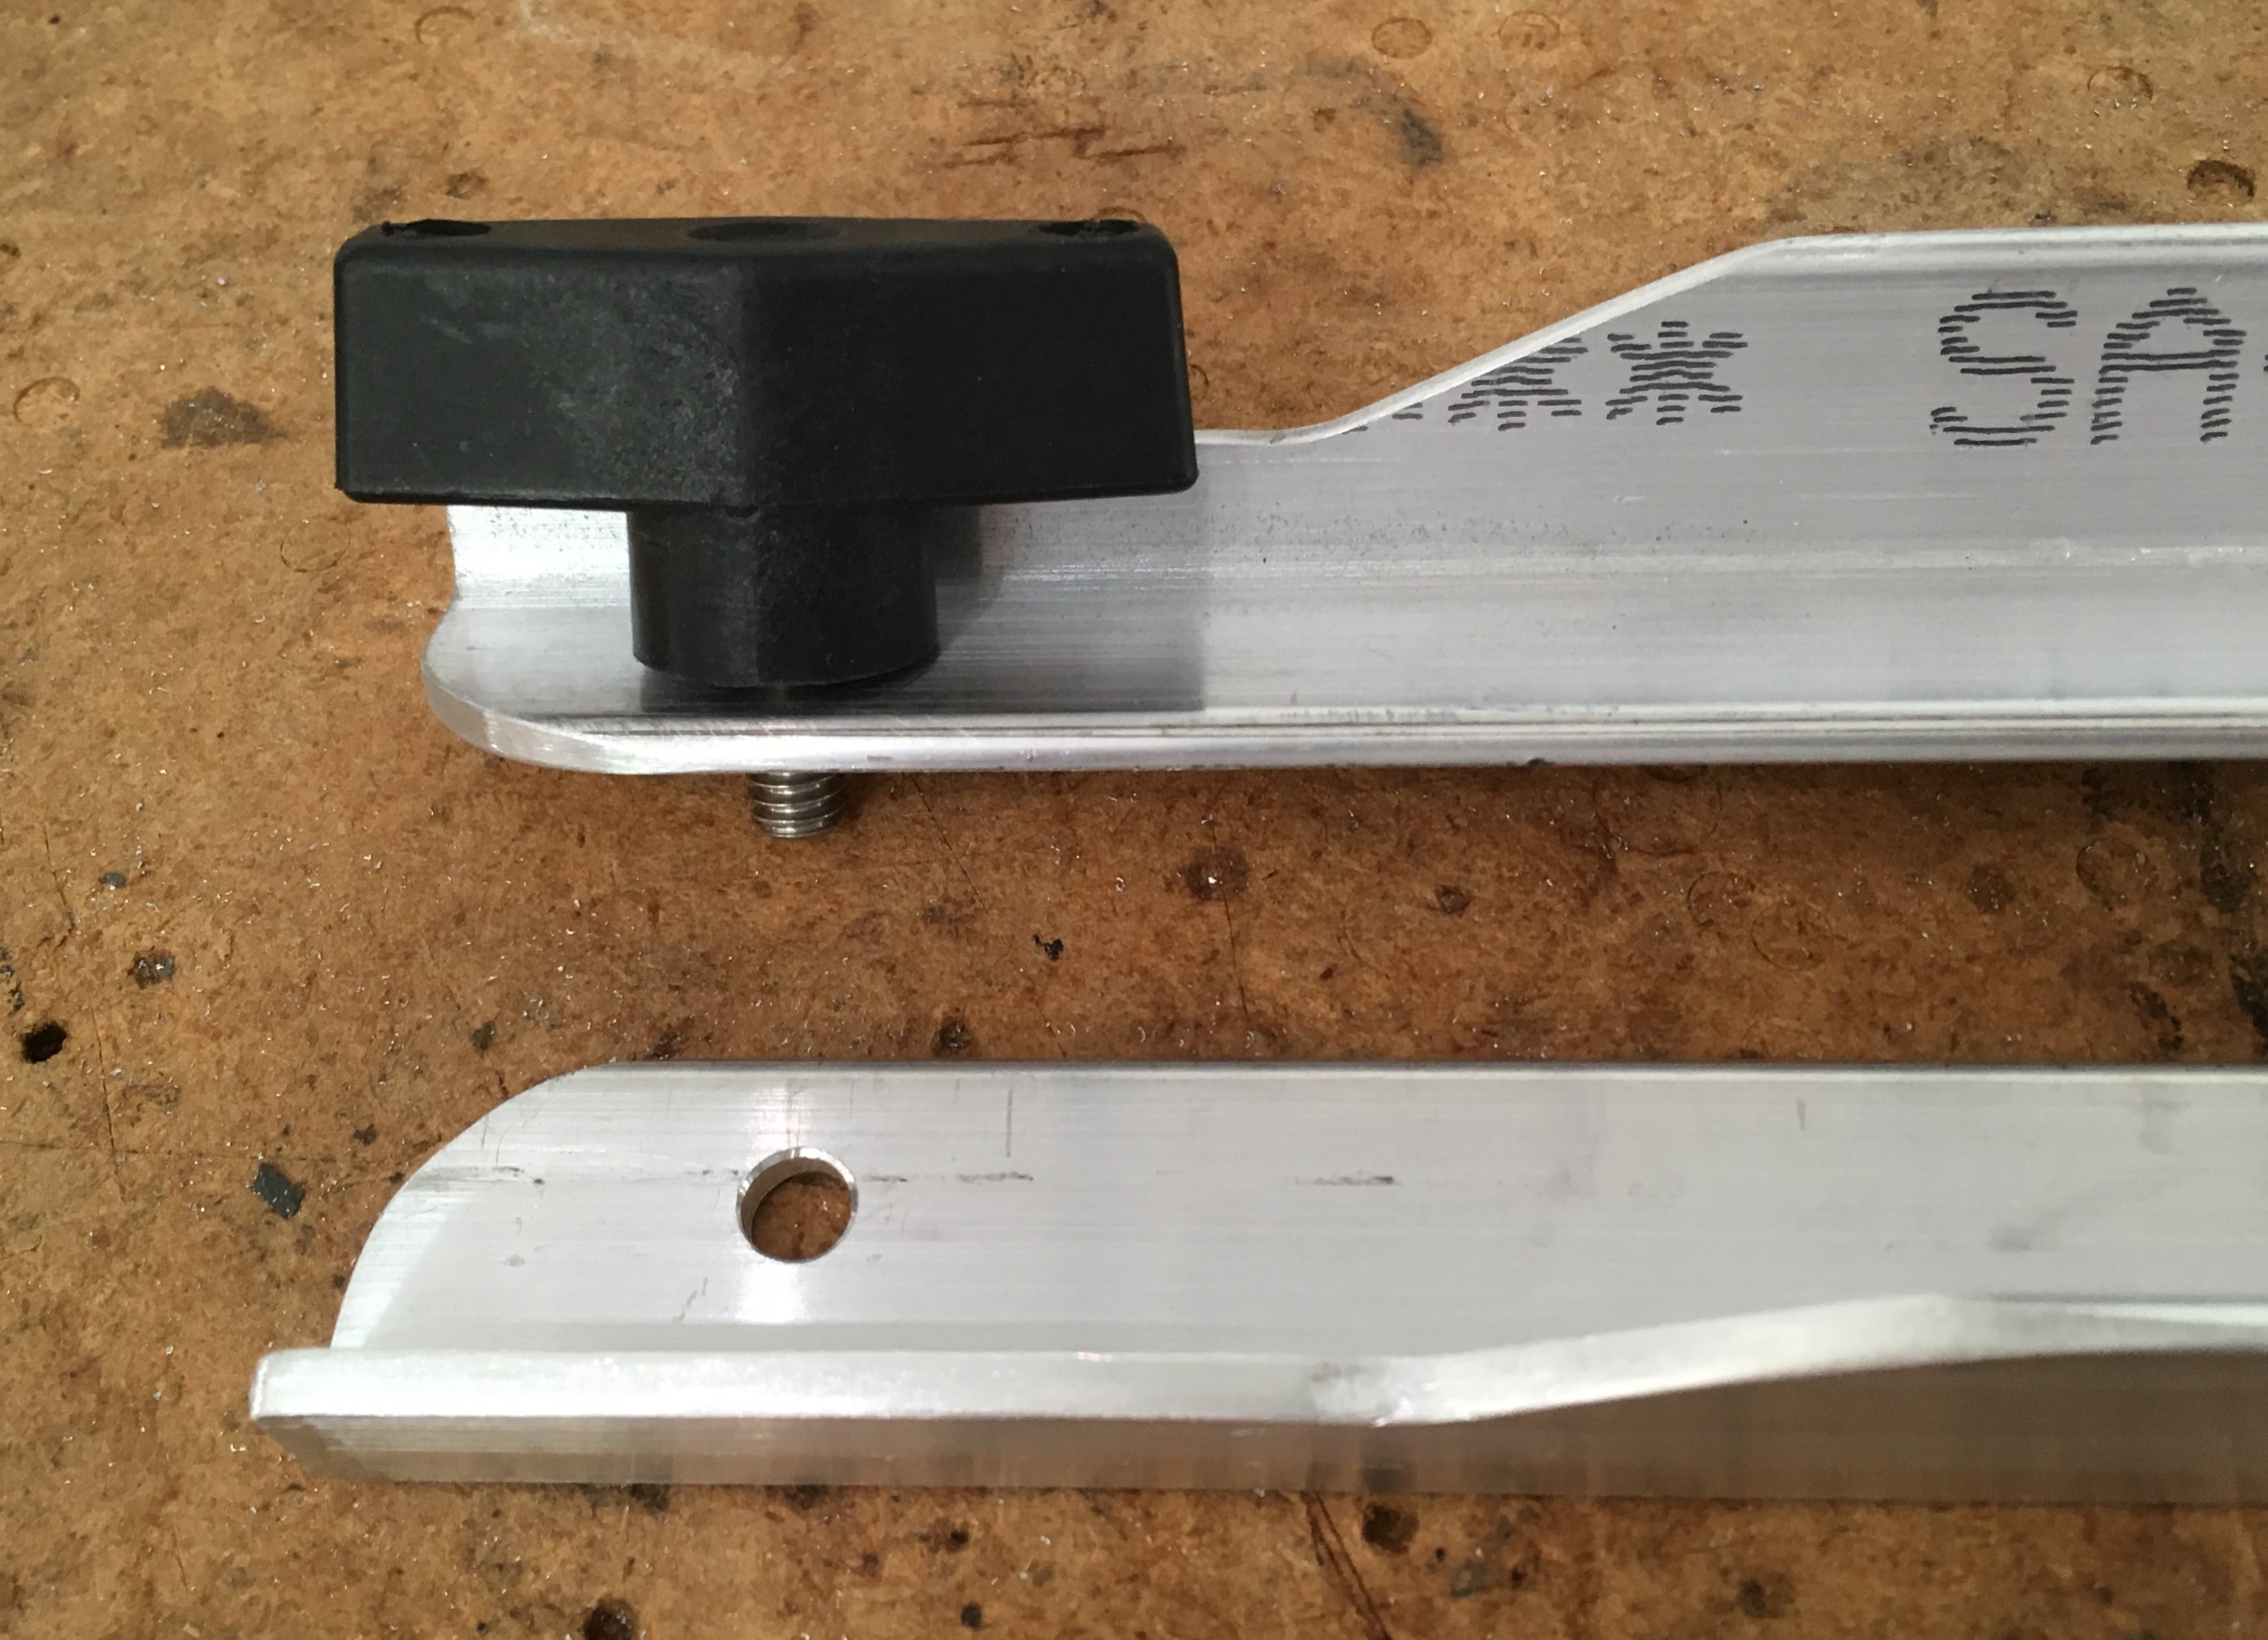
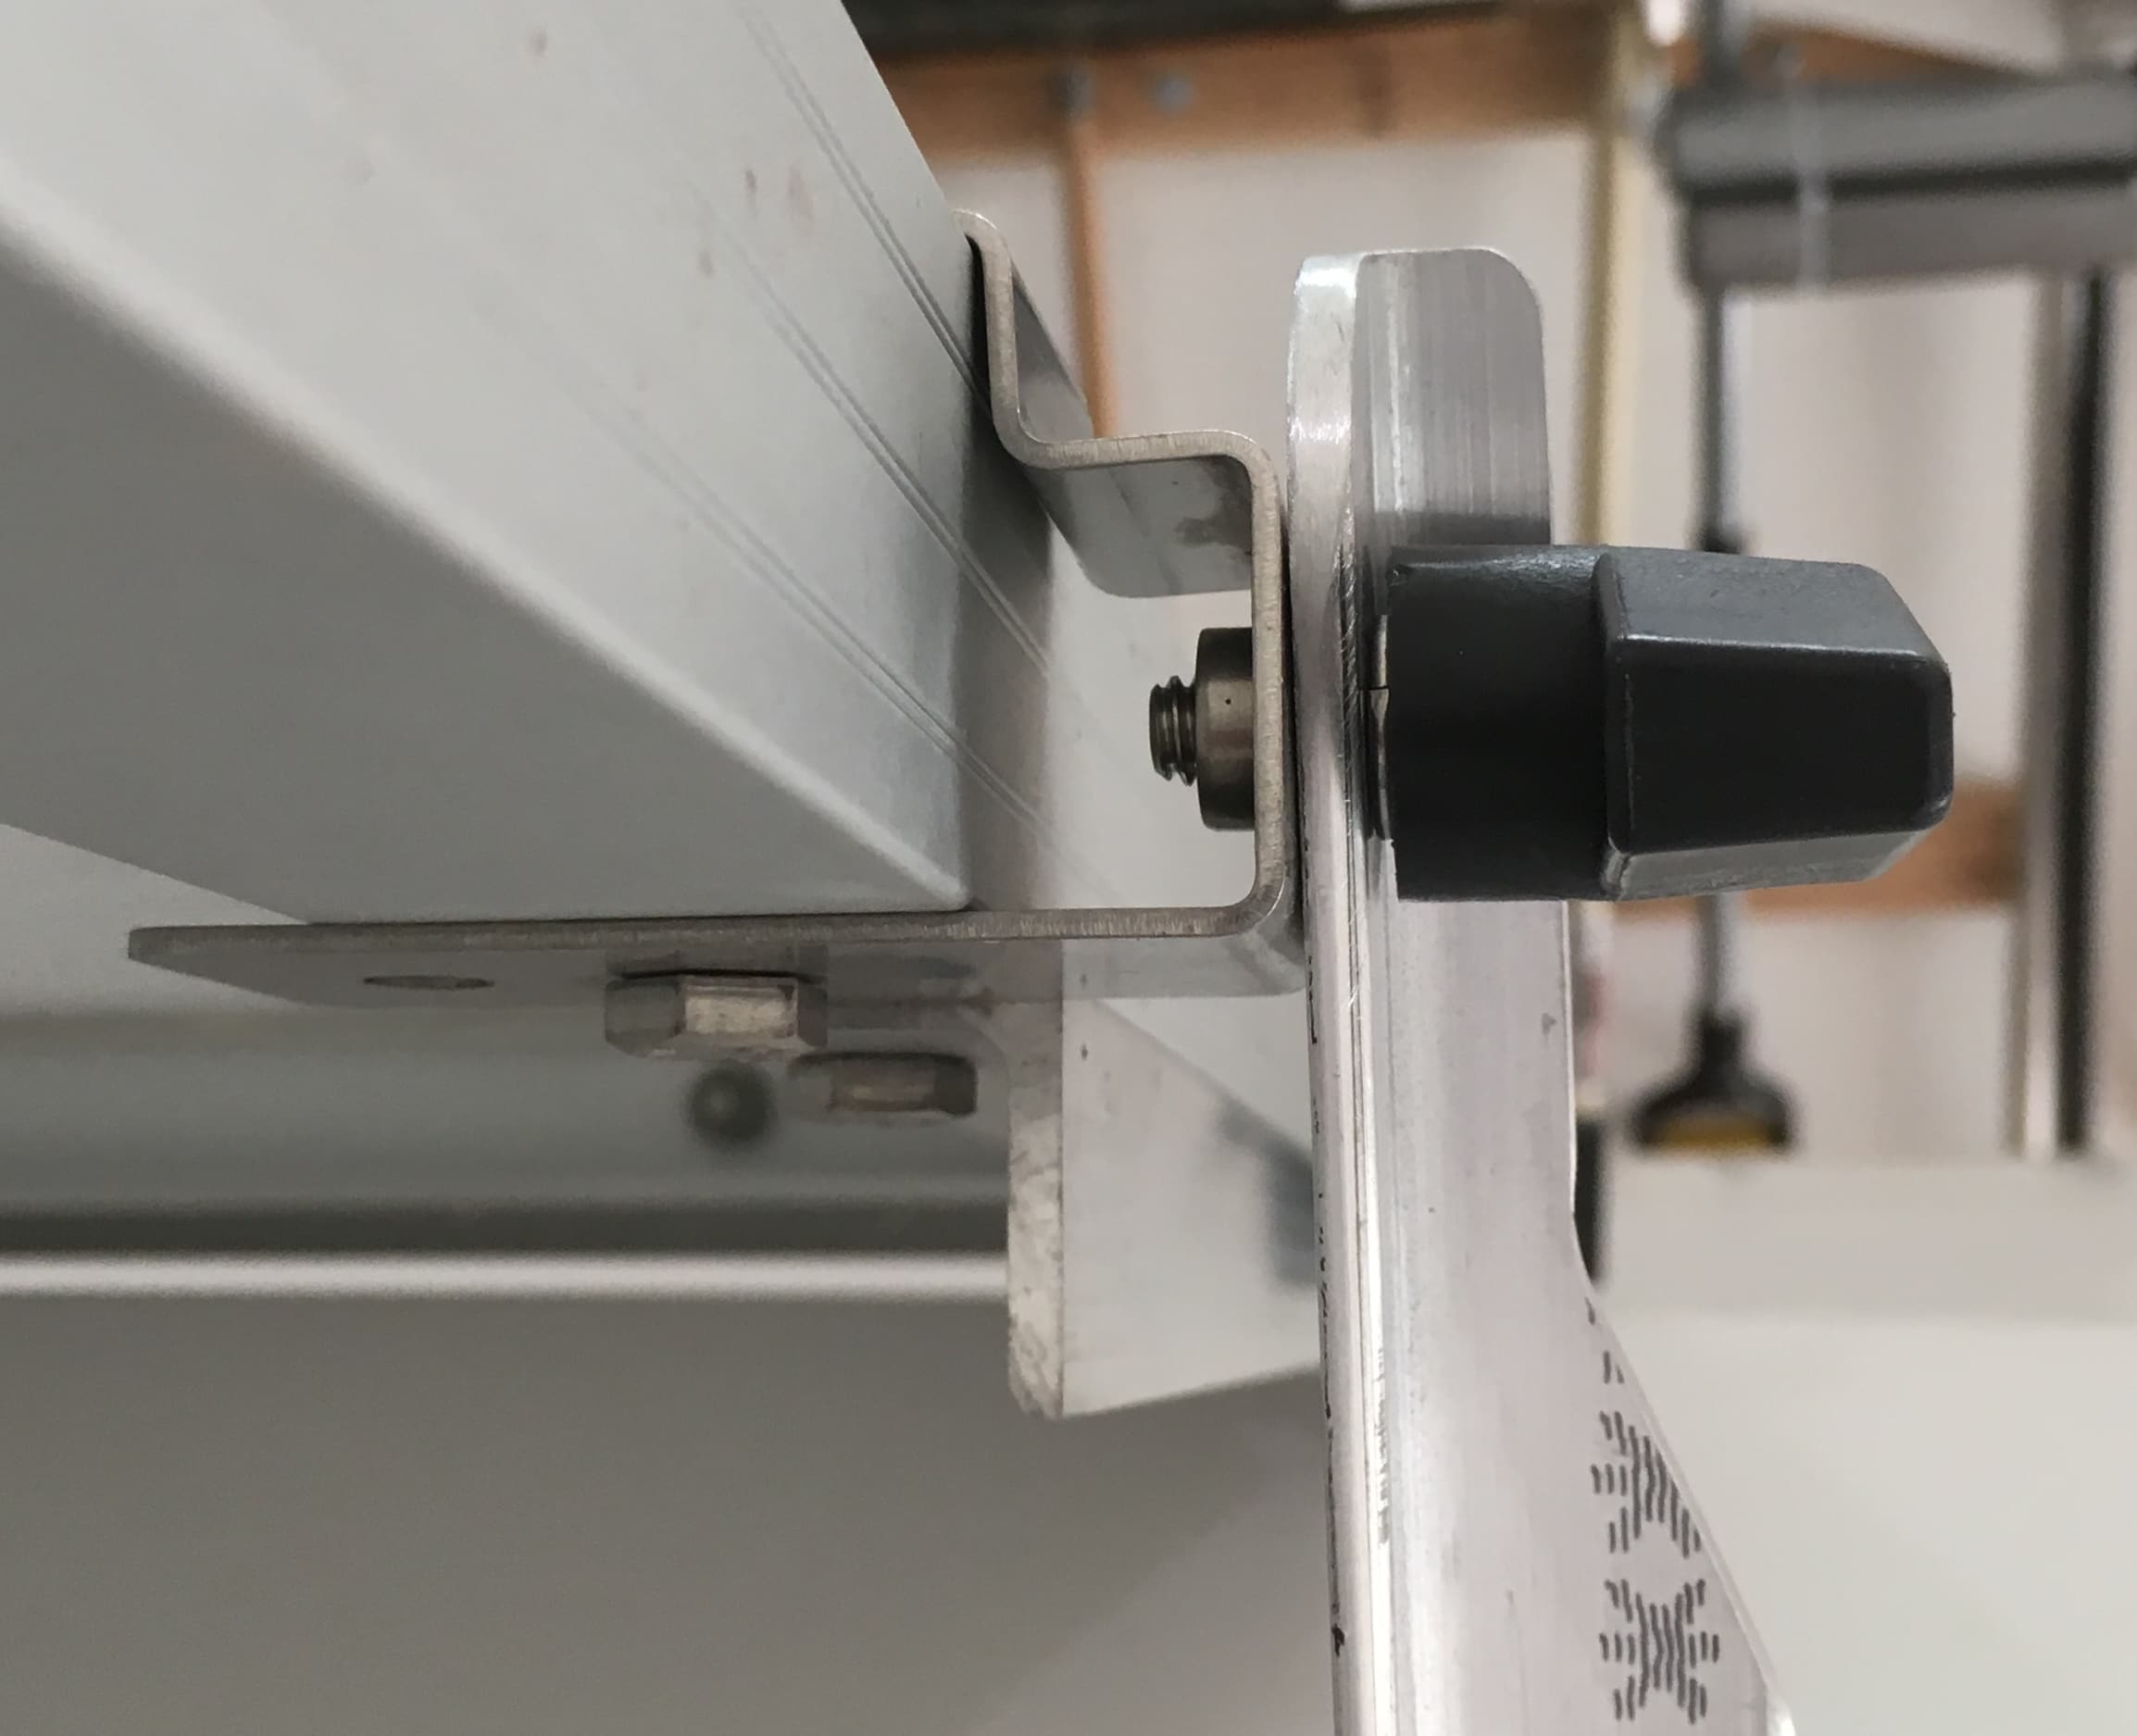
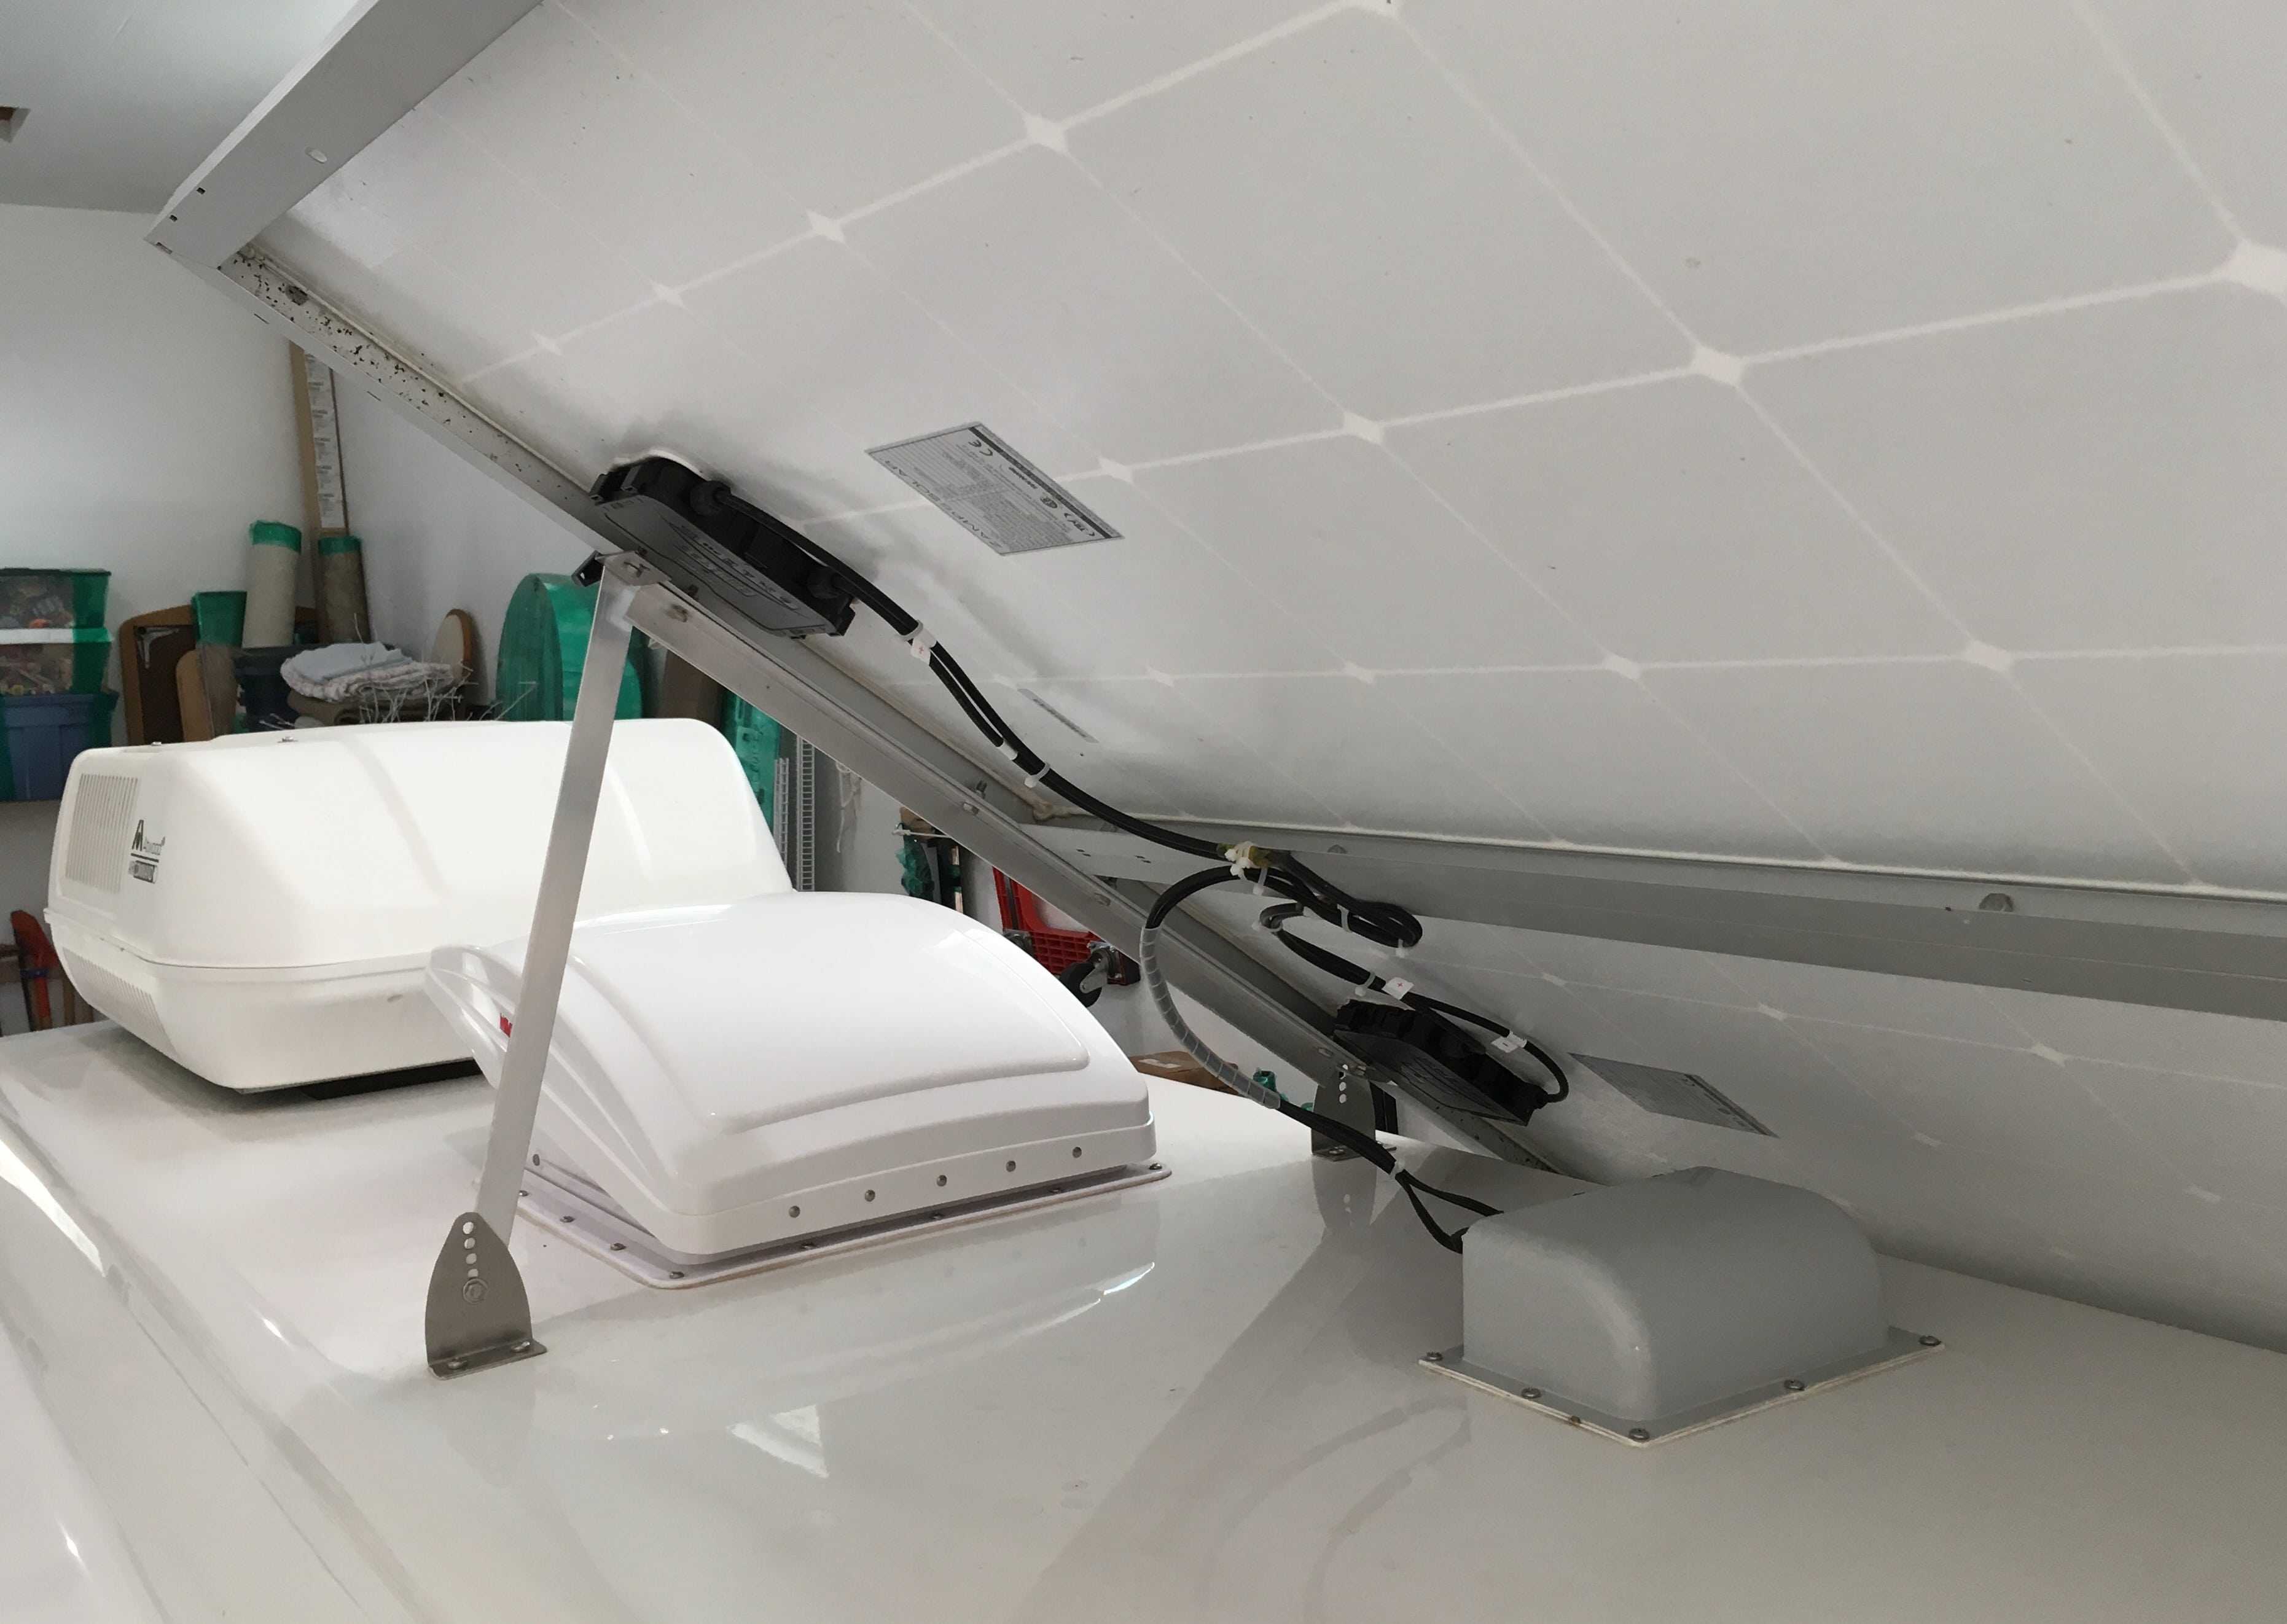
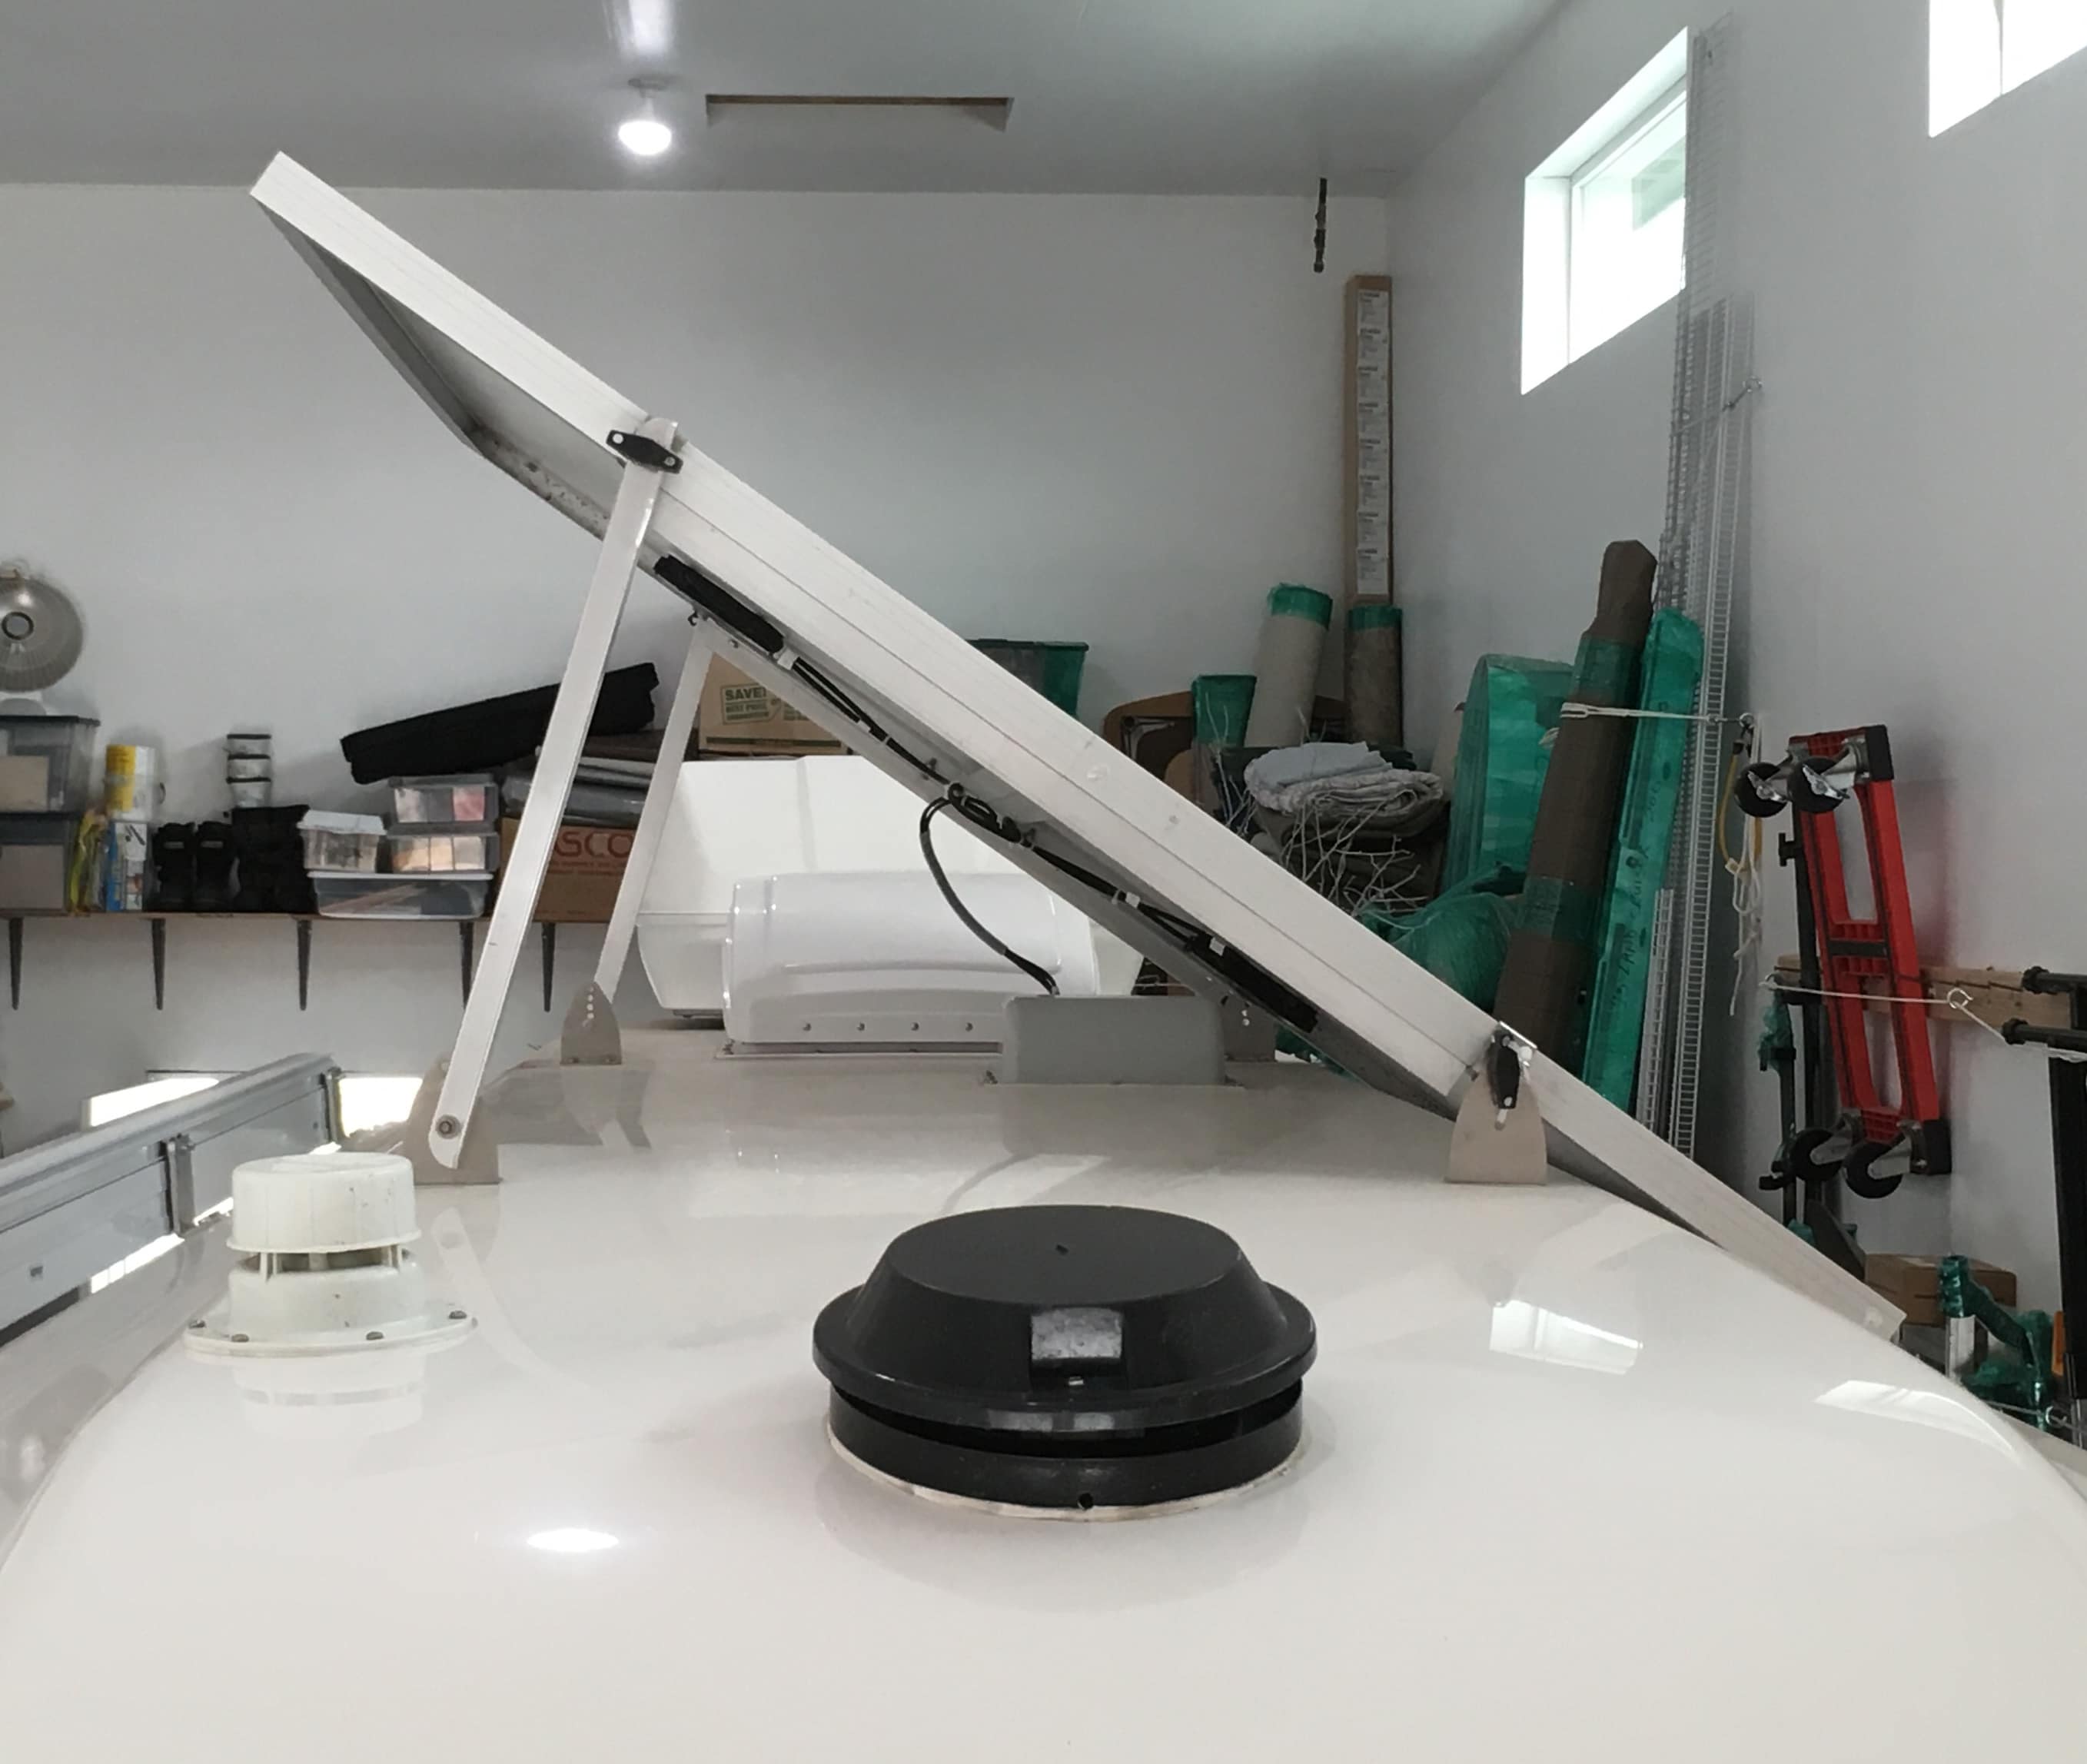
This mod is great for either working on your roof, for repairs or detailing, or for angling the panel toward the sun if your Ollie is parked long term, such as in the off-season. I used the following: 40” of 6061-T6 angle, 1 x 1 x 1/8”. For ease of fabrication, you could use 1 x 1/4” flat bar. I wanted angle since it is more rigid for the same weight, but I think the flat bar would be adequate. 2 - 1/4-20 x 1” stainless bolts, 4 - flat washers 2 - self locking nuts (nylocks) Cut the material into two 20” sections. Drill a 1/4” hole 1 inch from each end along one side of the angle. Center the holes in the inside of the angle (3/8” in from the edge). Since I wanted to use the existing knobs at the top of the arms, I trimmed away a section to allow the “ears” to clear. I left a 3/8” wide section for strength. You need to make two “mirror image” arms (front and back). Radius the corners, and file and sand with 180 grit paper. A workbench belt sander like my 4x36” Harbor Freight one works great for this. To use the arms, you have to climb up carefully with a ladder with padding under the top part. You can start at either end of the panel, the right side is shown in the pics. Attach the appropriate arm at the bottom hole of the bracket using a bolt, snug it down. Make sure that it can rotate up. Remove the knob and let the panel settle. You can put some foam underneath but I didn’t need any. Go to the other end and attach the second arm. Remove the knob, raise the panel and screw the knob back through the arm, into the panel. Go to the other end, raise the remaining arm, and secure it. You can see in the above pic that there are lots of threads sticking out the back of the nut, so if you use thicker 1/4” flat bars, they should work fine. If you are going to leave the panel up long term, in the weather, tighten the lower bolts and all knobs. If you are just going to have the panel up for maintenance you can leave the lower ones slightly loose. With the arms in the bottom holes of the roof brackets, the panel will be at a 35 degree angle. You could get a few extra degrees by selecting higher holes, but the other end of the panel frame might hit the gelcoat on the roof. Use caution. I have NOT tested this mod outside in strong winds. It feels very solid when the hardware is tight, but I cannot guarantee how well it will work in violent weather. Use caution. I thought about not mentioning this last part, but I will anyway.... Please leave a prominent note inside the trailer on the table, or a bright piece of surveyor’s tape flying from the panel, so you do not drive away with the panel up. John Davies Spokane WA
1 point
-
Bill, Starbrite white marine silicone sealant/adhesive used. Here's the Oliver lens that was removed along with sealant and resealed with white marine silicone: Off Topic: Bill, Update, going to test 3" black tank valve for bypass next week after cable adjustment. If the valve needs to be replaced, will post photos/installation in your original thread about this topic, will see how it goes. William :)1 point
-
Hi we're newbies too and just picked up our new Oliver last week. We have a Ford Expedition with back up assist and the generator basket on our trailer. The sticker will fit on the Bulldog hitch right in front of the basket in the HORIZONTAL position. Backup assist is very helpful and I'm glad we have it.1 point


-
Recent Achievements
-


")


")


