Leaderboard




Popular Content
Showing content with the highest reputation since 09/28/2025 in all areas
-
This video will give you a basic outline to some of the upgrades we had done earlier this summer on the Outlaw Oliver.18 points
-
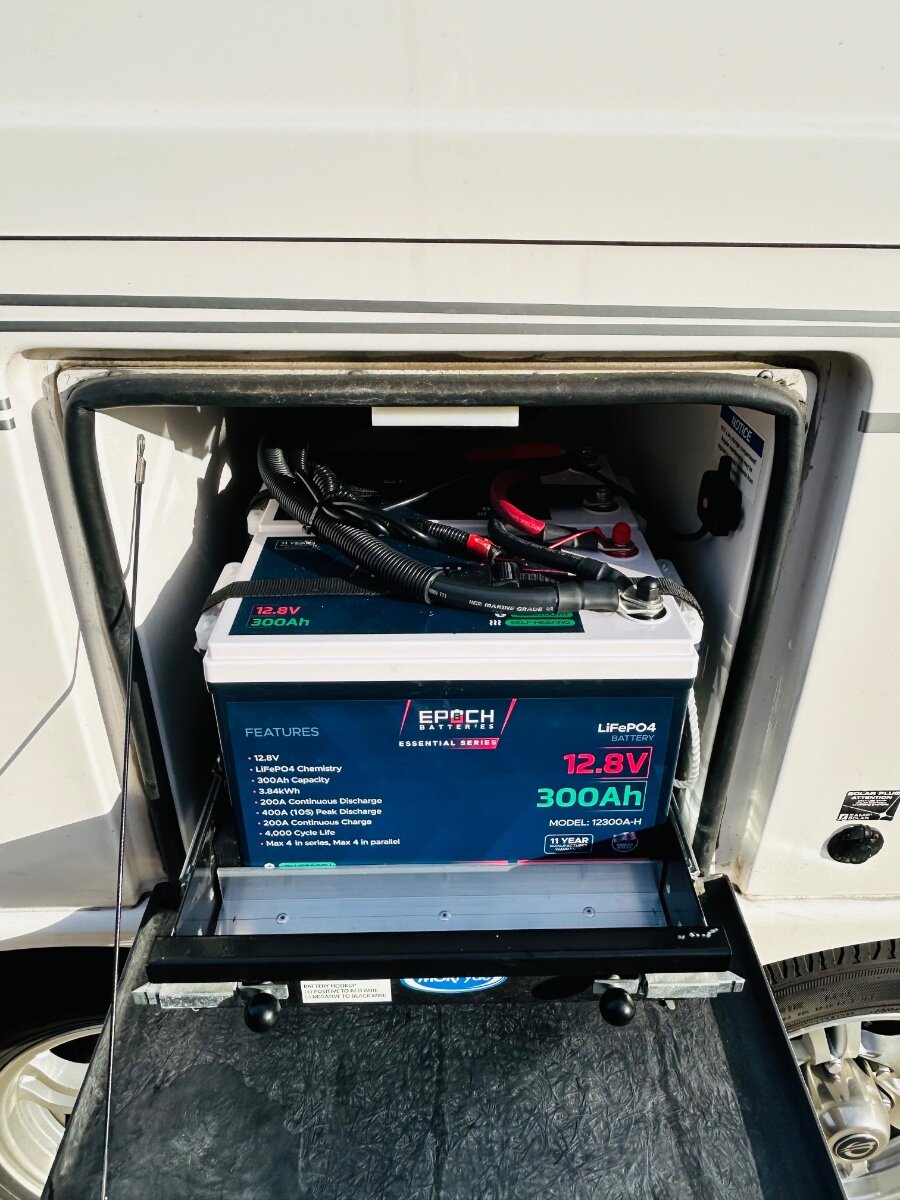
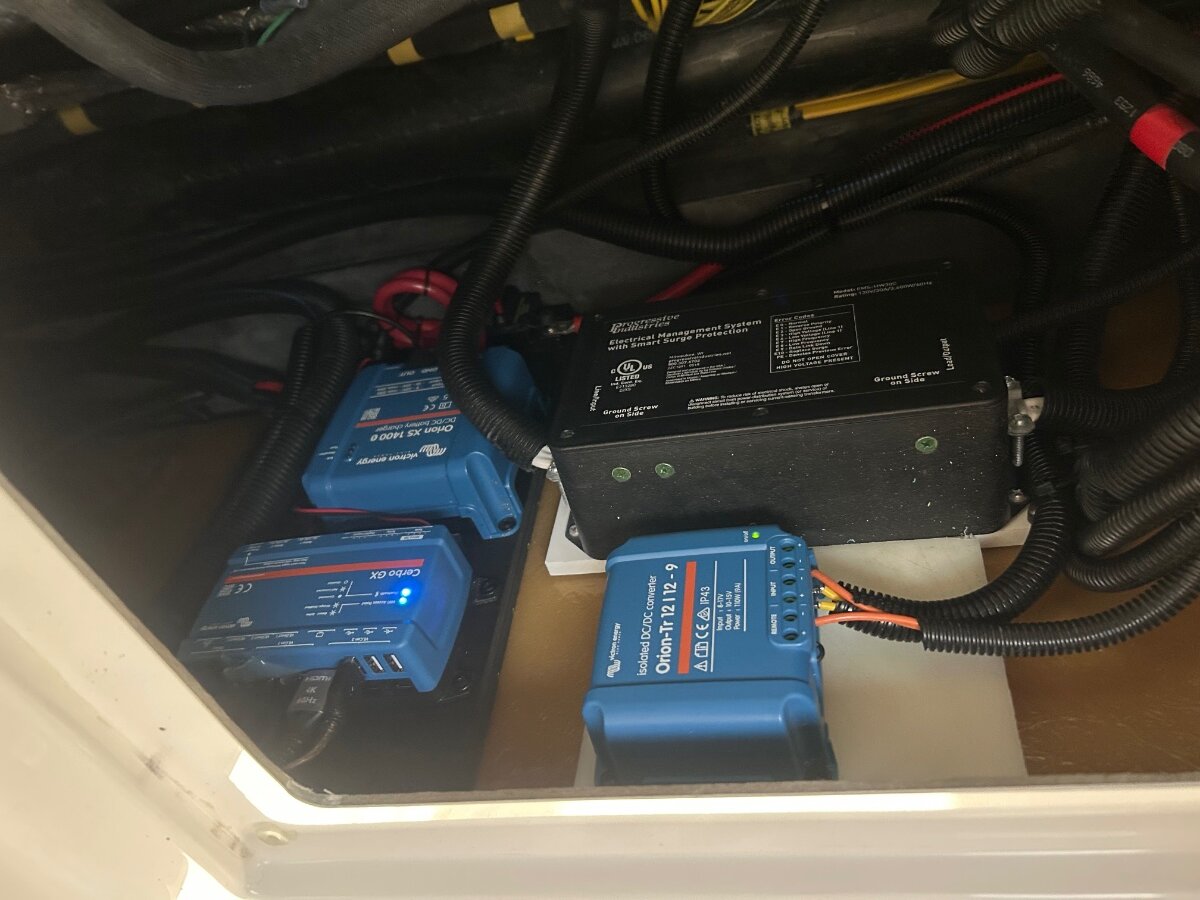
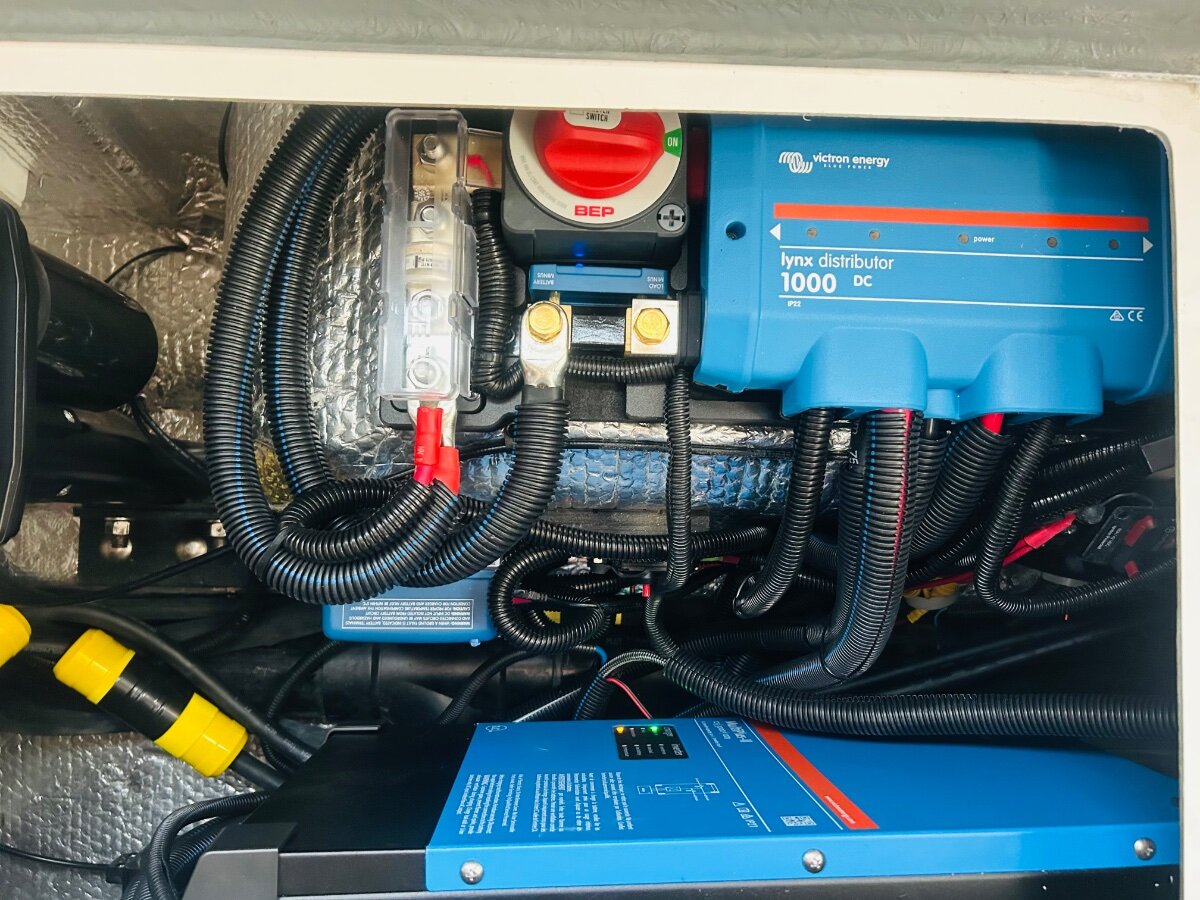
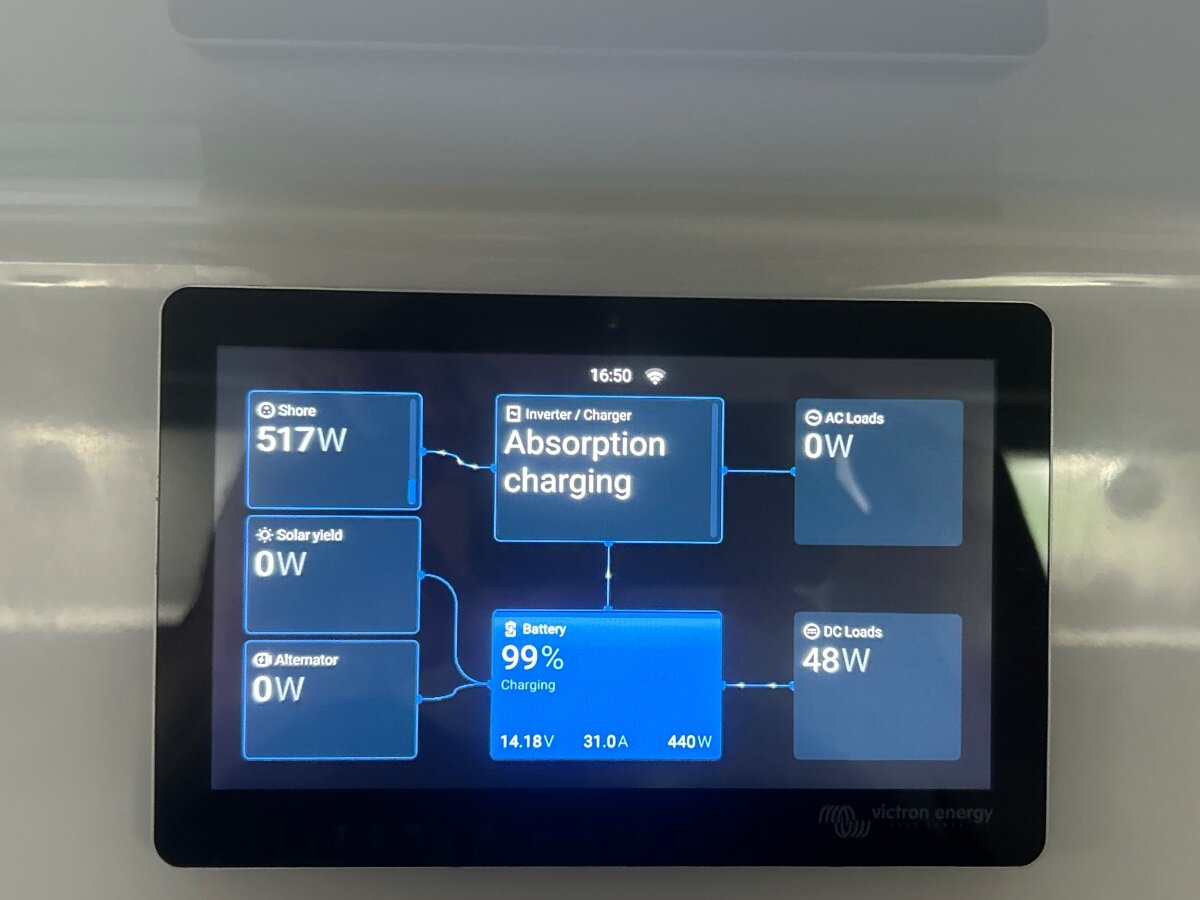
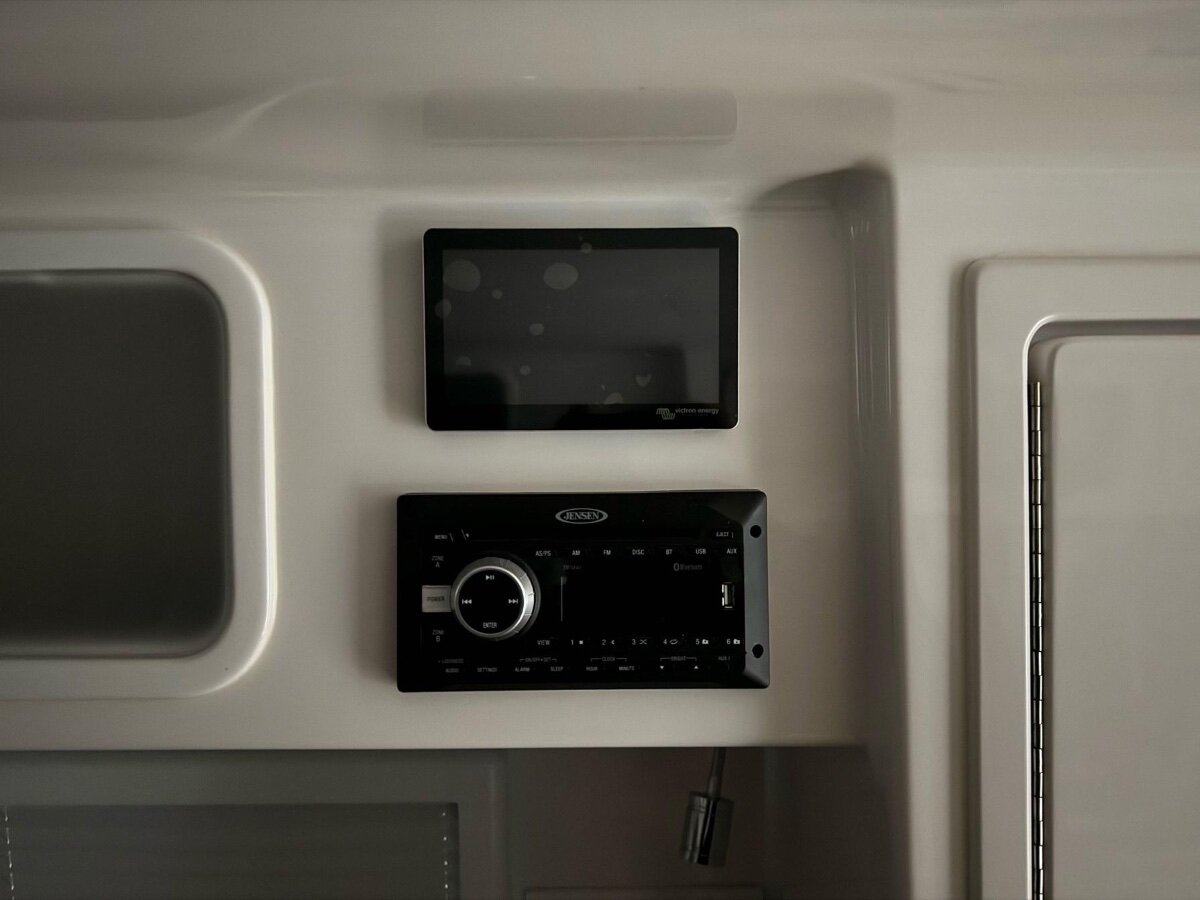
***Long Post*** XPLOR Hull #634 Victron 3000 watt inverter, Victron 12v DC to DC charger and Epoch lithium battery upgrade. Note: To discuss options and pricing, please contact Jordan Hall at Inverter Services, White House, Tenn. Our OEM AGM batteries were getting long in the tooth and it was time to upgrade our batteries to a complete lithium battery system on our 2020 Oliver LE2. Our good friend, and former Oliver owner Jim Posey, highly recommended we speak with Inverter Services in White House, Tennessee. I called and spoke with Service Manager Jordan Hall and discussed our needs and options. Jordan and his team at Inverter Services were excellent to work with and have a lot of experience working on Oliver travel trailers. Our tech/installer, Easton Ford, kept us updated on our install progress with photos and discussions as needed. We found Easton to be extremely detail-oriented and dialed in and focused on our project. We were originally scheduled to have this work done next March. After returning from our 54 day New England and Canada trip, I decided to call Inverter Services and ask if they had any cancellations. They did and we immediately took the cancellation. They are typically booked 6-7 months out. So we hitched op Oliver and headed to White House, Tenn to leave our Oliver with the team for 2 weeks. Important note: Inverter Services supports the RV and Marine industry in ALL things lithium battery and electronics. This is one of the most detailed and thorough, cutting-edge companies we have ever done business with. I chose Inverter Services to do this install because this is not my area of expertise and it absolutely is theirs. These guys are experts in their field and I admittedly am still in the learning process. Based on our excellent experience, we highly recommend Inverter Services in White House, Tenn if you are considering a lithium upgrade. We chose all Epoch & Victron following products for this install. (2) Epoch 300ah lithium batteries (internal heating elements) -https://www.epochbatteries.com/.../12v-300ah-heated... *Victron MultiPlus-II 3000w Inverter/charger *Victron GX 70 Touch Screen *Victron Smart Solar MPPT *Victron Orion XS DC-DC Battery Charger **We also had the RV Soft Start installed on our Truma Aventa AC. Inverter Services provides tech guidance/support/firmware updates as long as we own our Oliver. I cannot stress enough the pride this company takes in their work. As I think most would agree, Victron components are a class all their own and leaders in the Marine and RV industry. Post install, we have on board 600ah of lithium battery power, and with our extra 90W Zamp panel now configured to lithium, we have approx 410 watts of solar. This will certainly give us more options on the roads less traveled and boondocking. Still lots to learn on this new system. Now having the 12v DC -DC charger I don’t think we will see a need to carry a generator any longer. Thanks to all those on the forum who made the Lithium upgrade happen. ⚡️ The information gleaned here helped me decide the direction I wanted to take this install. ⚡️Happy Camping and Safe Travels! ⚡️ A few install pics- The Victron GX 70 touch screen fit the existing opening with no cutting or trimming of the fiberglass. Our system at a glance. The touch screen nice option if no cell service is available for the Victron app. Although with our SL mini that’s not an issue. Very happy with the touch screen and the Victron app. We can set the screen to time out at 5 or 10 min or longer and then go dark for sleep mode. Zamp 90W suitcase. 12v DC to DC Andersen connector. On our way home we camped at Cumberland Mountain SP in Tenn and gave our new system a shake down. It’s nice to not have to plug in. 😊
 16 points
 -
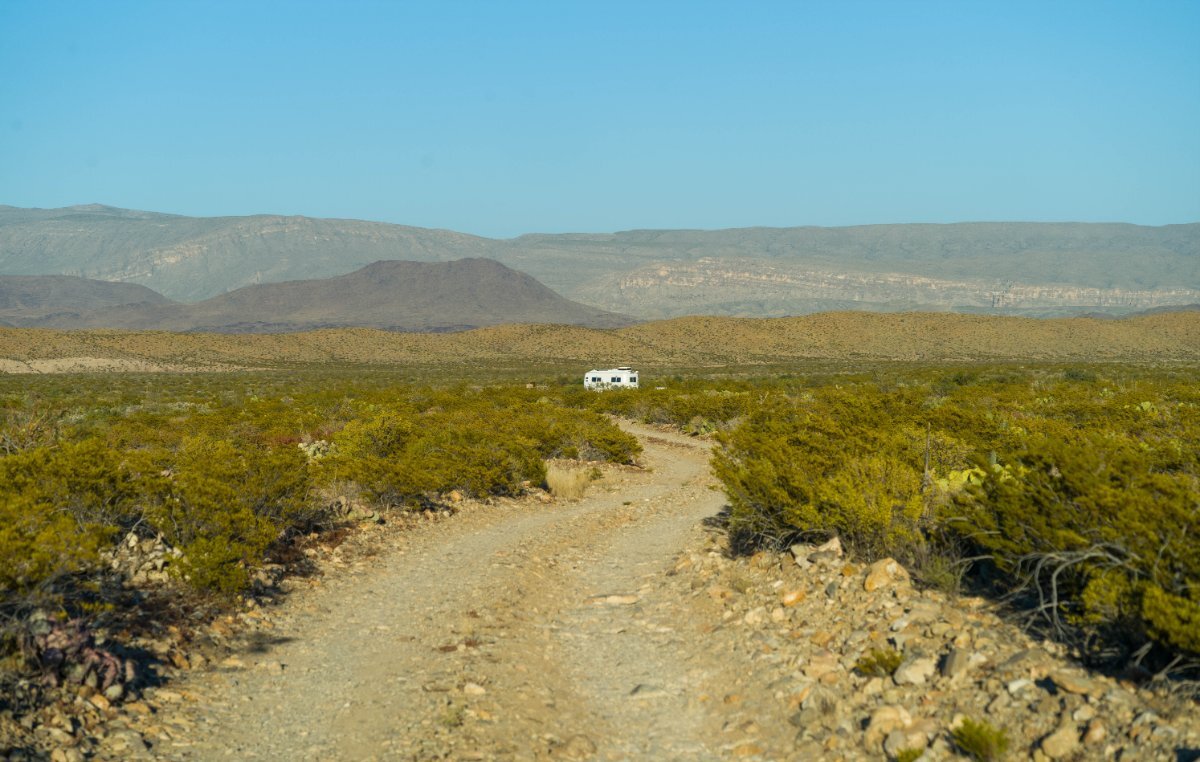
Been here for the last 5 days. Chihuahuan Desert, Big Bend NP
15 points
-
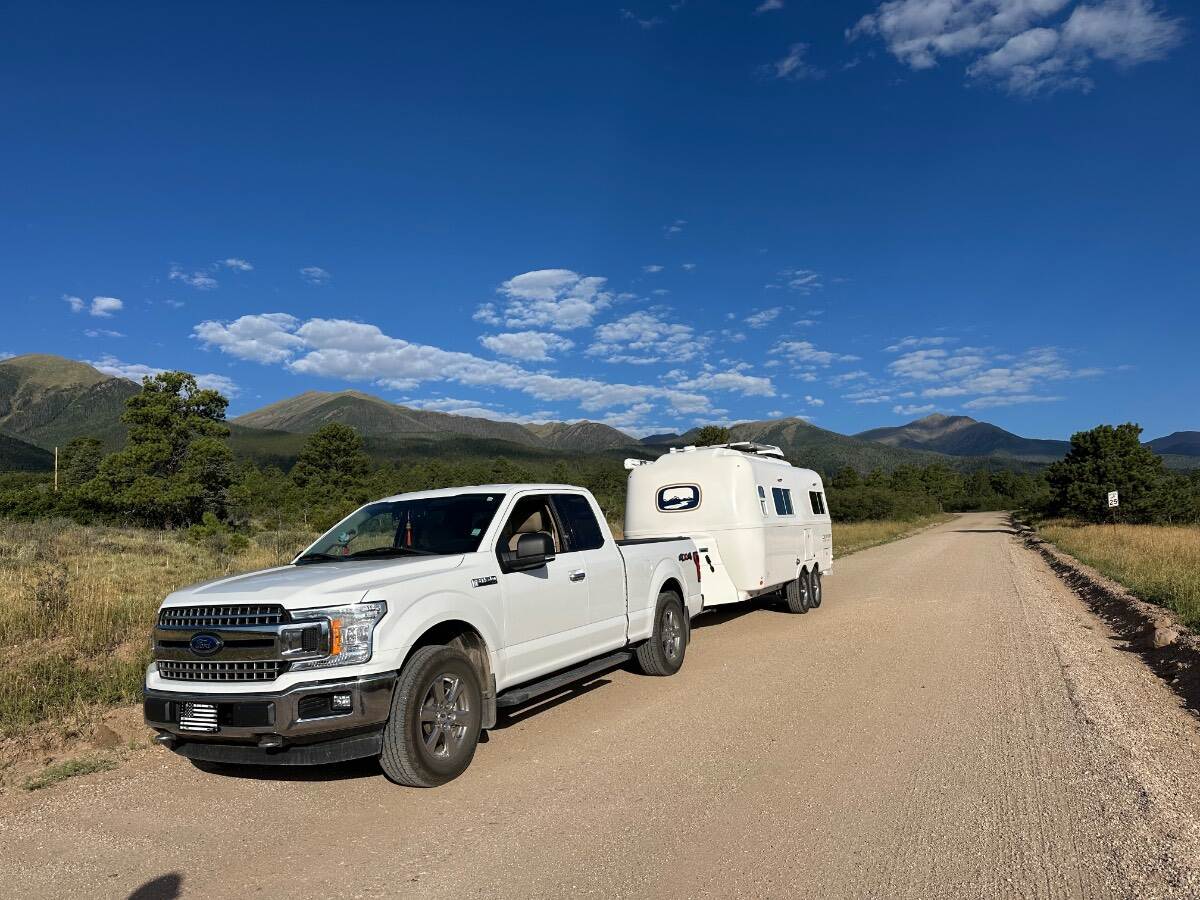
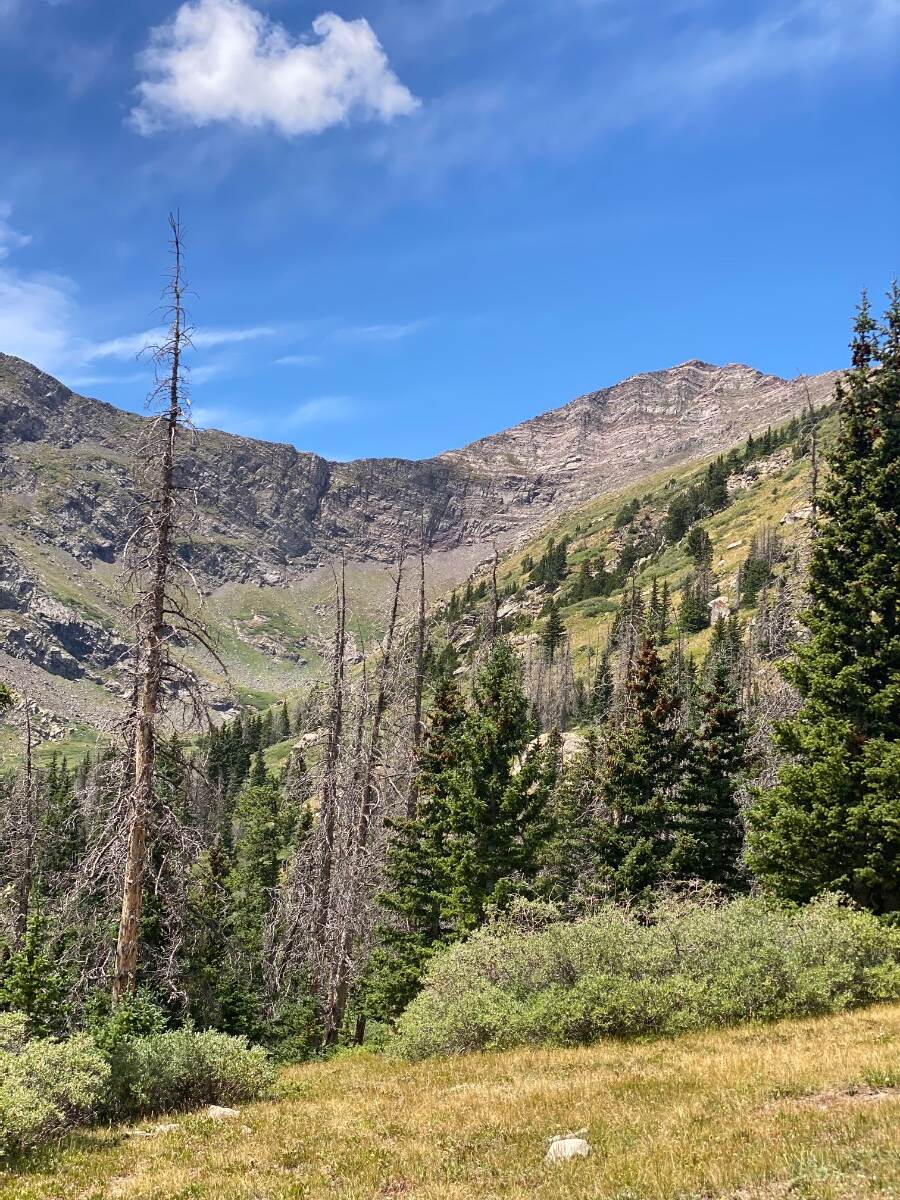
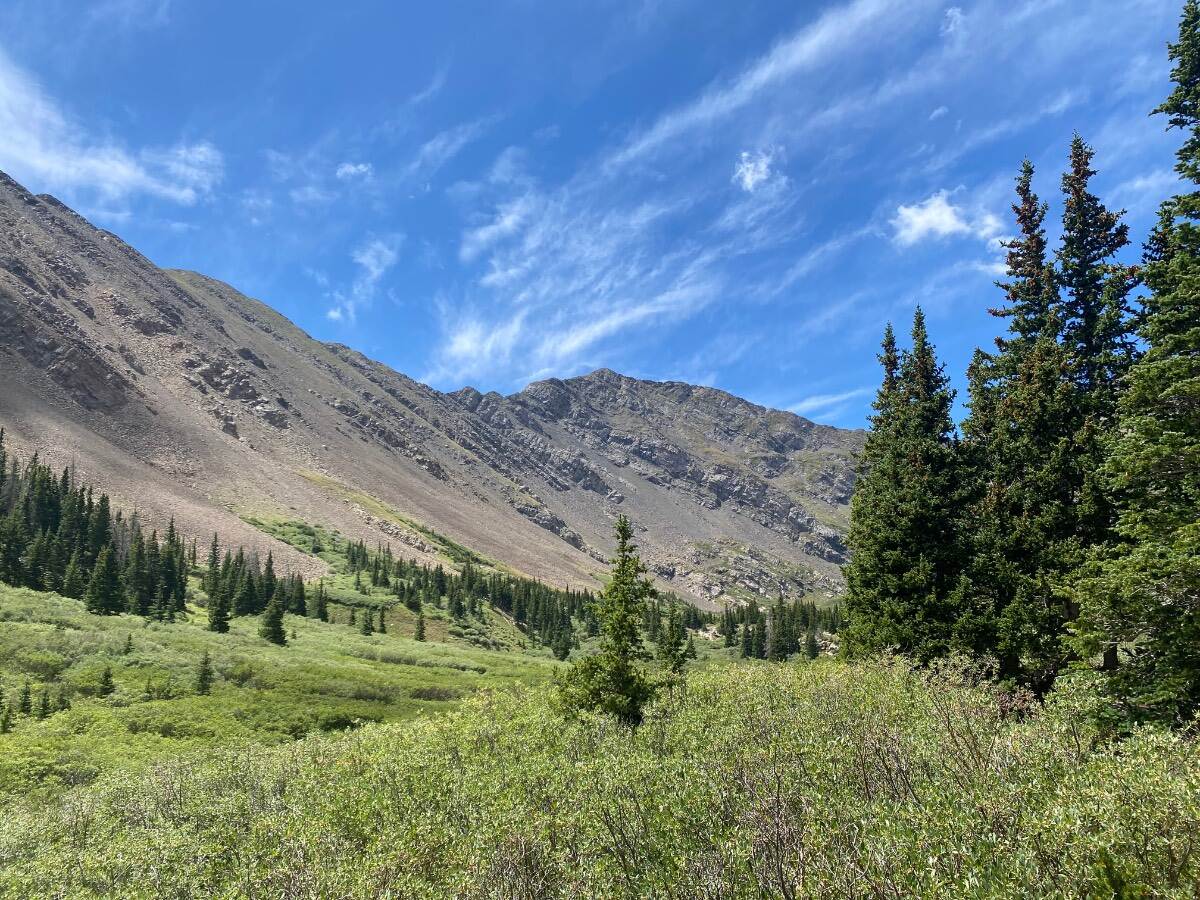
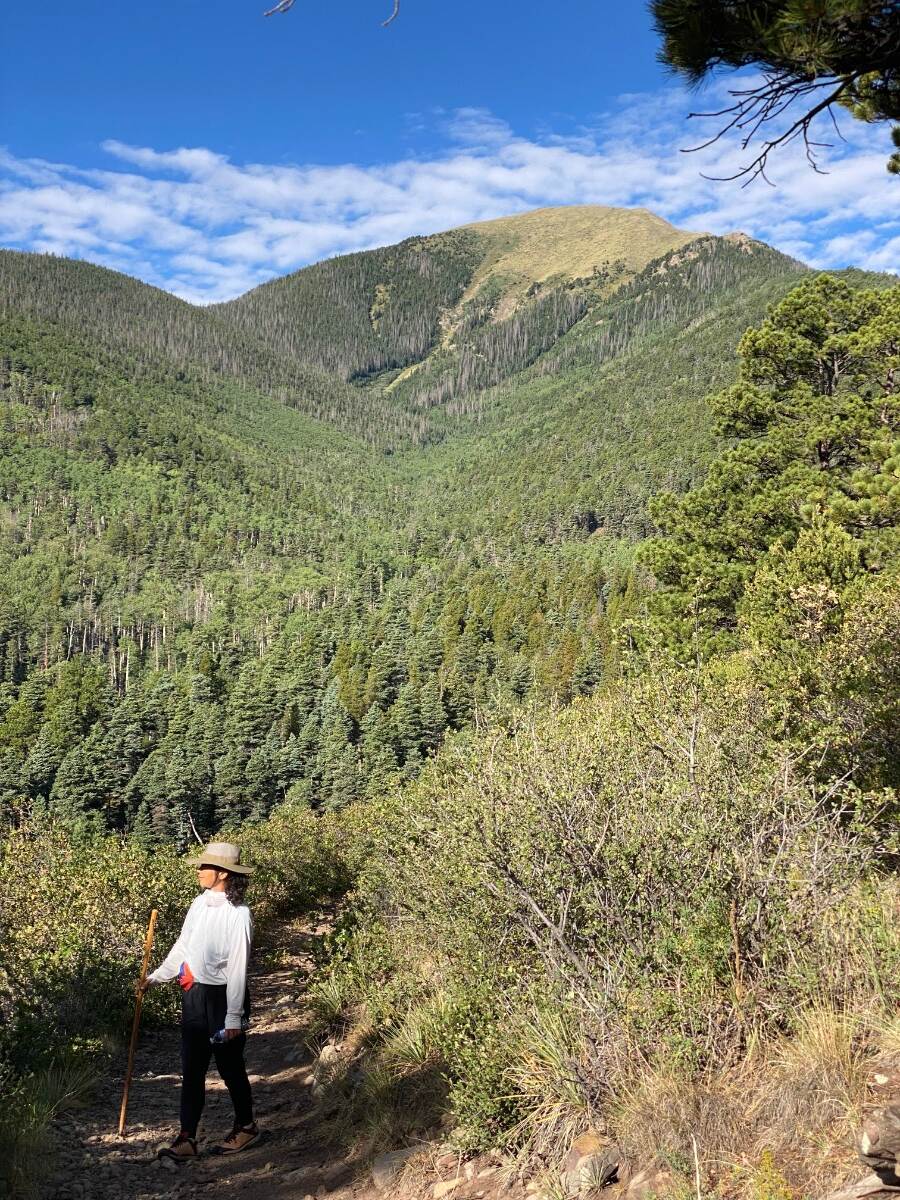
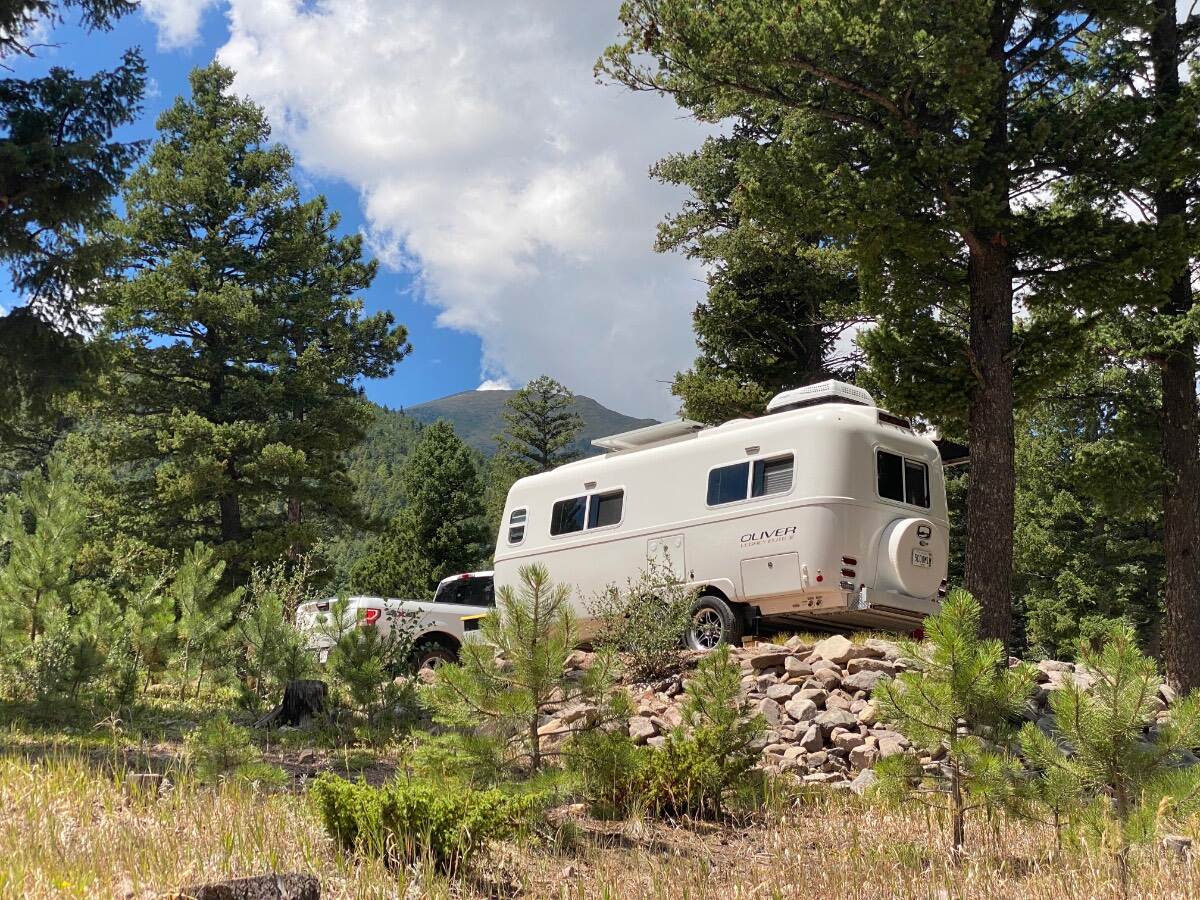
after 3.5 months on the road and the Colorado mountain hiking trails we are heading home…. pulling out of Alvarado campground USFS near Westcliffe, Colorado San Isabel National Forest Sangre De Cristo Wilderness we hiked mountain trails all over Colorado and hit the pickleball court in Gunnison our longest hike was 10.5 miles, 2600 ft elevation gain
14 points
-
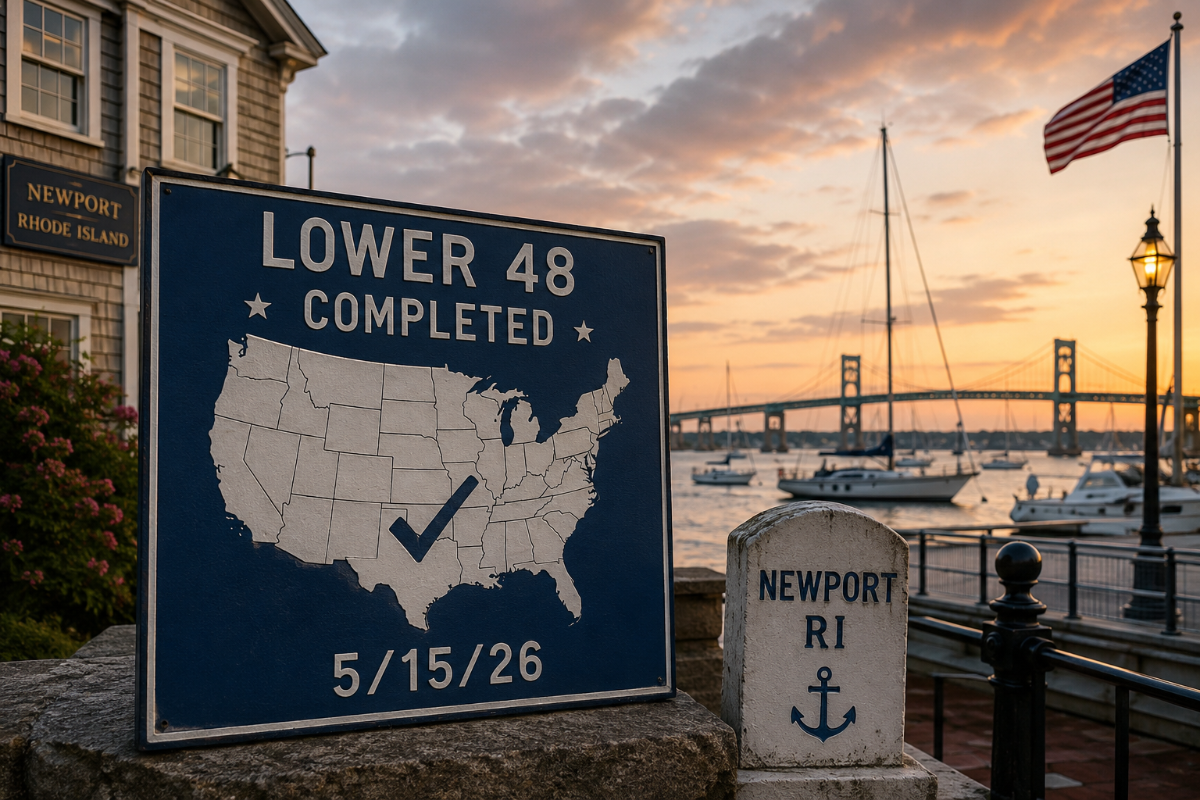
The 48th state was Rhode Island. We completed the last fifteen (15) states over the past 12 Months. Newport, RI was a fun town to complete the job.
14 points
-
Hi everyone — I previously did an intro in the introductions section, but my wife and I are new (to us) Oliver owners (about 2 months in). We’ve camped twice so far and already have several trips planned over the next several months, including a lot of boondocking in USFS campgrounds. I've had travel trailers of various forms for about 20 years and we are super excited to now be Oliver owners. I just finished a lithium / inverter / portable solar upgrade on our 2019 Legacy Elite II (Hull 514) and put together a detailed project write-up with photos, wiring approach, parts list, and lessons learned (see attached). The trailer came from the factory without an inverter, no roof solar, and no solar connector. It had two AGM batteries when we bought it. The main goal was a clean, reliable, serviceable install that leverages the existing factory AC/DC wiring/routing and keeps the system simple (including an inline inverter/charger pass-through so the trailer’s AC panel works “like stock,” just with inverter capability). I found great info on this forum as I undertook this project and hope to give back just a little by posting this as a practical reference for anyone planning a similar upgrade — happy to answer questions or share any additional photos/details if it helps. Happy camping!! Lithium Inverter Solar Write-Up.pdf14 points
-
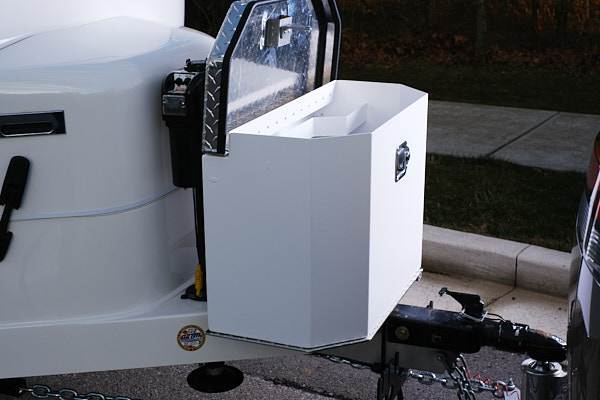
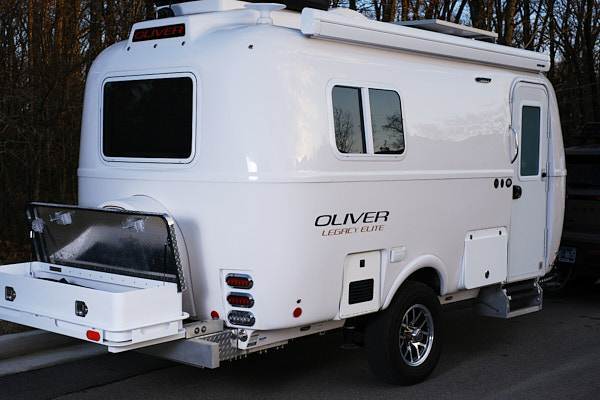
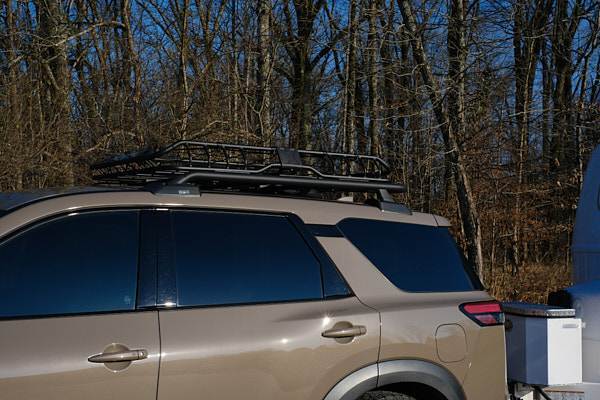
Barb and I have had our LE I for about 18 months now. We fancy ourselves minimalists, but truth be told, we viewed the LE I as a bit of an experiment knowing that it would be a challenge getting all of our gear in the trailer and the Pathfinder. What helps is that we are both perpetual organizers and efficiency nuts so we welcomed the challenge. The game changer for us has been connecting with the folks at Sea Biscuit. Knowing we needed a little more storage one of the first accessories we added was the rear basket from Sea Biscuit. We weren't quite sure what types of containers we could put in the basket, but we knew it gave us lots of options for adding storage. After looking at the myriad options of storage containers, boxes, etc. that could go in that rear basket, we settled on the rear storage box from Sea Biscuit. The locking rear box is home for our hookups, a large tool bag, our outdoor carpet for under the awning, and several other items that immediately come out when we land at a destination. Our sewer hose for draining the gray tank (we have a composting toilet, so no black tank hose) is still in the bumper and it is surprisingly easy to store and deploy when needed even with the box over top. The expanded storage we gained from the rear basket and box combo was our first game changing moment. It allowed us to move several items out of the Pathfinder permanently. Shortly thereafter we noticed the front box that many of the LE II owners had added. To our disappointment, the box was not compatible with the LE I, but we started a conversation with Dave and Kristine at Sea Biscuit about our options. Fast forward several more months and we are one of the first to acquire a front box unit designed specifically for the LE I. The front box is deeper than the rear box and fits neatly between the front jack post and the bull dog coupler. It sits on a steel platform making it super stable, and when opened leaves plenty of clearance for the jack post. The front box now holds our DC to DC charging cables, wheel chocks, and several other necessities that also formerly rode in the back of the Pathfinder. This was game changing moment number 2. One of the final accessories we added to compliment our storage accessories from Sea Biscuit was the rooftop basket from Rhino Rack. The rack holds our chairs and camp table that were also - yes, you guessed it - in the back of the Pathfinder. (Low and behold, I can now see out of the back window.) Barb and I are huge fans of the little Ollie having put over 15,000 miles on it, visiting 21 states in 2025. Our travel style is such that we rarely spend more than a couple of days in one spot so the flexibility of the smaller LE I, and smaller tow vehicle (17 mpg with the Pathfinder) is the perfect combination for us. For anyone who is considering an LE I, or who has an LE I and is looking for quality accessories to expand your storage, we cannot recommend the folks at Sea Biscuit highly enough. The products are top notch and the Hess's are awesome folks. See you on the road!
14 points
-
Greetings, All! Well D and I went over to the "dark side" and sold Casa Blanca to a great guy from near Kerrville, TX, David Knight. Please welcome aboard @Kpaladin David into the Oliver family. We're now into our next chapter of RV'ing and starting new adventures with our 2026 Brinkley I 235. It's totally "Victron'ed" out and includes 600A-Hrs of Epoch LiFePO4s and 800W of solar modules. We'll stay in touch! MAX Burner
14 points
-
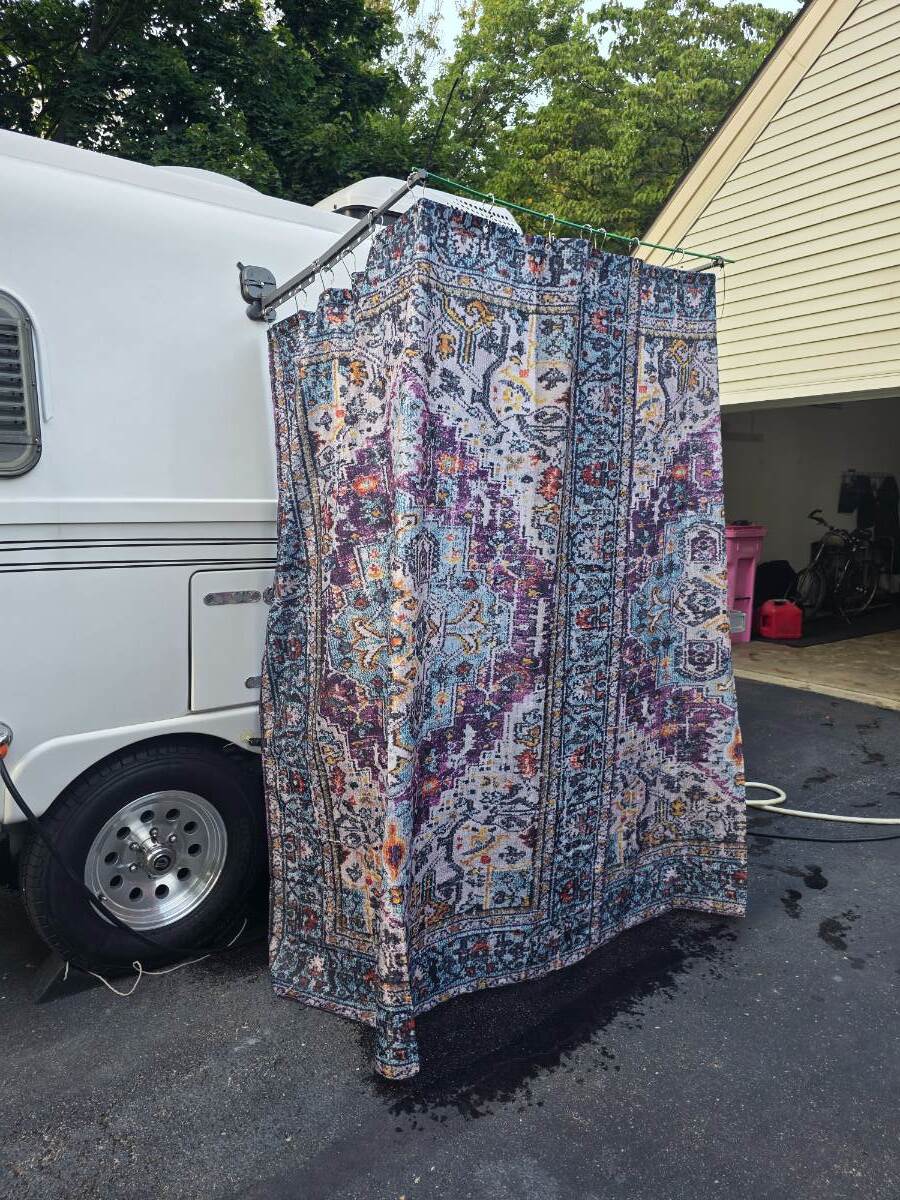
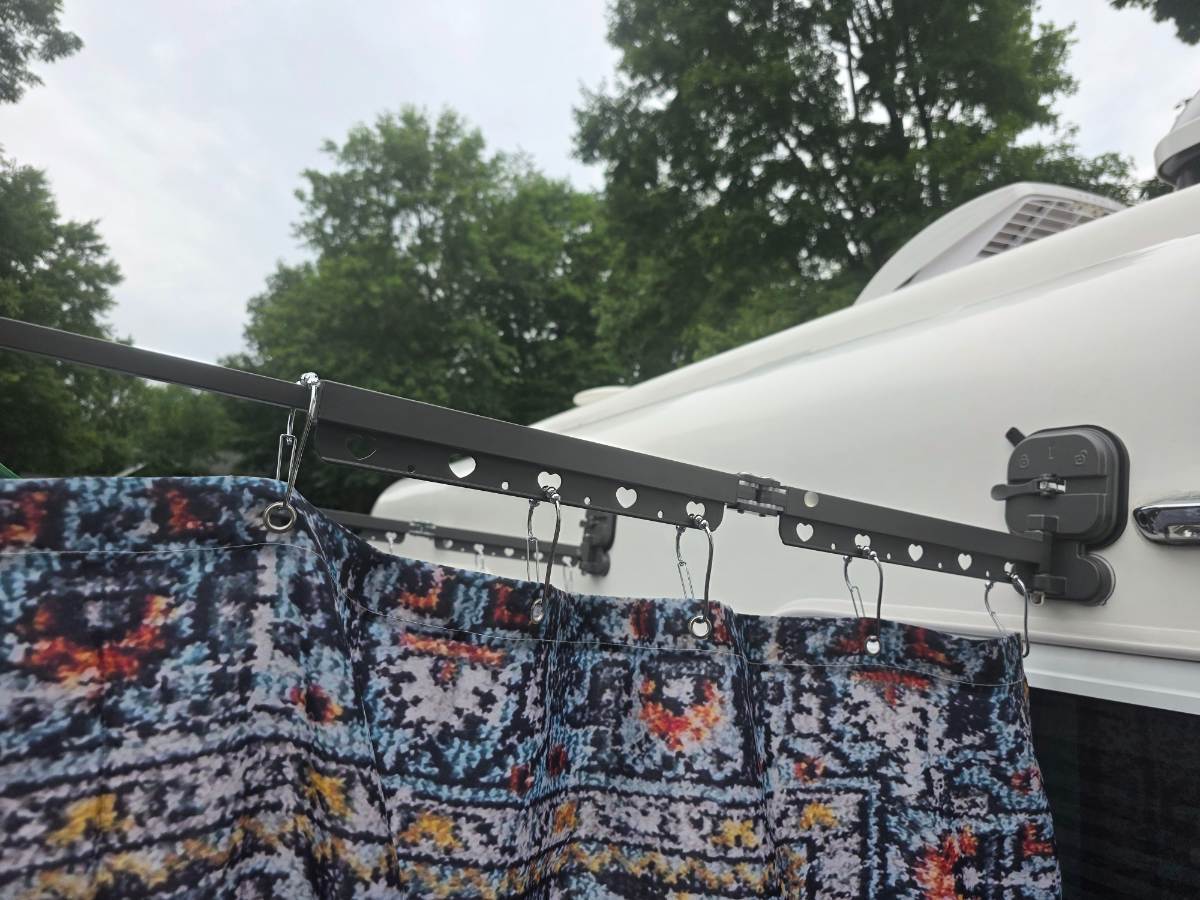
Hi Oliver Family.. It’s been quite a while since I last posted around here, but I just finished a quick little mod for the exterior shower station on the ILOVHER. I do use and absolutely love my wet bath inside the trailer! But before the forum gray-water police sound the sirens: having managed a National Forest campground for five years, I promise I know the rules about gray water and where it belongs. I know there are plenty of places out West that actually permit surface gray-water disposal (and, funny enough, with the wildfire season we're having, the ground could probably use every stray drop). For this upcoming trip, I'll be boondocking in a private field for 12 days, and the owner doesn't mind me showering outside. I'll be using organic, biodegradable shampoo, and with no dump station for miles, keeping gray tank fill to an absolute minimum is the primary mission here. I considered one of the standard pop-up privacy tents, but having used a bicycle tent for camping, I could already envision the poles, stakes, folding/unfolding and general tent wrestling that would be involved. I was looking for something much simpler — something I could put up in a couple of minutes and take down just as quickly. I also wanted to avoid the usual problem of routing the shower hose into a privacy tent. You either have to run the wand through the main zipper opening, which can make the entrance/exit awkward, or start modifying the tent itself. Then I stumbled across these ratchet-style suction arms, and I immediately started thinking, "Oh, I can do something with these!" They reminded me of the SeaSucker-style mounting systems, and the Oliver's smooth, gelcoat fiberglass seemed like the perfect surface for them. I was so excited about the idea that I put the whole thing together and actually showered in my driveway last night just to test it out. 😂 And honestly, I think these are going to work perfectly! The Setup: Ratchet-style suction arms: I found these folding rack arms on Temu. Say what you will about ordering direct from China, but the mechanical ratchet suction on these things locks onto the fiberglass extremely well. They’re designed to hold weight and, so far, they’ve been remarkably solid. DM me if you want the link to the product. Curtains & rings: I used standard shower rings through the cutouts and repurposed heavy shower curtains I already had from a previous project and the bar that goes between the mounts is a simple tomato stake zip-tied tight to the ends. (I may reconfigure that at a later date with tool clips) No modifications to the Oliver: Nothing is drilled, screwed, glued or permanently attached to the trailer. The whole thing takes less than two minutes to set up, packs down flat, provides total privacy (other than wind, LOL) and gives me direct access to the Oliver’s outdoor shower faucets without having to wrestle with a tent or poles. I even have a suction mount for the shower wand. Please note that I have replaced the original ss shower hose with one that is 120" on my ILOVHER. Attached are the suction arms mounted to the Oliver and the full enclosure deployed. I’m pretty pleased with how simple this turned out!
13 points
-
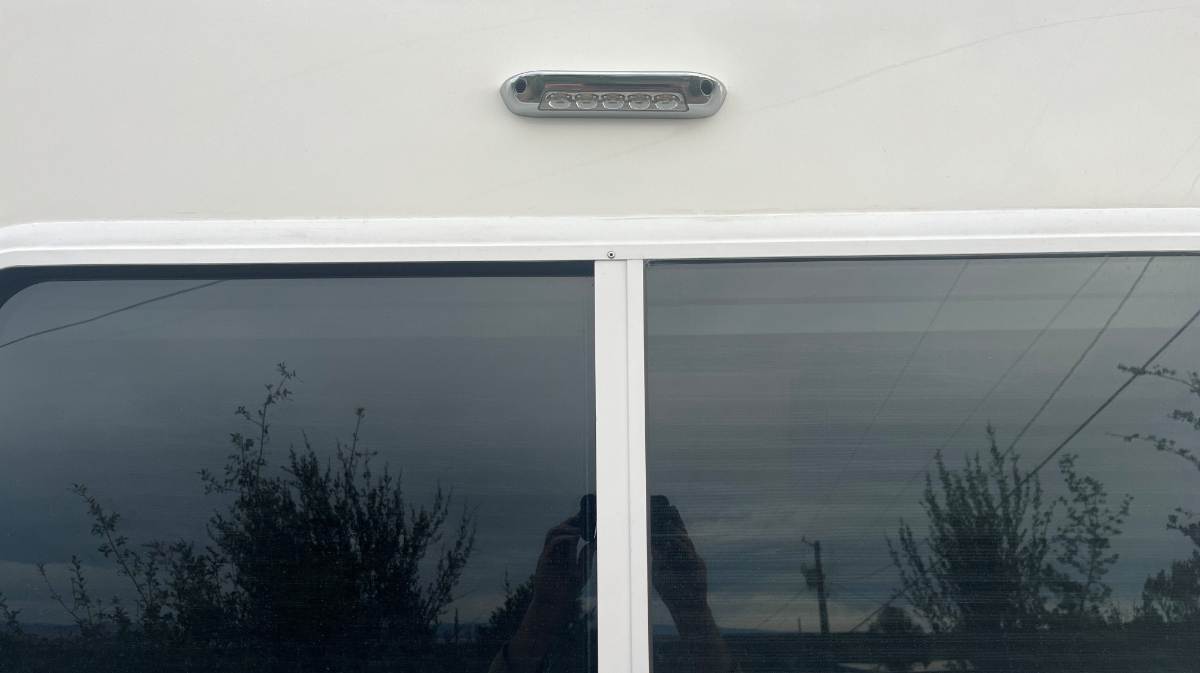
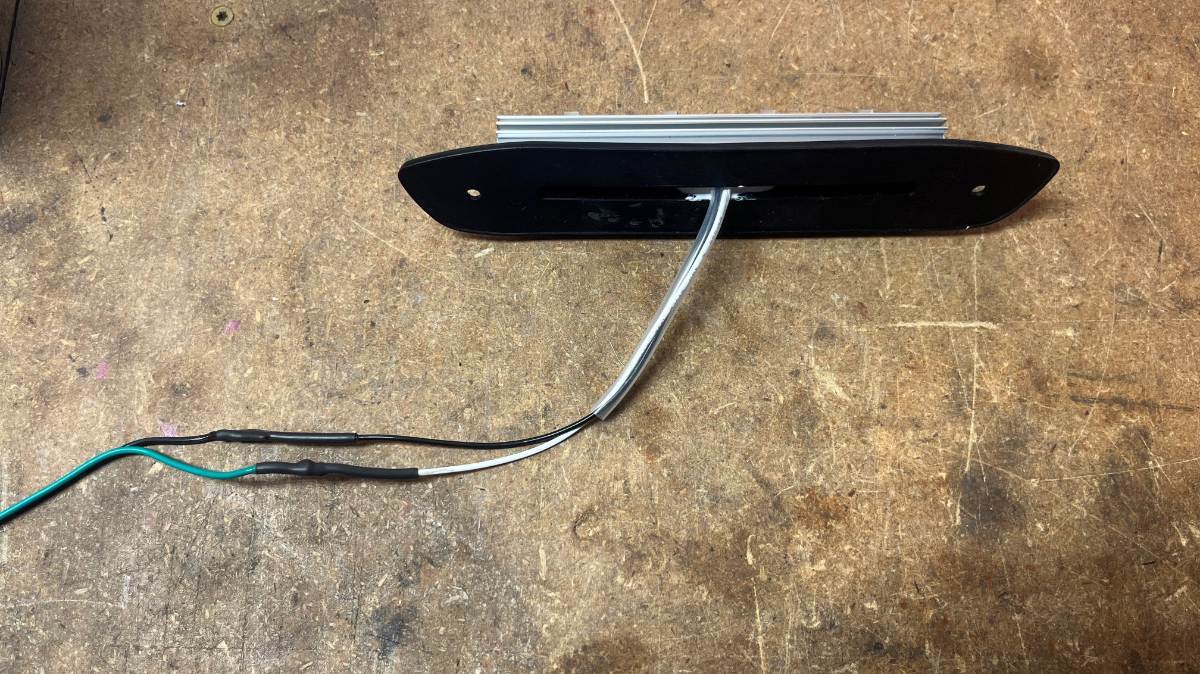
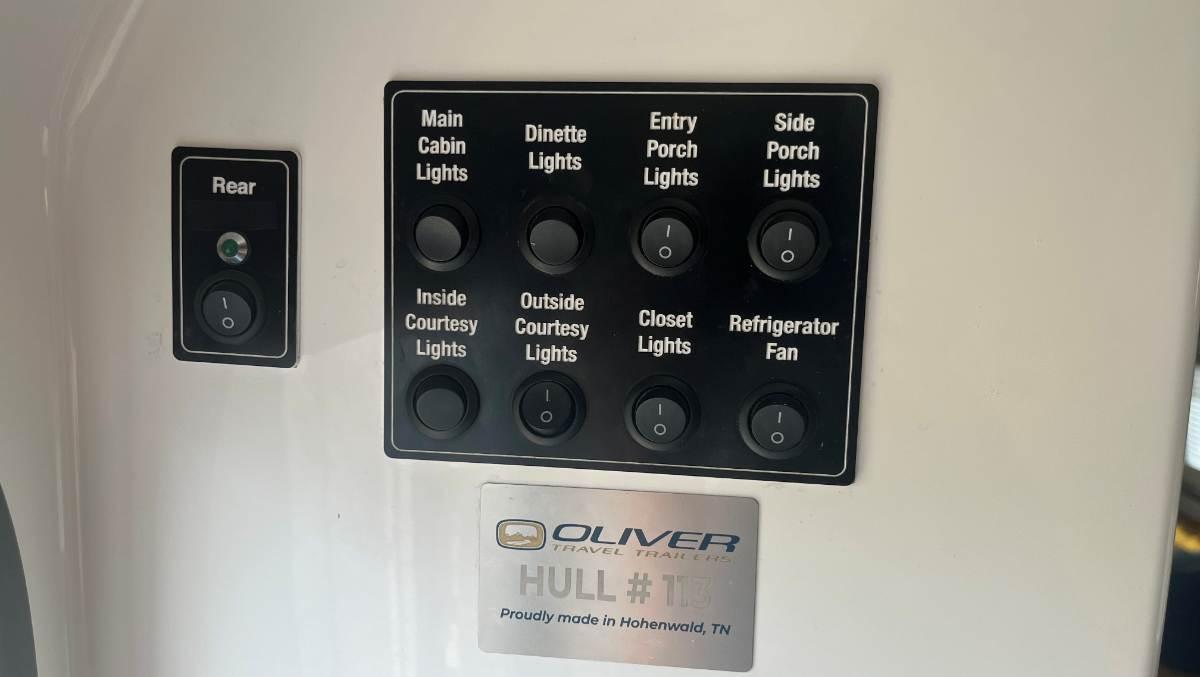
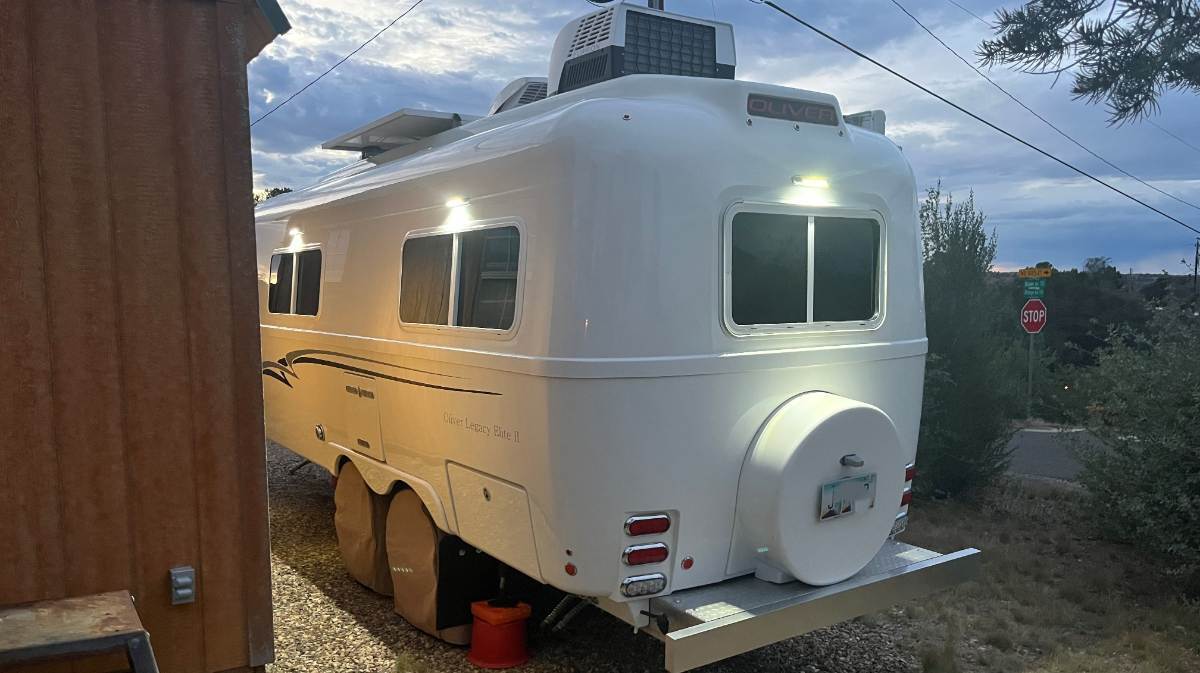
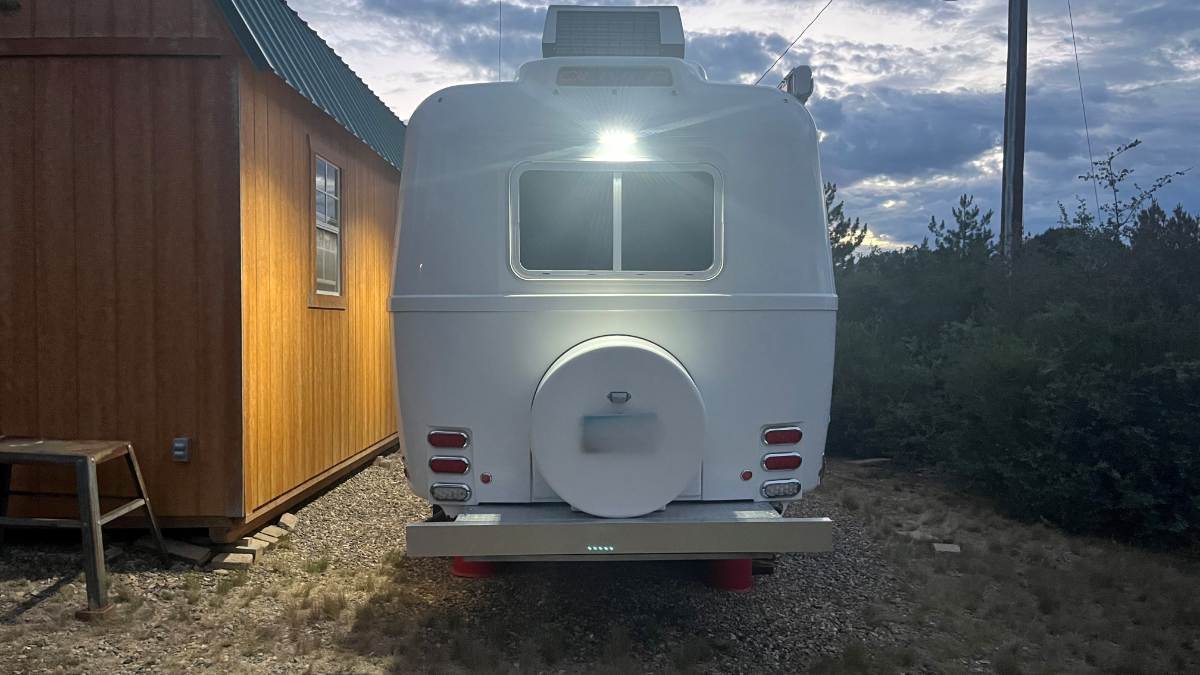
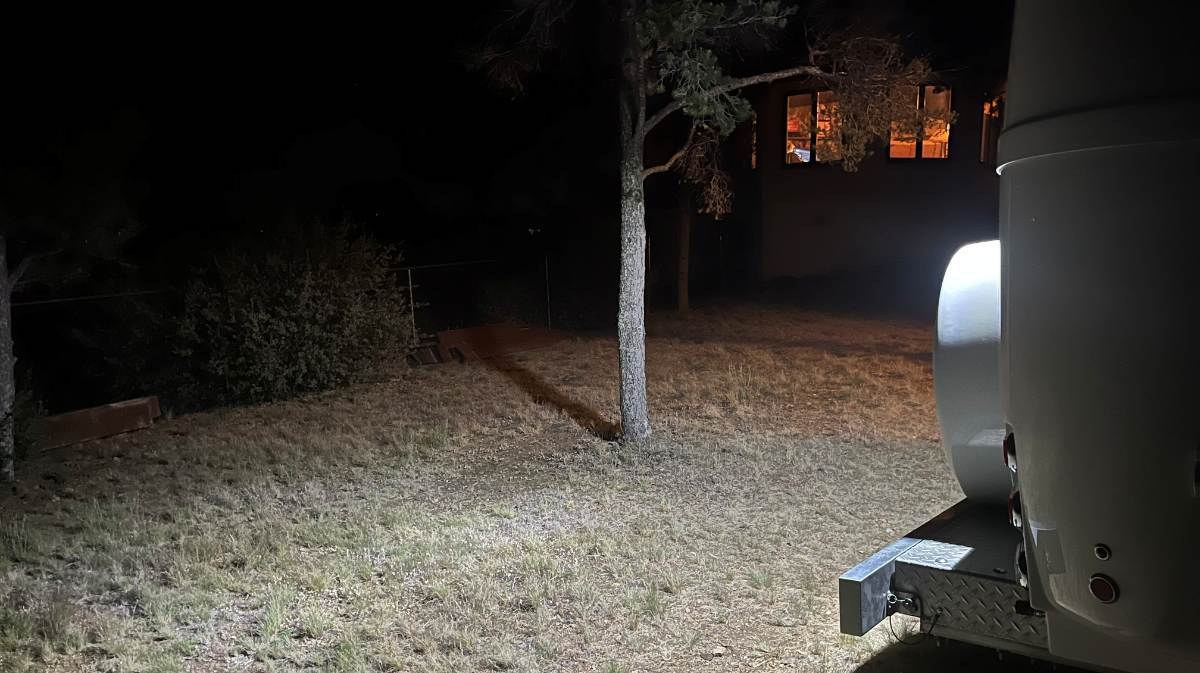
The Oliver Porch Lights are bright for a dark campsite, so we rarely use them. But if you need to light up the area they work great. I've often wondered, why isn't there lighting on the front and rear of the Oliver? I asked a year ago about replacement lights for our OEM Porch Lights and just purchased some recently. OTT should install these lights in all four directions. I would have done one up front too, but running wire would be difficult. I got something else for up front, more on that later. https://itcshopnow.com/products/assurance-exterior-flood-light?variant=50392962007319 I carefully measured the four Porch Lights OTT installed, as the distance from hull belly line, which btw holds a tape measure nicely, up to centerline of the Porch Light at the mounting screws. Turns out they were all installed at different heights +/- 3/4". As a special bonus, this light is 1/4" off from front to the rear mounting screws. My new Rear Porch Light, I promise is the straightest of the bunch! 🤣 It's not easy to choose the best spot to drill into the exterior of your hull, this one especially. I cut away some of the white insulation in the back of the attic. I used a 2-ft piece of metal fish-tape with the ends curled back, running it down the inside of the back exterior hull. Repeatedly, it measured 12" form the bottom of the OLIVER taillight to where the fish-tape hit the top of the rear window frame. It measured 12" so I figured I should go 10" max. Looking from the outside, there is a flat fiberglass frame around the rear window. Above that, the top rear is convex. I had to find the best spot so that the approx. 8" x 1 1/2" light would sit flat in both directions. If not water would get behind it. I drilled a 1/4" hole centered to the window, so the light is just above the flat frame area of the rear window. I soldered and heat shrink extra length of wire to the light. If they only attached 18" of wire! Offset the splices so that they would fit nicely into the drilled hole. It wasn't an easy pull but a few ins and outs and the light pulled flush (would be easier with 2 people, one in one out). I eyeballed the light level to the window frame. I wanted to VHB the light housing vs. drilling two mounting holes but the design of the light would not allow for it. They do not include hardware. Found the stoutest 1" course thread screws that would fit the openings and I drilled 6/94" holes after marking the centers. Wiring? I wanted to add the new rear light to the Side Porch Lights (streetside). However, I could not find the switch leg in the back corner of the attic and I did not want to remove all the stuff out of the kitchen cabinets. But that would be the right way to do it. Cabinets empty, you can easily run wiring up to the main switch panel. Our hull had a rear camera and a separate switch to power it. I removed the camera a year ago, so I'm using this separate switch with existing wiring. I copied something Geoff did, where he used a Sharpie to black out the word "Awning." Mine has a thin cut piece of black tape over the word "Camera" so it just reads "Rear" now! 🤣 I had to wait patiently for dusk and dark tonight! The hull looks great with the new Rear Porch Light to compliment the side lights. And finally, it alone lights up the yard! 😎
13 points
-
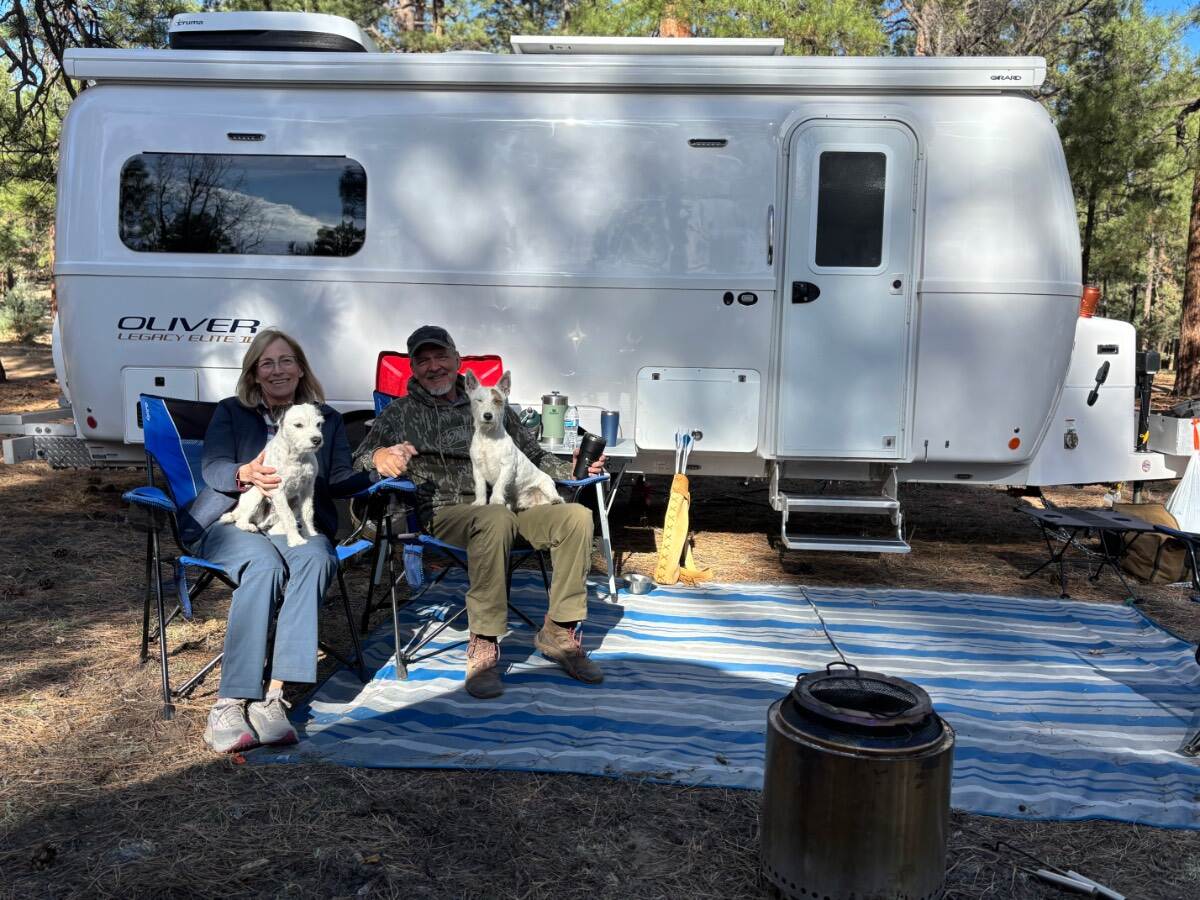
Greetings to you all! We are the happy new owners of Hull #1665, an Oliver Elite II. We picked up our new camper at the dealer in Colorado a few weeks ago. Our first night in the camper was at a Cracker Barrel on the drive home to New Mexico. Last weekend we had our first official 3 day -2 night camping trip and had a wonderful time. Our previous camper was a nuCamp Tab 400. We really loved that camper and it will be missed, but we both realized it was time to get a camper with more head room on the bed! (Especially Mary who always slept scrunched against the wall with two pups at her feet. :0) ) We live in Albuquerque and have been long time hikers, climbers, skiers, campers, hunters and general outdoor enthusiasts. Having a larger camper definitely makes traveling so much more comfortable. There is much about the camper that we love. We like the fact that the Ollie has a great suspension that will allow us to go on two track roads. The battery capacity and solar means that we can be off grid in NM for quite some time. After our first trip, we both realized just how comfortable and usable this camper really is. This summer we are planning a long trip back east for an archery competition and will be making a stop in Hohlenwald for some minor issues with the camper. We also are planning a long trip to Portland this fall to visit a new baby granddaughter. We look forward to meeting other Ollie owners on the road as we travel and at future Ollie rallies! Zane and Mary Rakes '26 Oliver Elite II One man, one woman, two small dogs and a sense of humor. 😊
13 points
-
Mather campground Gand Canyon NP An amazing week to be in Grand Canyon N P. The main water supply is shut down for repairs and the whole Park is almost empty. That would be Hotels, campgrounds, parking lots and South rim drive. The park is a ghost town. We are among the few dry camping in Mather Campground (only campground open). Might be 20 campers tonight. No traffic, no lines, no people. This might be a once in lifetime event to have the greater Grand Canyon N P uncrowded and as our personal playground. Doesn't get better than this.
13 points
-
As others have done, I recently completed a Victron Orion XS DC-DC charger installation between my 2023 Ram 1500 and 2019 Oliver Legacy Elite II, Hull 514. The attached write-up covers the truck and trailer wiring, Anderson SB120 connection, cable routing, fuse locations, Victron settings, parts list, photos, and lessons learned. I thought I'd share in case it helps anyone considering a similar project. Happy camping! Oliver and RAM DC-DC Charger Installation FB pdf.pdf12 points
-
RV owners should know the height of their trailer or rig. For the last ten years 9’ 7” has been in my brain just in case we encountered a low overpass. My thinking has always been if it’s under 10’ I’m turning around! Some years ago we came to an overpass on a back road somewhere that was 9’6”, there was no traffic and I was able to easily back up turn around and find another route. On our trip home from Hohenwald a couple of weeks ago we were on I-35 South between Dallas and Waco when our GPS showed a red road ahead and recommended we exit and take back roads. That’s what we usually do anyway so we followed all the other folks doing the same thing. We started out on normal county roads but after a half hour or so we were put on a small, unnamed road for a few miles before intersecting with a major highway. We were one of many, there was a big boat and two long travel trailers ahead of us. The road soon narrowed to about a lane and a half. Basically one way traffic unless you moved over to be half off the road. There were a few oncoming vehicles, so we slowed and moved over. We could see the highway ahead so we ventured on with everyone else. When we got close to the highway we saw that we had to go under the highway, make a sharp left and continue on the access road before merging onto the highway. As we got closer we could see a big sign on the overpass - 9’10”. The boat ahead went right under. The 30+’ travel trailer stopped and two guys got out, scratched their heads, rubbed their chins looking at the overpass and their trailer while traffic is backing up behind us. They turned around and announced they couldn’t go under and would back up to get out of the way. This is on a 1.5 lane road, with a curve and a line of traffic. Cars started to scrunch over and he proceeded to back his long trailer with his big dually pick up. I put my truck mirrors in, there was about 12” clearance as he went by, slowly. Once he passed the guy in front of me came back and asked me “how tall are yew?. I said 9’7”, how tall are you? He said he had no idea and wasn’t about to measure now. He said I could just go around and then he’d do the backup thing too. When I looked at the line of traffic behind and the narrow road I estimated that it would be a better choice to break my 10’ rule and go for it. We pulled around the other long trailer and moved slowly to the overpass. Carol jumped out to watch and I was checking my mirrors. We had at least 2” to spare. I heard cheers and “he made it!” being yelled as Carol jumped back in and were were quickly on our way. Worst case I figured I might have to replace my noisy Dometic AC, but alas it is still there! Mike12 points
-
Happy Veterans Day As a veteran myself I understand at least a bit of what fellow veterans gave to our country and I certainly thank them for the time and sacrifice they spent/gave on behalf of all of us. We should all give at least a few moments today to reflect on what time and sacrifice means to all of us. Bill12 points
-
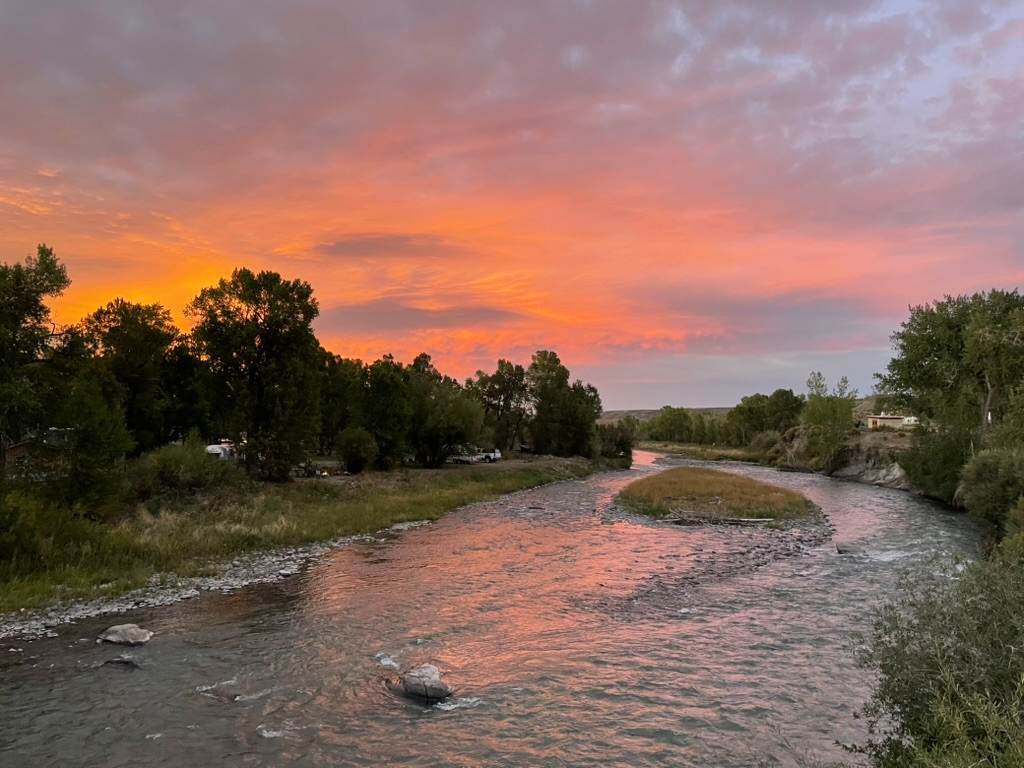
Wyoming sunsets are glorious.
11 points
-
I just noticed that with the exception of the dealer in Canada, all of them are now gone. All sales have officially moved back to Hohenwald. I think this will come as welcome news to many potential new owners. Many were opting to actually come to Tennessee for their pickup and delivery anyway. It has been reported that many dealers were taking payment, handing over the keys and sending people on their way without any kind of walk through. That's just not acceptable. Other dealers were selling the trailer, allowing the new owners to pick up their unit in Tennessee and still charging them $1.2-1.5K for "cleanup and delivery". That's just wrong. I believe this is a wise and good move for Oliver. They gave it a good run. Sometimes things just don't work out as well as predicted. Good job, Guys...11 points
-
What I just posted in John's Facebook group for Oliver Owners. This does not require a lot of discussion. WARNING: Fake Facebook groups cropping up everywhere! Folks, we have a growing disturbing problem with Facebook (FB) groups, especially, because you are reading this, in regards to owning an Oliver. You may have noticed at least one or two new Oliver-related FB groups crop up lately. From the very first picture posted, from the Oliver group that has the word "Community" in it, there are suspicious postings & members. Now the more legit people who join these fake groups will make the group look more and more legit itself. Our information is being collected, I promise you. I'm not usually an overly suspicious person, but as an active Information Technology (IT) guy who also supports cyber security, I'm seeing more obvious signs of trouble. Even a dumb monkey like me can start to see the issues. Now, I just left that "Oliver Community" group just last night after I had seen enough AI generated material and started to smell bad actors. You can ask any AI out there this question and read for yourself why and how and why this is happening. Just ask it something like this: Are there fake facebook groups being created to collect information on us? I usually have not cared about what is collected on me, as big American businesses are notorious about collecting info. These fake groups are not maintained by American businesses, I promise you that. I have no stake, nor real loyalty, to this group we are in right now. I am not an admin, and frankly, I was once kicked out of the group for a misunderstanding on my part. I was later asked to rejoin due to my loyalty to the OTT owners in general. That's it. I'm sure this will be received like politics. We will be split down the middle 50/50 or at least split 33/33/33. Just be VERY safe out there in this mucky world of social media we have created. This group is managed by real good people. We may not always understand why they do what they do, but that is because you are not trying to keep bad actors out of a private group. It's a fulltime job these days. Some forums of the world have to block entire countries due to the issues developing now. Be safe and "you do you", but you've been warned.11 points
-
Snackchaser was spot on. I got up this morning and found the emergency breakaway switch had gotten pulled out during setup. I put it back in and voila, back to 0 draw. Thanks you all so much for the responses. I was really stressing out about this issue.11 points
-
Probably most members and readers of the Forum are aware of the "brewing" winter storm that is forecast to hit the southern states this weekend. But, for those that are not - it is forecast to start Friday over in the mid to northern Texas area and move through Oklahoma and Arkansas. Then on Saturday morning it moves over Tennessee, the northern part of South Carolina, and North Carolina. Continuing through Saturday and well into Sunday the storm then moves slightly north before exiting off the coast in the mid Atlantic region. While totals of snow are as high as 18 inches, it is the ice that will cause many problems - downed power lines and roads that are very difficult to clear. For those not familiar with the southern States - many simply do not have the equipment to deal with either the ice nor the amount of snow that is forecast. If anyone and or their Ollie is in this area of the country, NOW is the time to prepare for this storm. Be careful and best of luck to everyone in dealing with all that is to come from a winter wonderland. Bill p.s. HERE is one forecaster's take on the storm11 points
-
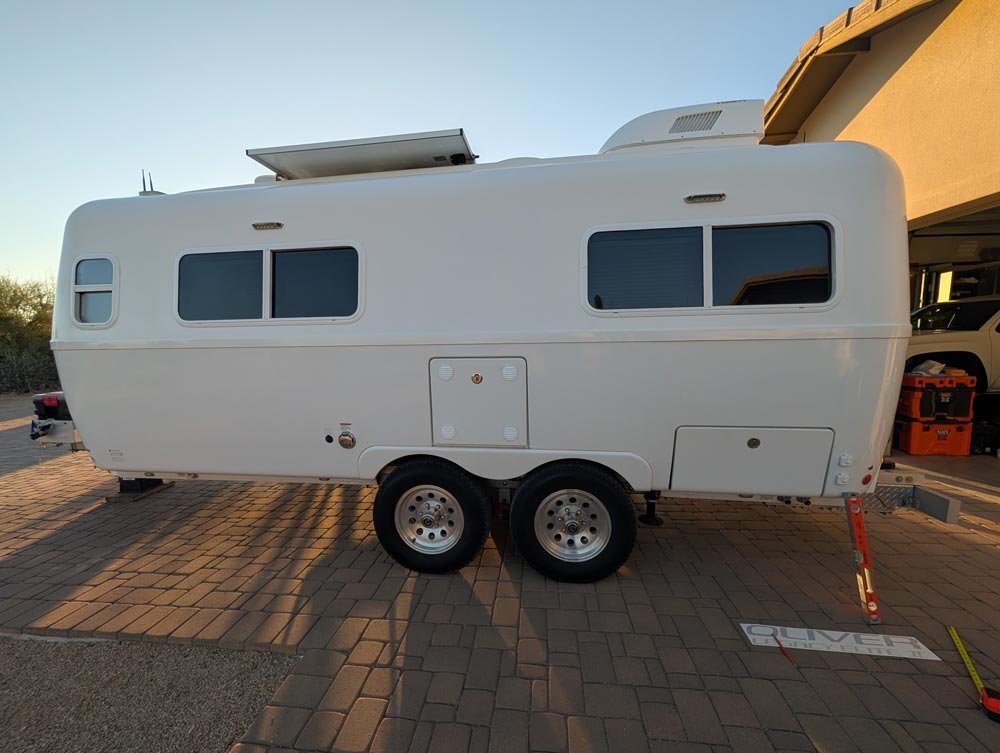
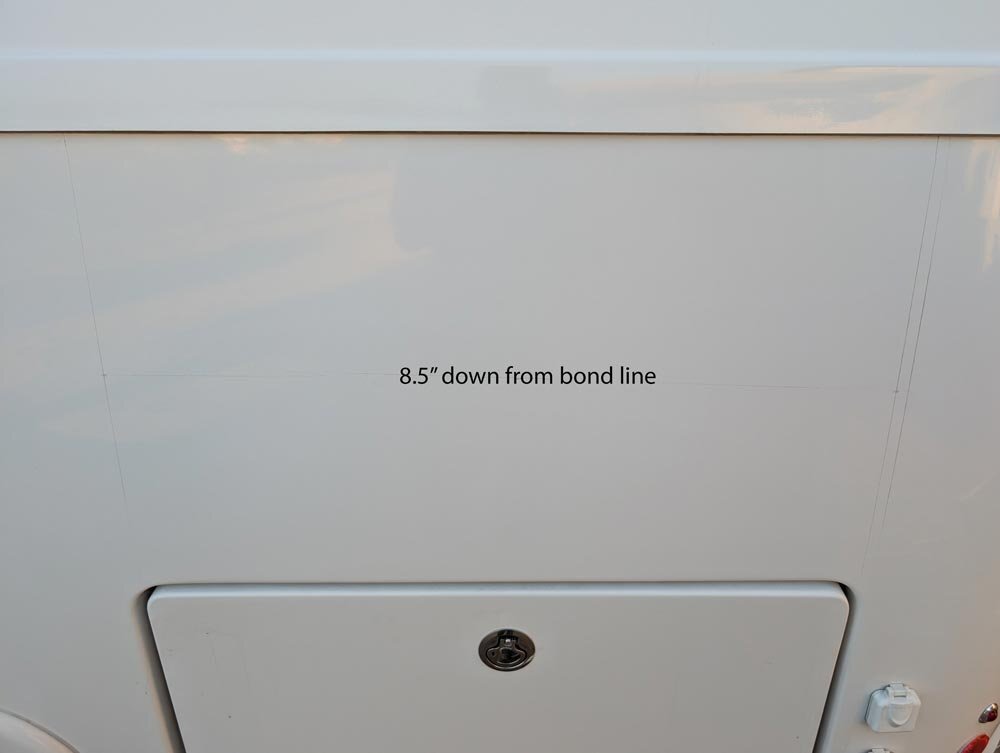
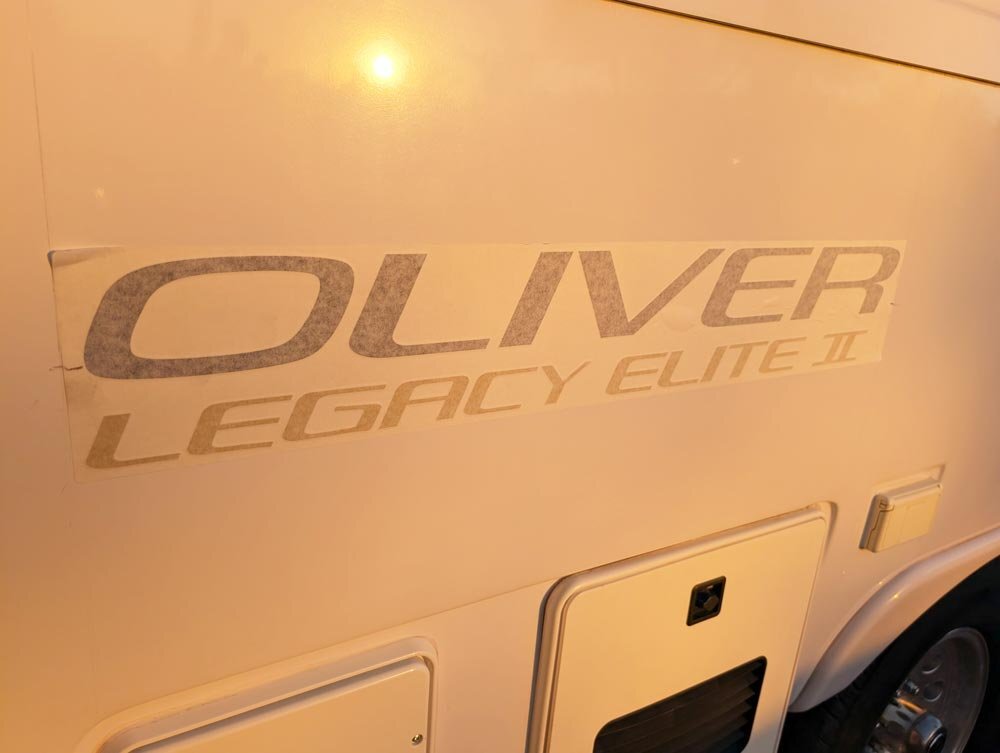
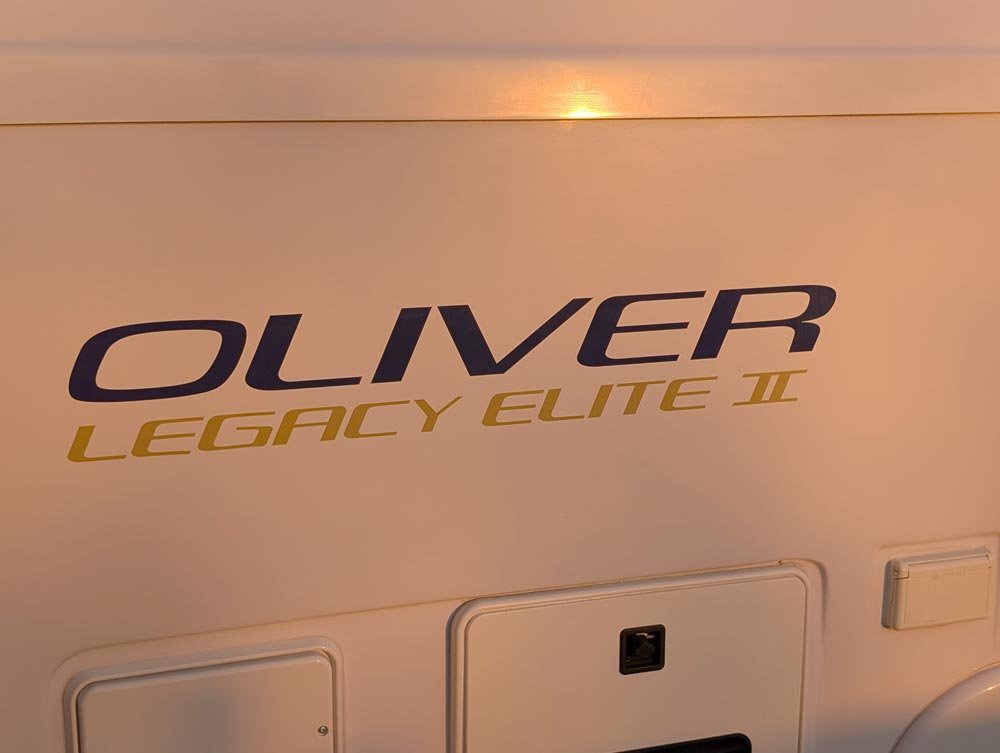
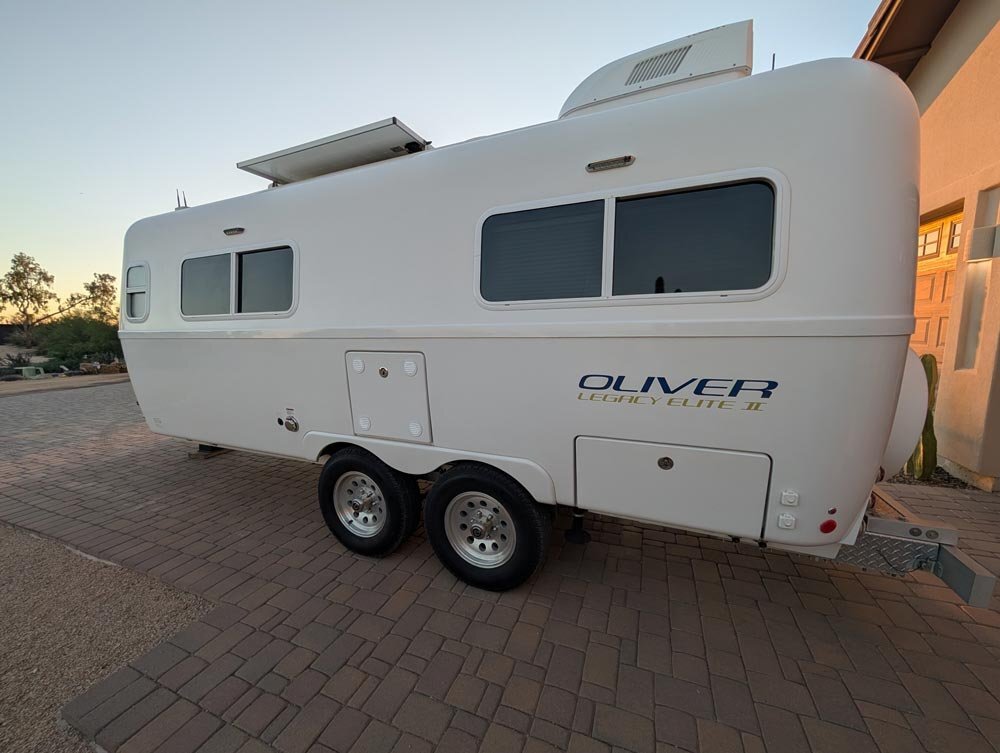
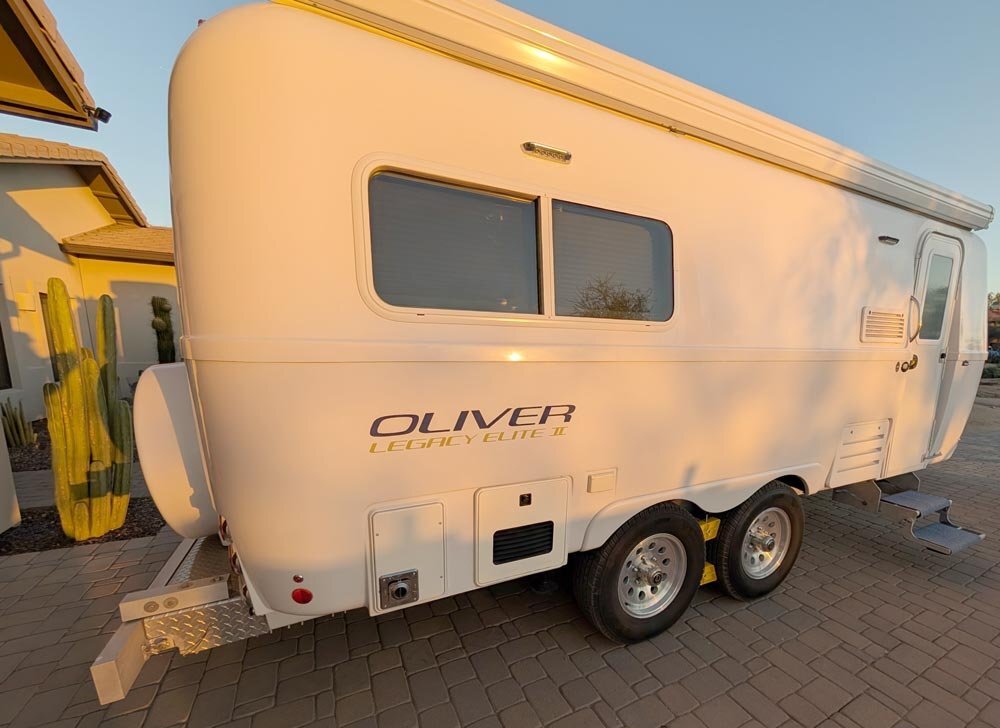
Put the new side decals on. Looks like nice quality decals and went on easily. I clay bared the sides first, then hit them with a 3M 1 stage buffing compound, then wiped and cleaned it before measuring it out. Drew vertical lines about where the doors are below where it goes, then measured to the middle of the bond line and door. I came up with 8.5" down from the bond line and that was the center of my decal placement. $73.71
11 points
-
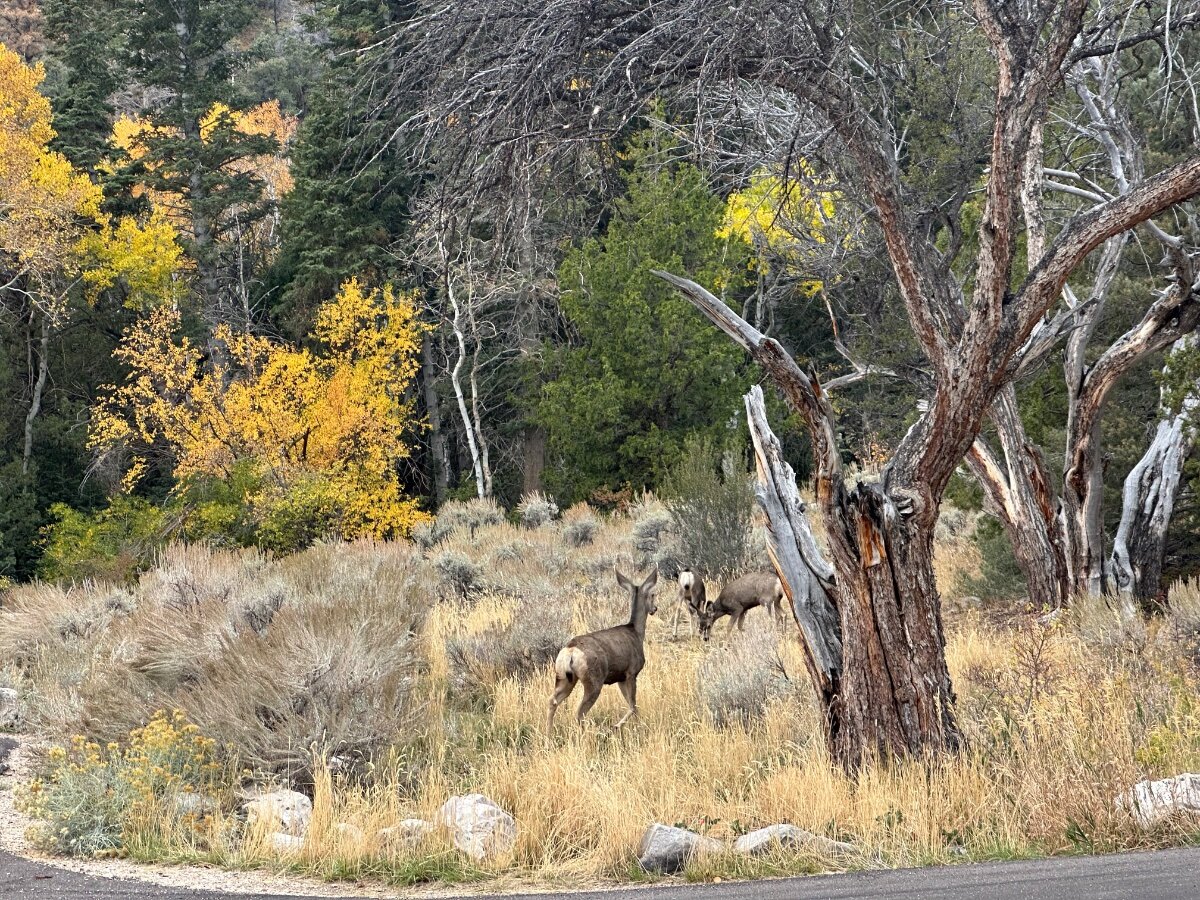
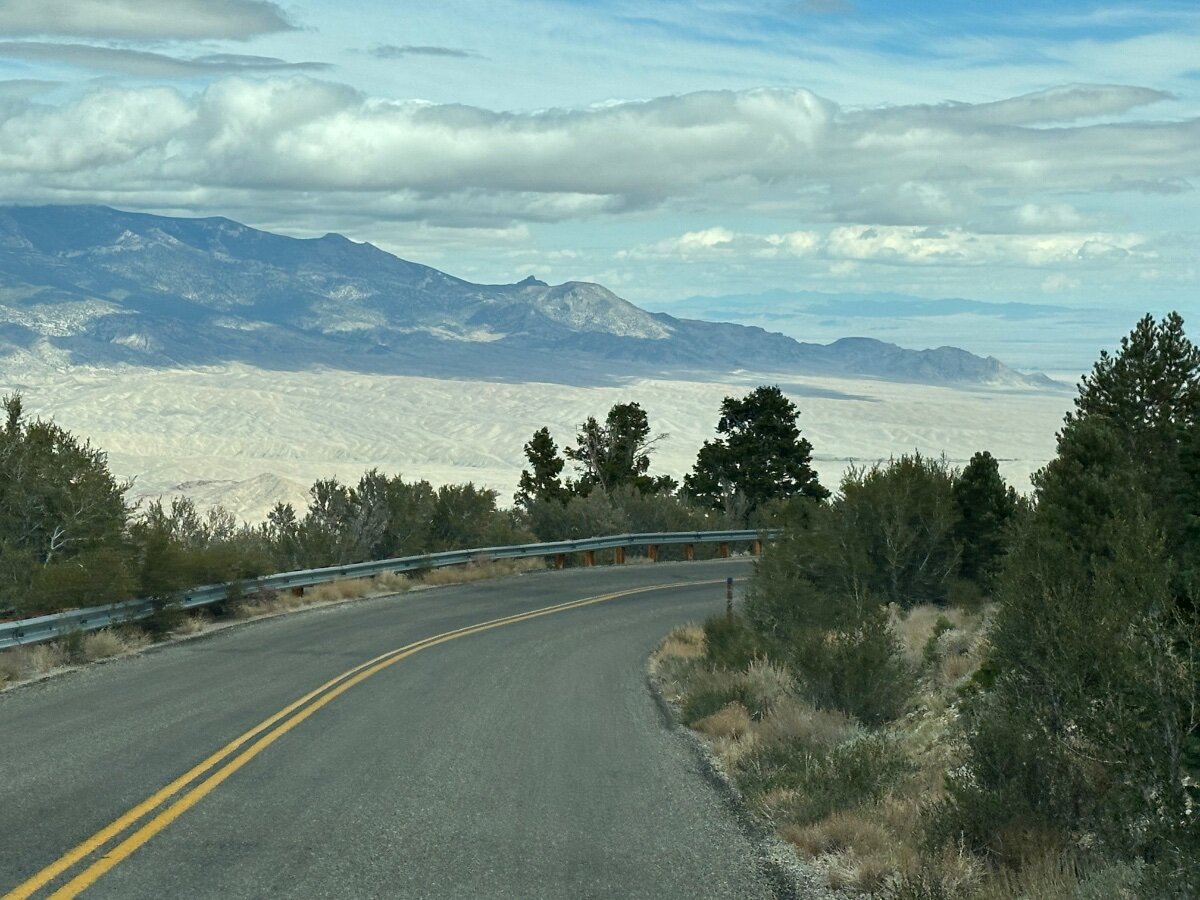
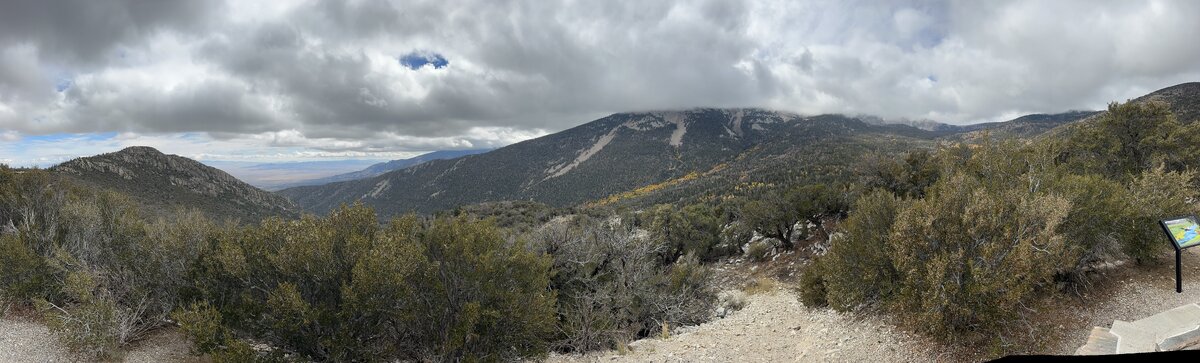
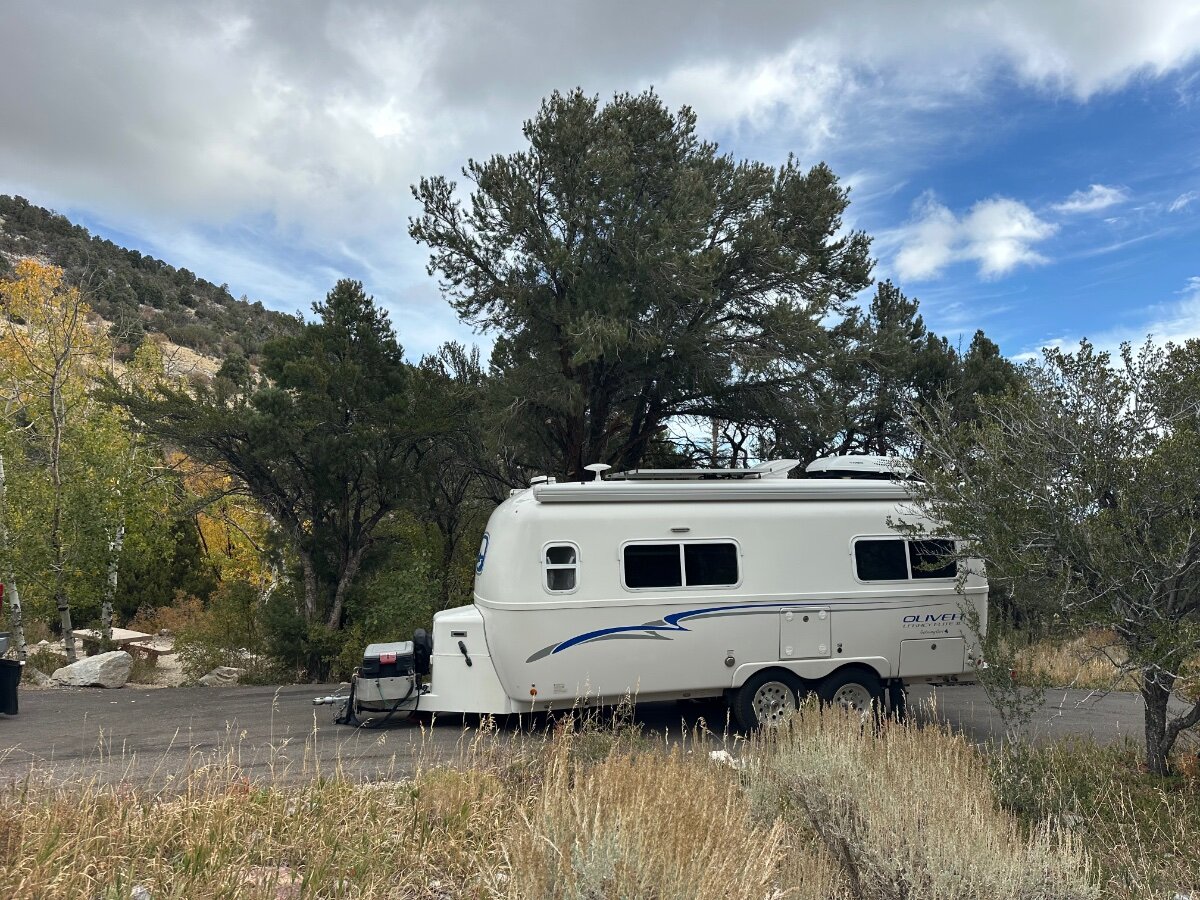
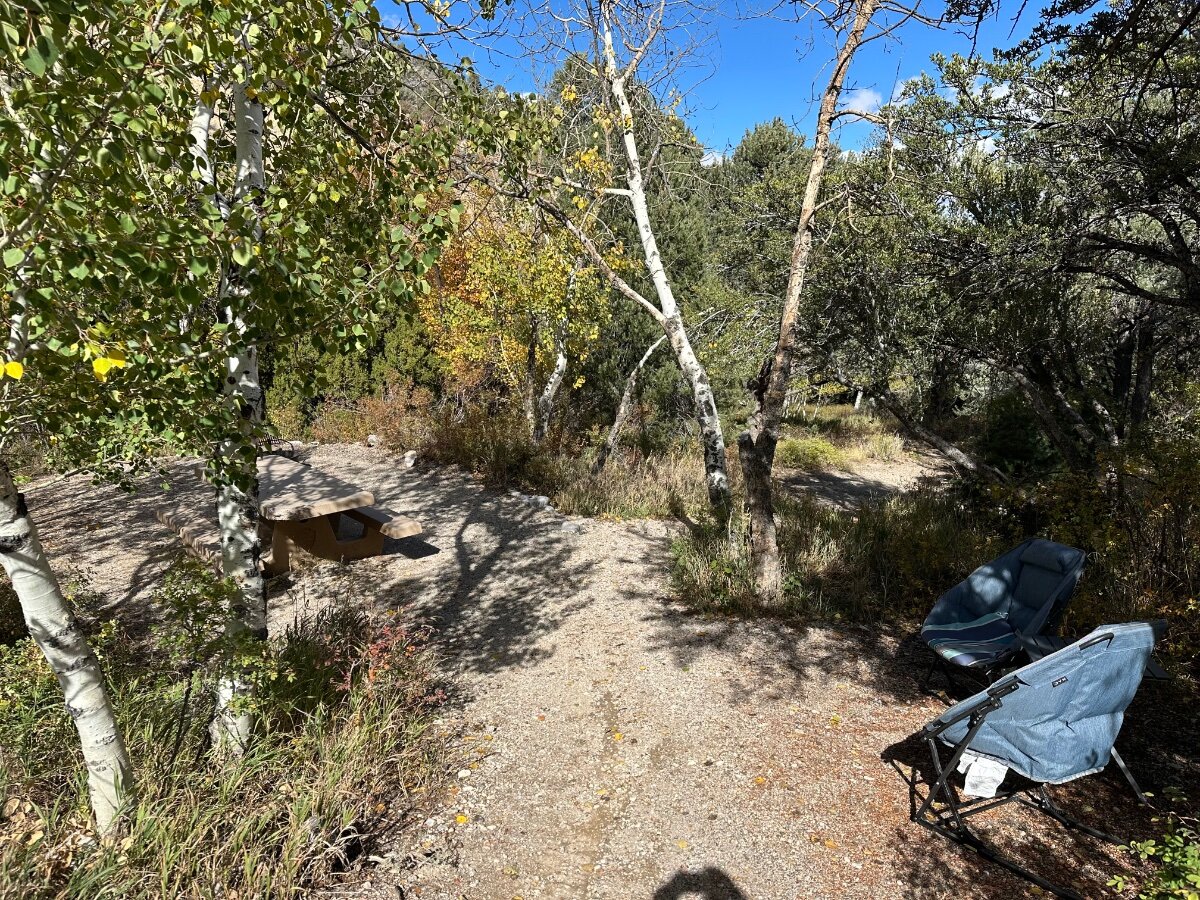
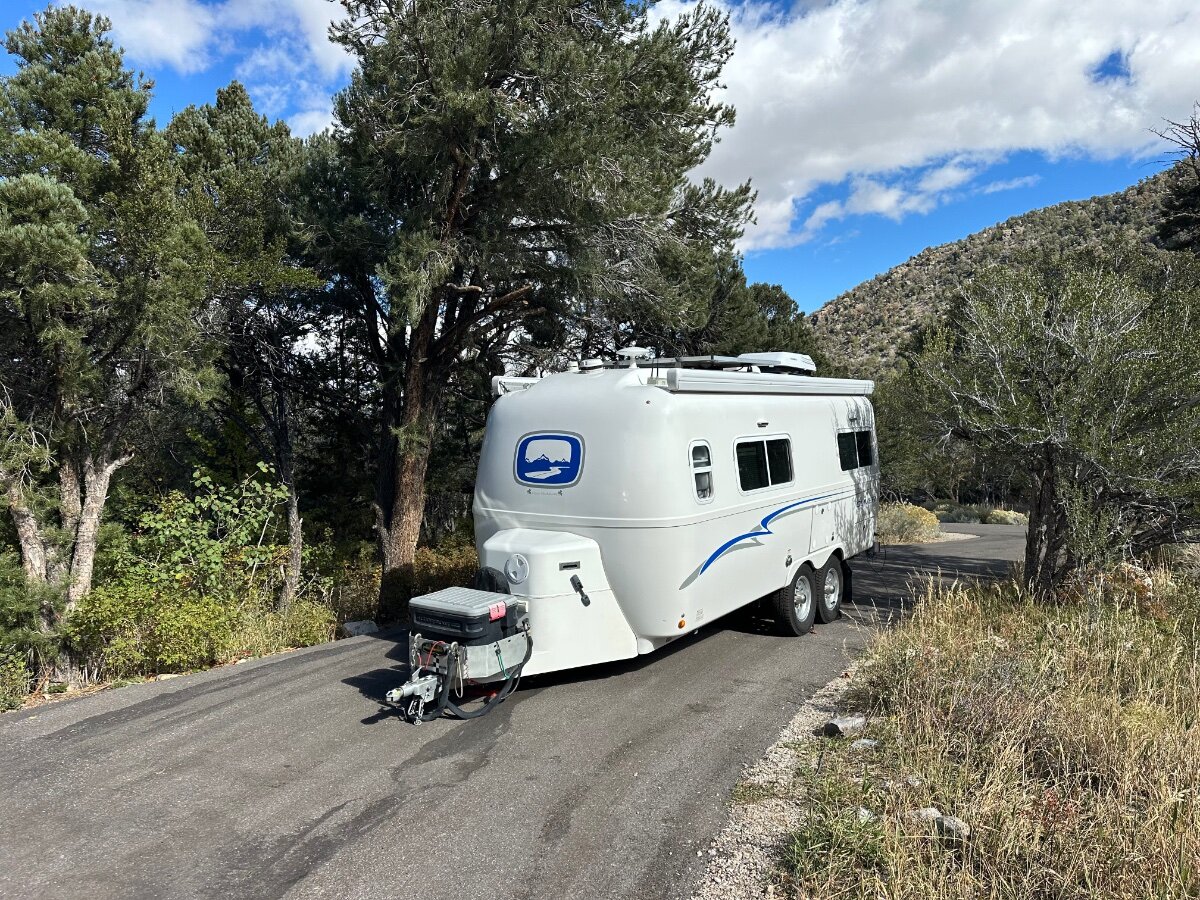
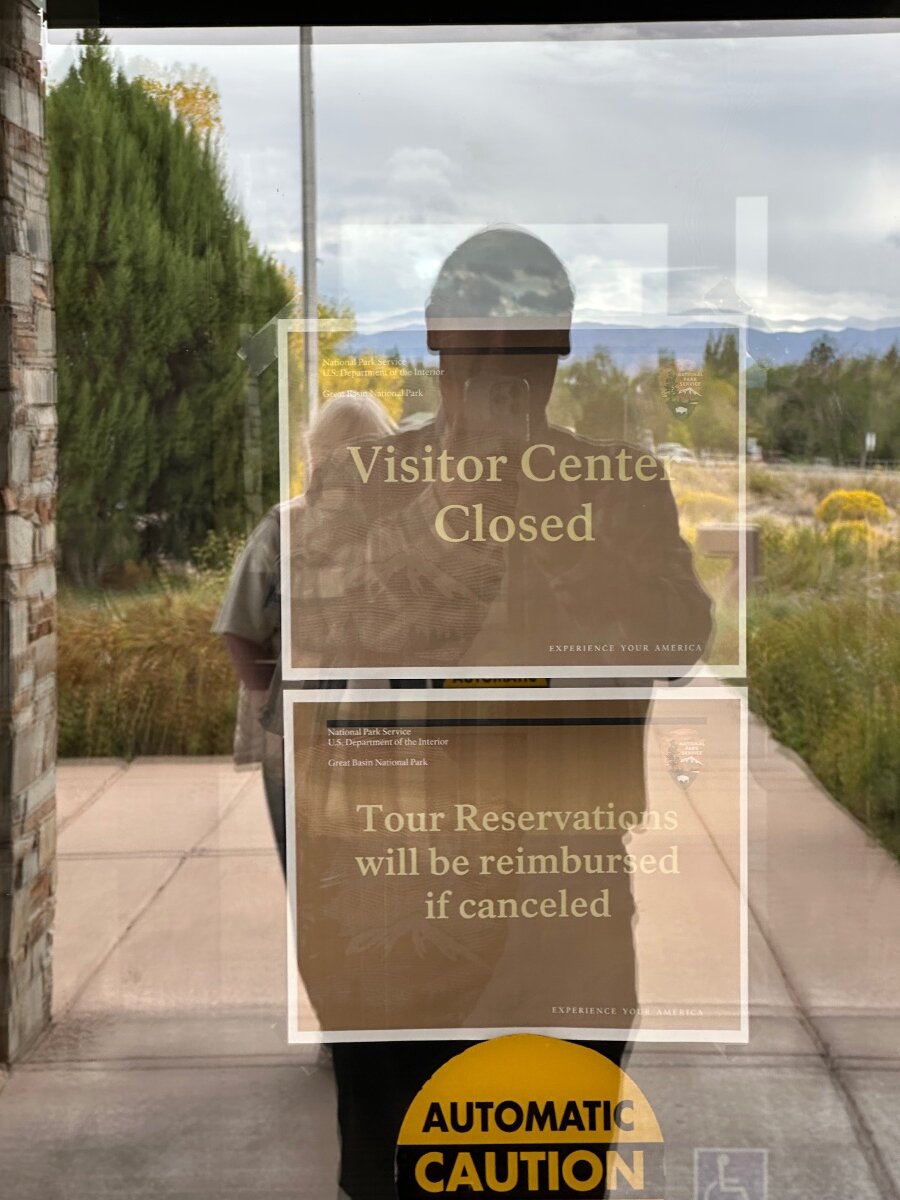
In Great Basin NP..upper Lehman CG site 17. Very steep slopes. Lower Lehman CG has been closed and completely re graded and all ne asphalt. Will open next spring. Visitor center closed…park campsites open as are roads to top of park Saw people come thru and collect trash.
11 points
-
There’s a wide range of “below freezing”. If it’s only down to the high 20s we still rely on our electric space heater (Vornado). I can turn it so that some of the heat is directed into the vent under the bed with the water pump, water tank, etc. We’ve never had anything freeze. I figure if the outer hull is in 27 degree weather and the inner hull is in 68 degree inside weather then between the hulls will be something in between. Below mid 20s we do use the furnace. That’s not been very often since we tend not to camp in very cold weather. Mike11 points
-
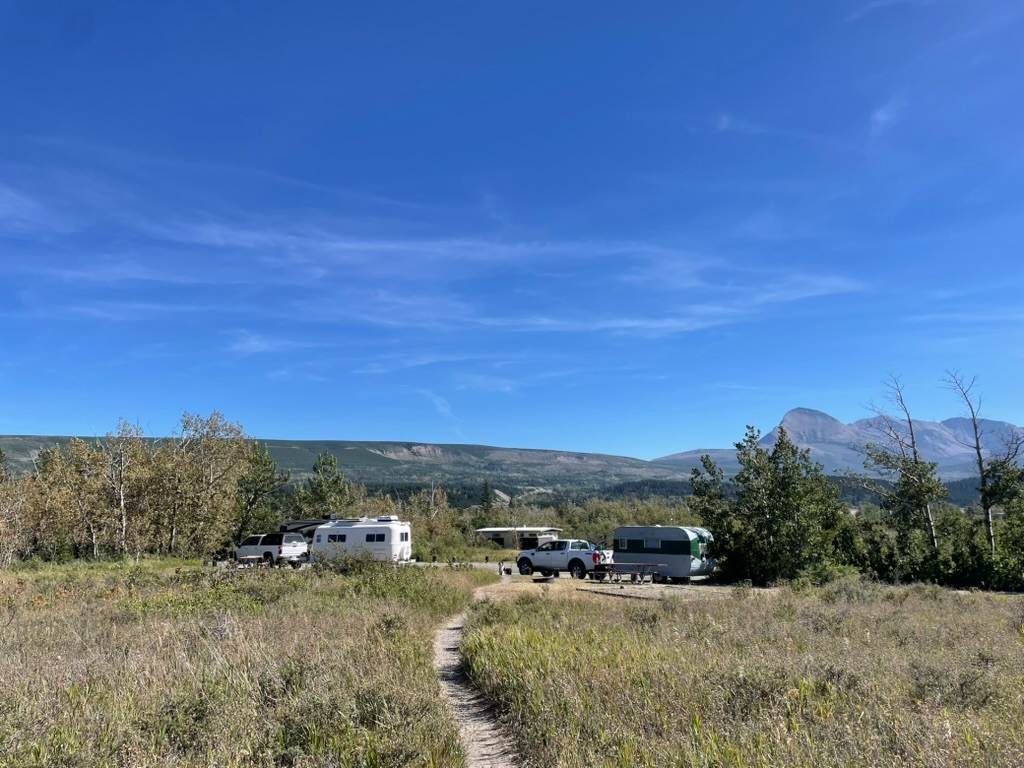
Glacier National Park, Saint Mary Campground near eastern entrance to the park. The campground amenities vary a bit depending on the loop, but they have hot showers (free) as well as fresh water spigots, waste water dump station (for gray water from dish washing) and an RV dump near the entrance. Full of berries and full of bears; maybe that's why the campground isn't full! The sites cannot be reserved before the day-of-arrival, but it wasn't a problem to find space. I'm so glad I took the opportunity to come here this year, at the suggestion of a friend. The weather has been perfect camping weather; cold enough to want a camp fire, and damp enough to be allowed to have a camp fire.
10 points
-
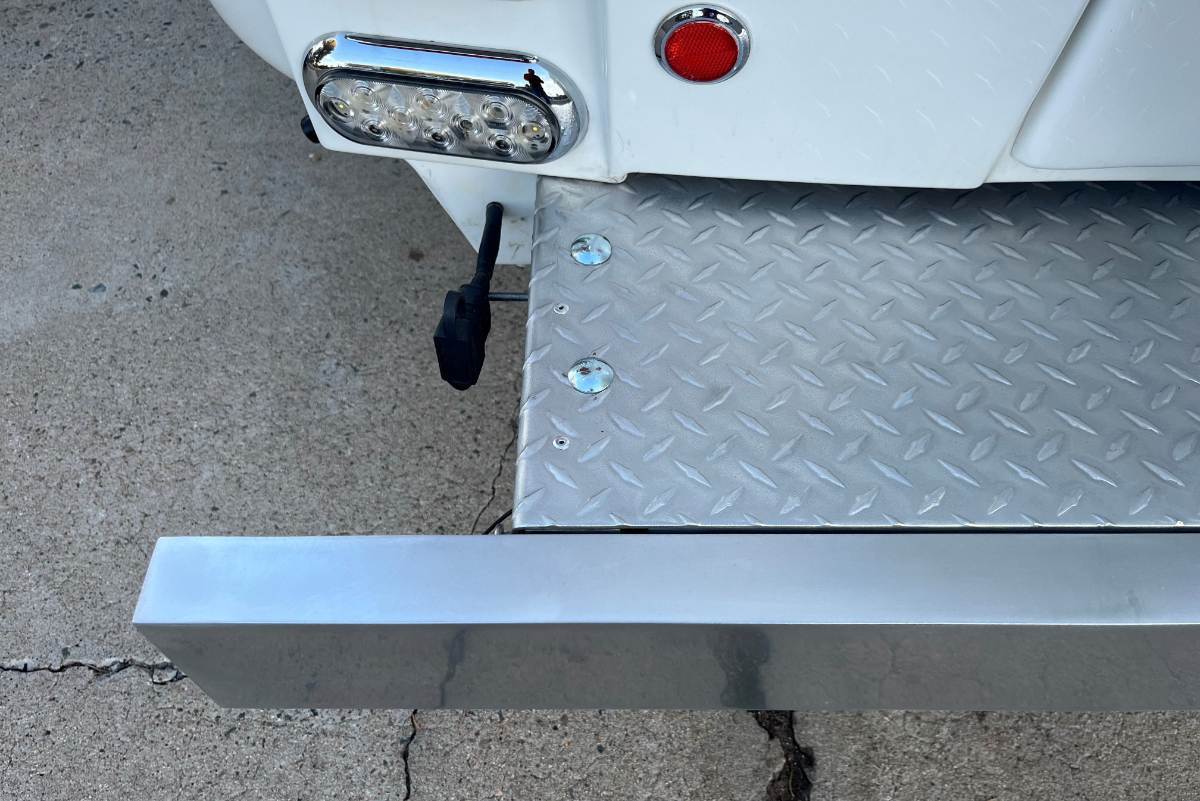
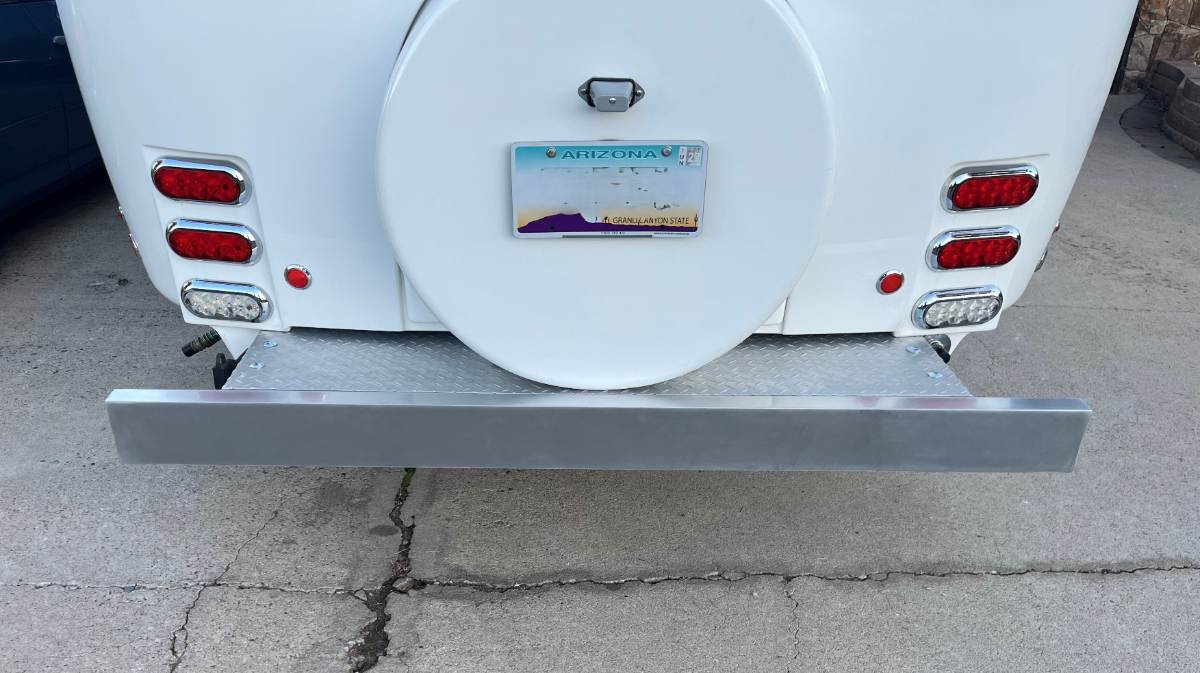
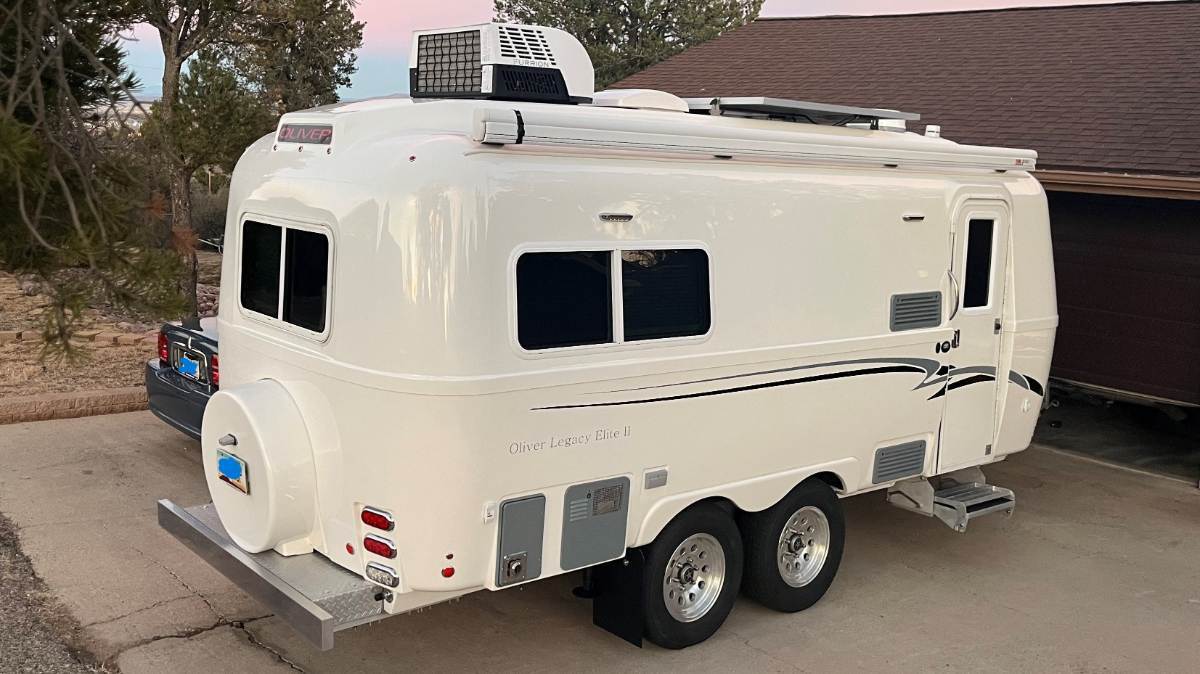
I had removed the Dometic Penguin A/C prior to this work. I temporarily filled the 14x14” opening with a piece of plywood to keep dust out while allowing Cameron the room above to make the entire rear roof shine! It’s always a mess under an old A/C. Good thing we did because the new Chill Cube is a foot shorter to the rear. With my son’s help, we installed the new Furrion Chill Cube A/C. One last task was to restore the rear bumper area. I removed the mounts for the bicycle rack we don’t use, drilled out more rivets and removed the deck plate and folding bumper. I cleaned the inside waste hose area, and steel brushed, sanded and ceramic coated all parts. I've been wanting to write this up for a few months now. Chris is out of town on her annual "Sisters Trip." Adam's been working overtime and it's boring being home alone. That’s it – she’s all done! 😎 When it's time for some love again, I'll drop her off with Cameron for a renewal! No more Ugly Duckling, but quite the Beautiful Swan she is now!
10 points
-
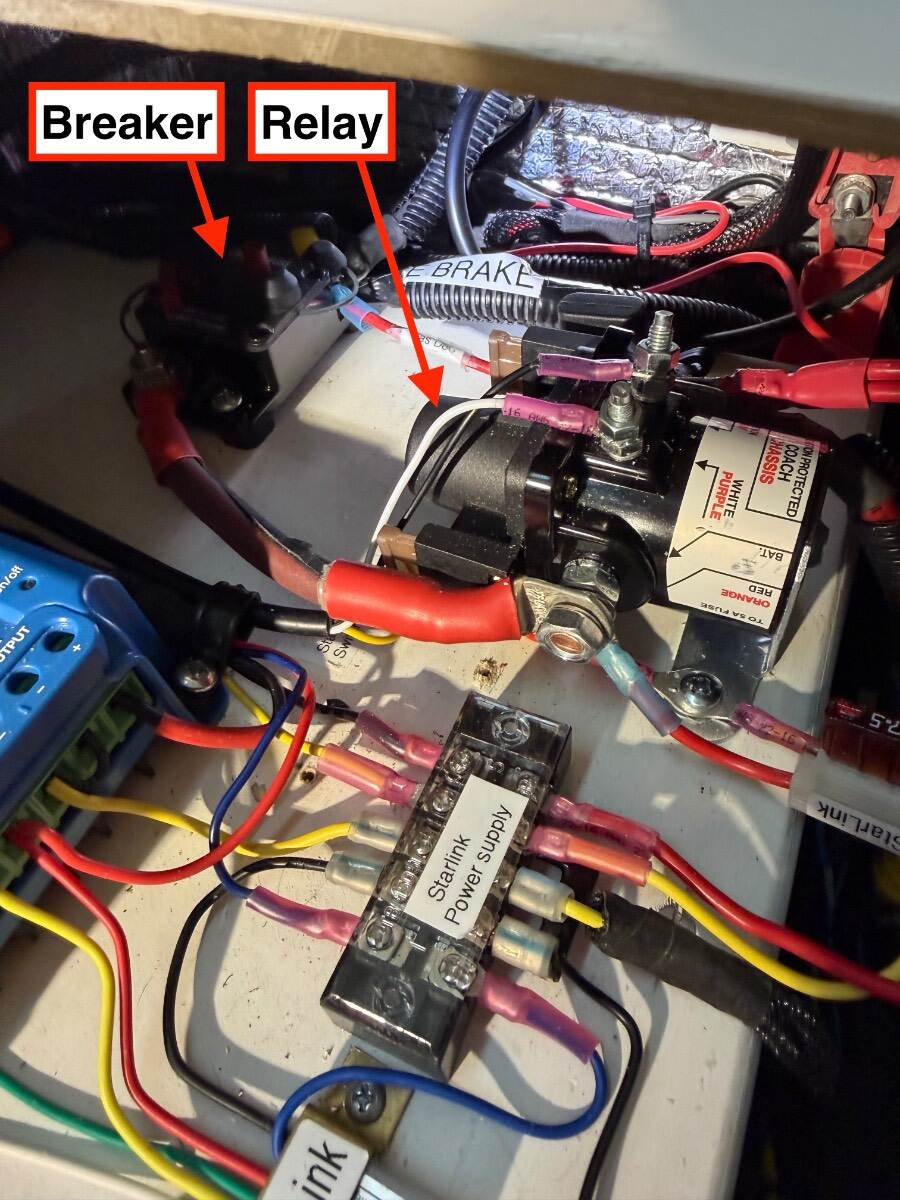
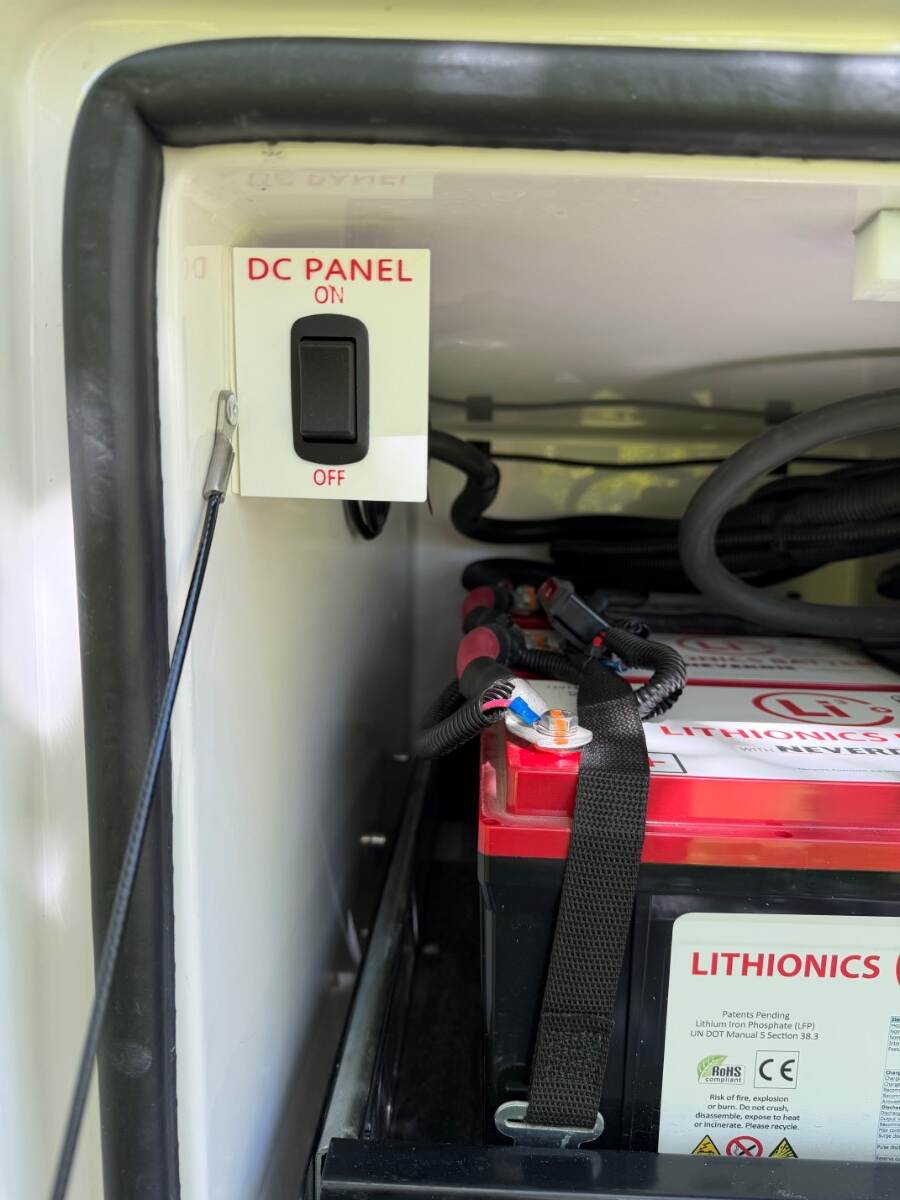
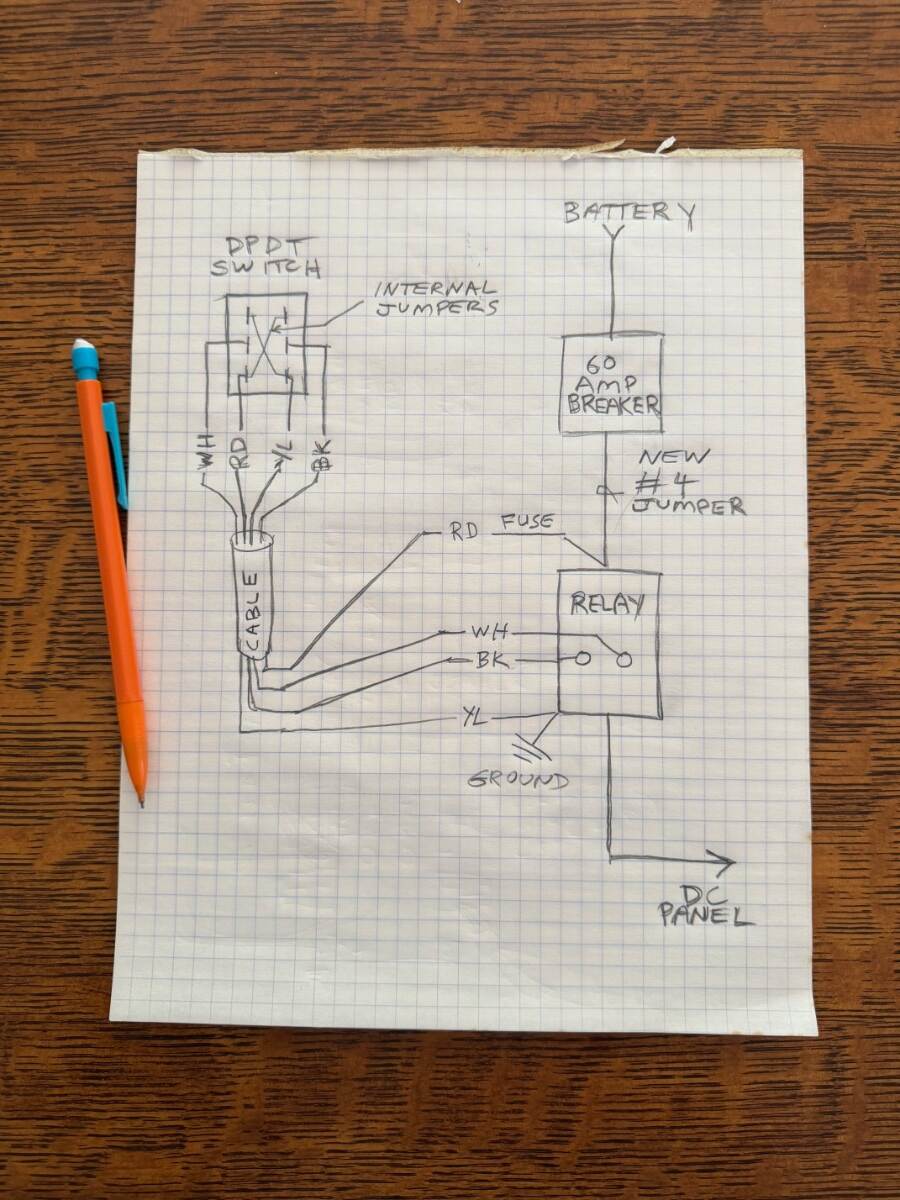
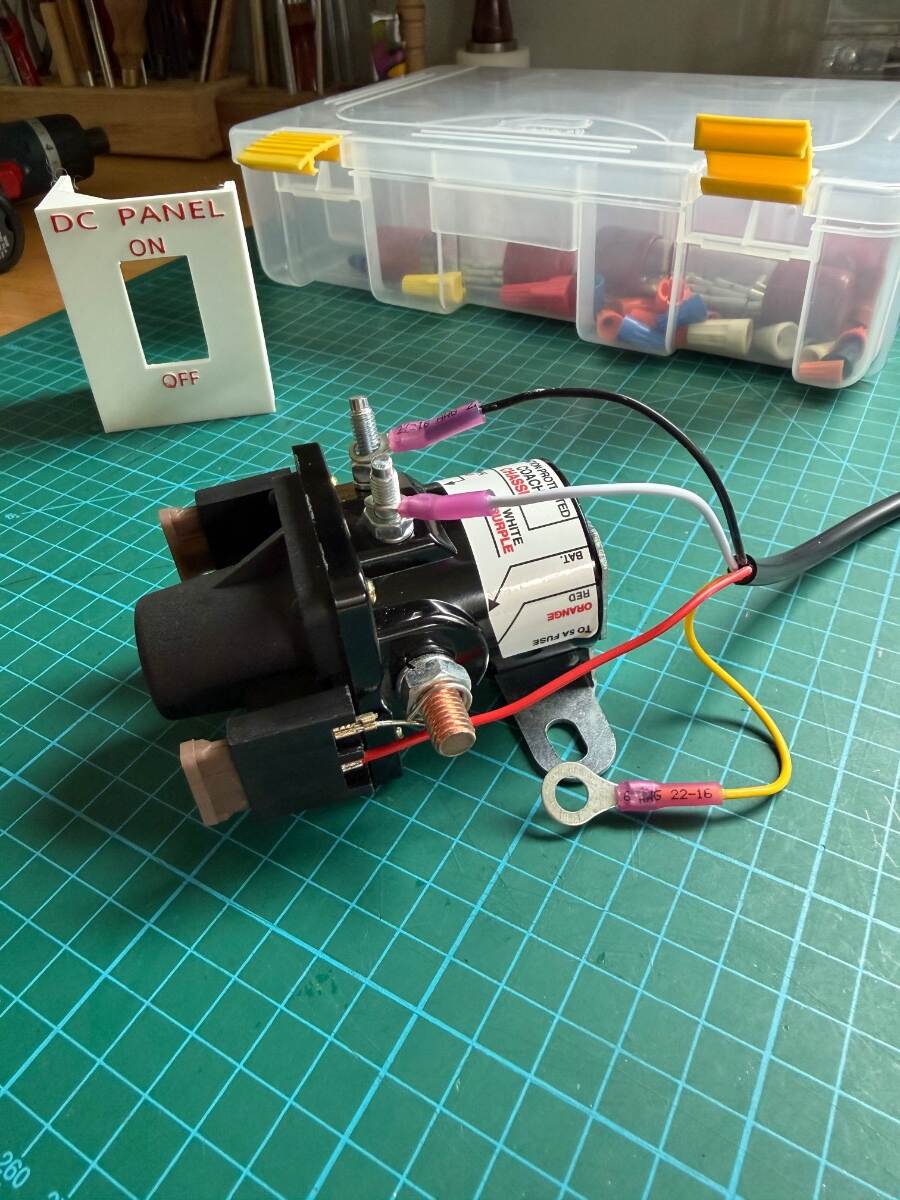
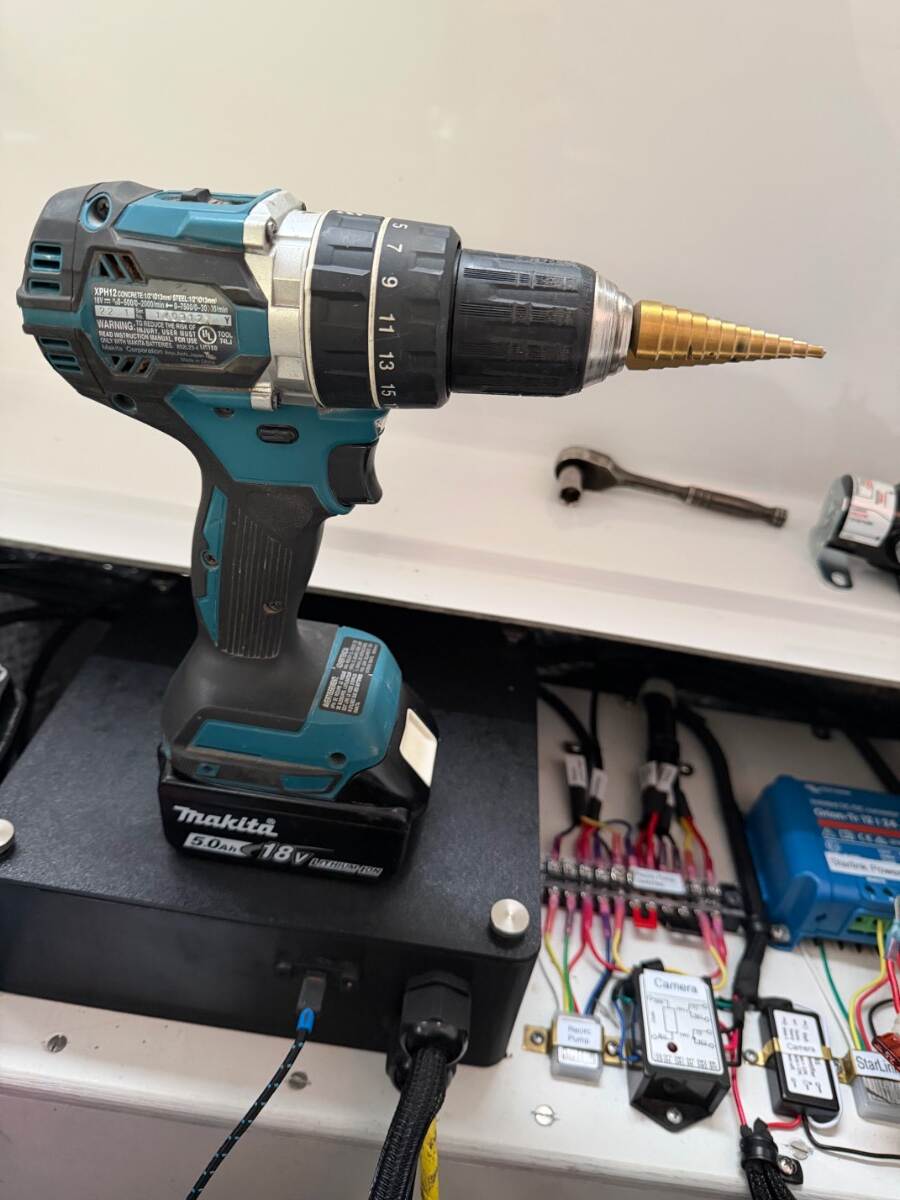
There are many great postings for installing a main battery switch. Folks like them for safety reasons, to kill parasite loads during storage, or for when working on the system. But I’m not a big fan because the safety benefits are more mythical than real, and 96% of parasite loads can be killed by shutting off the 60 amp DC panel breaker. I just don’t like introducing unnecessary resistance in the high current battery circuit. In rare cases when the main battery circuit needs to worked on, the battery can be disconnected, or the 300 amp breaker can be opened. Even with liability exposure, Oliver’s decision not to have a main battery switch was a deliberate and sound engineering choice in my opinion There may be some merit-worthy arguments for one, or perhaps a lingering perception that one is needed because it’s a requirement in the marine industry for different risks. In reality, the need to cut power in 12-volt RV systems during emergencies is rare and not normal practice. Besides, most firefighters are trained to cut battery cables before looking for a switch, or trusting it. There is no shock hazard from the battery, and breakers and fuses are more reliable protection against fire hazards, than relying on the right person being in the right place at the right time to find a switch. I've seen a number of battery switch installations that completely disconnect the battery. This can actually create more credible safety hazards than it prevents. A towed trailer with its battery switched off has no emergency breakaway brakes and no gas or CO detection, both of which should never be switched off. The solar and AC chargers are also disabled in that configuration. However, switching off parasite loads is definitely a good idea for storage, but it doesn’t require switching off the entire battery. In the example shown below, the DC panel carries 96% of the parasite load. The remaining 4% of parasitic load comes from the inverter/charger, solar charger, and LP/CO alarm which are all connected directly to the battery. I don't believe it's necessary or advisable to disconnect these circuits for normal off-season storage because those parasite loads are non-consequential. For unusually long storage periods, some additional battery maintenance would be needed regardless. The parasite load percentages below are based on precise measurements of my Oliver trailer with a 390 amp battery, your setup and amperage may vary. They include electronic standby currents from various LEDs, memories, displays, power supplies, and such. There is no singular large load, but they collectively add up: Circuit Draw DC Panel load 0.48 A 96% Inverter, Solar Charger, Gas/CO detector 0.02 A 4% Total measured from battery 0.50 A 100% DC panel breakdown: Fuse Circuit Draw 2 Various electronics 0.117 A 4 Furnace 0.012 A 5 Main lighting 0.003 A 6 Fans 0.016 A 7 Truma water heater 0.113 A 8 *Furrion Radio 0.204 A 9 USB outlets 0.007 A 10 USB outlets 0.009 A Total 0.481 A *My new IRV stereo is only 0.083 A Under ideal conditions, a 0.481-amp load from the DC panel would deplete a 390 amp-hour battery in roughly 34 days. Real-world depletion will be faster due to BMS overhead and temperature effects. The remaining 0.02-amp load from the non-DC Panel circuits would take approximately 2.2 years to deplete the battery. A lead acid battery system without inverter would have less parasite draw with the DC panel shut off. It would still last a 7 month storage season before depleting the batteries to a safe 50% discharge. I used to turn off the DC panel with its 60 amp breaker under the street-side bed. Although effective, it’s inconvenient to reach. This modification provides a more convenient way to turn it off with a latching solenoid relay controlled by a small switch. Latching means it holds position without any power draw, it only consumes current for the instant it switches, adding nothing to the parasite load. These relays are designed for exactly this purpose and are commonly used in boats and RVs. I used an Intellitech style RV latching relay rated for 100 amps. The relay mounts next to the 60-amp breaker. The existing DC panel feed wire is moved from the breaker output — to the relay output. A new #4 AWG jumper goes from the vacated breaker output — to the latching relay input. Premade made jumpers with ring terminals are readily available in 6” & 12” lengths. Note: The 60 amp breaker may also have other loads such as the electric jacks. The jacks do not have parasite loads, but turning them off is a form of anti-theft protection to prevent the trailer from being towed away with jacks deployed. If you choose to move these loads to the relay, then the ring terminals need to be enlarged from 1/4” to 5/16” stud size to fit the relay. Use a sheet metal step drill to enlarge the terminal ring lugs while holding them with pliers, otherwise a twist drill will grab and destroy it. Step drills are great for drilling chip free holes in fiberglass tool. The relay is controlled with a Double Pole Double Throw (DPDT) momentary switch with a spring return to center. This is the same type of polarity-swapping switch used for the electric jacks. The switch can be located in any accessible and convenient location. I put mine in the battery compartment and wired it with a jacketed 4-conductor 18-gauge cable. The cable fits snugly through a 5/16” hole drilled next to where the DC panel wire penetrates the battery compartment. I linked one option for a switch mounting bracket. However, I made my own 3-D printed bracket with a red label to identify it as the DC panel shutoff. The print STL file is available, or I have a few extras if anyone needs one. I mounted the switch bracket with high strength double-stick foam tape and stick-on zip-tie mounts for the wire. The DC panel can now be turned on/off with the switch, without disturbing the inverter/charger, solar charger, or safety circuits. Newer Olivers have a solar disconnect switch and it’s possible to use the latching relay to disconnect the solar too. However, there is limited space on the relay’s stud for circuits so a terminal block would be needed for that purpose. I couldn’t find decent wiring instructions for the relay, so I provided a sketch. The relay comes with two fuses, use the one connected to the V+ input to power the switch. The other fuse is for an optional switch indicator LED. The switch’s V+ wire connects directly to the fuse spade with a female spade terminal. BTW: As seen in the picture, my installation is way more congested than normal due to other modifications. I have a large piece of plywood for mounting all my gadgets, you may need to glue a small wood mounting block for the relay. Just trim the insulation and use a good construction glue or epoxy. Here are some Amazon links for parts: Latching 100 amp Relay https://a.co/d/09MjQYjx DPDT momentary return to center switch https://a.co/d/0hNXSZkO Switch bracket https://a.co/d/08qc1lvY 4-18 AWG cable https://a.co/d/05Zn0CF6 6” x #4 AWG Jumper https://a.co/d/049xhKq6 Zip tie mounts https://a.co/d/0iRWzLD2 3-piece step drill kit https://a.co/d/01TaDQmg Hope you find this useful. Cheers! Geoff
10 points
-
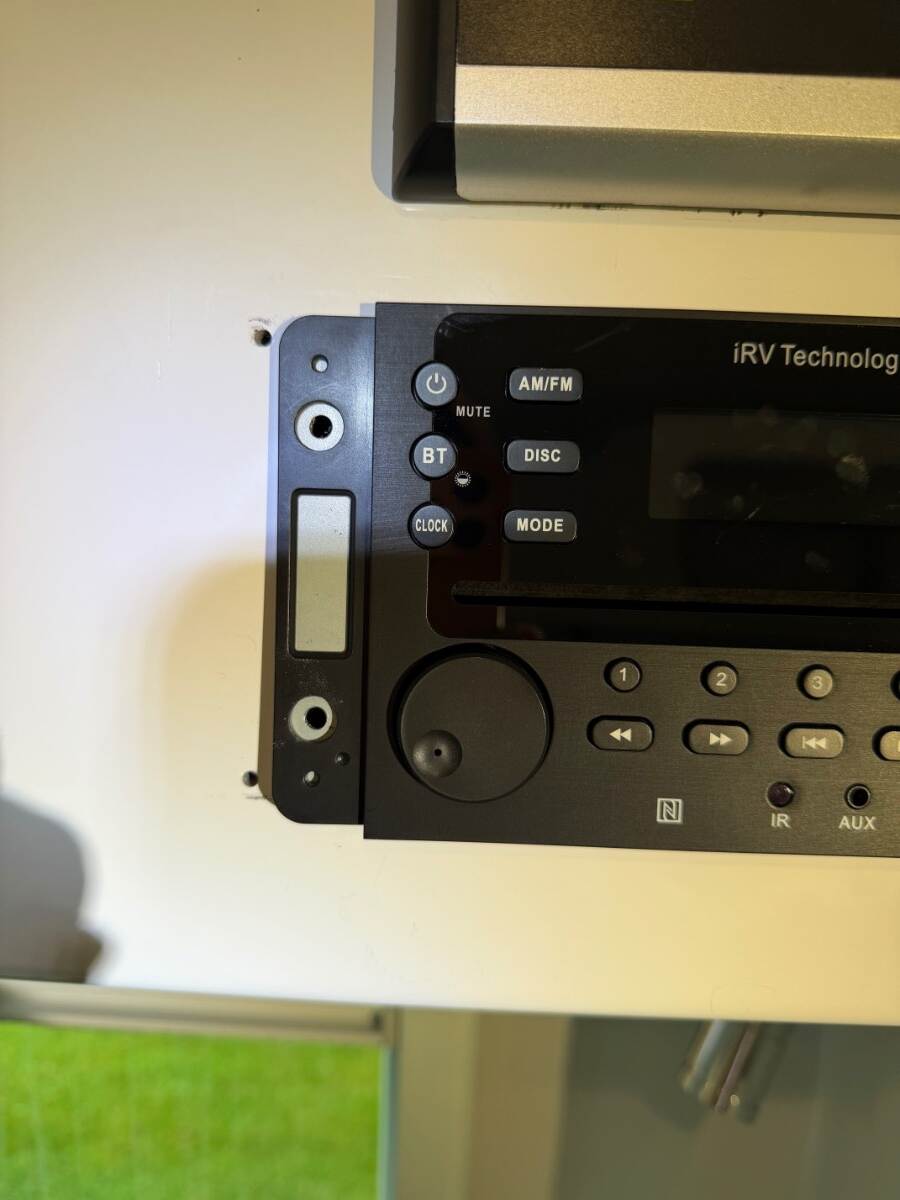
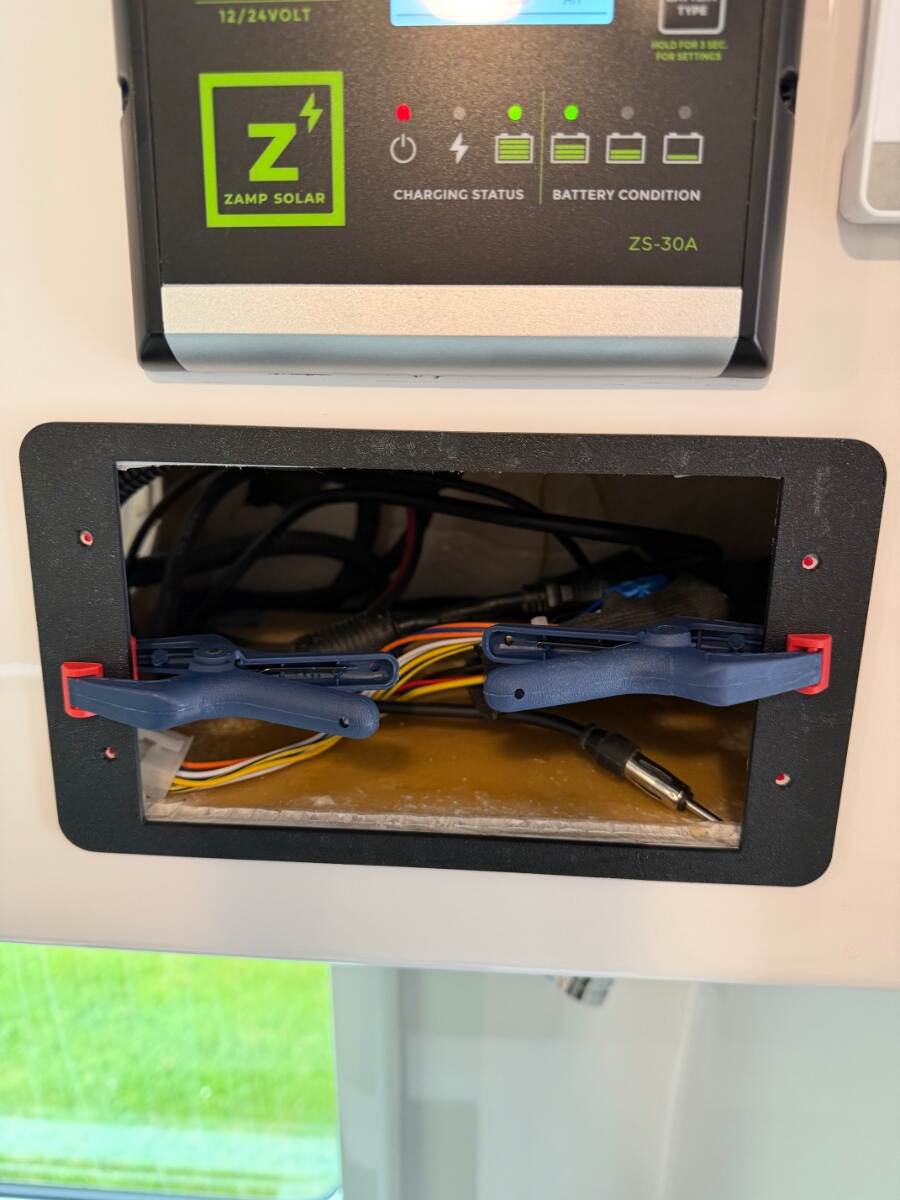
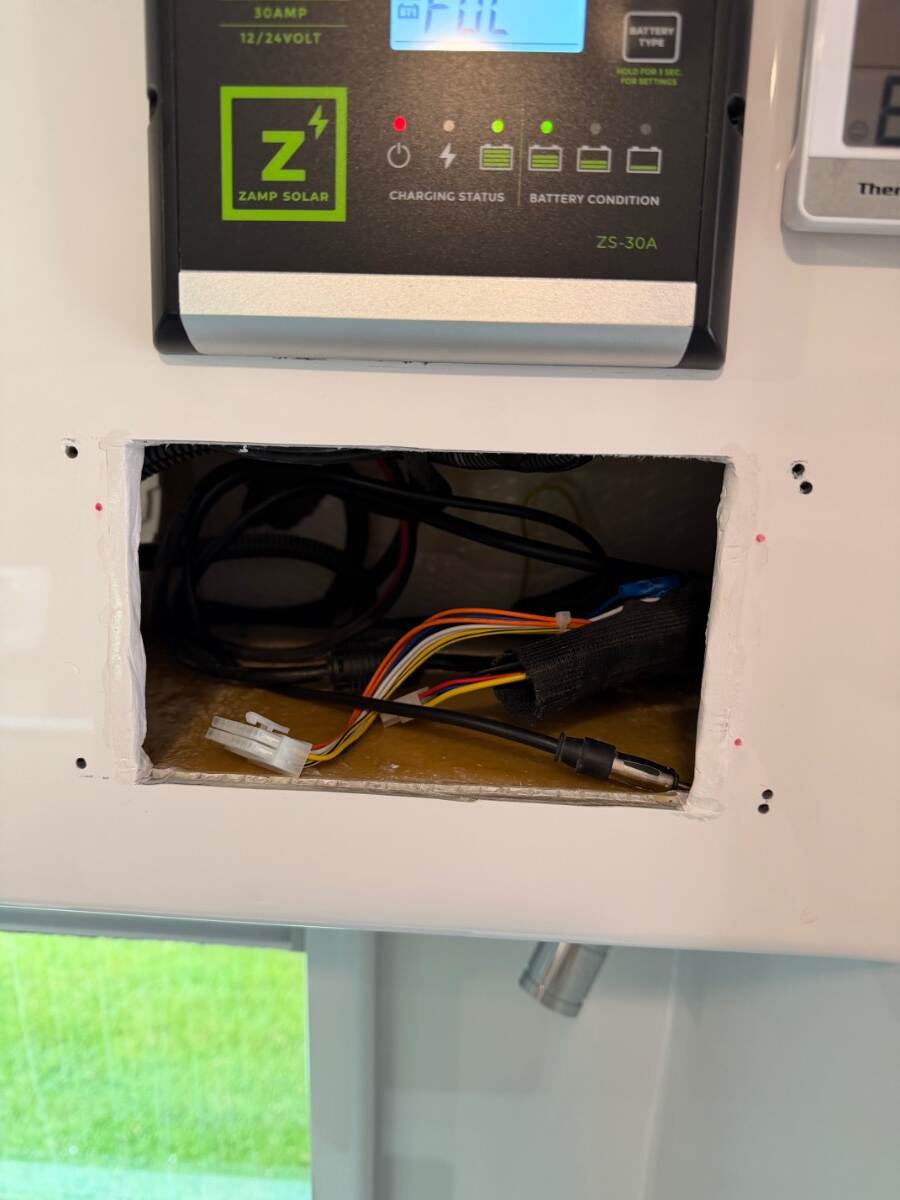
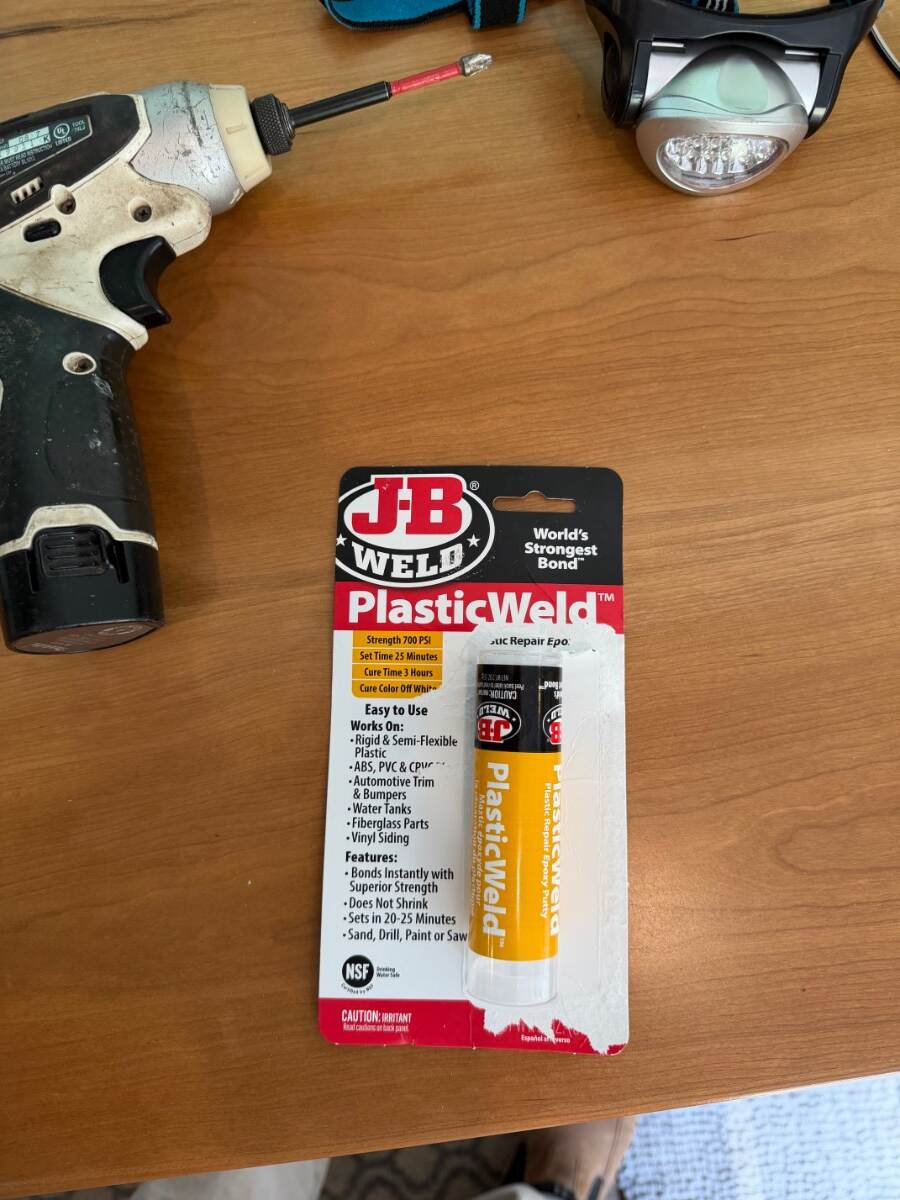
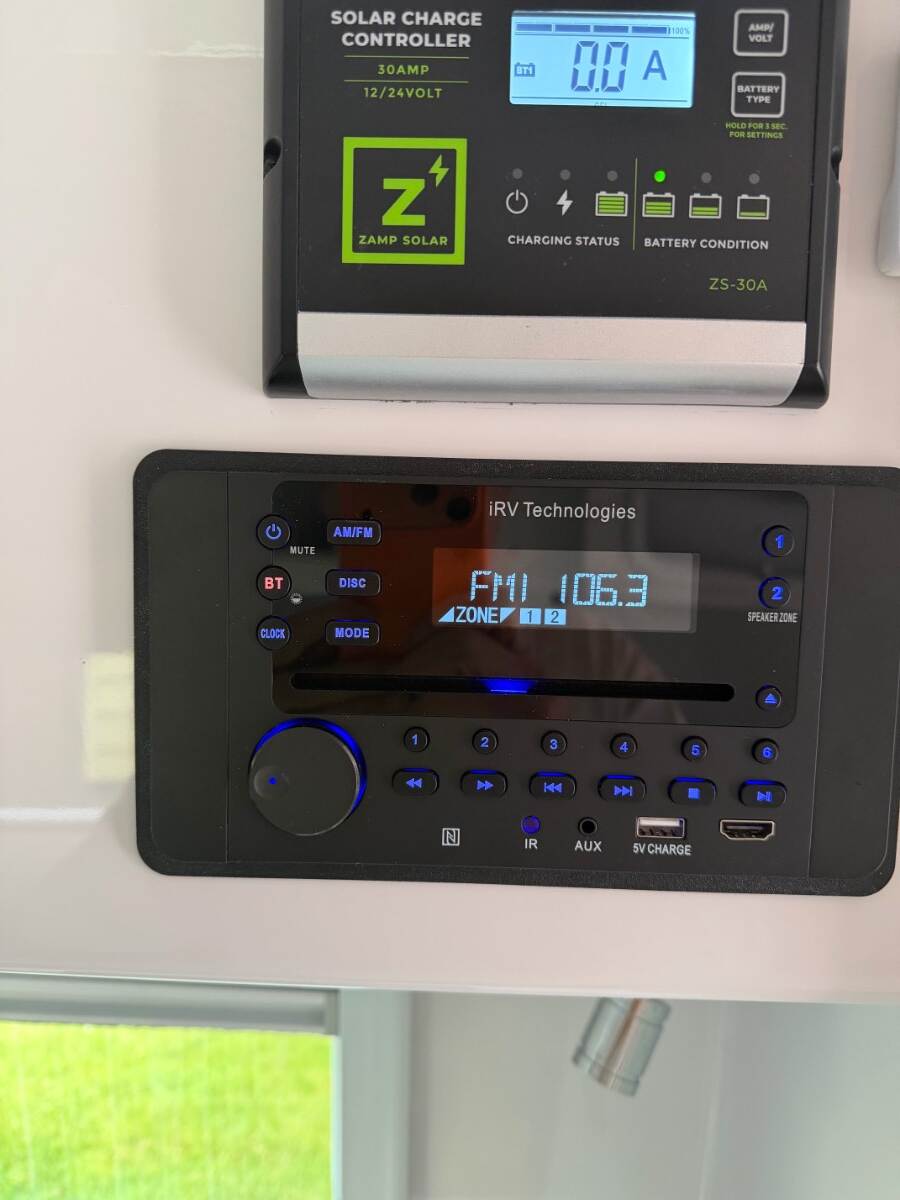
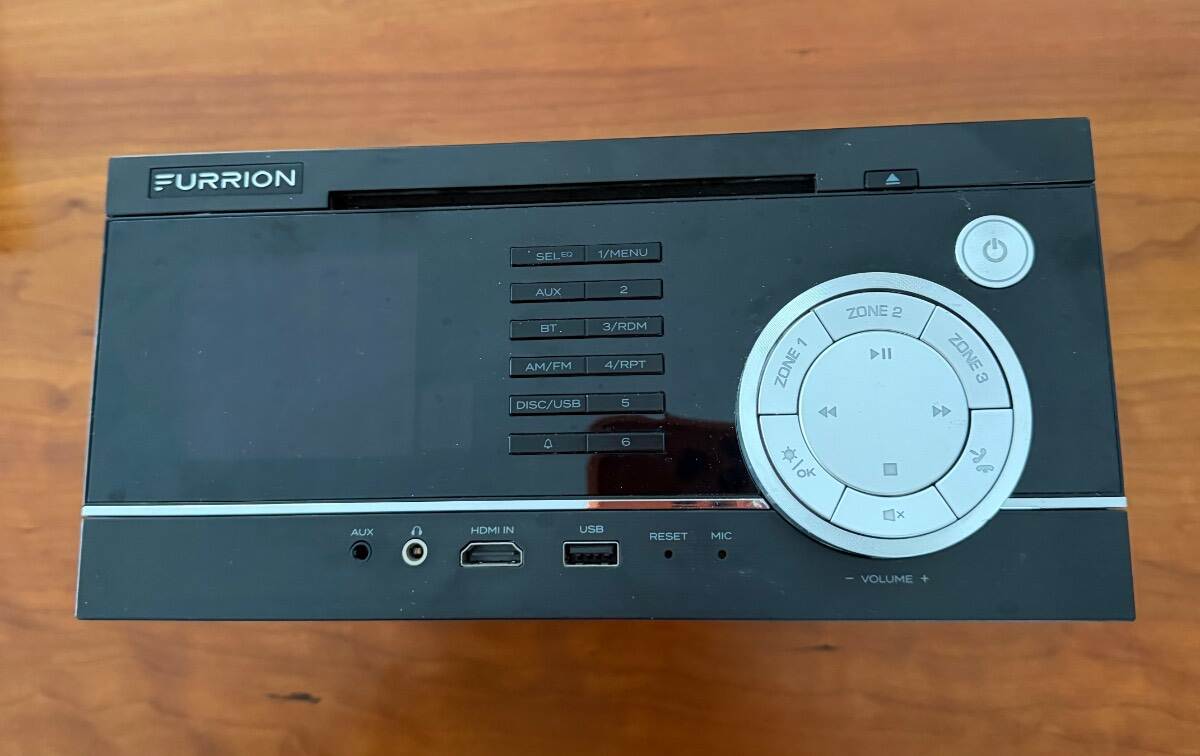
I’ve never liked the Furrion DV1230 entertainment center, it’s not user friendly and the front panel is difficult to read in low light. The tiny remote is absolutely terrible, and the larger upgrade remote isn't much better. I usually control it with the phone app when I remember where to find it, for some reason they called it "ES Control,” and it constantly drops out. The tech is outdated. Iv’e wanted to upgrade it for years, but never found a unit that met my requirements and justified the expense: Has to fit into the existing cutout (7-3/8" x 4") Controls that are intuitive and easy-to-read Decent remote control HDMI ARC ports on front and back (not the cheap HDMI pass-through ports) Current Bluetooth technology Two speaker zones Cost under $200 I found IRV Technology’s model IRV62 for a $180, and it had everything I wanted. https://a.co/d/0dODdwBi The controls couldn’t be simpler or easier to read. It does have a few less features than the Furrion, but nothing that will be missed. Like only 2 speaker zones compared to Furrion’s 3 and the Optical audio port that caused horrible sounding audio phasing issues between TV and stereo speakers. The IVR62 was a close fit on paper. But unfortunately Oliver had cut an oversized opening for the Furrion and miss-drilled extra mounting holes. Consequently, the new faceplate didn’t quite cover the extra holes, and the new mounting holes were on the very edge of the cutout. This was resolved with white JB weld on the edge of the oversized cutout to strengthen the screw holes, and I made a thin 3-D printed bezel that covers the extra holes. It’s not even noticeable. The print file is available if anyone has the same problem, or I made extra bezels if anyone needs one. The rest of the installation was easy, although it took a minute to figure out how the Furrion was mounted. There are 4 screws behind top and bottom trim pieces. These trims have small notches on the ends where they can be popped off with a screwdriver. It’s highly recommended to identify and mark each of the 4 speaker cables before cutting the connections. Use the wire color code legend on the back of the Furrion case to identify the right rear, left rear, right front, and left front. Also the IRV’s yellow “Bat” wire and the fused red “+12” wire are both connected to the Olivers hot wire, which was purple in my case. Other than that, the wiring is straight forward. The new stereo is so much easier to use, it works seamlessly with Bluetooth and the TV, and it sounds better too. I’ll be using it more often now that I don’t need a flashlight and reading glasses to operate it. Cheers! Geoff
10 points
-
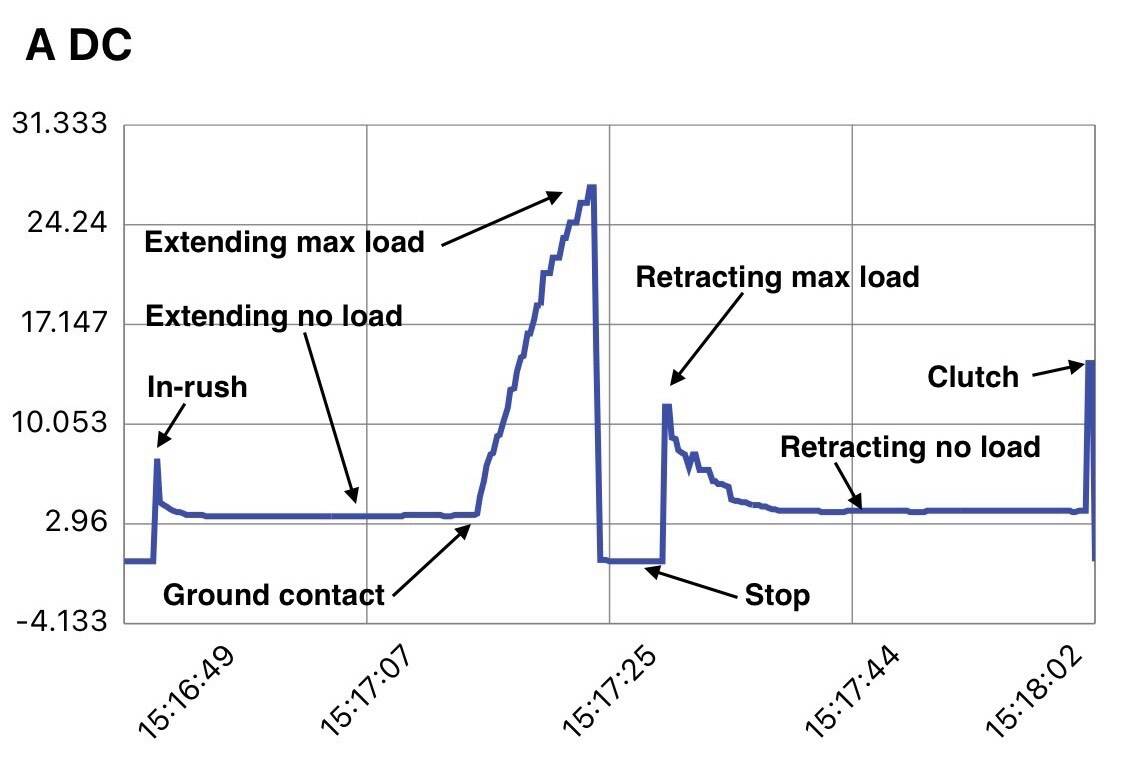
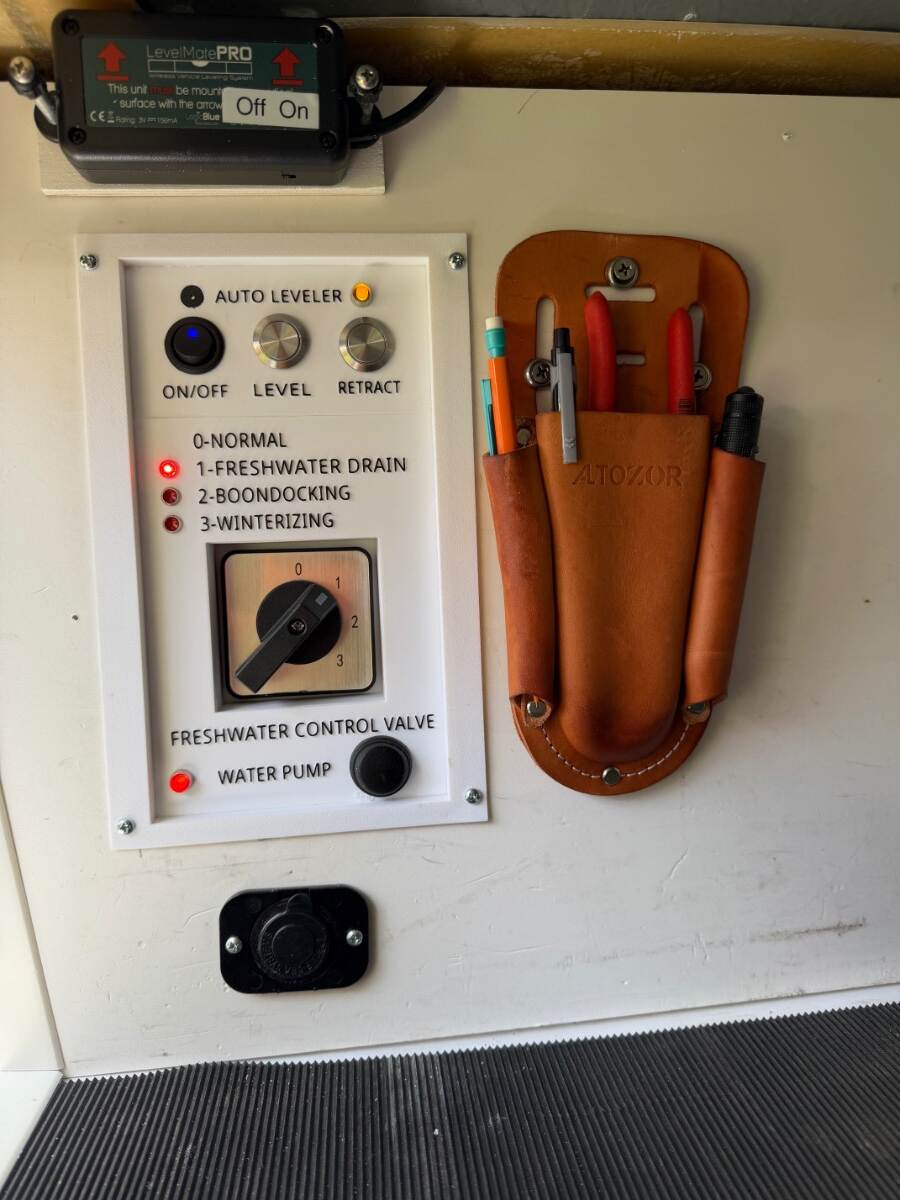
As far as I can tell, I’ve made the first automatic leveling system for the Oliver’s Barker stabilizing jacks! Maybe even the first 3-jack leveling system on a travel trailer! It’s simple to operate, safe, and works great! I built the leveling system as a novelty for my own entertainment, so I’m only posting it as a interest item not a recommended project. In reality, manually leveling with the electric jacks is already easy, particularly with a LevelMate, so automatic leveling isn’t really needed. There are even warnings that the jacks are stabilizers, not to be used for leveling. However, I believe the warnings are more about liability than capability, as long as the jacks are used within reasonable limits. I'd been thinking about an auto-leveling project for a long time, but was deterred by the thought of modifying the jacks with fiddly proximity sensors or revolution counters as used in conventional leveling systems. I didn't want to alter the jacks for a DIY project that might not even work. But then it dawned on me. The only time I really needed to know the position of the jacks, is when retracting them to their parked position. I wasn’t interested in returning the tongue jack to the truck hitch hight like some systems offer. So this led to a revelation that automatic leveling could be done with nothing more than current sensors mounted in a control box rather than on the jacks themselves. This was only possible because of the Barker jack’s mechanical clutch. When the jack reaches the end of its travel, the clutch activates with a distinct clack-clack sound. It was likely that clutch engagement would produce a unique current signature that could be used to detect when the jack is fully retracted. A plan was developing, but I needed actual amperage values for proof of concept. Fortunately I had a data logging ammeter, and the chart below illustrates the results for one of rear jacks starting from its fully retracted parked position. The jack was extended through free air until it touched ground and began picking up load, maxing out when the wheel lifted off the ground. Then it was retracted to the parked position until the clutch actuated: I didn’t include the tongue jack chart because it's far less dynamic — it's always under load, and the clutch doesn't normally actuate during leveling. The clutch only comes into play after trailer is hooked up to the TV and the tongue is manually retracted. The amperage results confirmed that current sensors could work, and beyond detecting the parked position, they could also be used to distinguish the different leveling phases: rear jack extension until firm ground contact for stabilizing, and then transition to "roll" leveling if needed. Completion of the rear jack phase could then trigger the tongue jack phase to handle "pitch" leveling. The amperage chart became the basis for the circuit and software design. No proximity sensors. No revolution counting. No permanent modifications — just two wires to each jack, a component box, and a control board. Sounds easy, but this was only just the start of a long process to perfect the system. I hope someone finds this interesting! Cheers! Geoff
10 points
-
When my tire pressure is too high and the ride a bit harsh, my mother-in-law starts complaining about the bumpy ride back there making her drop stitches on her knitting, which then upsets my wife, and when momma ain't happy, ain't nobody happy. Happy wife, Happy Life! Just set yer tire pressure so your MIL may knit in peace.10 points
-
Check to make sure that your brake "breakaway switch" wasn't accidentally pulled out. If so, the electric brakes have been on the whole time. Four brakes would draw 3-4 amps each. If you were reading 2-3 amps draw on your Lithionics battery App, then that's only one of the 3 batteries. So it's actually 9-12 amps. Add in the solar input and it's about right for what the brakes would draw. Good luck, Geoff10 points
-
Home in northern Ohio. That mailbox is about 30” off the ground, and you can’t even see the road our daughter says 12-14” reported. Here on Gulf Islands National Seashore in Florida’s panhandle. Lunch
10 points
-
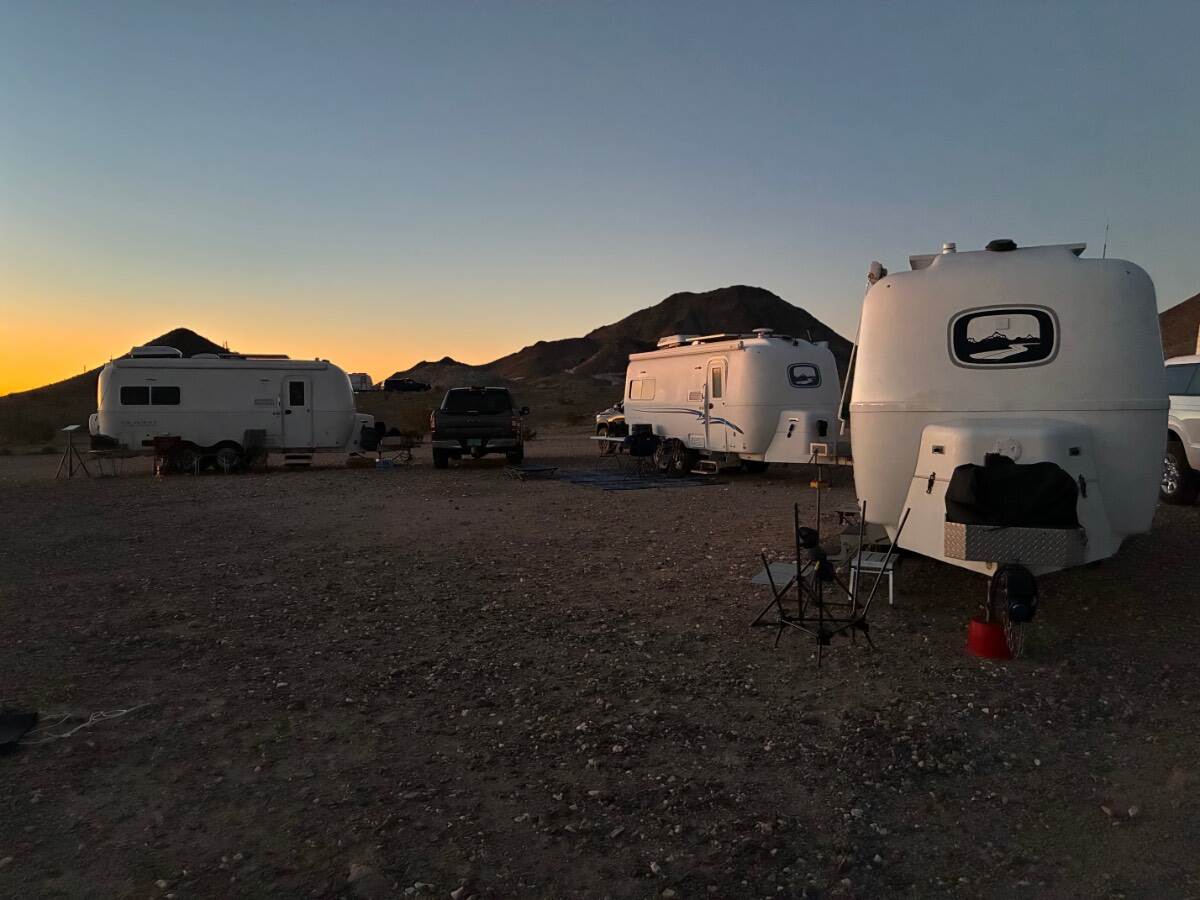
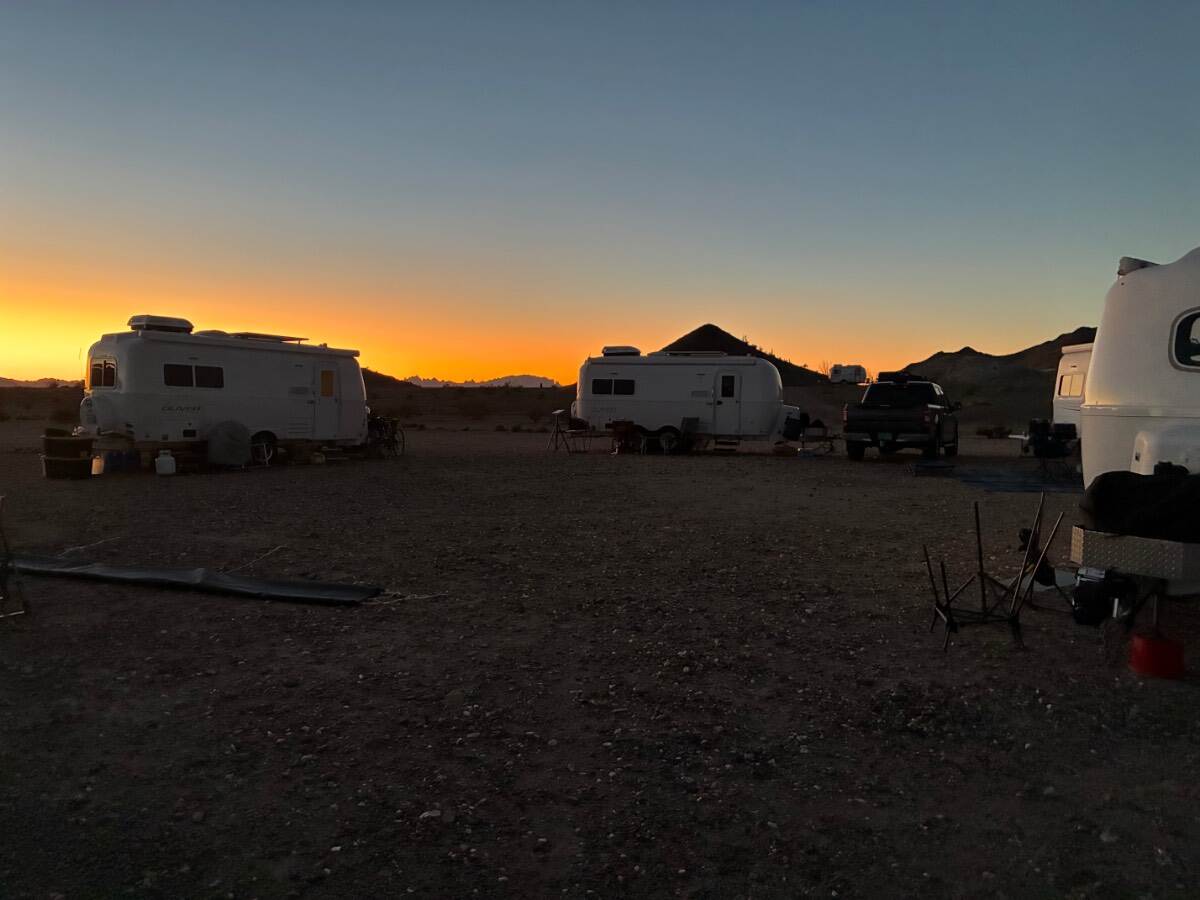
A beautiful Quartzite sunrise with 6 Oliver LEIIs….
10 points
-
In my eyes, John Davies was a pioneer in DIY efforts. I have often referred back to his wisdom and approach when doing my own. Sadly I have neither the tools, equipment or skills as this great craftsman. But I sure can gain insights on how to do things in our trailers from his efforts. Attached is a list I "Borrowed" from his posts. Saving a copy as a MS Word document lets me easily search his DIY Library. I hope it is useful to you. When you do, say a thanks to John D. It would be good Kama! Geronimo John John Davies Posts Index (April 2023 Version).docx10 points
-
Merry Christmas, Happy New Year, and Happy Holidays. Here is to a Healthy 2026 with many great camping trips.🎄⛄10 points
-
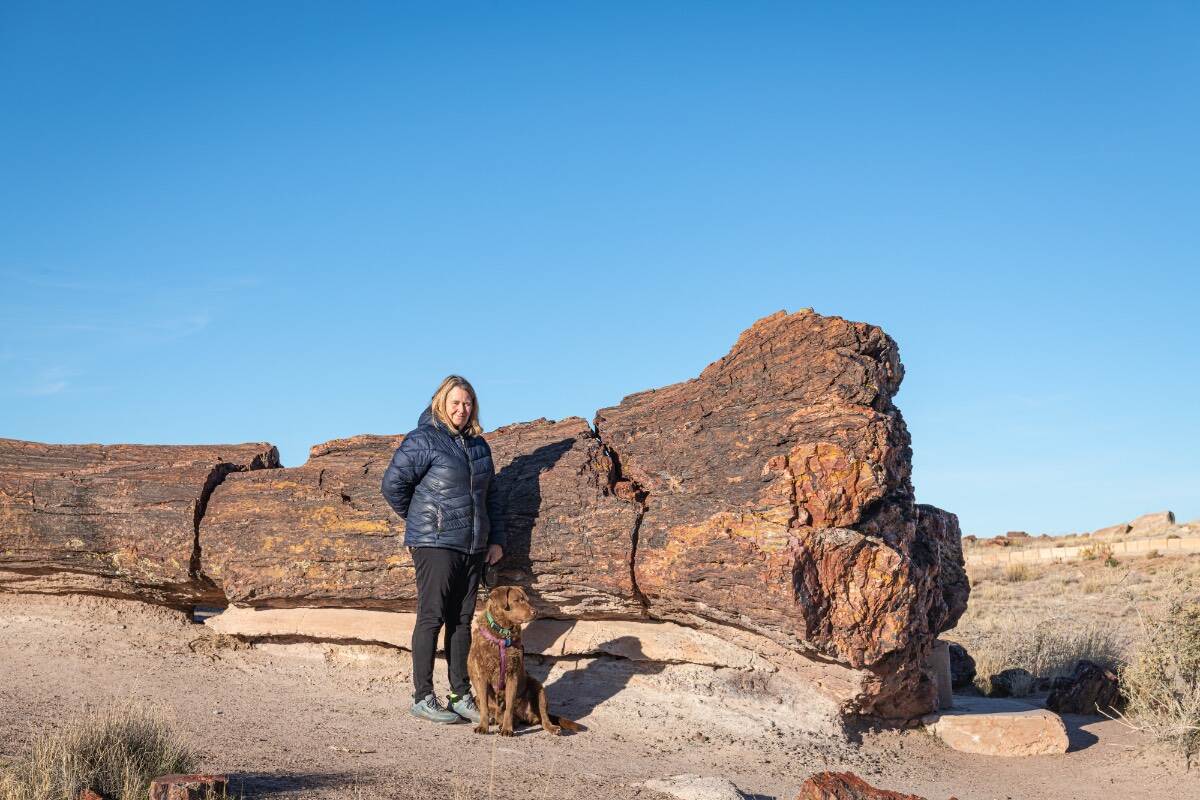
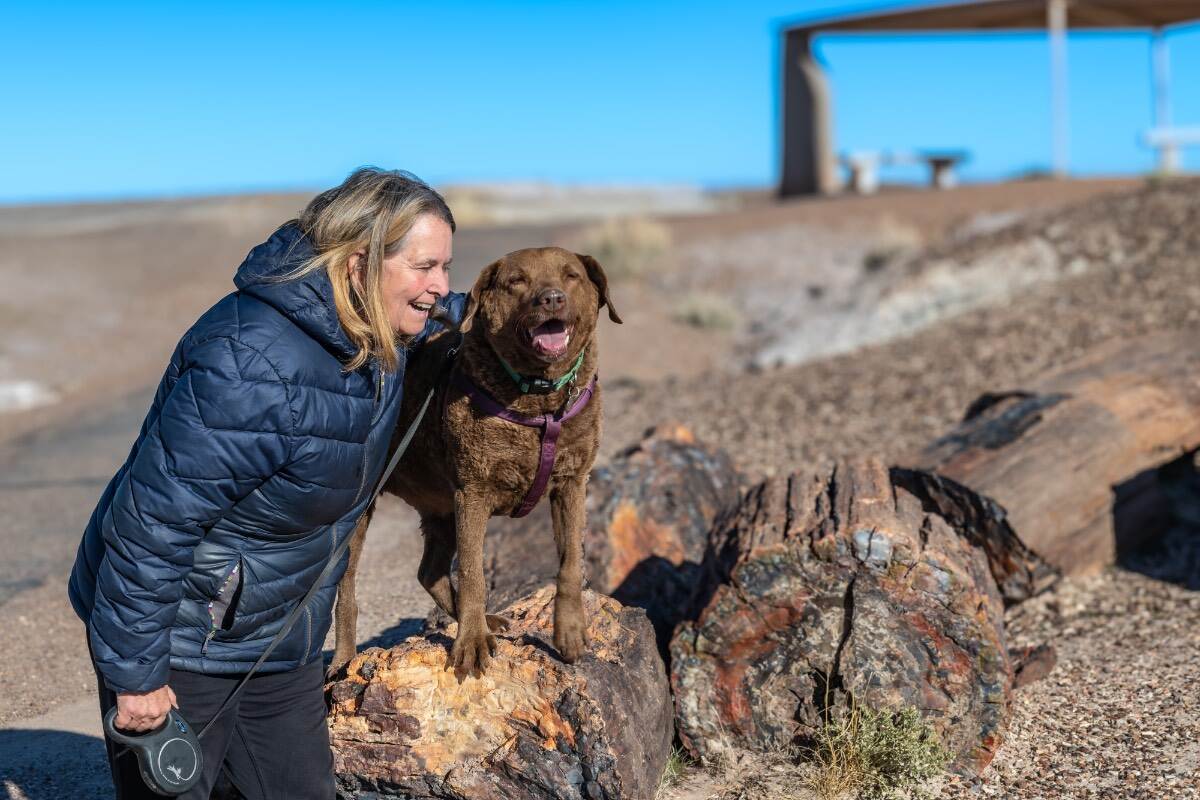
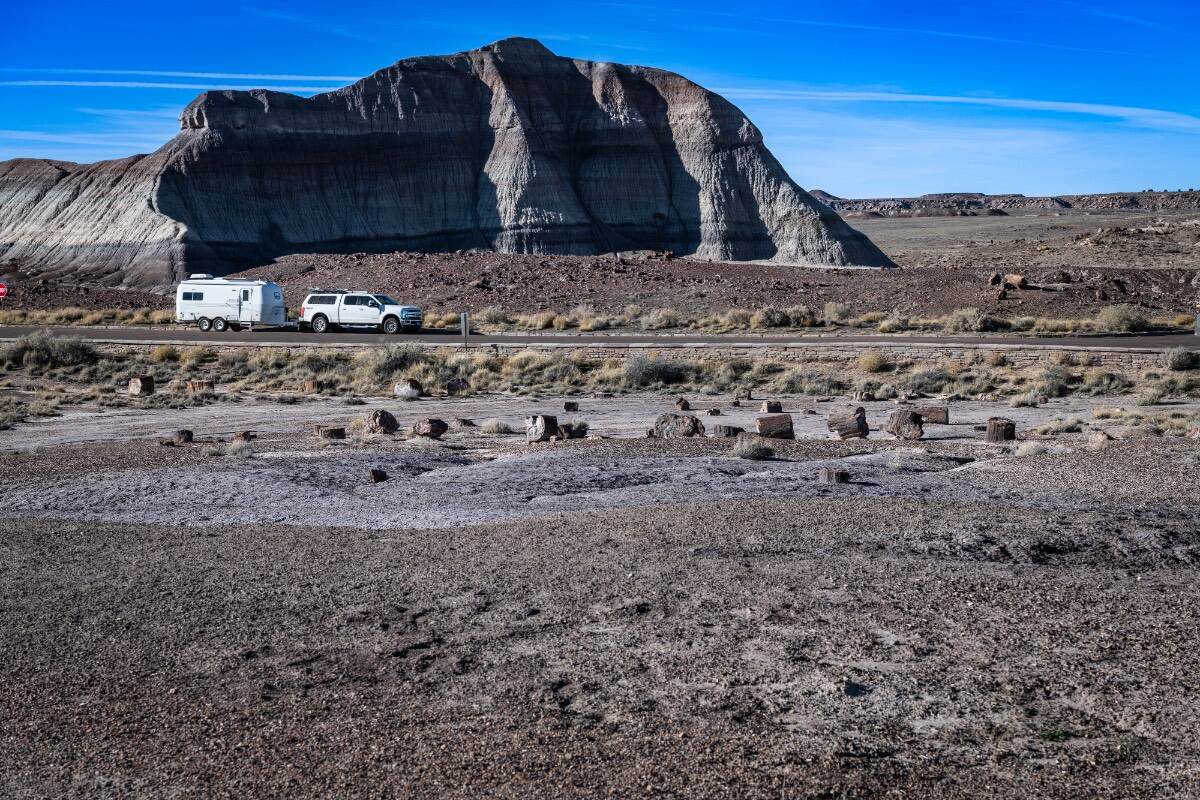
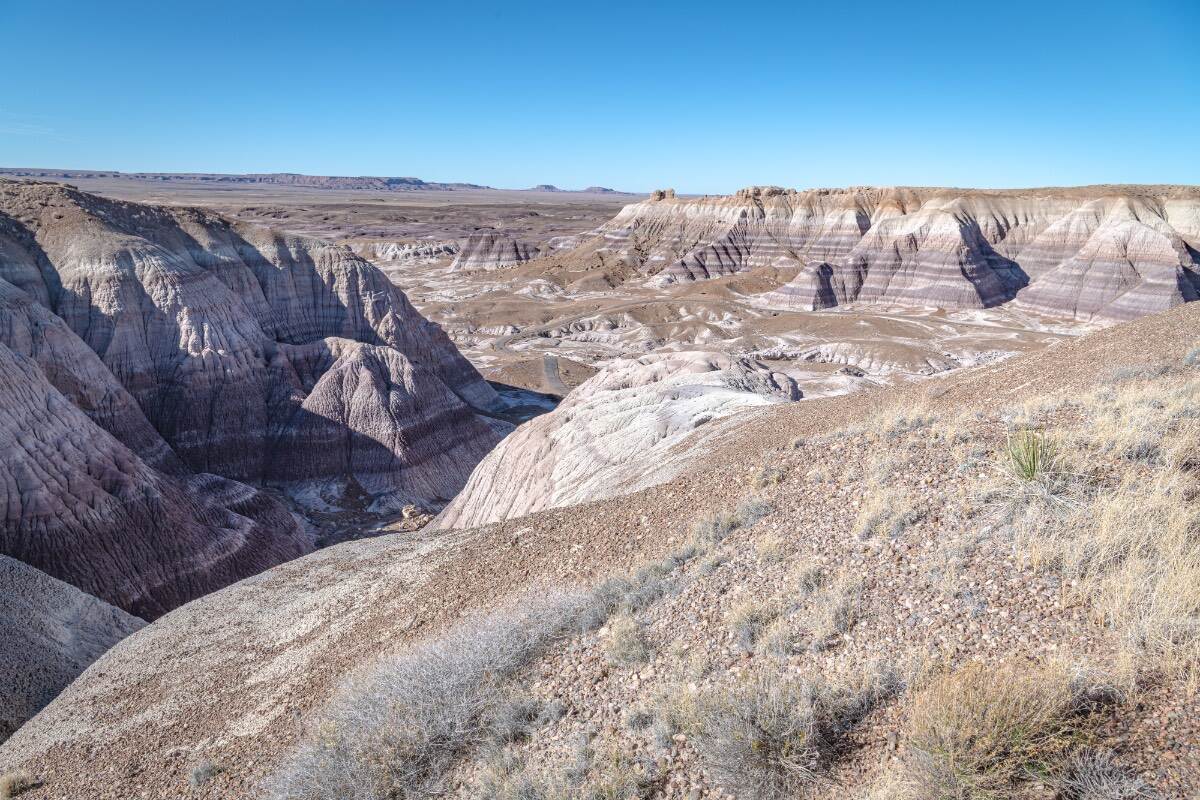
More activity for us in the Navjo Nation with a visits to Canyon De Chelly and the Petrified Forest/Painted Desert.
10 points
-
9 points
-
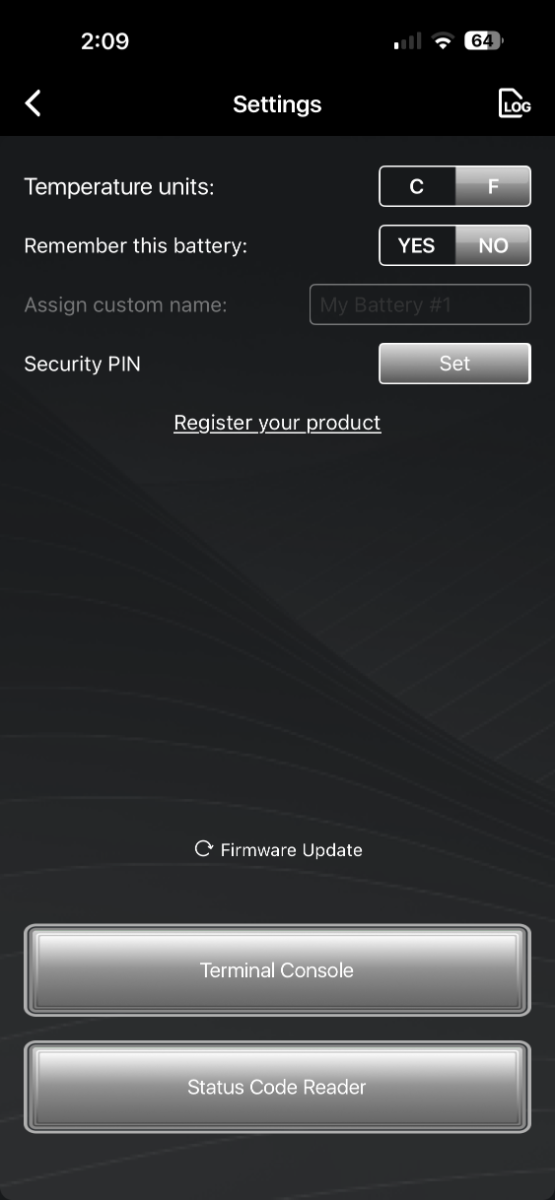
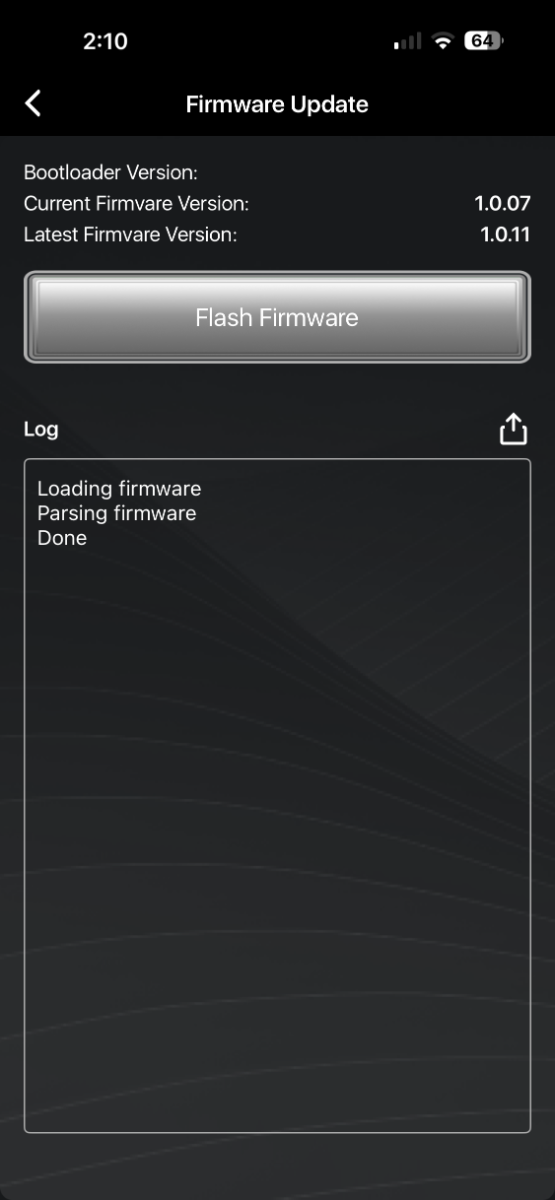
If you have Lithionics batteries, you should check their Firmware. Mine was three versions outdated! The latest version of Firmware includes upgrades and corrections to the Battery Management System (BMS) and State Of Charge (SOC) accuracy. The Firmware can be checked and updated with the Lithionics Application. Go to settings and pick “Firmware Update.” Then press the “Flash Firmware” button if you don't have the latest version. Be sure to up-date each battery.
9 points
-
For those of us who have been around for a few decades or so, probably have a collection of USB cords numbering anywhere from the hundreds to perhaps the thousands. I know I do. I decided to go through all of mine and sort them by type. For anyone that's not been paying attention there are currently three types of USB cables: A-B-C. Within these types there are at least five sub-types. Within all of these there are many versions of capabilities and speeds. Some will only carry data, some will only carry power. Some will carry both. Before I started sorting I wrote a little document to help me understand the differences. All this information was copied from multiple sites on the internet so I know it is all accurate. 🤪 I have included a PDF for anyone that has nothing better or more interesting to do. Enjoy... USB Cable Types.pdf9 points
-
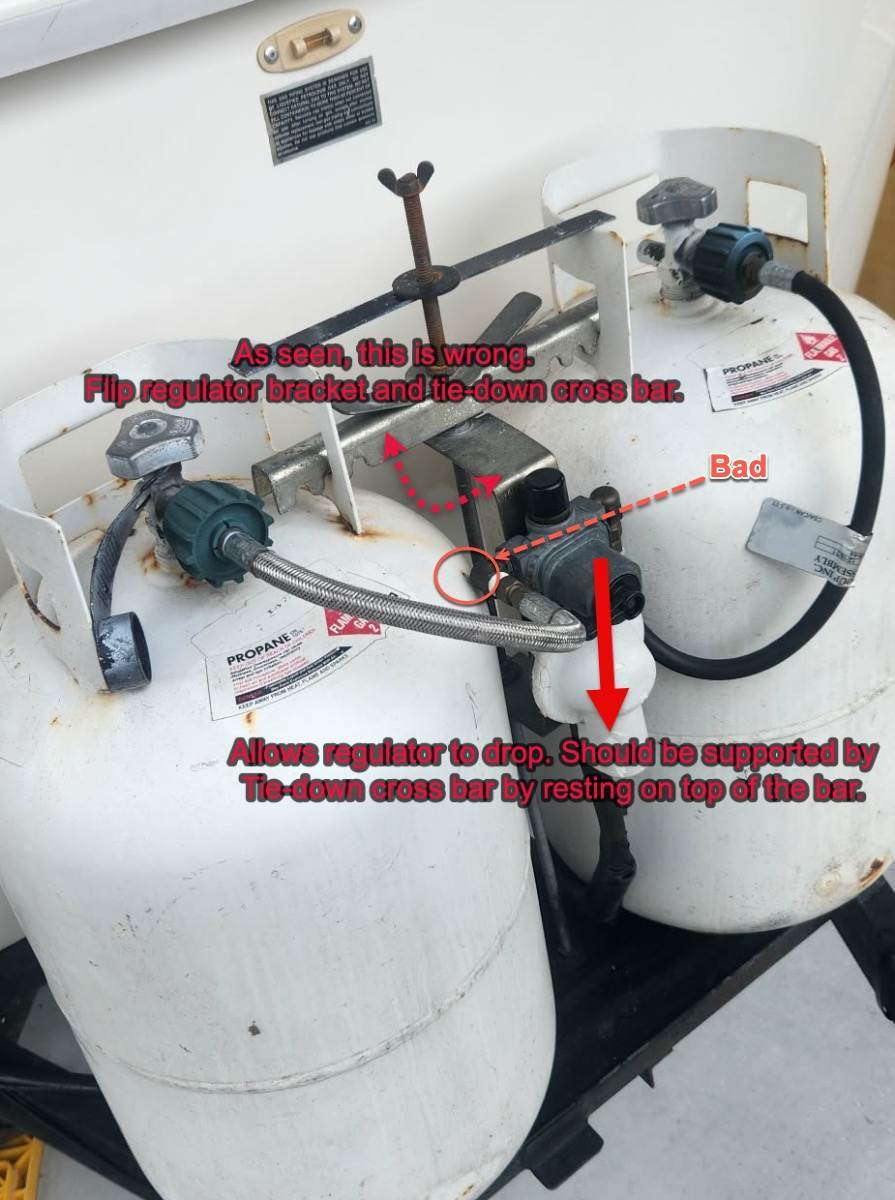
While helping my girlfriend with her 2002 Casita to down-size her propane tanks to new 20 lbs tanks, we found that the propane regulator bracket and the hold-down/tank retainer bar were flipped and allowed the regulator, and hence hose/lines, to drop too far down. This can easily happen to any camper with a dual propane tank system like this. After anyone works on your rig, or you purchase a used travel trailer, ensure things are in order in the propane area. Hope this helps. UPDATE: If you look close at her picture, you can also see that the right-angle LP connector off the regulator has now rubbed into the passenger-side tank. That's not good in any way shape or form - truly bad. I'm sure these have very strict rules by the DOT. Also, in some rare cases, having certain regulators lower than the tops of the LP tanks, may cause certain LP appliances to fail to operate properly.
9 points
-
After having more than my fill of the latest “state of the art” weather forecasters, here is what we know so far. 🙄 😂
9 points
-
Finally got around to picking up a Greenland Turbro Inverter AC/heat pump to replace the original Coleman that came with Hull 45 back in 2009. Been wanting to do this for a while now and couldn't resist once @jd1923 posted the about the anniversary sale going on that knocked the price down from a list of 1,499 to 1,099 with free shipping. Install was a breeze. The hardest part of the job was cleaning the gunk off the roof after the Coleman was removed. The seal for the Turbro is preinstalled so it's just a matter of getting the unit centered over the opening and bolting it down through the inside mounting plate. Since it doesn't have a wired thermostat, electrical connections were simple too. Just the 120v power and connecting the wiring between the rooftop unit and the inside cover panel was all that was needed. I have separate thermostats for AC and heat which made it easy but if you have a single thermostat for both AC and heat additional steps may be required. The Turbro comes with a remote with a wall mount and it also has a phone app available. Once fully installed, I connected our power cord to a voltage/amps/watts meter and used an adapter to plug into a standard 15amp outlet. I also turned off all other breakers to insure I was getting only the draw from the Turbro during startup and running. There were two main reasons I purchased the Turbro unit- One, because it uses the same extremely efficient "inverter" compressor technology used in mini-split systems and two, because of this technology the system is able to "ramp down" once set temp is reached and continue to run at a lower capacity instead of powering down and cycling like a standard single speed compressor does. Running in this manner reduces or eliminates the humidity spikes common with standard compressor systems and is very important to those of us who live and travel in hot/humid locations. Added benefit is that no soft start reuired and it can be easily run off the Honda EU2000 that we have as a backup. Since my brother is using our Ollie for temp housing while his house is being finished I didn't have much time for testing after the install, but here are some of my finding and opinions for the short time I had. The good- Power efficiency is right about what I expected, which is excellent. The unit slowly ramps up starting around 120 watts and peaks just under 1000 watts. As it gets closer to setpoint, it begins ramping down and settles in around the 500-700 watt range. At set temp I was seeing watts in the 120-200 range but couldn't tell if the compressor was running or not at those watts. The compressor is so quiet that it was impossible for me to tell. The air output continued to be cool so I assume the compressor was still running. Cooling and humidity control were both excellent too. Cabin cooled quickly after which I changed the setting on the remote to "dry" mode which locks the fan on low speed with compressor running. No humidity spikes seen at all. Outside sound level is about the best I've encountered. You will not annoy anyone around you running this unit at night, even if they're in a tent right next to you. LED strips built into the inside panel can be left off or set to white, blue or yellow. I think this feature will come in handy for us at night when getting up to go the bathroom. The not so good- While not close to Dometic level loud, and quieter than our old Coleman, it's not the quietest unit out there. Quiet enough for us for sure, but if sound level is the most important feature you're looking for then you should probably look somewhere else. On the bright side, I think the sound issue could be improved with an updated interior cover panel alone. I loosened the cover and dropped it a couple of inches down and the sound dropped dramatically. Another issue that makes me think the cover panel is the problem is that the airflow only can be felt across about 1/3 of the vent openings on both front and back vents. The ability to adjust the airflow between front and back vents with a damper would be another nice feature... Temperature control... Wasn't happy here. It seems to be about 4-5 degrees off from actual cabin temp. Hoping that this can be solved with the addition of the external Cielo wireless thermostat that @Ronbrinkturned us on to and has had great success with. I wish I had more time to test and give better feedback, but I most certainly will update this post once I'm able to. I want to see how it performs in different environments, how the phone app works, and how it interfaces with the Cielo thermostat before I make a final judgement. For now I'll give it an overall rating of A-. On power efficiency alone, an A++
9 points
-
Hello to all! We are the new owners of a 2019 LEII, Hull 514, as of last week! We have owned travel trailers for about 20 years and started seriously looking at fiberglass trailers about 6 months ago. We are looking forward to our first trip in the next few weeks. We plan to do a lot of boon-docking in out-of-the way NFS campgrounds for trout fishing, hiking, etc. and our large toy hauler was NOT suitable for that. Hull 514 did not come with an inverter or any solar, so I am installing Lithium batteries and an inverter over the next few weeks and then will add some solar charging capabilities. I'll probably create a post about that project after I'm done in case it helps others who are in the same boat. I have already enjoyed and gathered great ideas reading about the various approaches others have taken on this forum. We will likely convert to the Twin layout eventually as well. I also plan to swap out to 30 lb Propane tanks and add my LevelMate Pro this weekend (both from my current camper). Anyway, just wanted to do a quick intro for this very active and informative group. Glad to be in the family!9 points
-
John, I think there’s a little more to it than that. I’m happy with my truck and car but I enjoy reading about other brands and recent changes and innovations. Same with my tech (phone, tablet, watch, ring), happy with all but interested in trends. I like my banjos and guitars but read and watch reviews on other manufacturers and luthiers. Etc., Etc. So, I’m interested in the RV industry because I like to keep up on recent innovations, new technology, etc. No reflection on Oliver one way or the other. Just curiosity! Mike9 points
-
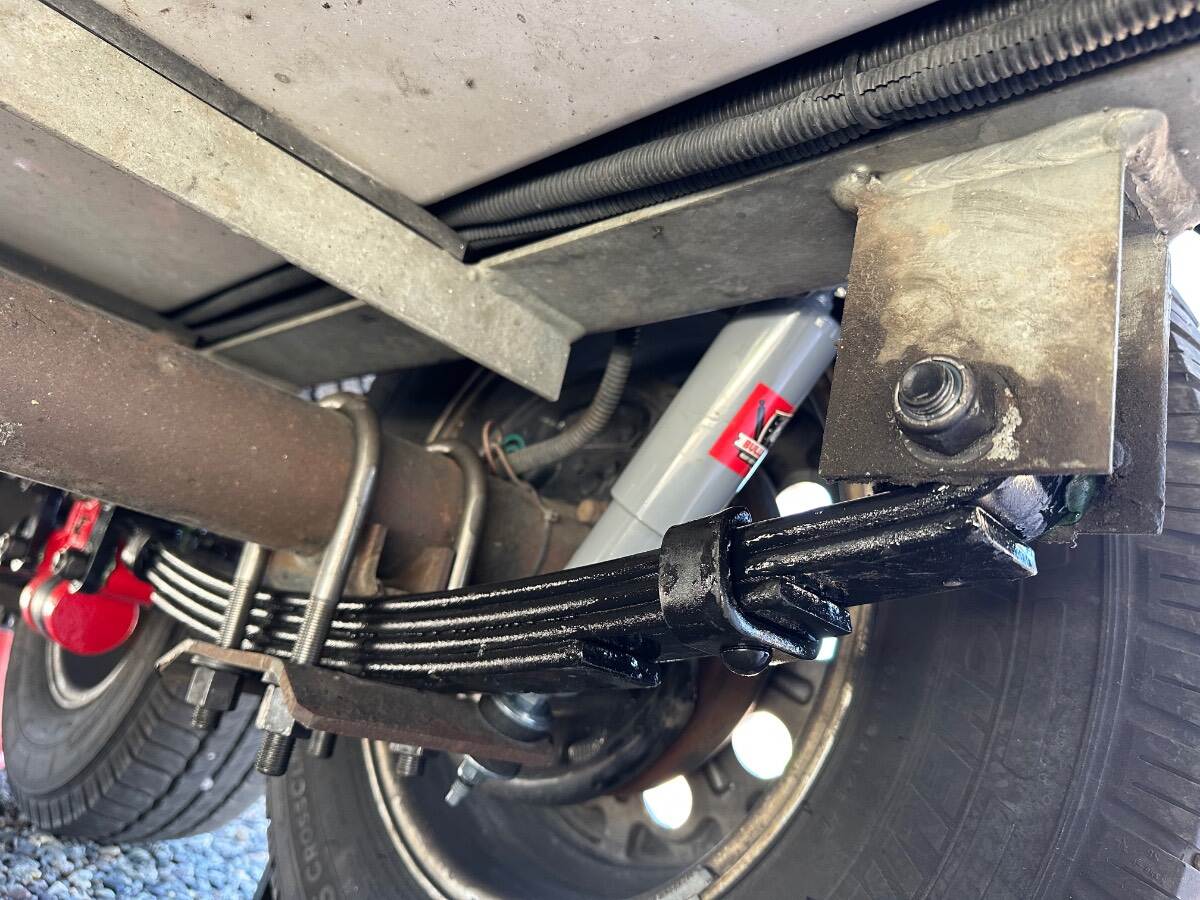
We had the 4 leaf alcans put on in October and they are a great upgrade. They also gave me the extra leaves in case I wanted to add them in the future. I also replaced shocks and equalizer at the same visit an it only took Alcan 3 hours. Craig
9 points
-
Monument Valley tonight. Took quick and dirty images from Goulding campground. Will tour the loop tomorrow. Weather is still amazing,. 60 day time 30ish night and clear as a bell.. very nice but no clouds makes for boring photography. Slow / slack season and few people.. good time of year to visit. Dinosaur tracks off AZ Hy 160 on the way to monument valley..
9 points
-
French Glen / Steens MT petroglyphs and painted rock CG white spar / Prescott Sedona
9 points
-
Over Thanksgiving week, my wife, daughter, dog and I drove out to Yosemite and Sequoia National parks. I let the dog do most of the driving 🙂 Camped at Yosemite Pines RV park, which was very nice, but a bit far from Yosemite. Made for some long morning and evening drives. Spend about 4 days there. My daughter worked from the RV one day via Starlink. That was our first experience with it and it went really good. Sequoia we stayed at Lemon Cove RV park. Decent place and much closer to the NP gates. Saw a bear on Bear Hill one morning, so we decided not to hike that area that morning. Had lunch with some deer then drove up to Kings Canyon, which was better, in our opinion, than Sequoia. All beautiful places though. The Oli towed great the entire trip and was nice to have some of the updates I had done previous to this trip. The new axels and Alcan springs felt great. The new Tosot AC/heater worked well for night time when I ran it for heat since I was plugged in to campsite power. No reason to burn through the propane while hooked to electrical. New Truma water heater worked perfect too. Overall, a great trip and no issues with the Oliver. It was also nice to have our daughter fly in from Denver and spend the week with us.
9 points
-
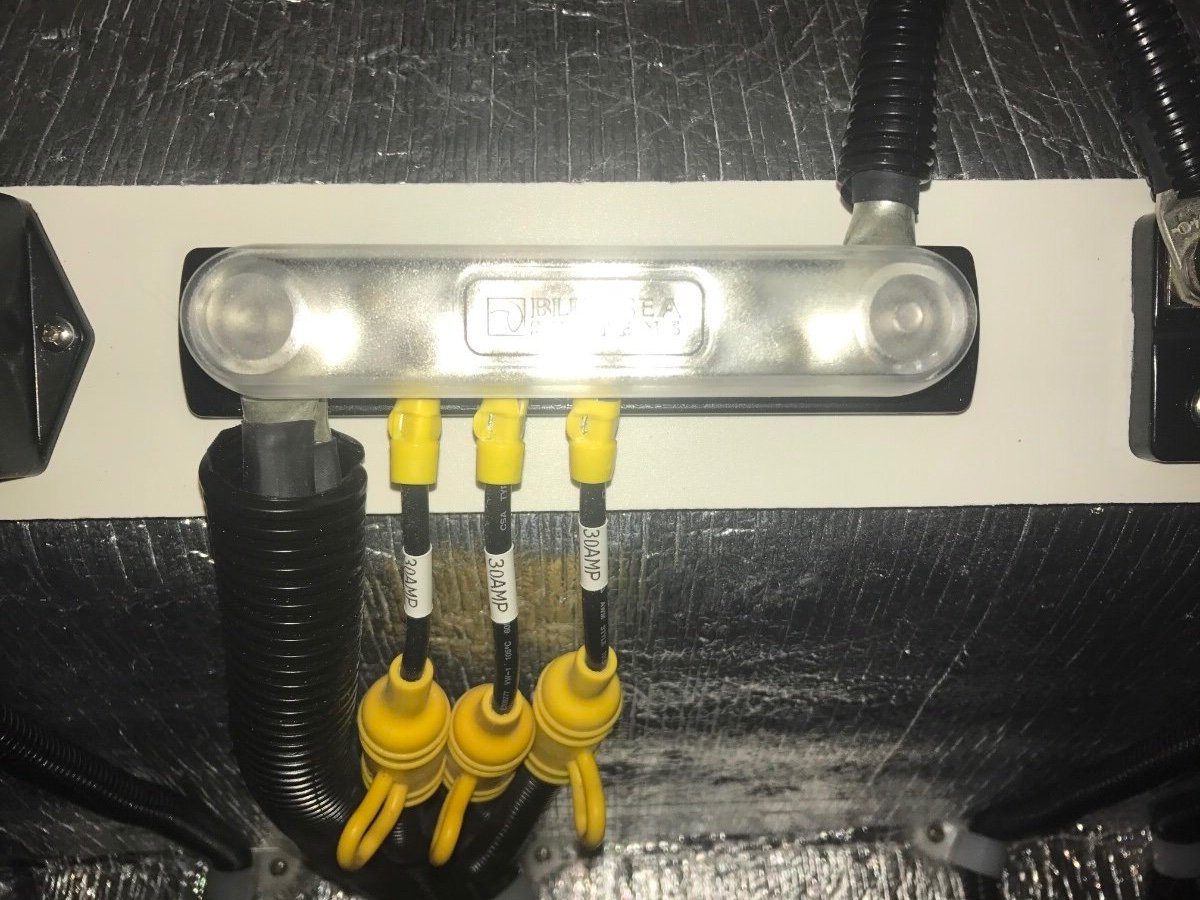
@taylor.coyote This picture is from below the front hatch under the street side bed of my 2017 LE2. The yellow fuse holders are for the 3 Barker jacks, 1 for each jack. There are 2 fuse holders for the front jack, 1 under the bed and 1 outside by the front jack. Good luck, Mossey
9 points
-
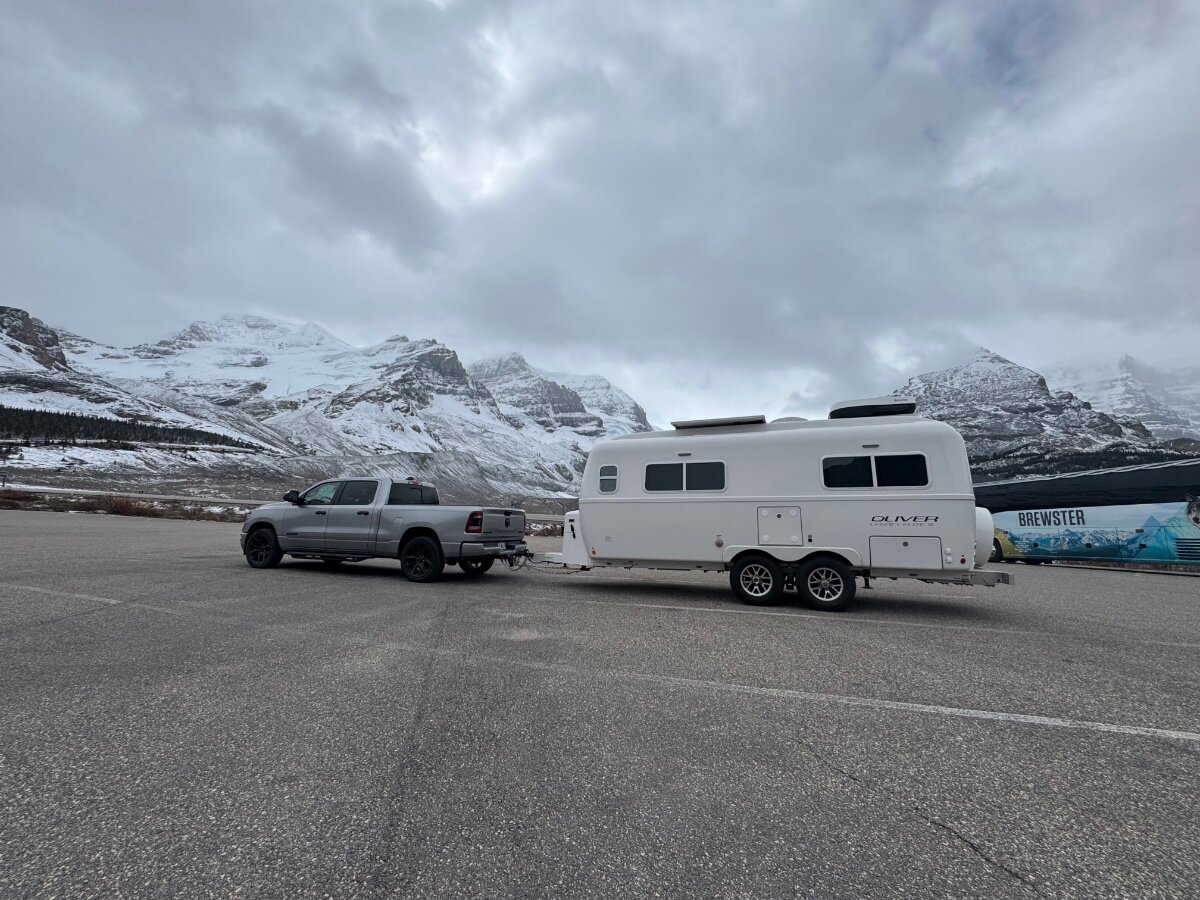
Columbia Icefield Parking lot for Athabasca Glacier Also functions as FCFS Campground
9 points
-
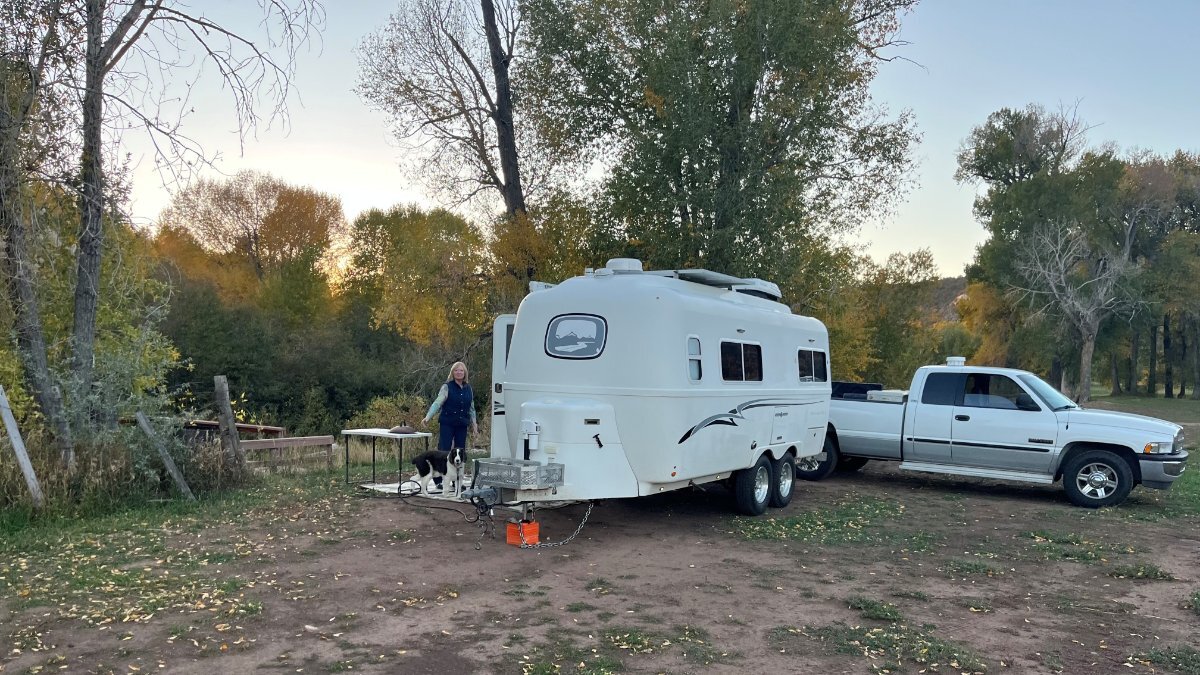
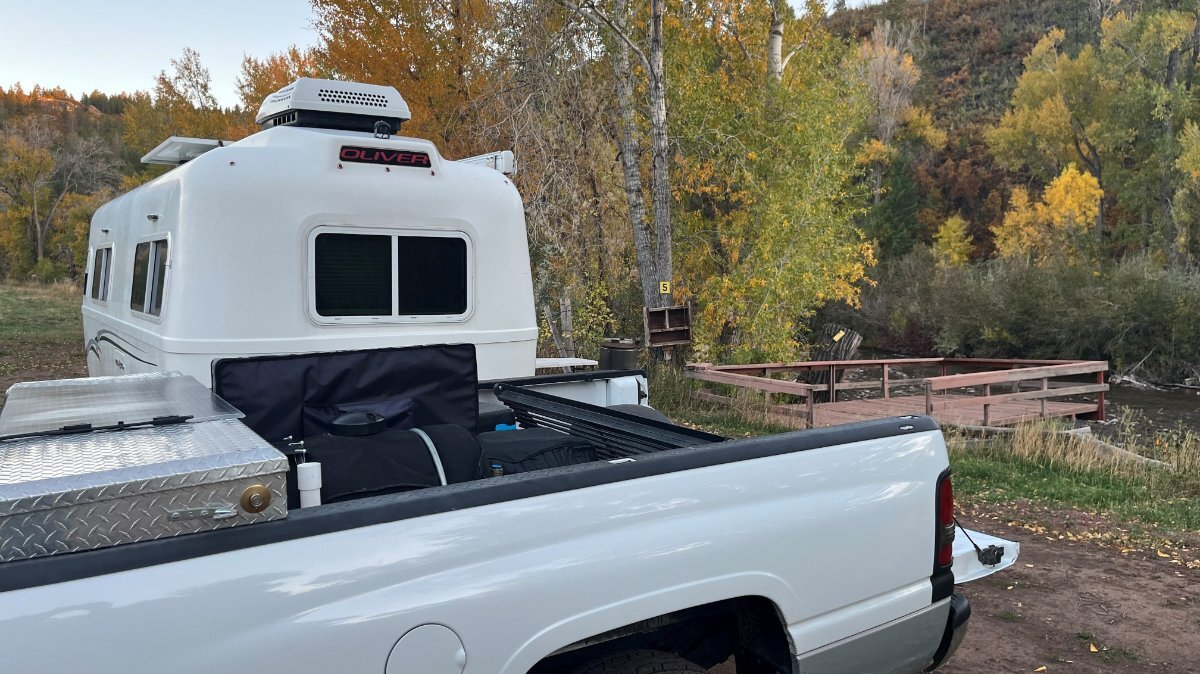
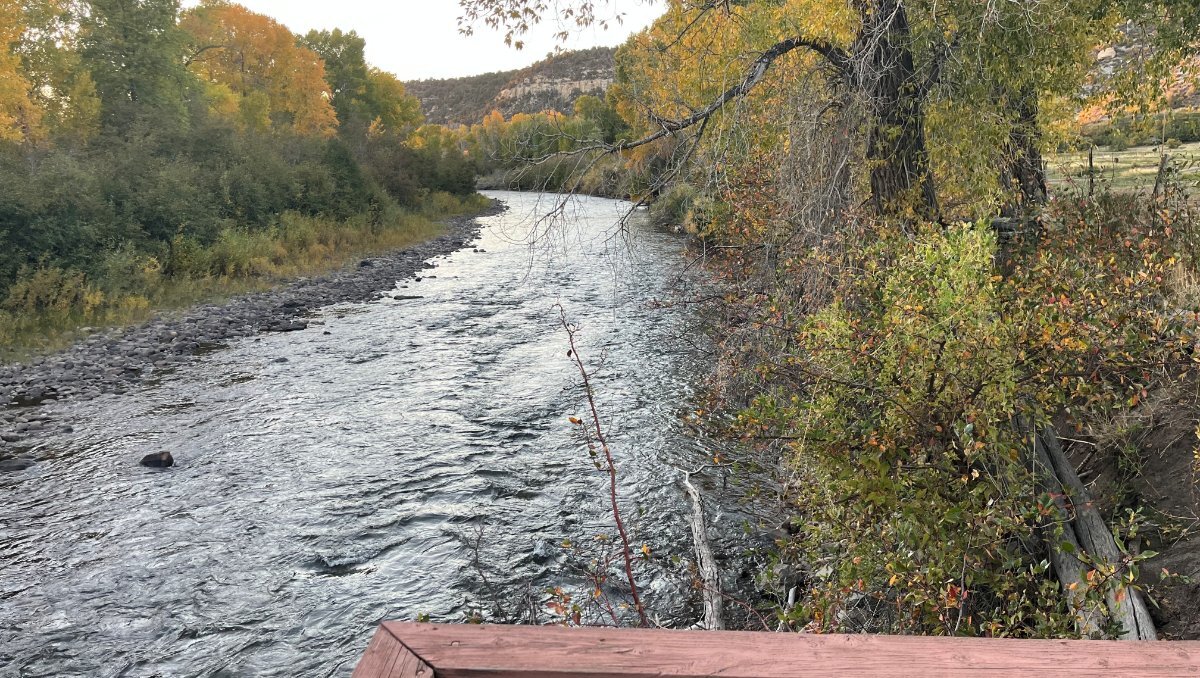
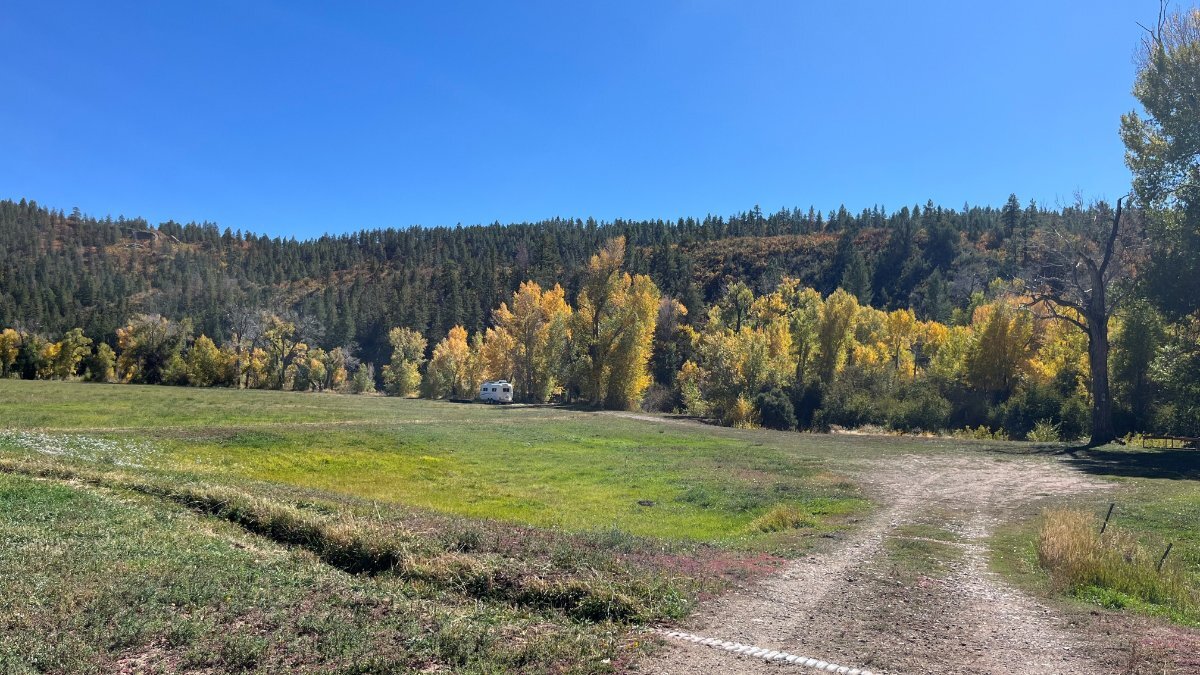
Where's Ollie? At Along the River a farm in Delores, CO! They were closed for the season but Jeanna (owner, tiny woman age 88, husband 96, farming all her life and today rides an ATV like a young girl), she said it's been a slow season, so she re-opened for our 3-night stay. We have the place to ourselves and the river sounds just wonderful! Delores Along the River.MOV
9 points

































.thumb.jpg.e34bf01ef7f7d5e99ad31856d45afbeb.jpg)







-
Recent Achievements
-