Leaderboard


Popular Content
Showing content with the highest reputation since 07/07/2026 in all areas
-
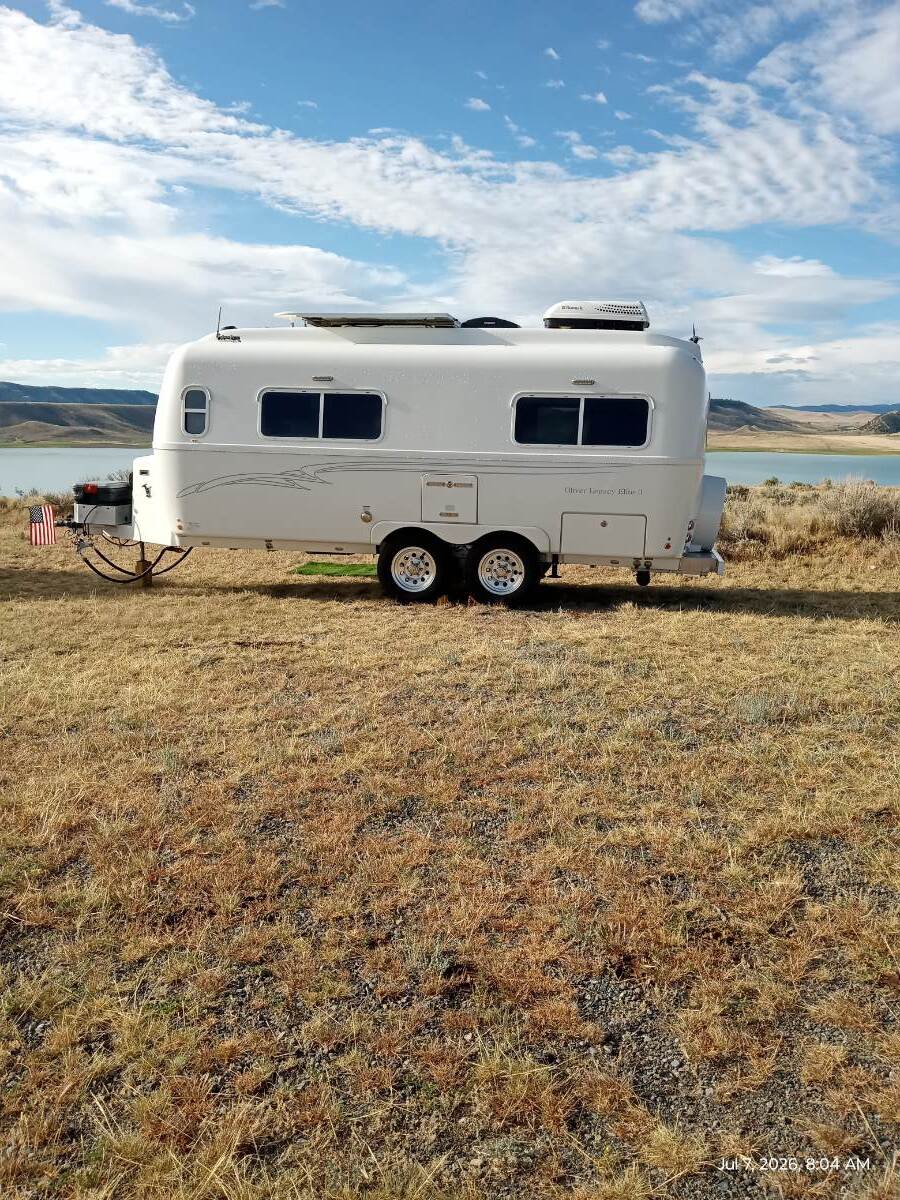
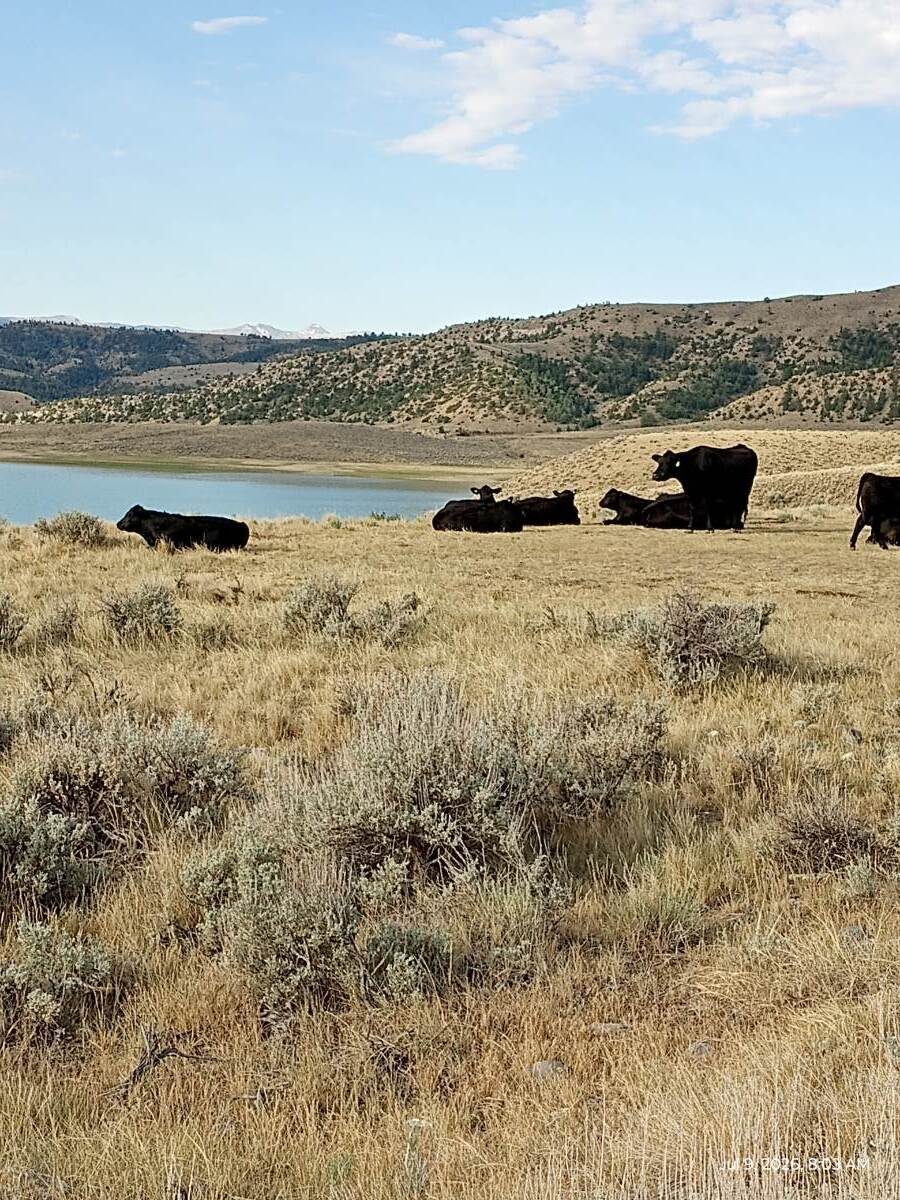
A bit of rain last night with a low temp of 51 degrees at Lower Sunshine Reservoir just outside Meteetse, WY.
 8 points
 -
Sometimes Mother Nature has a very kind way of saying "Good morning".
6 points
-
That was us. We were heading home to Woolwich, ME from Campobello Island in New Brunswick. Just set up an account so I could reply.6 points
-
Update! I contacted Jason Essary per Topgun2's advice and we have a path forward. Oliver will be rewiring our Legacy Elite so that the induction stove top will run through our inverter. I have decided to keep our 2000w inverter as OTT indicates that is part of the build as designed. I was aware that my unit was equipped with this inverter when I made my order. They will also be adding an omni directional antenna which was on my build order but was not put on my unit. It is something that we have often used and prefer that it is installed. Finally, they will fix the lettering on the side of my unit given it is badged as a Legacy Elite II but is actually a Legacy Elite. That is an easy fix. My hat is off to Jason Essary for getting this hammered out so quickly. I called at noon, got his email, sent him an email, and had a resolution by mid afternoon. Great response. Sales will cover the costs of this service. I am now just waiting on a service date and plan to travel to the OTT facility for the service. Thank you to everyone on this forum. Your advice and support has been great! I know I will have more questions in the future and hopefully can pay back by helping others someday as well. Onward to explore this amazing country😊! Lamar5 points
-
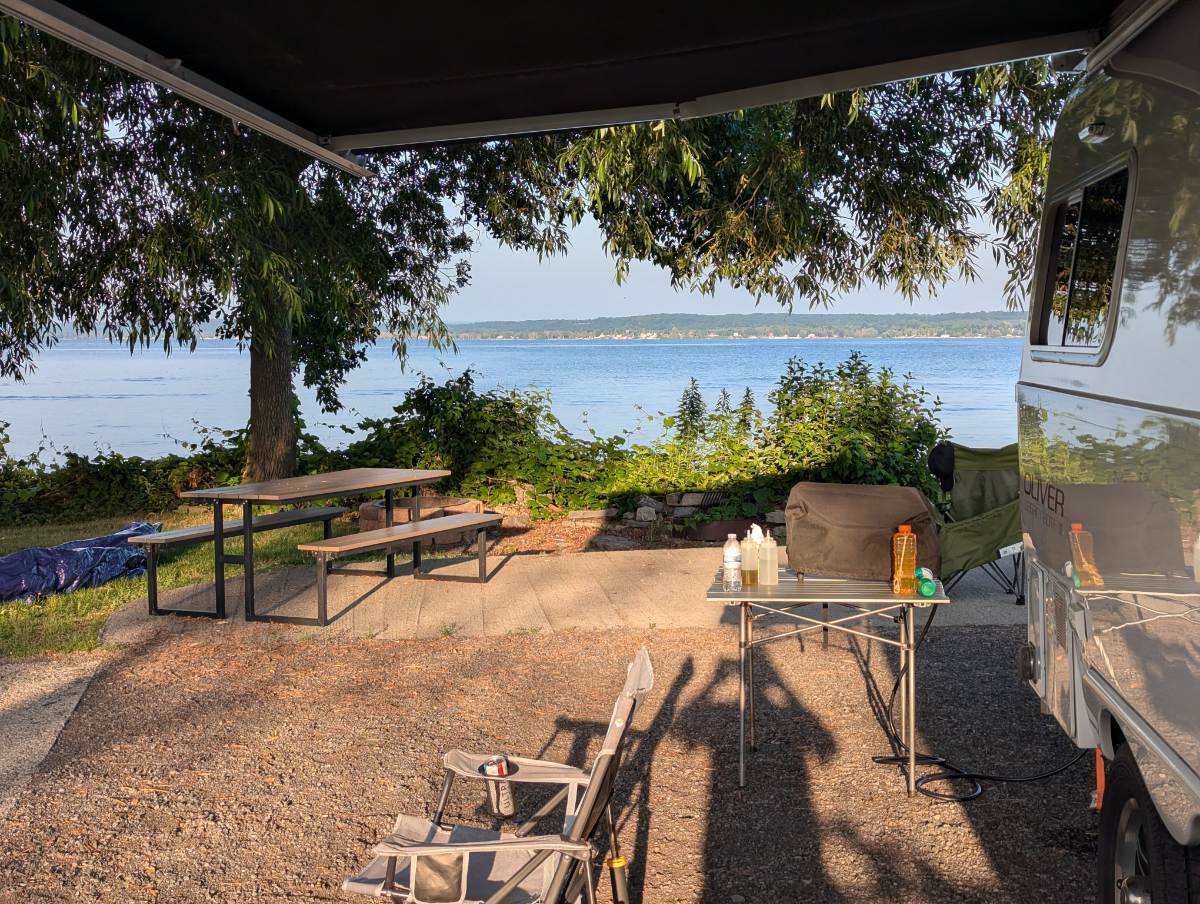
Association Island campground on the shores of Lake Ontario in upstate NY. This place has an interesting history. The island used to be the General Electric executive retreat. Thomas Edison held court there. Now it's a campground surrounded by water (there's a causeway), but some of the original buildings are still there. The largest, which was a lodge, has been refurbished into hotel rooms and there are dozens of sites and cabins, including many waterfront sites.
4 points
-
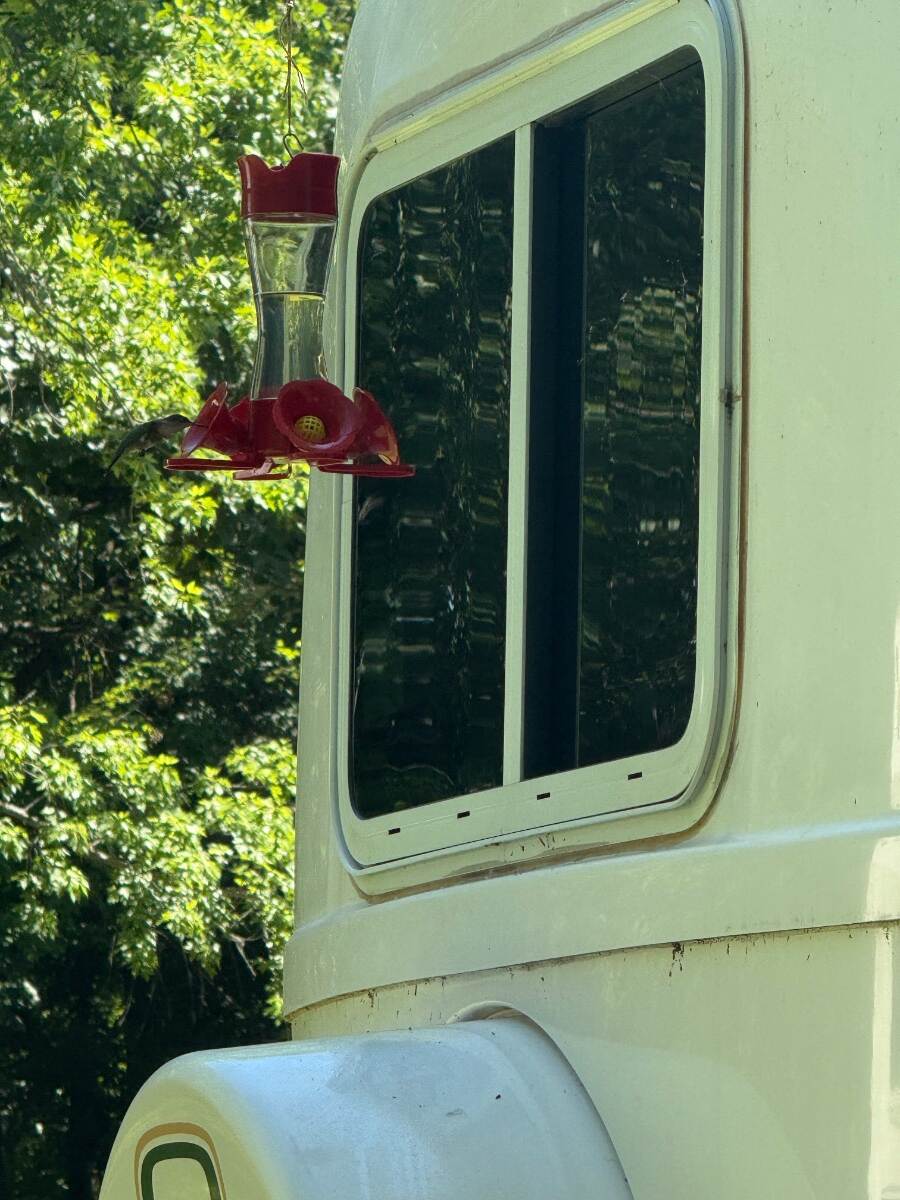
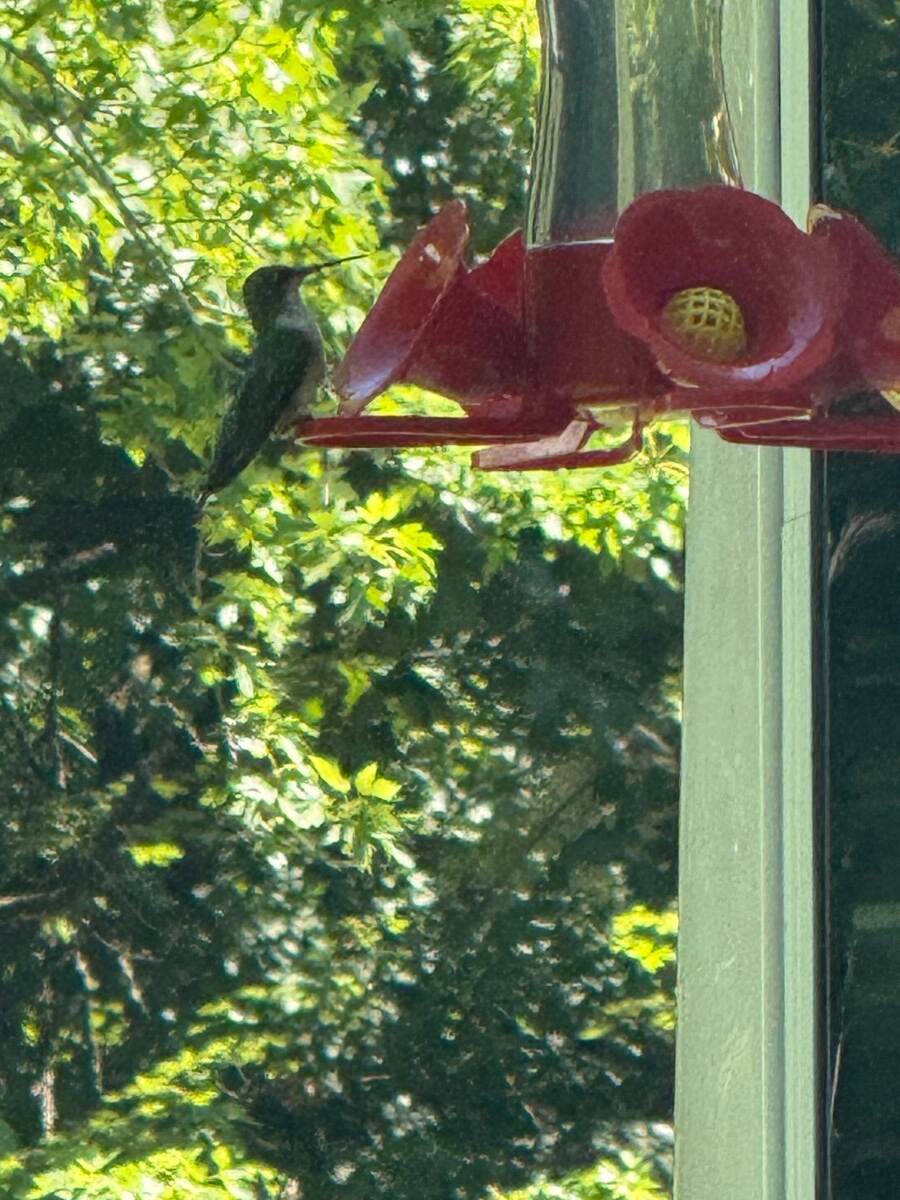
Hanging out at Glacial Lakes State Park (near) Starbuck Minnesota. Our second time here as the campground hosts. Been here since the first of July and leaving the 29th. I saw a camp host at another campground that put out hummingbird feeders, so I thought I’d give it a try. This isn’t “elegant” by any means. I grabbed an old fishing rod and secured the handle end under the edge of the A/C - twist-tied it to the TV antenna to keep it from coming loose. (Extreme vibration of our love-to-hate Dometic Penguin 2) Hummers showed up less than 24 hours later. I have it rigged just outside of the rear window so we can relax in bed and watch them come and go. IMG_9854.mov
4 points
-
The ones on the 2027's are completely different and should not suffer this same fate.4 points
-
For those owners that want to follow this story, please do so at https://www.facebook.com/groups/OllieOwners/permalink/2252240891847686/ I don't want to see this thread turn into "War and Peace" like the Alcan one did.4 points
-
These windows on the 2026 models are the ones that only open 3" at the bottom. The 90 degree windows are only on the 2027 models and should not be affected as the design is completely different from the ones on the 2026 models.4 points
-
We actually tested this in Florida this past April. Outside temps were low 90s with 80%+ RH. With the Chill Cube in Dry Mode, the highest we saw inside was high 70s and 55ish% RH. So it didn’t quite get below 50% humidity, but it made a huge difference. At 77°F/55% RH it was comfortable enough to hang out in. In those conditions I’d say 55-60% RH is probably the realistic best-case without adding a separate dehumidifier. Bear in mind our Brinkley 5th wheel is not as “efficient” as an Oliver. We love the Chill Cube, the variable speed compressor is very efficient, we have seen similar numbers than @jd19234 points
-
There are times that I feel exactly the same way with regards to being out in the world! Bill4 points
-
At one point, we were traveling with 2 cats, male and female siblings. One day the screen door got left unlatched and Callie (the brave one) wandered out, followed by Max (the big coward). Steph saw them and walked toward the trailer. Callie jumped back inside but Max panicked and dove under the fifth wheel. Eventually, by securing Callie inside and leaving the door open, Max made a mad dash back into the camper and hid under the covers. The outside world looked pretty good. Until they were in it. 🙂4 points
-
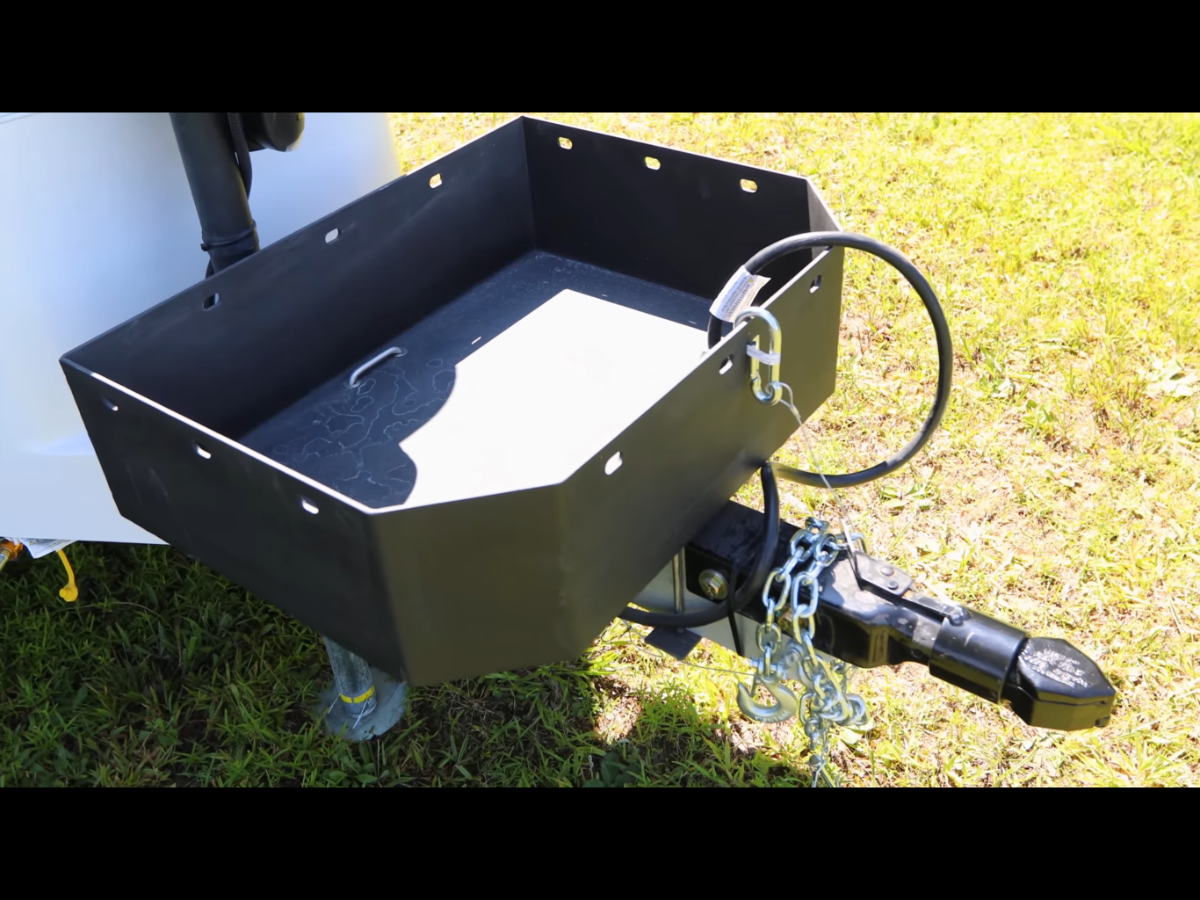
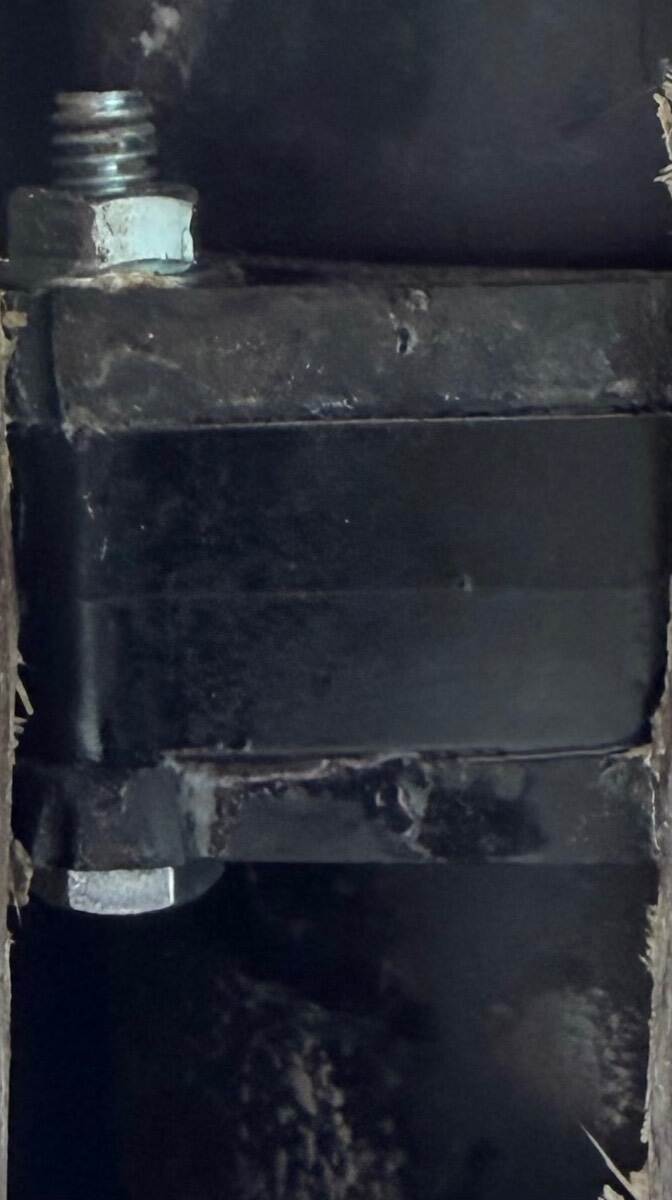
Yes, you are correct. Oliver has had to source another coupler supplier. Bulldog is supposedly in bankruptcy proceedings as of Oct of 2025. Hopefully they will restructure. Pic of new coupler -
4 points
-
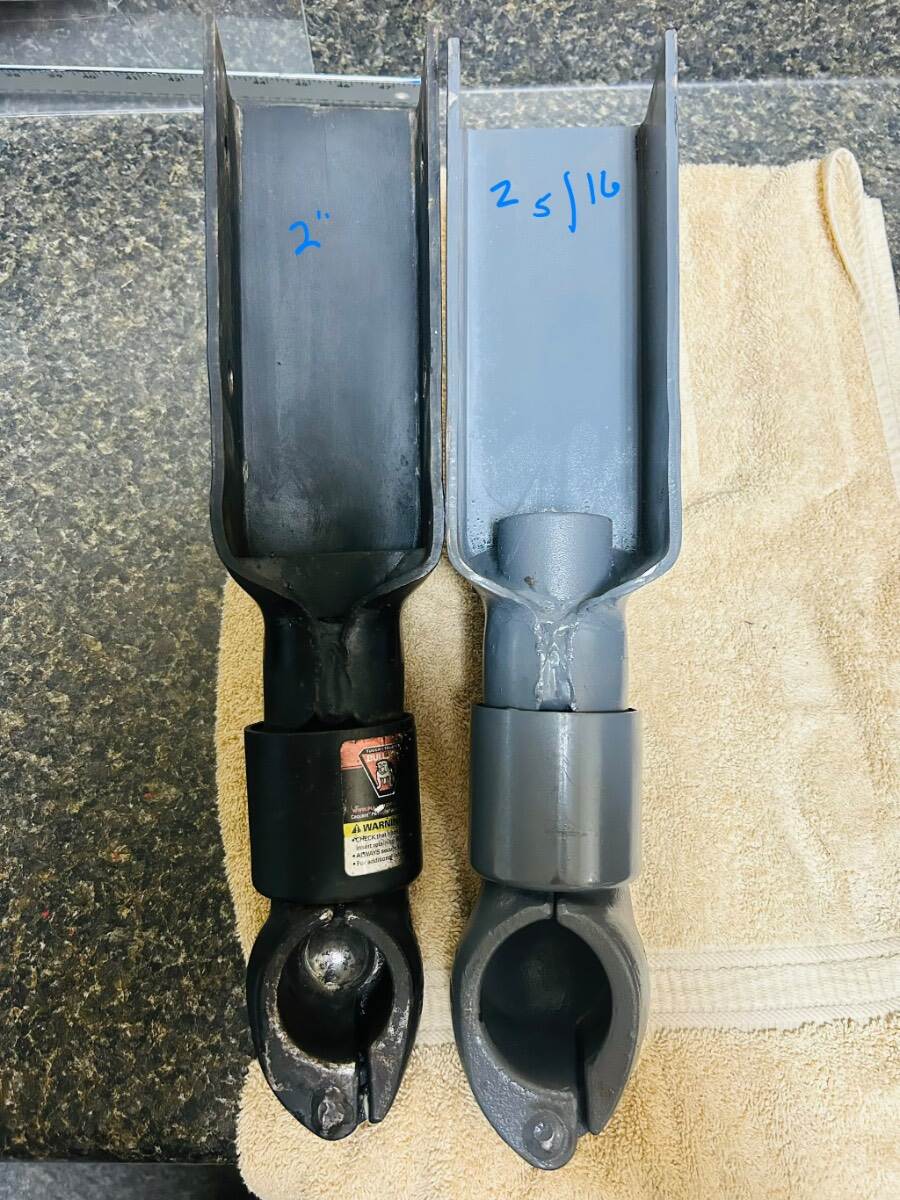
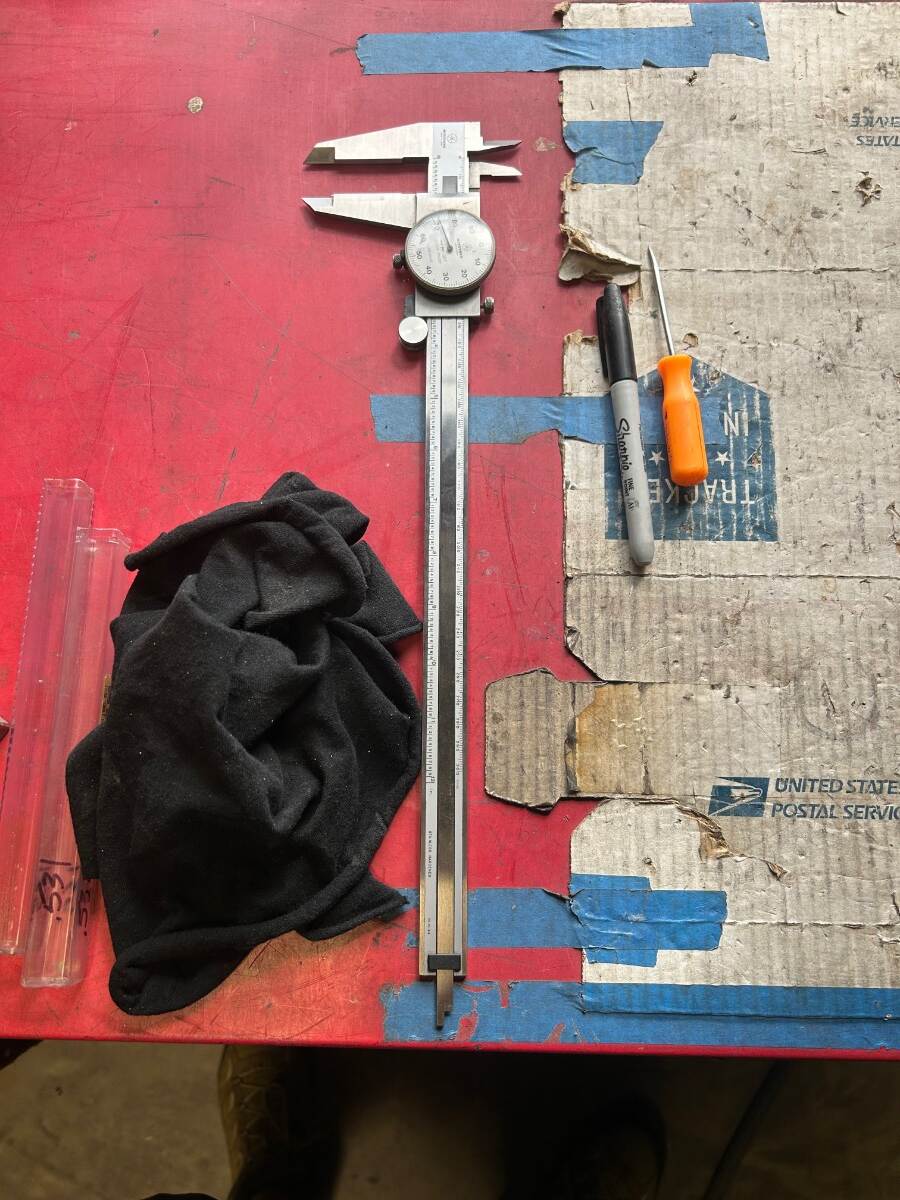
You are 💯correct on the stamping of the hitch sleeve being different on each coupler during BD’s production. This has to be accounted for and calculated when drilling new holes for a proper fit. My buddy who is a machinist measured each of the 1/2” coupler holes individually and then transferred and dialed in those exact measurements onto the new 2 5/16 coupler. He totally nailed and fit was better than factory. An inside pic of how different the couplers actually are. Pic of the bottom of the 2” coupler on the left and the new 2 5/16 coupler on the right. You cannot see the difference in the sleeve fold, but it’s not the same and thus requires exact measurement of each hole prior to drilling for proper precise alignment and fitment on the tongue. My buddies tools of the trade and his knowledge were invaluable today.
4 points
-
Where's Ollie is my favorite thread and it's 10 years old! Thanks @Mike and Carol for getting it started!3 points
-
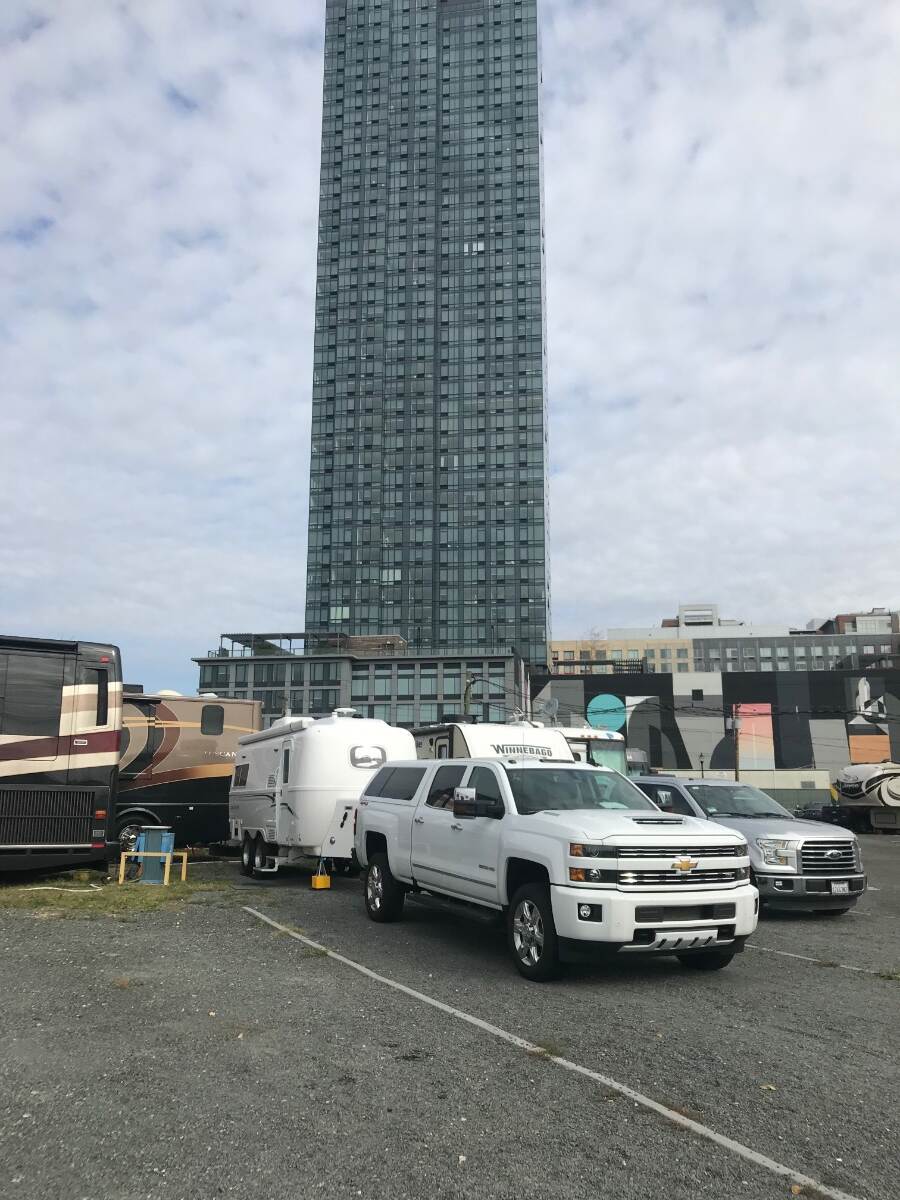
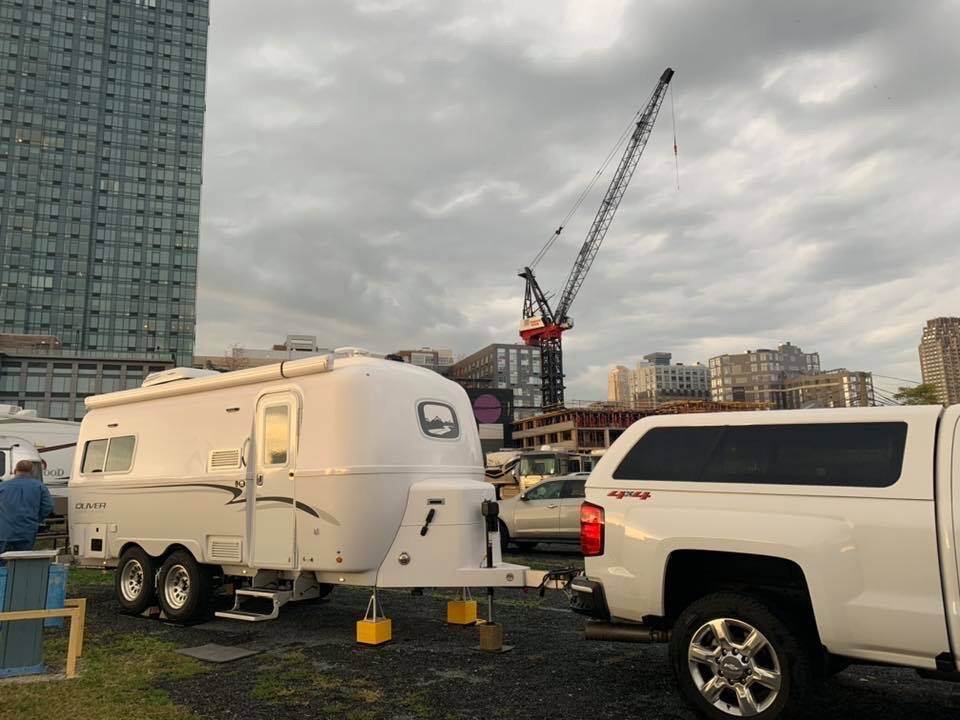
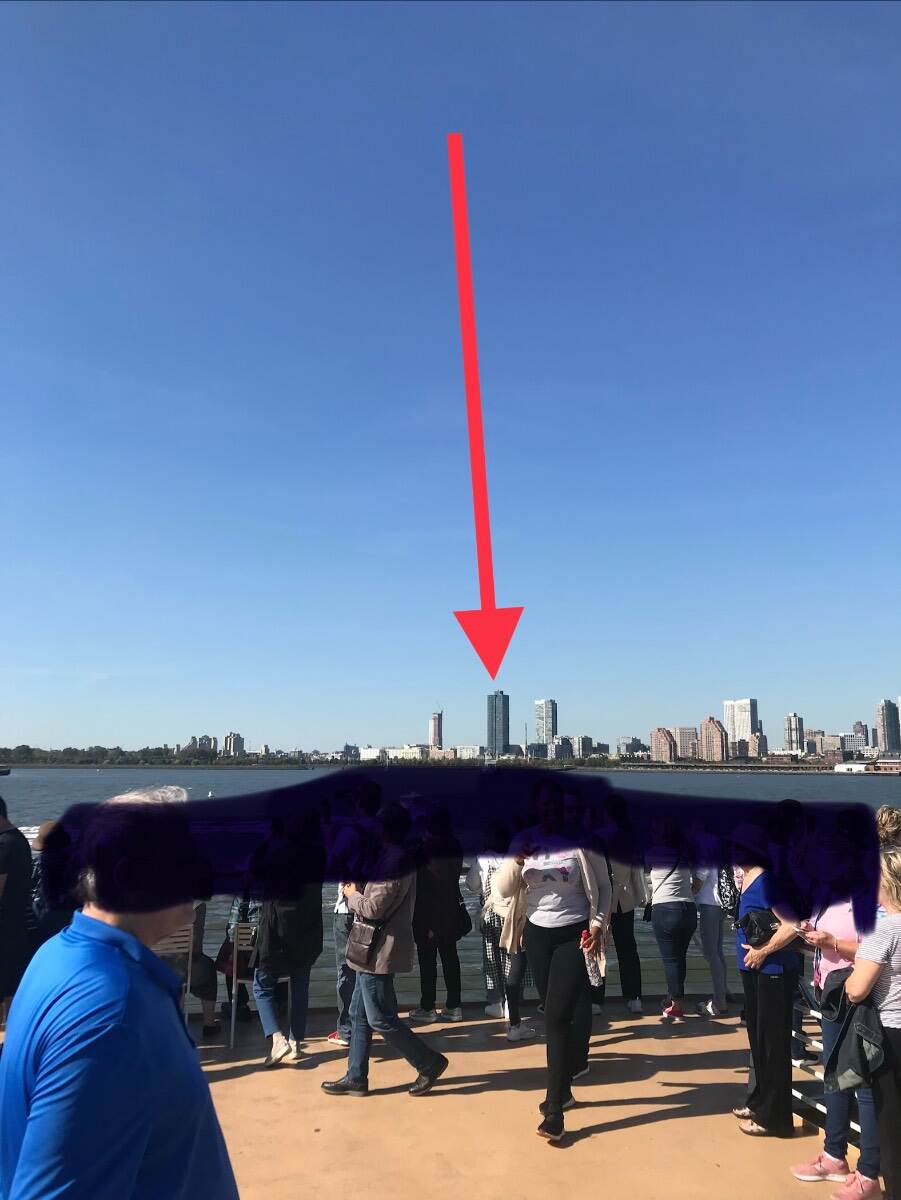
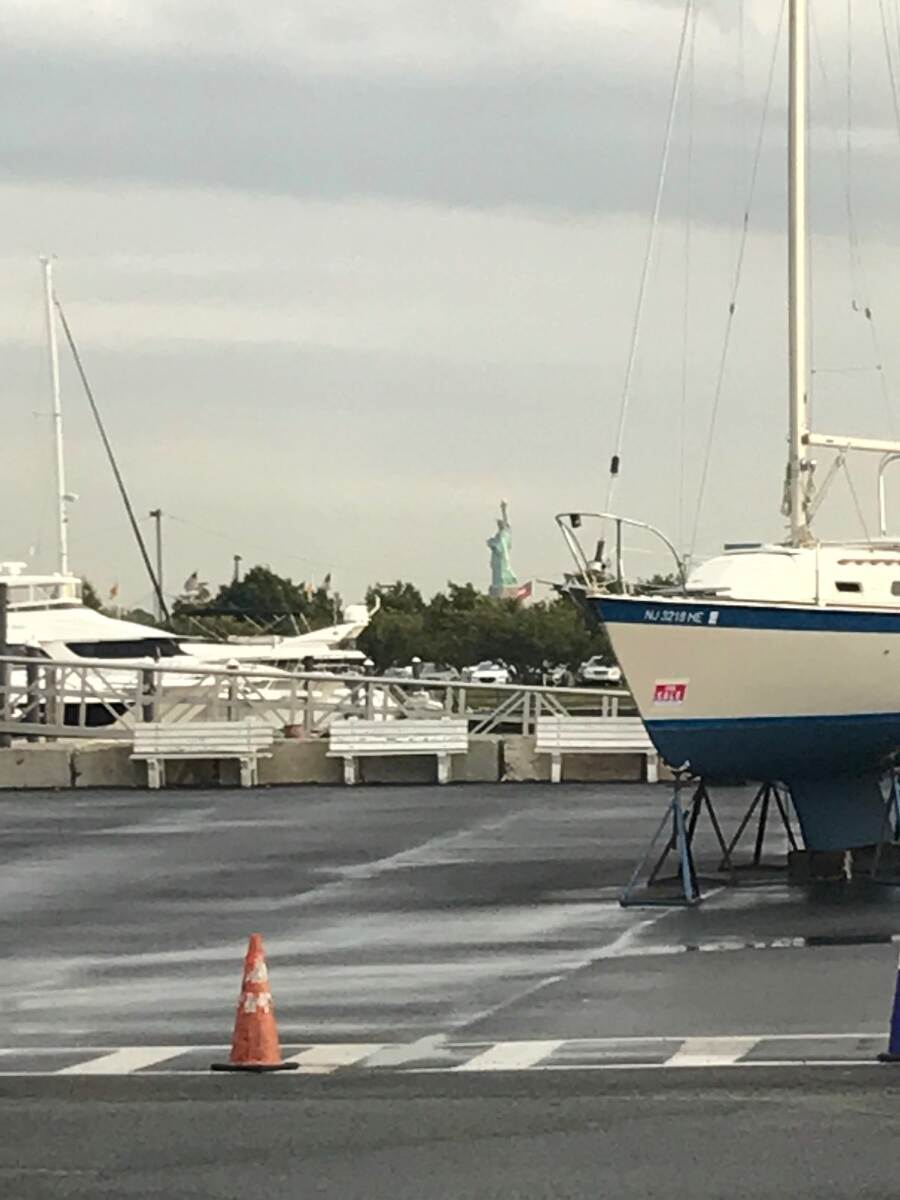
Over the past few days I’ve looked through all 39 pages of this thread. Very pretty pictures of “Where Is Ollie”. I have pictures of a not-so-pretty location. During late September, 2019 our Oliver was here for a few days We were parked near the base of this building A hint as to the location A screenshot from the campground’s website At the next campground after my one-and-only venture into NYC our Oliver was parked here. A much better looking location. September 30, 2019. And then again in June of 2026. Libby’s Oceanside Camp, York, ME. One of our favorite campgrounds. Bill
3 points
-
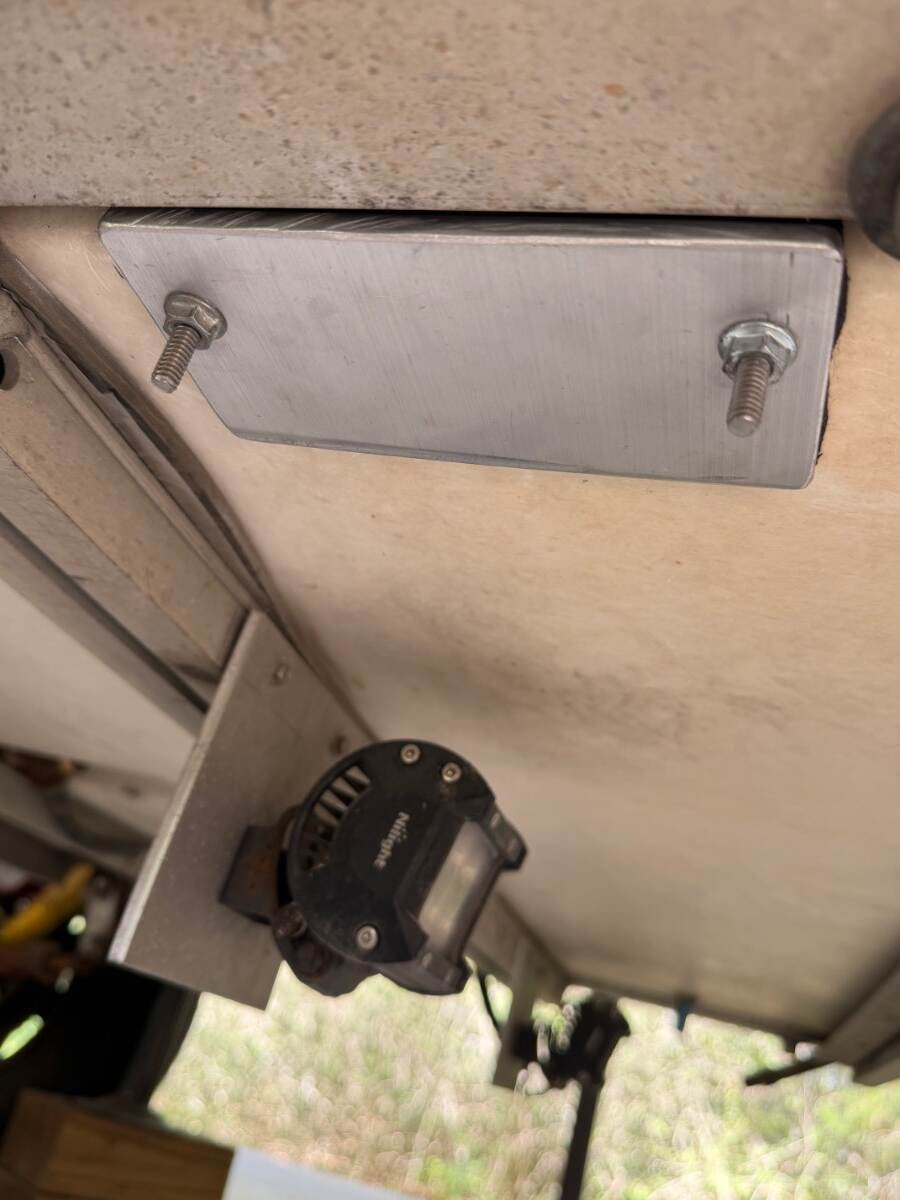
@johnwen be careful of rigid connections to things that move or vibrate like at the water pump.3 points
-
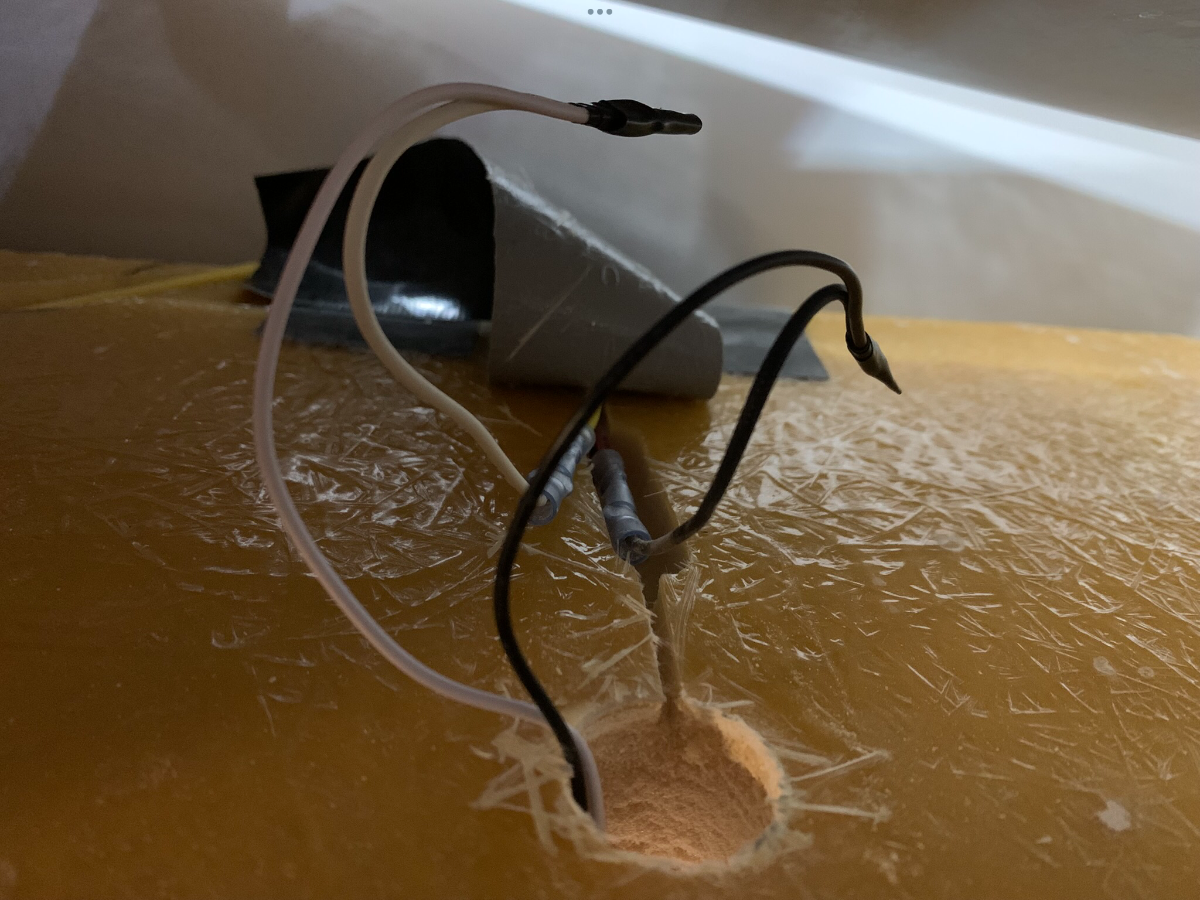
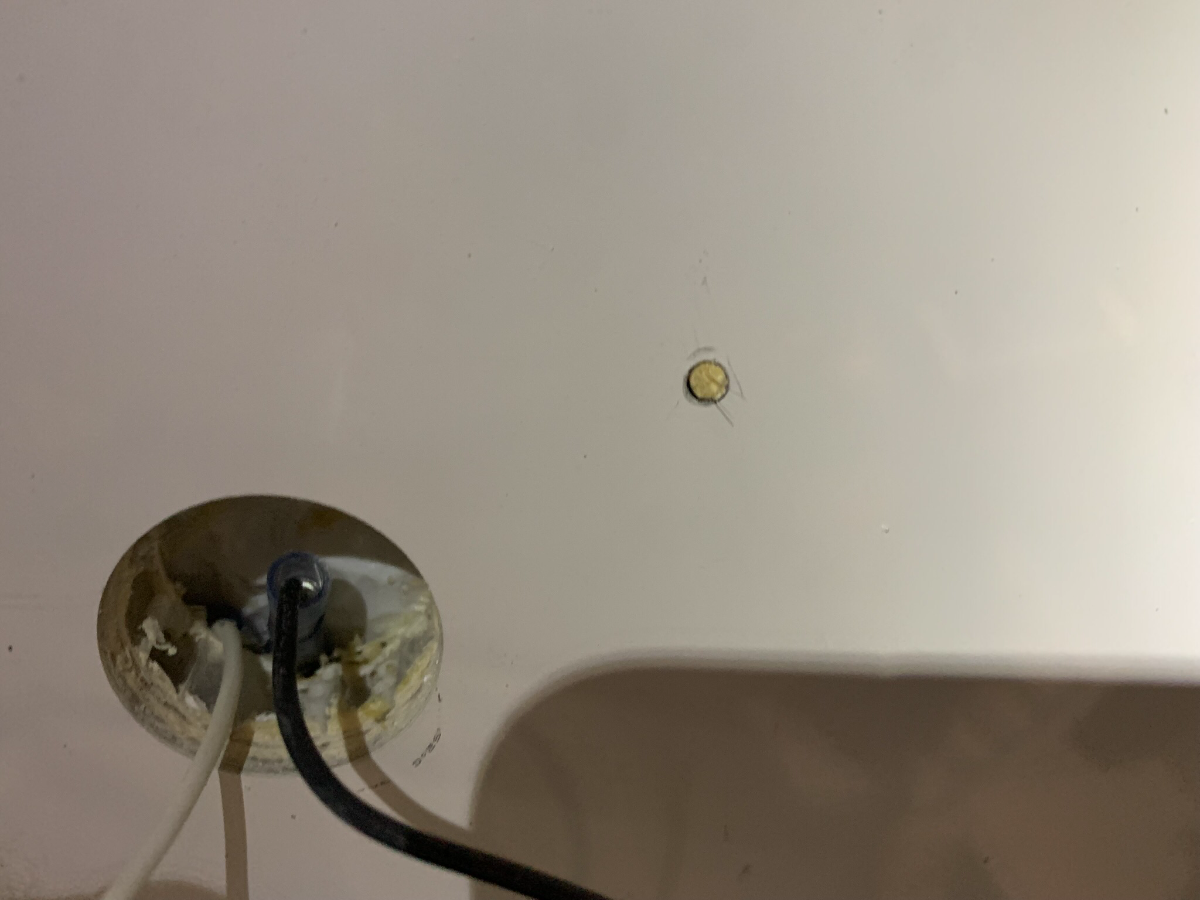
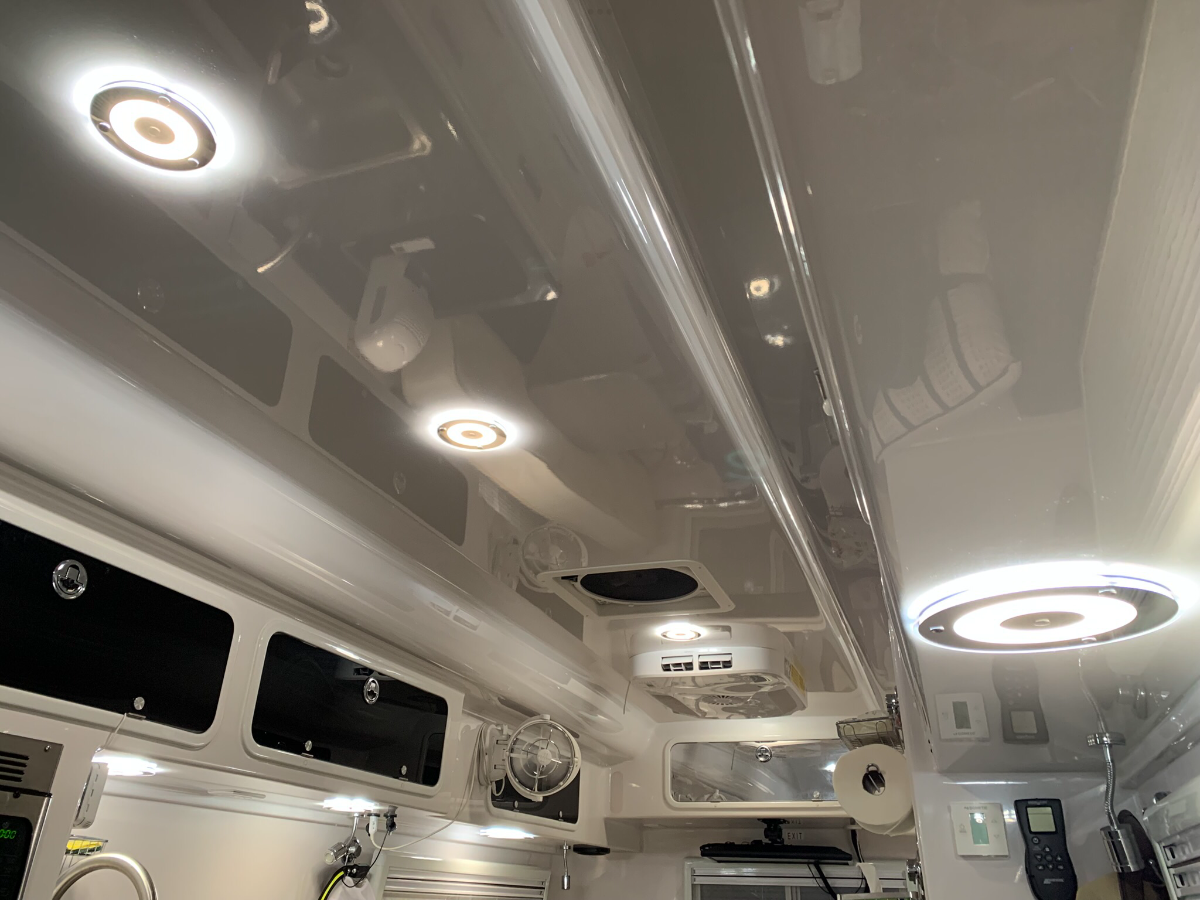
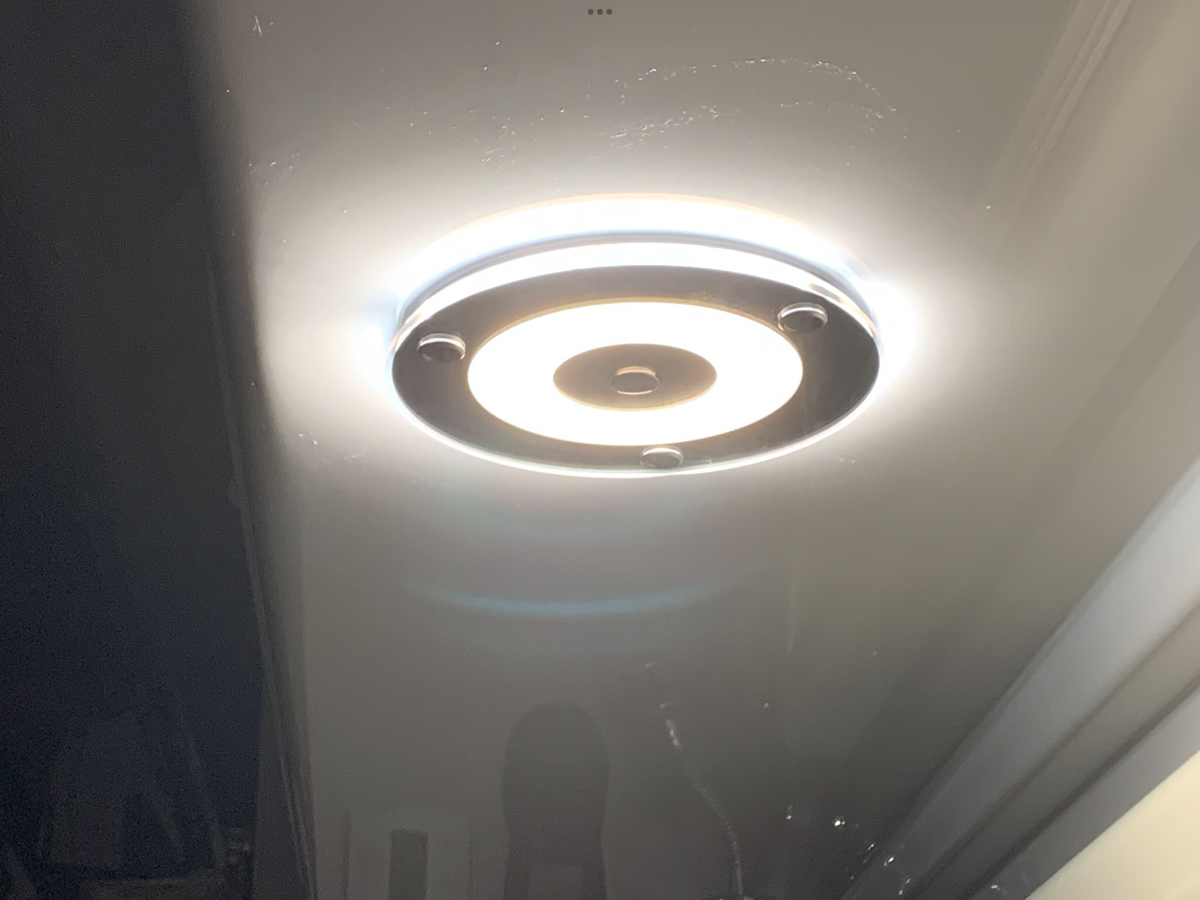
The Obeaming model I installed doesn’t have a physical button, but rather a center touch feature for on/off, as well as dimming and color selection. Wiring in my instance was simple; black to black, white to white. The wires were crimped and taped in my installation. I was pleased to find the overhead cabinets had routed channels to better conceal the wiring. Although the rivet holes matched these new lights, I choose to use screws rather than rivets; a piece of wood skewer was snapped off in each hole as filler for screw securement. I also decided to replace all of the former touch lights to forego any further issues. I’ve throughly enjoyed these lights for the past year and very pleased with the added ambiance of the blue color. They also operate as Tom @Tom and Doreen describes with “memory” when using the master power switch.
3 points
-
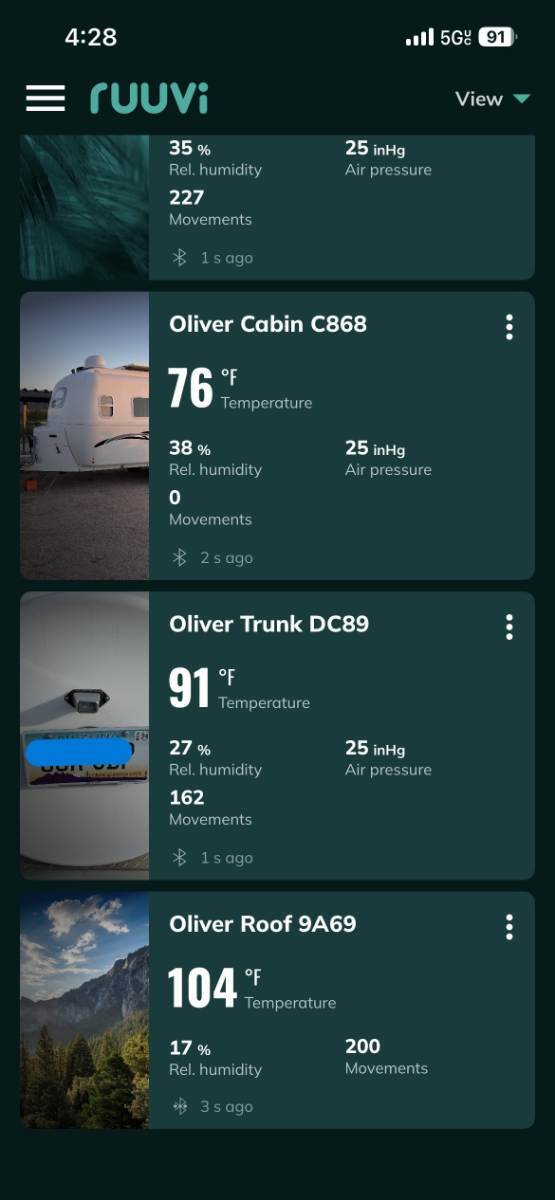
Performance update => I was able to run the Chill Cube 24x7, thermostat set at 74F, for 4 days producing this data. Data was recorded each day later afternoon 5PM +/-. The Chill cube did not quite produce the set temp in the heat of the day but did so the rest of the day. The high of 76F was still quite comfortable in the cabin. Off course our Oliver was unplugged, but in addition to battery power, our 320W rooftop solar was adding power consumed by the A/C. The table shows Ah used daily. Keep in mind this is with the A/C running 24x7 which is rarely our use case! Having 900 Ah it appears I can count on running the A/C 24x7 for 3 days, 4-5 days if it’s off during portions of the days. With 600 Ah you could truly count on two full 24 hour days. The picture below shows cabin and outdoor temps one afternoon during the test at 4:30 PM. The cabin temp is read by a Ruuvi sensor mounted above the kitchen sink. The sensor titled Oliver Trunk is positioned in the rear basement, near the incoming water lines down by the 4" drain plumbing. For "Oliver Roof" I placed a sensor rooftop under the solar panels so that it is in the shade. If I took this picture 1-2 hours earlier in the day the roof temp would certainly be above 110F! I had no idea these results would be so positive and being the avid boondocker, it's great to know we can now count on A/C cooling anytime/anywhere! When you have the old-school A/C, with the basic single-speed ON/OFF compressor (Dometic, Truma, Tosot, Houghton, etc.), you will use approx. 100 Ah per hour in the heat of the day (assuming 1400W while the compressor is ON). The inverter or variable-speed A/C will consume in 24 hours what the standard A/C will consume in just 2 hours, OMG! (BTW, the Dometic P2 will produce worse results since it uses 1800W when ON, or 150 Ah/hour). The technology capability today is amazing. Time to stop waiting on the next great product. We’re not getting any younger! 😎
3 points
-
Tractor Supply sells a 2” ball 7,000lb capacity coupler that looks like the hitch on the X23. https://www.tractorsupply.com/tsc/product/tractor-supply-traveller-straight-coupler-2-in-ball-7000-lb-capacity-25261793 points
-
Hey, our's was not brand new and it was still really special 😉 Welcome to the clan!3 points
-
Welcome and Congrats and enjoy the delivery day! There is something really special about taking delivery of a brand new Oliver, it was for us. Before you know it your day will be here!3 points
-
Not a bad life first thing in the morning. However, they seem to like scratching their faces on the rear bumper at 5:30 in the morning!
3 points
-
So, you're not glamping, but we sure are! 🤣 I would say an OEM Oliver, one purchased without any lithium package, little to no owner mods/upgrades, yes that shiny fiberglass is only skin deep. Leaky windows, the Dometic P2 A/C and with other OTT installation issues, it is hard to be comfortable. Glamping means comfort! Yeah, the G is for Glamour, but nobody is glamorous parked in a campground or anywhere else without all the creature comforts you desire! When you seriously upgrade the Oliver, at some point you're no longer roughing it! To start with, throw out the little $89 TV that OTT installed and replace it with a Samsung 32" 4K TV monitor, on a better mount and add a soundbar. Then correct the awful furnace ducting, vent the closet, bath and basement, and do something about those leaky windows! And it will take a while to move all those misplaced switches, water valves and breakers out from under the beds! And speaking of beds, all the OEM cushions and mattresses are way too basic to be glamping. The next item going to the junkyard is the common RV microwave (I use a Craig's Free Stuff ad and a driveway full of stuff is gone in hours)! A small Emeril Air Fryer fits there perfectly. We have 6 ways to cook indoors and outside, including the dual-burner Napoleon grill/griddle, cooking on the fire ring, a mini pressure cooker and an induction cooktop. Not hotdogs and smores, but glamorous meals for sure. It's not glamping when you get stuck somewhere making life uncomfortable. Or you can't use the bathroom or run the A/C while on the road or taking a break. Got to have freshwater tanks full, the one onboard and 35 gallons extra in the TV for if/when needed. With two 30# LP tanks full, 900 Ah LiFePO4, 720W solar, a 50A DC-DC charger topped off with the Victron MP2 3KVA inverter/charger, we can be VERY comfortable for a week or more and even throw some loss sole a 10 AWG extension cord to power their trailer overnight. And of course, remove the old-school rooftop cameras and nobody uses Wi-Fi repeaters anymore, or campground cable or Wi-Fi, OMG! Got to add a cellular router and antenna and the Starlink Mini is a must. Can't be glamping if you're not online 24x7! Then you could be riding on the lame Oliver OEM suspension or upgrade it with new D52 axles, Alcan Springs, Bulldog shocks and speaking of Bulldog upgrade the hitch coupler too. I can't believe OTT went with the 4-leaf Alcan Springs on this odd X23! Just so they could derate it to a 7k suspension? The tires are so out-of-place on the white egg! My forecast, OTT stops making the X23 after 2 years of meager sales. There are several REAL off-road trailers in the marketplace, and if that's what you want, it's not an Oliver. Some old guy said, after having a knee replacement, "I should have done this years ago!" Just like those of you who have that freight-train-engine sounding Dometic P2 still sitting rooftop! Even if you claim, "We hardly use it." You're fooling yourself and either way, once is enough! Our Chill Cube keeps the cabin cool on battery for 3 full days with daily highs of 94F outside! And at nighttime when outside temps drop, you can hardly hear it running while it's sipping 2Ah. Why did I wait 2 years? This is only the half of it and then there's the TV! I won't bore you with the technical details but the 45L CFX5 fridge in the truck bed never runs out of cold drinking water in our desert. With room for new groceries, it's much easier than adding to the fridge inside. Pantry full and closet floor lined with adult beverages and soft drinks, craft cubes in the freezer - yes, we're glamping! I was 3 nights camping in The Valley for a major sinus surgery. Everything I needed to recoup was at arm's length, only a few paces to the bathroom, truly all the comforts of home. Spending nights in a hotel was not an option, not near the comfort. Love our Oliver!😎 Our first RV was a 39' Fleetwood Discovery diesel pusher with 3 slides. Thought the way to go, was to go BIG! It had the big screen TV, but otherwise, it was awful. The Class-A is only comfortable on US Interstates and large paved lots in RV Parks and must have 50A service. If you get stuck, you have to run the generator because unless you spend another $50K in solar and lithium, all you power you have unplugged is enough to reheat up a cup of coffee in the microwave! Don't try big city streets or much in dirt roads. Only ex-truck drivers are comfortable in a Class-A. BTW, generators and glamping do not mix. 🤣 So, when you're done with all these electrical and mechanical system upgrades, you gotta make it look as good outside as it runs inside. We know it, but it's the only way people will know we're glamping too! 😎3 points
-
We’ve been accused of “glamping” because we have a nice trailer. I’ve heard of ‘glamping’ obviously, but didn’t think we qualified. Now, if you’re cruising around in one of those 4mpg 40 foot coaches with a laundry room, hot tub, 4 slides and a 50” TV - THAT’s “glamping”.3 points
-
Agreed its the same old chick dressed up in a different skirt, nothing really of substance here that one couldn't implement themselves and many or most of us have already such as the Bulldog shocks, LT off road tires etc. It preposterous they are promoting this as an off grid off road travel trailer yet still using the basic old leaf spring dexter axles rather than an independent suspension. The least they could have done was adopt the Curt independent suspension as so many others have for a better off road experience. Then there is the same old (mostly) bulldog hitch rather than a full articulating hitch. The gravel road they test drove this thing on is joke. This might be off road for back east but it sure isn't out west. And what on earth is the point of going off grid just to set in your camper and run the air conditioner just because you can. People out in this neck of the woods who choose to go off grid and off road are certainly not setting around knitting, watching tv in an air-conditioned camper. What happens when that solar awning jams, or gets off center and will not retract properly. The 48 volt system seems a bit weird too. There are several dozen more ruggedly built campers than this for off road and over landing that do not use a 48 volt system and get by fine with a tried and true 12 volt system. What happens is you have issues with that system in the middle of nowhere? The interior is certainly nice and at least theoretically love the new windows and shades but thats about it. All the black isn't appealing to me, might be to others. Not sure who is in charge of marketing at Oliver but man oh man this is making much ado about nothing. By no stretch of the imagination is this an off grid/off road camper any more than my old 2015 model is with some modifications. They really need to rethink this before releasing it to the public in its current configuration. Not impressed.3 points
-
The thing that gets me most is the tires. “Aggressive tread” for sure. Maybe they make sense, but they look like what you’d use if the trailer wheels were actually used to propel the thing. I suppose if you’re braking down a muddy hill they come in handy. Im not one easily impressed by trim and accents. But, seeing all the bright orange and lime green sports cars on the road these days, I guess I’m the old guy who’s behind the times.3 points
-
Yup, and why on earth did Oliver switch from the MaxxAir fan with cover to that weird brand name fan without a cover? 🤷♂️ The issue is that the new fan will close in wet weather, so there’s no vent option while cooking in the rain. The MaxxAir with cover could stay open in wet weather, which would pair perfectly with the new awning windows that also stay open when it rains!3 points
-
To all single axle Ollie owners, have you ever needed to have the black tank dump valve replaced? How much fun was that?! There is virtually NO room underneath to wrangle a wrench into in order to remove the bottom bolt. I’ve owned The Wonder Egg for 18 years now and it seems about every 9 years, the black tank dump valve begins to seep “water”. The first time I took it to my local, reliable, RV repair shop, Boerne RV, the technician stated that job was so difficult he almost quit being an RV tech! Well, here it is, 9 years later and I just had Beorne RV replace that *!%#! Valve again, I told them to feel free to make any modification to the trailer to simplify the process. Here’s the brilliant idea they came up with . . . A sealed, water-tight exterior access panel directly underneath the valve.
3 points
-
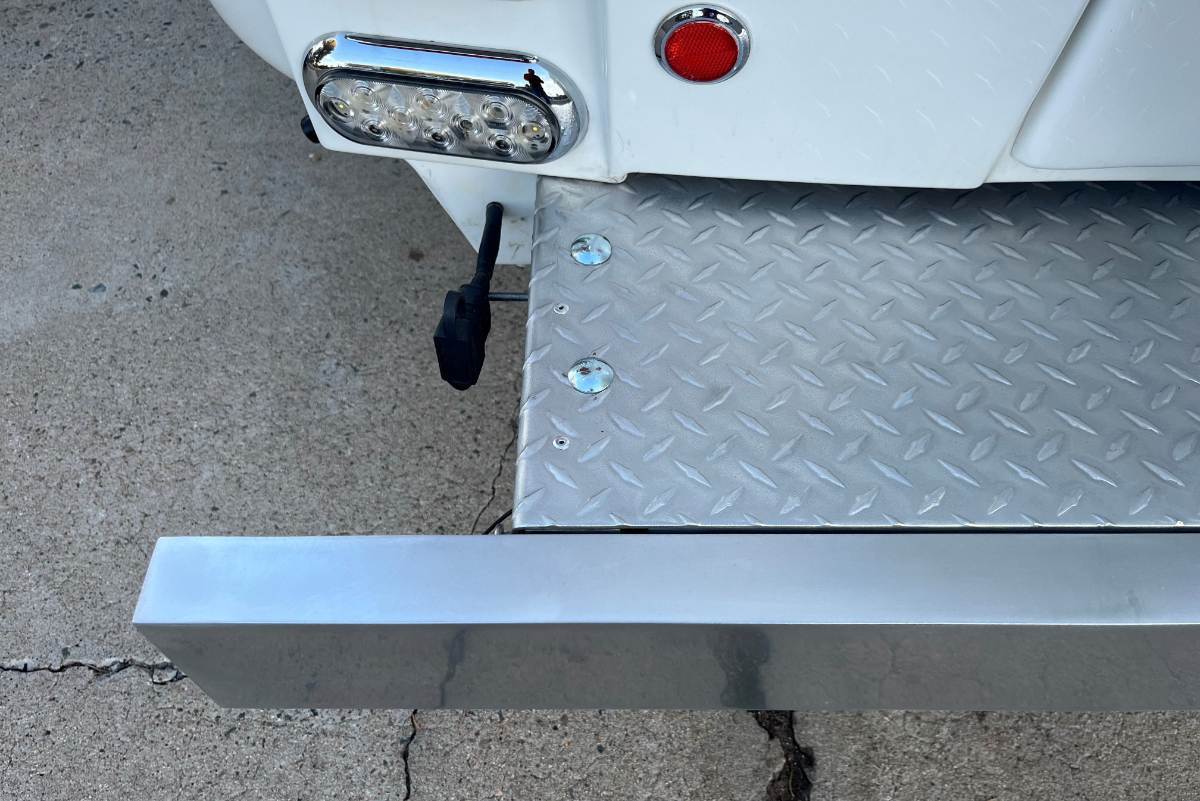
I had removed the Dometic Penguin A/C prior to this work. I temporarily filled the 14x14” opening with a piece of plywood to keep dust out while allowing Cameron the room above to make the entire rear roof shine! It’s always a mess under an old A/C. Good thing we did because the new Chill Cube is a foot shorter to the rear. With my son’s help, we installed the new Furrion Chill Cube A/C. One last task was to restore the rear bumper area. I removed the mounts for the bicycle rack we don’t use, drilled out more rivets and removed the deck plate and folding bumper. I cleaned the inside waste hose area, and steel brushed, sanded and ceramic coated all parts. I've been wanting to write this up for a few months now. Chris is out of town on her annual "Sisters Trip." Adam's been working overtime and it's boring being home alone. That’s it – she’s all done! 😎 When it's time for some love again, I'll drop her off with Cameron for a renewal! No more Ugly Duckling, but quite the Beautiful Swan she is now!
3 points
-
Welp, after first talking to Anita in 2021 and putting maybe 30k miles on the microminnie we ended up with, we paid for an X23 build slot today. We live in SETX and have been scheming for an Oliver for a while now. Did the factory tour 2 years ago. We should be taking delivery during our annual trip to Tenn. to see family. Decided to skip thr solar awning -- spider sense tells me we'd break it somehow. We'll catch flack, but we'll be using our 3rd gen Tacoma as a TV for a good while. No plans for mountains, and when we do we'll get a full-size. We live in SETX, and it is _flat_ here.2 points
-
Never thought it would last this long! Since we’re not able to travel for a while it’s inspiring to see everyone else contribute with really interesting places to keep it going. I had our Oliver in the driveway last weekend for some maintenance and at one point I just sat at the dinette and thought we’ve got to get on the road soon! Mike2 points
-
On my Oli, I removed the rubber track cover and exposed the end of the felt track insert. I used two picks from my small O'ring pick and hook set to loosen the sides of the track and lifted one side of the track and then gently pull the one side up and rotated the track out of the slot. I was able to exposed the track bottom within about 3-4 inch of the center divider. I was then able to enlarge to drain holes and completely clean the inner track bottom. If you can get the Felt track insert up, then you will have a lot more room to get a small tube of chalk in the area and force it through the hole.2 points
-
Excellent point! As others and self, the best position with the three-way is having fans in the upper vent whereby the fans blow outward and thus, pull air upward and out.2 points
-
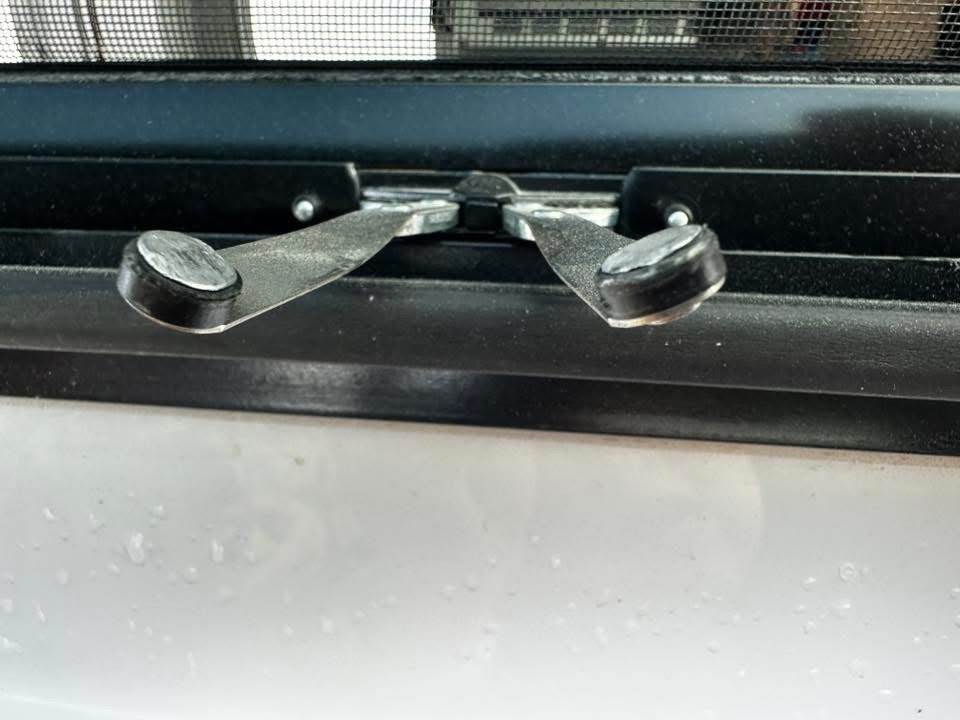
Yes, by the photo from FB these hinges are 2026 the awning style windows with the 3” opening at the bottom.
2 points
-
2 ACs, a chill cube in the living area and diesel sounding 1910 style Furrion up front! But the 2027 Brinkley models Zs now include dual Furrion Chill Cubes. The new 15k low-profile up front, and the std 18k in the living room. Maybe, with the gas prices we might end up in Texas this year.2 points
-
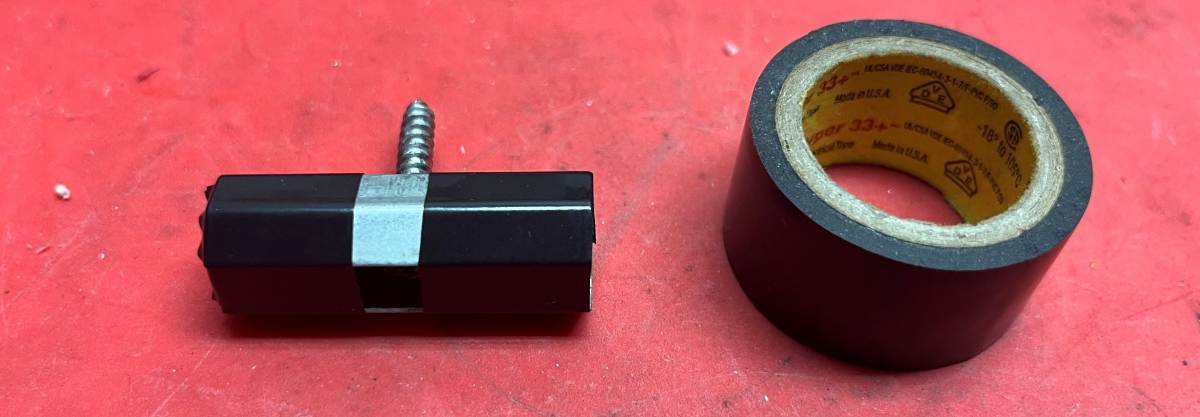
Yeah, I tried this today and you are correct. I hosed our blinds this week with a fine mist spray setting. I did this 2 years ago and it was about time again. When I reinstalled I found a couple of clips where the mounting screw needed tightening, so check for this first. Then of all the 24 clips, 6 per window, only one would not seat properly (guess we're lucky). I removed it, tried to stretch it wider on my vise and no-go on the spring steel. So this is my solution and it worked great, tight as can be! just one wrap of electrical tape. 😎
2 points
-
Thanks -- I did that. Glad to have this in the thread as a warning to others.2 points
-
Thank you Got it filled in now.2 points
-
There are several posts discussing how the signature works... try this one: You could also search for something like "signature" in the search field in the banner at the top of a forum page.2 points
-
There is some info here:2 points
-
Anybody notice that they appear to be using a different coupler on the new Apex X23?2 points
-
Saw an olie on 295 in ME today with ME number pate LAND HO just curious ?2 points
-
Not sure if this is the same one we bought. Also from Amazon (where all good things come from) and has a physical pushbutton as well. As @Boilermaker Chemist notes - a real ‘switch’ means that when the power is off - it’s off. With the touch light, they’re always “on” and waiting to sense your finger. We had some weird ‘on’ conditions on the same (over the sink) light that preceded full failure: flickering, inconsistent operating, half-brightness. That kind of behavior always worries me. Maybe it’s obvious, but the most frequently used fixtures are the ones failing. I wouldn’t expect that with a “switch” that shouldn’t “wear out”. Of course, the second most commonly-used light - over the dinette - is showing signs of failure. Luckily, the package from Amazon had two lamps. Replacement as @Boilermaker Chemist describes are similar to my experience - except I did soldered splices with heat shrink tubing to insulate.2 points
-
Yep, that's about it! They're just for looks. Besides A/C efficiency... Ah = Ah! 🤣 He already converted the 100 Ah 48v battery to be equivalent to 400 Ah on a 12V system. 600+ Ah on 12V is 200+ Ah better. One problem that can occur in a 48V RV system, is when the 48/12 DC-DC converter fails, you cannot use your trailer jacks, any cabin lighting, the CO detector, USB chargers, the fail-safe for the trailer brakes and every other 12VDC device (unless they also integrate a 12V battery).2 points
-
I agree. I did some napkin math when the specs first came out and it seemed to make much more sense to have 600-900ah of 12v over 400ah of 48v and run everything though either 12v or the inverter. Even the AC efficiency came out better running a 120v inverter compressor unit over the 48v Houghton unit, especially at the lower BTU rating of the 48v Houghton.2 points
-
Aside from the 48volt electrical system and a few accessory changes, the main changes seem to be cosmetic - black trim and such.2 points
-
Wow. I am truly impressed. We just bought our 2019 Oliver E2. I am thinking I will have it cleaned and new coating next year. Had to replace the water backflow valve and my heater won’t ignite. Thinking it may need new sail switch. We love it. Thanks. Martin & Linda2 points
-
Good discussion! Just measured the Bulldog 2 5/16" coupler and 1 7/8" ball mount/ball and discovered the following. With the 2 5/16" coupler with collar lock installed, a thief can easily back up to a trailer with 2 5/16" coupler, lower it on a 1 7/8" ball and drive away (not sure how far the 1 7/8" hitch would make it). My current 2" Bulldog coupler is still on Ollie stored at the airport, doubt it will slip over a 1 7/8" ball if locked with a collar lock like the Bulldog 2 5/16" coupler, but will check. At the most narrow inside portion of the 2 5/16" coupler with collar locked measures 1.91" A 1 7/8" ball measures 1.87" outside diameter A theft deterrent for the Bulldog 2 5/16" coupler needs to have the ball opening covered or filled to prevent this type of theft. I like using the Bulldog coupler latch locked with a long shank padlock while in transit and for storing the chains with the emergency brake cable snap-hook. Also use an inexpensive Universal Coupler Ball Lock that Fits 1-7/8", 2" and 2-5/16" couplers. Previous Bulldog hitch discussion:2 points
-
That's for sure, Chris! All Dometic units (except a 230V/50 Hz Inverter model in non-US markets) and Truma, the Atmos/Tosot and all others made through the years, the compressor goes ON & Off and you hear it with a bang and a thump! Add a Soft-Start and then they take 3-5 minutes ferbling around to finally start cooling!2 points


.thumb.jpg.e34bf01ef7f7d5e99ad31856d45afbeb.jpg)

-
Recent Achievements
-


")


