Leaderboard


Popular Content
Showing content with the highest reputation on 10/27/2018 in Posts
-
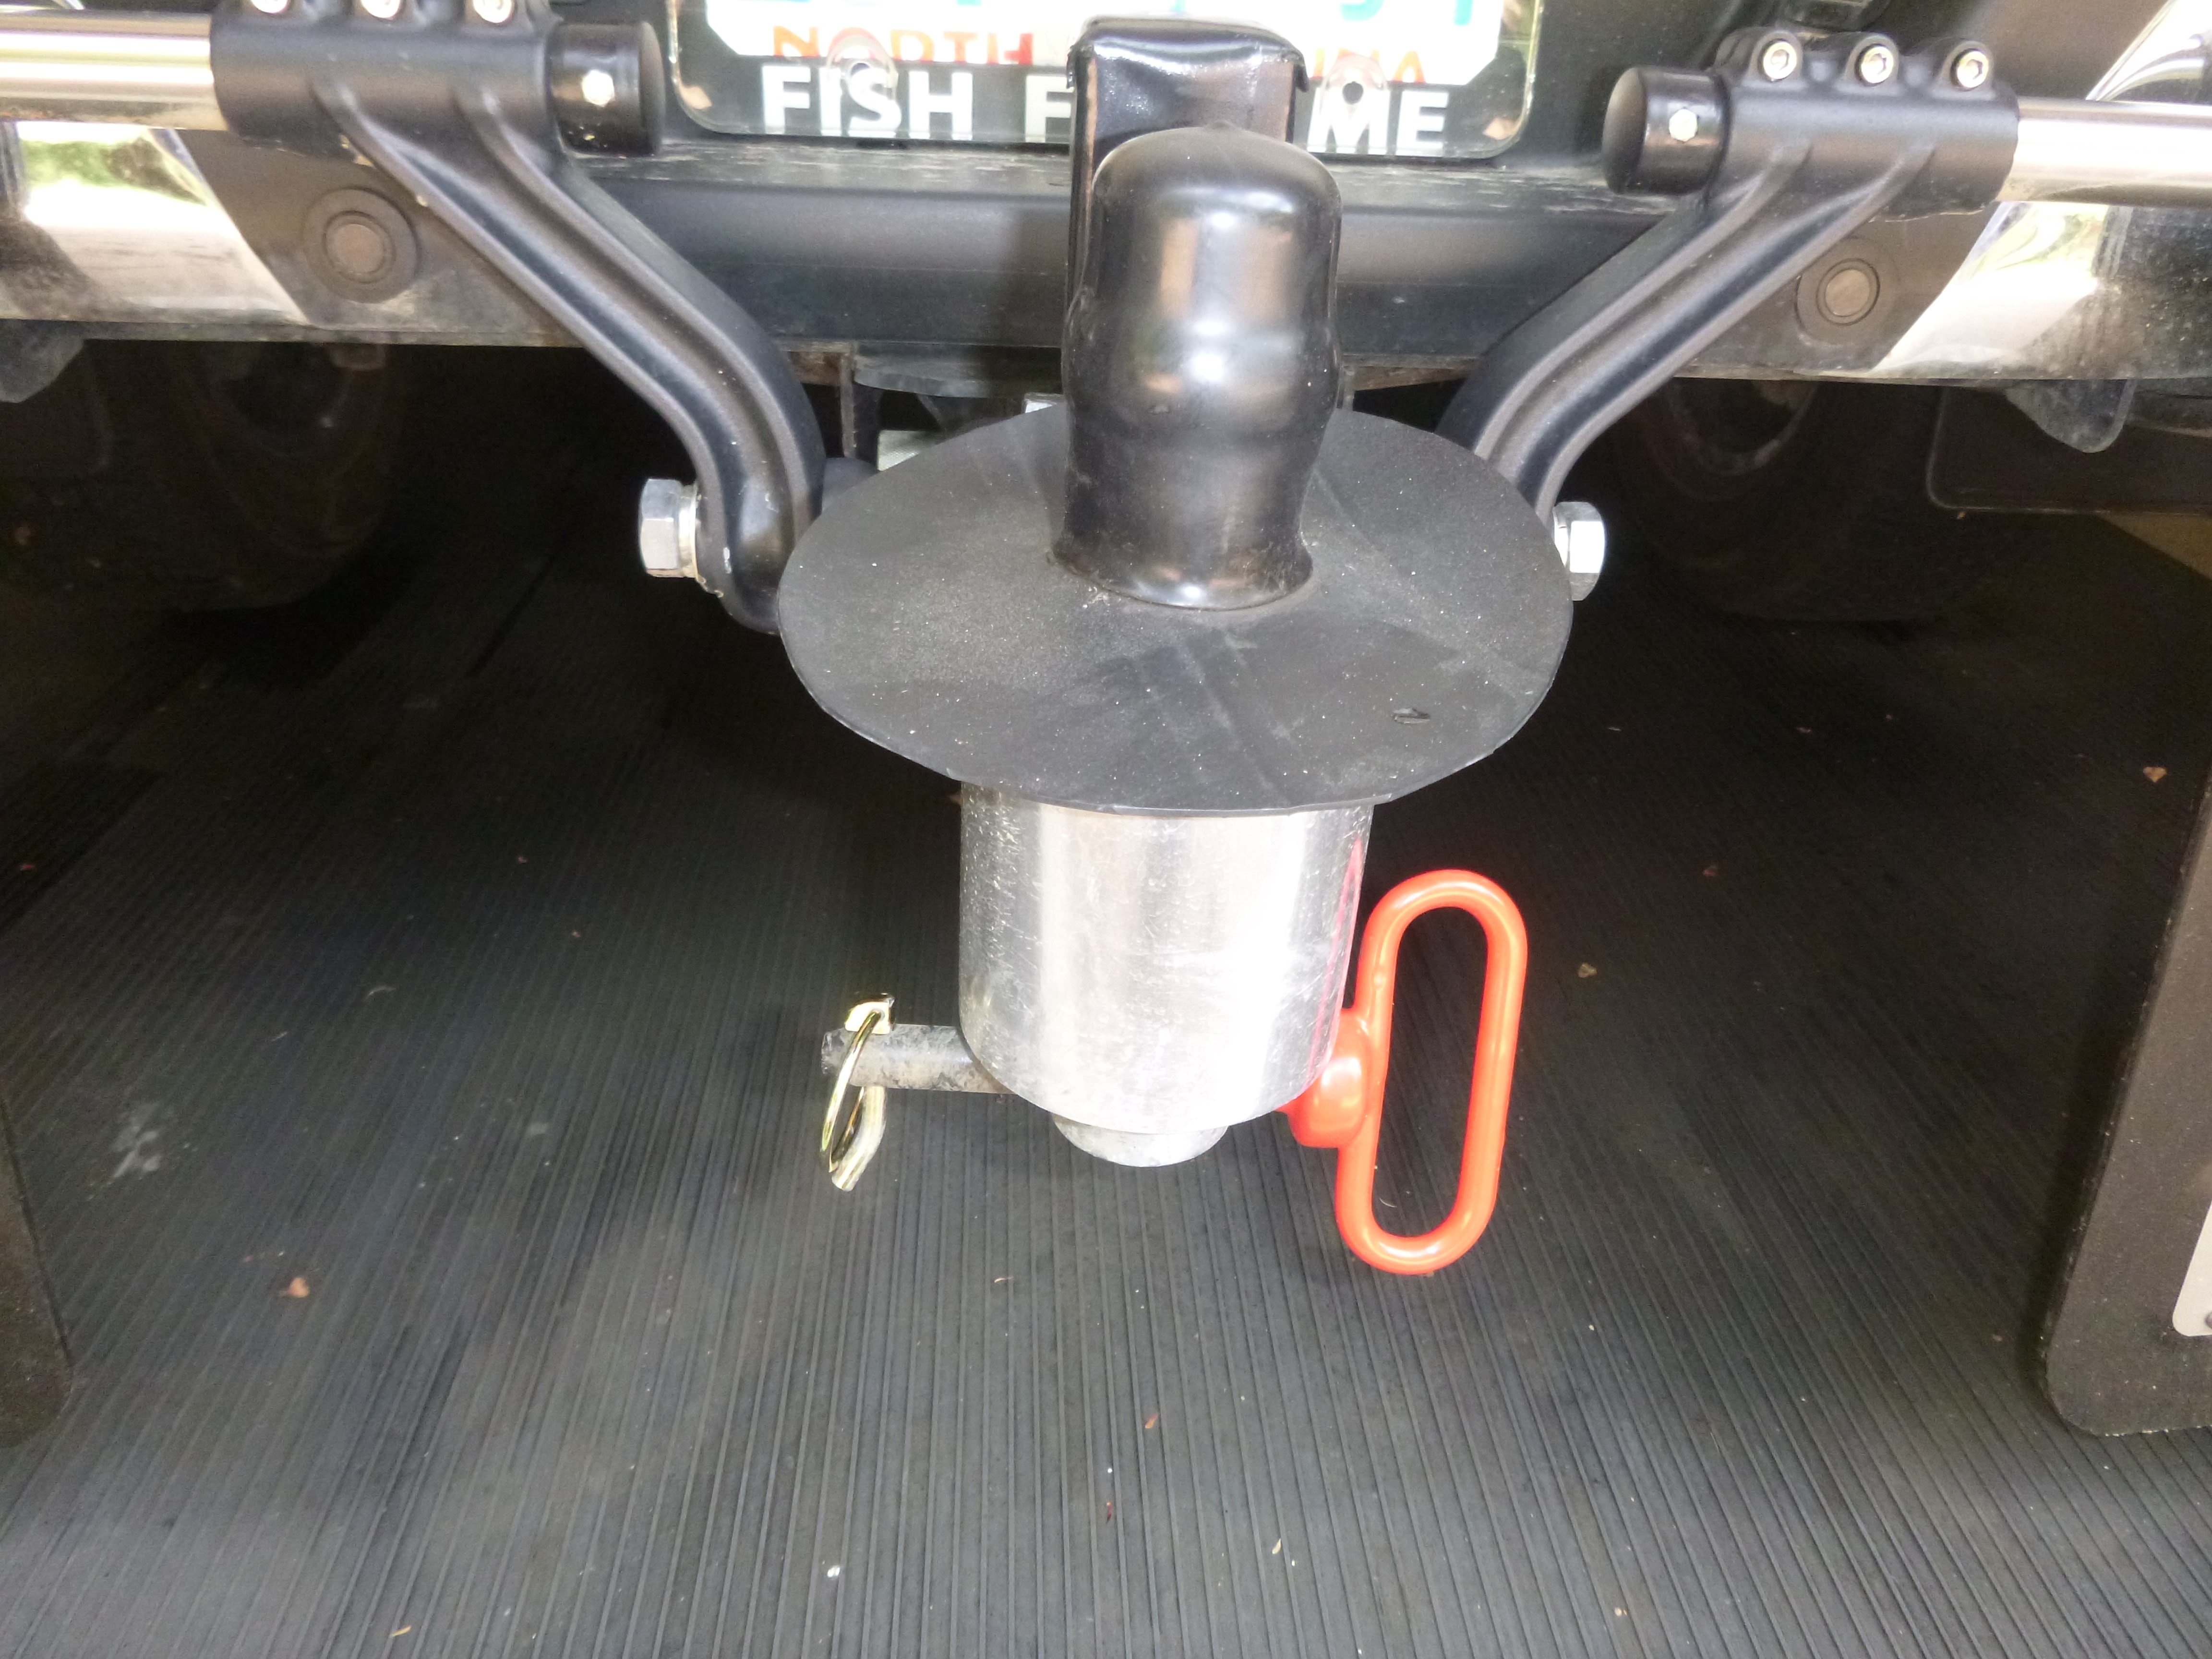
When I visited the Andersen factory in Idaho Falls this summer the Sales Manager told me that, indeed, on the "new" model the triangle (whale tail) could be moved by hand when there wasn't any weight on it. This was not the case with the old model. Being able to do this allows you to realign the whale tail with the tow vehicle without releasing one (or both) of the chains when it is difficult to get the tow vehicle and trailer aligned as they were before you separated them. Like Maverick, my "new" design hasn't made any noise in over 10,000 miles of towing. I'm not sure if my "water diverter" had any effect on this, but, it makes me feel as if I'm doing something to keep moisture and dirt from getting between the housing and the sleeve (see picture below). I simply cut this to fit out of an old lawn mower inner tube that I got free from a local tire shop. Bill [attachment file=P1020095.JPG] I cut the inner tube with a diameter of 6 1/2 inches and then cut a 1 inch diameter hole in the center. The center hole has to be stretched over the ball in order to get it on.
 3 points
 -
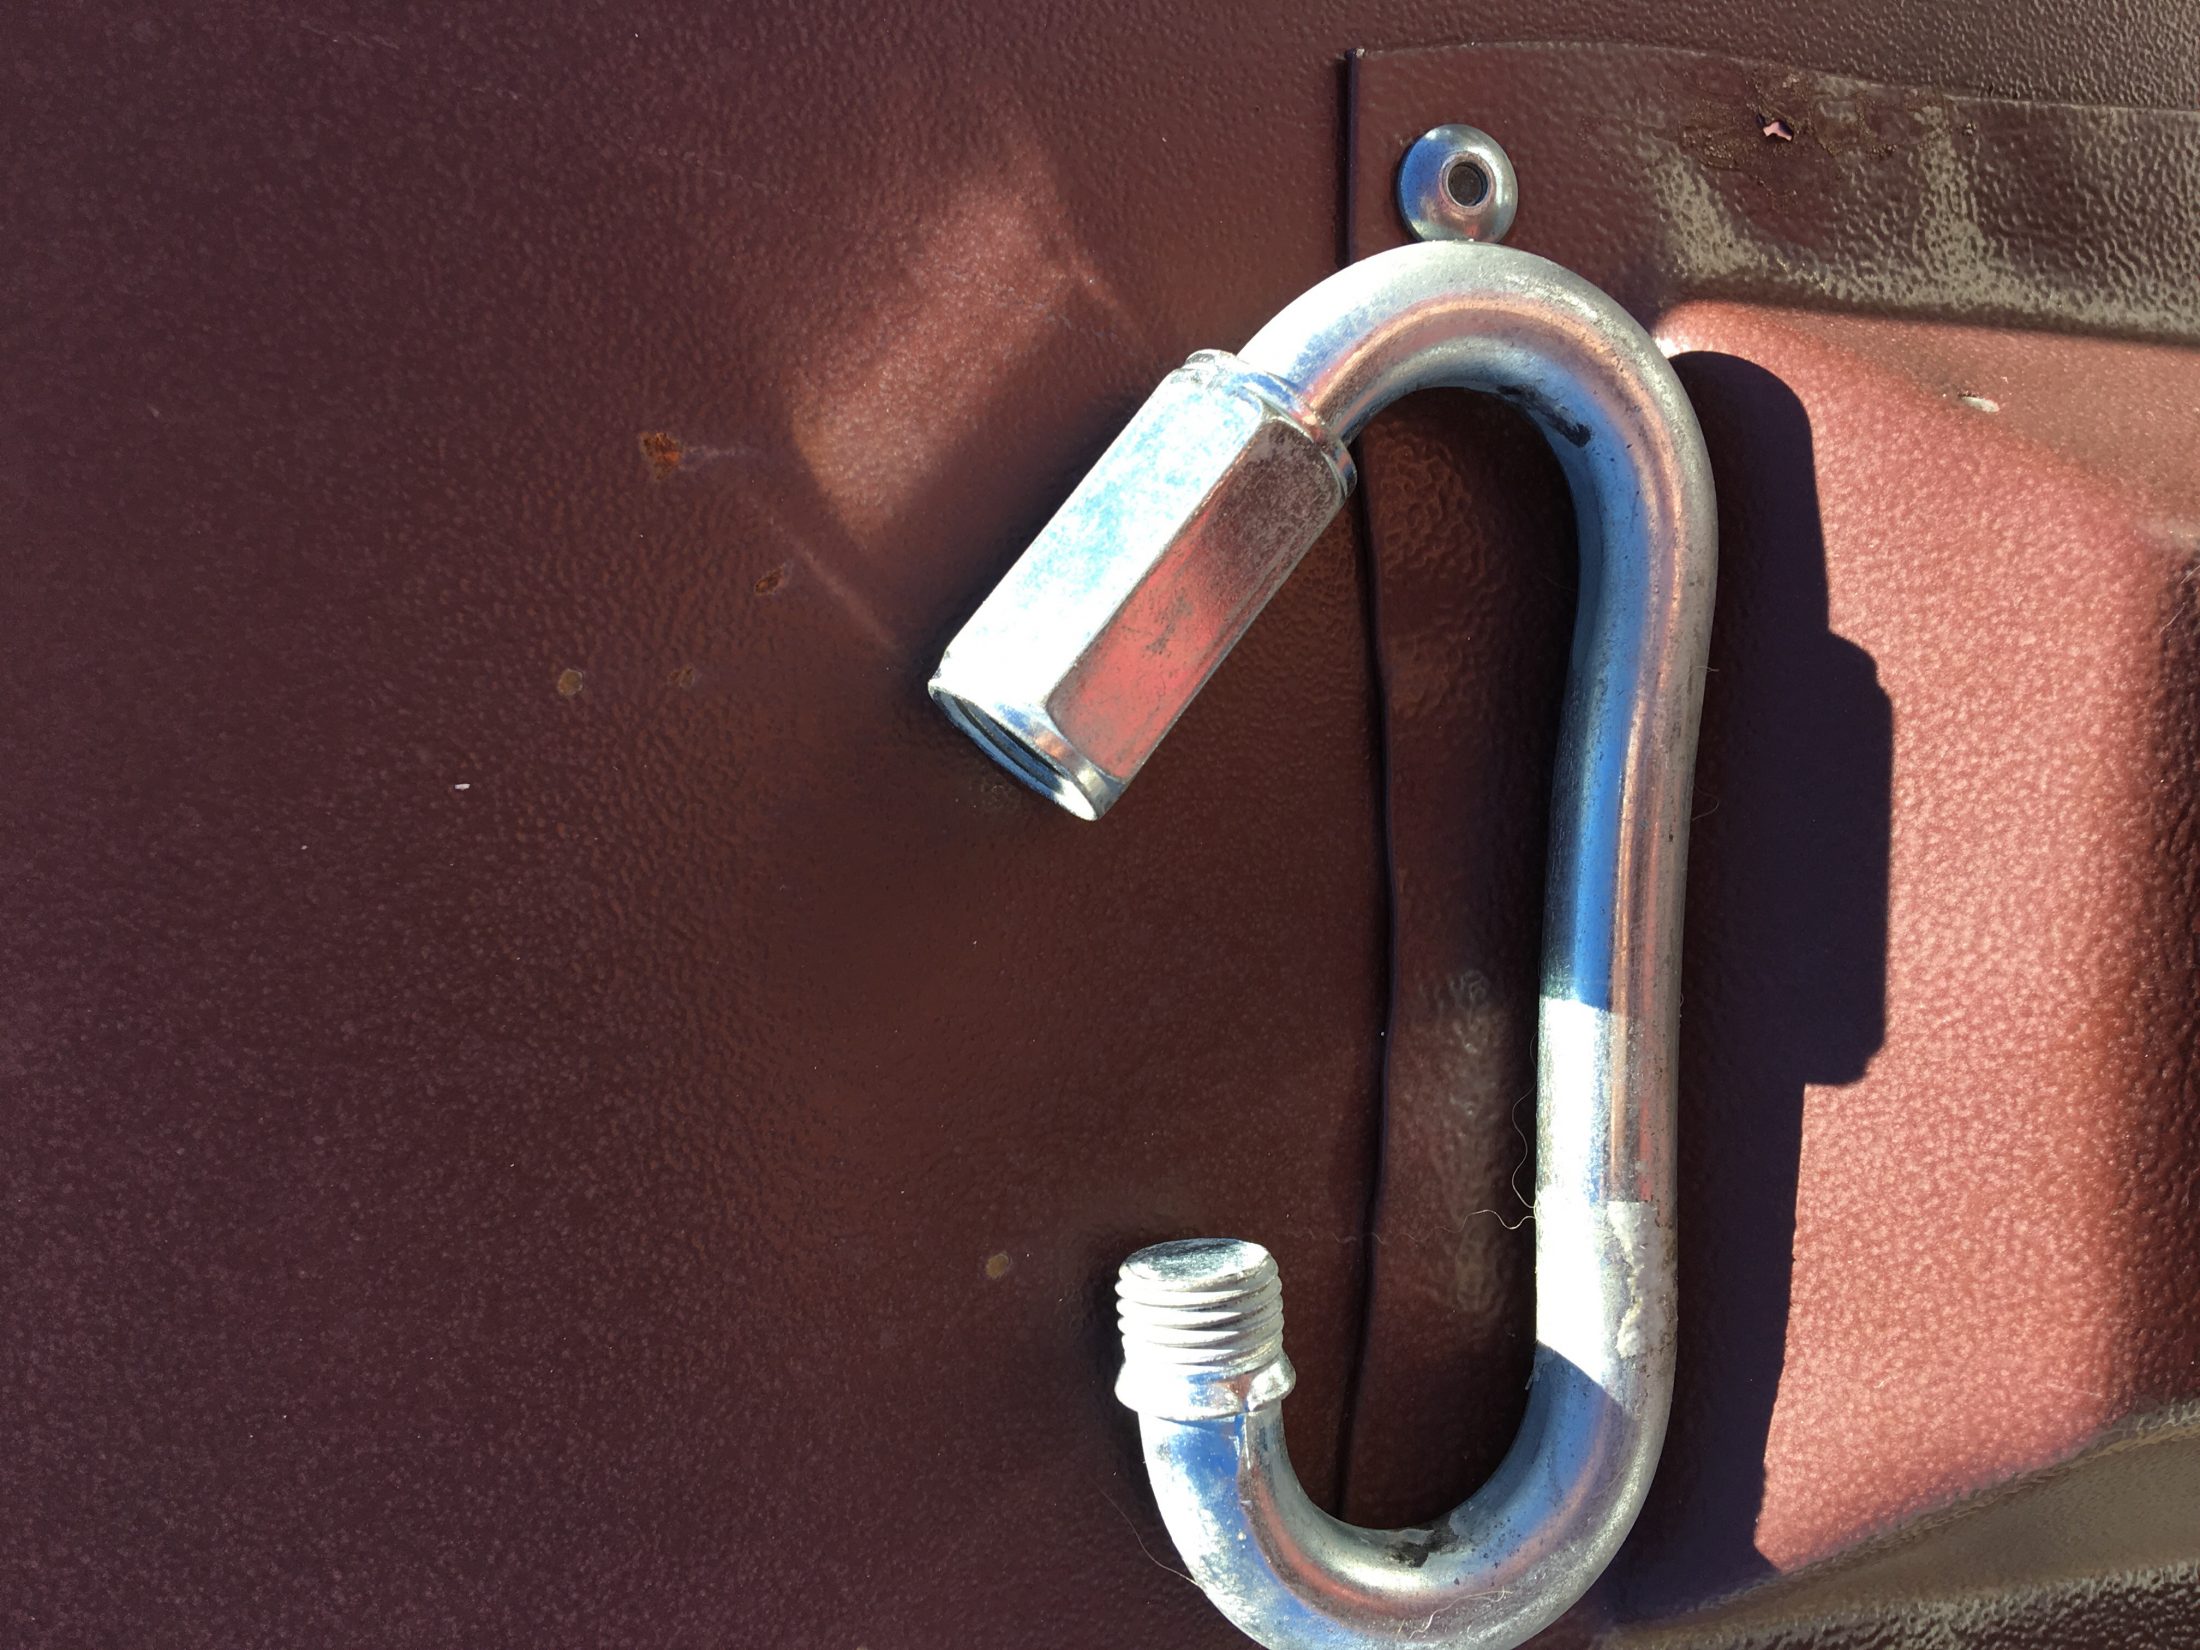
<p style="text-align: left;">Please check your Andersen links for tightness. I found this at the end of a travel day.</p>
2 points
-
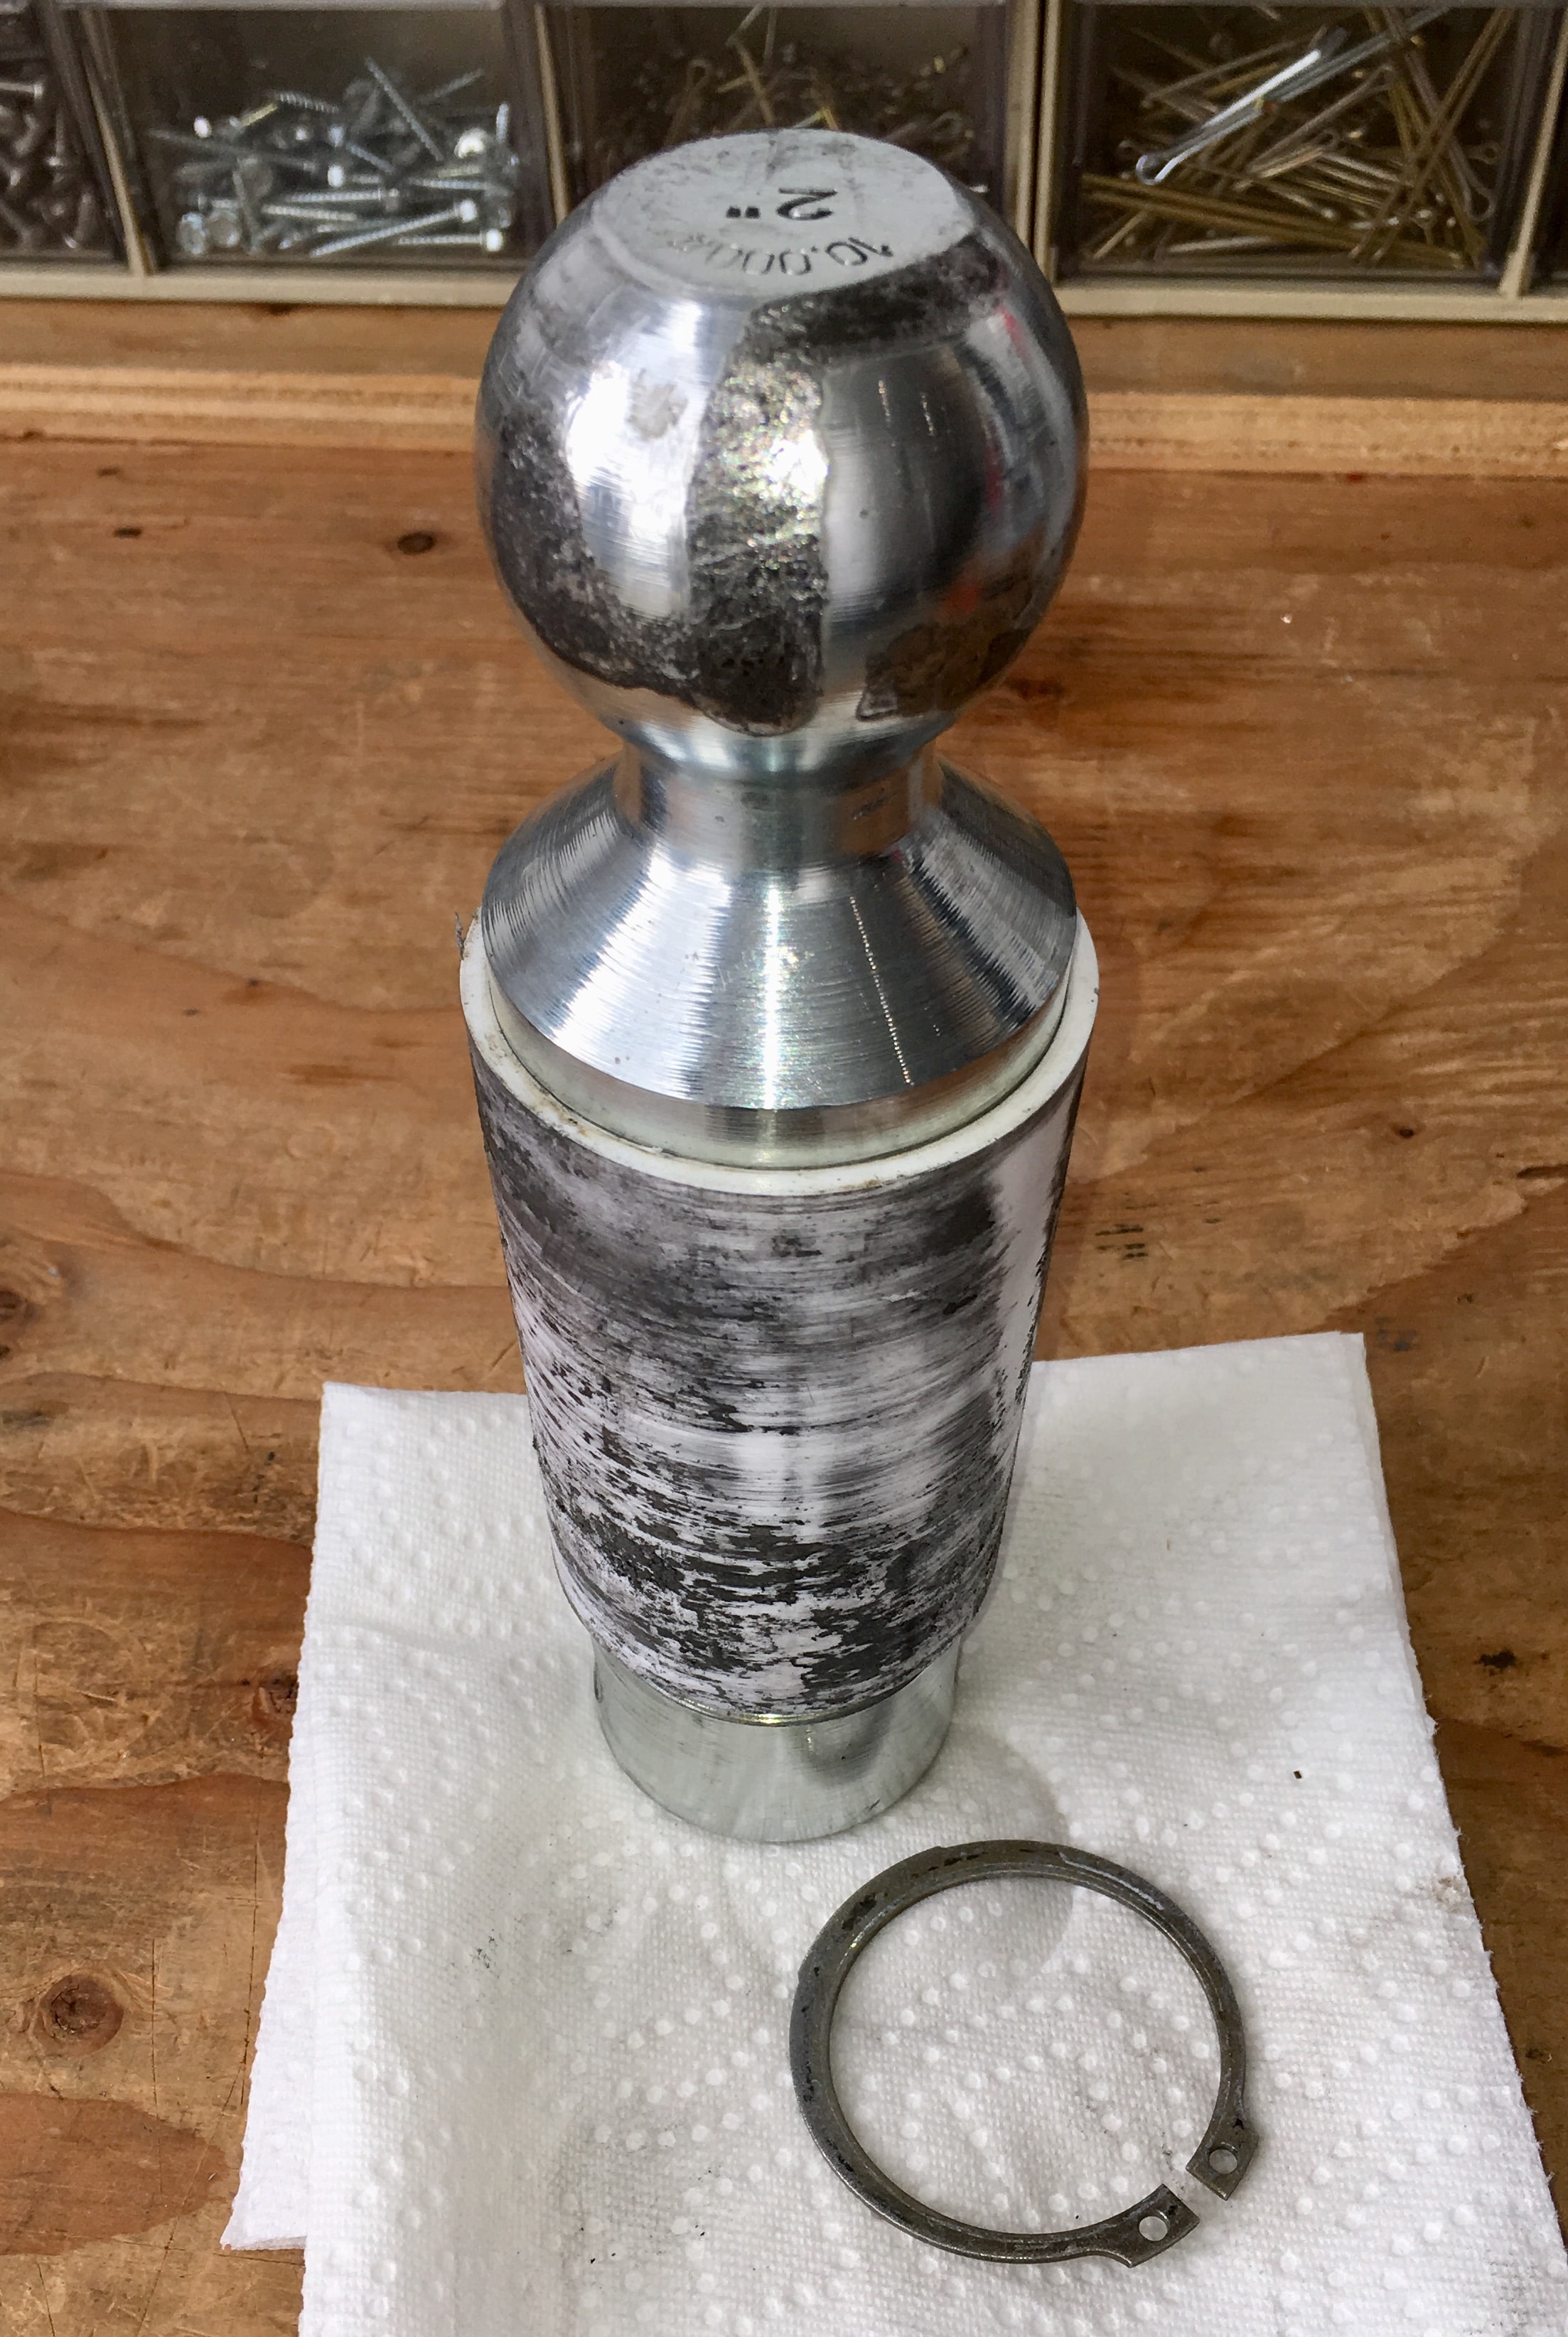
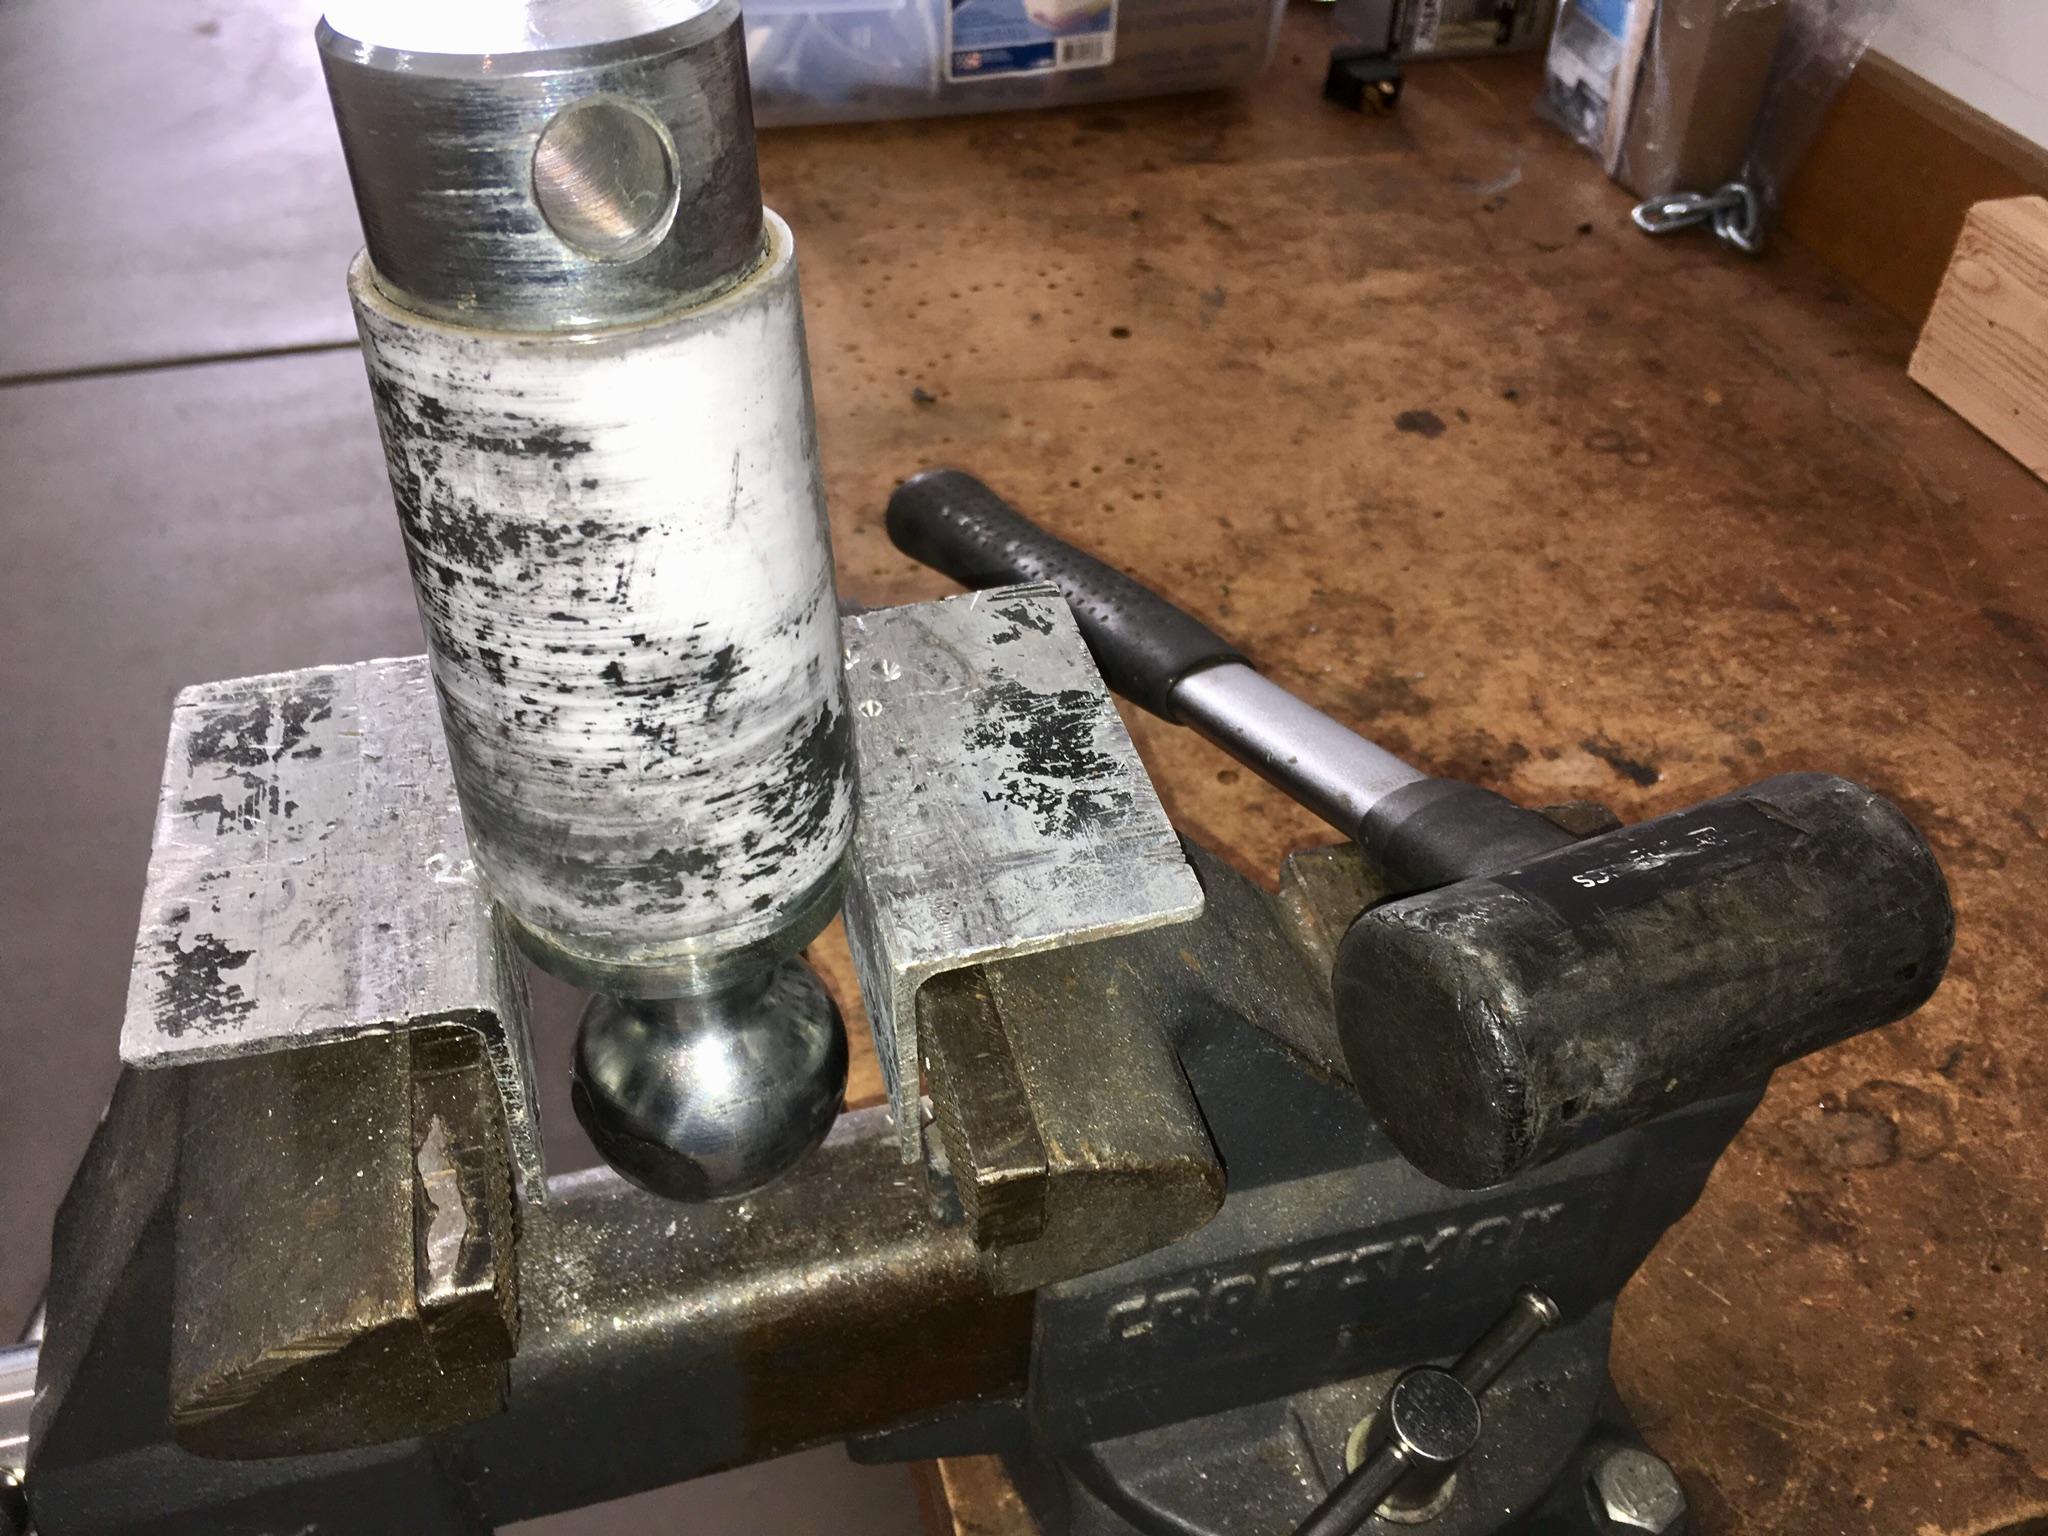
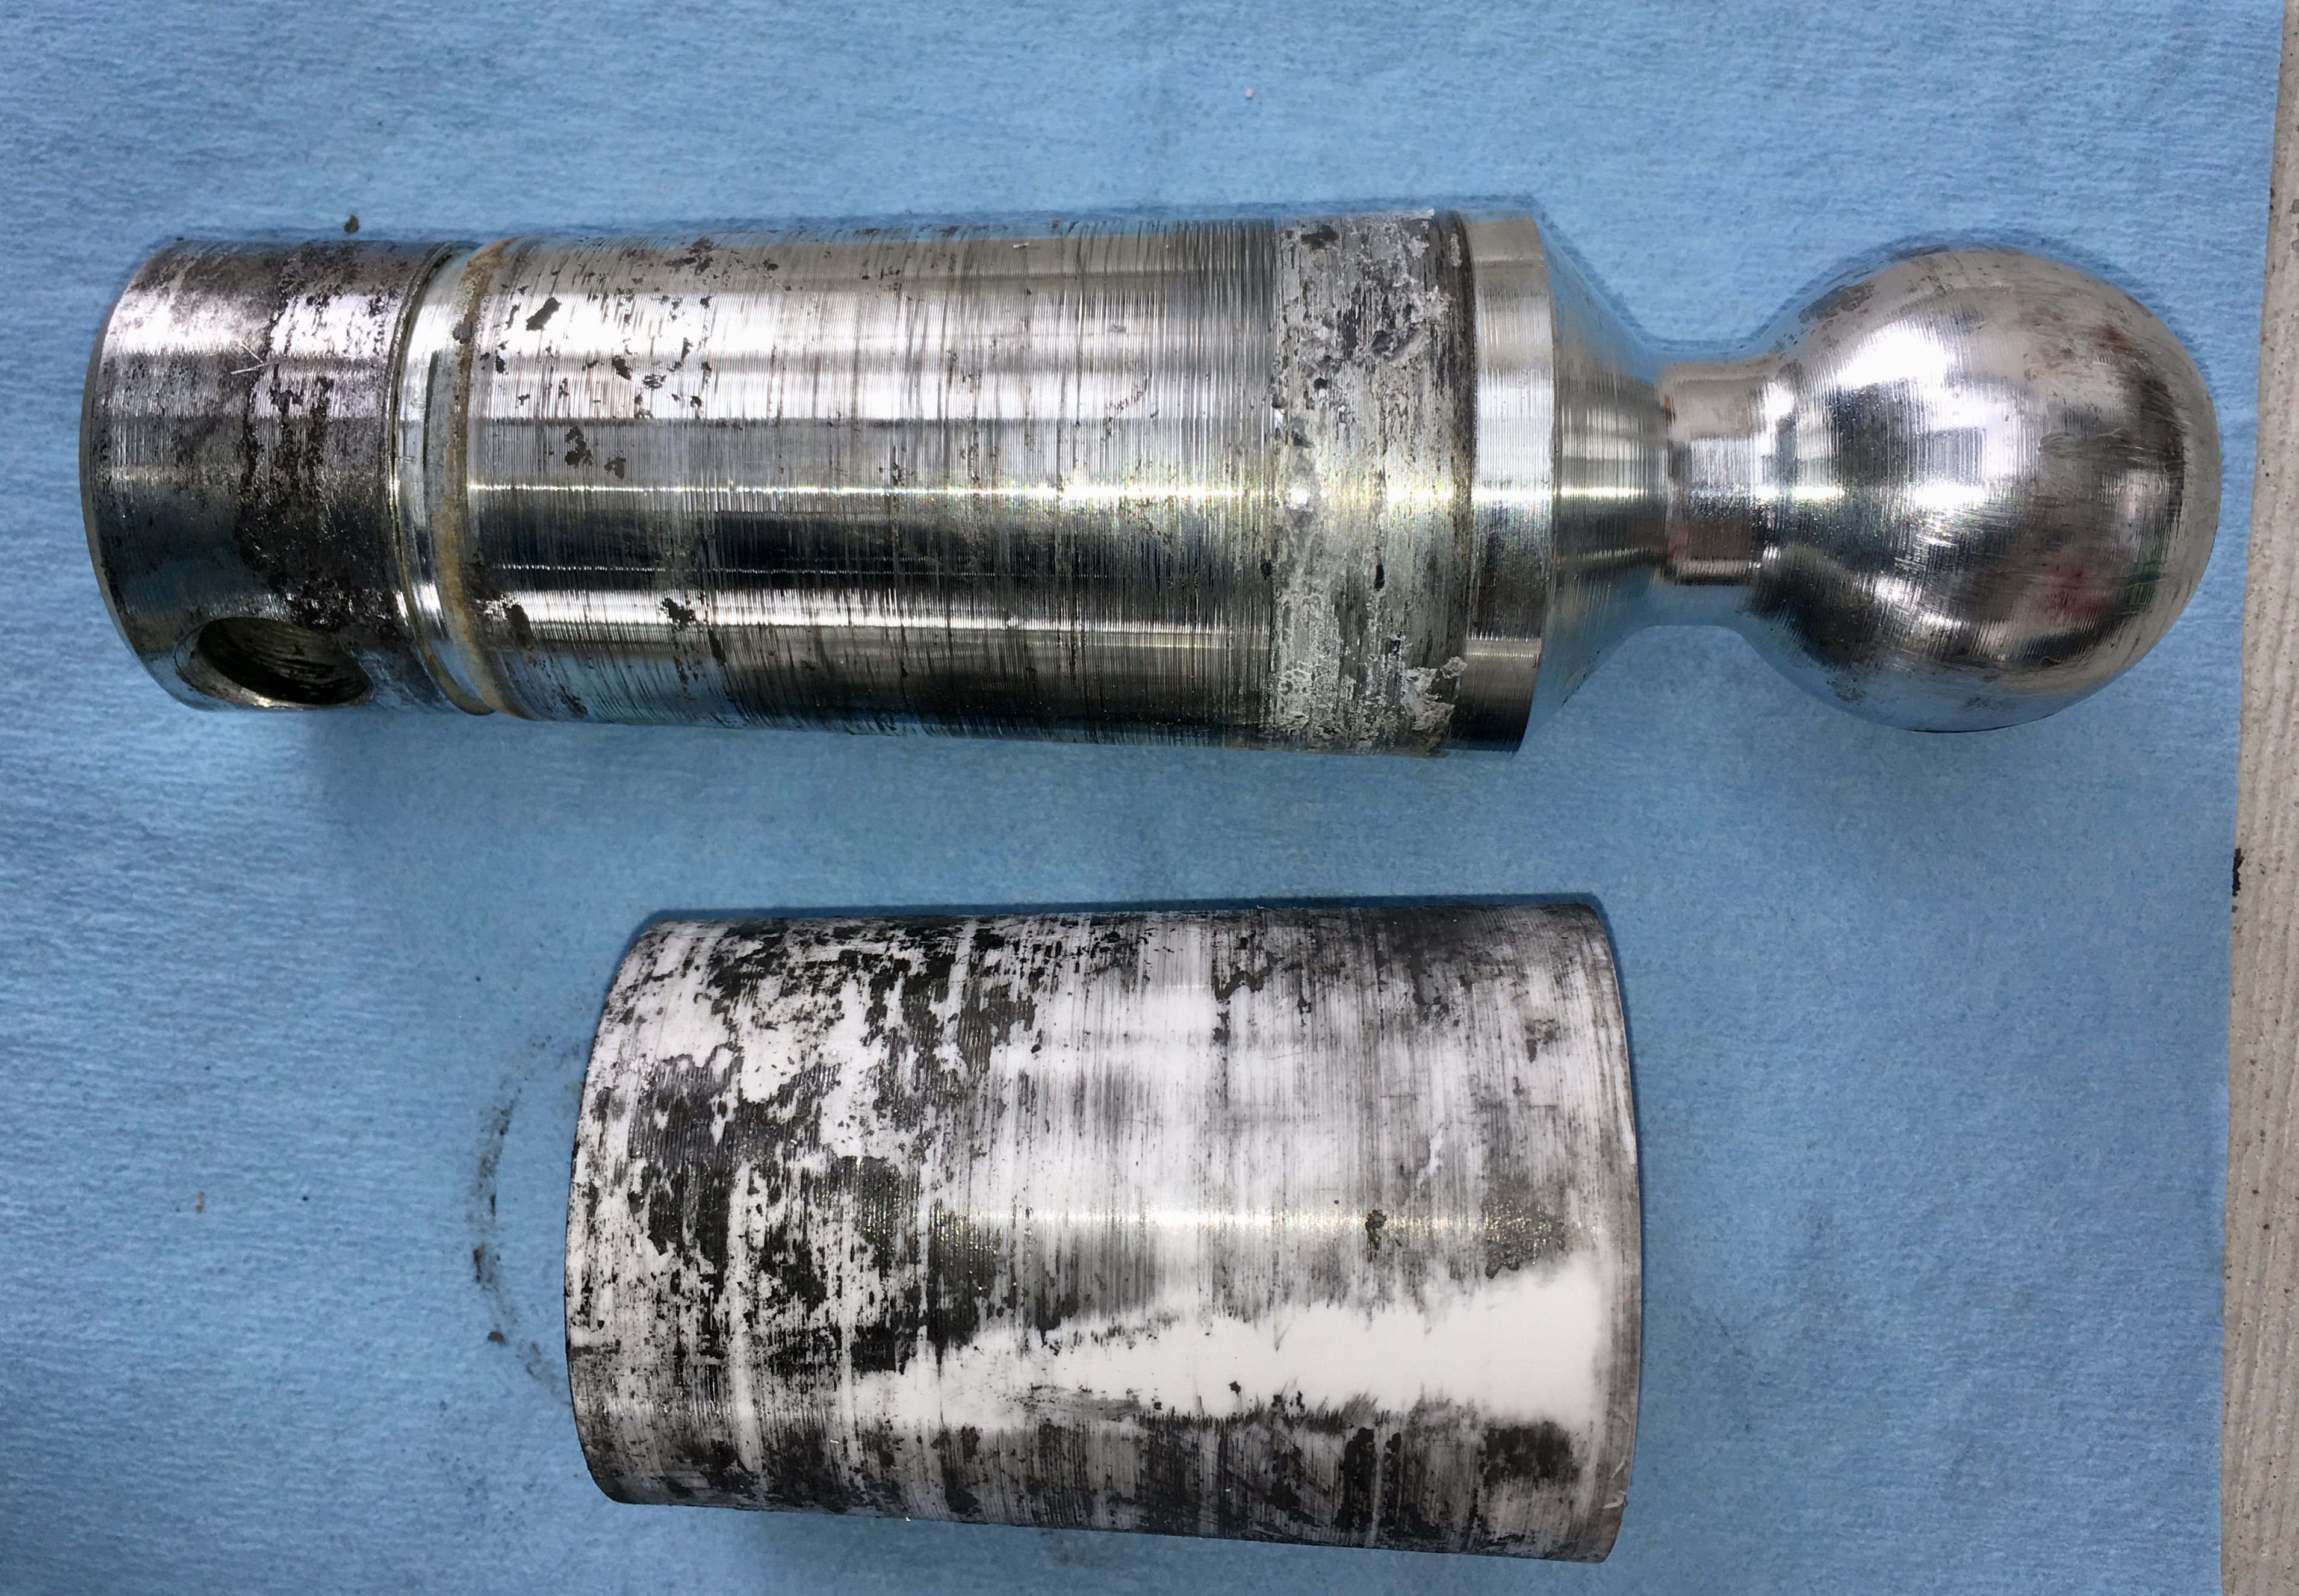
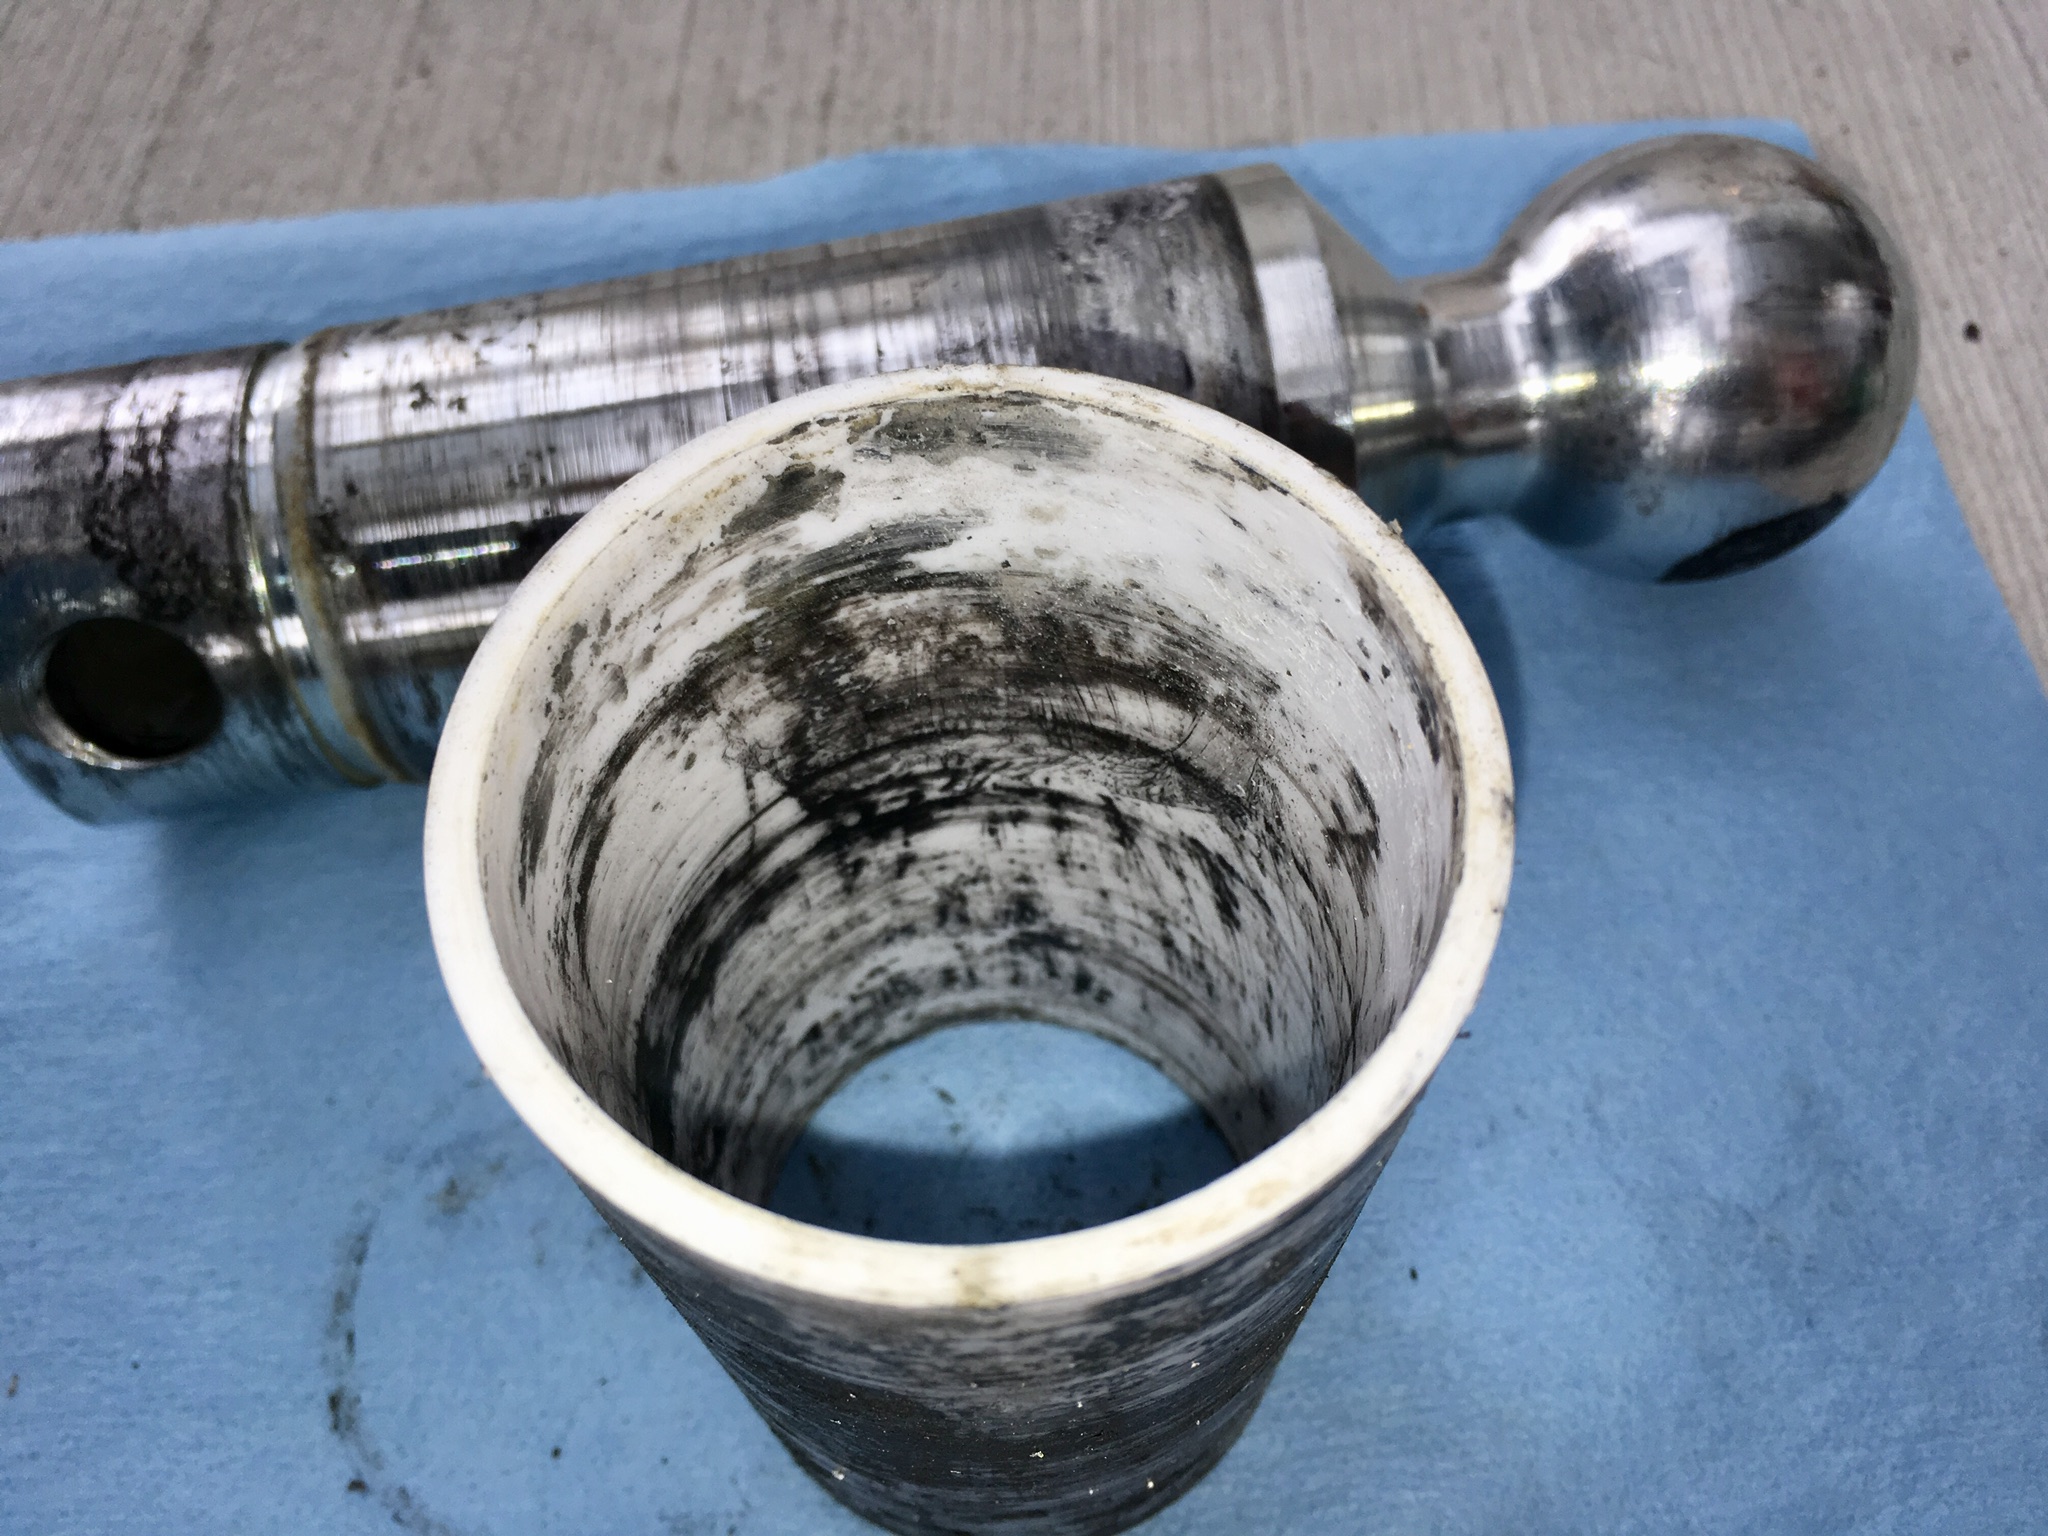
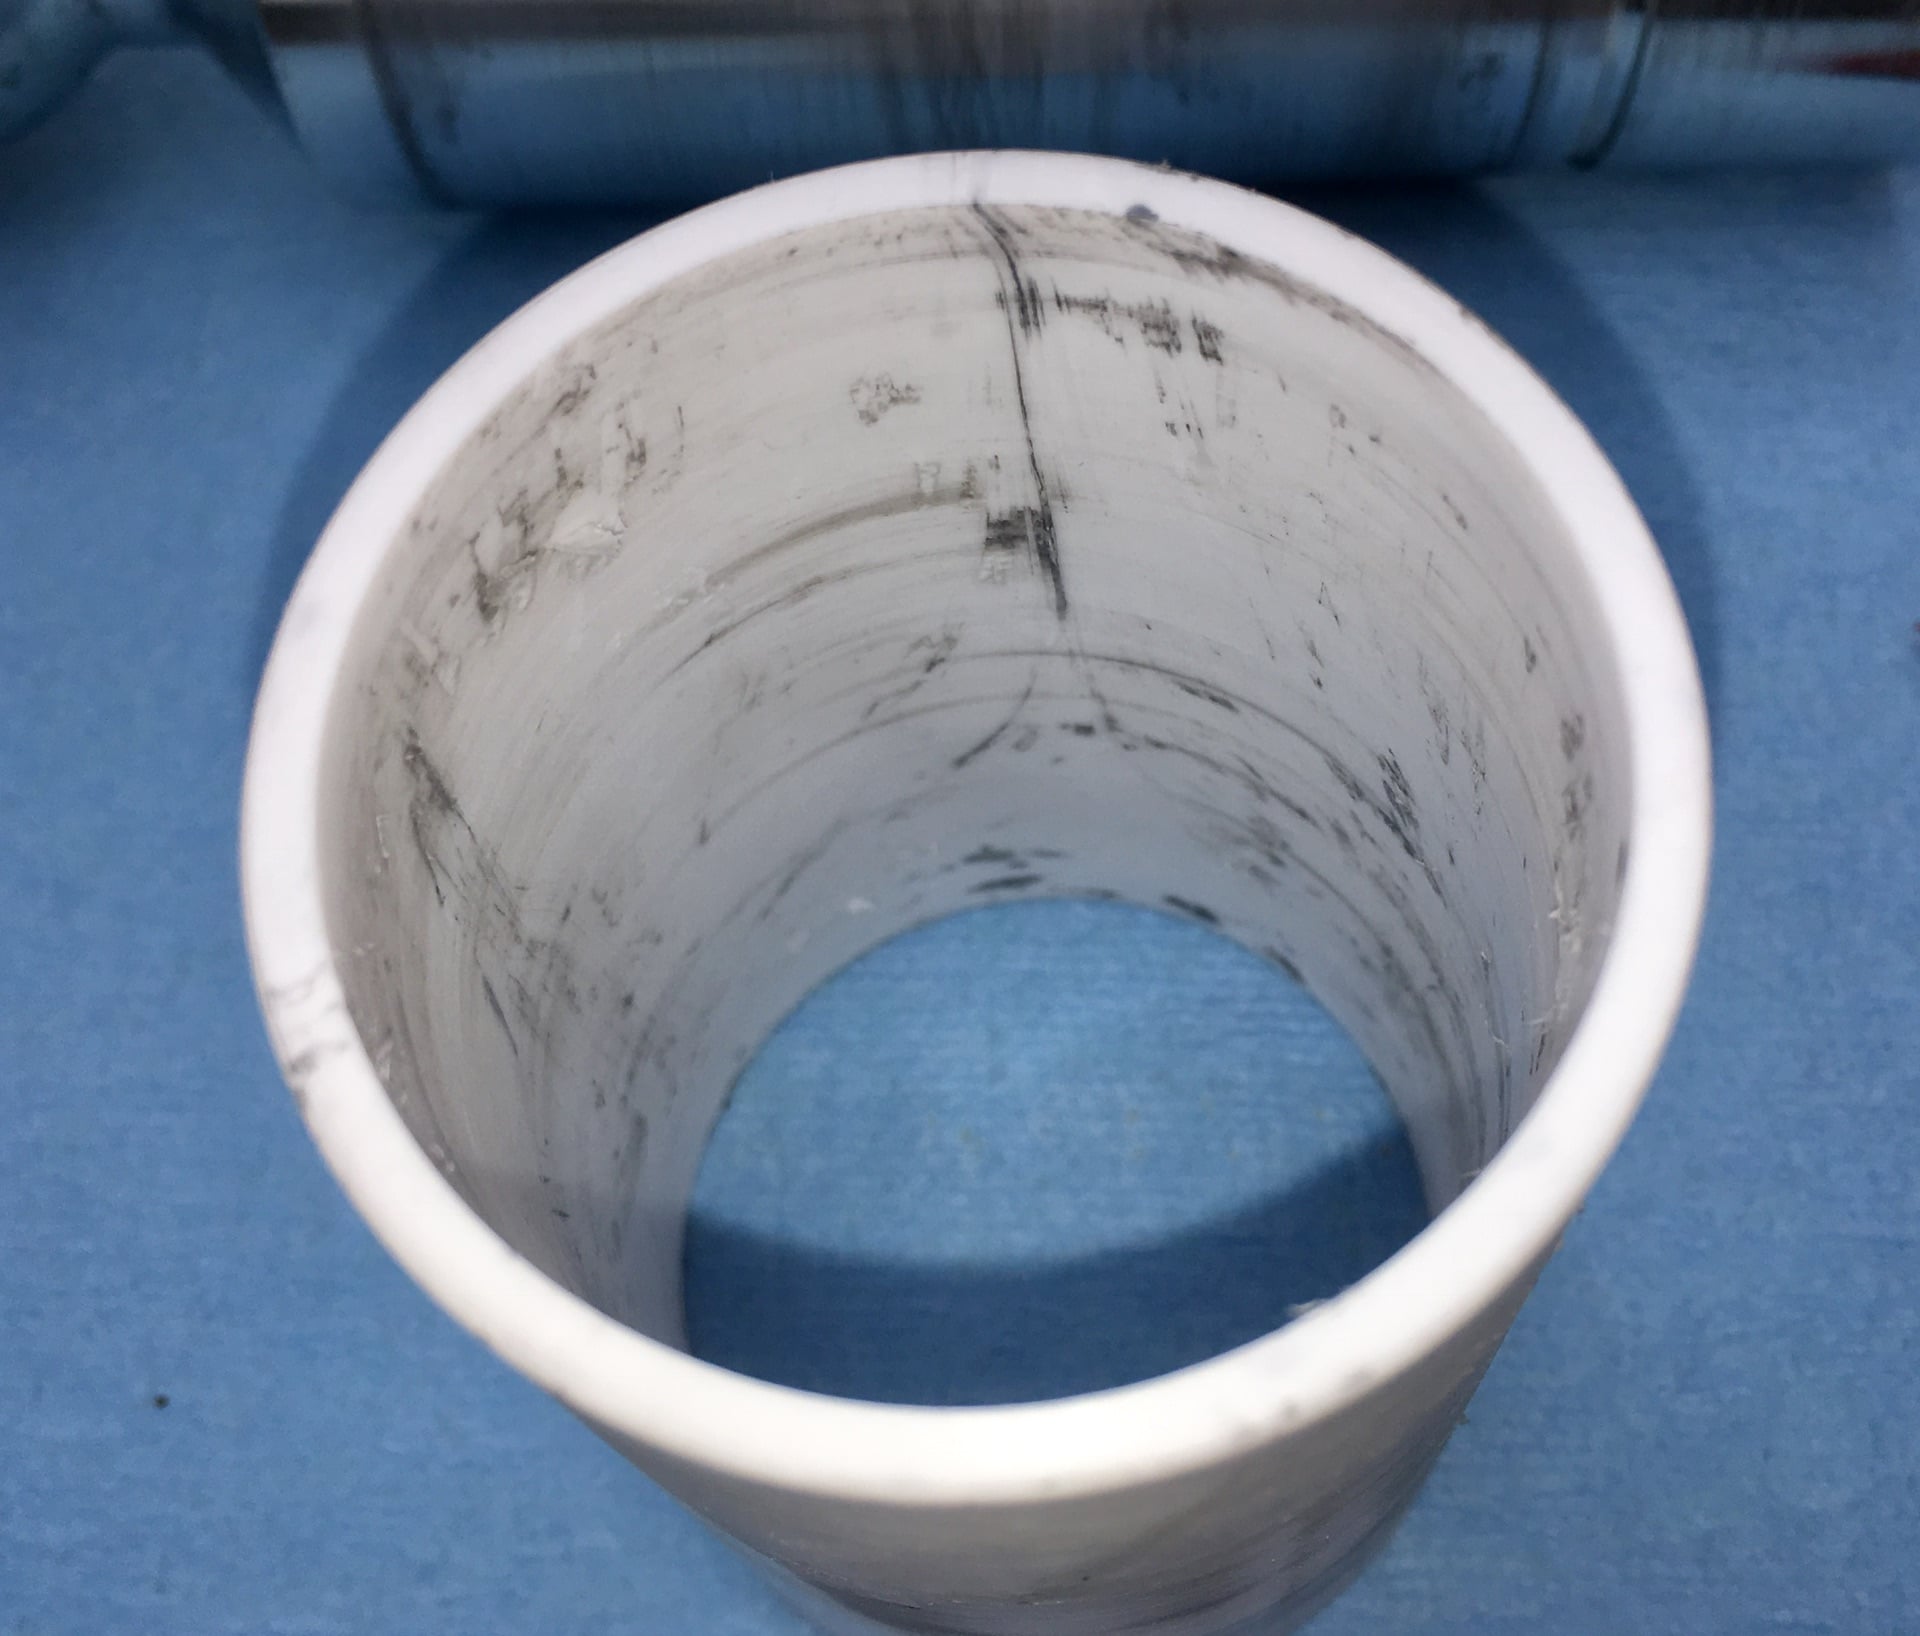
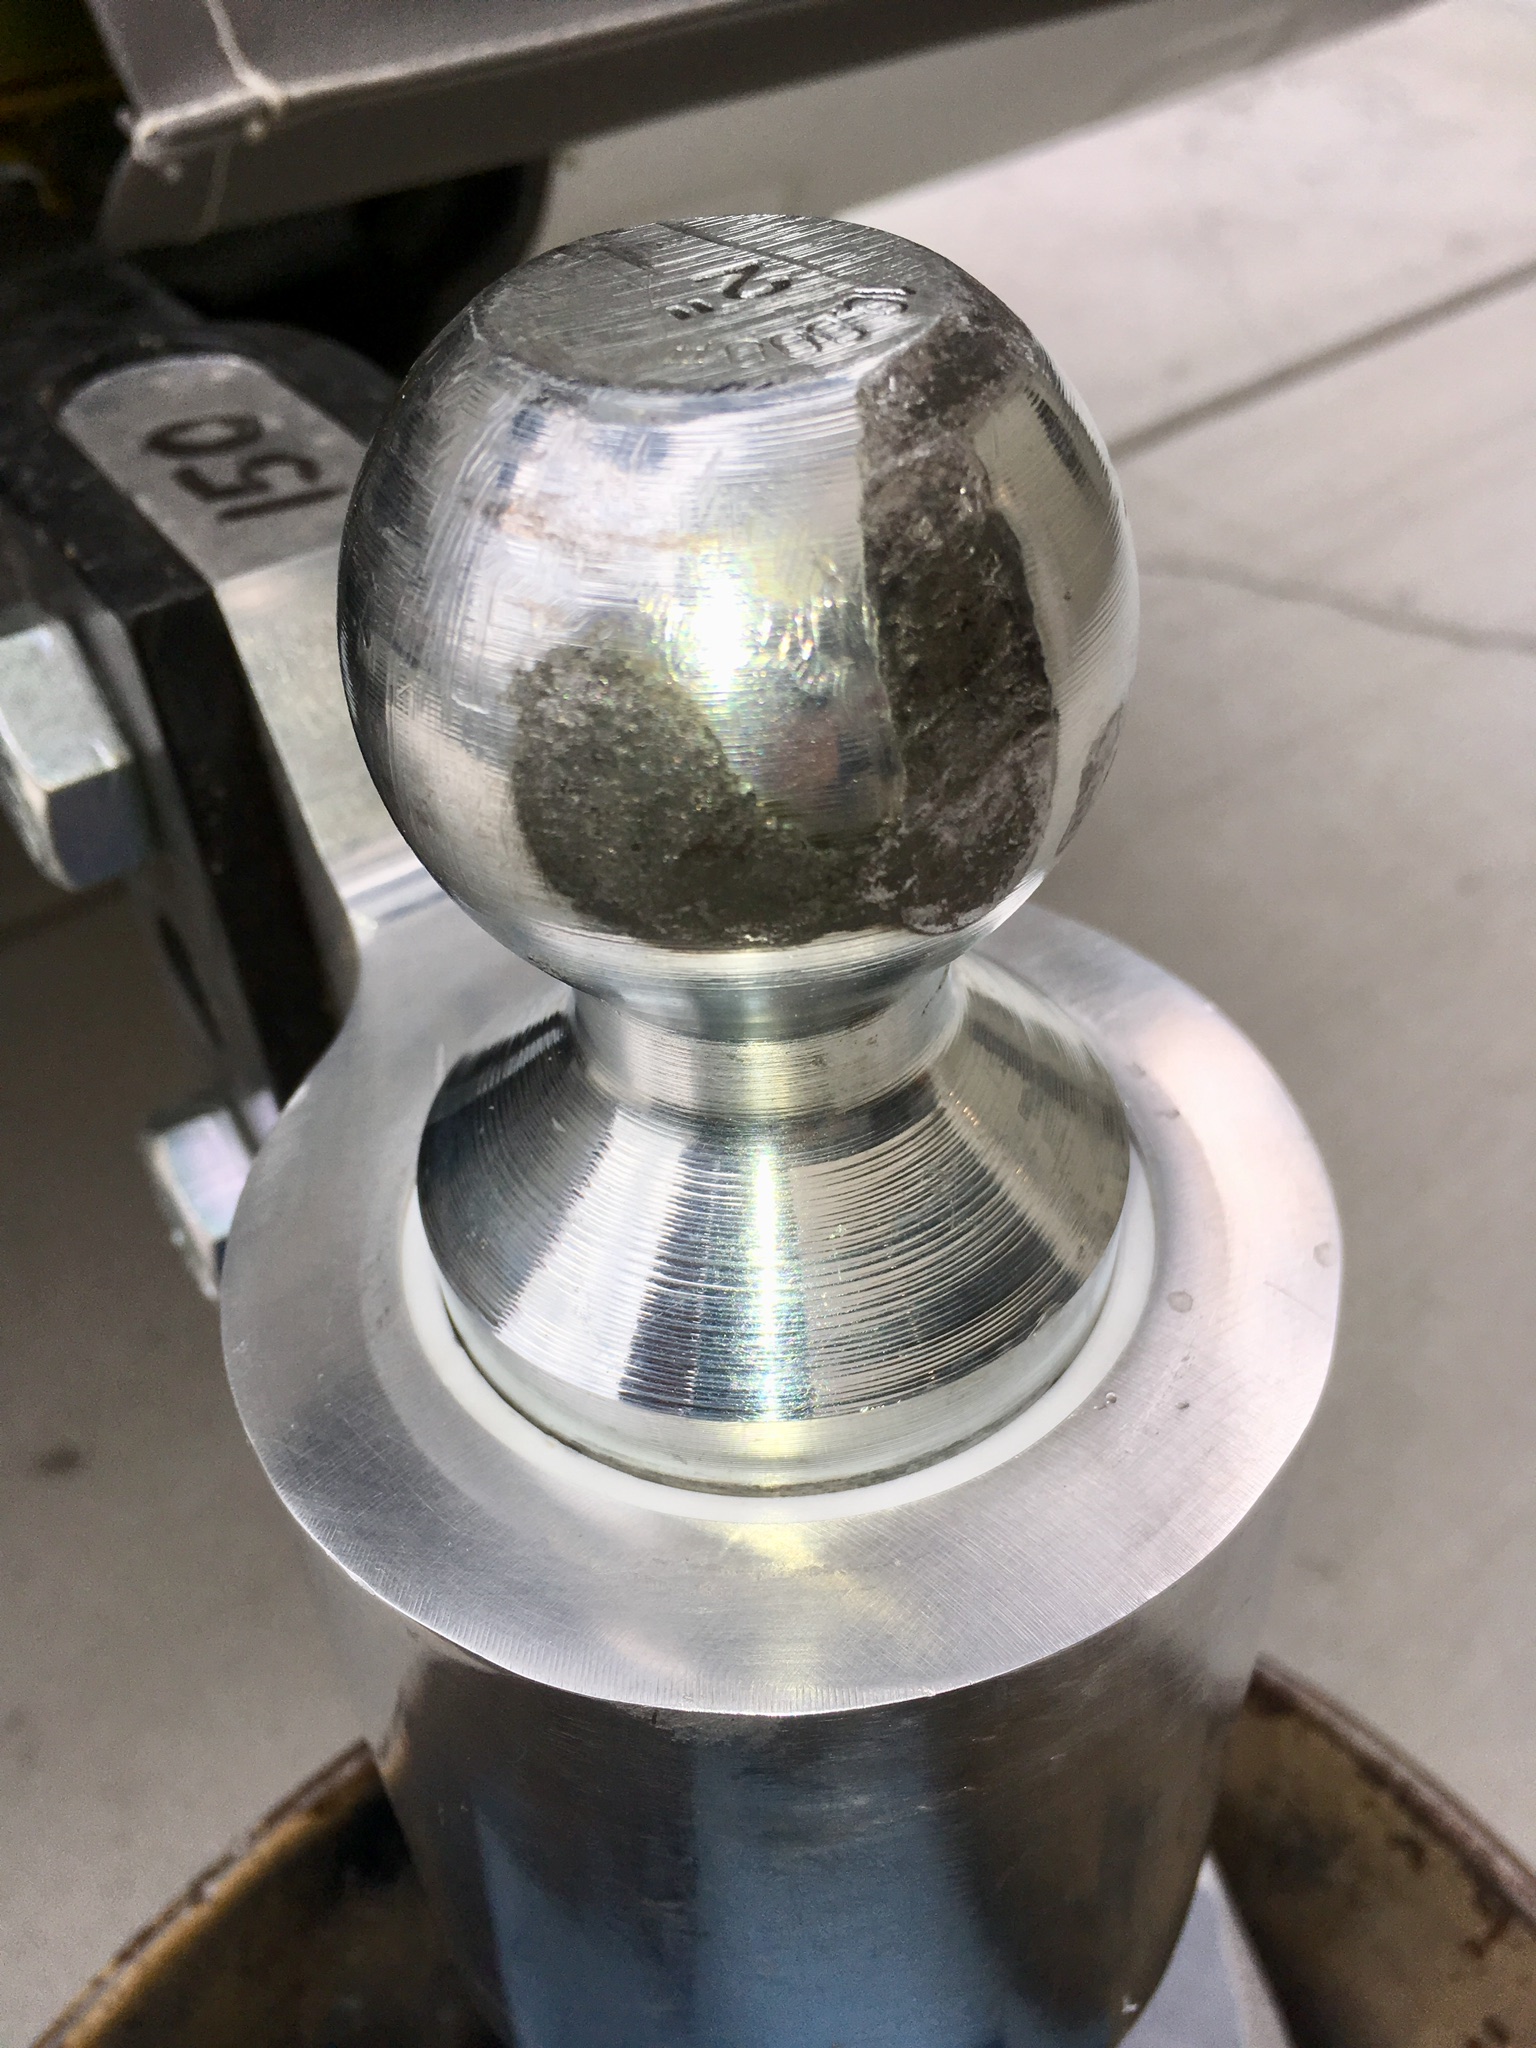
My hitch started to make the dreaded Anderson Groan during sharp turns, an indication that the sleeve was contaminated with grit. The sound first appeared at about 2800 miles since I bought the hitch.you need a pretty heavy duty external snap ring tool to get the bottom ring off. It is strong. Invert the hitch in the receiver, remove the snap ring, whack the bottom of the ball mount. If that doesn’t work you may have to connect to your Ollie and use the jack to raise up the ball, and jump on the mount to free it. Mine popped loose with a single hard blow of my 2 lb dead blow mallet. Separate the sleeve from the ball mount. Upside down in a vise, one whack. Clean parts with a strong solvent and a red scotchbrite pad. I used brake cleaner. There was a lot of nasty crud stuck to all the parts. Don’t forget to clean the inside of the aluminum mount itself. Cracked sleeve. I don’t see how it could fall out, I just reused it. Reassemble dry, install the snap ring. Good to go.... no more ugly noises. I really think that the hitch needs to be sealed from the elements. Moisture won’t hurt it, but grit and dust certainly will. I can see having to do this annually at least. I plan to carry my snap ring pliers on long trips, just in case. Yes the ball is heavily worn, but it is not getting worse. I do plan to eventually replace it and the coupler in the stronger 2 5/16 inch size. This worn ball works ok, except on the rare occasion that I drive over a really steep slow speed dip, the coupler rotates out of the groove on the ball with a loud bang. Disconcerting but fairly harmless, I hope... John Davies Spokane WA
1 point
-
John and Eileen, glad to hear you’re in the final stretch! Hopefully the weather will cooperate in November for your pick up. There should be room at the rally, it’s a great place to meet a lot of fellow Oliver owners. Mike1 point
-
J & E - The park where the annual Owner's Rally is held is quite large. It is highly unlikely that it will be filled. Certainly come join us - it would be a great place for you to learn even more about you new Ollie and get ideas on many other ways to spend even more of your money. Bill1 point
-
Well over a year ago just as soon as Andersen did the re-design. I don't believe that you can even get the old design anymore. Bill1 point
-
I agree with John. I've used links of this type in several applications over the years and have never had one come apart all by itself. Yes, I've had several loosen but they never came apart. However, I do snug mine up with a wrench. Indeed, just one more thing on the check list. Once installed and properly adjusted, these links will probably last the "life" of the system. Perhaps a bit of "blue lock tight" just might be in order for those threads. Glad that nothing was really damaged (other than the link itself). Bill1 point
-
That looks to me as if it was tampered with. If it unscrewed by itself, which normally cannot happen, the last few threads would be stripped out where the metal there failed. Your threads are completely undamaged! These links are pretty foolproof, but I prefer to use a wrench to snug them down. This helps if somebody tries to mess with it. Sabotage to your hitch is not unheard of. It is prudent to check your hitch pin, coupler and chains (as well as do a quick walkaround of the trailer) every time you approach your vehicle, especially if it was parked out of sight for a while. Did you see any other damage due to the failed link? I am having a real hard time believing that it did that to itself. Scary.... OTH they do have a load limit, a common 3/8” one from the hardware store has a working limit of about 2200 to 2600 pounds. I don’t know what the fail limit is. I use these but I half expect to strip mine out one day when I go through a really severe dip, the kind that tries to lift the rear wheels of the TV off the ground. That really loads the chains beyond their normal limits. When tensioned on level ground the chains have around 2000 pounds tension, each. I would rather rip out a couple of links than wreck a more expensive part of the system. It is always good to make the weakest part of the system - the “fuse” - easy to swap and inexpensive to purchase.... Do you carry a couple of spares? John Davies Spokane WA1 point
-
Laws vary hugely from state to state. If you live in a restrictive one like mine, and if you plan to travel with your bike, you need to know where you can legally ride it. Three-Tiered E-Bike Classification System Ten states (Arizona, Arkansas, California, Colorado, Connecticut, Illinois, Michigan, Tennessee, Utah and Washington) have created a three-tiered e-bike classification system intended to differentiate between models with varying speed capabilities. The ten states have almost identical defining language for e-bikes, as well as similar safety and operation requirements: Class 1 electric bicycle A bicycle equipped with a motor that provides assistance only when the rider is pedaling, and that ceases to provide assistance when the bicycle reaches the speed of 20 miles per hour. Class 2 electric bicycle A bicycle equipped with a motor that may be used exclusively to propel the bicycle, and that is not capable of providing assistance when the bicycle reaches the speed of 20 miles per hour. Class 3 electric bicycle A bicycle equipped with a motor that provides assistance only when the rider is pedaling, and that ceases to provide assistance when the bicycle reaches the speed of 28 miles per hour and is equipped with a speedometer. Any device outside of these definitions is not considered a low-speed electric bicycle that would be regulated as a bicycle. These ten states that allow bikes on trails "usually" limit them to Class 1, but communities can set their own more restrictive rules! Always check and watch for local signage! Lots of info here: ... http://www.ncsl.org/research/transportation/state-electric-bicycle-laws-a-legislative-primer.aspx Also, there are utility brands, which are designed as commuters or workhorses, and there are recreational brands that have lighter bikes that emphasize performance and fun over utility. The better ones feel just like a regular bike, but with magic power added to your legs. Which type you get depends on your personal desires and needs, but be aware of the major differences when shopping. Some high end and/ or very powerful models are not legal to ride anywhere but off-road or on private property, unless you get them registered as a moped. OTH some of them like the Optibike are available "detuned" with software that limits their power and reduces the top speed... but any time you ride an 'exotic" model (untraditional styling) on pedestrian/ bike paths, you run the risk of getting stopped and questioned, and possible ticketed. In this situation a stealth bike that looks like a regular pedal bike would be a better choice. Riding this bike would not get you any bad looks from a cop unless you were speeding on a path through foot traffic; [attachment file=Trek Domain+.jpg] John Davies Spokane WA
1 point
-
The Trek Verve + has hydraulic activated disk brakes, but they do not feed back energy into the battery pack. Turning the battery on and off or selecting the amount of assist is managed through an easy to use, integrated controller on the left handlebar. Changing the level of assist is done by pressing on a + or - sign with your left thumb, which can be done on the fly. Trek uses a Bosch controller, battery, and motor. You can see the low center placement of the battery. The assist motor is located between the peddles, putting the extra weight low and centrally located, making the bike more stable.1 point
-
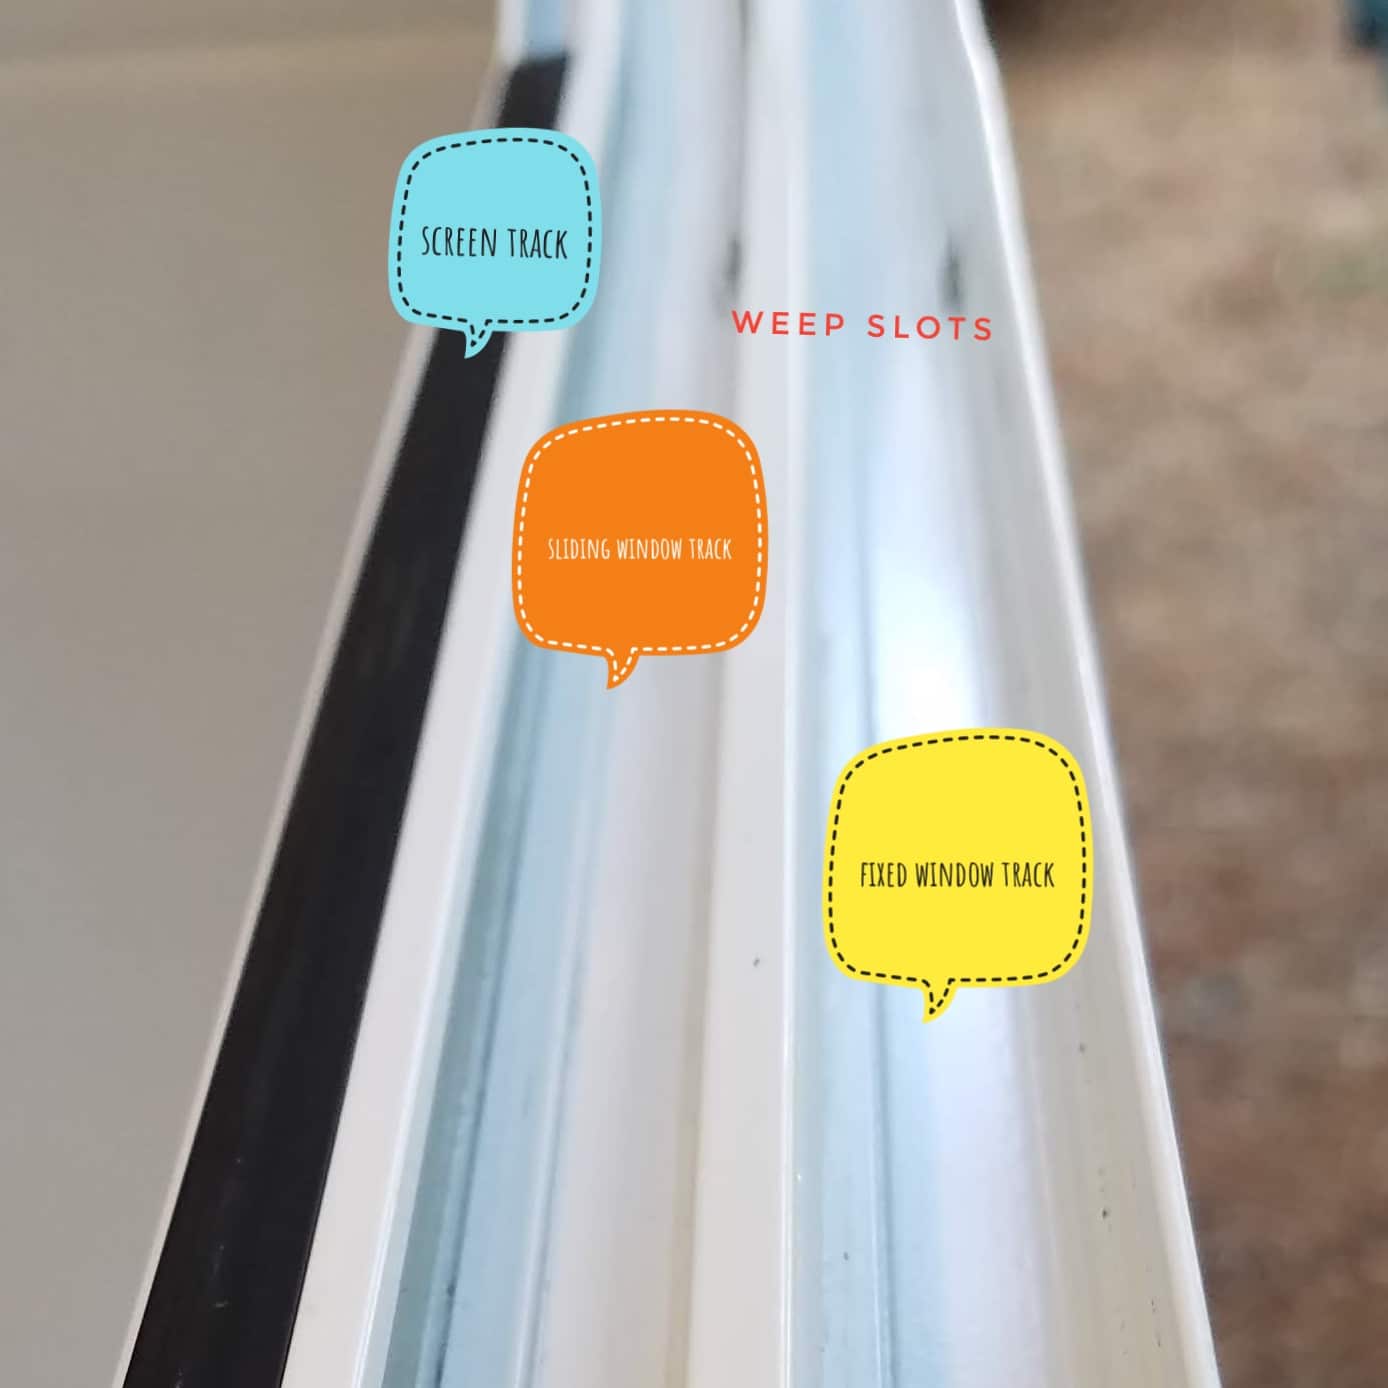
I wanted to offer a few suggestions for removing the window seals and tracks. Please read the entire message first as my writing style is a little disjointed. And if you think it tough to read, you should be grateful you don’t have to think like this.? First off, only do this if you feel you can’t clean the tracks and drain slots with brushes, vacuums and compressed air. It takes me about 30 minutes to remove and replace the seals, minus the drying time for the seals. Removing the outside seal for the fixed glass track is pretty simple, I used a metal pick to raise the seal enough to grab it by hand and then pulled it out. The sliding glass track has a different seal that is actually 5 individual pieces. Without looking closely you would think that it is all one piece. The top and bottom horizontal pieces are straight and run the length of the track. The curved corners are two separate pieces with a short straight vertical piece between them. My trial and error procedure is to remove the window shade assembly first and then the screen. The screen has spring clips on the top. Slide the screen open enough to grab it on both sides and push up while pulling the bottom out. With the screen out, remove the sliding window rubber stop. I think a piece of masking tape on the window frame will prevent the sliding window from scratching the frame with window stop removed. Wish I had thought about that before scratching my frame. Working from the outside, remove the outside seal. Next remove the short vertical seal between the curved corner pieces in the sliding window track using something like the pick and a butter knife. The seal is U shaped and it is necessary to fold either of the side portions into the middle and then carefully remove the entire piece. Removing the short vertical piece first will allow you to slide the bottom corner piece upward into the space created by removing the short vertical seal. Do not remove the corner pieces as the are very fragile due the the cuts is the sides which allow the seal to fit the round corners. Now begin removing the long bottom seal by folding both sides in and lifting it out of the track an inch or so at a time. After you get about half of it out you can begin sliding it out from under the window. Now you can clean the seals, tracks and slots by which ever method you prefer. Allow the seals to dry if you cleaned them with soap and water. I treat mine with 303 protectant before reinstalling them. If you are any questions, please ask and I’ll provide any help I can. Mike1 point
-
Missing pictures from original posting. I hope?
1 point


-
Recent Achievements
-
")


")


")


