Leaderboard


Popular Content
Showing content with the highest reputation on 05/11/2020 in Posts
-
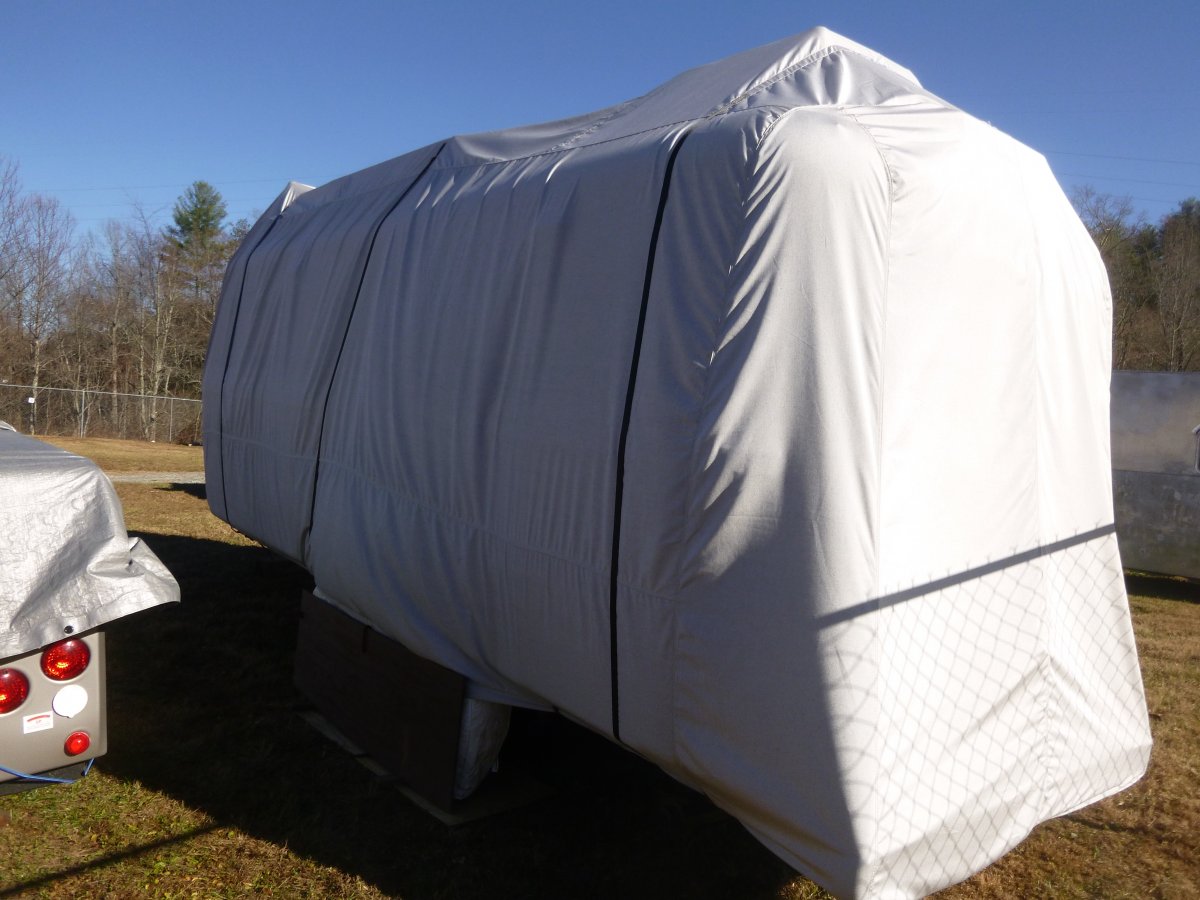
Just before changing into my workout cloths and going downstairs to the home gym, some guy has to mention "weighing in" - bummer. However,with reference to the CalMark covers - just type Calmark into the search box at the top right of this page and have fun reading. And, there are even pics in some of those posts. I've used both CalMark and Adco covers over the years and firmly believe that the CalMark's are better. Both are made from the same "Sunbrella" material but the CalMark has three webbing straps that completely go around the Oliver (front, middle and rear) and it has both a cinch rope in the bottom hem and grommets in the bottom hem that the Adco doesn't have. Both companies have the measurements for the Oliver LEII (they probably have it for the LEI also). Both have an access door so you can get into the Ollie without taking the cover off. Bill
 2 points
 -
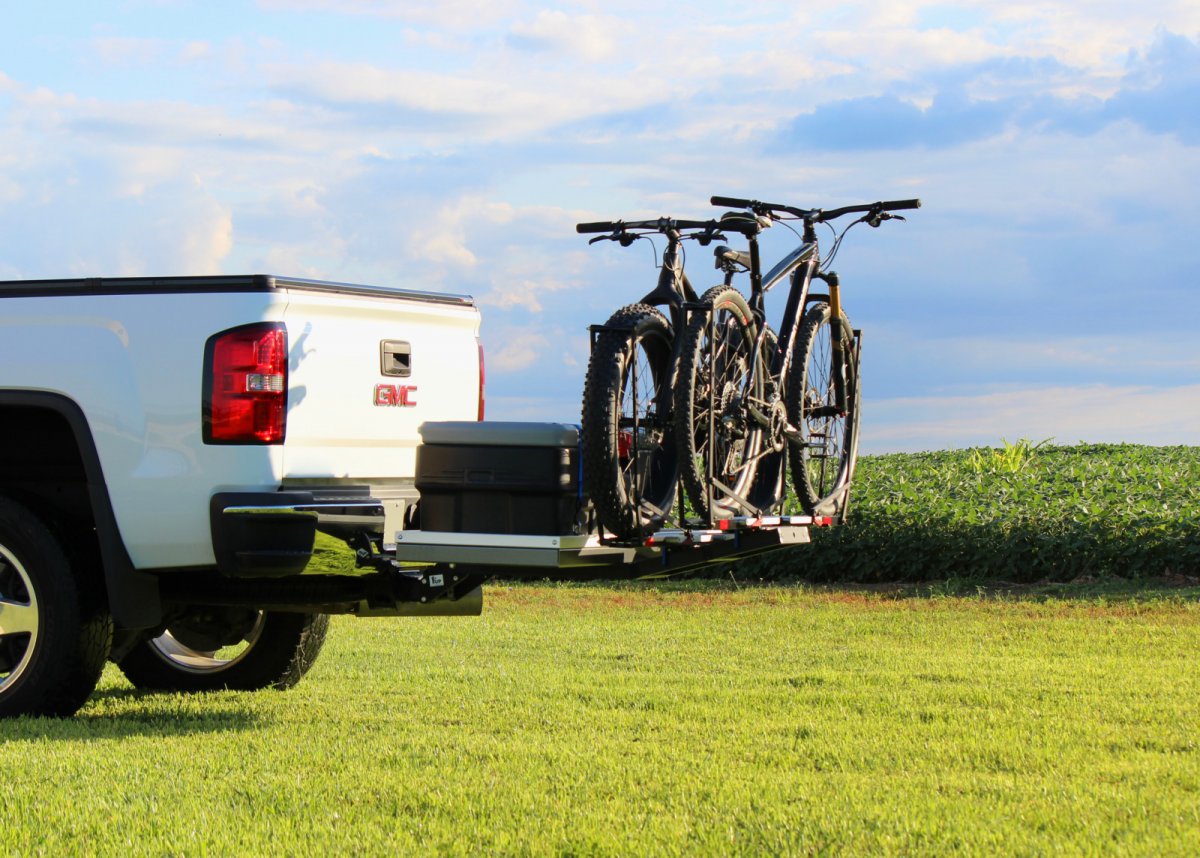
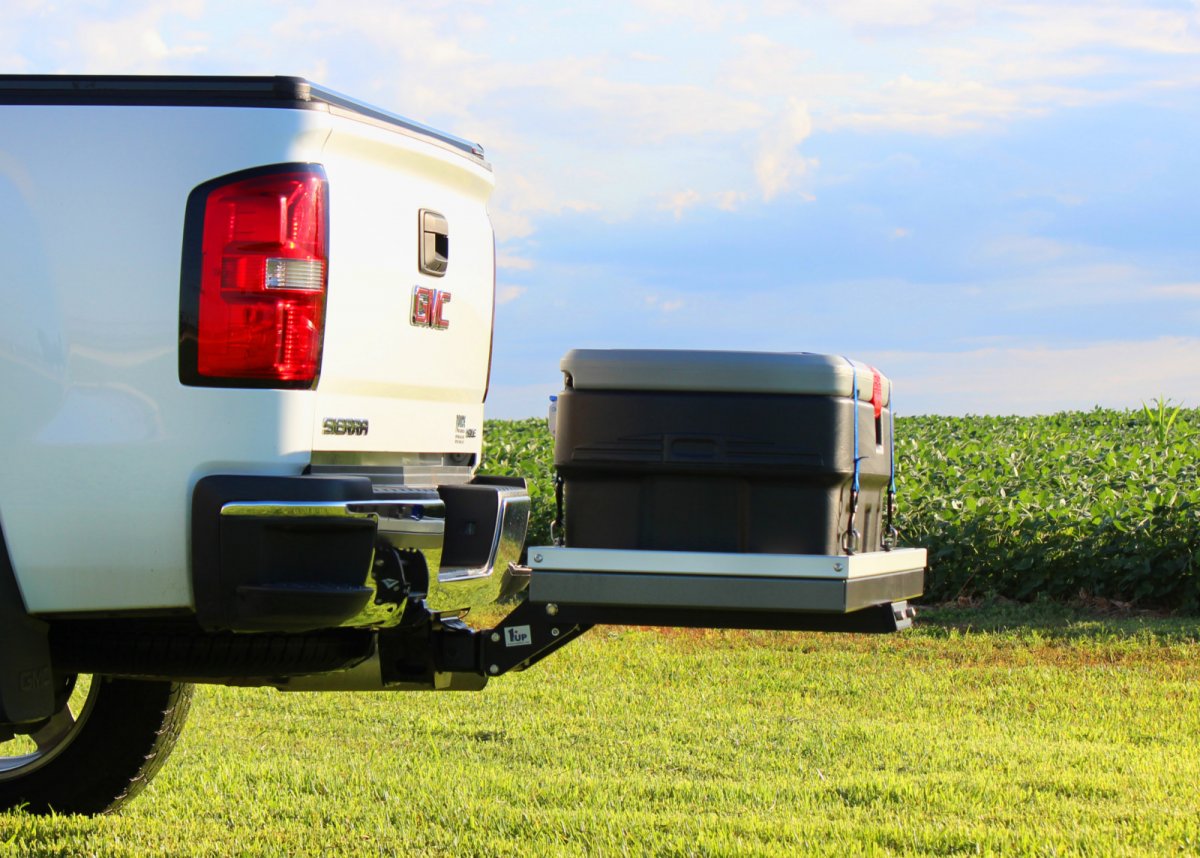
We have a cheapy Chinese one that we used when tent camping before we got our Ollie. It wasn't the highest quality thing I've ever owned, but honestly, it did it's job and seems none the worse for wear after three or four years of use. Apart from the aluminum tube, I can't say that it looks much different to the one pictured above. I think that if I were going to spend real money on a hitch carrier, I'd probably go for the one that 1up sells. I've never seen it in person, but if it's anything like the quality of their bike racks, then it's probably worth the $500 bucks they want for it. Plus you can fold it up out of the way when not in use and can attach one of their bike racks to it. And for just $20 more you can get a 60" version, which seems like the better deal.
2 points
-
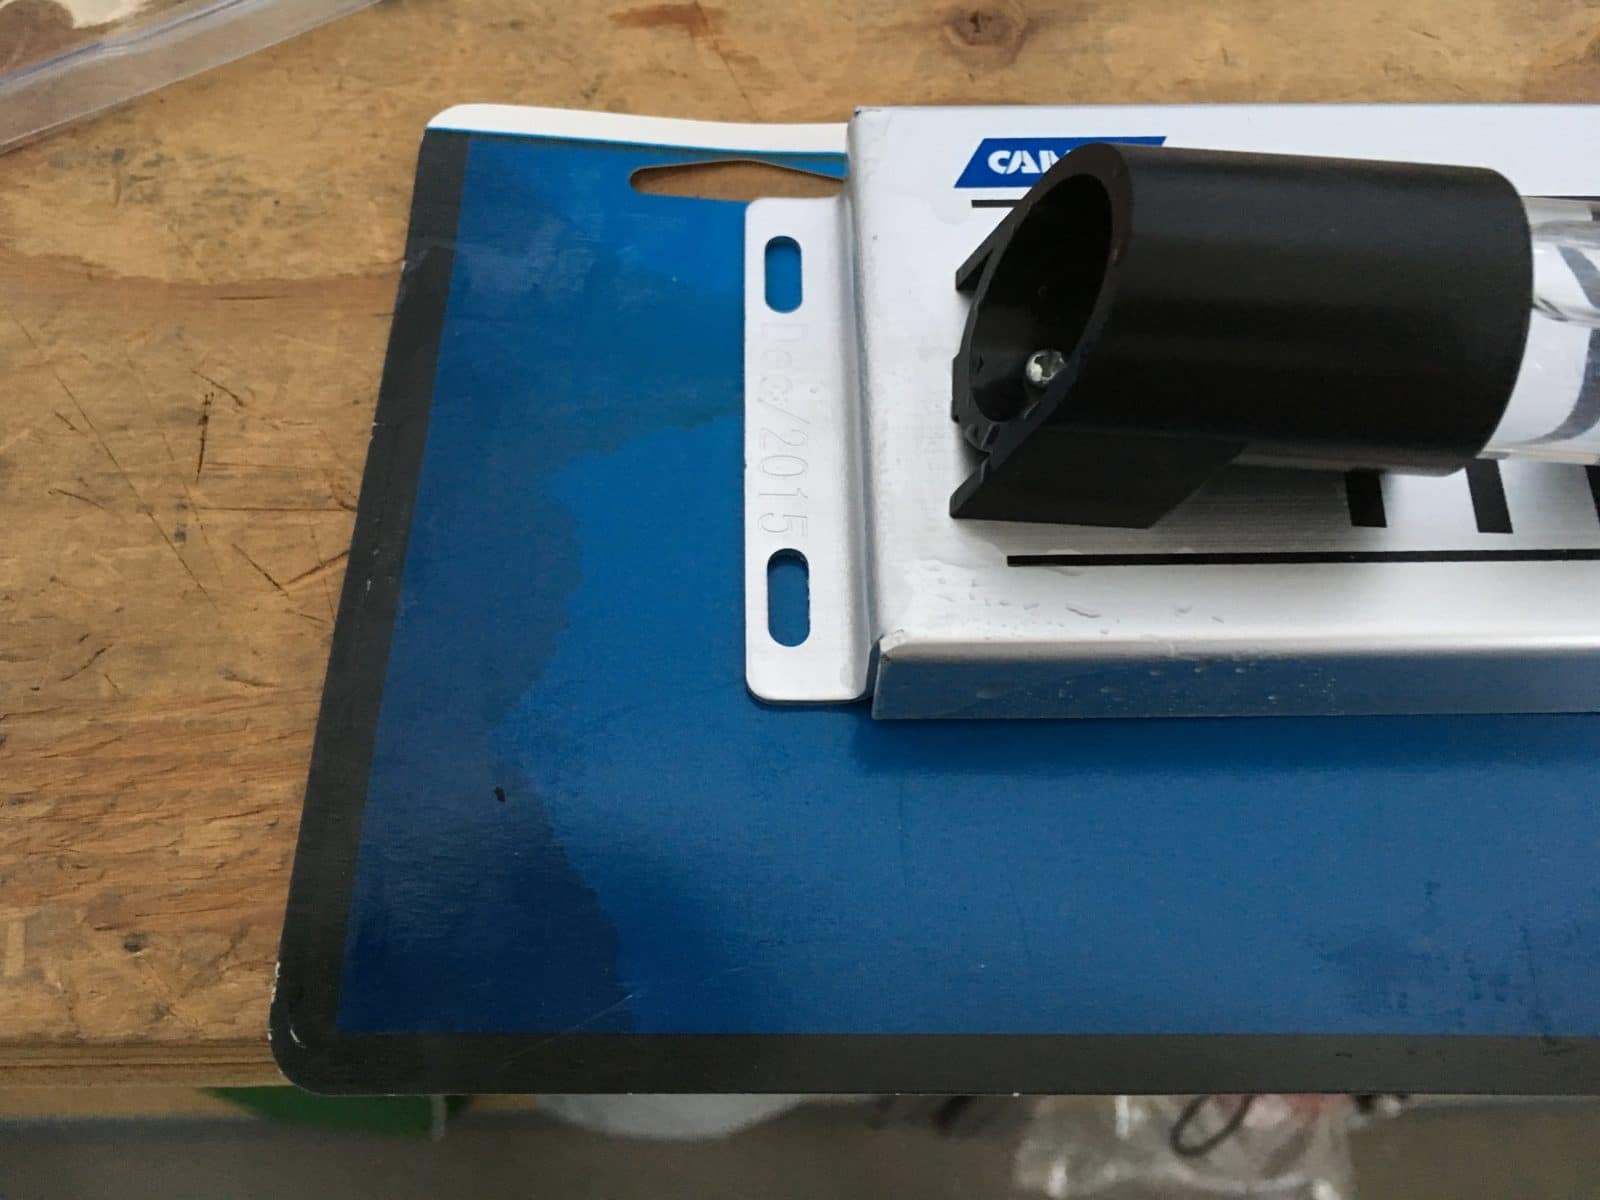
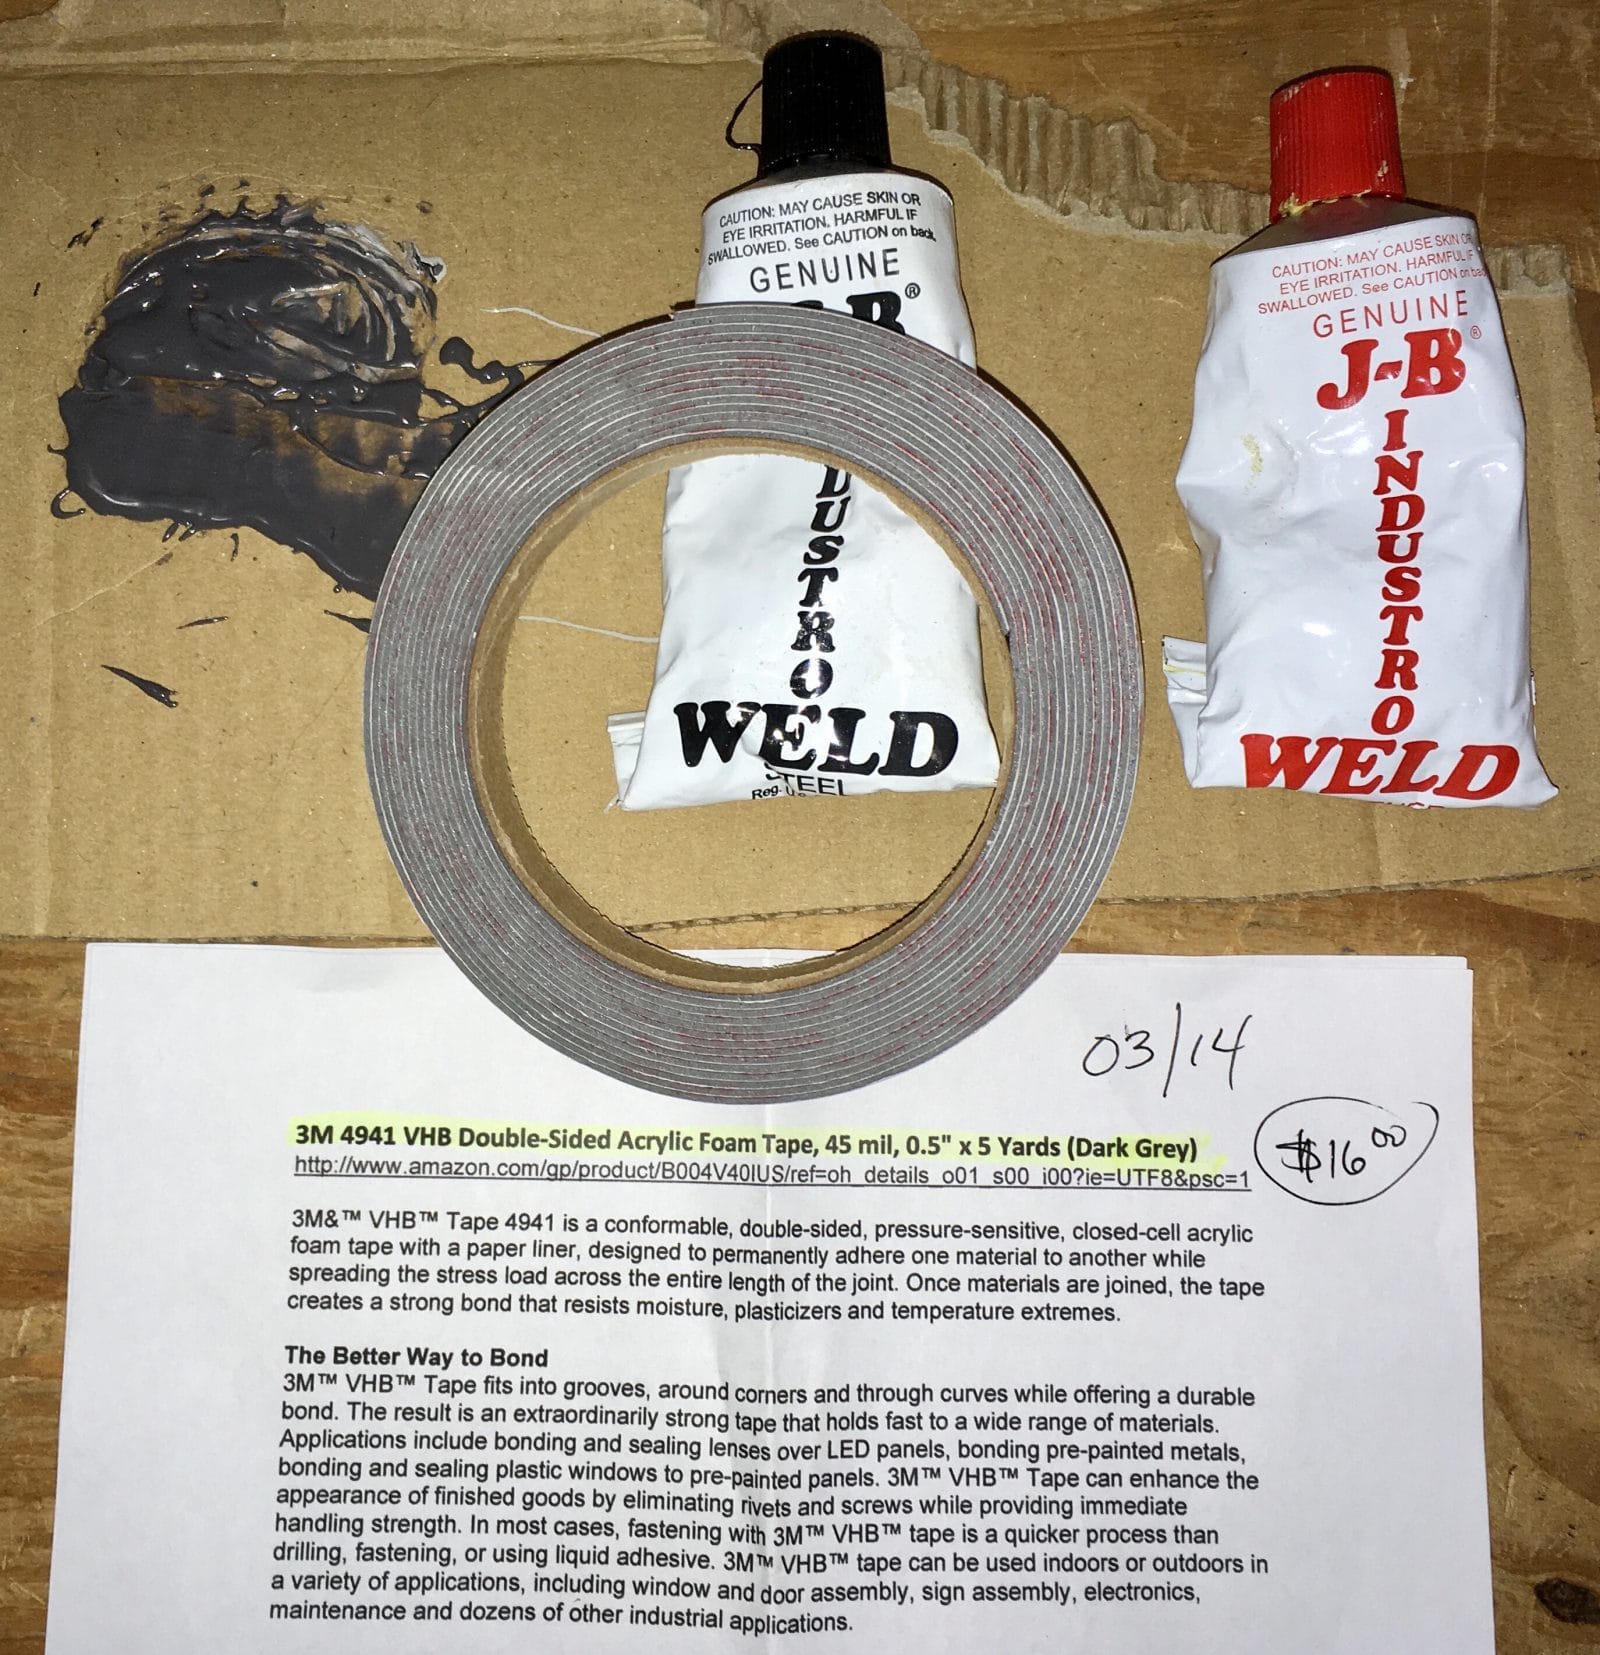
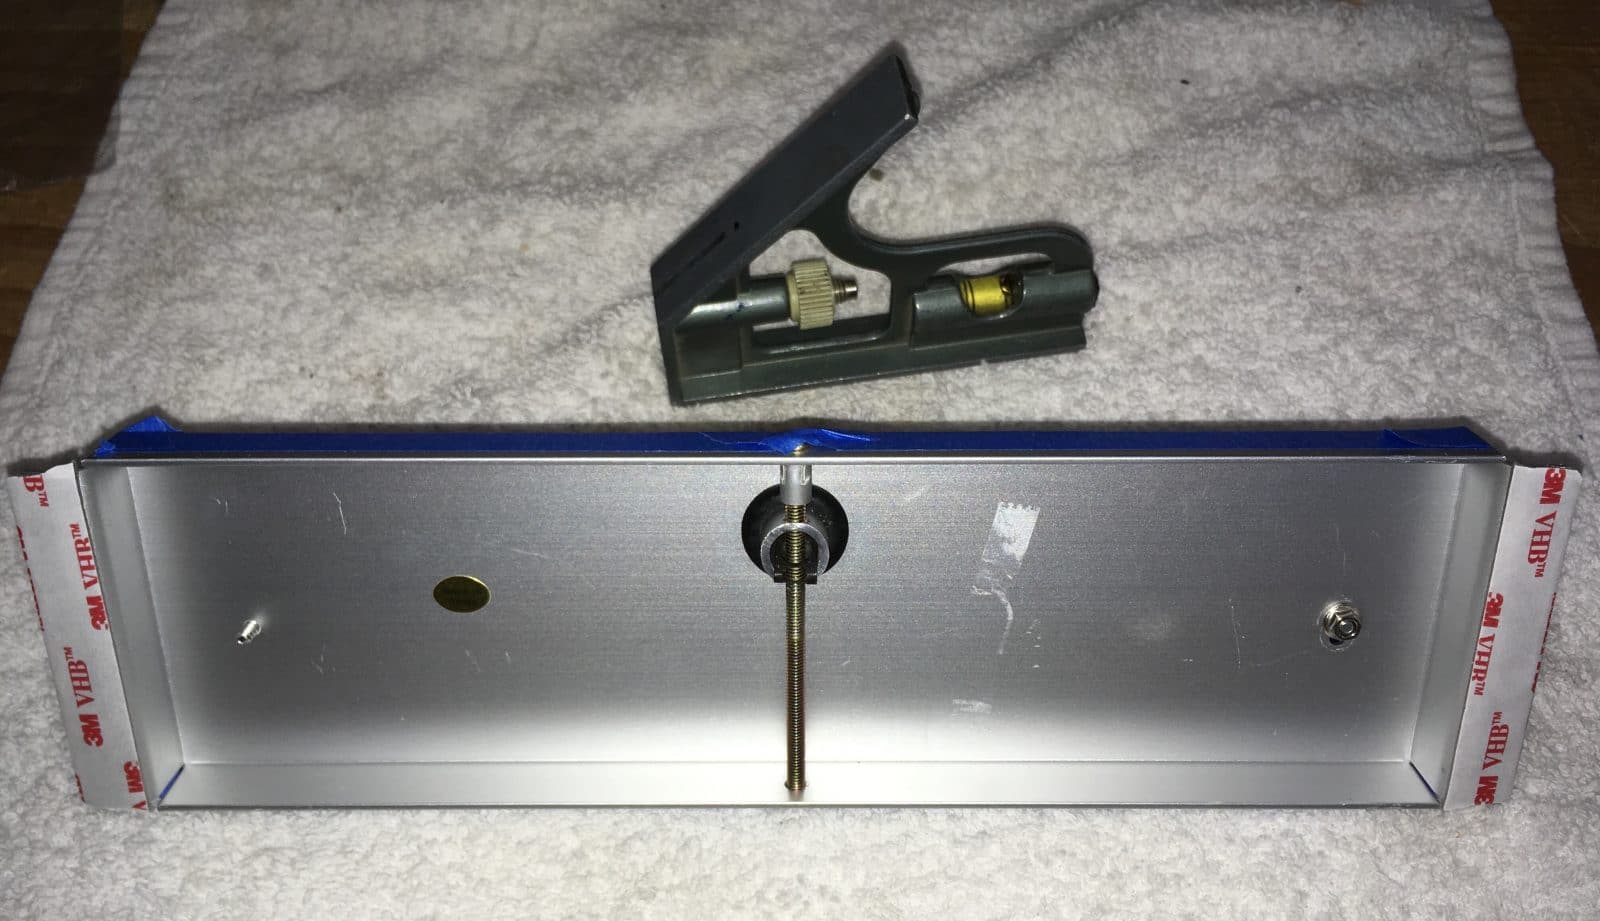
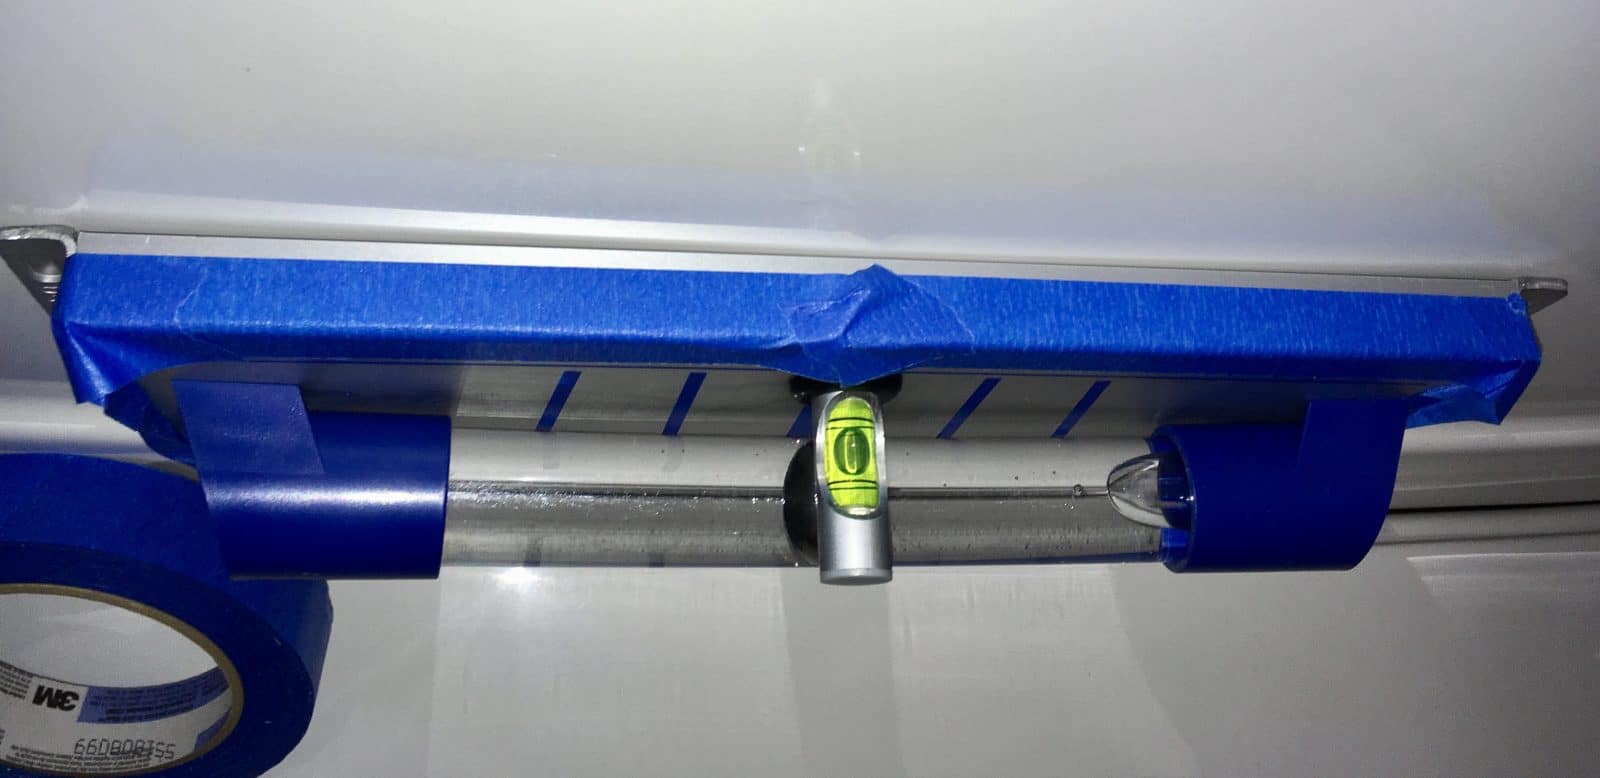
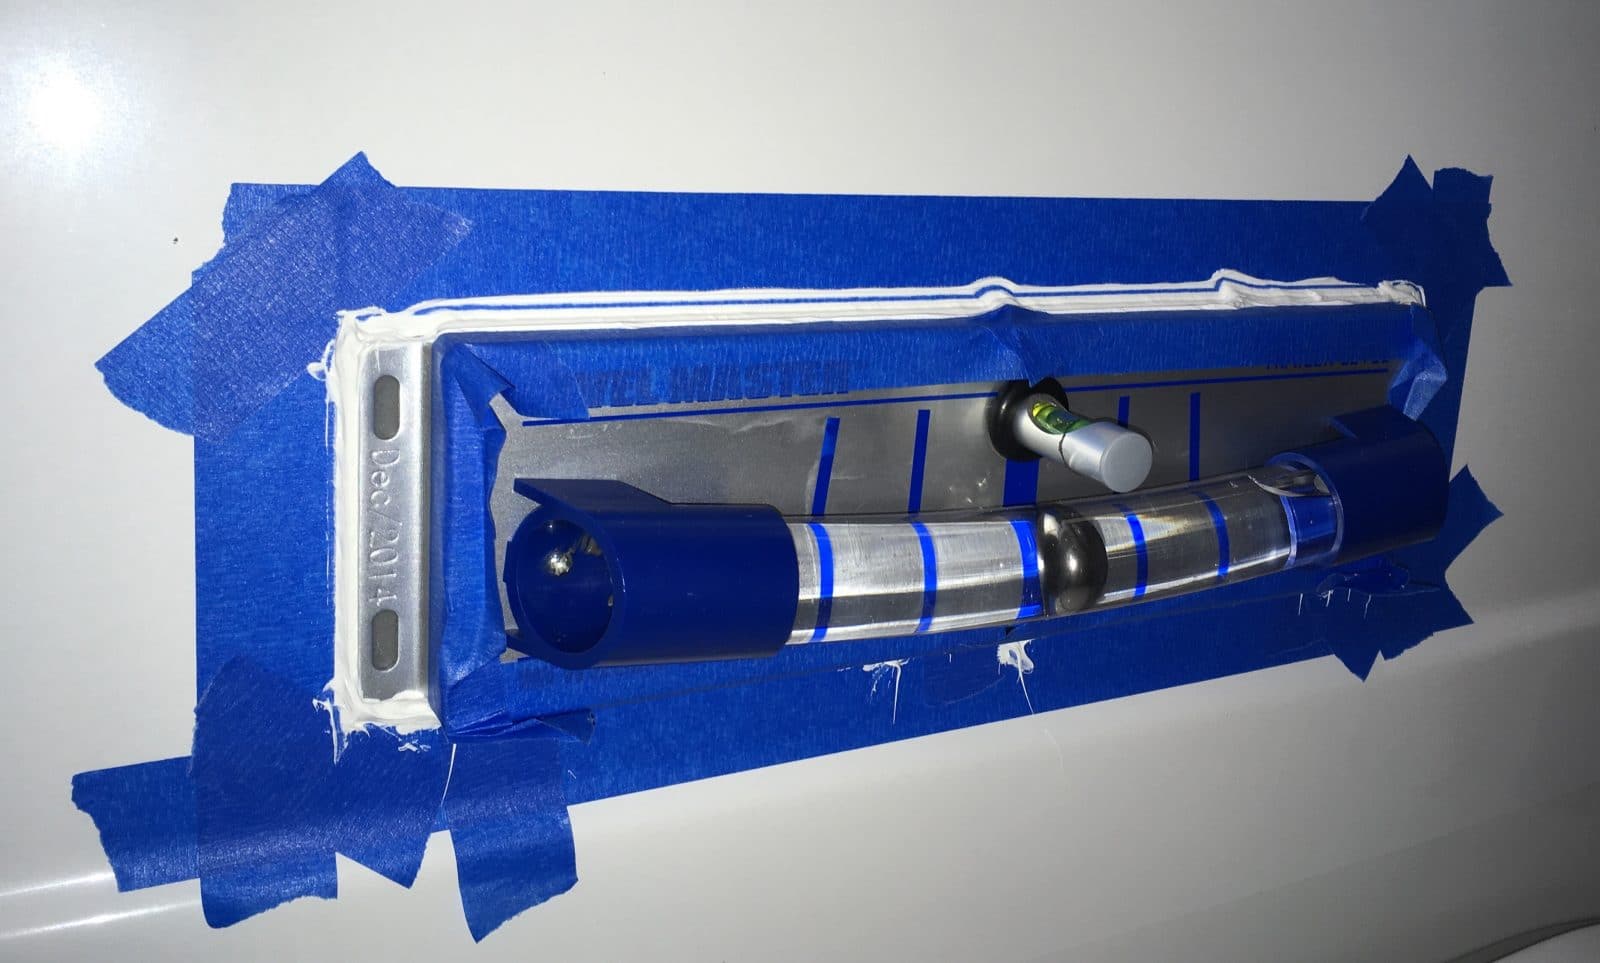
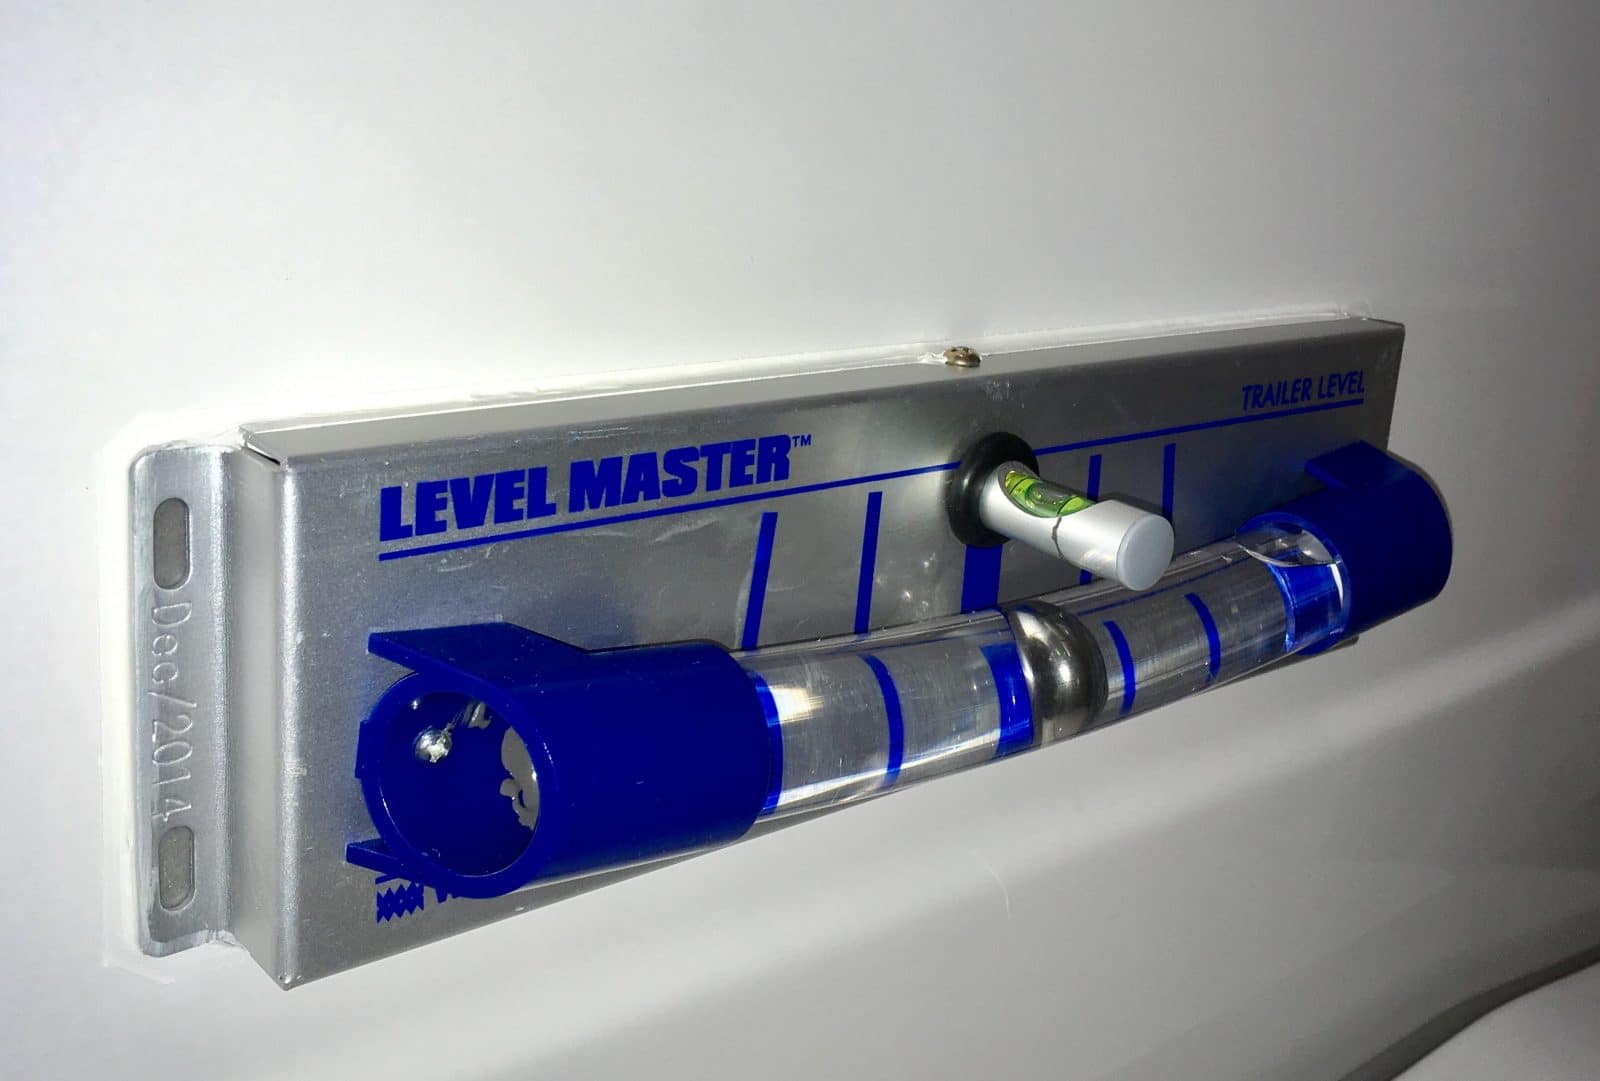
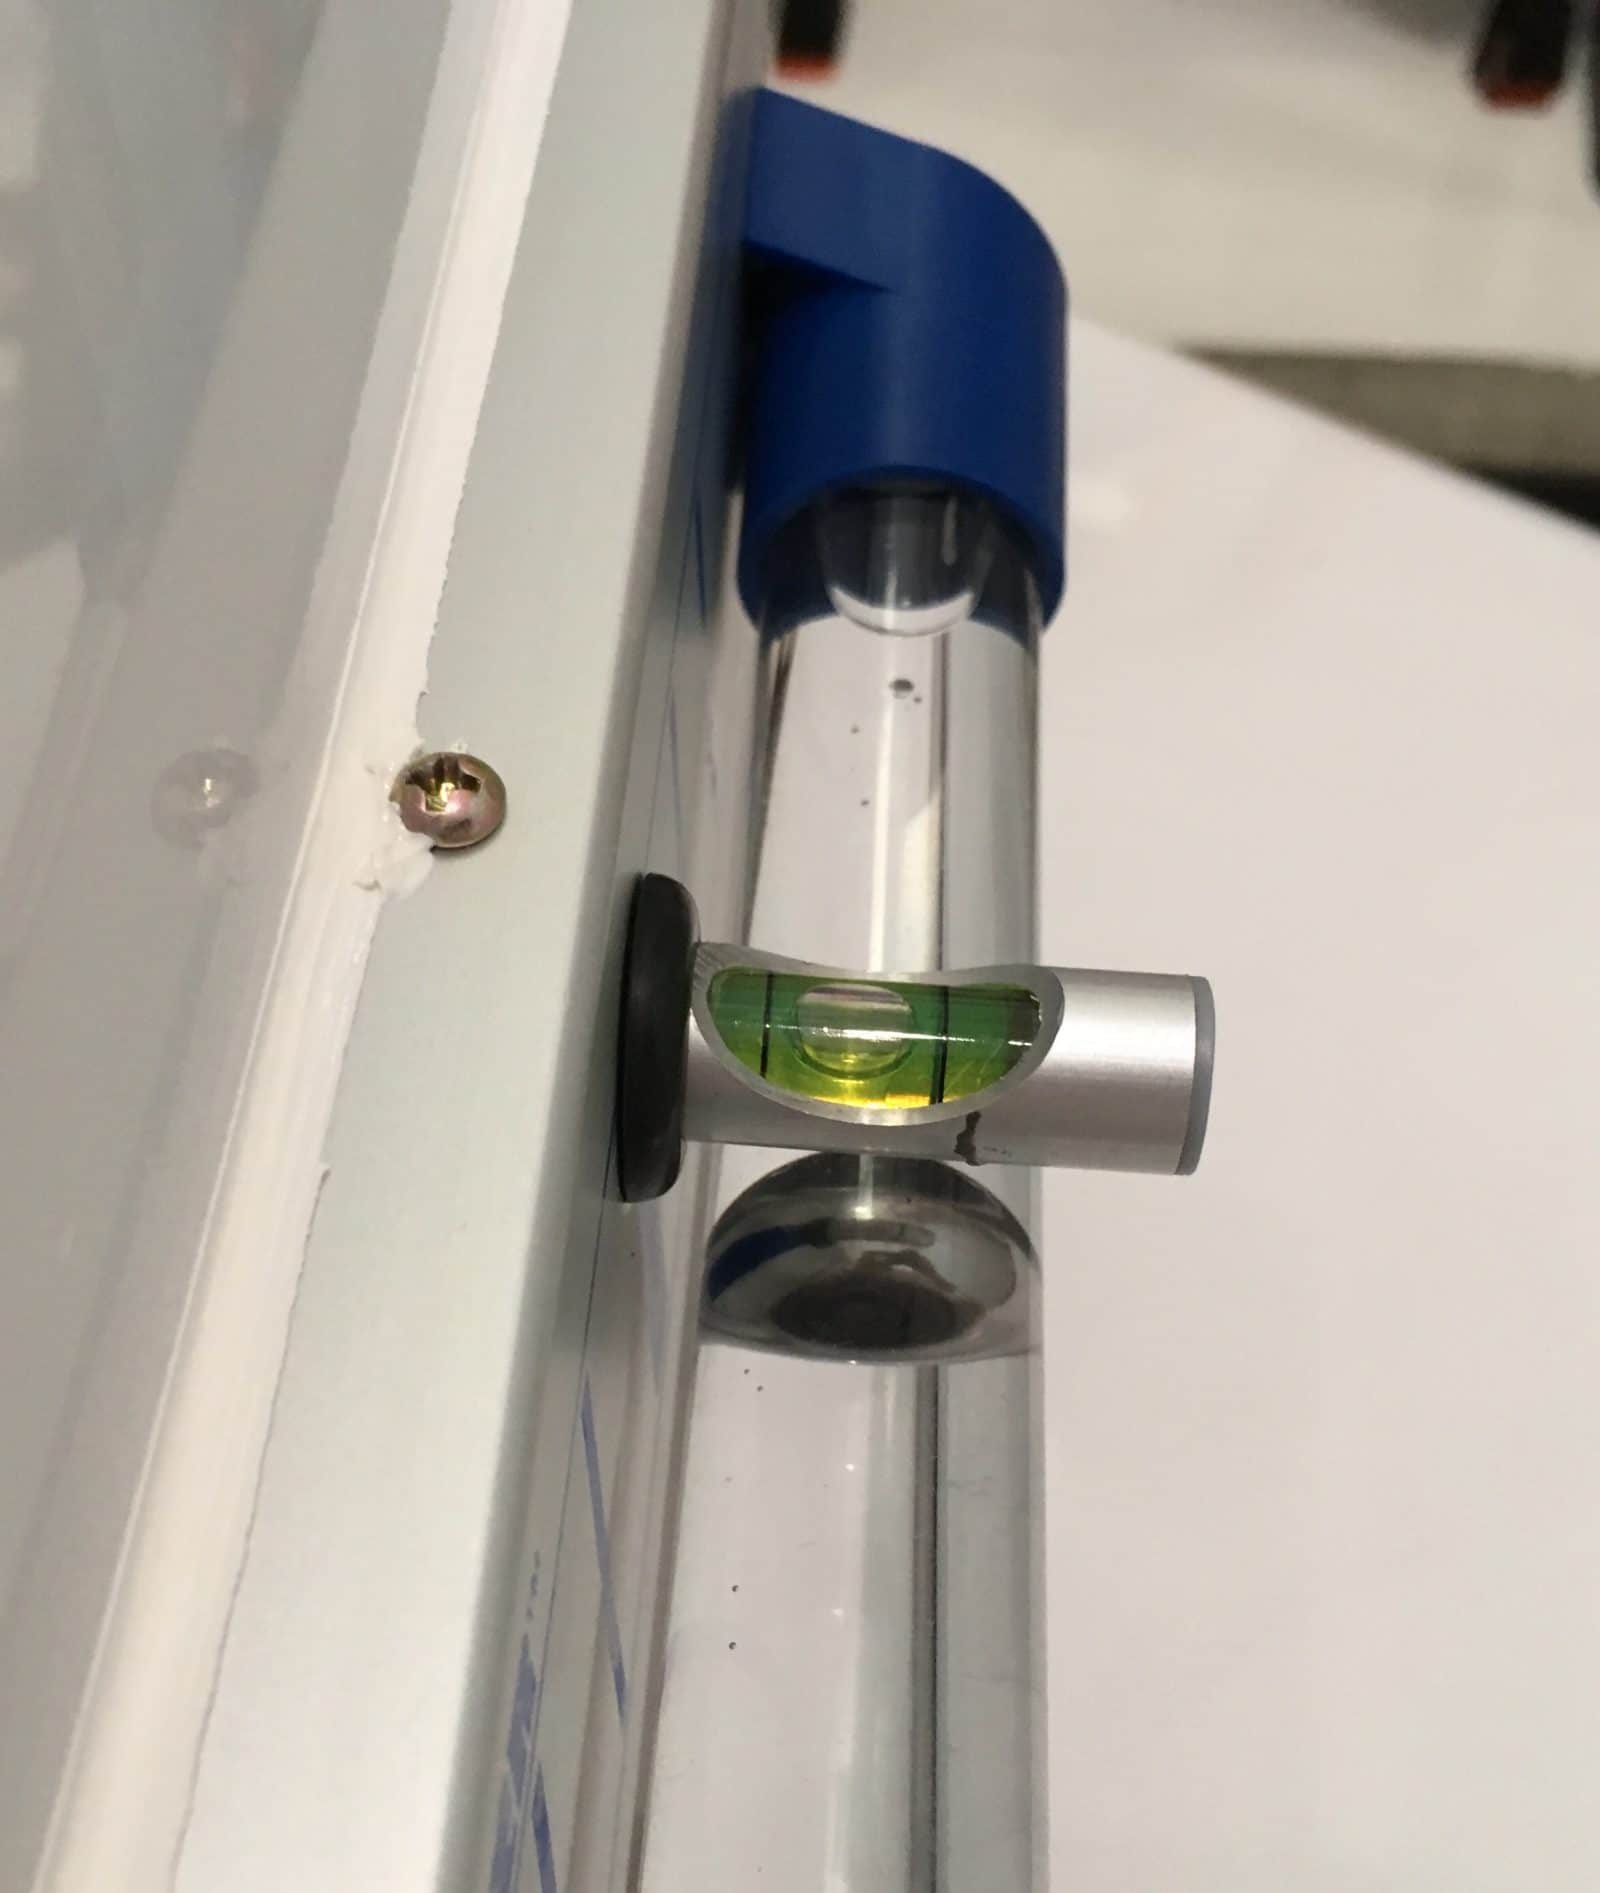
I originally wanted the Camco 25563 level because Amazon had it on sale for less than $15.... The one I received had leaked badly and there was oil all over the inside of the packaging, and the cardboard was soaked through: I arranged for a refund and another level through Amazon's painless return system. The next one I received had ALSO leaked, though not quite as badly. I returned that one and decided that maybe Camco was not a very good choice for this particular device. I went by the local RV Stealer parts department and found a similar model made by Level Master. It was $34, but it was not leaking, so I brought it home. After test fitting it where I wanted it to go, I pro-actively sealed the two ends where the factory plugs go, to prevent any future loss of fluid. Parts used: https://smile.amazon.com/Wheel-Masters-6700-Level-Master/dp/B000V55NB0/ref=sr_1_1?s=automotive&ie=UTF8&qid=1501042191&sr=1-1&keywords=level+master+trailer+level JB Weld (or any good two part epoxy) 3M 4941 VHB Very High Bond Acrylic Foam Tape 0.5" wide (used for securing automotive trim, very tenacious!) White Marine Silicone RTV Adhesive Sealant, UV stabilized. Not regular silicone sealer. The "Adhesive" part of the description is important! Masking tape and assorted measuring stuff Carpenters level I carefully secured the level vertically in a bench vise and added a thick layer of epoxy to cover the factory "plug" in the hollow tube. I let it kick off (two hours) and then did the other end: [attachment file="IMG_2792.jpg" There is no way that is going to leak, unless it gets hit with a bird or large rock..... Here is the back, showing the small bubble leveling screw. It has a hole at the bottom where it turns, this must not be covered with sealant on the final step. Also shown is the two strips of VHB tape. Alone they are probably not quite enough, but with the adhesive/ sealant added afterwards it will be plenty strong:: I cleaned the front of Mouse with isopropyl alcohol, and also the surfaces of the level. I used masking tape to find the center of the front wall. My choice for height is based on being able to see the level over stuff piled in the rear cargo area of my Land Cruiser, so it is an inch above the belt line. [attachment file=IMG_2794.jpg] I leveled the trailer left to right using the rear bumper, double checking the inside floor ... and carefully stuck on the level. Once pushed down firmly there is no removing the VHB, but if you lightly position it, you can readjust it. Once in the correct location, push and hold each side hard for 30 seconds. Now it is stuck hard! Detail showing that there is a gap all the way along, in spite of the curvature of the wall, thanks to the thickness of the VHB tape: Mask off the perimeter, leaving gaps on the bottom at each end and at the hole for the small level adjuster screw. The gaps are for moisture drainage: Inject the adhesive/ sealant into the cracks all around: Work it in smoothly by dragging your finger along it. Do not lick your finger! I am sure it tastes really bad: Carefully peel off the tape, do not let the sealant dry first. Mistakes can be wiped up with a dry paper towel: Make sure the trailer is level fore and aft and adjust the little level: Done: If the big ball is a little off center, you can adjust the entire tube a _small_ amount by loosening the left screw (looking at the front of the unit) and then gently tapping that end down or up with a screwdriver handle. The mount is slotted for that screw and the nut is serrated, so you can retighten the screw after and the nut will not turn. DO NOT LOOSEN THE SCREW MORE THAN A TINY AMOUNT, just enough to move the tube, or the nut back there may spin around and you won't be able to tighten the screw. Then you will say very bad words, indeed.... I will post more pics when I next tow Mouse. This should make it a lot quicker to get the side to side leveling done, from the driver's seat, by simply driving along until the ball is closest to dead center. John Davies Spokane WA
1 point
-
We are ready to leave FL in the morning to visit the mothership and pickup Hull #444 on Thursday (04-04-2019). My 2015 Toyota Tundra Limited, 5.7L, 4WD is packed with way too much stuff after a year of following forum suggestions, which has resulted in soooooo many Amazon purchases - Clam tent, Blackstone griddle, beautiful wooden shower mat and sink cover (thank you Foy), rugs, chairs, pillows, blankets, table, water filter and regulator, electricity stuff, tape, door magnets, coconut coir, Magna cookware with induction stovetop, tools, Andersen levelers, wheel chocks, LevelMate Pro leveler system, LP gas quick connect hose, Solo Stove Bonfire, Mifi 8800L jetpack, TPMS, Yeti Tundra 65 cooler, food, drink, clothes, portable air compressor, propane monitor, Honda 2200i generator... Got everything except the Oliver Legacy Elite II (and, will have that this Thursday). Plan to stay in Dickson, TN, at the Montgomery Bell State Park for three nights and learn the Oliver trailer. Not too far from the factory in case assistance is needed. Then, back to FL for Karren to do her magic inside the trailer before the Rally in May. Looking at my overpacked TV, I am thinking all we really needed was blankets, pillows, and maybe a coffee maker. Way too much stuff for a maiden voyage. Over time, we will learn how to camp properly.1 point
-
This topic is intended for determining maintenance/replacement info for all small batteries in the Oliver Elite II. I do not have access to my trailer (In OK) as I live most of the year in HI. As such, I can't go look. I have also looked on the OTT site and not found such a list, or for that matter much info about this topic as well. Hence this RFI. As such, with your assistance, I would like to compile a list of small batteries that need service, what size they are, and get a consensus of their service life. In this regard, where it is possible to do so, I remove all small batteries from their devices when the trailer will not be used for months on end. This is why I am suggesting a 24 month service life for those listed. The following are some that I am aware of: TV Remote 2 each AAA? Change Every 24 months Furion Remote 2 each AAA? Change Every 24 months Smoke Detector 1 each 9V Change Every 24 months Propane Detector ????????? Dexter Brakes Do we have a separate battery in addition to being tied to the 12V Buss? Any Others? Thank you for your inputs!1 point
-
Agree with WhatDa, plan to spend a few days, or more, in the local area. There is a lot to do in TN and KY, so might as well take advantage! When you get home find a local RV repair and use them. Our local guy works on 3 Olivers that I’m aware of. He’s done warranty work for me that was reimbursed by Oliver. I take my trailer in to him annually for wheel bearings and brakes. We haven’t had any other issues the last couple of years. Mike1 point
-
Hi Moots, I don't think you are really limited by who can service your Oliver so long as it isn't just some fly by night outfit- they are very flexible and were willing to have a mobile shop come out for some work on mine. The list is more of a "who has taken care of a customers well and we will recommend" list. I'd talk to your sales person to see who they have experience with in the area. When buying new, it's definitely worth camping in the area (they provided one free night at a local park, or you can camp in their lot). We paid for an extra night at the campground and would recommend the same. We did full hookups, played boondocking on Solar+Internal tank+pump/etc... to test everything before leaving. Didn't run into any issues, but the peace of mind was great.1 point
-
Hi Moots, Welcome -- any relation to the bike manufacturer? I actually rented a sprinter RV (Revel) before getting the Oliver LE2. What I liked about the Revel: drive down the road, walk to the back and take a nap without ever going outside. propane-free design - only had to make sure I topped off on Diesel parking was a breeze - I could fit in one space at a store while on the road bed/garage design was very flexible and did provide What I didn't like about the Revel I was less likely to take it somewhere once all hooked up and settled Didn't have jacks so wasn't super stable inside, if someone has restless leg and you are trying to type on the computer you get seasick Cost: I could buy an oliver, an awesome tow vehicle, and another car for the price of the Revel Sprinter Maintenance/Reliability Space - Revel is the shorter sprinter so the closet is also the shower - I needed someplace good to hang clothes Why I eventually got the Oliver Price - with the Oliver I use the TV as our main car, so the cost of the revel is $100k more easily. I needed a hanging closet for dress shirts/etc... and shuffling those around in the Revel was a pain Parking the Oliver is very easy, I have ended up with some money "tent only" or "no one else can fit" spots that back up on lakes/rivers. #VanLife was stolen by people that eat avocado toast. It was the only TT that I didn't cringe when going to the underside of a used Northeast model. Beautiful welds and no rust on the Aluminum. VS other TT: If the roof somehow leaked on an Oliver all winter, you could pretty much fix the leak on the Oliver and have an awesome spring. For many other TT's your trailer is now a total loss. While the big foot is fiberglass on the outside, it's more traditional on the inside. Narrow - it tows easier than the 8' wide trailers and uses less gas I can use it in the snow - we live in the Cascade foothills, so we get snow and venture in the mountains often. It could be better insulated, but it's better than anything else I've seen.1 point
-
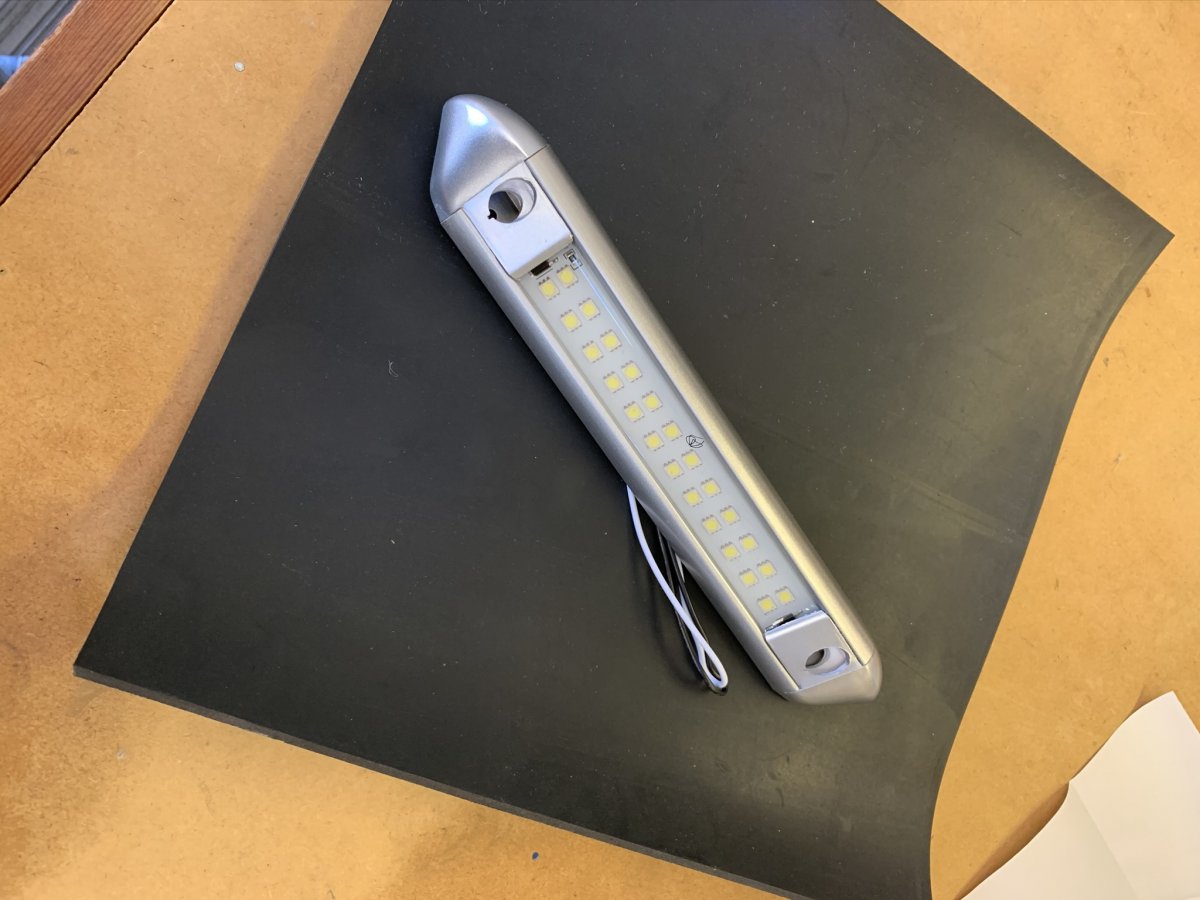
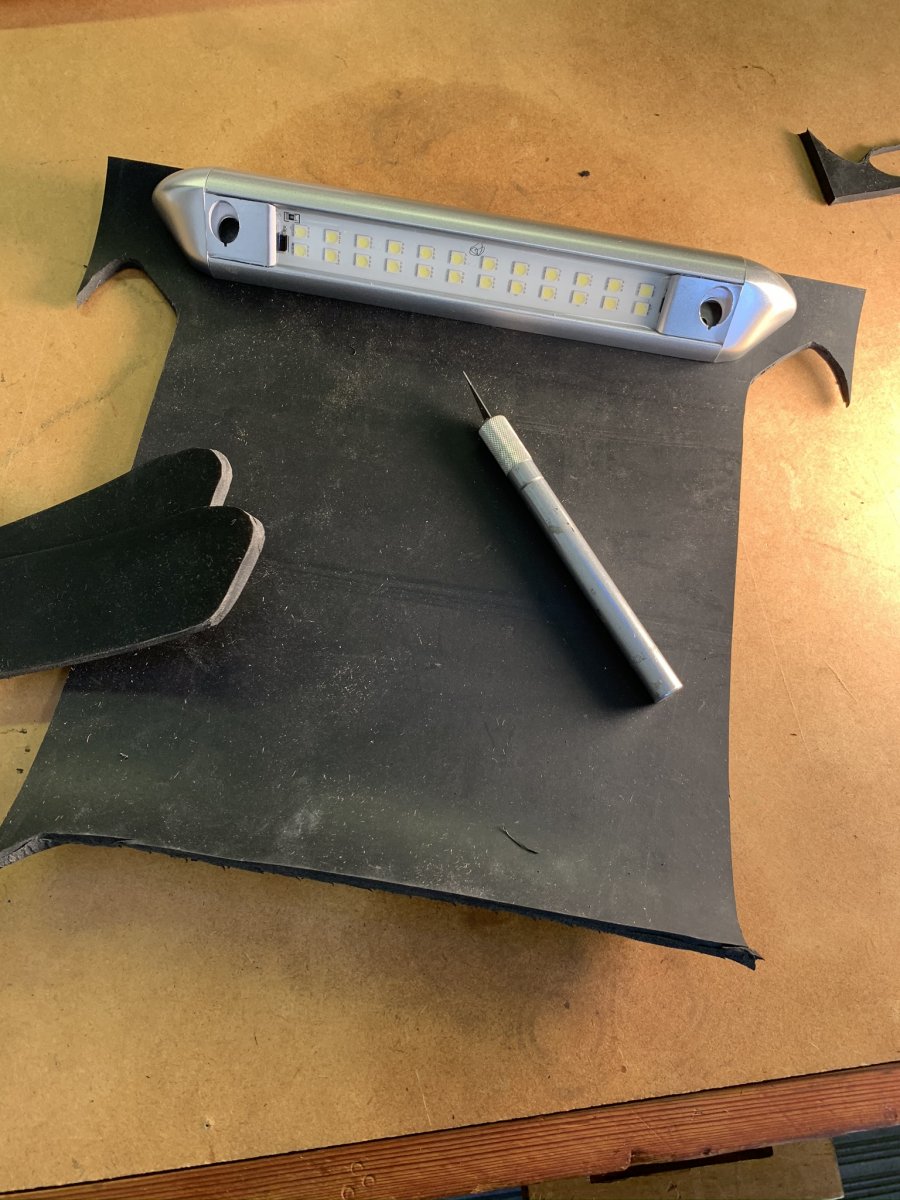
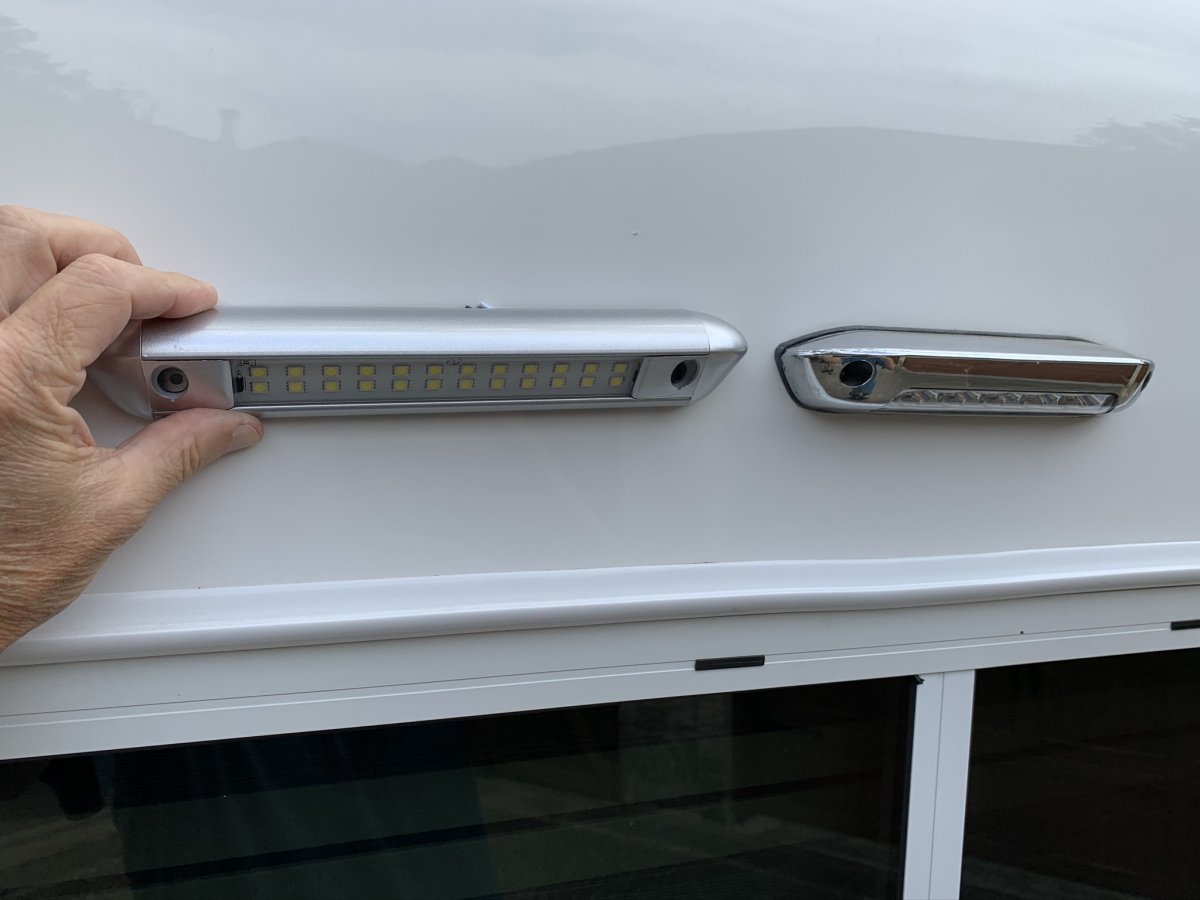
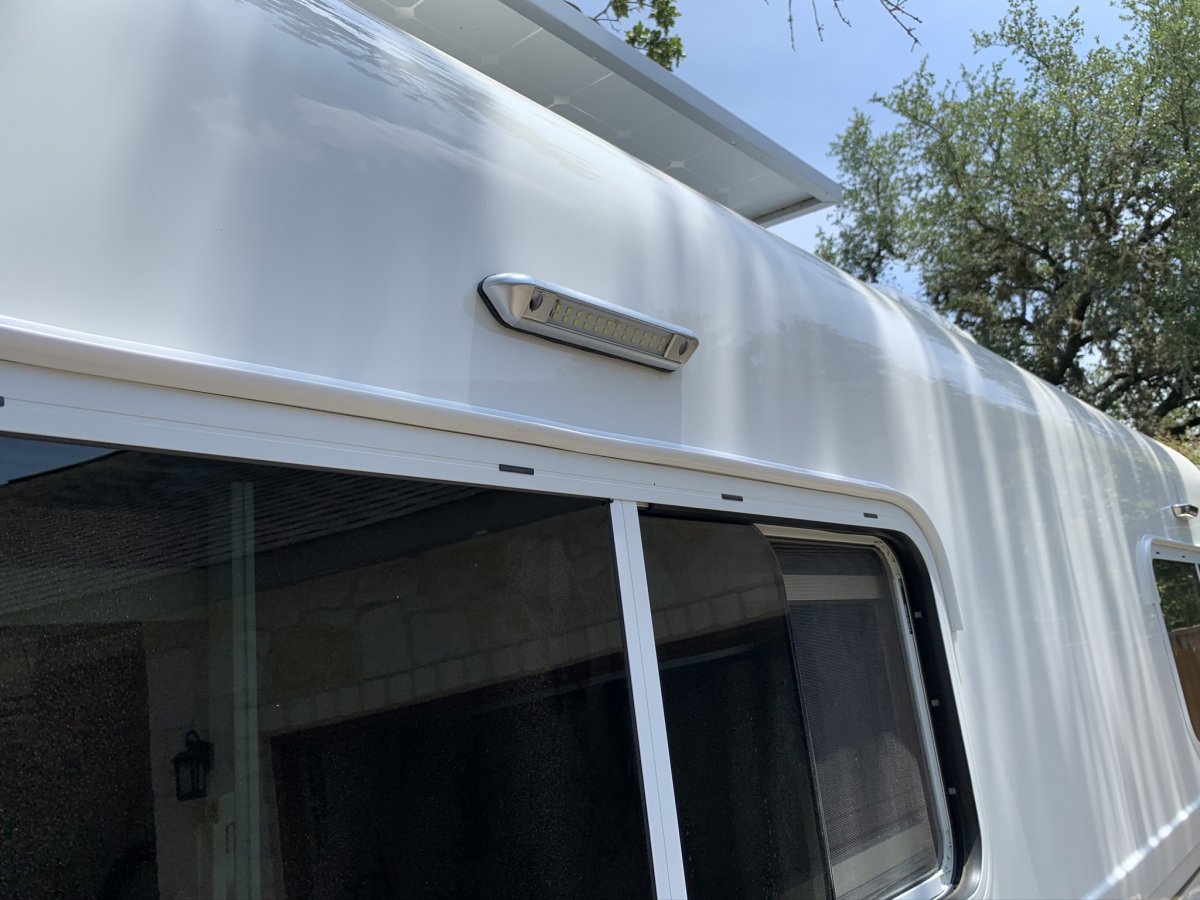
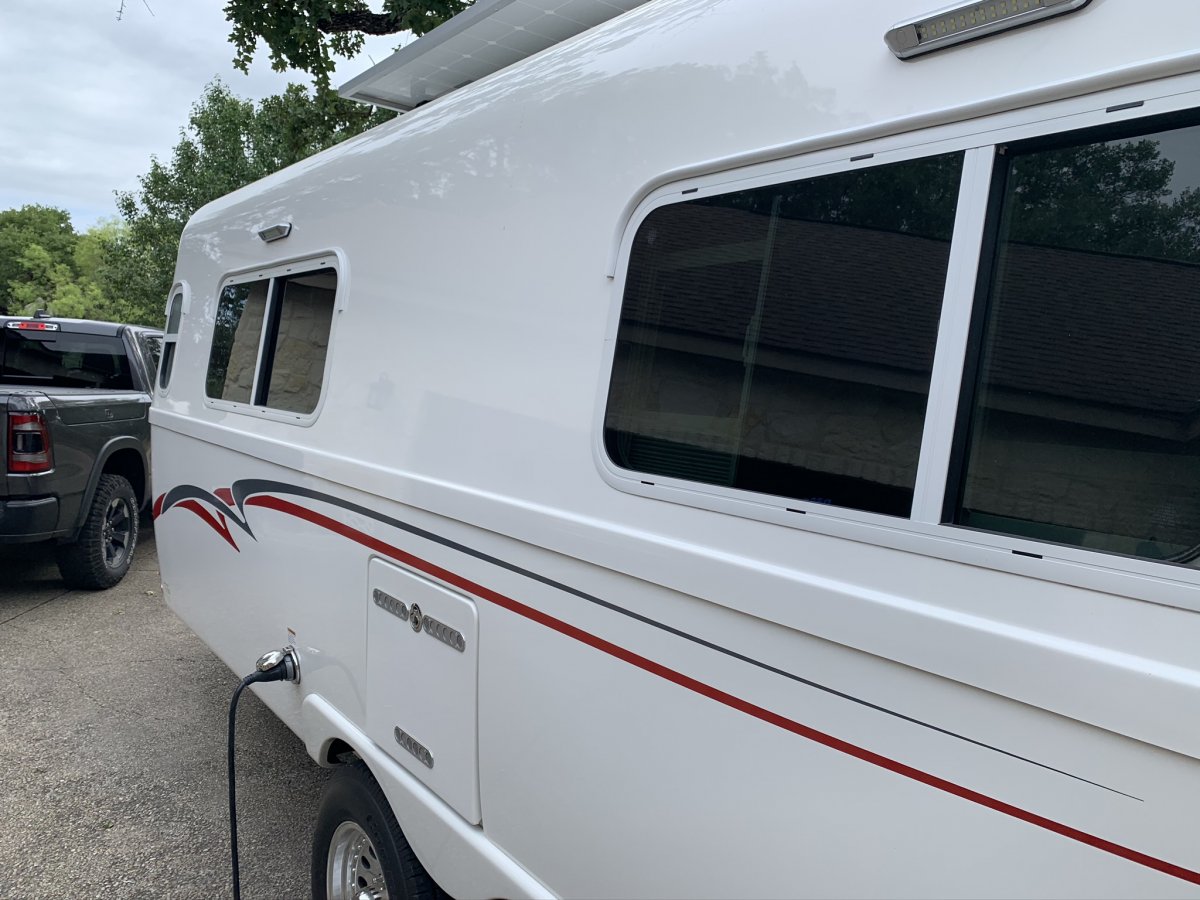
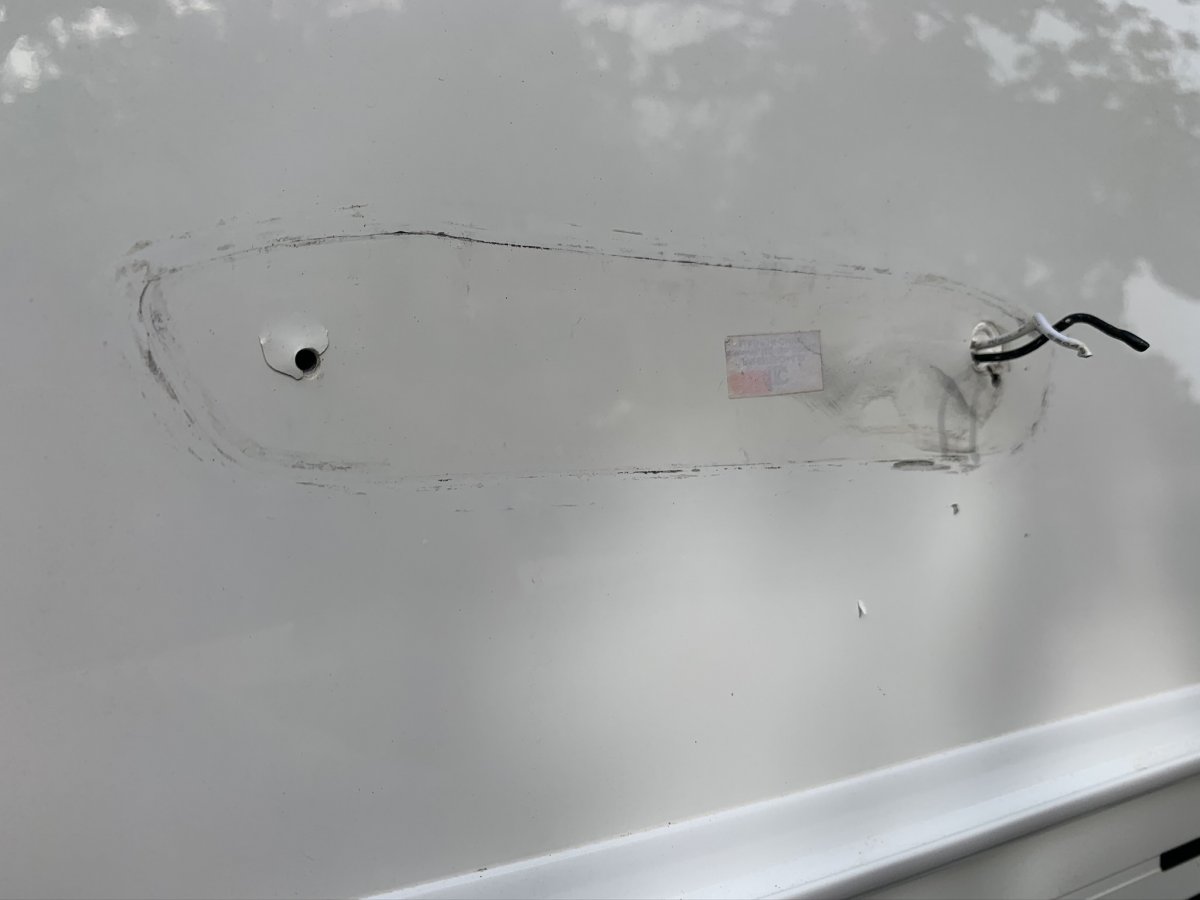
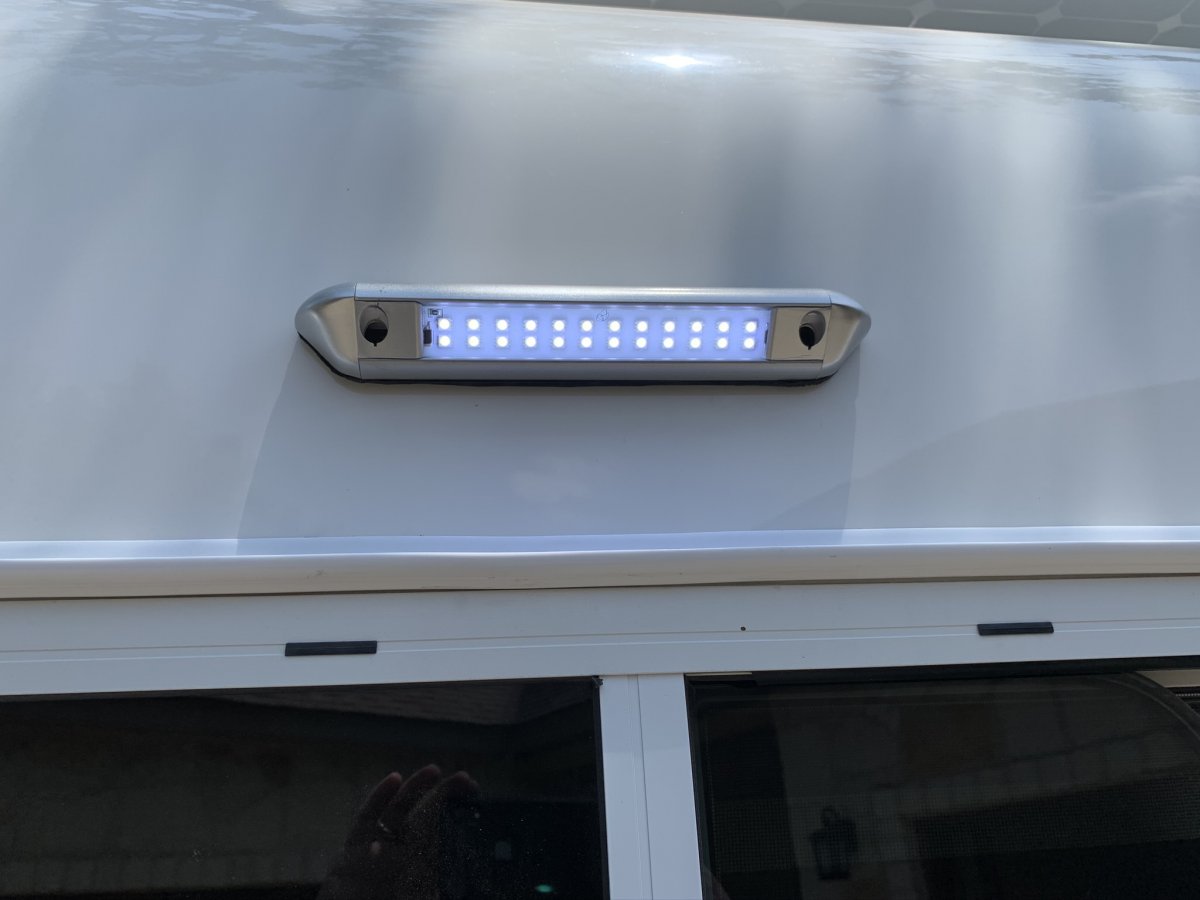
The plastic chrome covers on my porch lights were starting to peel and the rubber gaskets were all dry rotting, causing those ugly black streaks. I’ve tried a few times to seal them with varying success. New ones are about $38. I found some on Amazon that are similar, about an inch larger lengthwise. They have an aluminum cover that is not shiny chrome. They were $19 each. https://www.amazon.com/gp/product/B00ODSBXB0/ref=ppx_yo_dt_b_asin_title_o00_s00?ie=UTF8&psc=1 Light and rubber sheet. Cutting gaskets. The rubber I ordered was much thicker than I needed. Probably 1/8” or less in thickness would be fine. The thickness I had made cutting square edges a bit challenging. Comparison of new and old. After removal of old lights. There isn’t much wire to work with so I cut them off right at the solder joint on the old light. The new lights came with plenty of wire. The remains of my feeble attempts to seal the old rubber is obvious! Cleaned up. I used some 3M fiberglass polish to get the shine back. I decided to drill only one new hole. I hate drilling into my trailer! Since the new lights were about an inch longer it meant the lights would not be centered over the window. I asked Carol to come out and look at the first installation and she didn’t notice the slight off center so I went ahead and did the same for the other three. I filled the old unused hole with silicon. New light. It’s hard to see but the lights are about a half inch off center to the front of the trailer. Lights on. They are about the same brightness as the old. Mike
1 point
-
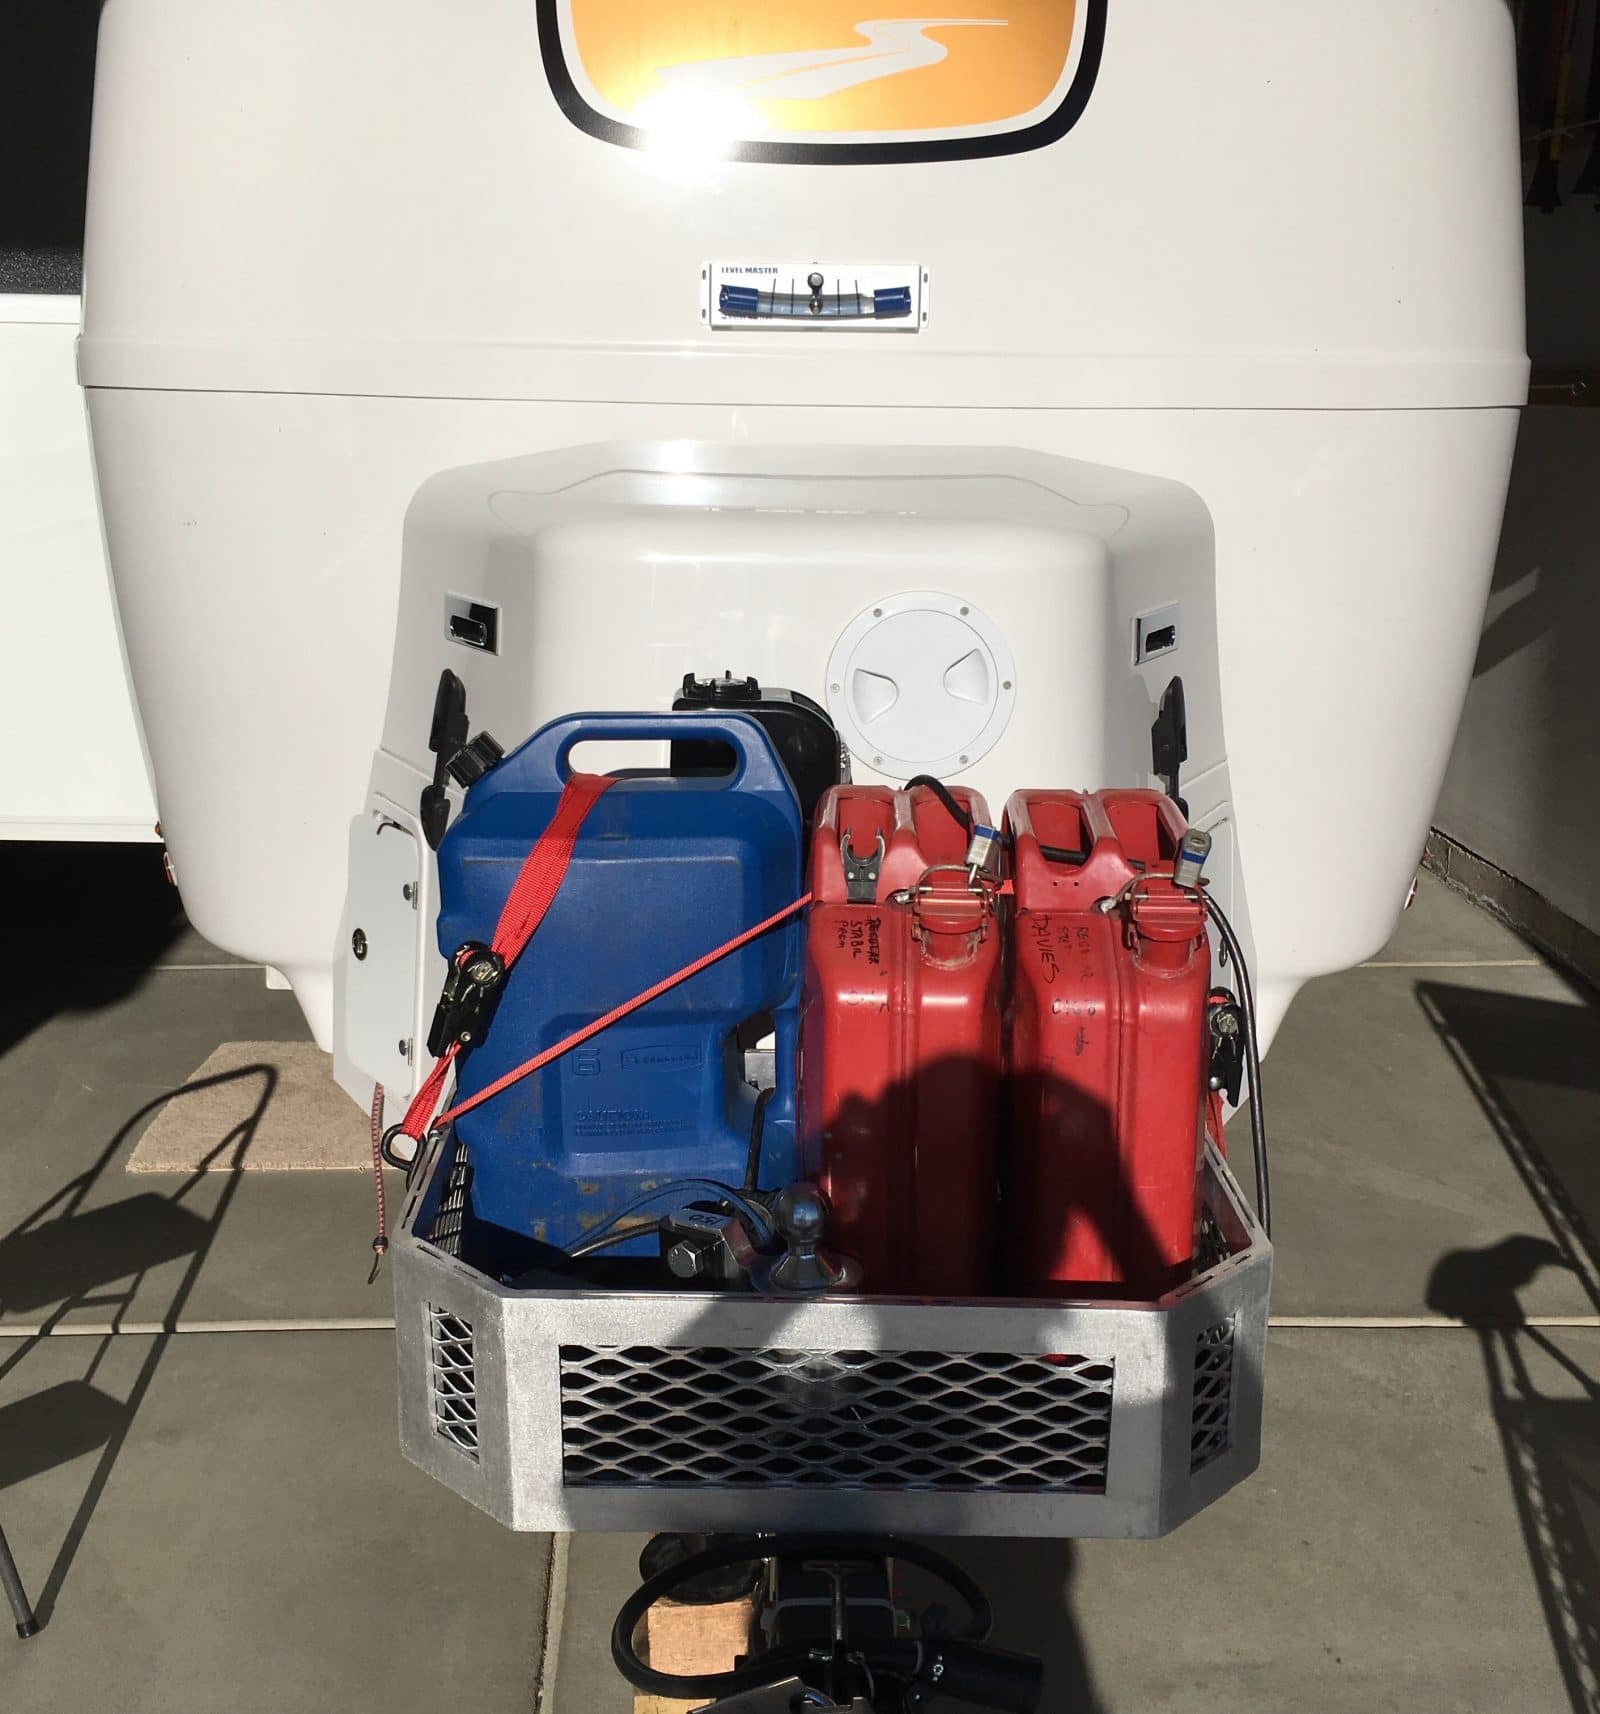
[postquote quote=177369][/postquote] I use the same leveler as John but I attached it to the front of my basket on the tongue. I can see it clearly in my TVs backup camera and it's magnified. Beyond that, it keeps me from having to attach it to the trailer itself up above the "waterline" which I don't like the looks of (if avoidable). I installed mine in the delivery room at Oliver before we ever pulled out. The service person who watched me do this said it was the first time he'd ever seen that done but he liked it. It's worked well for me in my particular application. BTW: I did take John's advise and epoxy the ends of the level to ensure no leakage.1 point
-
Go get 'em (both of you)! Most important thing to bring if a sense of fun and adventure. This is exciting - except for writing THAT check part. Try to take notes during delivery, and, ask questions. Take pictures and let us know how it went. Bill1 point
-
YES, Andersen levelers are expensive, but, worth it. YES, "Legos" are cheaper, a little more difficult to use, but, they get the job done. YES, scraps of lumber are even cheaper, are heavier and can be dirtier, but, they also get the job done. NO, don't jack the axles. Bill1 point
-
Randy - A big YES to all of those but especially number three. It seems that when I'm breaking camp someone interrupts me (usually wanting to know something about the Oliver) and then I'm in a hurry to get out of Dodge. I have to remind myself to slow down, relax, and get back to business - the potential "costs" of not doing that are simply too large. Bill1 point
-
When I got my first boat trailer (about age 15) I made the same mistake of not chocking the trailer wheels before unhitching. Nice hole in that garage door that my Dad sure wasn't happy about and I got to fix. Since then I've always placed a sign on the tongue that says "CHOCKS". Bill1 point
-
The accessories that Oliver provides (hoses, etc) will pretty much get you through an initial pick up trip. You are going to want to get some “just in case” items, so it doesn’t hurt to show up with those at pick up. Plug converters: I’ve got a 30a to 50a and have only used it a couple of times. I also have a 30a to 20a and use it when the trailer is in the storage area. External Surge Protection: If you have the built in you shouldn’t need an external. We don’t have the built in and I carry a Camco external. It has a 60 second delay when first plugged in to check the circuit and if it’s okay it passes electricity. If not it blinks yellow or red. Wheel chock or “X” blocks: We carry both. The chocks are good if the tires on on the ground. If I drive onto legos to level the chocks aren’t so good. I got a cheap “X” block that fits between the wheels and you turn a handle on top to tighten for the side that might be on legos. Extra 25′ potable water hose: I have a black collapsible hose that I use to flush the black tank. I think it expands to 50’. It’s also used with a nozzle for general clean up tasks. Extra 25′ water hose. We got an extra at Camping World. There have been a few sites that required two hoses to reach the water. One hose is enough for most sites. Extra 25′ 10 gauge extension cord. I carry one and have never used it in over 35K miles and 250 nights of camping. Jack stand blocks: which ones? We got the yellow Camco pads. I made some blocks out of 2X6’s and set them on the pads. We also use the yellow legos that we got at Walmart for leveling. External water filters. On this point, is there not one already in-line inside the trailer? In either case, do I need an external filter too and which one? I don’t think there is an internal filter. We use the blue or white filters that you can get at Walmart or Camping World. Hitch lock for BullDog 2 5/16″ coupler. Which one? https://www.amazon.com/gp/product/B00HL2NM0K/ref=oh_aui_search_detailpage?ie=UTF8&psc=1 Extra grey water discharge hose: Yes/No? What if any accessories for discharge lines? We used the hoses that came with the trailer for black and gray discharge for over a year. Replaced them with Rinoflex and carry the old as back up. We also got a clear 90 degree fitting for the end that goes into the sewer so I can see what’s being dumped. For composting toilet: What kind of toilet paper? What kind of media and how much? We flush! Tool Kit: List of tools that are needed or desired. Is there a fairly comprehensive tool kit for RVers that already exists? Yes, there are a couple of tool list threads. Cookware: (Pots, Pans,etc. )Suggestions as to “what” and where to purchase RV specific items (also looking for good sources): We didn’t buy much, just repurposed extra stuff we had in the house. It depends on how you cook. Utensils: Spatulas, serving pieces,, forks, knives, spoons, etc. (also looking for good sources) (RV specific?). Mostly stuff we already had. Dishware: plates, bowls, glasses, cups, coffee mugs, serving items, etc. (also looking for good sources) (RV specific?): We have some Corelle dishes and some plastic cups, mugs, wine glasses. We also carry paper for those places that don’t have hookups. Napkin and paper towel holder/dispenser. Utensil and plate organizers: Dish soap and hand soap (storage). We use the pump dispensers. Paper towel dispenser: Type, location, how to attach? We found a cheap plastic one on Amazon and stuck it over the kitchen counter with On Command Tape. It’s been there over 2 years, no problems. Towels (bath and hand) RV unique? We bought some microfiber bath towels. They don’t take up much room and are functional. Just not as nice as a big fluffy cotton towel. Fitted linens sheets for the upgraded single bed mattresses available as an option from Oliver: We got regular twin sheets and just tuck them in. Also twin blankets and bed spreads. We’re on our second set. Inside entrance matt:(brand/size?) We have a 16X24 mat just inside the door. It has a grippy rubber bottom. We also use a runner between the beds we got at Walmart. Ground matt at exterior entrance to trailer: There’s a bunch to choose from at Amazon or Camping World. Extra matt for outside of bath area: (Yes/No?) (We’re getting the teak floor covering for bath and sink from Foy): We use a round bath rug that is in the bathroom when we’re not showering and then we set it outside the bathroom when we shower. Trash receptacle: We have a small plastic one with a lid that pops up. Plastic shopping bags fit it nicely. Not sure where it came from. Toiletry organization suggestions: Shampoo and soap bottles can fit in the area under the sink. We have a couple of low plastic boxes in the area above the toilet for other toiletries. Any kind of cabinet or closet organizers that are essential: Toasters: Cheap two hole toaster. Coffee maker: (We like GOOD coffee and grinder but want to know if there is something smaller for an RV): We carry a Nespresso Pixie and also a Melita pour over cone and a small electric grinder. When boondocking we heat water on the propane cook top and use the pour over into a thermos. When we have electricity we use the Nespresso. In general, I wouldn’t worry about getting too much stuff. We carry less now than we did the year we picked up. It’s easy enough to acquire things as you see the need, stores are everywhere. After you’re out a few times you’ll get a feel for what you need and don’t need. Mike1 point
-
Overland - Just leave them out in the sun for a couple of days and the odor tends to lessen. Bill1 point
-
Yep - Mike's basically got it right. Since the brakes are activated electrically, the only way to keep them activated is for electric current to constantly be applied to energize the magnet that in turn causes the brake shoes to press against the inside of the brake drum. Unfortunately, once the current is turned off the brakes are no longer "applied". Therefore, if you energize the brakes by pulling the emergency breakaway cable and your batteries run out of juice then your trailer is no longer in "park". Chocks are simple and effective - all you have to do is remember to use them. Given that the penalty for not using them could be very severe (destroyed trailer and even possible death) it pays to be VERY careful in making sure that chocks are used. Bill1 point


-
Recent Achievements
-


")