Leaderboard




Popular Content
Showing content with the highest reputation on 08/06/2026 in all areas
-
This fall we will be attending the rally in AL, but coming from Niagara Falls. So, kind of similar? We are choosing a pretty "super-highway-friendly" route this time: Niagara->Watkins Glen-> New River Gorge-> Panther Creek SP-> Lake Guntersville. With multi-night stops along the way. Enjoy your trip.2 points
-
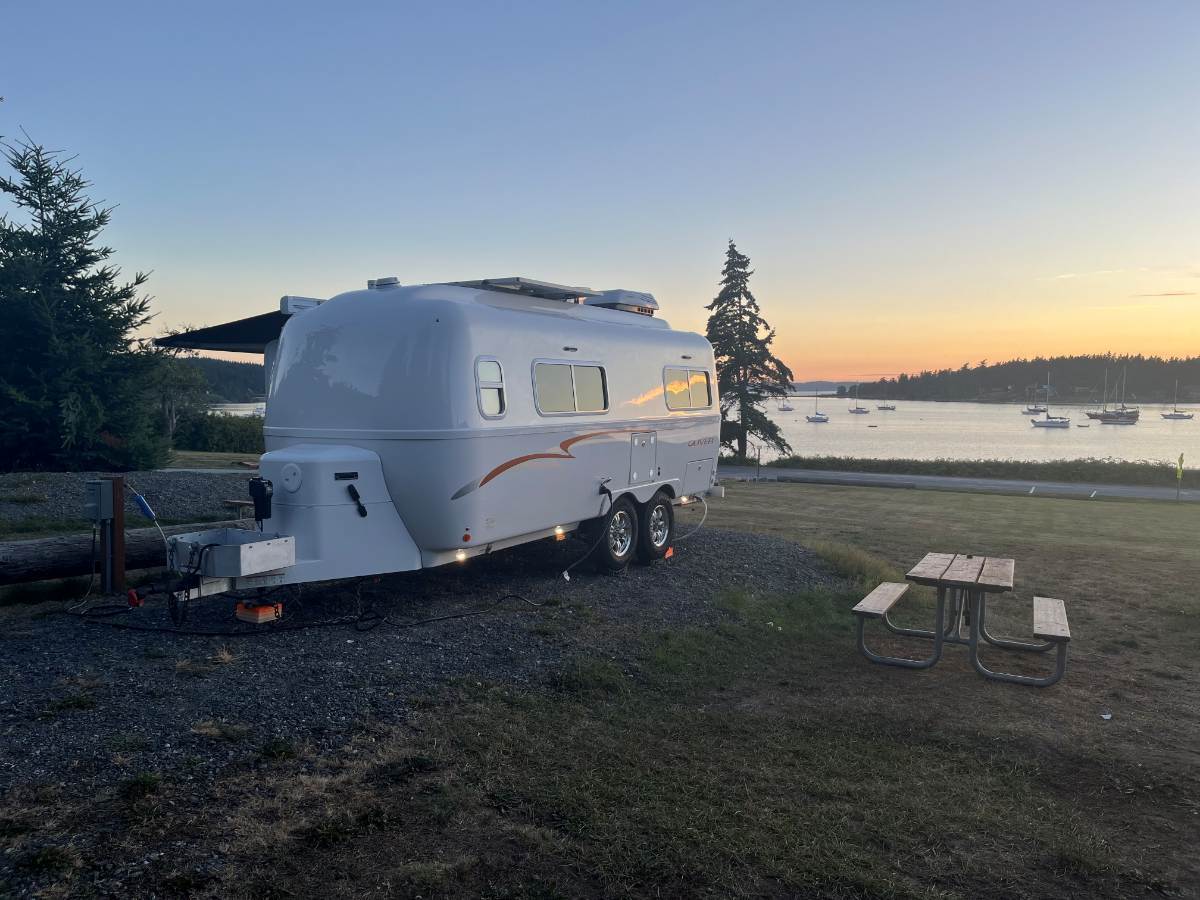
First Post, awesome thread. We were on Lopez Island, WA over the weekend.
 2 points
 -
Love I-81, through the Shenandoah Valley, along the Blue Ridge, etc. You did not mention this Interstate but could be on your route. When we lived in northern VA and traveled often to see parents in Florida, we often traveled I-81 south to I-77. The conventional thinking was I-95 is direct but one of the worst, most dangerous interstates in the country, IMHO. I also try to map as many non-Interstates routes, as much as possible. For example, we drive from Prescott AZ to anywhere in Texas and I only get on I-17 for 10 miles in AZ, because there's no way around it. The next 1000 miles all on US and state highways. Most everybody else takes I-10 or I-40, boring. Tow less per day, see the country on the secondary roads, stop anywhere in the Oliver overnight! 😎2 points
-
This new travel trailer from Evotrex has some interesting features. All electric. I’m sure nobody will be shy with their opinions! Evotrex Mike1 point
-
We often stop at Panther Creek. Nice campground. If anyone is looking for Harvest Hosts or campgrounds along I-81, we have some favorites.1 point
-
I-95 north of roughly Richmond, VA can be horrible, especially Washington DC through Boston. We try to avoid it like the plague. I'd take I-81 north then head east on I-90, but be aware of the tolls. (Also, FYI, in NY and CT, only passenger cars are allowed on Parkways like the Taconic State and Merritt.) We live in CT and try to stay off I-95, even in our car. I-95 north of Boston isn't too bad. There's an old joke about a tourist asking a Mainer for directions that ends with, "well you can't get thar from heah..."1 point
-
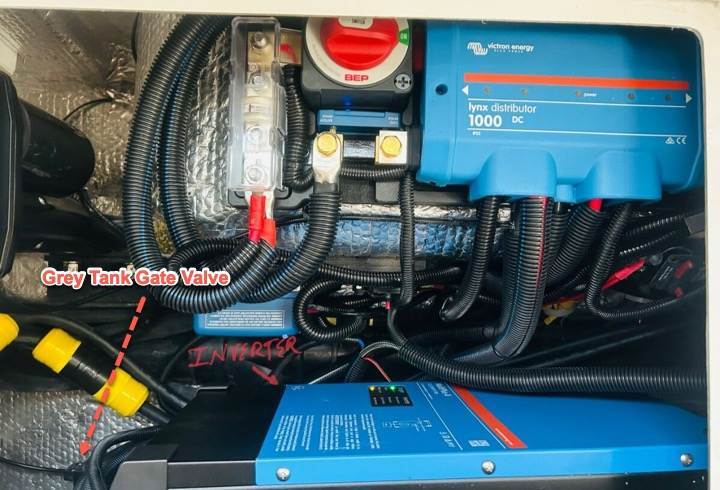
@Patriot as always, fantastic information. One word of caution for future owners putting more items in rear area street-side area. If your TT is say 4+ years old, I might suggest you change out the grey tank gate valve before installation of new equipment. It's horrible to get to, even with nothing over it. My very first maintenance on my Oliver was the very first trip out, and it was the black tank gate valve up front under dinette. I was in and out in 20 minutes. BAM! Too easy! I thought all things would be that easy on the Oliver. Bahahaha. I thought the grey tank would be a similar experience. Oh man, was I wrong! After some choice poopy words spoken and nearly 2 hours later, I replaced the grey tank gate valve. I hope they are easier than in my 2016 TT. Those two lower nuts were a bear to get to, and separating the black tank pipe enough to get the valves out and back in again, was scary, as you have to use a wedge & leverage to move the primary black-tank waste pipe about 1/4 inch to the street-side. Fun times. Also use some good plumber's grease on the rubber seals in hopes of adding a couple additional years of life; so you won't curse like I did too soon. LOL
1 point
-
I asked Oliver how they do it. They use a methacrylate adhesive to bond a 3/4" thick PVC mounting board to the fiberglass. He said I could score the mounting board but that the adhesive is very strong. Once the adhesive is dried, THEN they install the inverter to the board with screws. I mentioned that the Multiplus has feet on it and I couldn't figure out how to mount the Multiplus to a board with those feet. (I later realized I could have cut the board short but I suppose that would have affected ventilation under the Multiplus (?)). He actually looked up the Multiplus and found that a hook and 2 holes are provided at the back of the casing for wall mounting. (They recommend mounting to concrete/masonry - I'm not surprised, this thing is a monster) and say vertical mounting is best for ventilation) I then asked Google Gemini Pro if it recommended a specific type of methacrylate adhesive for this specifc job. This is what it said: When mounting a heavy piece of equipment like a Victron MultiPlus 3000 (which weighs roughly 40 lbs) to the fiberglass wall of an Oliver trailer, the choice of Methyl Methacrylate (MMA) is critical. Because trailers experience significant vibration and road shock, you need an adhesive that balances high shear strength with impact resistance. Top Recommended Methacrylate Adhesives For bonding PVC board to Fiberglass (FRP/Gelcoat), the industry standards are typically found in the marine and transportation sectors: Plexus MA310 (The "Gold Standard"): Why it's better: It is specifically engineered for structural bonding of thermoplastics (like PVC) to composites (fiberglass). It offers a medium cure time (15-18 mins), giving you enough time to align the heavy PVC board before it sets. Strength: It reaches 3,000+ psi and is known for "substrate failure"—meaning the PVC or fiberglass will usually break before the glue does (!!). Modern technology.... Plexus MA560-1 (For Large Surface Areas): Why it's better: If you are bonding a very large PVC board, MA310 might set too fast. MA560-1 has a much longer working time (55-70 mins) and is designed for "thick" bond lines (up to 1 inch). It is highly thixotropic (won't sag), which is perfect for vertical trailer walls. SCIGRIP SG230: Why it's better: This is the primary competitor to Plexus. It is often cited for its excellent "toughness" and ability to handle the thermal expansion differences between PVC and fiberglass, which can be an issue in varying climates. Comparison for Your Specific Use Case Adhesive Working Time Best Feature for MultiPlus Plexus MA310 15–18 mins High stiffness; ideal for heavy vertical loads. Plexus MA560-1 55–70 mins Excellent for large boards or thick gaps. SCIGRIP SG300 10–15 mins Very fast "green strength" (holds weight quickly). Export to Sheets Critical Installation Tips Since you are mounting a Victron MultiPlus, which generates heat and internal vibration (transformer hum), keep these factors in mind: Thermal Expansion: PVC and fiberglass expand at different rates. Using a "toughened" MMA (like those listed above) is essential because it remains slightly flexible enough to absorb that stress without cracking. Surface Prep: While MMAs are "primerless," you should still scuff the fiberglass gelcoat with 80-grit sandpaper and wipe both surfaces with Isopropyl Alcohol or Acetone to ensure no wax or mold-release agents remain. Mechanical Backup: Even with a structural adhesive, many Oliver owners prefer a "belt and suspenders" approach. Consider using the adhesive for the primary bond but adding a few well-placed stainless steel bolts through the hull (if possible) or into the aluminum frame for peace of mind. Would you like me to look into the specific weight-bearing calculations for a certain size of PVC board to see how much adhesive you'll need? How to use Plexus 400ml cartridges This video provides a deep dive into using Plexus structural adhesives in marine environments, explaining why they outperform other bonding methods for composites like fiberglass. Why Plexus Adhesives Outperform Putty & Wet Layup | Marine Bonding Deep Dive Chemical Concepts · 156 views1 point
-
I just completed installation of a Victron Smart Orion 30 amp isolated DC to DC charger after reading all the great information provided in this forum by MAX Burner, and others. I really appreciated all their groundwork and details, so I wanted to share some of my experiences in the hope that others will find it useful. I used #4 AWG wire for ease of installation and for better termination options. BatteryCablesUSA recommended their “Jumper Cable” wire and it was the best deal I found at $197 for 55’ x 2. It consists of a black and red cable joined together like zip cord, and it’s flexible enough to lay flat under it’s own weight. Their lugs and heat shrink were also reasonably priced. I sheathed the full length of the cable with 3/4” braided cable sheath for extra protection and good looks (Amazon Keko 100’ roll for $21.) I seized the ends with Amazon XFasten fabric Wire Harness Tape (5 rolls for $14.) BatteryCablesUSA also recommended Anderson SB50 connectors, instead of the larger #4 AWG rated SB120 connectors that I originally planned. They said that #4 AWG wire would fit in the SB50 #6 AWG contact pins, which it did. I used Trailer Vision covers for the Anderson SB50 connectors. A TV-201426-50 surface mount receptacle with hinged cover plate was installed under the truck bumper. It has a red LED power indicator that I discourage from connecting because it’s on all the time and annoyingly bright. They also offer a flush panel style mounting. The sheathed cord on the trailer side got the Trailer Vision TV-328993-50 plug cover. It has a protrusion that catches on the mating receptacle’s hinged cover to stop it from pulling out. It’s similar to how the 7-pin connector ports hold the plug in. It also has a LED power indicator that’s more useful because it’s only on when connected. It uses a compression gland for the cable that I filled with black RTV. Powerwerx company sells Trailer Vision parts, Anderson connectors, and other accessories for reasonable prices. Get at least 4 extra #6 Anderson pins for connecting to the Victron compression terminals as explained later. Powerwerx also sells the “PanelpodSB,” which is a surface panel mount Anderson SB50 housing for $11.99. I mounted one on the Oliver’s cargo box for “parking” the Anderson connector when it’s not plugged into the truck. It keeps with my existing theme of parking places for the 7-pin cable and RAM rear view camera cable. They also sell a tethered cap to keep it clean when traveling. The engine compartment wiring was straight forward. I connected the cable’s red wire to a 60 amp terminal post fuse on the battery positive. The black wire terminated to the battery negative. The trailer half of the sheathed cable went through a penetration behind the LP tanks. A hole was drilled through the trailer wall next to the existing penetrations with a 1-1/8” step bit. The sheathed cable passed though an Amazon PA66 1” nylon cable gland ($7.99 for two.) I used a short piece of heat shrink over the sheathing where it passed through the gland and filled the gaps with black RTV. The shelf under the bathroom sink has to be removed for access to the inside cable penetrations. From there the cable can be simply pushed under the floor to the rear dinette seat where the Victron was mounted. The Victron has some great safety features that will automatically reduce, or shutdown, the output if it gets too hot or the input voltage drops too low. It’s important to take this into consideration because it would likely happen while driving, and you wouldn’t know it without constant monitoring. Voltage drop especially comes into play with the new smart alternators that lower voltage output to save energy. The Victron’s default voltage settings account for this. However, due to the longer run of cable needed with travel trailer installations, the cable resistance can cause enough voltage drop where it can go below the default settings and cause the Victron to derate it’s output. I calculated the voltage drop for different wire gauges at 35 amps (nominal input current) and a cable distance of 53’ x 2. The results don’t include the connector and termination losses: 1.46 volt drop for #6 AWG 0.92 volt drop for #4 AWG 0.58 volt drop for #2 AWG Per Victron’s instructions, a 0.6 voltage drop can cause a “Voltage Lockout” with the default settings. There are many factors that can affect this, and fortunately the Victron defaults can be adjusted. To account for my voltage drop, I decreased the “Start Voltage” from 14 to 13 volts, and the “Shutdown Voltage” from 13.1 to 12.8 volts. These setting were recommended by “Offgrid Power Solutions,” on a You Tube video called “Victron Orion-Tr Smart DC-DC Charger settings.” Cooling is also an important consideration for the Victron because they create a lot of heat, and they derate charging current 3% for every degree above 1040 F. That’s almost 50% performance loss at only 1200. Maximum operating temperature is 1310, where I believe it shuts down completely. This is why I installed cooling fans (but also for the fun of it.) Amazon’s ”Sound Original” low profile blower fans (two for $9.99) were the right size, they had bearings, brushless motors, and a good mounting configuration for this application. The Victron was mounted on 1/4” standoffs to keep its cooling fins off the mounting surface, and it also helps the fans to distribute air more evenly. I used a Normally Open, 1040, 5 amp, thermostat switch to control the fans (Amazon Uxcell KSD9700 (2 for $5.49). The fans get power from the input terminals on the Victron so they can only come on if the truck is connected, and the temperature is over 1040. The thermostat switch resets at 860. The Victron was mounted on a painted plywood board that was attached to the forward battery compartment wall. It’s an easy to reach, out of the way location. I used 4 rubber well nuts that stay in place by themselves, but regular nuts and bolts could be used. The sheathed #4 cable was terminated to the Victron’s input compression terminals, with the fans power leads. I struggled at first with the Victron’s compression terminations, the wire wouldn’t fit, and I couldn’t find #4 square ferrels. So I was pretty pleased to discover that Anderson pins can be filed down to fit perfectly. Just be sure to cover the exposed barrels with heat shrink. The negative output of the Victron went to the main chassis ground post under the rear dinette seat where there is a 2/0 cable going directly to the battery negative. The positive output was connected to the line side of a Blue Seas 60 amp fuse block, from there it went to the line side of the existing inverter’s DC circuit breaker, which is jumpered to the battery positive with a 2/0 cable. With the TV at idle and the lithium batteries around 60%, the Victron output was 35.8 amps as measured by a clamp-on amp meter. The TV input was 42.5 amps. This calculated to 84% efficiency, which is close to Victron’s 87% claim, which I assume is under perfect conditions. I really liked the looks of the sheathed cable and Trailer Vision plug and receptacle,. The hinged receptacle cover will keep the dirt out when not towing. The plug and receptacle are locked together more securely with the Trailer Vision covers, otherwise the Anderson connectors can be fairly easily pulled apart and they might not stay together on a bumpy road. Cheers, Geoff
1 point




-
Recent Achievements
-