Leaderboard



Popular Content
Showing content with the highest reputation on 09/01/2026 in Posts
-
The few times so far when I had no connection was a blessing I have to admit 😅2 points
-
Yeah, I like having a freezer for ice and a good ice pack for the back & neck. Looks like the Nova fridge uses a lot less power at about 4.5A on 12v. My old 3-way burns at least 10amps on DC, but my 4 good AGMs sustain that all day, with Solar coming in. I'm estimating that the Nova, without a freezer, might run on a Jackery 1000 for approximately 30 to 35 hours. I always travel with at least one of my Jackery 1000s portable power units, for among other things, running my 12v Truma Cooler that I either carry in the cab of the truck or in the camper itself. The Truma cooler runs at least two days on that portable power unit, and I seldom charge past 85%, depending how hold I want things and the ambient temps. I'm estimating that the Nova, without a freezer, might run on a Jackery 1000 for approximately 30 to 35 hours. But that remains to be seen, and weather dependent. In theory, and if I put my money where my mouth has been, I'll be retired in 122 days. (Fine, yes, I'm counting)2 points
-
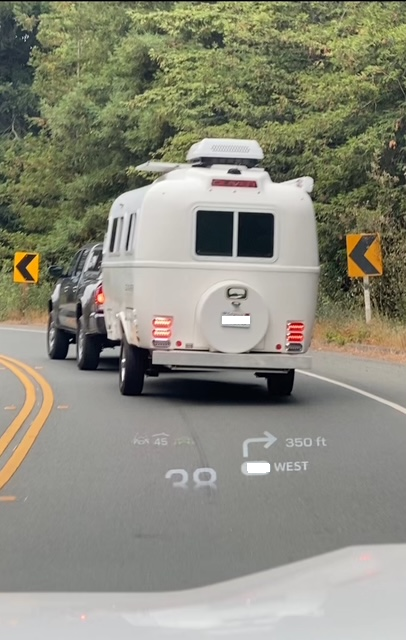
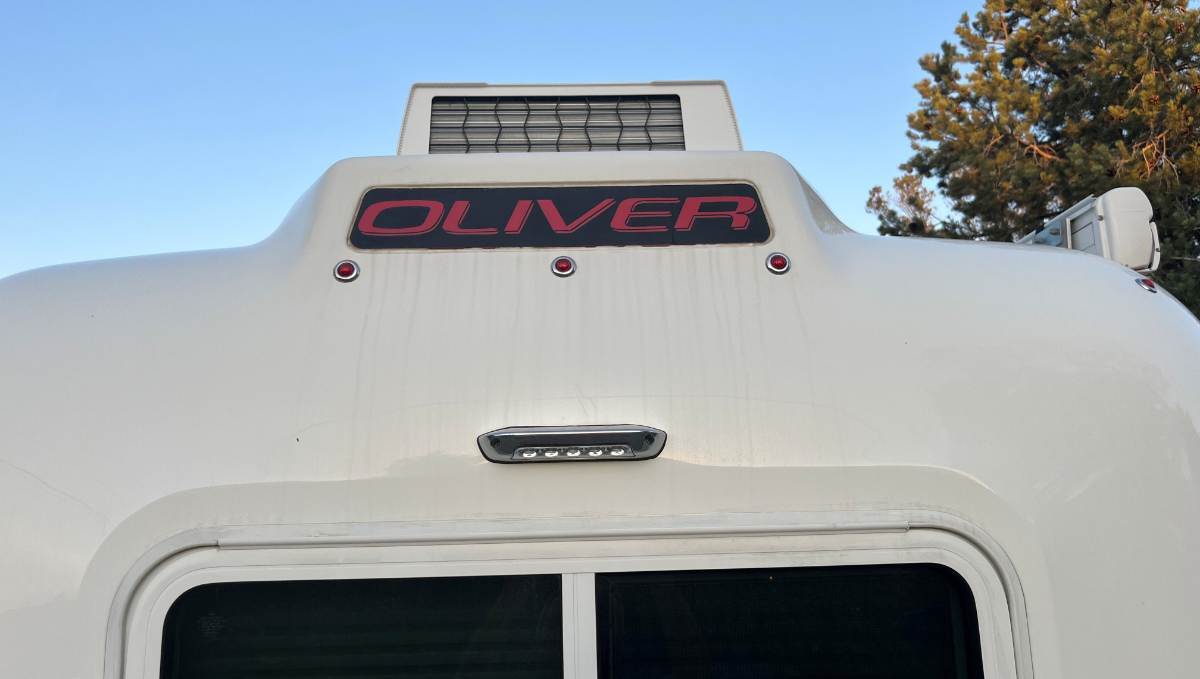
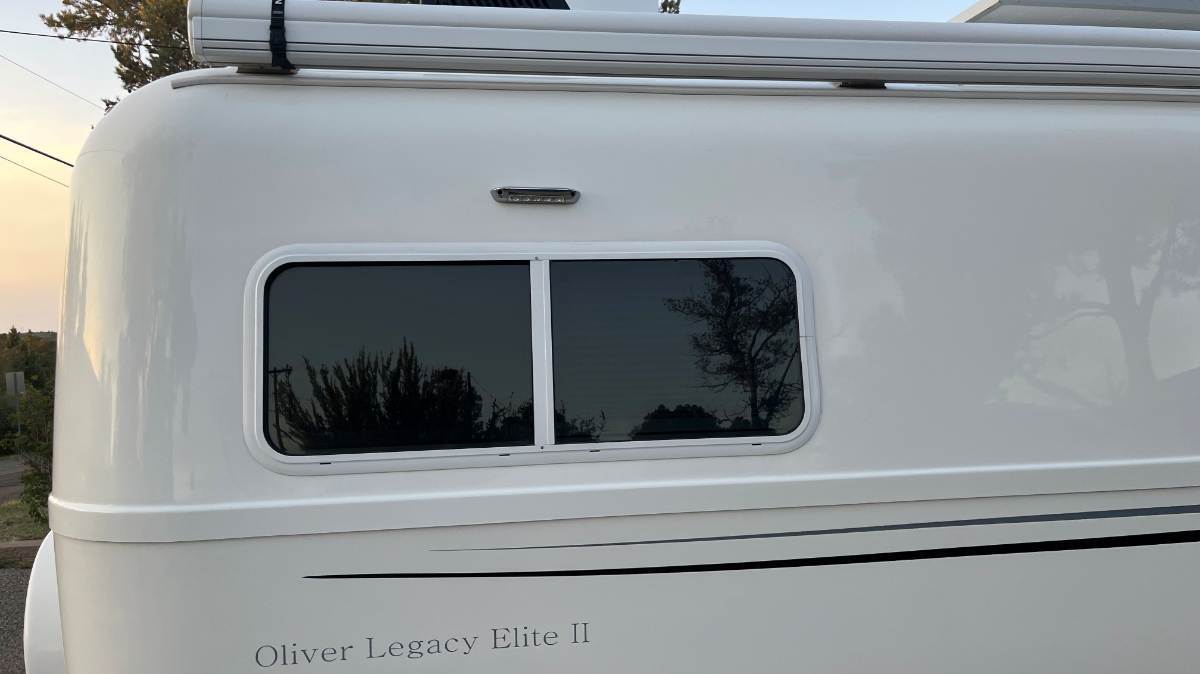
Ollie spotted traveling north on California 101 / Arcata, Ca 12 noon Sept 1st. Black graphics. Not many Ollies' located on the west coast but three known Ollie's are located Arcata/Eureka area.1 point
-
We get 100s of hummingbirds in Prescott, with the peak season during August. It just cooled off and the hot summer temps are gone 'til next season, thank goodness. They all know Chris as the bird lady. She puts out seed, water in the bird bath and gallons of sugar water in 4 feeders. She even had a couple hummers drink from a hand feeder! The hummers will start to migrate south in the next few days/weeks. We do have some winter hummers, but only a few. We spend an hour or so on the deck each evening. Soon we'll be wearing winter clothes and have the fire ring going! 😆 Hummers in Prescott v2.MOV1 point
-
I am looking forward to meeting you as well and 'the dog house' graphic may be gone by then. I need to get a replacement. Mossey1 point
-
Hi DanielBoondock, Blake works by himself and is the owner of Triple B Detailing. He works one project at a time so he’s 100% committed to the task at hand. I dealt with only him, start to finish and he was wonderful! We dropped our Ollie off on a Monday and picked it up on Wednesday. The wash, prep, and application was a full 10 hour day. We had everything except the awning coated, including the solar panels. He used Stark yacht products. It’s not really a double coat but is a double step process of base coat/prep, then topcoat. I highly recommend him! If you want more in depth information or have any other questions, reach out to Blake! He is passionate about his craft and I found him more than willing to help us by text/phone/email.1 point
-
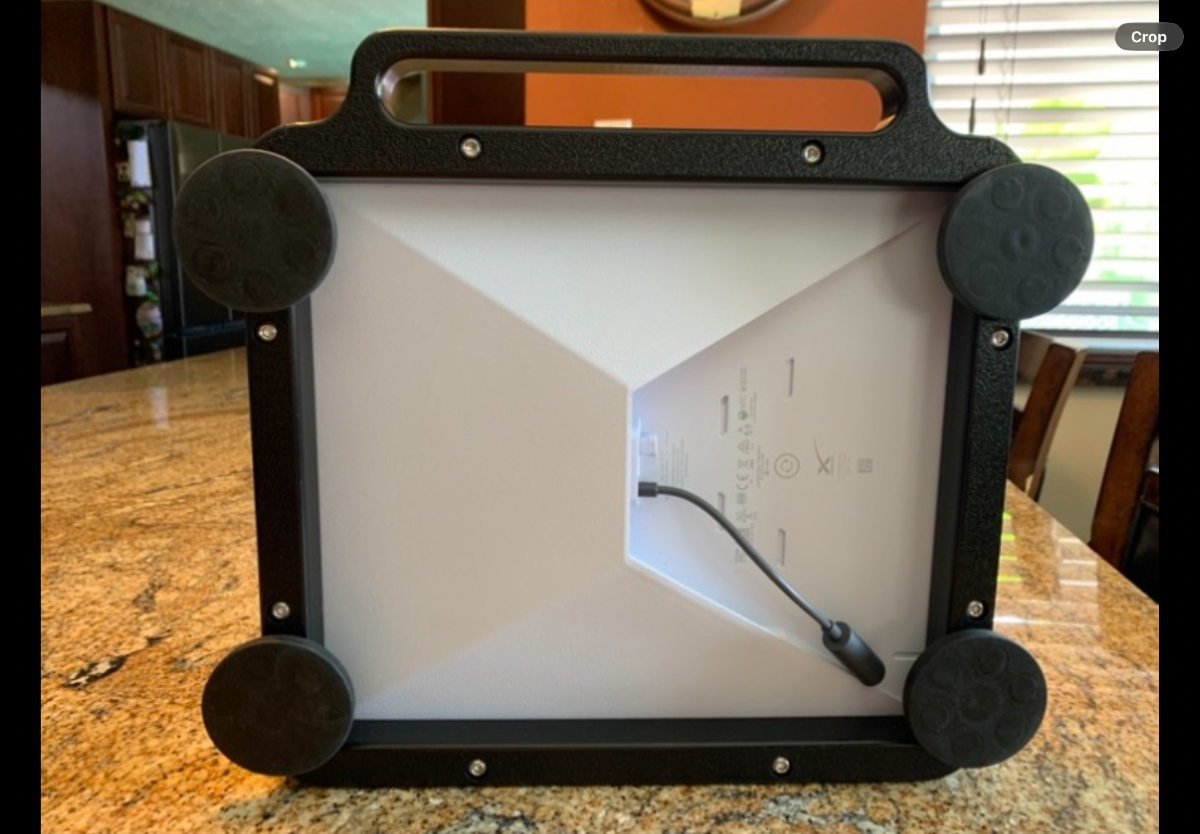
Take a look at Veritas Vans Starlink mounts, I have the magnetic mount version with bolt-on handle for the Mini and very pleased.
 1 point
 -
I’ve got dual awnings and am happy with the built in gutter system. This 8.5’ ladder is small and easy to work with, and is the perfect height for the Oliver. No problem to keep the gutters relatively clean, only bother is getting a pressure washer up there occasionally for the dirt. https://www.amazon.com/dp/B0BJF4PXM2 But the gutters do mean I get brown trails at the four edges. It took a bit of work to buff those out before clear coating, and I hope the oxide will make it a non issue now. Regardless I’ve been thinking if there was a way to have a kind of downspout on the edges. Maybe there’s a 3D part that could be put there while it’s stored. Probably over thinking it
1 point
-
😍 Love it! The Dog House is certainly getting high-tech. Love to see your take on this one with all of your great Mods! Mike/Mossey, I hope to meet you at The Rally! (Your hull graphic should be easy to find.)1 point
-
Does everyone's outdoor shower head basically stink? As in horrible water pressure? I even replaced mine in the past two years with the same model as original, because original cracked as they all do. Maybe I have junk in the Pex line to the shower head, or the head stinks. I'm sure there's a thread around here somewhere. I figured I'd ask since it's being talked about. Thanks.1 point
-
When I installed my accumulator tank in my old #110, I put a new mounting board up for it, I think it was PVC board maybe. Anyways, my first attempt to glue it to the fiberglass hull near the water pump did not hold long. I then tried Gorilla Heavy Duty Construction Adhesive (white). Oh man, was I impressed with that. That board has not moved since, and may never. I've used it now on other projects. It seems good to me. I'm also surprised that the remainder of the adhesive, in the opened tube, has not hardened up yet, nearly two years later. Then again, I keep it in the air conditioned house. I need to add a small tube or two of this to my tool packing list for long travels.
1 point
-
Pretty rare out here on the West Coast, I'm the only one (registered) North of SF. Though I did see this rare bird in nearby camping hotspot while mine was being built last year. I bought sight unseen and was really impressed with how beautiful it looks on the road. I took it as a good omen
1 point
-
Another use for the fuse located at the jack is to make it more difficult for a thief. When leaving it in a sketchy situtation, I lower the tongue and remove that fuse. Want my Ollie, they will have more difficulty than planned for. GJ1 point
-
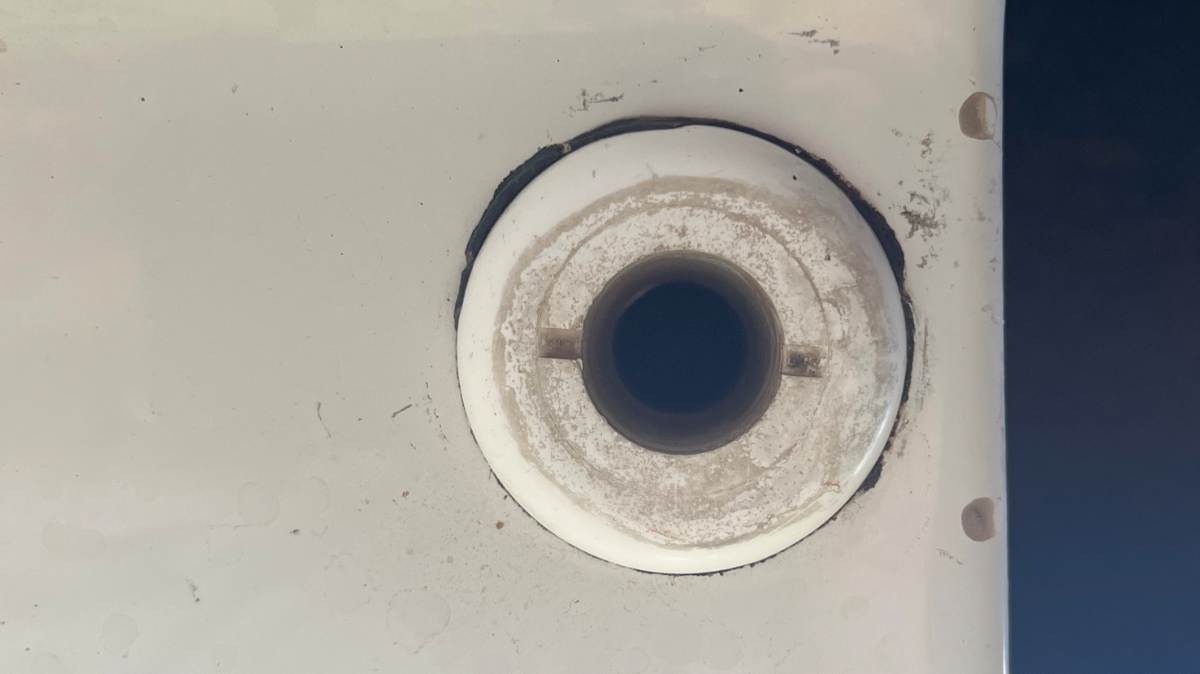
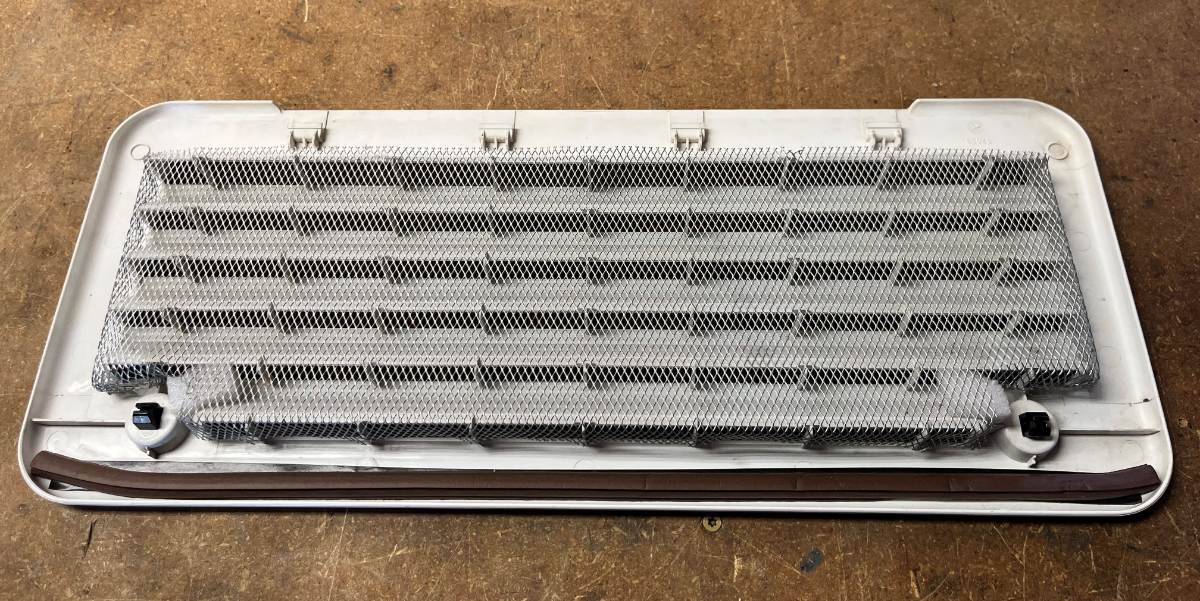
Thank you Chris, for bring this to our attention! 😂 Every time a forum member brings up a maintenance issue, next thing I'm outside checking ours. That's for sure! Ours has no screen at all and no rust. I can stick the full length of my index finger all the up into the opening. Thought I better secure our drain to keep mice and bugs out. I cut a circle about 2 1/2" dia. Then cut a radius line to shape a cone. Then crushed the screen over a 3/8" socket extension and pushed it up into the opening. Same screening I used in the fridge vents.
1 point
-
I second the PITA! I did figure out on our recent trip I can fold the mattress from front to back (with bedding in place) and the frame on the window blinds will hold it in place while I get into the front compartment.1 point
-
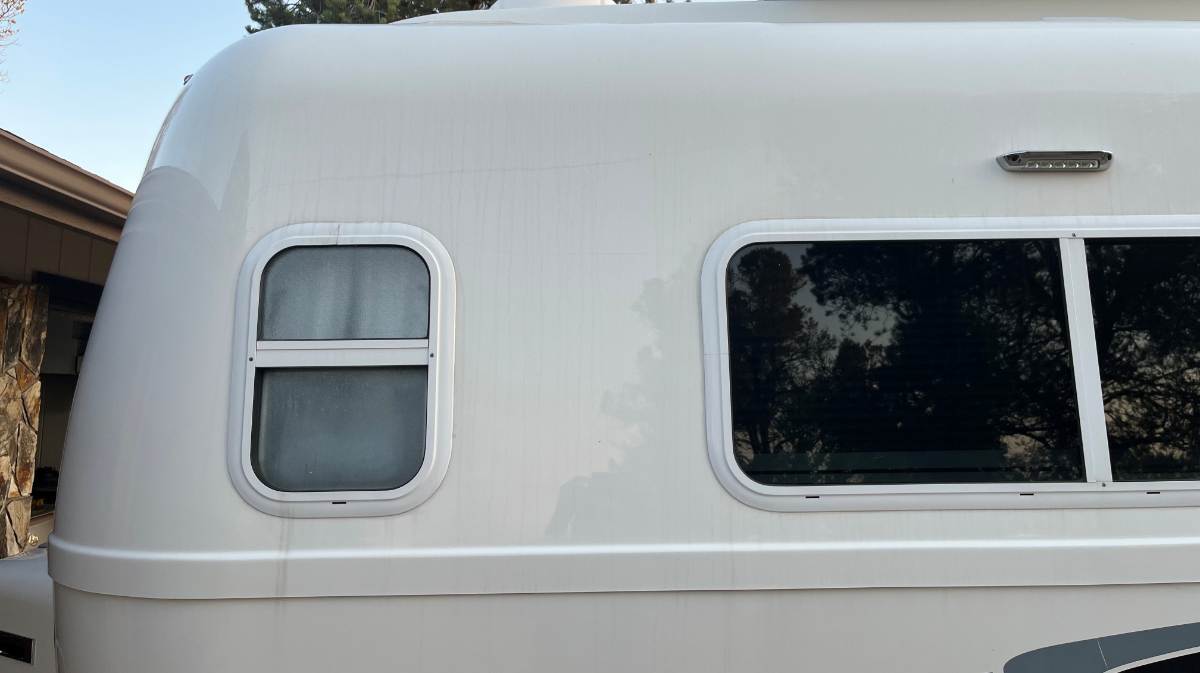
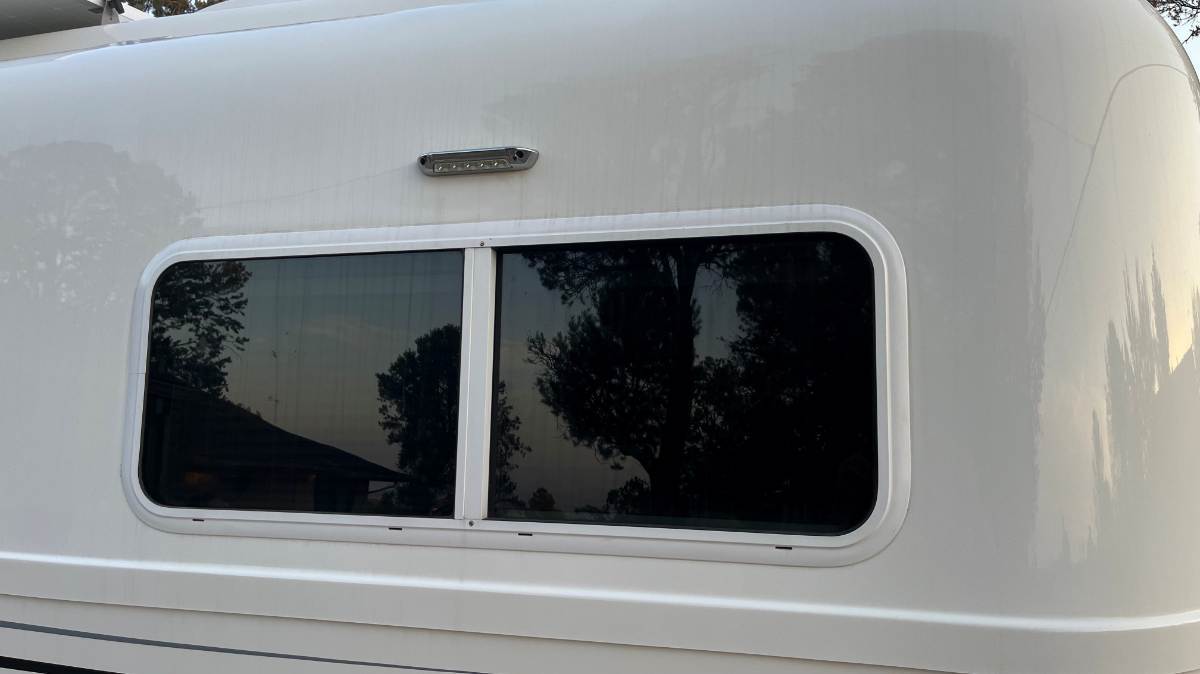
I have an ongoing experiment... For 3 years now, we've had a drip rail on the curbside and not on the streetside, the perfect A-B experiment! Keeping the roof clean? Yes of course, but everyday the breeze coming over our ridge will deposit more red dust on the Oliver! Pictures to follow will start streetside front and end curbside rear. Only the last picture has no pin-striping where the drip rail has been installed. I'm going to install them on the length of the streetside to copy the curbside and a section in the rear below the OLIVER taillight.
1 point
-
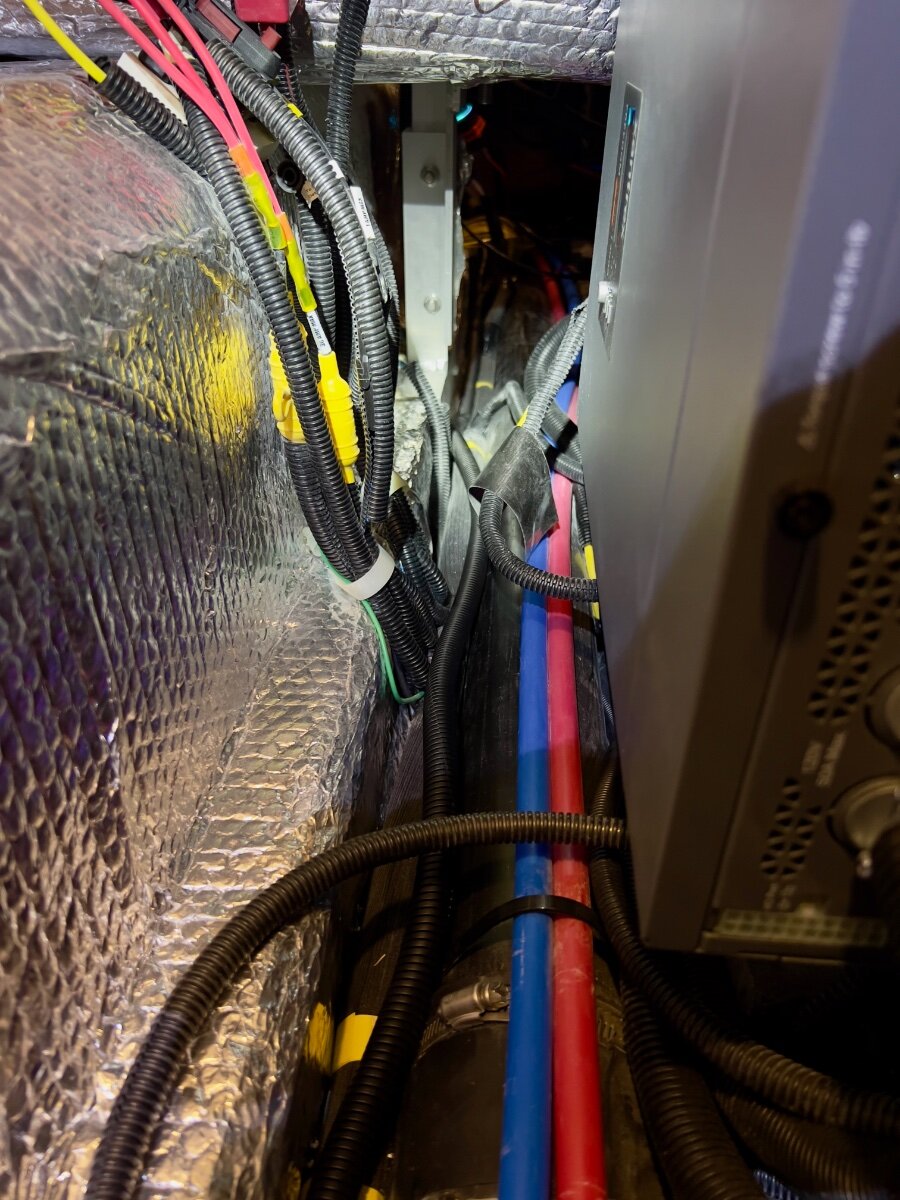
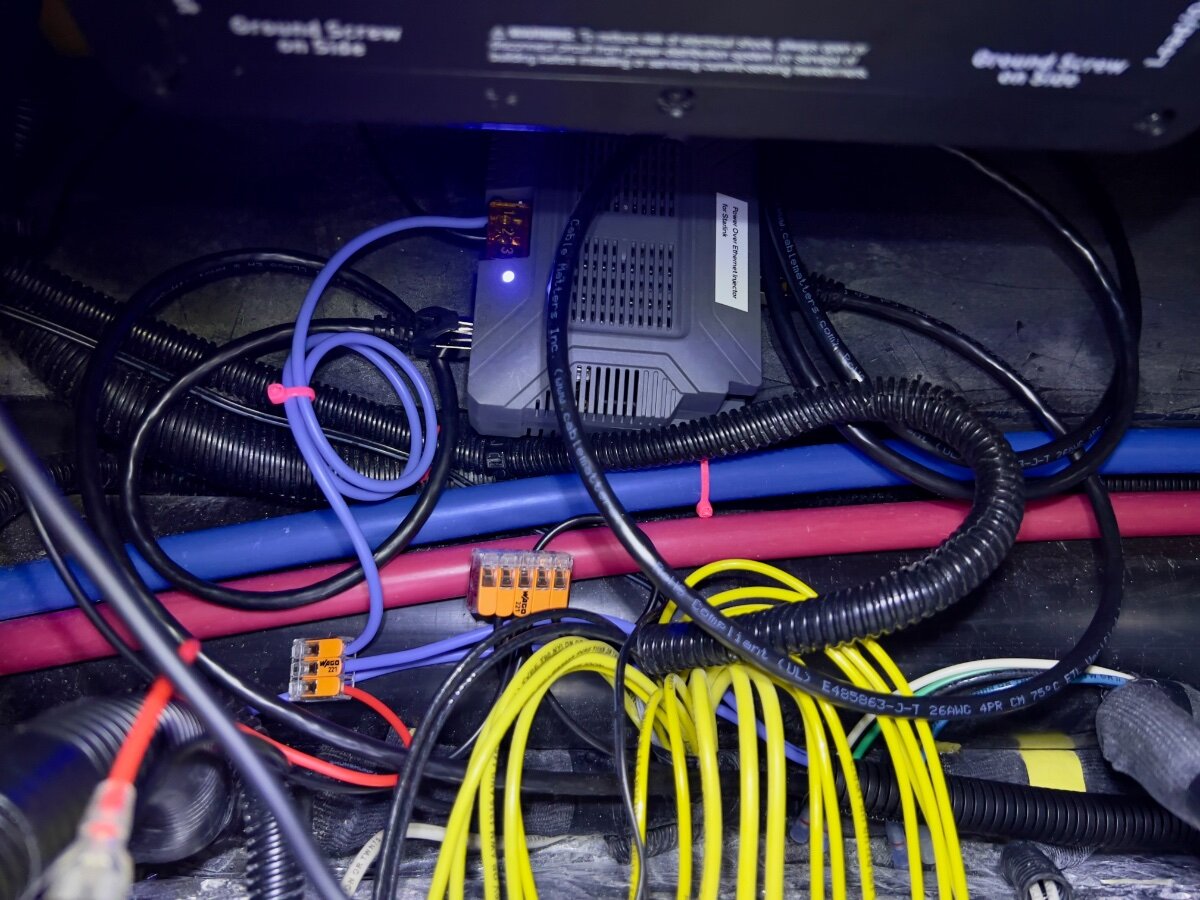
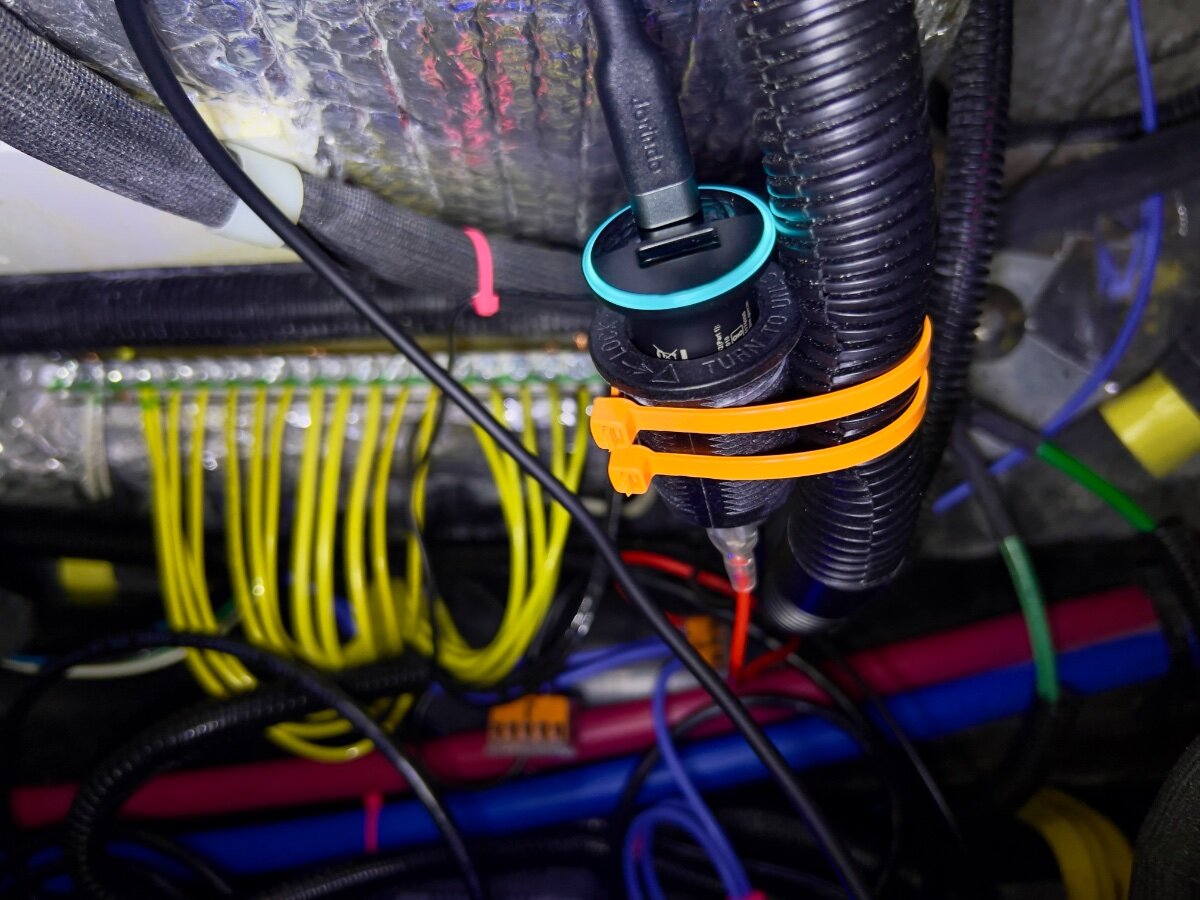
On a recent trip from Dallas to South Carolina we stayed in multiple locations with no (or very limited) communications capabilities (cell phone or WiFi). Over the three years we have owned our LEII, there have been many other occasions with no ability to communicate. As a result, we decided to order a Starlink Mini and a Starlink Router Mini to use on our trailer trips. I have been following Starlink related postings on the OTT Owners Forum, especially since the release of the Starlink Mini. I have found the postings by @Snackchaser particularly helpful in planning the installation of our Starlink system. I especially liked the use of a Power over Ethernet (PoE) injector to power the Starlink Mini and to provide an Ethernet connection from the built-in router back to the trailer, using a single cable. Installing the PoE injector and a DC powered router in the attic of the LEII seemed a reasonable location, being nearly directly above the exterior Furrion ports for connecting satellite and cable TV. So I planned to install in a similar location in the attic of our LEII, assembling a list of the components required. I ordered a PoE injector from MobileMustHave.com and the rest from Amazon. Once all the key components had been delivered, I began the installation, with the first step being to replace the Furrion Satellite coax port with an RJ45 pass-through connector and to fish an Ethernet cable from the basement to the attic. Replacing the Furrion coax connector with the RJ45 pass-through connector was no problem, even though enlarging the hole through fiberglass exterior shell was required. However, fishing an Ethernet cable from the basement to the attic proved to be a major obstacle. Although I have prior experience fishing wires through difficult spaces, I was unsuccessful getting a fish tape (or rods) from the attic to the basement. I could get the end of the fish tape rods down near the ceiling of the basement, where the interior shell ends and multiple cables run up to the attic area at the rear of the trailer, but not into the basement. As suggested, I tried following the A/C drain line and multiple other locations but could not get past the bottom of the inner shell into the basement. I tried running the fish tape/rods in both directions. No luck. Consequently, I began to ponder other installation locations inside the trailer for the PoE injector and Starlink Router Mini. After a couple of days, I had an Aha! moment- install the PoE Injector and Router Mini under the rear dinette seat. I inspected the space between the basement and the rear dinette seat, nearly all of which is readily accessible from the two rear street side hatches and the rear dinette seat hatch. Only the space under the battery compartment is not accessible from directly above, but is easily accessed from either side. I looked for any obstacles to using this location and found none. I could easily route the Ethernet cable from the Furrion/RJ45 pass-through connector forward to beneath the rear dinette seat. I located the PoE Injector atop the trailer frame member, just below the Progressive surge protector box, which is mounted on the aisle wall of the rear dinette seat. The PoE jack and the power terminals of the PoE Injector are positioned toward the front of the trailer. I connected a 20 foot shielded Cat 6 cable from the inner side of the Furrion/ RJ45 port, then routed it under the floor of the basement, around the street side rear stabilizer, then following the waste water line, forward to the area under the rear dinette hatch. About 3 feet of excess cable are coiled in the basement, concealed by the rear wall of the basement. I installed a lighted rocker switch through the forward basement wall, mounted high, almost directly above the side-to-side bubble level on the left side of the basement entry. This switch is to control 12VDC power to the PoE Injector and the Starlink Router Mini. Using 14 AWG silicone coated wire, I ran two purple colored wires from the space beneath the rear dinette hatch back to the rocker switch on the forward basement wall. A third, 14 AWG black wire was also run along the same route to the rocker switch. The switch has two terminals with red lead wires,: one to the DC power source and one to the load. The third terminal has a black wire, which connects to ground (the bus bar). The ground wire enables the light on the switch to operate when DC power is ON. On the DC power panel, position 15, I installed a 15 amp fuse. One of the purple wires connects to the 12VDC positive terminal on the PoE Injector. The other purple wire connects to position 15 on the rear of the DC power panel, using a crimp on connector. The single black wire from the switch connects to the ground bus located under the rear dinette seat. Another 14 AWG wire connects the PoE Injector negative terminal with the other end connecting to the bus bar. All wire-to-wire connections were made using Wago lever lock connectors. I also added a 12VDC auxiliary power outlet (cigarette lighter type) which is connected to the same circuit as that which powers the PoE Injector. An Anker 323 USB-C Car Charger Adapter (USB Power Delivery (PD) capable) plugs into the auxiliary power outlet. A USB-C to Male to DC 3.5 x 1.35mm Male Power Jack is used to power the Starlink Router Mini from the Anker charger. I found the Starlink Router Mini conveniently fits on top of the Progressive Surge Protector box. I later secured it with a releasable zip tie around the surge protector. The 20 foot Cat 6 Ethernet cable from the rear connects to the PoE jack of the PoE Injector. A 5 foot Cat 6 Ethernet cable connects to the LAN jack of the PoE Injector and to the WAN/Satellite port of the Starlink Router Mini. All Cat 6 Ethernet cables used are shielded. I believe this installation location approach has several advantages over an attic installation: Access is MUCH easier. Fishing wires is no challenge. A dedicated circuit from the DC power panel provides power to all Starlink related components. A lighted switch for the PoE Injector and Starlink Router Mini is located in the basement, near the exterior pass-through Ethernet jack. The PoE Injector is located where it cannot be covered by clothing or other cargo stored in the attic which might cause overheating. The VERY bright blue light on the PoE Injector is not visible in the cabin (always ON if power to the PoE Injector is ON). The Starlink Router Mini is located centrally in the trailer and should provide uniform WiFi coverage within the trailer. We have not yet taken the Starlink on a shakedown trip, but plan to do so at the end of August. Regards, Don
1 point
-
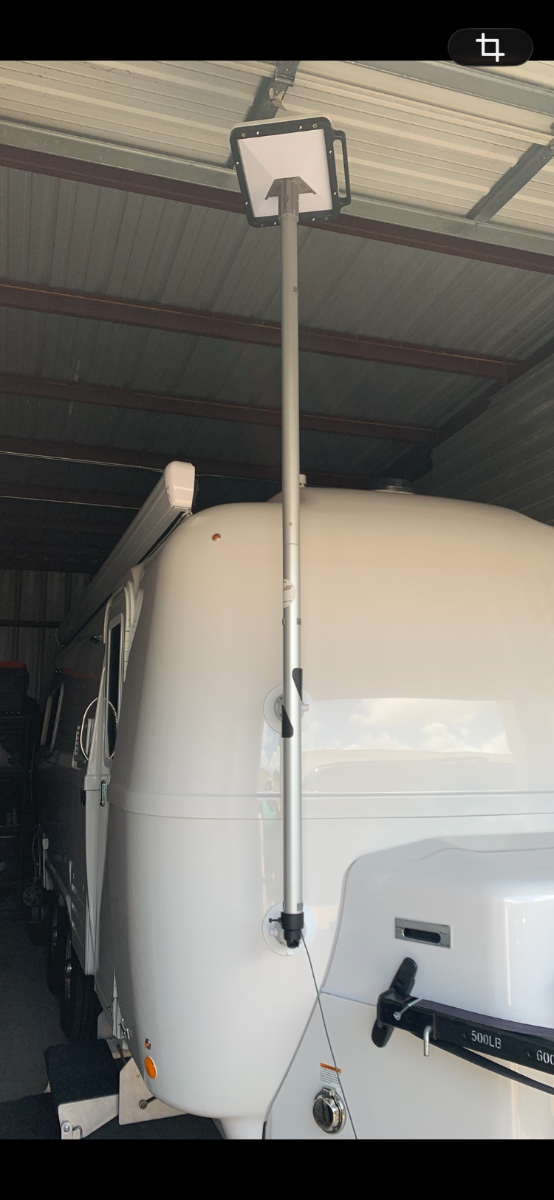
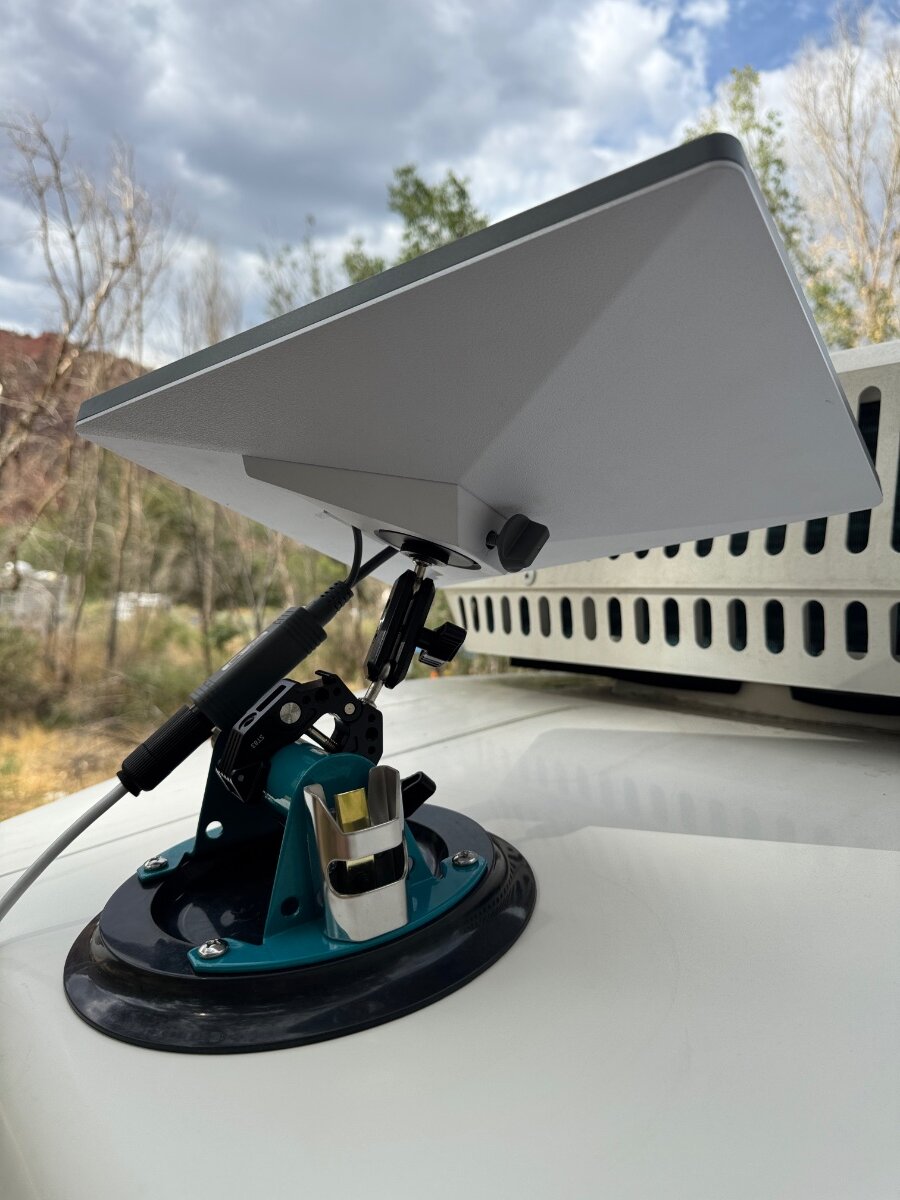
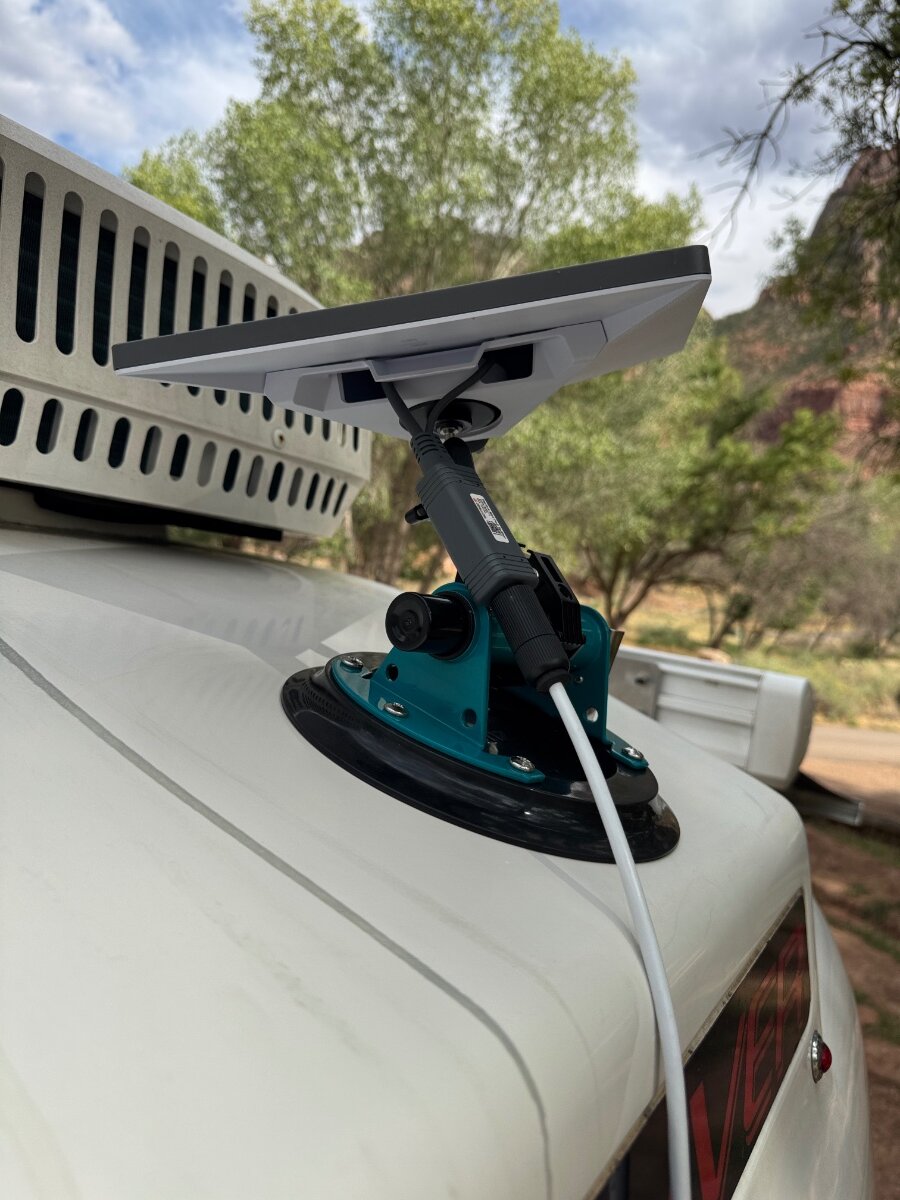
I also did the POE injector method for powering the Mini. As far as mounting I initially had it on top of my flagpole but the ended up being a problem with the cable and the flags getting bunched up. This is my current method for mounting on the Oliver. It has been working great so far. Links below. NEEWER Aluminum Mount Accessories Kit Compatible with Starklink Mini, Adjustable Roof Rack Super Clamp Mount, RV Ladder Pole Clamp Kit for Yacht Camper, Not for The Lastest Pipe Adapter, ST83+NA02 https://a.co/d/5qcuwb6 ZUOS 8" Glass Suction Cup Lifter, 560lbs Load Capacity, Green, Metal Handle & ABS Pump, Vacuum Glass Lifter https://a.co/d/ippF5gt
1 point
-
@johnwen, your guess was correct. The switch mounted on the forward basement wall connects to what had been a spare circuit on the fuse block via a junction. Three wires are connected by a Wago lever connector: wire from switch wire to the Mini Router wire to the fuse block If you used the same lighted rocker switch as I did, it has three wires, one smaller than the other two. This small wire needs power for the LED light in the switch. Don1 point
-
@Steve Morris I am pleased you found the tips helpful. It looks like you are on your way with the install. I like your base for the Starlink Mini. It certainly keeps it off the ground. 😀1 point
-
Don, The reason I asked was we are only 6 numbers apart on our hull #'s so the same person probably worked on our Progressive surge protector box but mine is either upside down or the cover had been taken off for maintenance and reinstalled upside down...makes it a little easier to read from the top :) Makes no difference either way but since there is that difference I'm wondering if there is anything else different down there. You mentioned "hard rubber frame covering" but that area, in mine, appears to be the top of the gray water tank and before I investigated I was planning to possibly drill in that area to attach. I'll probably find another location since there seems to plenty of possibilities. Our mini is working very well and definitely recommend as others do. Out POE injector/converter is on the way...yay! I'll tackle this project soon. Ditto on the couplers. Thanks much, John1 point
-
@johnwen, my apologies, I thought I had included the details on the Ethernet cable running from the RJ45 through jack utilizing the Furrion external shell. All of the Ethernet cables I purchased are Cable Matters products. All are shielded Cat 6A. In addition to the 20 ft. cable used inside the trailer, I purchased a 50 ft, and 2x 25 ft. cables and a single 1ft cable. I also purchased VCE CAT6A Waterproof RJ45 Coupler IP68, 10Gbps CAT6A/CAT6/CAT5E/CAT5 Female-to-Female Outdoor Ethernet Connector Shielded, Network Cable Extender for Outdoor Use 2-Pack, 5.3 in. To connect the Ethernet cable to the PoE splitter, I had to slightly trim the black plastic anti-snag protector on the 1 foot long Cat 6A able. This was necessary because of the tight fit through the watertight connector on the PoE splitter. You may have run across mentions of this issue by others online who are using this PoE Injector and Splitter. Once I trimmed the soft plastic cover over the cable release tab I was able to fit the RJ45 connector through the watertight connector on the Splitter. I chose to use the 1 foot long cable so that I could leave the splitter and the 1 foot cable connected to Starlink Mini. I find the connectors going to the Mini from the Splitter to be difficult to remove due to the watertight seals. I don't like the idea of pulling on the cables to release the Splitter from the Mini. I anticipate repeated removal of the Splitter from the Mini will result in damage to the cables on the Splitter. Replacement Splitters appear to cost about $65. At the other end of the 1 foot cable I attached one half of the VCE RJ45 couplers listed above. This way it is much easier to disconnect the Ethernet cable from the Mini without messing with the watertight connector on the Splitter again. I also installed the VCE couplers on the ends of the 50 foot and 2x 25 foot cables. This way they are like extension cords which are easily connected/dis-connected. I am impressed with the VCE couplers. They are excellent and easy to use. I bought the three longer length cables to be able to easily connect 25, 50, 75 and 100 foot long cables, as needed. I specifically want to avoid having to deal with a single 100 foot cable, which I find to be a PITA. I have not yet had a chance to use the Starlink Mini on a trip, but have only tested it with our LEII parked in our driveway. Due to tree coverage, I needed to connect at least 75 feet of Ethernet cable to position the Mini for a reasonably unobstructed view of the sky. The Mini still had some obstructions, but I was able to measure Ethernet speeds inside the trailer >100 Mbps. I sometimes saw speeds drop to the 50-75 Mbps and rise as high as 200+ Mbps. I suspect the variable is at least partially attributable to the position of Starlink satellites at the time of the speed tests. The satellites are each only in view 8-9 minutes, without obstructions. In any case, I connected my laptop to Starlink WiFi inside the trailer and was able to browse comfortably. I did not notice the occasional losses of service which I noticed in the performance data on the Starlink app. I don't recall any RV park or state park where the provided WiFi was anywhere close to the minimum speeds I have observed in our driveway. BTW, in our residence we have AT&T wired gigabit Ethernet throughout, so I have a low tolerance for poor WiFi service. I have high expectations for using the Starlink service, based on reports by others and my experience so far. At this point, I have not used any adhesive to attach the PoE Injector to the top of the frame member on which it sits. I have a small zip tie connecting it to a PEX cold water line. With the Ethernet cables attached it cannot really go anywhere. I did not want to use a more permanent method to secure the PoE Injector, until field testing on a road trip. We have our next trip scheduled in late August, so I will observe it over a 400+ mile trip. I will likely use a small strip of 3M VHB tape to fasten to the hard rubber frame covering. Good luck with your installation. If you have any questions, feel free to send me a Personal Message and I will be happy to answer.1 point







.jpeg.799f3cf194b3b21d05b2a7bb19f728b1.jpeg)
.jpeg.dd379fc2e5087fa6910ce21b437441ad.jpeg)
forPoEInjector.jpeg.2ff4c7b3725adaf25e5bdfc30965ceff.jpeg)
atopProgressiveSurgeProtector.jpeg.5c03a313182d5fdb47bf1a254dec329d.jpeg)


-
Recent Achievements
-