Galway Girl
-
Posts
748 -
Joined
-
Last visited
-
Days Won
23
Everything posted by Galway Girl
-
Staying 2nights at Gulpha Gorge CG in Hot Springs NP. Site 12 is a FHU site and good size but with a large downward pitch and sideways roll. Other smaller sites without hookups back onto the creek.

-

Stabilizer Jack Tightening
Galway Girl replied to Galway Girl's topic in Mechanical & Technical Tips
David, You are welcome. After I saw the carriage bolt heads when I looked inside under the beds I thought a post may be helpful. I checked mine and re torqued them as I prepared the post. Sorry we missed saying goodbye. craig & Rose -
Oliver Rewards Program now has a month service fee
Galway Girl replied to routlaw's topic in General Discussion
Guess it’s time to spend or lose it. -
At the eclipse meet up I was asked about tightening the stabilizer rear jacks. i use blue threadlocker to help with bolt retention. Spec: 3/4” Leveling Jack flange bolt nuts (43 ft-lbs). Bolt locations shown for rear. inside : outside:
- 2 replies
-
- 10
-

-

-
Multiplus II with PD EMS wiring help
Galway Girl replied to rideadeuce's topic in Ollie Modifications
It says on the mp2 datasheet: ”Two AC Outputs The main output has no break functionality. The MultiPlus takes over the supply to the connected 120V loads in the event of a grid failure or when shore/generator power is disconnected. The transfer time of the L1 output is less than 18 milliseconds so that computers and other electronic equipment will continue to operate without disruption. The transfer time of the L2 output is longer: approximately 40 milliseconds. The second (auxiliary) output is live only when AC is available on the input of the MultiPlus. Loads that should not discharge the battery can be connected to this output.” -
Multiplus II with PD EMS wiring help
Galway Girl replied to rideadeuce's topic in Ollie Modifications
It says on the mp2 datasheet: ”Two AC Outputs The main output has no break functionality. The MultiPlus takes over the supply to the connected 120V loads in the event of a grid failure or when shore/generator power is disconnected. The transfer time of the L1 output is less than 18 milliseconds so that computers and other electronic equipment will continue to operate without disruption. The transfer time of the L2 output is longer: approximately 40 milliseconds. The second (auxiliary) output is live only when AC is available on the input of the MultiPlus. Loads that should not discharge the battery can be connected to this output.” You might try asking service how they connect up their 3000 watt inverter to run both a/c and outlets. -
Multiplus II with PD EMS wiring help
Galway Girl replied to rideadeuce's topic in Ollie Modifications
The shore power ( or generator) feeds thru the ems to the breaker panel. The a/c ciircuit is on its own 20 amp circuit . if you want to power the a/c from the new inverter, you would need to also wire into that 20 amp breaker from your inverter. what does the multiples 2 have as ac output? Is it one output or two? -
Multiplus II with PD EMS wiring help
Galway Girl replied to rideadeuce's topic in Ollie Modifications
I believe in your specific trailer has two external ports for shore power. Those connections first go to the transfer switch that is on your front wheel well. That shore or generator power (when applied to either port) goes through that transfer switch then the output connects to the input side of the EMS. The output of the EMS connects to the main Breaker Panel. On that panel you'll see the following breakers as indicated on the inside door panel. The #4 (20A double wide ) breaker is the one that feeds your outlets and microwave. It's also the one connected to the GFCI outlet under the front dinette seat. It's this circuit that your inverter feeds when you turn it on. As to the PF4000 charger output. In the photo you'll see I've taped off the 15A breaker #5. That's the breaker that fed power the charger in the PD4000 panel. I've also disconnected the PD4000 charger outputs from the battery circuit and capped and taped the charger output wires. (That way even if the breaker is flipped on, no power will be applied to the new batteries from that old charger.)
-
Multiplus II with PD EMS wiring help
Galway Girl replied to rideadeuce's topic in Ollie Modifications
I upgraded our 2019 from the older 2000watt xantrex inverter to a new combo 2000w xantrex inverter/charger and added Lithionics batteries. I disconnected the on board progressive dynamics charger (below the dinette). I suggest you do a diagram of your current wiring before doing any work. I created an article on our upgrade: https://4-ever-hitched.com/ggs-blog/f/lithium-battery-upgrade?blogcategory=Electrical+Upgrades I left out the ems connections in the diagram. if you have questions after looking at that pm me and we can talk directly on the phone. Craig Short -
From Lady Bird Johnson Park. (9) Oliver’s here today. Lots of looking between clouds. Fun to hear the crowd cheer at totality. All pedestal lights turned on at totality.
-
Spotted an EII in an HEB store lot on south side of San Antonio today. It had a white Ford truck as the tow vehicle. Left our card in the drivers side window to say hi. Craig n Rose
-
Are there any higher wattage panels that would fit that space? Or are the 200w the max for that size? Just curious.
-
San Antonio F350 service recommendation?
Galway Girl replied to Galway Girl's topic in Towing an Oliver
Thanks. I’ve scheduled at Cavender Ford which is 1.5 miles from the Alamo koa in San Antonio and has shuttle service for the day. I’ll report back later on how it went. -
We’re going to need some basic services done on our F350 6.7l diesel. front/rear diff service, oil and filter change, diesel fuel filter changes. Any local knowledge suggestions of good repair shops? craig
-
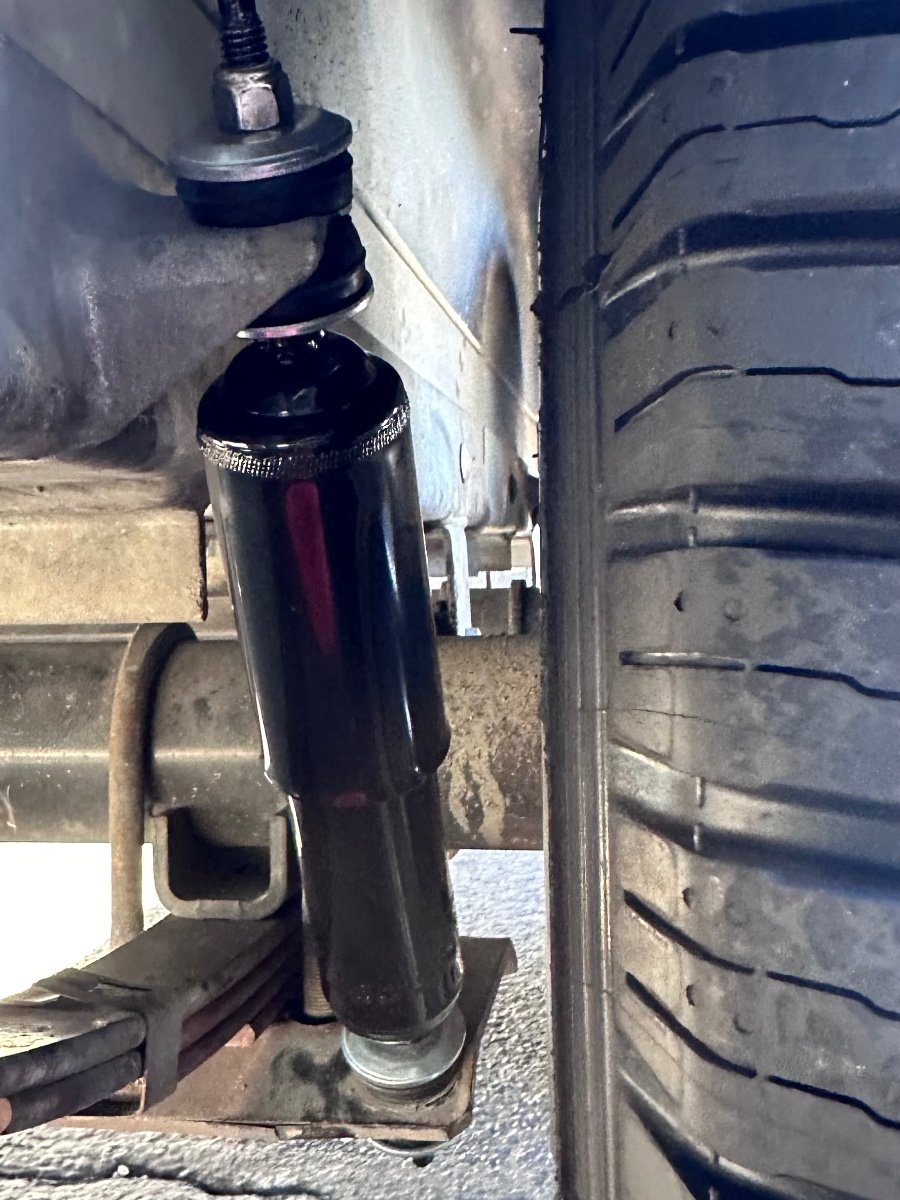
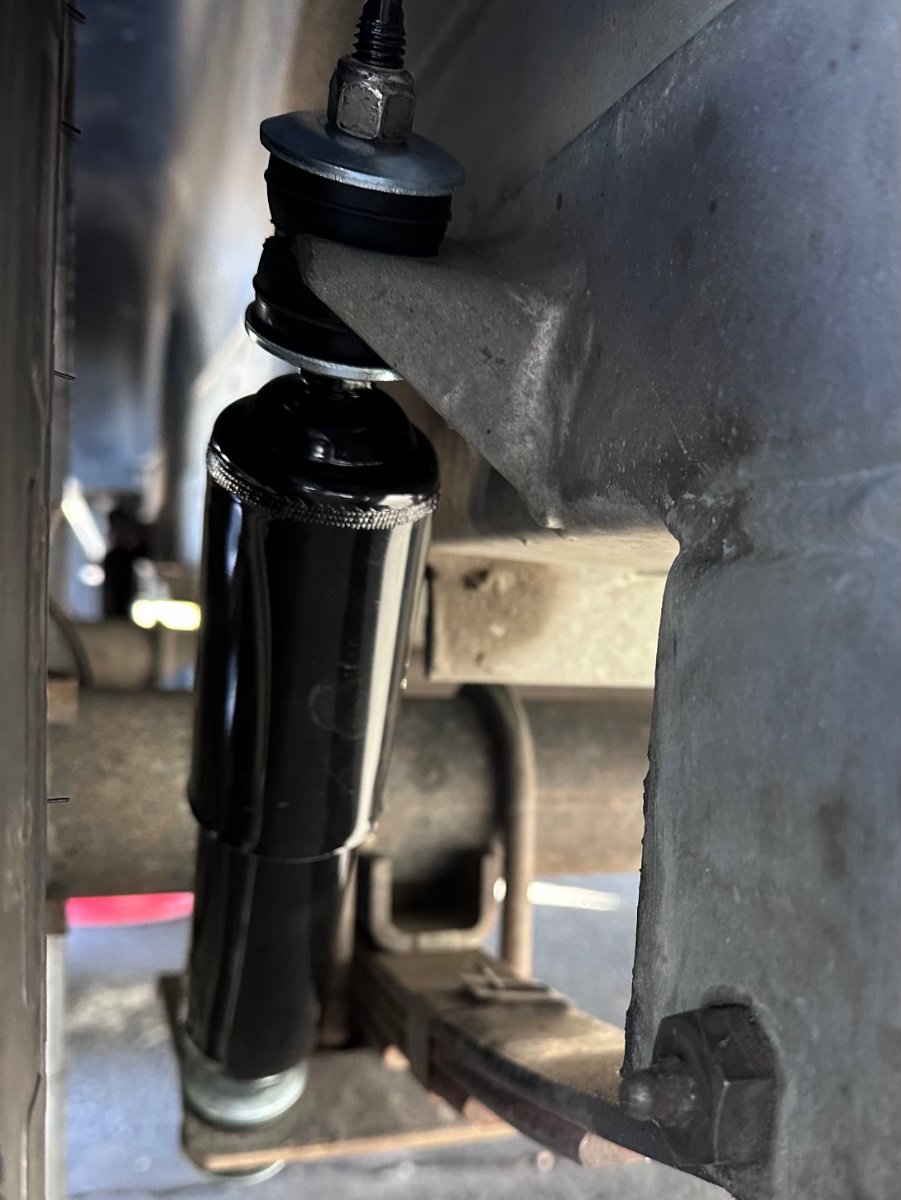
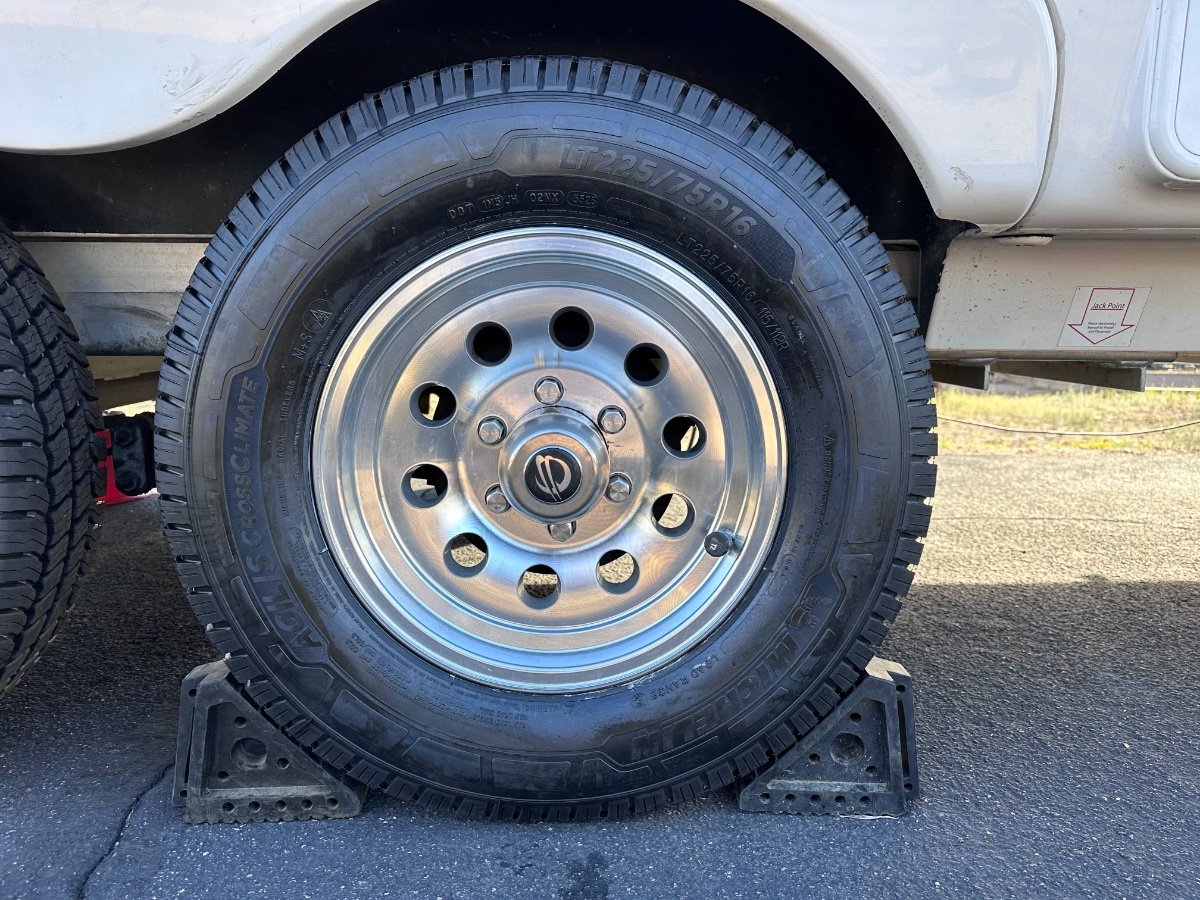
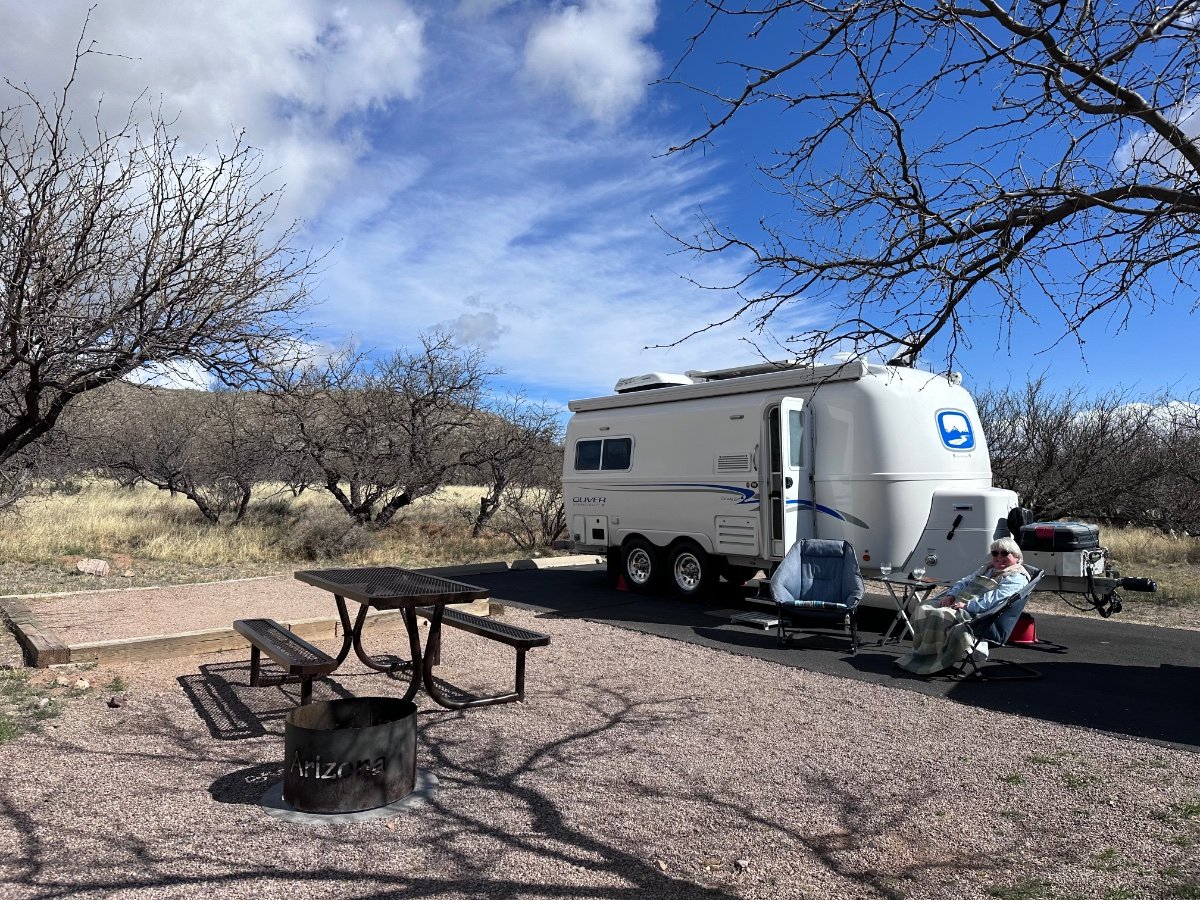
On the road at Kartcher cavern SP in AZ. Since we are here for a week, I decided to Replace all tires and installed 4 new shocks at 50k miles. At same time checked springs for wear /cracks and re-lubed all Zerks. The tires had simply aged out but one in particular had an odd scalloping wear pattern. (Cause was a slightly loose bearing castle nut on that right/front wheel.) The shocks were getting a bit rusty and I decided to change as prevention. ( All 4 seemed functional upon removal.) Since the original tires were 16” LT Michelin, I stuck with the brand and now run: Michelin Agilis Cross Climate LT225 /75 R16 115R E1 BSW Shock replacement is: Monroe Magnum RV 555001 I was able to get the tires at a local Discount Tire in Sierra Vista. ( took 3 in one day and 2 the next as we had chores in town. ) Ordered shocks online and shipped to my sisters who we visited on the way here. Shocks went on quickly once the unit was jacked up so suspension was hanging. All set for the next stage of our trip where we will meet up with several owners at Ladybird Johnson for the Eclipse.
- 24 replies
-
- 11
-
-
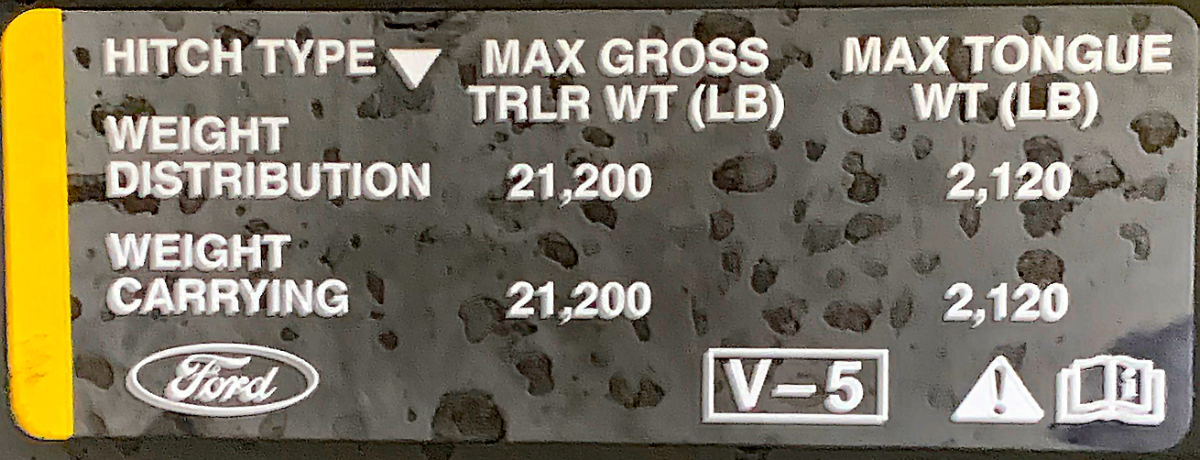
in case folks wonder about the data on receiver hitch. Here are two labels from trucks we’ve pulled out EII with. The F150 required the Anderson Hitch, the F350 has plenty of margin and automatic auto-sway control so no sway or load leveler hitch needed. F150 Hitch Label F350 Hitch Label
-
Example of the great silencing of Oliver. Recorded this at a campground next to I-90 near Seattle. audio file here…about 1:34 Quiet%20Oliver.wav Craig
-
What year is that trailer? Looks like maybe a 2017.
-
We were traveling on I-8 in Arizona heading eastbound to Organ Pipe Cactus NM and spotted 2 Oliver’s Westbound and 2 in the campground when we arrived. On road spotted: Westbound, before Yuma, Blue & Grey logo towed by grey F150 Near exit 67 I8 Az , Gold logo pulled by white Mercedes suv Two others in Twin peaks CG , Gary Foy Lin a 2022 pulled by F150 hybrid. tbd other unit. tgats more sittings in one day than the whole time from Sept 2023 to today Craig hull 505 - Galway Girl
-
Starlink dish mount on Dometic awning brackets
Galway Girl replied to RoadKingsofGA's topic in Ollie Modifications
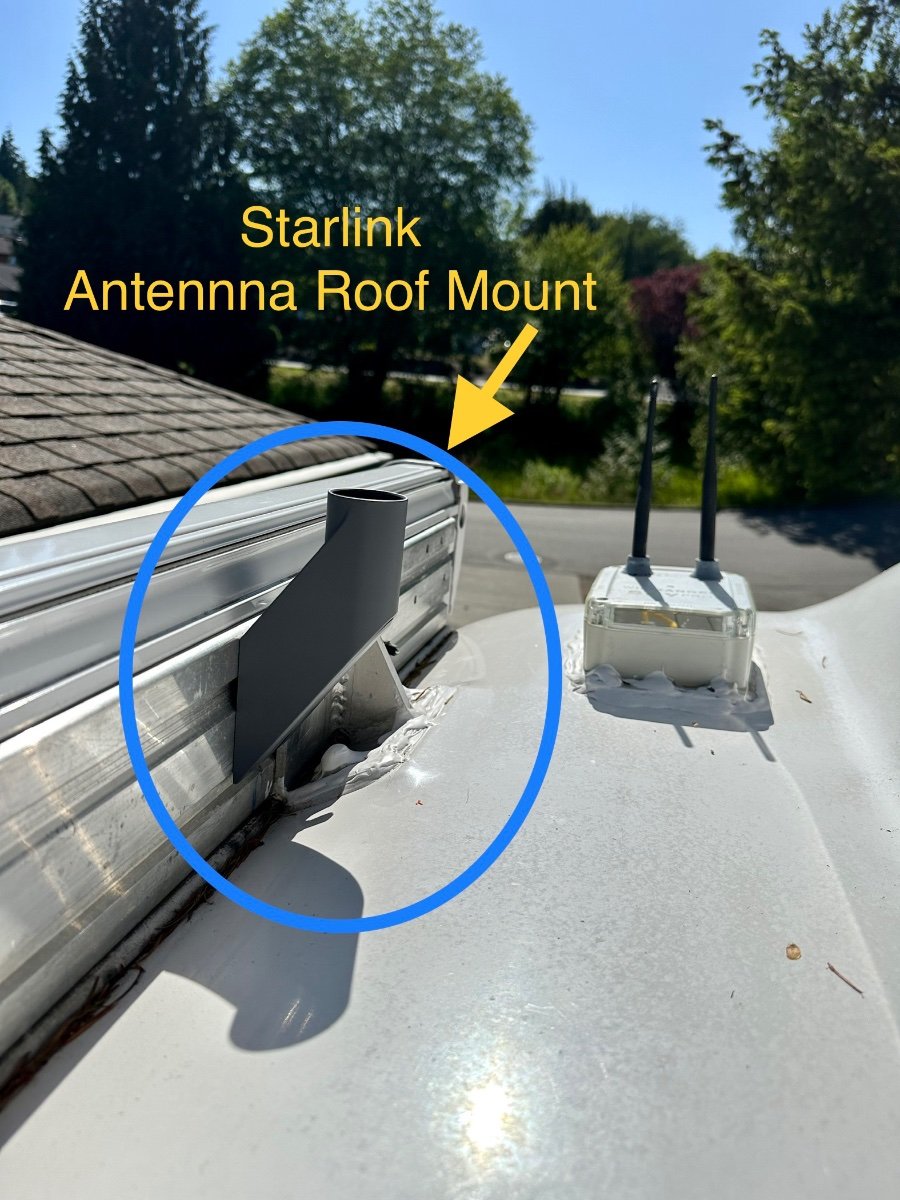
An alternate method for Dometic awning is to mark and drill 2 holes farther down the mounting rails. Then usea thread tap to make threaded holes then bolt on the Starlink holder as shown below. this creates a low profile for the mount.
-
We’re 505, 999 ahead of you. Wonder who will be 1000 (hull 1505). craig
-
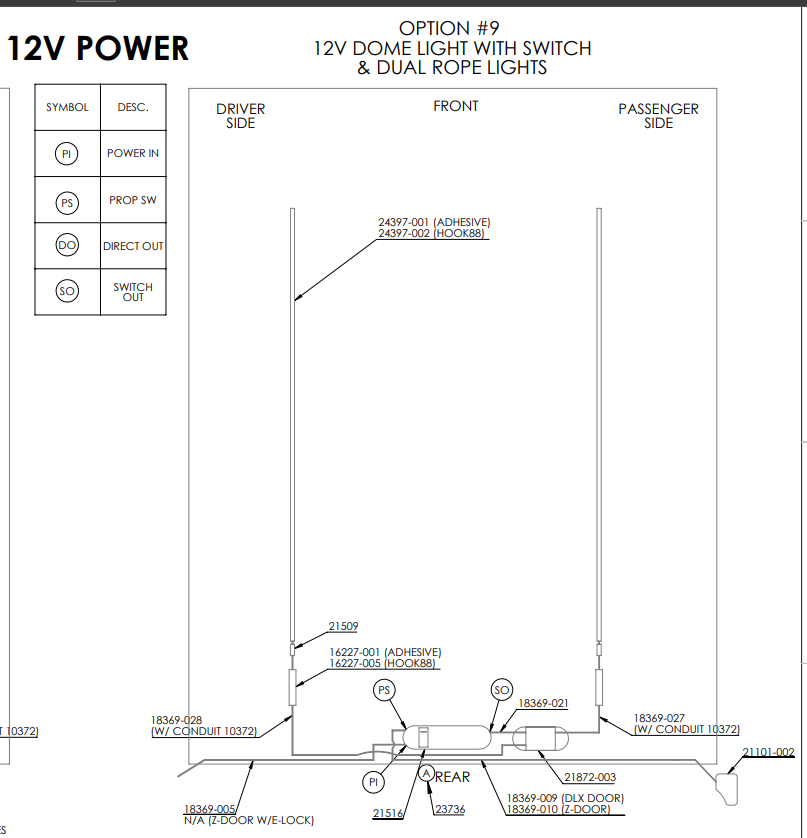
I’ve recently had an issue with the wiring on my ARE Canopy. It took a lot of emails and time with ARE to share the wiring diagram for the lights. Thought I would share here just in case any Oliver owner needs the info. ARE directs buyers through the dealer network for parts and info like this. Each dealer is pot luck on support and trying to attain a simple diagram was a major feat, especially while traveling. To get a response, I had to share the SN of the canopy, show receipts of part orders from a dealer before ARE sent the diagram. The replacement parts are not shipped with any instructions or indication as what connects to what and caused me 3 weeks of delay. I appreciate Oliver support more each day.
- 1 reply
-
- 3
-
-
-
Oliver batteries not charging with generator
Galway Girl replied to chiwald's topic in Mechanical & Technical Tips
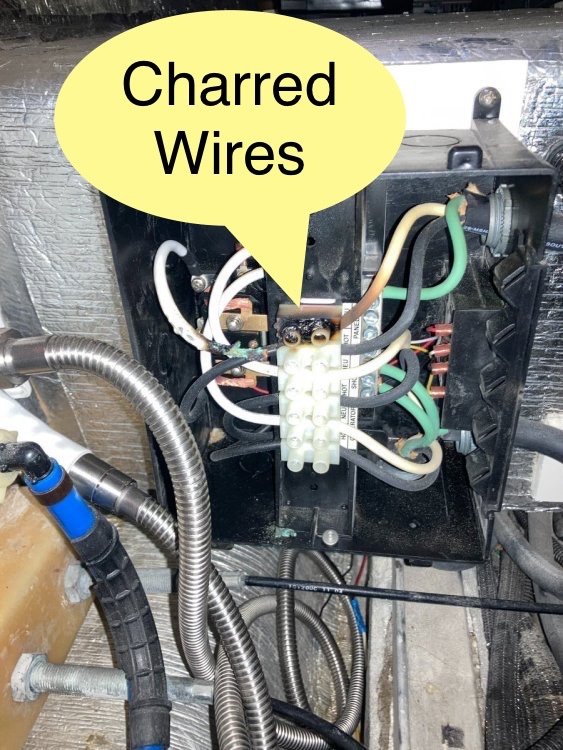
As a safety check as you contact Oliver. There have been a few of those under the dinette transfer switches that failed due to loose wiring connections inside and had thus melted internal wiring. Transfer relay wires can wiggle loose and cause the switch to toggle back and forth when power is applied. To check, you would need to disconnect from shore power and generator, then open the transfer switch box to check if its connections are tight and no smoked wiring.
-
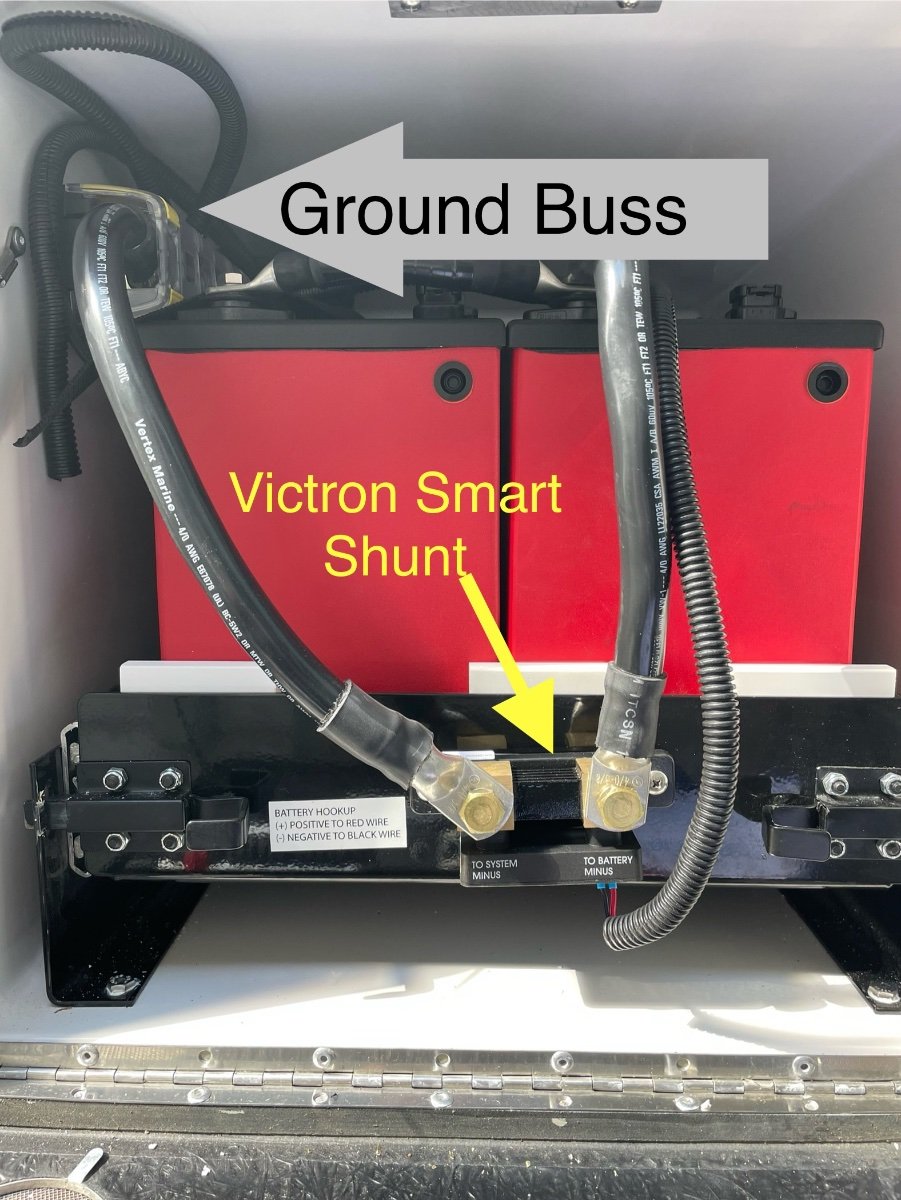
Simple AGM to Lithium Conversion question(s)
Galway Girl replied to Danno and Donna's topic in Mechanical & Technical Tips
I was able to re-use 2 (+) cables that were on the batteries and those coming into the battery bay from the inside connections. I had to make 2 new ground cables for the battery as they were farther apart for the new batteries. I also added a common bus bar for all grounds as I installed a Victron smart shunt for measuring battery bank status.
-
Simple AGM to Lithium Conversion question(s)
Galway Girl replied to Danno and Donna's topic in Mechanical & Technical Tips
In this blog post I cover the many aspects of a Agm to lithium conversion including a discussion of the 7 pin wire disconnection and dc-dc converter installation. Hope it’s of some use. https://4-ever-hitched.com/ggs-blog/f/lithium-battery-upgrade Craig