-
Posts
719 -
Joined
-
Last visited
-
Days Won
21
Everything posted by Galway Girl
-
Looks like we need a new door. A few months back first saw cracks on the interior panel by the window. This am we woke up buckled up by interior panel near hinges. Door wasn’t overstressed (wind) and works fine but is ugly. Feels like the frame of the door may be flexing due to a cracked door frame. I will likely self repair if I can find a new door. Ticket sent to Oliver Service. Craig Hull 505 @ 65k miles
-

Outfitting our new to us Oliver LE II
Galway Girl replied to Tideline77's topic in General Discussion
We built this guide based upon 4 years of travel: https://4-ever-hitched.com/ggs-blog/f/oliver-outfitters-guide?blogcategory=Camping+Equipment Give it a look. Craig & Rose hull 505 -
From 3 years back the snap pad install video on hull 505
-

Xantrex Inverter/Charger questions
Galway Girl replied to Gliddenwoods's topic in Mechanical & Technical Tips
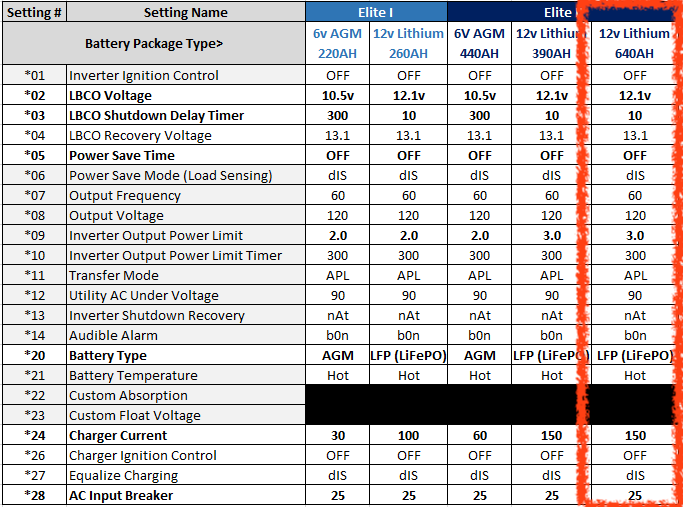
this table shows settings for various lithium batteries. The red is for 2 large Lithionics using the 2000 watt inverter. Hope this helps. -

Xantrex Inverter/Charger questions
Galway Girl replied to Gliddenwoods's topic in Mechanical & Technical Tips
Try the service knowledge base here: https://support.olivertraveltrailers.com/portal/en/kb/articles/xantrex-inverters#Inverter_Settings -
I’ve had to replace the antenna once. If you want to remove the antenna completely there are a few steps. The antenna has the upper part big disc) and the lower part (mount) that is screwed to the roof. To disassemble there are three steps 1) the top part (dish) of the antenna is pushed straight down then twisted. This unclips the top of the antenna from the clips on the shaft. 2) With the top removed the top part rca cables can be unplugged from the top of the antenna. They will be tucked into the roof later. 3) Unscrew and remove the base shaft. You’ll need to cut the sealant to get it loose. Finally tuck the wires into the roof and cover the hole with a suitable body material and seal it with a marine sealant like 3M 4200.
-

Is this the gray tank vent in the bathroom vanity?
Galway Girl replied to Steve Morris's topic in General Discussion
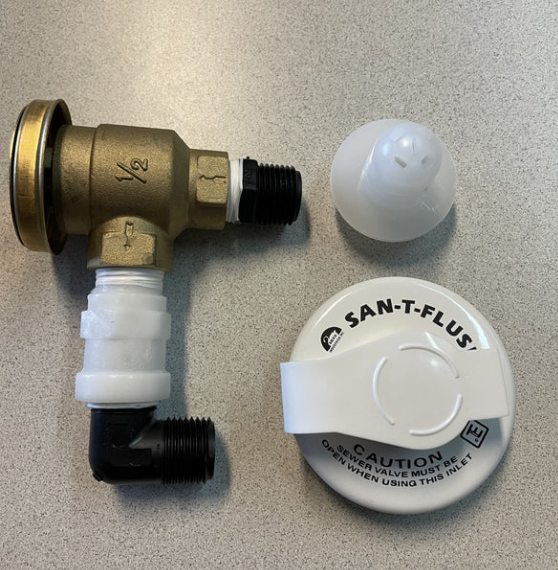
That brass fitting is the vacuum breaker valve from your black tank flush. One pipe comes in from the black flush hose bib inlet on the street side of the trailer. The other side runs back to the flush head on the black tank. It’s auto draining so the black tank flush line won’t freeze. The part is in a kit as the Swan San-T-Flush SFS150. In the diagram from Oliver it’s the red square on the left. I also remember having a smell once because we hadn’t used the shower and the grey tank odor came up the dry p-trap for the shower pan. We put a couple cups of water in and no more smell. -

Broke a Leaf Spring in Maine
Galway Girl replied to Galway Girl's topic in Mechanical & Technical Tips
-

Broke a Leaf Spring in Maine
Galway Girl replied to Galway Girl's topic in Mechanical & Technical Tips
First - look on the forum for a US Made leaf spring set. Second - contact Oliver service as the spring packs change depending upon hull number and axles on your trailer. For hull 505 - 2019 Elite II Oliver service sent this link for the BARE springs on Amazon: NOTE does not include U-Bolts/Nuts like the Dexter parts below. These are all Made in China parts: https://www.amazon.com/TexTrail-9150014-Double-Trailer-Spring/dp/B07LFK6N33 Leaf springs part number from Oliver Service - for 2019 EII with standard axle (not a never lube hub) Dexter 9150014-02 for the Elite II trailers. (9150014-02) for the Elite II tandem axles and purchased from dexterpartsonline.com for $80 for the pair including the U-bolts and nuts. Out the door cost for the set was a total of $109.82 w/ tax and shipping. -
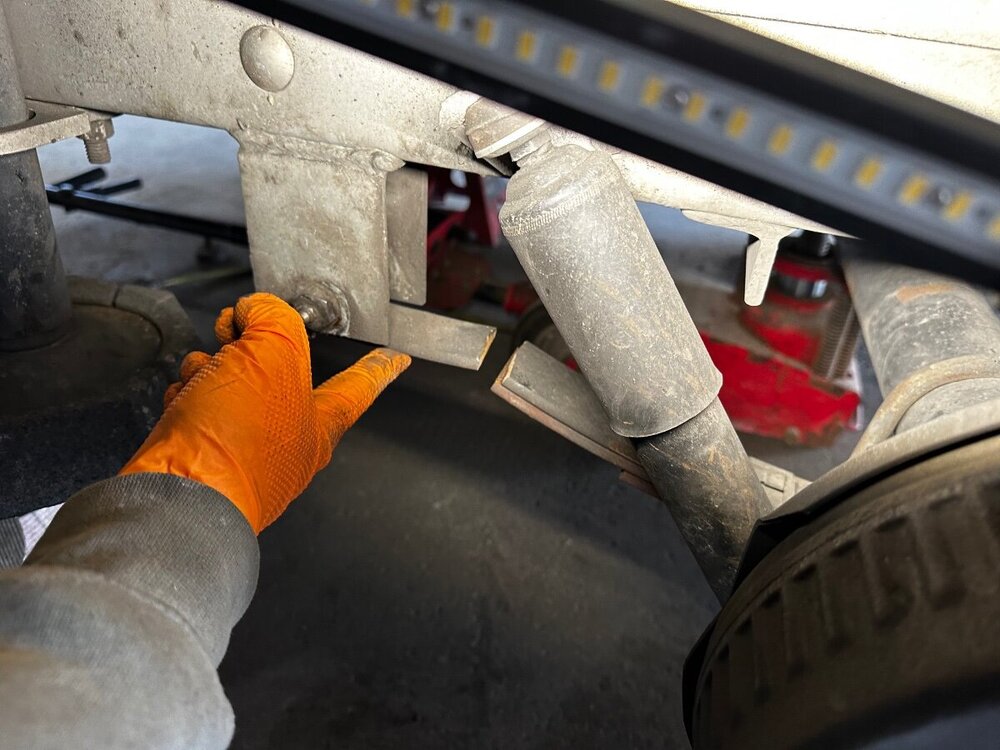
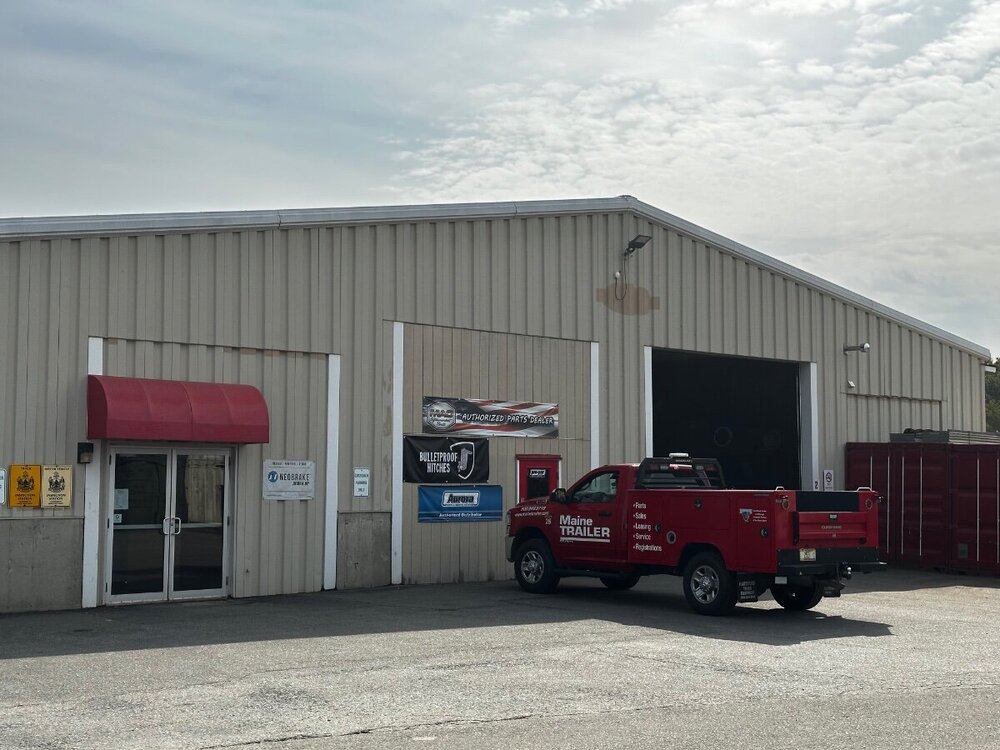
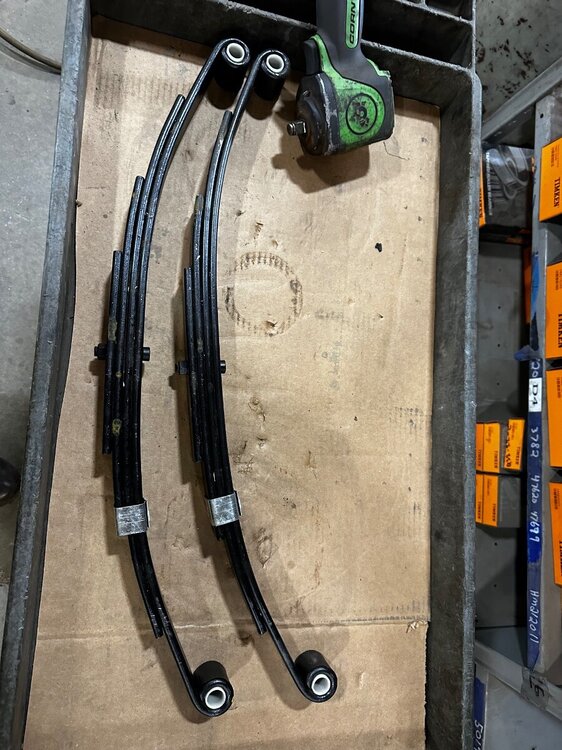
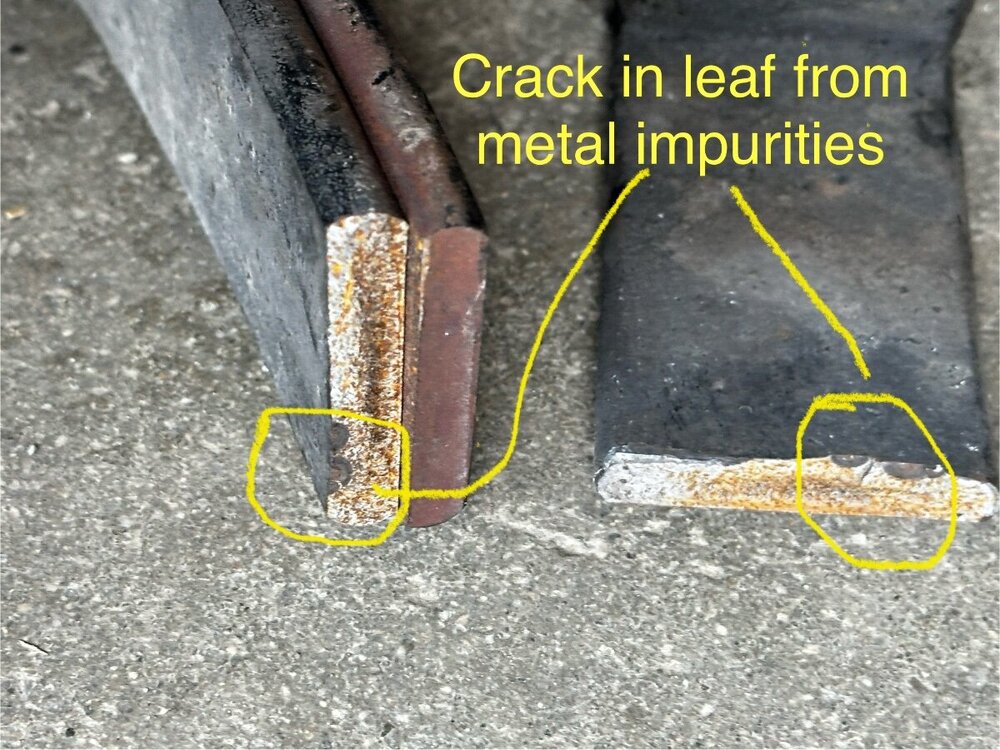
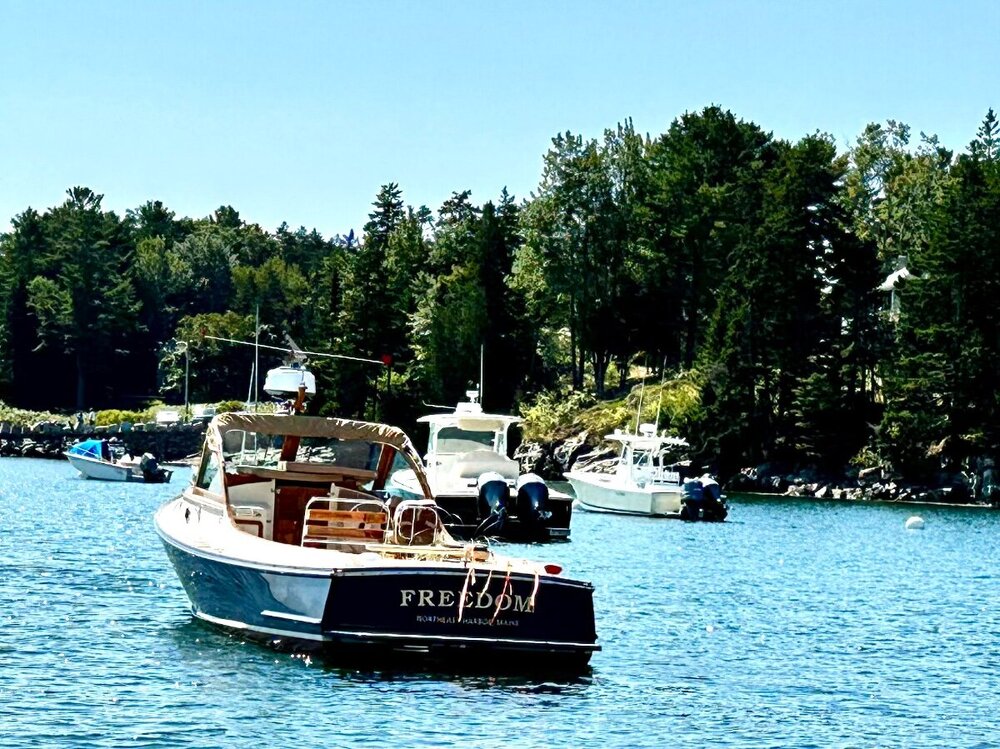
We’ve been in Main this week at Schhodic Woods Campground in Acadia NP We left this am to head south stopping a Walmart to re-supply. Upon returning to the trailer I noticed that the steps were much closer to the ground. Upon further inspection I found (After 5 years and about 65000 miles ) Hull 505 EII finally broke a leaf spring. it was the curb side rear and sheared just where the first and second leaves meet. Lucky this happened 5 miles from a Maine Trailer location. it looks like the issue was caused by a small crack in the leaf that has the bolt eyes. That small original impurity caused internal rust weakening the metal and over time and bumpy roads it finally snapped right where the next leaf touched the longest spring. I called them at 11:30 and they got us in on a Friday at 12:30 and on the road by 2:30. That’s pure luck! I had a spare pair of springs in the bumper from our Alaska trip, but had them put on 2 new springs that were a perfect match, so I kept the spares and put on the new ones on the rear axle. $314 installed! new springs Maine Trailer 101 Coldbrook Rd, Hampden, ME 04444
- 25 replies
-
- 13
-

-

-

-
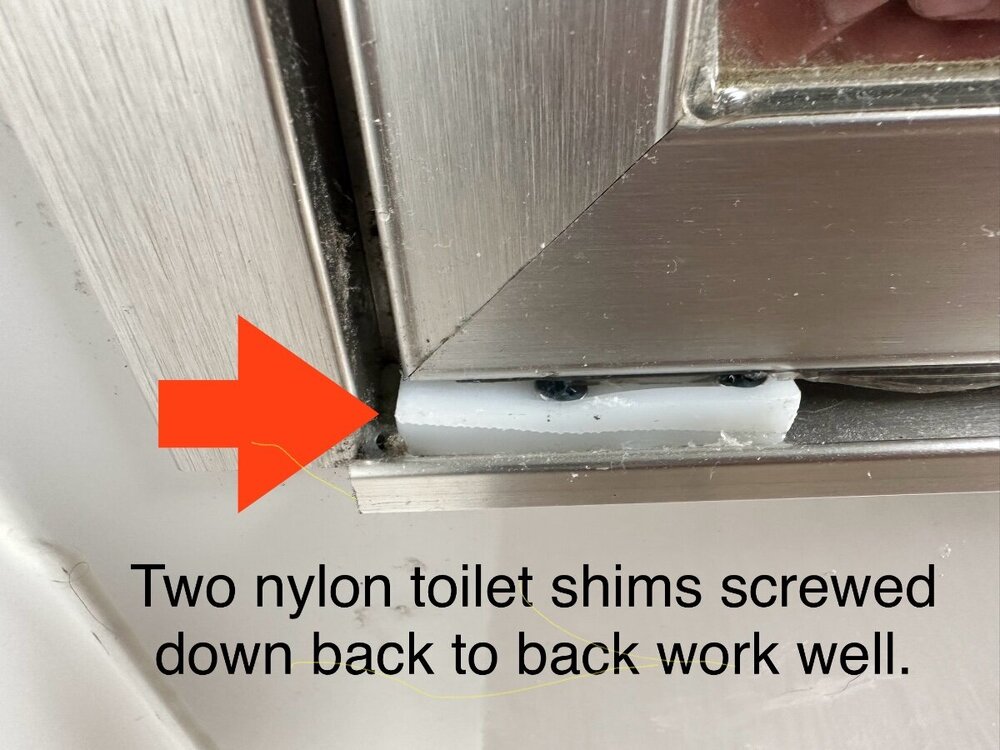
In my case the ball bearing on the top hinge didn’t work, so my temporary solution are some nylon toilet shims screwed down to the threshold. They hold the door up and are slick enough to bear the load. When I get home I’ll do the full repair (assuming the parts arrive.) Craig - hull 505
-
The contact that picked up my service request about new door pins is listed below: she was very helpful but needed a picture of the door to find their internal part numbers ( which I never found) . Deanne Cummings DCummings@coralind.com (205) 345 - 1013 ext. 52235 Coral Industries www.coralind.com 3010 Rice Mine Rd NE | Tuscaloosa, AL 35406
-

Truma water heater repair #3
Galway Girl replied to Galway Girl's topic in Mechanical & Technical Tips
Yes, the last issue was from Truma factory, improper torque on the regulated gas line into the burner. Nova Scotia was fantastic. view from site 54 at The Islands PP. -
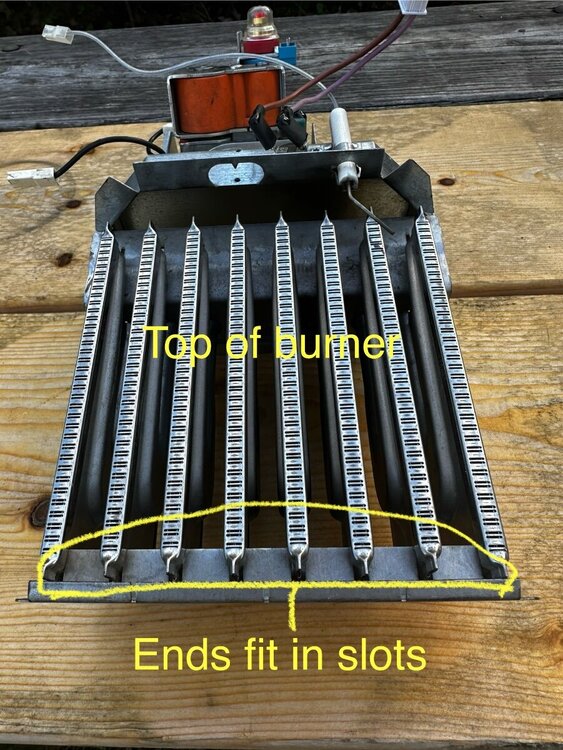
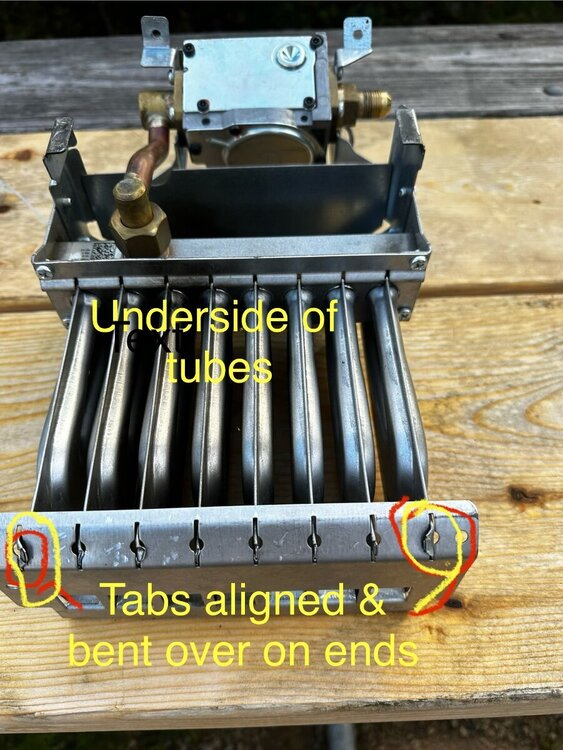
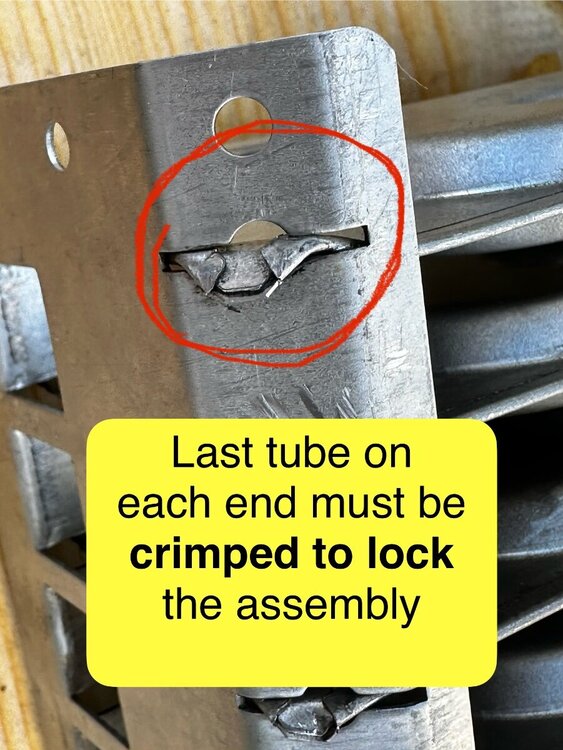
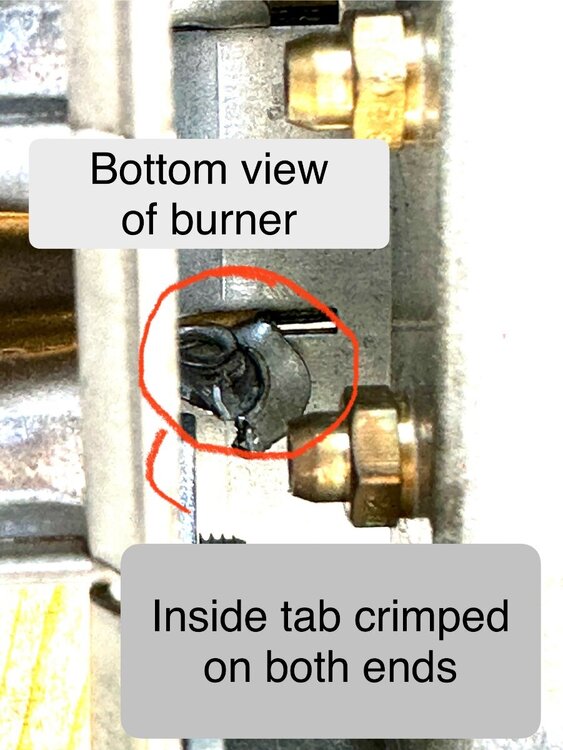
We’ve been on some bumpy roads in Nova Scotia and it caused an issue with our truma water heater. Symptom: Louder than normal water heater ignition. A loud whoosh or pop on ignition. Strong enough to blow out the flame. A smell of gas! Cause: Burner tube assembly had come apart on the end of the tubes by slipping out of the retaining slots (last tube on either end) Fix on the road: Removed the burner and regulator assembly and re-assembled by re-aligning and re-crimping the burner tubes into the frame. Time: 40 minutes Tools: Crescent wrench & pliers for gas feed 2 Different size torx bits for burner screws Steps: Turn off gas & let burners cool down Pull fuse for water heater Take pix of wiring ( for re assembly) Disassemble gas feed using backing wrench Disconnect various wires from plugs & headers ( Includes 2 screws to remove igniter) Remove 2 screws on front of burner/regulator assembly Slide out burner. Reassemble burners in slots and crimp end burners Reinstall in reverse order, checking for gas leaks before reinstalling fuse. Run water heater to test. Enjoy hot water ! The last right and left burner tubes had fallen out of the registration slots. That caused gas to flow from the two orfices directly into the burner chamber. ( A nice big ignition event that blew out the other burners.) I reassembled and crimped them back in place. video describes which tabs need to be crimped. IMG_0872.mov
-
The contact at the door manufacturer is mailing a couple of new pins. I’ll install them when I return home in December. In the meantime I’ll use some shims to meet the door from jamming. Craig
-
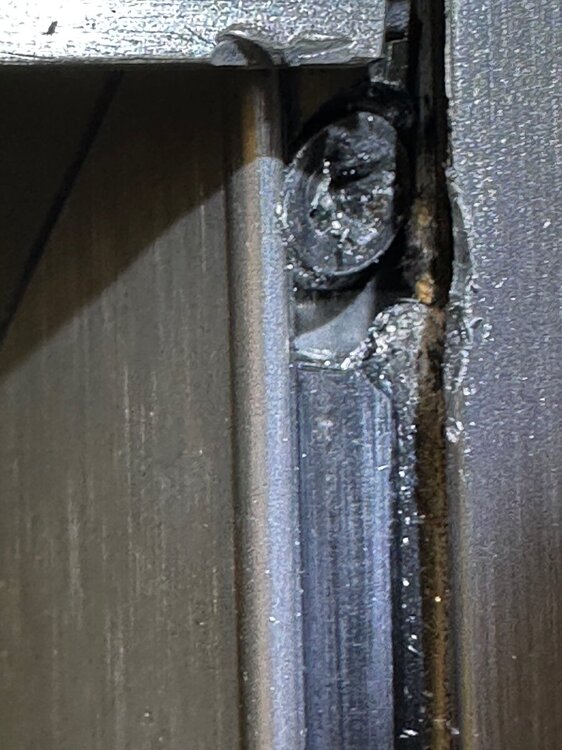
Here’s the failure: top hinge lins have worn away on the lower side of the pin. This causes door to drop and stick. Another owner put 2 BBs in that space, but new hinge pins are the fix. below pix is with door lifted and you see the space that has ground away.
-
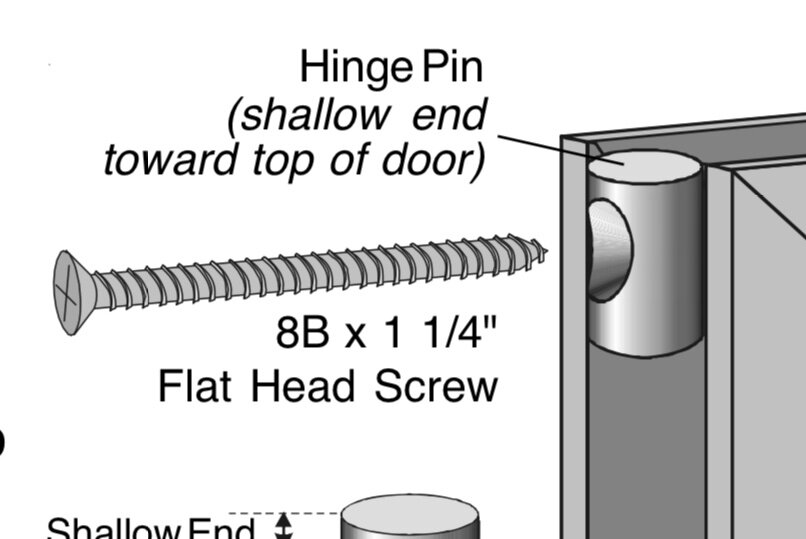
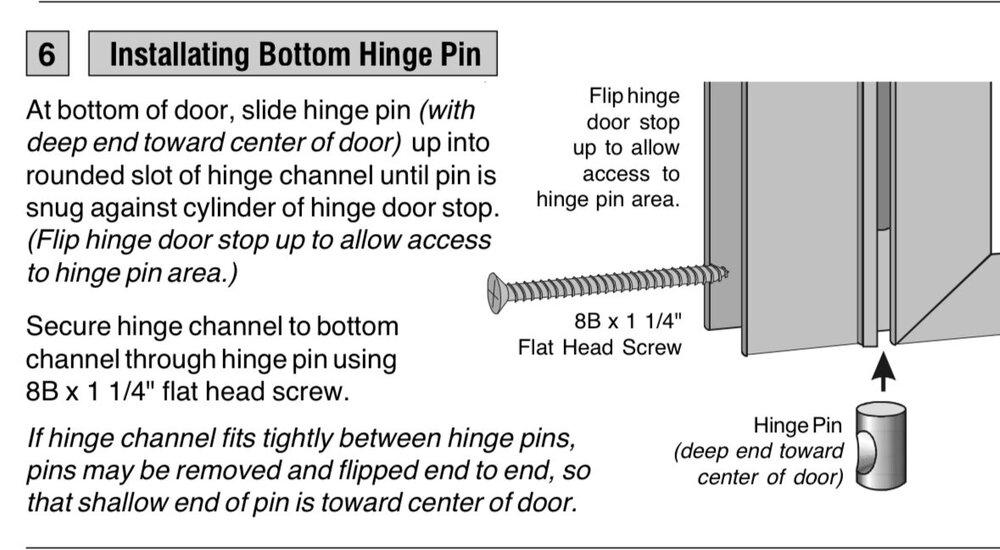
From the company that makes the door: KstlKD_HingePin_982.pdf Excerpt below of bottom. It appears my hinge pins have worn away the silencers sleeve so it now drops the door down. once I get confirmation of what’s happening I’ll update. craig
-
Thanks @Patriot In my door those pieces above and below the screw (in yellow area on your pix) are missing. tried loosening, lifting and tightening to no avail. I think something fell off or wore away
-
I placed a plastic cap under the bottom off the hinge. This temp fix holds the door up to cleat the threshold. i wonder what the bottom of that hinge is supposed to have under it? Is there a pin/bushing missing on mine? Anyone that can show a pix of a functioning bottom door hinge area would be a help I have a ticket open for this..
-
Our 2019 EII bathroom door is no longer functioning. When trying to open it has dropped down and sticks on the bottom frame. We have to now vertically lift the door to open and close . Anyone know how the door hinge is supposed to be adjusted? I’m considering placing a nylon pivot block in the bottom left (hinge corner) to hold the door up. Craig
-
Here is the article on upgrading hull 505. it included new inverter and batteries. https://4-ever-hitched.com/ggs-blog/f/lithium-battery-upgrade?blogcategory=Electrical+Upgrades
-
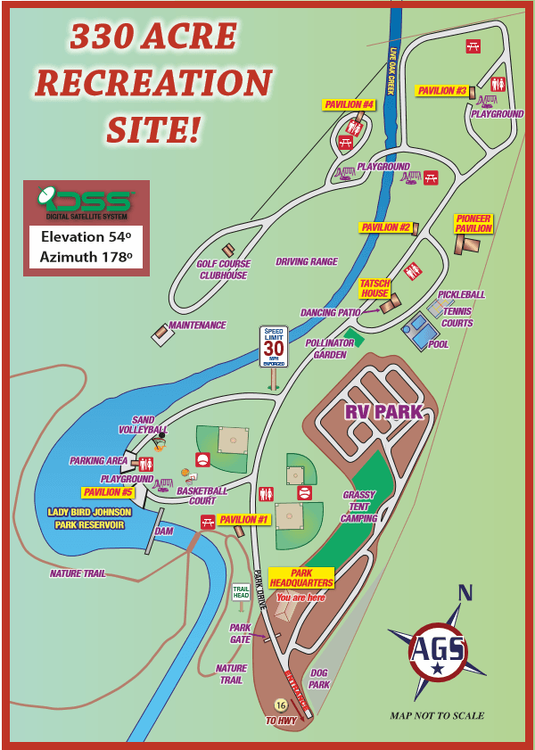
Several of us have stayed at Ladybird Johnson Municipal RV Park, a city park of Fredericksburg. https://www.fbgtx.org/236/Lady-Bird-Johnson-Municipal-Park its near a winery, golf course and local airfield and about 5 min from downtown Fredericksburg. park has full hookups and shade trees . ( pix below is from last April for the eclipse)
-
-
- 14
-

-

-

-
The drip line can be accessed in the basement (bottom street side) and above in the attic corner street side. You would need to remove the concealing panels for access.


