routlaw
-
Posts
877 -
Joined
-
Last visited
-
Days Won
19
Everything posted by routlaw
-
Perhaps I am beating a dead horse on this subject and thread but wanted to add a few things that might be of interest to those with Lippert 8800 series of windows. This past week I ordered 3 sample packs from Steele Rubber in NC which includes many if not all of their rubber weather stripping and glass sliding seals they manufacture. They arrived today. The samples seem to be well made, albeit very expensive for what they are. On my unit the outer most rubber w/s does not nor has it ever touched the sliding glass window and in fact misses the glass by a full 1/8th of an inch. Needless to say our windows were more like a sieve than a sealed window. Weeps holes do little to nothing to mitigate the incoming water during heavy rains. For those of you who need to replace their exterior rubber w/s for what ever reason the part # I have ordered is 70-4500-257 and this sample does indeed provide a relatively tight seal against the sliding window. This part also has a tighter fit in the channel, a good thing. No doubt the wrong w/s was installed on our windows given its rather loose fitting in addition to it not being wide enough to seal against the sliding window. Effectively the original does nothing at all to seal water. Steele Rubber company has a huge amount and variety of gaskets and seals making it nearly impossible to determine the correct fit without the sample packs. They also produce a much different type of glider seal/track that appears to be better and less likely to allow further leakage into the window channels. The ones that came with these windows do nothing to prevent water from entering into the channels and dripping into the cabin. The part # for that item has conflicting information between the website and the sample pack ID's they sent. It is either 70-3577-58 or 70-3577-256 come in 8ft lengths and priced at nearly $49 for each length. The exterior w/s piece is sold by the foot at $7 per foot. In addition to the effort of sealing the windows I have also finally added gutters over the windows. I put this off for a long time mainly because I didn't have faith in these small channels being effective during a downpour. I also installed them a bit different than most by gently curving the ends diagonally away from the window. The sharp bend pointing toward the ground never made sense to me and also caulked above and under the J channel to provide a longer lasting seal, hopefully. Thanks, hope this helps some others

-
 We probably have the same Dometic unit though I have never checked its model # but my hull is #70 so not too far apart. No issues on mine so far. Given your description I would be inclined to think you might have to take the unit out of the Oliver to work on. You are already much further down the pike of knowledge on this thing than me. Best of luck with the repairs and working through this. Rob
-
Cabinet instead of Stock Convection Microwave
routlaw replied to HDRider's topic in General Discussion
We ordered our Oliver #70 back kn 2014 without the MW. It came with a built in cavity of sorts which I guess one could call it a cabinet. The cavity was wood line probably 1/4 inch Luan plywood. Oliver installed a rather unappealing door during the build but did use the standard SS latches seen on the rest of the overhead doors. Once home I built a new door to replace the original one that appealed to us. -
Uh oh.
-
https://res.cloudinary.com/lci-cloudinary/image/upload/v1734451736/Design Team/Sell Sheets/Lippert_-_Sell_Sheet_-_3000_Series_Windows_OEM_-_2023002334-WEB.pdf https://corporate.lippert.com/products/rv/windows For all the people interested in these other windows, link above. Not easy to fine.
-
Nice but too much luxury for my crusty 'ol a**. Couldn't take where I like to go either. Definitely not camping at this point.
-
Oliver windows, how I hate them let me count the ways. Like others here I am now searching for replacements for the original windows. The only good thing I can say about them is they let a certain amount of light in along with an equal amount of water when it rains or snows. Otherwise they are a relic out of the early part of the 20th century. Just spent part of the last week cleaning and disassembly only for it to rain the next day with leaks galore coming into the cabin. Pipe cleaner wicking had no effect whatsoever. New mattress was soaked. Imagine buying a $100K car or truck and having to deal with such nonsense. I don't have a solution yet but am searching. To the OP I imagine one would have to completely take the entire window assembly out of the cabin to remove the stationary portion of the window. Surely a local window and glass business could repair one of the components if taken out of the Oliver and delivered to them? Good luck @dewdev with your repairs.
-
Difficult to tell from the existing picture but it's also possible the duct work has dropped out of the knockout panel. If you haven't already I would move your bed aside, open the hatch from above to make sure the duct has not vibrated loose and onto the floor.
-
Thanks! Sort of a rinky dink stove top compared to other offerings on the market now days. Have thought about buying and installing a different unit which would require copious amount of cutting into the FG countertop which is not appealing. Good to know these are replaceable.
-
PS: they are less expensive than an Oliver but most likely an introduction price, bound to become more pricey over time
-
Bill got to the website choose a trailer link, only two models and the prices pop right up. There is also a fair amount of other info that might answer some of your questions. Regarding those windows. Had them on our T@b for 7-8 years without issue, no scratches scuffs etc. I really miss those windows, great ventilation.
-
Furrion Stereo Upgrade: A Sound Choice
routlaw replied to Snackchaser's topic in Ollie Modifications
I have thought about doing just that, remove radio and create small cabinet or something else more useful. Just now turned off the AC breaker bar for the old WH and unscrewed the black wire and capped it off per your suggestion. Feels much better knowing there isn't a live circuit laying dormant at the back of the basement. While I'm still recuperating from knee surgery 10 weeks ago considering changing out the old kitchen faucet and maybe even sink too. I would love to change the old Suburban furnace as well, just haven't found anything that would fit. The Fogatti is much nicer, more efficient but from what I can tell would never fit into the Oliver and if it did man what a major project that would be. Enough of that taking this thread off topic from the OP hifi change out. Rustoleum does make a very nice white paint that one could paint those speaker grills with. I've used it and it's very durable paint and the spray cap puts out a very nice even spray unlike so many of those other spray cans. You can find it Lowes. Might be a lot cheaper and easier in the long run rather than replacing the grills. -
Hate to say it but it looks like Oliver now has some serious competition. This thing is a true work of industrial art IMHO. https://www.awakenrv.com And for a complete walk through check this one out. So many things done right. They are above my pay grade but competitive to Oliver pricing, actually a bit less.
-
Furrion Stereo Upgrade: A Sound Choice
routlaw replied to Snackchaser's topic in Ollie Modifications
I totally agree though our Furrion unit is probably older than yours but regardless these things could have only been made by a very troubled mind. Effectively we never use ours, never watch TV while out in the Oliver and radio reception is near non existent in places where we usually are at. If it weren't for creating an ugly gapping hole I would have taken the thing out years ago. Looks like you found an excellent alternative. Looks nicer too. -
I did consider this method too @jd1923 but by the time I got to this point honestly I was tired of working on the project. FWIW in the conversation when I measured DC voltage it perfectly matched the current SOC of my Epoch battery which at that time was 14.4 volts. This gave me assurance there was no voltage drop. I want to add this is not an easy install nor a quick one either. Now for the vast majority of campers it probably takes a couple of hours max but due to the Olivers lack of a basement foundation and access one has to re-engineer a platform for the WH to rest one. The old 1x1.5 aluminum tube originally used which by the way was very wobbly on my unit due to the bolts used not being screwed all the way in. Worse still bouncing had called some indentation on the insulation of old WH creating a less than ideal surface for the unit to rest on. Reusing this piece sideways with a 1/4 shim installed on top seemed to provide the right height of 1.25 inches. The new Fogatti is much shorter than the older Suburban thus the change in support position. It's also considerably lighter in weight too not to mention the extra 50 lbs of water you're carrying with a Suburban. For anyone contemplating this change there are other things to consider. The soft copper tubing to the WH is far too long for the new Fogatti which requires a significant amount of bending or shortening. If shortened then one has to also buy a flaring tool if you can even find one. I couldn't. Since the copper tubing on the Oliver runs along the outside of the trailer this is the harder/stiffer version of soft copper tubing which means it's a ***** to bend and maneuver. This was quite the wrestling match given the cramped access in the Oliver. Water fittings have to be re-considered as well. I chose to use two double threaded nipples to join the old half inch fittings attached to the pex pipe with a short run of flex water pipe to the NPT connections on the WH. The old pex pipe does not even come close to lining up with the location of the new NPT connections. While my method works not sure this was the best arrangement and may revisit it at some point. I also might revisit my method of creating a platform for the new unit to rest on. According to Fogatti what I did was fine but only by a half inch or so. Eventually I might create a second platform further toward the back of the unit supported by the frame of the trailer. Also considering using spray foam insulation under new unit but this can get messy if not done right, but it would provide a decent foundation for the unit to rest on. Hope this helps
-
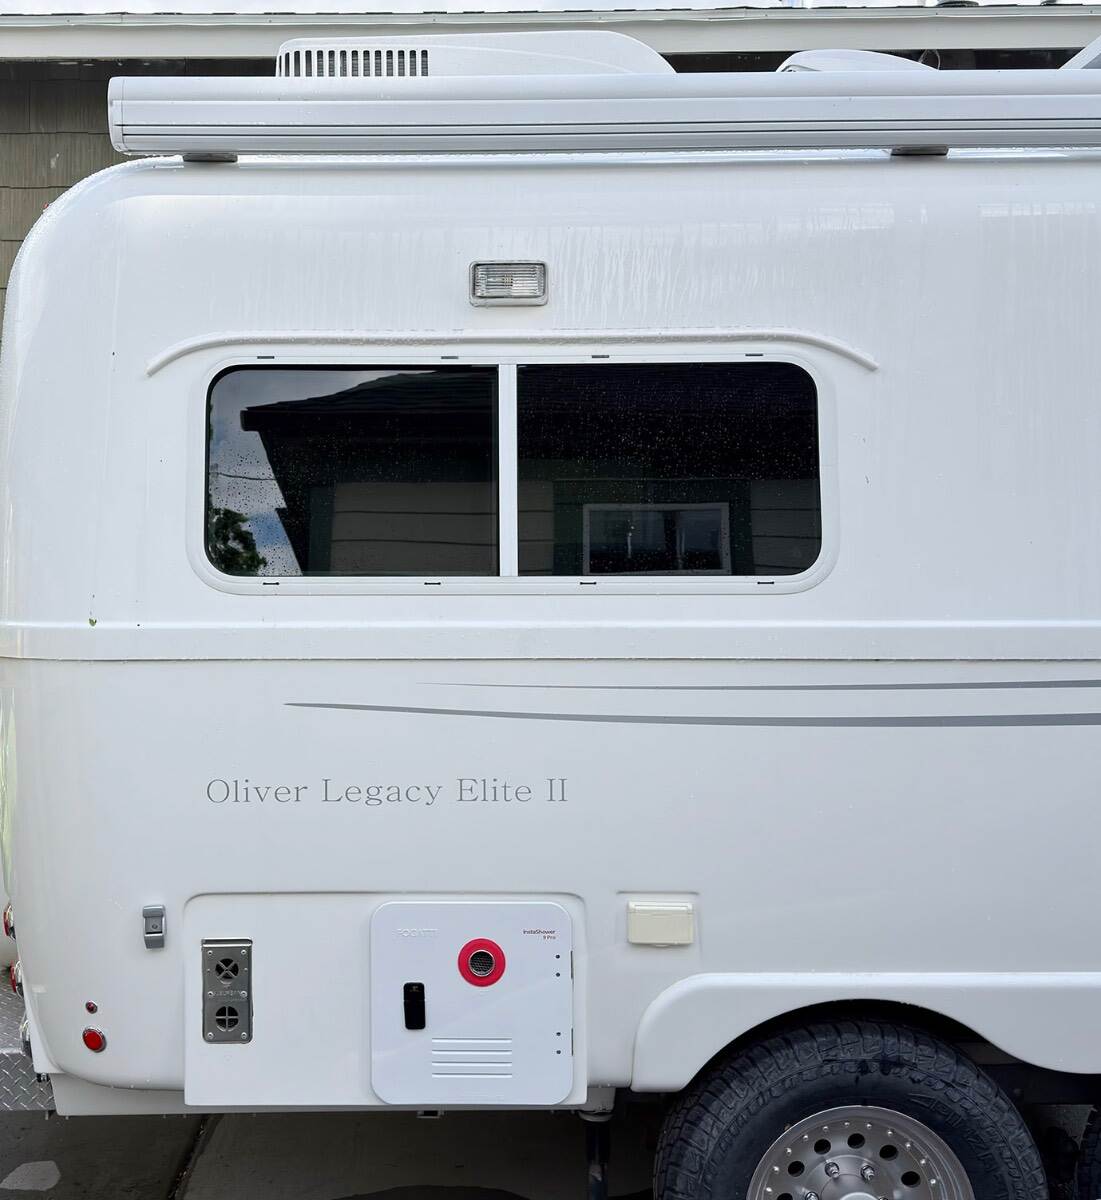
Insta Shower 9 Pro, which also fits the basic 13x13 hole with 15 x 15 door. However the fit was tight and just a titch out of square from the original install of the Suburban. Used a drill with rotating drum sanding attachment and vacuum in the other hand to sand away critical parts for an easier fit. After a few efforts it slide in nicely. I chose this unit over some of the less expensive models due to its mixing chamber/valve the less expensive models did not have. These WH are said to be 74% efficient ± and would bet the Suburban is nowhere near this level of efficiency. It's also very quiet and very easy to winterize. Your Suburban has a 15x15 door but the actual hole or rather square is 13x13. The Fogatti comes with a surround trim piece but will not work on the Oliver due to the recessed indentation for the WH and Furnace. Not a big deal as the supplied gasket and caulk easily seal the unit well. Finally finished the install today and thanks to @Snackchaser for his suggestion of capping off the two other blue and yellow/green wires and running an additional black wire from a bolt on the chassis to the black wire on the WH. Everything seems to be working perfectly. Had gorgeous day in Big Sky country after frigid night before. I really like the remote control for adjusting water temp to your taste. The fit and finish on this product is on an order of magnitude better than the older Suburban. The engineering and tech seems to also be light years ahead of the Suburban which by comparison seems like a relic out of the end of WWII. Is it perfect? Probably not, but thus far I like it much better than the older Suburban WH. LMK if there are more concerns or questions.
-
Makes sense to me thus the comment earlier regarding using crimp connectors at the final stage
-
I agree, also don't like the idea of hot wires laying around, capped off or not. Having a cold snap tonight (24º) got to run a heater out there so it might be a day or so before I can take the wires out from the panel though. Just finished winterizing. The fuse is front and center once you open the door from the outside very easy to get to, also a piece of cake to empty what little water there is in the WH. Way easier than dealing with the Suburban IMO.
-
It does, thanks. Never knew that switch was also used as a reset. Regardless. You are correct, see photos above for pic of the control panel which works nicely. There is a power switch on the new WH which can be seen from the exterior view photo. You are also correct in that running the new black wire straight to ground and only connecting the red wires allows for the unit to work. Oddly enough as previously mentioned the new WH works perfectly with both the blue & yellow/green wire connected to the black wire from the WH. It will not work if using those two wires individually connected. This aspect is a mystery but clearly the two combined wires (blue, YG) create the same connection as running the WH black wire to ground. Given the location of the Oliver WH switch and lack of access at least on our hull it's not worth the trouble to eliminate that switch from the system but in theory yes it should be possible. Its not that big of a deal though to use, no different than years past with the old WH. Also @jd1923 good points on eliminating the AC wires at the panel. As for fuses for 12 V DC there is a fuse located directly on the new WH and they provided an extra with the kit. I would assume this more or less suffices for a fuse inline at the panel but maybe not.
-
Thanks @Geronimo John and @jd1923 for the additional comments. Clearly I have not provided adequate information regarding the install. No the Fogatti WH only uses 12 VDC to run the internal circuits, sensors etc and which also then feeds back to its remote control which is a nifty device itself. The power to heat water is only through propane and not AC and certainly not DC voltage. The wires themselves coming from the Fogatti are probably 16 AWG or 18 AWG at best and they are intended to connect to the same wires that fed the Suburban sensors circuit board, nothing more. Attaching a few photos below to illustrate (hopefully) the layout and wiring situation. I will be crimping those connections later on today rather than the wire nuts but used those just to make sure everything is working ok before proceeding to final installation. In the first photo the black and red wires represent those coming from the WH and as you can see I have red to red (+) and black to blue & green/yellow (- & GND). The new WH works fine this way oddly enough. The next photo is the same just pulled back further to illustrate the entire enchilada a bit better Remote below with two blue wires (non polarity) from the same wiring harness of the new WH inside the basement where the new WH is installed using 1/4 - 20 SS screws, lock nuts and fender washers rather than the pitiful pop rivets initially used for the Suburban WH. Note this IS a two person job. 1/4-20 stainless steel screws viewed from the outside though the bottom row I used self tapping Big Timber screws into a block behind the FG wall. There simply is not access to tighten nuts and screws on the bottom row. Everybody knows what a locking nut looks like but just in case someone else tries this method thought might be helpful.
-
Get well soon, and hopefully a quick recovery
-
After many attempts finally got the thing to work but only after I used both the blue - and green/yellow ground wires connected together and to the negative black terminal of the Fogatti WH. The device would not work using either the blue or green/yellow wires individually connected to black wires of the Fogatti. So apparently it would be better to connect the green/yellow wire to some metal portion of the trailer, correct? I should add once operating the Fogatti worked great.
-
Understood good luck with JD. The HW switch I am referring to is the one remote switch that Oliver installs on the interior not the switch at the new WH. IOW's I'm still confused. Thanks for trying though. Thus far nothing is connected to the new WH other than the propane. I am trying to figure out which wires to connect to the new WH. Many thanks.
-
I probably did not explain my situation thoroughly @Snackchaser. The old Suburban is completely out of the Oliver, AC wires are taped off and disconnected. When measuring the remaining 12 volt wires they have not been connected to anything yet. If measuring with the HW switch off, crickets, I get nothing other than small microvolts. The switch has to be turned on to obtain anything close to 12 volts +. So if I connect the red + wire and the blue - wire to the new Fogatti it will only receive 12.2 volts of input. That amount of DC current is not enough to effectively run the Suburban furnace based upon past experiences and it might have a negative impact on the new WH with only 12.2 volts. Or am I missing something? Thanks
-
So I am finishing up the install of a new water heater, tankless version to replace the old Suburban. Retrofitting into the Oliver is NOT an easy task but more on that later. So on the old Suburban there are 3 12 volt DC wires connected to the 12 volt terminals, red for +, blue for -, and yellow/green for ground. However when I measure the voltage across the wires with HW switch turn on, the red to blue measures only 12.2 volts but when I measure the red to green/yellow @ ground I received the full SOC of my Epoch batter which is 13. 7 ± volts. The new Fogatti tankless only uses two DC wires, red and black, and no AC connection at all. I am inclined to think in my case to use the red and green/yellow wire for the full DC voltage available to me. Can anyone explain why the red to blue wires only return a reduced voltage of 12.2 volts DC? My gut instinct is the wiring was done incorrectly at the factory build swapping the negative terminal for the ground but this is just a stab in the dark not being totally versed in DC electronics. Thanks and appreciate any insight on this.