All Activity
- Past hour
-

Upgrading from a Bulldog 2” coupler to 2 5/16 BD coupler
Patriot replied to Patriot's topic in Ollie Modifications
Hopefully they will restructure like many companies do. Only time will tell. -

Upgrading from a Bulldog 2” coupler to 2 5/16 BD coupler
Boudicca908 replied to Patriot's topic in Ollie Modifications
I purchased my Oliver in 2022 with the upgraded Bulldog 2 5/16 coupler and have no regrets. I also use this collar with a slightly different ABUS lock. EDIT: I will also say that I use this coupler lock when I am hitched (visiting somewhere, for instance) as security. AND on top of that, as I like to boondock, I use the Fort Knox Locks box when I am not hitched, along with the collar lock. It might seem like a lot, but I worry a lot less with this setup. https://ftknoxlocks.com/shop/ols/products/bulldog-lock I'm sorry to hear about the issues with Bulldog. Hopefully they will straighten out and pull through. -
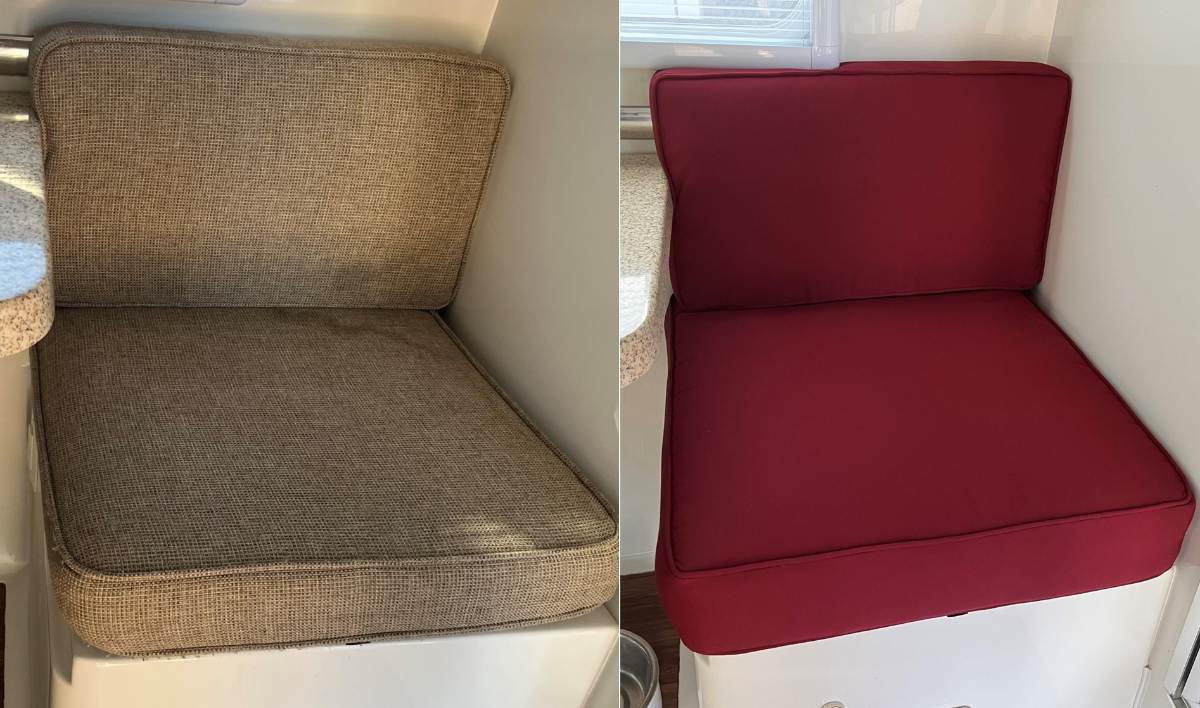
 We do not have the king setup, but we did replace EVERY cushion in our Oliver! Also hated a king topper we had at home years ago. We'd sink into the foam making us sleep HOT! We now use Brooklyn Bedding at home and the Oliver. They manufacture in the Phoenix West Valley and have every RV mattress size imaginable. They roll up and box their mattresses and ship everywhere. If you're ever down here, they have several store locations across The Valley. RV Mattresses by Brooklyn Bedding They have new models this year, with hybrid (foam/coil) models in RV sizes. We purchased two 30x75" foam beds 2 1/2 years ago for our twin bed setup. We went with 12" mattresses based on the fact that the taller the mattress the softer the feel (you can see that in their charts). The 12" mattresses are heavy, but Chris is able to lift them/stand them sideways to work the sheets. I'd prefer a shorter/lighter mattress for the Oliver, but they might be too firm. Time to take care of our older bodies! We had to replace the dinette cushions too. The original cushions were 4" and we made ours 5" tall. We had these custom upholstered at a local shop with higher quality foam for $500 OTD. Boy, the OEM ones were ugly, and my bony butt doesn't hit the hard fiberglass right through the cushions anymore! 😎
-
Upgrading from a Bulldog 2” coupler to 2 5/16 BD coupler
Patriot replied to Patriot's topic in Ollie Modifications
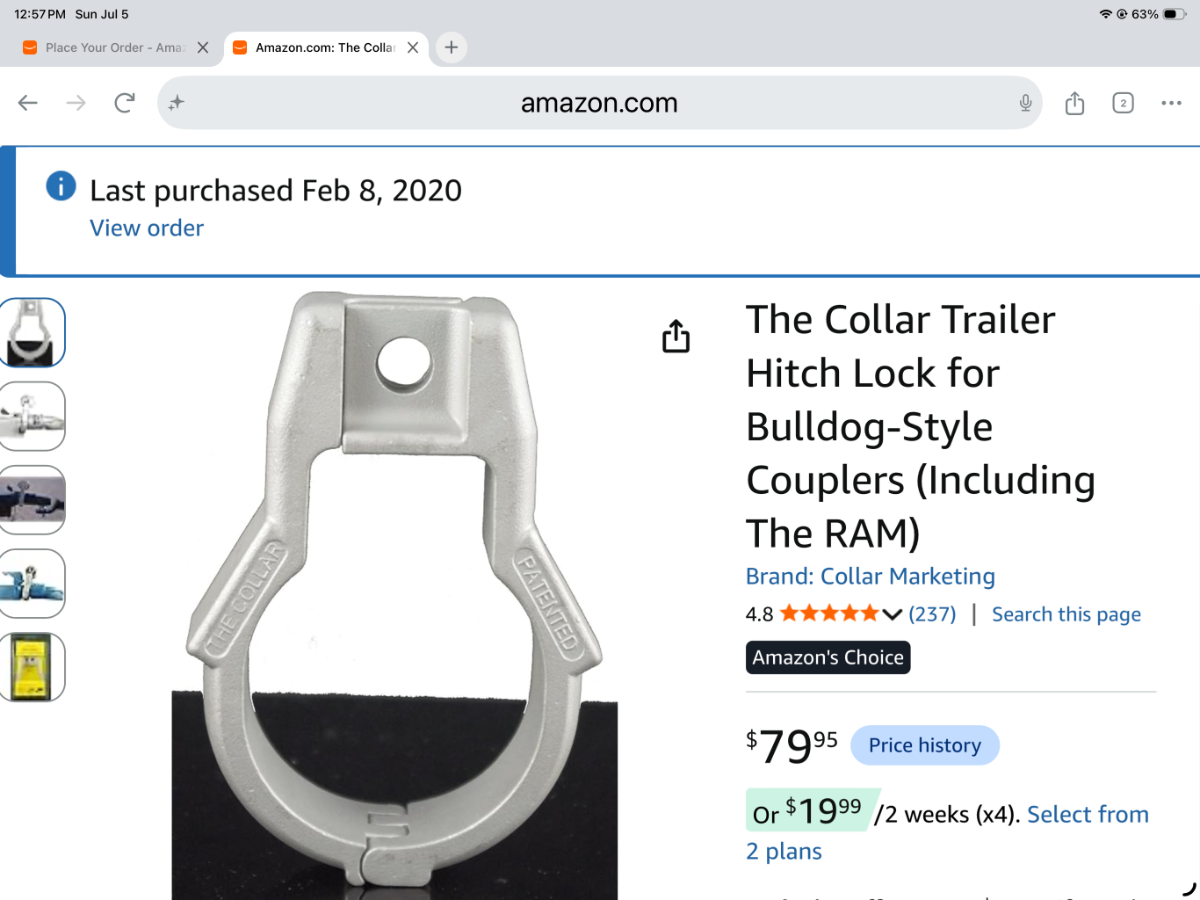
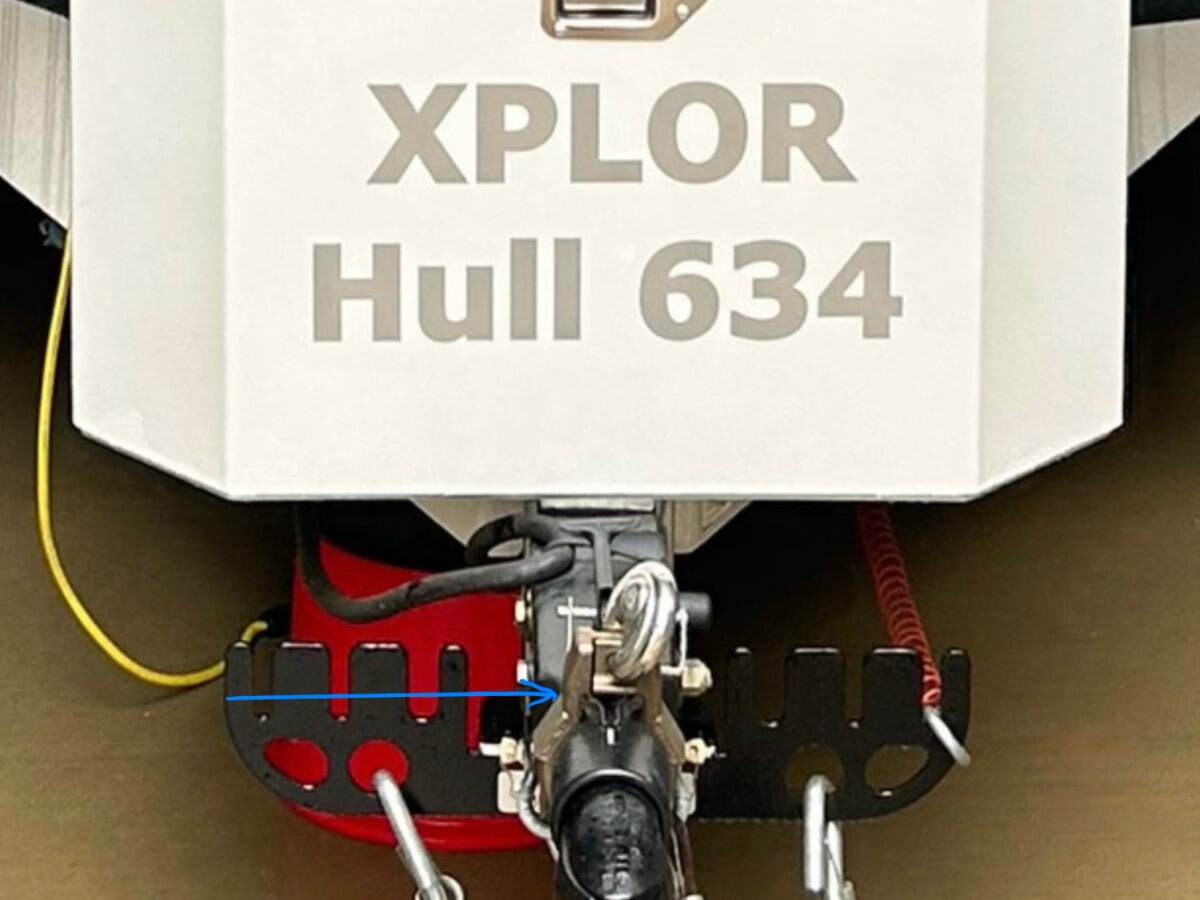
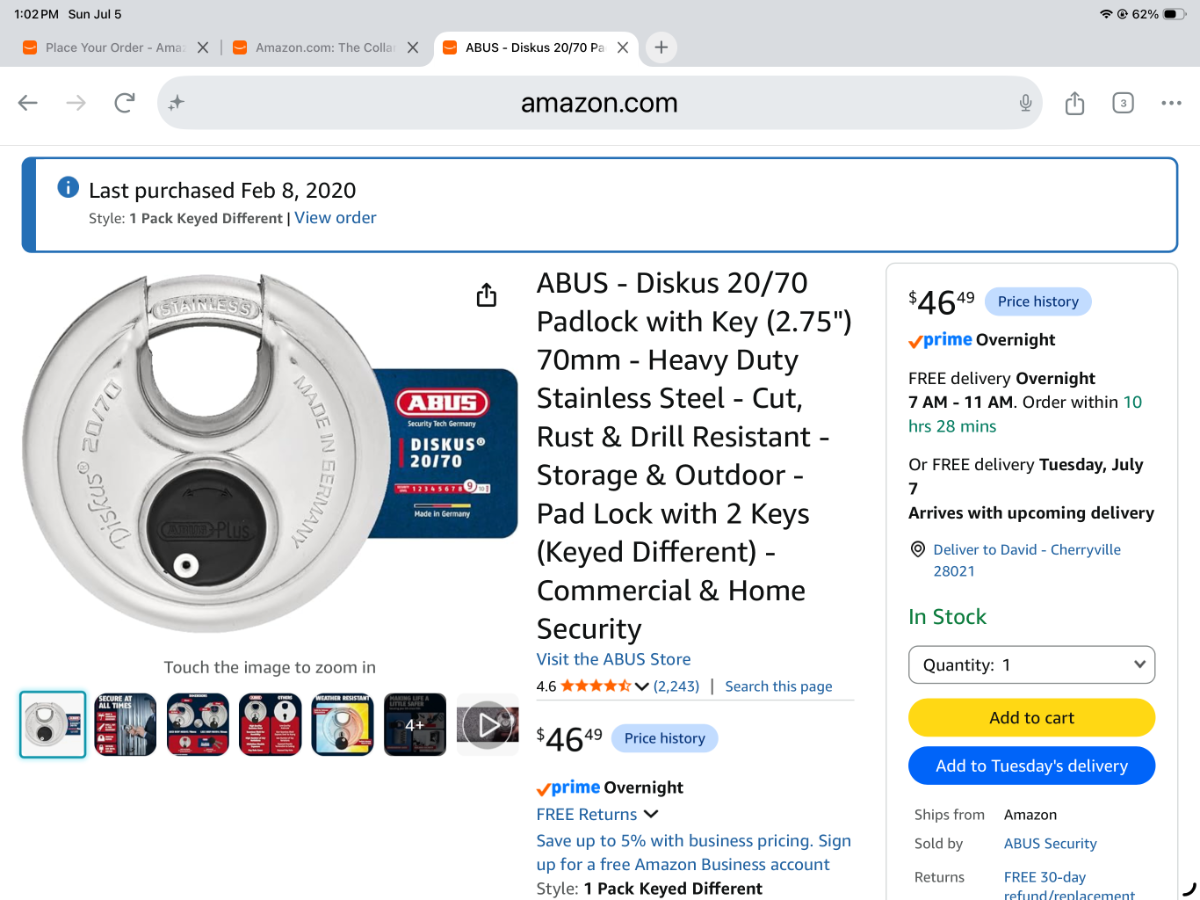
We have used this coupler security and ABUS lock combo since we took delivery in June of 2020. Since it only takes less than 5 minutes to remove the BD coupler via the two bolts off the trailer tongue it’s a good deterent and better than nothing. Also when on the road it makes for an easy eye check during a walk around of our rig. This combo continue to serve us well 6 years in. Both have strong reviews. I will use this collar and lock on the new 2 5/16 coupler. Another plus with the S/S collar, you cannot secure the collar on the coupler locking mechanism if the coupler is not properly locked down on the hitch ball. A nice little extra built in secondary safety feature. https://www.amazon.com/dp/B00HL2NM0K?ref=ppx_yo2ov_dt_b_fed_asin_title ABUS Stainless lock made in Germany- https://www.amazon.com/dp/B009S5Y6ZS?ref=ppx_yo2ov_dt_b_fed_asin_title&th=1
-
In September, my friend and I are going to be camping in Theodore Roosevelt NP (the North Unit) and Badlands NP & Rapid City SD environs. After that, we are heading east and looking at spending a day near Fargo ND, and then a few days in the Sioux Falls SD area, to explore museums and local sights. West of Sioux Falls, we plan to go to the World's Only Corn Palace, in Mitchell SD. We prefer not to camp in the urban area. The closest federal camping I see is Cottonwood Recreation Area campground near Yankton SD (1.5 hours) and Left Tailrace near Thompson SD (2.5 hours). I've camped at Cottonwood and it was nice. But we would like to be closer to Sioux Falls. Any suggestions for the Fargo area and the Sioux Falls area would be appreciated.
-
Look under street side bunk. Make sure valve is open all of the way when handle is pulled. Also if you’re going to fill it lay a water hose in the shower pan (but watch it REAL close) and really raise the nose so you are washing the bottom of the tank. Fill tank until water stops draining in shower pan. Be sure to quickly turn water off. Open the valve and let it rush out. Do it a few times. Watch what comes out if you can. You know that white snot that grows in HVAC condensate pans and lines? I think similar stuff grows in gray tanks. I think #1455 has sat unused and you have a build up in your tank. I think people set these trailers up level, hook up to the sewer and open the drain and let the water out as it is filled. This lets solids settle on the tank floors. We were told to keep the drains closed and only dump when the tanks were filled so that solids could be flushed out. We always dump black first. Then we use the flush inlet and fill and drain the black tank 3,4,5 times until I don’t see anymore floaters (we don’t put paper in our black tank) in the clear elbow at the sewer connection. Then I open the gray tank and let it drain while I do something else. After a few minutes the gray tank level is 0. Since I got that gunk out of my gray tank I haven’t had any problems. It will still drain slow but I eventually get to 0%.
- Today
-

Upgrading from a Bulldog 2” coupler to 2 5/16 BD coupler
rideandfly replied to Patriot's topic in Ollie Modifications
We use a long shank Brinks padlock in the 2" Bulldog coupler. It fits snugly without drilling and hang the chains on the emergency brake cable snap-hook: Tried a short shank Brinks padlock in the new 2 5/16" Bulldog and it fits, too. After making holes in the new Bulldog, will sand and spray paint with aluminum finish for contrast. -
My gray tank was draining really slow one time. I filled it then drove around and went home and backed it down a slope and dumped. The water came out with force and brought out a nasty looking slime. Since then we have added dawn dish washing soap and traveled with some water in the gray tank. I try to dump the gray soon after getting home while backed down a slope so as to get really good flow. It still drains slow due to the size and layout of the tank but it was much better after I got the algae (?) out of it.
-
I did raise the front put it still seams to take a long time to drain , not of water flow. Im used to a large flow when I pull the handle , very very slow stream.
-
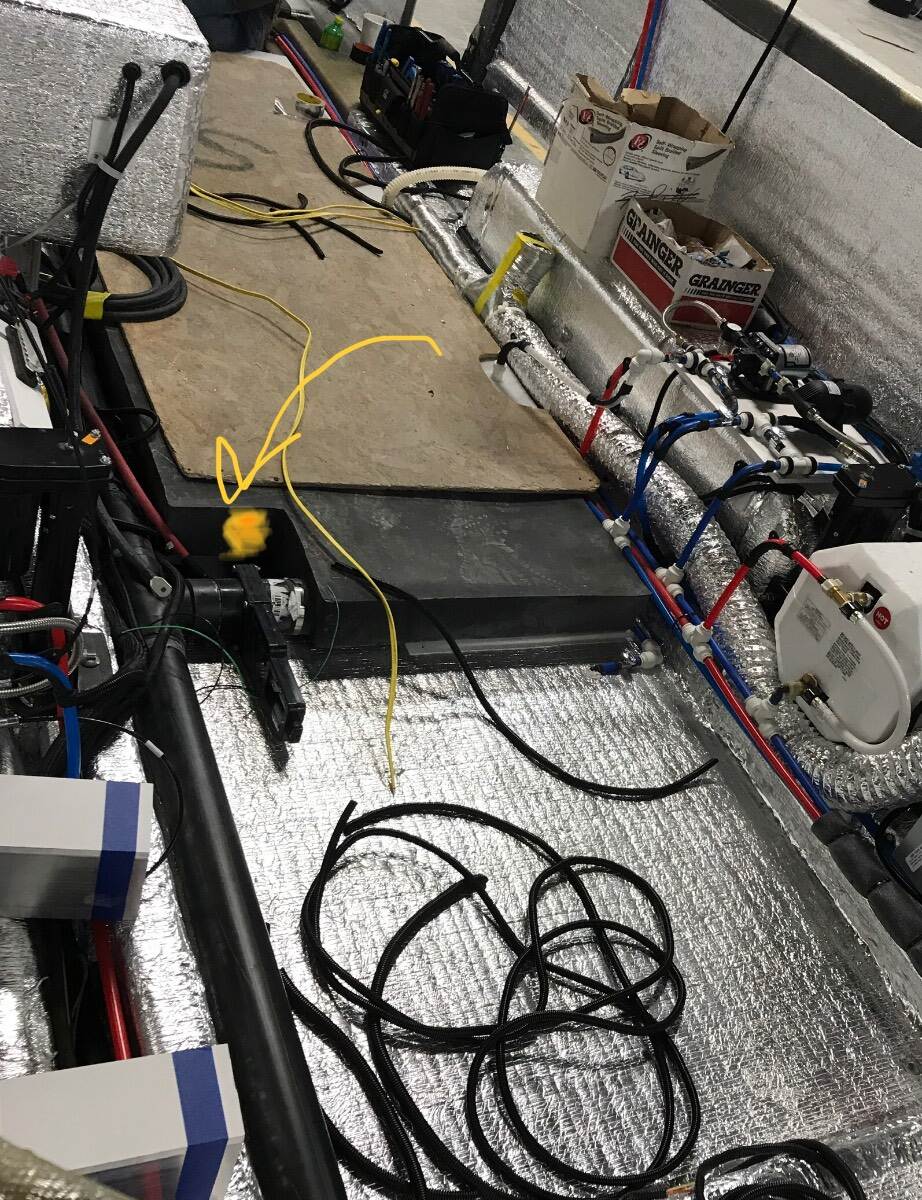
Hello Aidan. The gray tank will drain quicker if the front of the trailer is raised a little. Raising the curb side a little near the end of the process also helps. The gray tank is long, narrow, and thin and the drain valve is on the left side rear corner of the tank. The gray tank level sensor on hull 313 is located where the yellow blotch is shown on the picture below. My tank level could show 0% and still have water in the rear of the tank if the nose is too high. Bill
-
Hi , I'm new to the Oliver scene. We had a 5th wheel and are getting use to the Oliver Elite 11 . I have one question , why does the gray tank drain very slowly. The black tank drains quickly. Has anyone had or have the same issue? Thanks Aidan 1455
-
 Aidan Trainor joined the community
 -
 Exactly. The newer models, certainly not ours, have many of those electric controls out of the basement. Some Oliver owners have also installed remote valves for the water/plumbing side. Good idea I just hate fiddling with plumbing. It really is a far easier to deal with sheet changing with two twin mattresses and piece of cake to lift them for access below. We should've done this years ago. No regrets so far.
 -
 Peter Thomas joined the community
 -
 I try not to in there too often - but not the usual reason people avoid basements. Winterizing/un-winterizing, and to the other side to manually trip and reset the main DC breaker when storing and recommissioning. It certainly is a pain when you have the original cushions, condensation mats underneath, topper and bedclothes on top…
 -
You have a real flair for understatement!
-
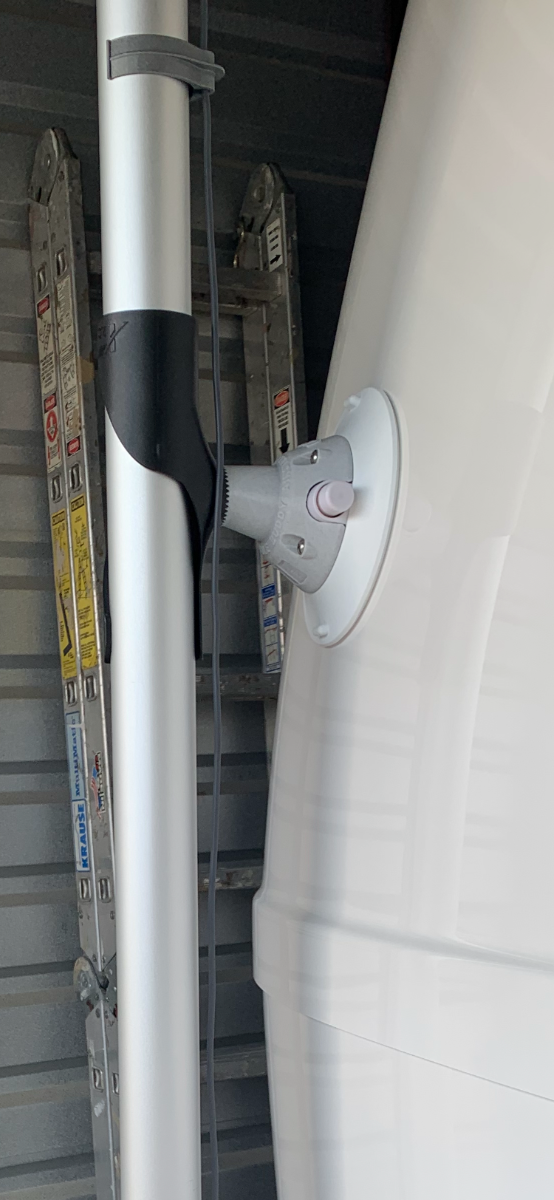
I have two sets of Flag Pole Buddy suction cup mounts; one with black cups for the flagpole, one with white cups for the SLM pole. Neither leave a lasting mark on the Oliver’s gelcoat once removed and surface wiped clean. Could be that they use synthetic rubber compounds specially formulated for a non-marring grip on RV fiberglass surfaces; unlike the typical natural rubber that does leave a mark (think black streak issues we all battle)! Been using 303 Aerospace Protectant for years on a skiff and many suggest this conditioner be applied to keep rubber cups soft and pliable for a better seal and UV protection.
-
For years we used a Temperpedic 3 inch memory foam topper. It works, was heavy and also a pain to deal with while trying access the basement. So earlier in the year while doing some repairs and other mods we decided to eliminate the cushions altogether and replace with two twin mattress we bought at Costco. Since neither of us are tall sleeping in line with the trailer works just fine for us and we have never used the main dinette anyway. The smaller dinette at the kitchen works great for the two of us. This method is far easier to access the basement too with only one thing per side to lift. So far so good. I would recommend this method as a possibility.
-
Yep
-
Happy 250th Birthday to our great United States!
-
Happy July 4th and 250th US Birthday!!!!!!!!!!!!!!!!!
-
From what I’ve heard Mike, you started serving our country back on its 200th birthday! Thank you Mike, and all our Oliver Veterans for your years of service! 😂 We all have to continue to fight for our country in these difficult times. It makes this 250th all the more special! God Bless America!!!
-
Our Ollie does not have factory solar or inverter. I use portable suitcase solar panels or a 2000W Honda Gen-Set when away from shore power. Copied @Snackchaser idea converting the Furrion Cable TV inlet to a Starlink Mini power outlet using a 5.5 x 2.1 mm DC Power Jack Socket. Thanks Snackchaser for the idea! Used a 7/16" drill bit to drill the new Furrion power outlet for the power jack socket to fit. Had enough threads on the 5.5 x 2.1 mm DC Power Jack Socket to install water/dust cover, lock washer and nut. Old Furrion inlet on the left: https://www.amazon.com/dp/B0GKB4YSM5?ref=ppx_yo2ov_dt_b_fed_asin_title https://www.amazon.com/dp/B0DLKN8J7M?ref=ppx_yo2ov_dt_b_fed_asin_title Purchased a 12/24V to 48V DC to DC step up Starlink Mini converter and switching with a manual switch to be installed.
-

Upgrading from a Bulldog 2” coupler to 2 5/16 BD coupler
FloraFauna replied to Patriot's topic in Ollie Modifications
Thanks. Mine is less fancy. In particular, the coupler lock is the Curt longer rod varient that wouldnt survive a decent set of bolt cutters much less a good hit with a hammer. You are probably correct that it doesnt matter that much.
-
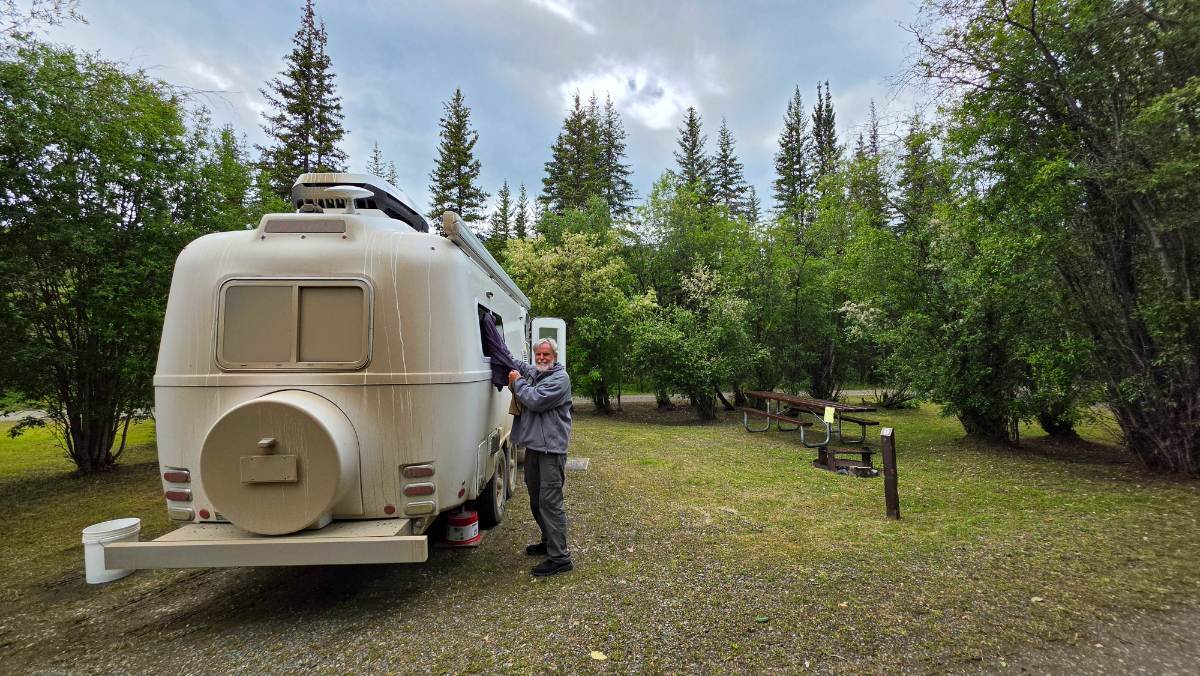
Walker Fork Campground (BLM) approx 15 miles north of Chicken, AK. 33 degrees this morning but warmed up nicely while we panned for gold...not much luck...this time. Dirt courtesy of Top of the World Highway coming from Dawson City, Yukon Territory.
- Yesterday
-
 We use a 2.5” matress topper and love it. It is no longer available from Amazon but was listed as BedStory 2.5 Inch Mattress Topper RV Short King Size. It works great but sometimes pulls up from the sides a little after 5-7 days, but that’s when we usually change the sheets anyway. I would note that changing sheets and making the bed in a king Oliver ain’t easy, but we have gotten used to it
 -
There are several of us here!